Jump to content


Photo

Winton or bust!


  • Please log in to reply
683 replies to this topic

#1 rodomo

rodomo

    To advertise here, call 13TORANA

  • Members
  • PipPipPipPipPipPipPip
  • 18,018 posts
  • Name:R - O - B Dammit!
  • Location:Way out west of Melbourne Awstraylya
  • Joined: 10-December 05

Posted 07 December 2006 - 07:23 PM

As of yesterday there were 11 days to go until the Winton fun day. The race is on to go to Mathoura (just over the border from Echuca), get the car and assemble it in 11 days. It may not happen :cry: but in the words of P.Brock:
"we're gonna give it a red hot go!" :spoton:
The car is VC SL/E 310 pack. It has 4 wheel discs and LSD.
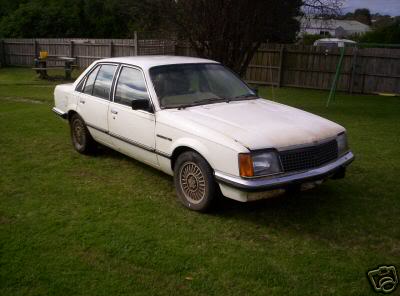
Posted Image

It was 308 auto and due to my budget (none):blink: we are using bits and pieces I have laying around and can beg borrow or steal.
So it will have 3.3 black/blue (unsure as the motor I have is painted red :blink: ) and manual, this swap has issues within its self as the pedals have to be changed and the tailshaft might have to be altered.
The dash cluster has also been removed and the loom chopped. I have another SL/E tacho dash and have to wire it in.
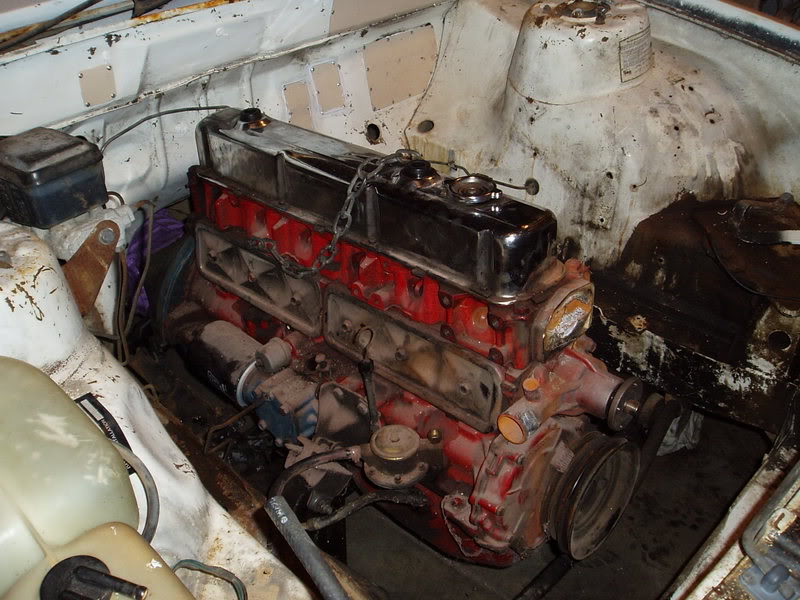
The project offically started last night and in absence of the car the engine preparation began. "Grasshopper" (Heath) came over and pulled the A/C bracket, air pump, thermostat outlet and manifolds off.
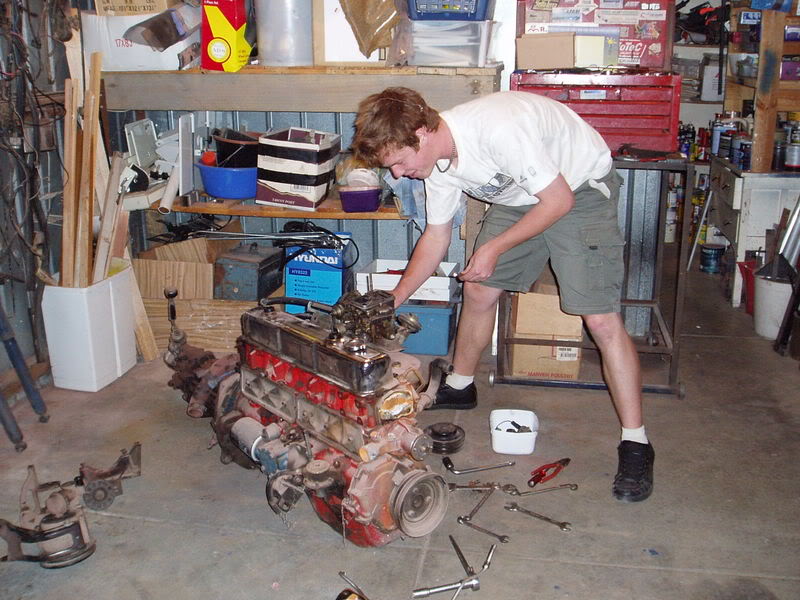
Posted Image

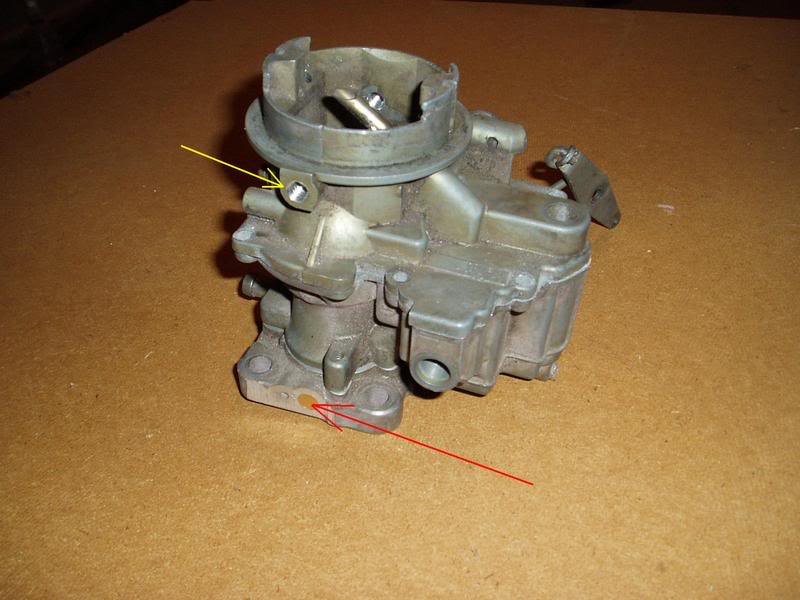
I started adapting a WW2 stromberg to the Varijet manifold and here is the 1st budget (theres that word again) tech tip.

I have read a couple of posts over time about 253's using too much fuel, as well as the usual suspects, float level, needle and seat, timing etc, these carbies can have an inbuilt fault that is hard to detect.
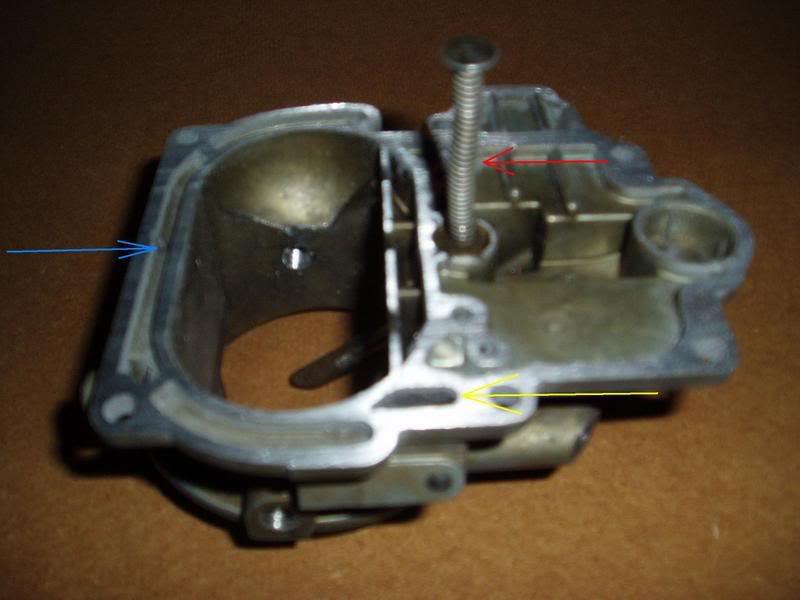
Posted Image

The bit with the spring on it in the middle of this pic. (red arrow) is the power valve plunger. This plunger opens the power valve when you put your foot down and relies on vacuum to stay up and keep the power valve closed at cruise. The groove around the back of the airhorn (blue arrow) is the channel that supplies manifold vacuum to the plunger to keep it up. If there is warpage in the airhorn and/or the carby body, this channel can leak vacuum and the power valve may be always open. The slotted port at the bottom of the pic (yellow arrow) is the port where engine vacuum gets to the top of the piston to hold it up. You can test the plunger operation by applying vacuum via a hose from a running engine if you dont have a vacuum pump.
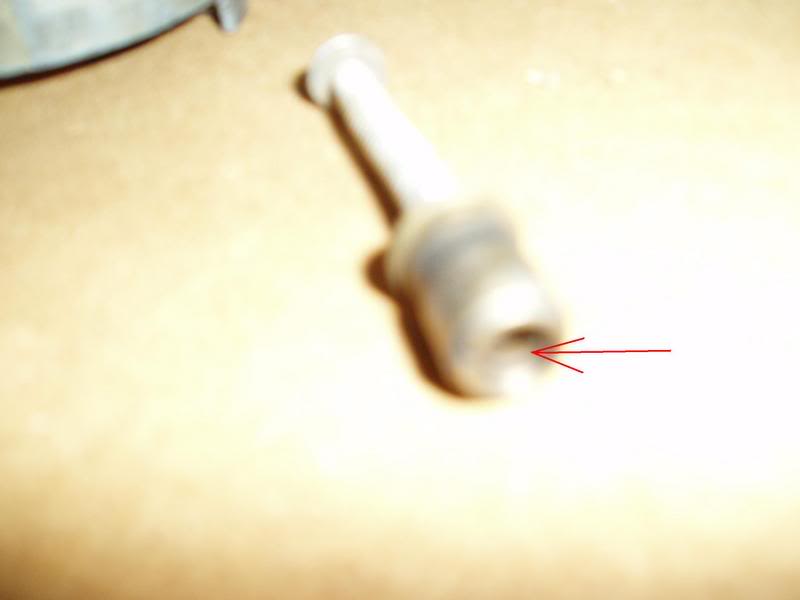
Posted Image

This is the plunger removed from the air horn. Arrowed is a tiny "welch plug" in the end of the plunger piston. This "welch plug" can be known to fall out and the result is the power valve is always open. If by using the test mentioned above, your plunger doesn't rise with vacuum applied, chances are this plug has fallen out. The 6 cyl carbies have a similar plunger though I have never seen a 6cyl one fail.

Also last night began adapting the manifold. I don't thing anyone makes an adapter for this carby swap so I am making one fron 12mm alum. flat. More pics to come.
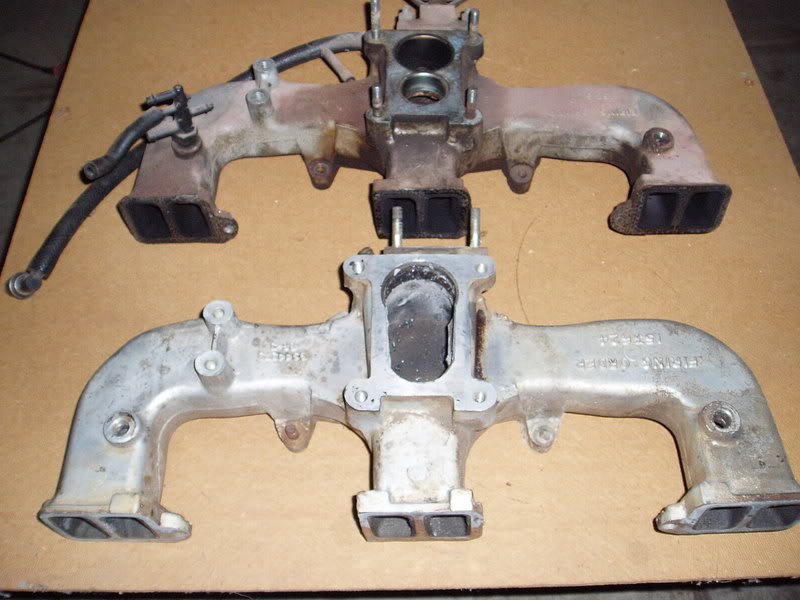
Posted Image

I am off to Mathoura tomorrow to pick up the car and returning Sat.
Later will doing a budget distibutor "tweak" with pics.

Edited by rodomo, 07 December 2006 - 07:33 PM.


#2 _Aquarius - LC_

_Aquarius - LC_
  • Guests

Posted 07 December 2006 - 07:38 PM

Exellent! we love budget "tweaks" keep em coming,good luck rodomo. :D

#3 MRLXSS

MRLXSS

    The Render Garage

  • Members
  • PipPipPipPipPipPipPip
  • 12,400 posts
  • Name:Matt
  • Location:Upwey, Melbourne
  • Car:355 LX Hatchback, DeLorean DMC-12, LX SS Hatch, VY Cross8 Crewman
  • Joined: 09-November 05

Posted 07 December 2006 - 10:28 PM

Great Project! Cant wait to learn more budget Tweaks!

Also keep up the pics of heath! The more retarded look on his face the better! hehehehe

#4 Heath

Heath

    I like cars.

  • Administrators
  • PipPipPipPipPipPipPip
  • 18,365 posts
  • Name:Heath
  • Location:Eastern Suburbs, Melbourne
  • Car:Heavily Modified UC Sunbird Hatchback
  • Joined: 07-November 05
Garage View Garage
Posted 08 December 2006 - 08:52 AM

Also keep up the pics of heath! The more retarded look on his face the better!

:<_<:

#5 _Yella SLuR_

_Yella SLuR_
  • Guests

Posted 08 December 2006 - 09:03 AM

Great, something decent to read.

#6 _Rob 5000_

_Rob 5000_
  • Guests

Posted 08 December 2006 - 09:26 AM

a good read, hope car does the job and provides a huge "fun factor". I used to race a Celica at Winton many moons ago.

#7 _73LJWhiteSL_

_73LJWhiteSL_
  • Guests

Posted 08 December 2006 - 09:31 AM

Also keep up the pics of heath! The more retarded look on his face the better!

:<_<:

I think Heath needs to be awarded "The face most posted on the GMH-Torana forum"

:tease: :tease: :tease:

Keep up the good work Rodomo... will be good to see that thing in action around Winton. :spoton:

Steve

Edited by 73LJWhiteSL, 08 December 2006 - 09:32 AM.


#8 makka

makka

    A m��se once bit my sister

  • Members
  • PipPipPipPipPipPip
  • 3,559 posts
  • Name:Cohen
  • Location:ya daughters place
  • Joined: 08-November 05

Posted 08 December 2006 - 10:48 AM

good work Rob, is the SL/E currently a roller or are you pulling out the 308 to put the 202 in?

#9 rodomo

rodomo

    To advertise here, call 13TORANA

  • Members
  • PipPipPipPipPipPipPip
  • 18,018 posts
  • Name:R - O - B Dammit!
  • Location:Way out west of Melbourne Awstraylya
  • Joined: 10-December 05

Posted 23 December 2006 - 06:35 AM

good work Rob, is the SL/E currently a roller or are you pulling out the 308 to put the 202 in?

I got the car with no motor or g/box, they are now in a Ford Transit van.
The car was supposed to be ready for Winton last Sunday the 17th. The next Winton fun day is 28th Jan and this is now the target. All of the above info is from the 2 weeks prior to the 17th. Sat the 16th 4pm we had to throw an exhaust at it (weld it where it touched was the plan and fix up later), run 6 or 7 wires to make it run, reassemble brakes and fit tailshaft. It all came unstuck with "fit the tailshaft". The tailshaft I have is commodore as it has a centre bearing but it was 2 1/2" too long. (wagon?) So I cut off the yolk, shortened it, just to find the centre bearing mount didn't line up. So that was "game over" for me.
I will still use the shaft but have to fabricate a new mount.

#10 rodomo

rodomo

    To advertise here, call 13TORANA

  • Members
  • PipPipPipPipPipPipPip
  • 18,018 posts
  • Name:R - O - B Dammit!
  • Location:Way out west of Melbourne Awstraylya
  • Joined: 10-December 05

Posted 24 December 2006 - 01:28 AM

More info on carby and manifold mods.

While Grasshopper was pulling bits off the engine, I was modifing the carby and manifold and making the adapter.

Posted Image

Everything that wasn't needed was removed, holes taped and plugged. Choke butterfly, choke spring chamber, and all other vacuum ports not needed for this application.

Posted Image

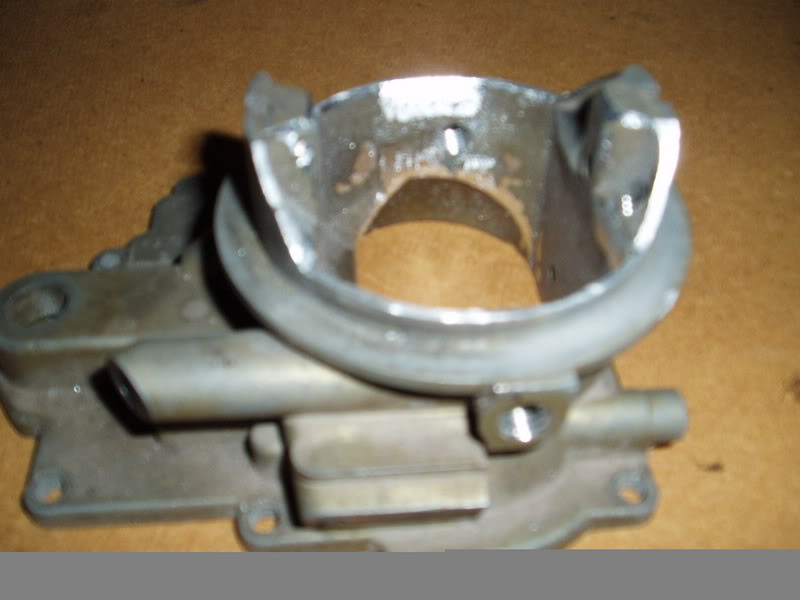
The air horn was also "attacked" with the $15 burrs from Bunnings. Basically, sharp corners/turns were smoothed out.
You might notice the "relieving" around the top where the aircleaner sits on compared the the earlier pic. I will try to explain the reasoning for this when I "attack" the aircleaner and have pics.

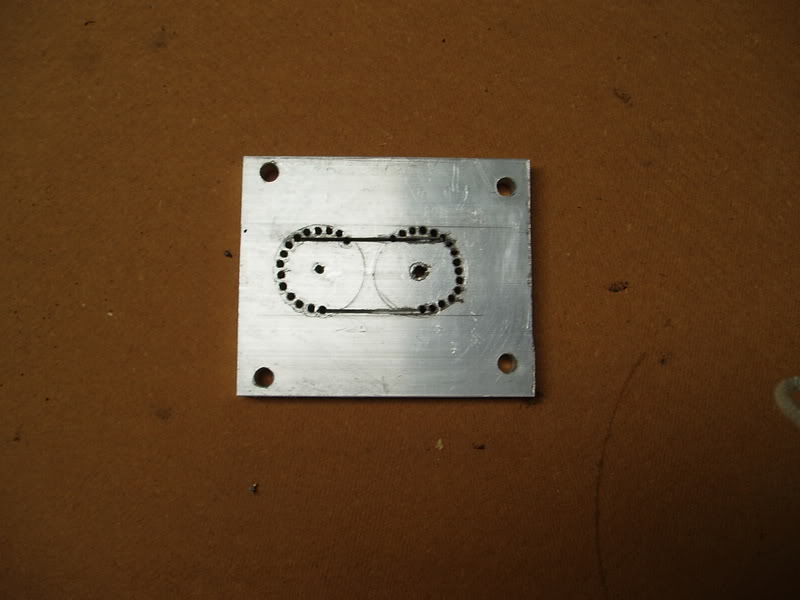
The adapter was made from 12 x 100mm flat alum. plate.

Posted Image

A 3mm (1/8th) drill was used to mark out the blank and a thin blade on the angle grinder to cut the straights.
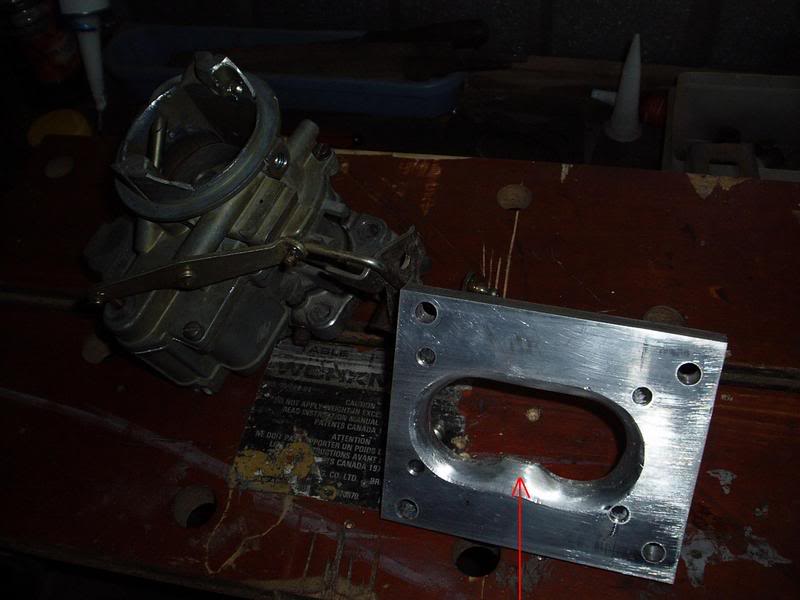
A jigsaw with a relieved blade was then used to cut out the blank and the hole was finished with the "Bunnings" burrs and a "Flapper" emery wheel.

Posted Image

The arrowed section was retained as without this, there is a chance one of the carby base plate screws could fall out and enter the manifold.

Posted Image

Posted Image

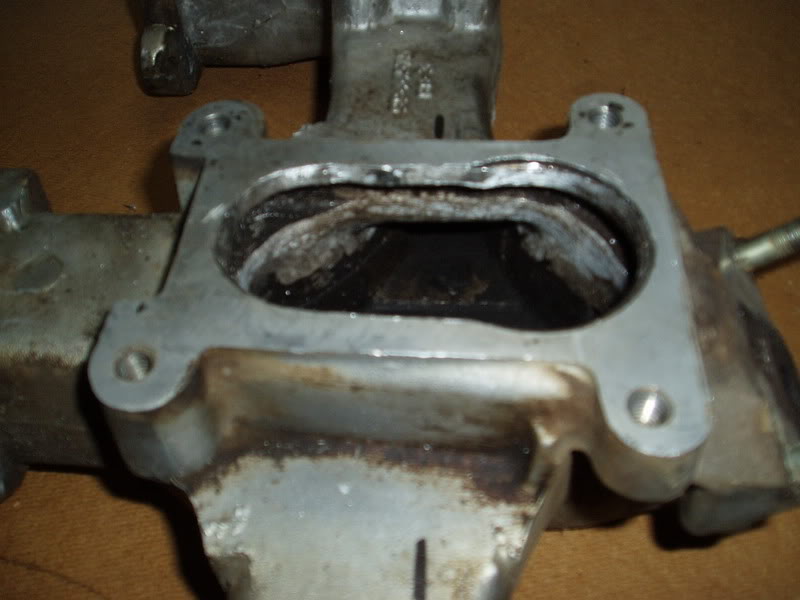
Before and after.

Posted Image

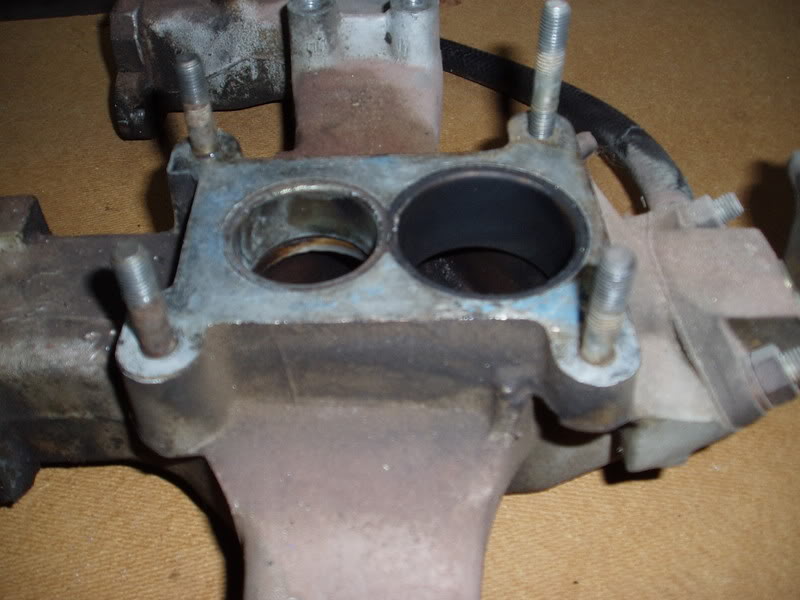
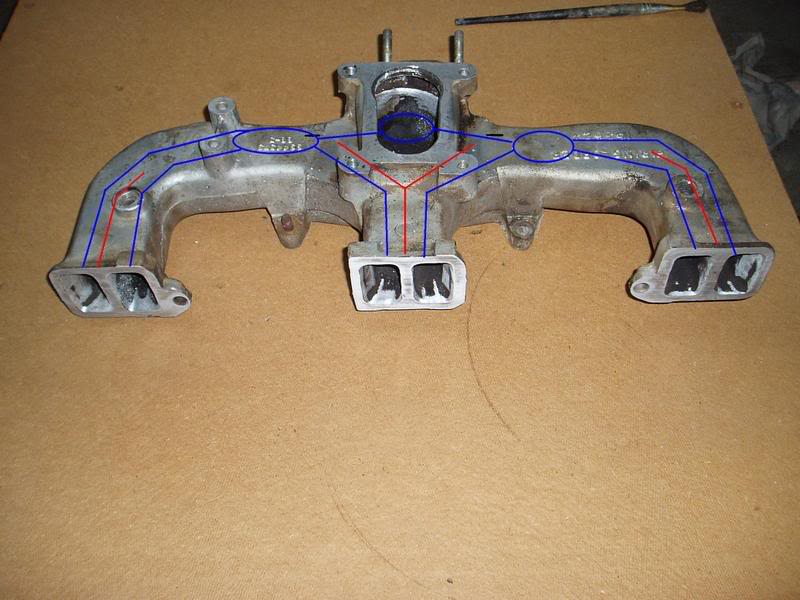
We also did this, it was more of a tidy up of an "ordinary" casting than match porting.
The red lines show (roughly) the internal walls in the manifold, something I hadn't paid much attention to until now. The blue lines represent the "flow" as I see it and would provide superior distributon of the charge compared to a stock or aftermarket red manifold.

#11 rodomo

rodomo

    To advertise here, call 13TORANA

  • Members
  • PipPipPipPipPipPipPip
  • 18,018 posts
  • Name:R - O - B Dammit!
  • Location:Way out west of Melbourne Awstraylya
  • Joined: 10-December 05

Posted 24 December 2006 - 01:57 AM

Here is the "budget" dissy tweaks.
This could be a bit of a "suck it and see" tweak for some as there are variables e.g. compression and has the dissy been tweaked before?
What we are aiming for is more overall advance by increasing the advance at idle without "pinging".
Extra advance at idle will make it idle smoother as it lifts vacuum and will give better pick up off the line.
The best way to test an unknown dissy to see if it is "tweaked" is to fit it and see where you can set the timing without it pinging compared to your old dissy.
On a standard motor we are looking for about 10-12 advance at idle compared to "stock" 6 or so.
An example as far as compression being a variable is my old Rangie.
With the old motor (8:1 comp) I used to run 10 deg advance, this motor was tired. With the new engine (10:1 comp) I now run 4 deg advance with the same dissy. The Rangie book specifys a ATDC timing figure, 3 deg. from memory.

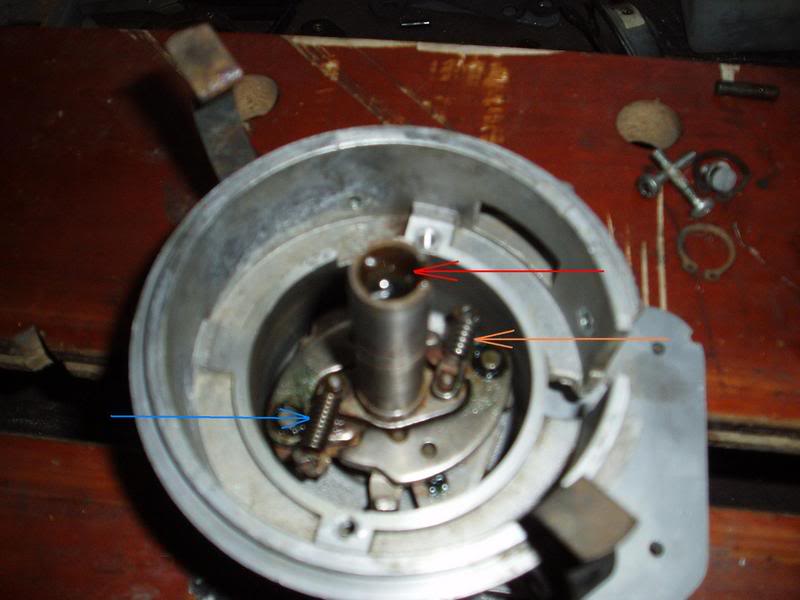
This is the dissy from the commodore. It is electronic but the mechanical advance is almost identical to a points dissy. These "tweaks" should also work for holden V8 dissys.

Posted Image

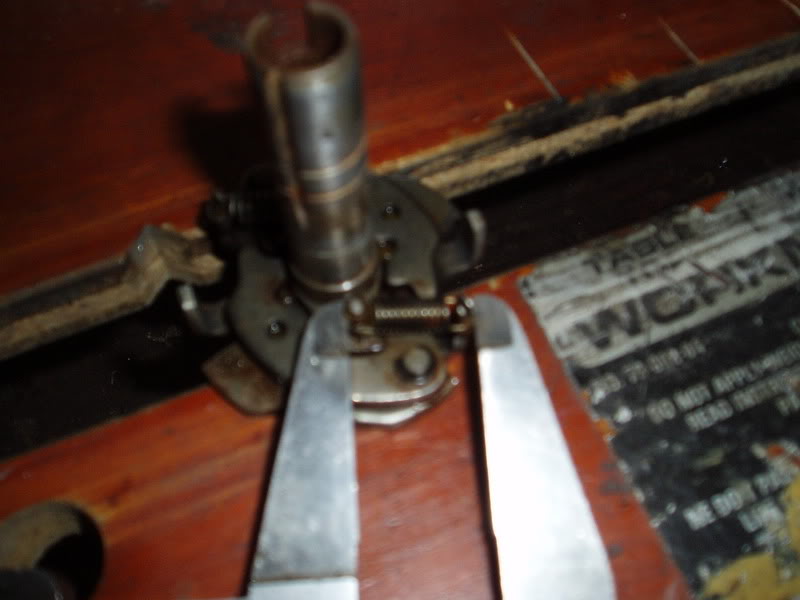
The top and lower sections of the shaft should be able to move independently of each other. To test this, hold the gear at the bottom, with the rotor button fitted turn the rotor button, it should be able to be moved about 20 degrees and spring back. If it doesn't do this freely, the 2 shafts are siezing and you would be having trouble getting the timing to stay adjusted. To dismantle the 2 shafts there is a circlip under a felt wad (red arrow) that needs to be removed to get them apart. The felt is there to absorb oil. 1 or 2 drops of oil on the felt at tune time will keep the 2 shafts lubricated.
The blue arrow points to the primary advance spring, this is the spring that governs how quick the dissy advances off idle and because it does the most work, is the one that looses tension most. If you have a standard motor, standard dissy, set the timing to standard and it "pings" chances are this spring has lost tension. The orange arrow points to the secondary spring. This spring doesn't start working until the engine is revving, maybe 1500-2000rpm? but I'm not sure of the exact figure.
Obviously you would check the condition of the springs, spring posts, weights and pivots at this point.

Posted Image

Here is my rule of thumb, somewhere in the ball park, she'll be right mate budget tweak.
On the primary spring measure the distance between the spring posts with the spring fitted and the weight closed. Bend the outer post (right in pic) outwards approx .5 - .75mm. This will, A. Compensate for wear and loss of tension and B. Retard the point that the primary weight starts to advance, in other words the dissy will start to advance later and allow more idle advance.
With the secondary spring, bend the post outwards about.2mm to compensate for wear.

Posted Image

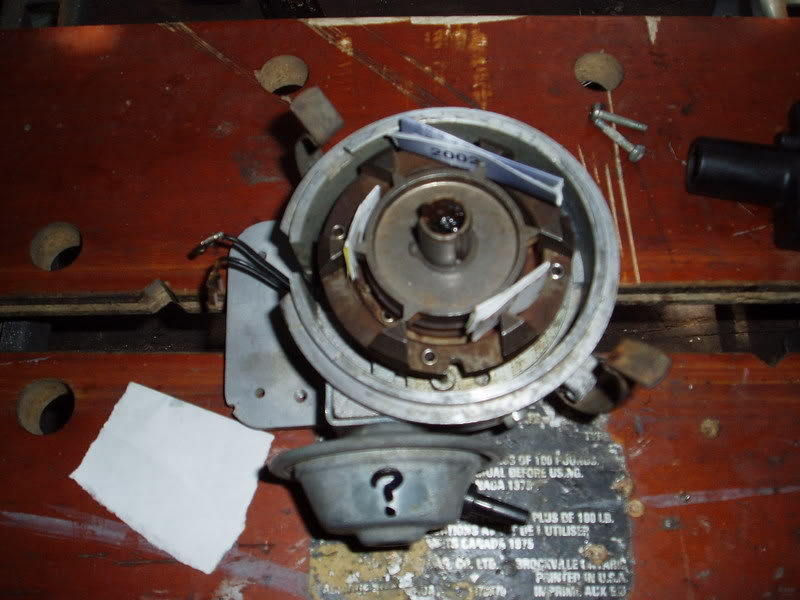
Here is the pain in the arse tear your hair out bit made easy. The manual says about getting the airgap right and can be a bit confusing. I use 3 pieces of folded paper. This paper was from a standard envelope folded in 3. It will set the gap evenly for you and hold the shaft in place as you evenly tighten the allen screws.
The vacuum advance on my application is only there to hold the "breaker" plate in place and the vacuum line wont be connected as there isn't much vacuum when your foots flat.

Posted Image

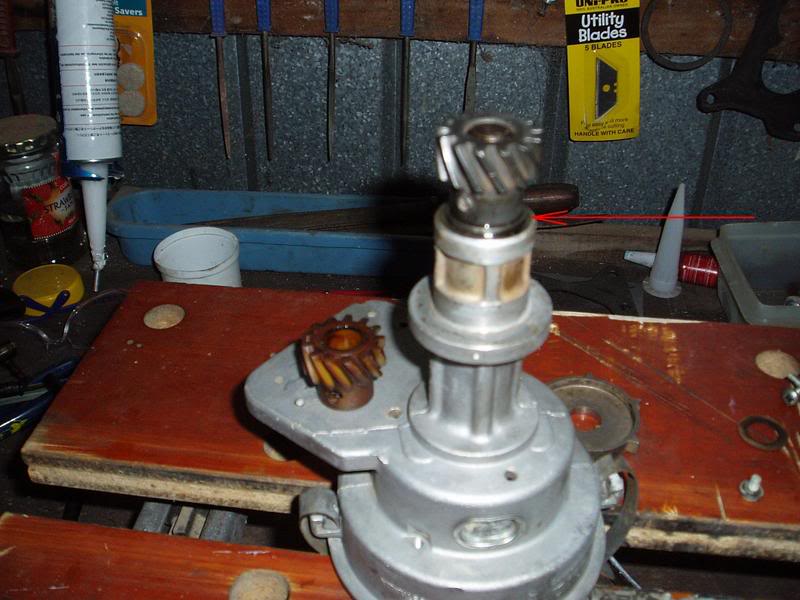
The red arrow points to the thrust adjusting shims. There are also shims at the top end of the lower shaft. Its important that the shaft doesn't have too much thrust (see manual for specs) as your timing will be erratic, the shaft will "hammer" up and down and parts will wear prematurely.

I am using a steel gear and have read arguments against this.
My theory is the dissy runs off the same gear on the camshaft as the oil pump. The oil pump runs a steel gear and exerts more load on the cam gear than the dissy should providing the dissy is in good order and that includes the thrust.

These "tweaks" were taught to me when I was a "Grasshopper" by my "Master". I was about 20 and had my Monaro dyno tuned. They adjusted the jets in the Holley but said the dissy was spot on. I have done these "tweaks" including the steel gear to every holden 6 I have owned and never had a problem.

I usually end up with about 10 - 12 degrees idle advance on a standard motor with no "pinging" but remember compression ratio will be a factor when finding your new idle timing.

Oh yeah, make sure your balancer hasn't slipped.

Edited by rodomo, 24 December 2006 - 02:09 AM.


#12 _devilsadvocate_

_devilsadvocate_
  • Guests

Posted 24 December 2006 - 05:18 AM

Like the setting the airgaps solution, just prayed and hoped on one I pulled apart.

#13 rodomo

rodomo

    To advertise here, call 13TORANA

  • Members
  • PipPipPipPipPipPipPip
  • 18,018 posts
  • Name:R - O - B Dammit!
  • Location:Way out west of Melbourne Awstraylya
  • Joined: 10-December 05

Posted 26 December 2006 - 11:42 PM

These pics were taken in the week before the 17th Dec.

Posted Image

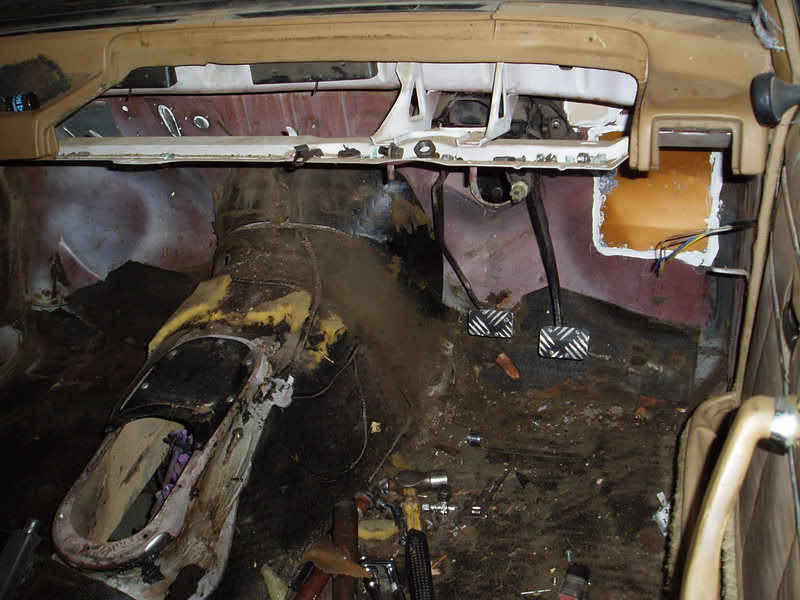
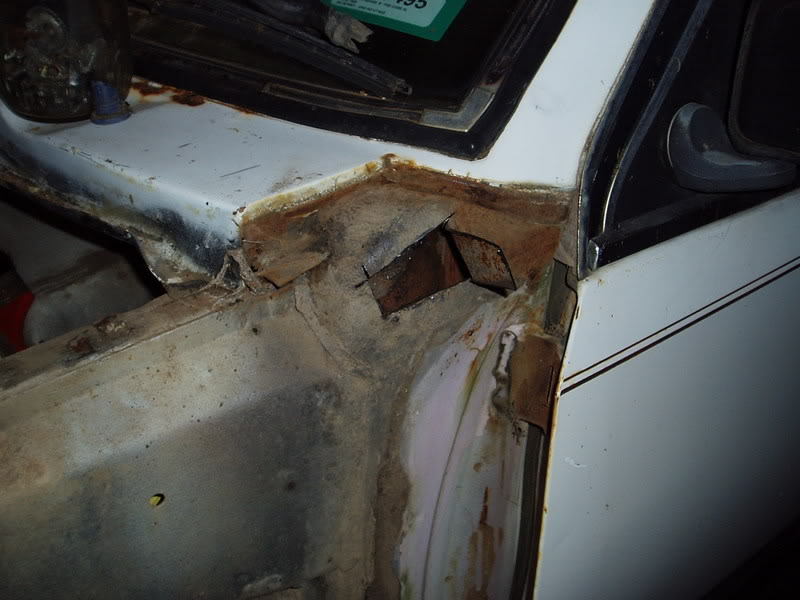
The heater and A/C had to be removed and the firewall patched before the engine was fitted.

Posted Image

The firewall had to be patched on the inside where the previous owner had chopped out the firewall to use the acc. pedal pivot. Leith's bonnet is still coming in handy. The manual pedals were also fitted and alum. checker plate pedal pads riveted to the original pedals. The entire dash was stripped out.

Works in progress:
I have been a little slack since the 17th past. I am a little buggered from the Rangie rebuild and trying to get this done as well. I have been gathering brake bits but have been doing an hour or so here and there as well. Tonight I was out there for a few hours and the enthusiasm is back.

Posted Image

"Keyhole surgery" on a broken bonnet hinge bolt.

Posted Image

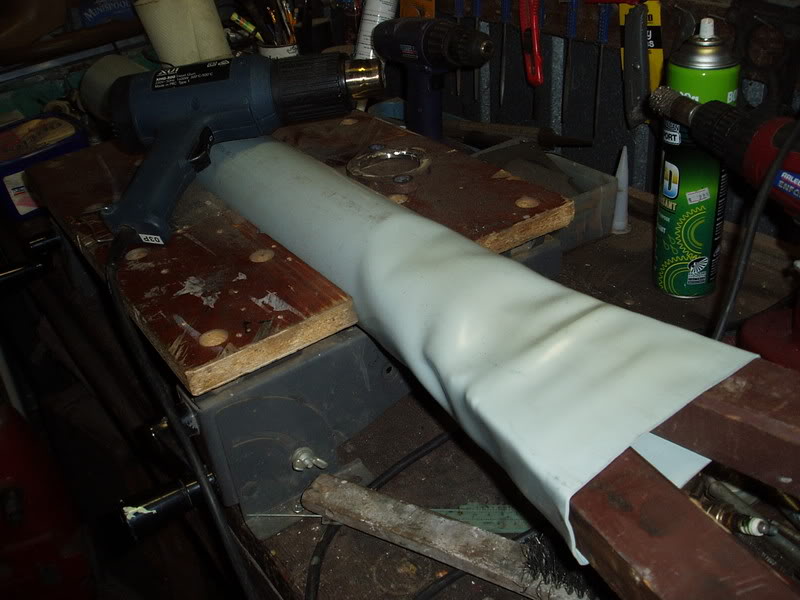
90mm stormwater PVC pipe from Bunnings available in 1 metre lengths for $9.00.
Heat gun $20.00 from Bunnings.
It will have cold air ram induction if all goes to plan.

Budget brake mods soon.

#14 rodomo

rodomo

    To advertise here, call 13TORANA

  • Members
  • PipPipPipPipPipPipPip
  • 18,018 posts
  • Name:R - O - B Dammit!
  • Location:Way out west of Melbourne Awstraylya
  • Joined: 10-December 05

Posted 31 December 2006 - 09:39 AM

Update:
This week I have been playing around with the ride height. The springs are being "adjusted" under controlled "don't try this at home kids" "remember this is a track car only" "not recommended or condoned for road cars" conditions. :<_<:

I have removed the "power" steering rack and am "maualising" it. This means removing all internal seals for less internal friction. Gear oil will then be used for lubrication. Apparently the "power" racks have a different ratio (I am not sure though, I wish I had a manual) and are faster lock to lock which will be good for this application.

New camber and caster angles are being "dialled" in.

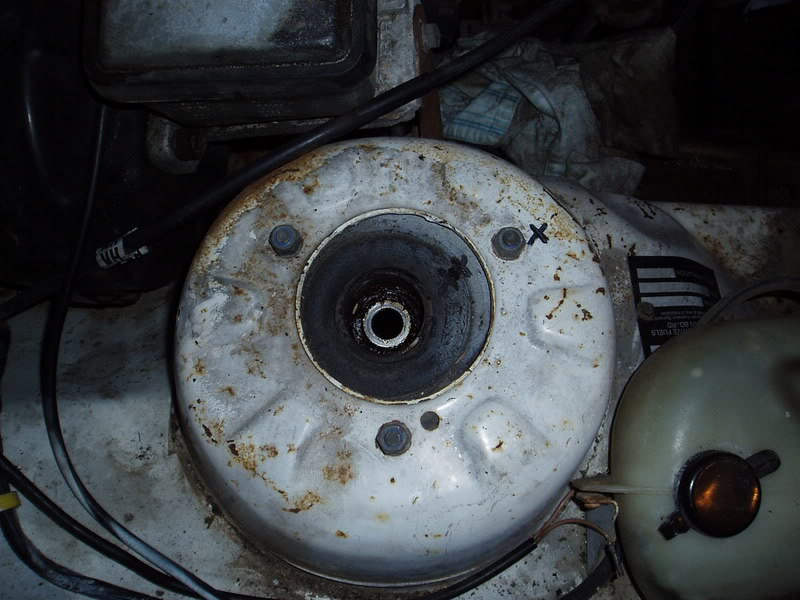
Posted Image

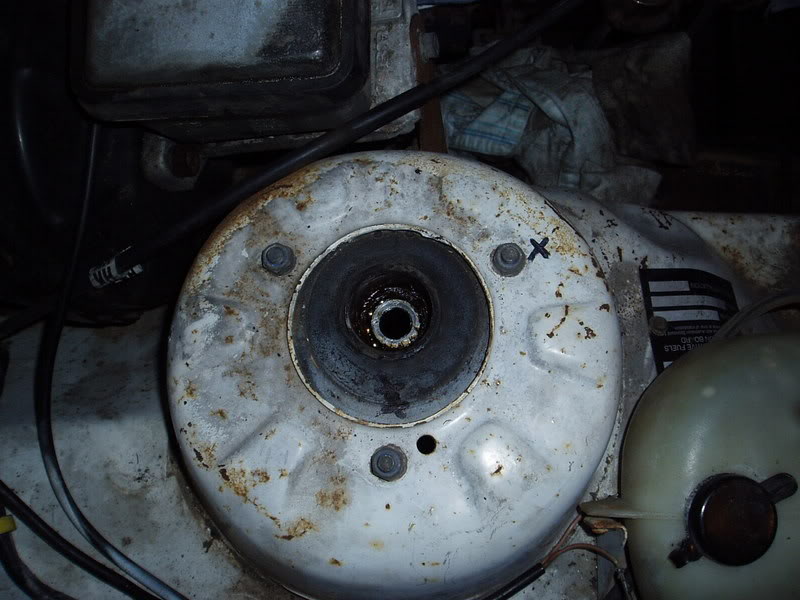
This "was" the setting, you can see the centre of the top pivot is to the rear (for caster) pretty much central (left to right of the car) which adjusts camber.

By un-doing the 3 nuts I have rotated the top pivot in the "tower" to give maximum negative camber at the expense of caster.

Posted Image

I just hope it still wants to steer straight :huh: it still measures positive caster so it should.

#15 _chevy_253_torana_

_chevy_253_torana_
  • Guests

Posted 01 January 2007 - 09:57 PM

interesting keep us posted

dam i wish i had the chance to meet my mates uncle who speedway raced the holden reds all of his life

even when they had the v6 for the formulas (not sure what one) he took in a set of homemade extractors and everyone said they wont work

turns out they were getting more ponies than there 1000s of dollar items

shame gmh hasnt got a tech page of the red and blues 6s tricks and tweaks that these blokes were doing as this guy was probably one of the best in aust when it came to the 6

sadly he passed away a few years ago and his stuff was sold off (im on ly 17 so i would of been a youngen)

#16 micklx

micklx

    Forum Fixture

  • Members
  • PipPipPipPipPip
  • 1,785 posts
  • Name:Mick
  • Location:Frankston South
  • Joined: 18-November 05

Posted 01 January 2007 - 10:05 PM

I like the idea of the ratio of the power steer rack but without having to have power steering.
From memory a P/S rack is 2.6 turns lock to lock versus about 3.5 for a manual rack.
My VH has a manual rack and its fine at Phillip Island but at my local hillclimb track that has a couple of really sharp turns, its a handfull.
Let me know if it works.

#17 _Bomber Watson_

_Bomber Watson_
  • Guests

Posted 02 January 2007 - 08:37 PM

what the hell is heath doing coming around to work on a motor in a WHITE SHIRT???

he has a lot to learn rod.

man this looks like fun.

#18 rodomo

rodomo

    To advertise here, call 13TORANA

  • Members
  • PipPipPipPipPipPipPip
  • 18,018 posts
  • Name:R - O - B Dammit!
  • Location:Way out west of Melbourne Awstraylya
  • Joined: 10-December 05

Posted 02 January 2007 - 11:40 PM

I like the idea of the ratio of the power steer rack but without having to have power steering.
From memory a P/S rack is 2.6 turns lock to lock versus about 3.5 for a manual rack.
My VH has a manual rack and its fine at Phillip Island but at my local hillclimb track that has a couple of really sharp turns, its a handfull.
Let me know if it works.

I hope you would find this mod. benificial at P.I. too, a lot of high speed corners there and less arm movement. I'm hoping that this mod. (which will make the steering heavier) will be offset by the reduction in caster (which will make the steering lighter).
Here's what I did and comes with the bit: This mod. was performed under controlled "don't try this at home kids" "remember this is a track car only" "not recommended or condoned for road cars" conditions.

Posted Image

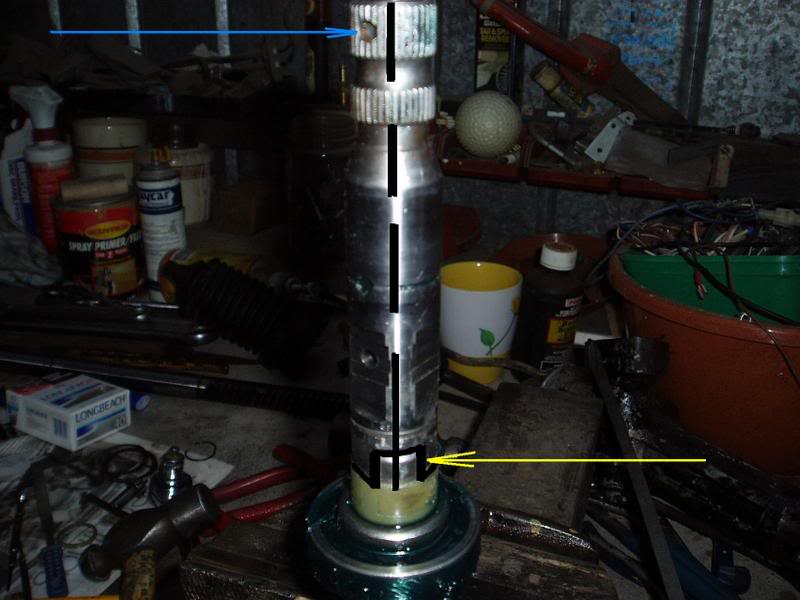
The pinion on a power rack is in 2 parts. The top part drives the lower part via a torsional rod down the middle (represented by the black dotted line) until the torsion rod twists enough to engage the "dogs" (yellow arrow) at which point power assistance starts. This is so power assist. is not always happening until the wheel is moved and enough resistance is present to engage the "dogs". It also allows for "feedback" from the road wheels without engaging power assistance. To separate the 2 parts the pin at the top has to be removed (blue arrow). I made up 2 "angle iron" shaped pieces from panel steel and fitted them to the gaps at the dog. I used this method rather than welding as I don't think its good practice to weld steering parts and there are 3 bearings on this shaft when assembled and would be difficult to align if the 2 parts were welded.
When I refitted the top part it was an "interference" fit and had to be "tapped" on with fair effort. This then made the unit "solid". The torsional rod was also retained. I then trimmed the 2 pieces of angle so the "valve body" could be refitted.

Posted Image

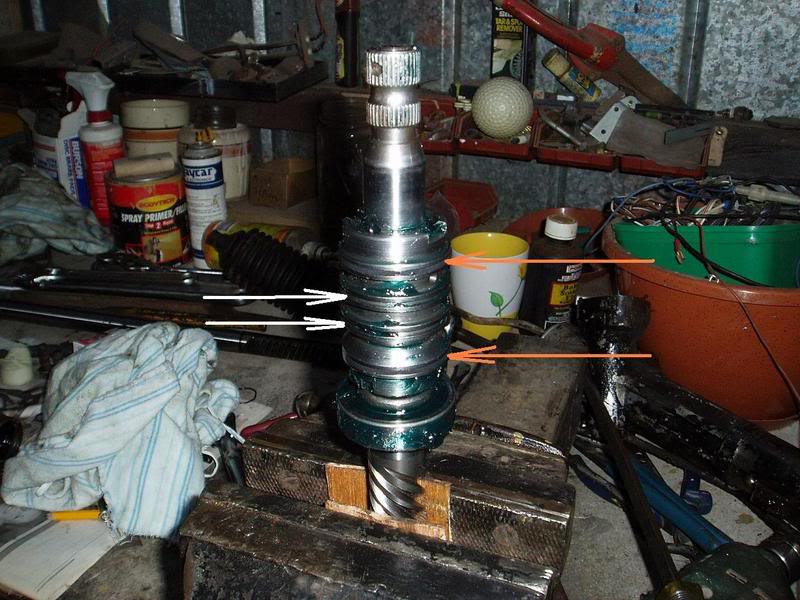
This will also hold my "angle iron" bits in place as this part covers the "dogs". There are 4 seals on this valve body, I removed the 2 middle ones (white arrows) but left the top and bottom ones there for their "bearing" value at the whole assy. rotates in the housing.
Just above the "spiral" of the pinion in this pic is a high pressure seal (located in the rack body) this seal was removed but the one at the top of the pinion where the steering shaft fits on was retained.

Posted Image

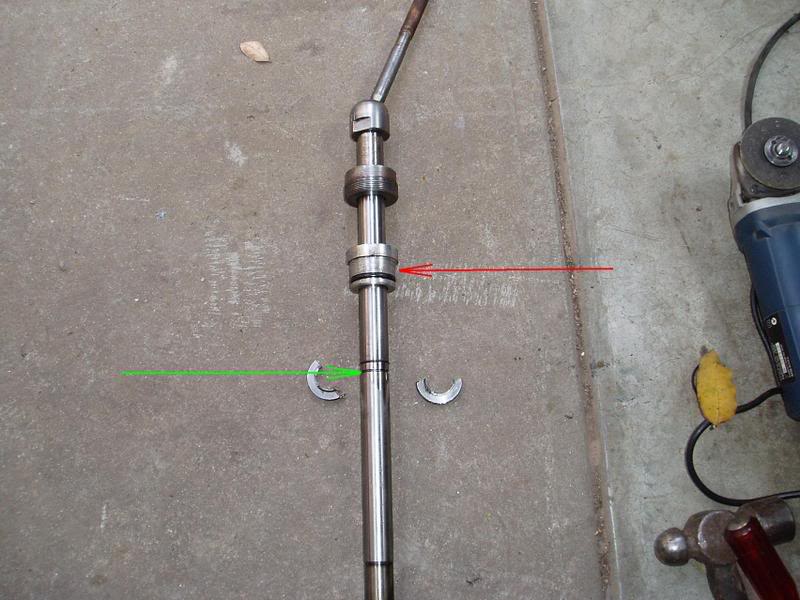
The high pressure piston on the rack was removed, this is retained to the rack by a circlip on one side but is "knurled" into a groove on the shaft on the other side (green arrow). I cut it with the angle grinder (thin blade) either side of the shaft and one hit with a chisel and it fell off. The high pressure seal and "O" ring were removed from the L/H bearing housing (red arrow).

Posted Image

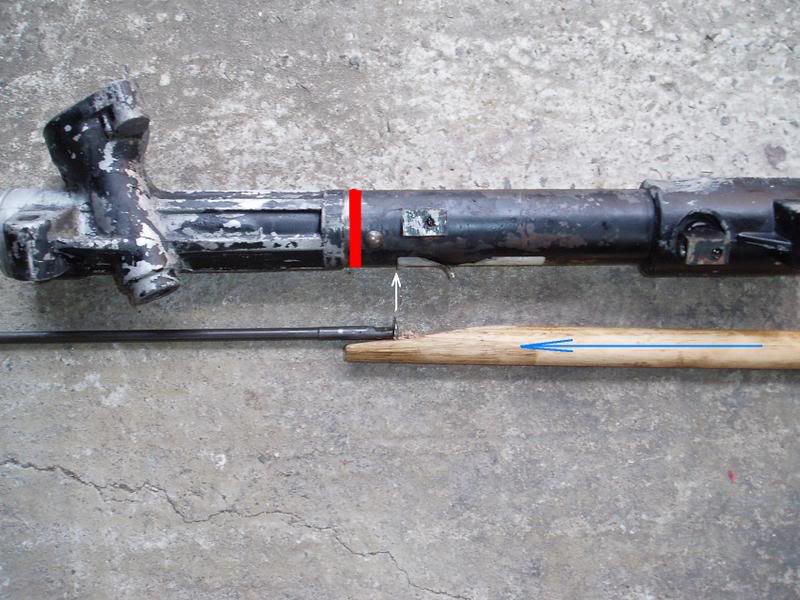
The pain in the butt part of the mod. was removing the R/H high pressure seal from inside the body represented by the red line. A "special tool" was fabricated from a piece of dowel and a Landrover Freelander head bolt (I dont throw anything out :huh: )(these bolts are bloody long as they engage the main bearing caps on a Freelander). Once the back of the seal was found from one end, the dowel was hammered from the other end to force the tool behind the seal so it could be hit out.
The rack was then assembled as per manual rack specs. The bearings, needle rollers and bushes were all assembled with hi-temp wheel bearing grease and 200mls of diff oil will be tipped in to the rack body before the rack boots are fitted.

Mick, if you decide to do this mod P.M. me your address and I'll send you the "special tool." I have 7 or 8 more Freelander head bolts so no loss here.

Edited by rodomo, 02 January 2007 - 11:43 PM.


#19 tinkers

tinkers

    Admin

  • Administrators
  • PipPipPipPipPipPip
  • 3,797 posts
  • Name:Kerri
  • Location:Perth - Gold Coast - Brisbane
  • Car:LX Hatch & VX Clubsport & VS Ute
  • Joined: 04-February 07

Posted 03 January 2007 - 01:34 PM

what the hell is heath doing coming around to work on a motor in a WHITE SHIRT???

Coming from someone who often works on the car in white, you soon learn that nappy san (the pink one is better) or bleach become your best friend when washing whites. :)

Interesting thread rodomo

#20 Heath

Heath

    I like cars.

  • Administrators
  • PipPipPipPipPipPipPip
  • 18,365 posts
  • Name:Heath
  • Location:Eastern Suburbs, Melbourne
  • Car:Heavily Modified UC Sunbird Hatchback
  • Joined: 07-November 05
Garage View Garage
Posted 03 January 2007 - 01:39 PM

lol Bomber that's one of the shirts I use for airbrushing and anything mechanical. It wasn't grease-free when I arrived and I didn't expect it to be grease-free when I left.

Now I know I'm a sexy bastard, but this thread isn't about me, so start talking cars! :clap:

Edited by Heath, 03 January 2007 - 01:40 PM.


#21 rodomo

rodomo

    To advertise here, call 13TORANA

  • Members
  • PipPipPipPipPipPipPip
  • 18,018 posts
  • Name:R - O - B Dammit!
  • Location:Way out west of Melbourne Awstraylya
  • Joined: 10-December 05

Posted 03 January 2007 - 11:37 PM

Interesting thread rodomo

Maybe the bits about the dissy and carby can be copied? And stickied in their appropriate topics? As they relate to Toranas?

Edited by rodomo, 03 January 2007 - 11:39 PM.


#22 _LX8VD69_

_LX8VD69_
  • Guests

Posted 04 January 2007 - 01:48 AM

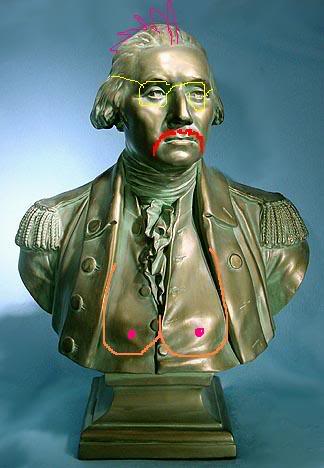
ok we can see the winton part now what about the bust? :tease: :tease: :tease: seriously good luck mate i hope all goes well :spoton: :spoton: :spoton:

#23 rodomo

rodomo

    To advertise here, call 13TORANA

  • Members
  • PipPipPipPipPipPipPip
  • 18,018 posts
  • Name:R - O - B Dammit!
  • Location:Way out west of Melbourne Awstraylya
  • Joined: 10-December 05

Posted 04 January 2007 - 03:46 PM

Just for you.
WARNING! MUST BE 18yrs or over to view!
MA18+


Posted Image

Posted Image

Edited by rodomo, 04 January 2007 - 03:48 PM.


#24 RIM-010

RIM-010

    DON'T PANIC

  • Members
  • PipPipPipPipPipPipPip
  • 8,079 posts
  • Name:Tim
  • Location:Cowell, SA
  • Car:LJ 2 Door - HQ Premier
  • Joined: 01-March 06
Garage View Garage
Posted 04 January 2007 - 06:33 PM

:spit:

RIM

#25 tinkers

tinkers

    Admin

  • Administrators
  • PipPipPipPipPipPip
  • 3,797 posts
  • Name:Kerri
  • Location:Perth - Gold Coast - Brisbane
  • Car:LX Hatch & VX Clubsport & VS Ute
  • Joined: 04-February 07

Posted 04 January 2007 - 06:41 PM

His boobs err sorry "bust" are uneven :P


4 user(s) are reading this topic

0 members, 4 guests, 0 anonymous users