
after reading another thread suggesting modifying the headlamp bucket i'm after a pic or description of how to go about this.
is it worth finding / buying a better way?
currently have set of lights from hz,which use a seperate park lamp.

H4 conversion solution
Started by
arrimar
, Jan 13 2007 08:27 PM
16 replies to this topic
#1

arrimar
-
- Members
-

- 3,134 posts
"Have you still got that Torana!"
- Location:brisbane
- Car:Salamanca L34, Absinth LH SLR/5000, Caribean Blue LH 5.0, C250 Merc,
- Joined: 13-January 06
Posted 13 January 2007 - 08:27 PM
#2
_Yella SLuR_
_Yella SLuR_
-

- Guests
Posted 13 January 2007 - 08:59 PM
Damn you, bringing back memories from last weekend. I got new H4's as mine had stone chips, got water in the bottom and lifted the chrome backing. Looked shit basically. Also did Herne's car the same way some 12 months ago.
The new lights have the seperate bulb for the parkers as you'll find all 7" replacement headlamps will now. Modification is pretty simple, provided you like filing or have a large enough drill bit (I don't).
Here is a run down on what I did.
1. Remove headlight surrounds.
2. Remove chrome retainer 3 screws (not the adjustment screws) and remove chrome retainer.
3. Unhook headlight connection, and remove headlamps.
4. Undo bastard spring that holds in the backing dish in for the headlights. Make no attempt to clean the dish, the dirt will come in handy. Also, don't touch the two adjusting screws, backing dish should just slide out with some gentle persuasion once the spring is removed.
5. Grab one of the new headlights, steal some of the kids plasticine, remove the parking bulb from the new light, and insert round ball of plasticine.
6. Put headlight in backing dish, making sure arrow pointing up aligns with TOP stamped in the backing dish. Remove headlight. Plasticine should leave a round circle on the backing dish where you have to drill a hole for the new park light. Even if the backing dish was clean, the plasticine should leave an oily circle when viewed at the right angle. Mark perimeter of plasticine oil mark. Drill hole, and if required, file with a round file out to the required size.
TIP: If you are using old original lamps with the seperate bulb, there are some issues with the bulb not being in the same location on all lamps. If this is the case, make sure you mark each headlamp separately for each dish, and mark one set so you can maintain the pair. Newer lamps seem to have better quality control and the parkers in the same location.
7. Test fit new headlight and see how you go for fit. By this stage, you should be able to see how you are going for alignment, and adjust accordingly.
8. Nearly there, now for the wiring bit. The park lamp on your old light fitting should be a screw in bulb holder, remove that from the main headlamp fitting. Purple is for positive, and the right hand headlight will have two of them, one coming into the parker, and the other running out to pick up the right hand parker. The other wire, dark grey from memory is the earth. Wire up to new lights with connectors. New aftermarket parkers have different coloured wires but meh.
9. Stick it all back together (reverse process) and you are off.
Hope that helps.
Edited by Yella SLuR, 13 January 2007 - 09:03 PM.
#3
_2wild4u_
_2wild4u_
-
- Guests
Posted 13 January 2007 - 09:44 PM
with mine, i have the clear front indicators, so i drilled a hole into the side of each front indicator, then i got some twist in globe holders that seal with an o-ring, and left it at that, now the park lights are in the front indicators, and the indicator still flashes orange, worked out perfectly
#4
_Yella SLuR_
_Yella SLuR_
-
- Guests
Posted 13 January 2007 - 09:59 PM
hehe, I didn't like my clear indicators, so on-sold em.
#5
TerrA LX
-

- Members
-
- 14,241 posts
Fulcrum Fixture
- Location:Sid 'n' knee
- Joined: 31-May 06
Posted 14 January 2007 - 02:42 AM
is there a prefered brand of headlight?
#6
arrimar
-
- Members
-
- 3,134 posts
"Have you still got that Torana!"
- Location:brisbane
- Car:Salamanca L34, Absinth LH SLR/5000, Caribean Blue LH 5.0, C250 Merc,
- Joined: 13-January 06
Posted 14 January 2007 - 08:14 AM
ok cheers yella,a hole in the bucket dear lilah dear lilah. hee hee.
#7
arrimar
-
- Members
-
- 3,134 posts
"Have you still got that Torana!"
- Location:brisbane
- Car:Salamanca L34, Absinth LH SLR/5000, Caribean Blue LH 5.0, C250 Merc,
- Joined: 13-January 06
Posted 14 January 2007 - 01:50 PM
yella,no way the original plug would fit with the waterproofing rubber cap so have used new connector. are you suggesting that with a hole in the bucket and removal of some of the chrome in the lamp it will shine through? picture is worth a thousand if possible. (words not bucks)
#8
_2wild4u_
_2wild4u_
-
- Guests
Posted 14 January 2007 - 03:37 PM
didnyt you like the clear indicators yella? i thought they suit the torries beautifully,spose it depends on the colour of the car
#9
_2wild4u_
_2wild4u_
-
- Guests
Posted 14 January 2007 - 03:37 PM
double post
Edited by 2wild4u, 14 January 2007 - 03:38 PM.
#10
arrimar
-
- Members
-
- 3,134 posts
"Have you still got that Torana!"
- Location:brisbane
- Car:Salamanca L34, Absinth LH SLR/5000, Caribean Blue LH 5.0, C250 Merc,
- Joined: 13-January 06
Posted 14 January 2007 - 05:08 PM
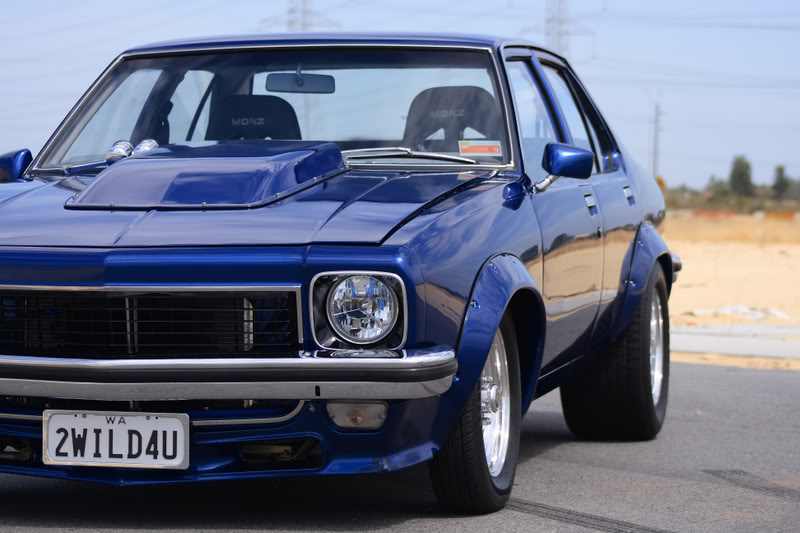
2wild that is a beauty, youve only half filled the front flares though
#11
_2wild4u_
_2wild4u_
-
- Guests
Posted 14 January 2007 - 05:36 PM
yeah, but thats the look i was aiming for
#12
_Yella SLuR_
_Yella SLuR_
-
- Guests
Posted 14 January 2007 - 09:22 PM
2wild, yeah just didn't look good sitting on yellow.
Arrimar, no mate, the bit that the lights actually sit in. Do the new lights you have, have the hole to fit the bulbs in, or the windows that the lights shine through?
Here is a pick of the backing dish that I'm talking about. Note that this is for old HZ H4's, have a separate light that sits in rubber grommets with two straight connectors for the connection. My new ones have a metal sleave, that another metal fitting and spring fits into.
Now, as for the actual standard light fitting, you'll find that the parker bulb actually sits in a separate fitting connected to the bottom of the headlight fitting. This bulb will clip out as it has it's own separate holder. Remove it from the larger headlight electrical connector, cut wires, and wire to suit the lights you have. I'd not be bothering with old headlights. I got new headlights, new Narva (blue) bulbs, and headlight protectors (plastic domes) all for $120ish. New lights come with wires, not electrical connectors, so you need to add your own fittings.
Below is a pic of the backing dish that needs the hole to take the new headlights. It was for the old HZ ones, which don't have holes in the same location, hence the elongated hole. The ones in Ole Yella only have a 12mm hole, as the newer headlights are more consistent with the location of the park light.
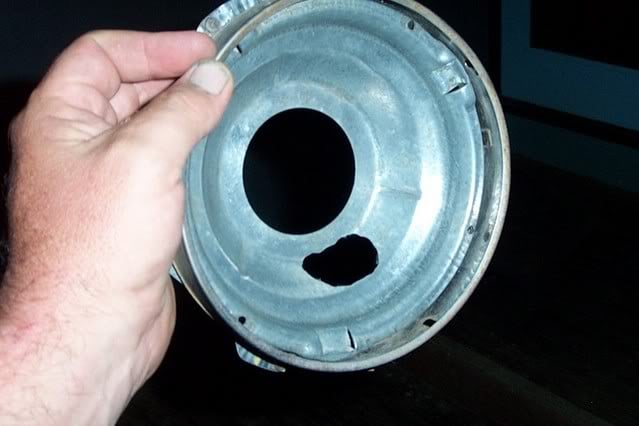
Hope this helps. Might help if you take a pic of your headlights, which might help me. Don't go scratching the silver shit off.
Your not doing a square to round conversion are you? If so there are a few extra steps involved in getting it right.
Arrimar, no mate, the bit that the lights actually sit in. Do the new lights you have, have the hole to fit the bulbs in, or the windows that the lights shine through?
Here is a pick of the backing dish that I'm talking about. Note that this is for old HZ H4's, have a separate light that sits in rubber grommets with two straight connectors for the connection. My new ones have a metal sleave, that another metal fitting and spring fits into.
Now, as for the actual standard light fitting, you'll find that the parker bulb actually sits in a separate fitting connected to the bottom of the headlight fitting. This bulb will clip out as it has it's own separate holder. Remove it from the larger headlight electrical connector, cut wires, and wire to suit the lights you have. I'd not be bothering with old headlights. I got new headlights, new Narva (blue) bulbs, and headlight protectors (plastic domes) all for $120ish. New lights come with wires, not electrical connectors, so you need to add your own fittings.
Below is a pic of the backing dish that needs the hole to take the new headlights. It was for the old HZ ones, which don't have holes in the same location, hence the elongated hole. The ones in Ole Yella only have a 12mm hole, as the newer headlights are more consistent with the location of the park light.
Hope this helps. Might help if you take a pic of your headlights, which might help me. Don't go scratching the silver shit off.
Your not doing a square to round conversion are you? If so there are a few extra steps involved in getting it right.
#13
arrimar
-
- Members
-
- 3,134 posts
"Have you still got that Torana!"
- Location:brisbane
- Car:Salamanca L34, Absinth LH SLR/5000, Caribean Blue LH 5.0, C250 Merc,
- Joined: 13-January 06
Posted 14 January 2007 - 10:38 PM
thanks yella.the lights im using are from my hz. they dont have a clear window on the back for the parkers. i got new connectors so i can use the rubber boot. am thinking of going the white indicator lens path.was trying to keep as much stuff original as i could but.....most stuff is modified anyway.
i wonder ,if the parker wires were connected to the headlamp would that work or would there need to be a resistor to lower the power ?
thanks for following me along here.unfortunatly my camera is in under warranty and i have missed being able to record the best bits of building the car.
no the round ones were allready in.
Edited by arrimar, 14 January 2007 - 10:39 PM.
#14
_Yella SLuR_
_Yella SLuR_
-
- Guests
Posted 14 January 2007 - 10:43 PM
Okies. Have a look at the headlight connection, you'll see that the parkers sit in there in their own little bracket/plug thingy. Just unclip it out of the main headlight connector and prepare to cut & join wires, or put connectors on, as the HZ ones are the two pin type, just use an insulated spade connector.
Anyways, have a look, I'm sure you'll see what is happening once you have a look at it.
HZ ones are the ones with the parker light in a slightly random location between different lights/manufacturers.
Anyways, have a look, I'm sure you'll see what is happening once you have a look at it.
HZ ones are the ones with the parker light in a slightly random location between different lights/manufacturers.
#15
arrimar
-
- Members
-
- 3,134 posts
"Have you still got that Torana!"
- Location:brisbane
- Car:Salamanca L34, Absinth LH SLR/5000, Caribean Blue LH 5.0, C250 Merc,
- Joined: 13-January 06
Posted 14 January 2007 - 10:53 PM
i have the parker connector thing worked out. the headlights are all wired up and low and high beam are fine. as the lights are all sorted and the parker bulb is hanging free within the engine bay and shining nicely think i'll do the same as the blue car. im wrecking the hz so kept the lights rather than fork out for newies. now shouldnt you be welding? practise practise.
#16
_Yella SLuR_
_Yella SLuR_
-
- Guests
Posted 15 January 2007 - 09:38 AM
Hehehe, I'm itching mate. Wife thought the gates were a higher priority (as they do). Tonight is Torrie Club, so hopefully tomorrow night. Have the scrap steel sitting there ready to play.
#17
arrimar
-
- Members
-
- 3,134 posts
"Have you still got that Torana!"
- Location:brisbane
- Car:Salamanca L34, Absinth LH SLR/5000, Caribean Blue LH 5.0, C250 Merc,
- Joined: 13-January 06
Posted 15 January 2007 - 02:47 PM
clean any rust or scale from it and thatll help with the finished product.its all in the preparation,just like painting.


1 user(s) are reading this topic
0 members, 1 guests, 0 anonymous users

