Winton at least like you to use them if going to the pits, but not essential.Since it's a race car, why the indicators?

Winton or bust!
#101

Posted 17 March 2007 - 07:31 AM
#102

Posted 20 March 2007 - 12:11 AM
Gearbox:
Some bits and pieces not all manuals tell you and what to actually look for.
Some of this stuff relates to any manual you do up.
Cluster gear.
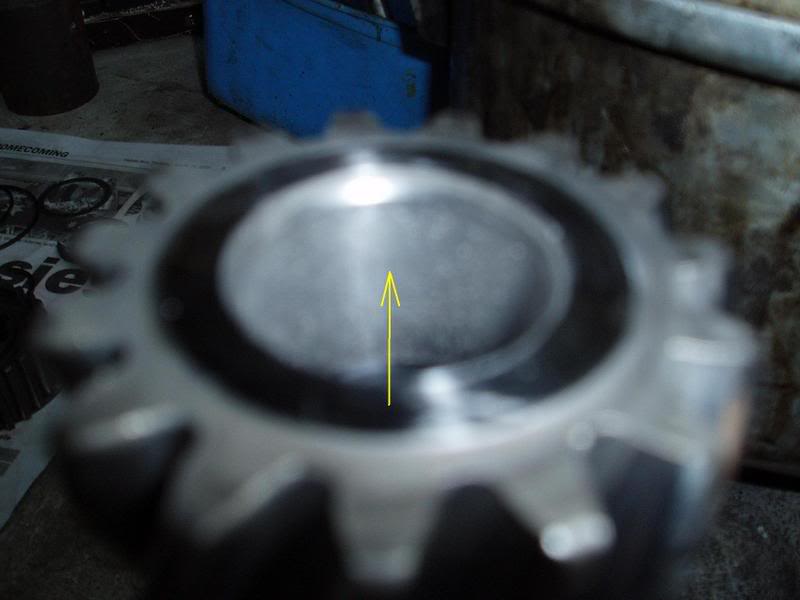
The arrow points to the bearing surface for the needle rollers in the 1st gear (small gear) end of the cluster. With time the hardening comes off this surface and the flakes of metal accelerate the wear process.
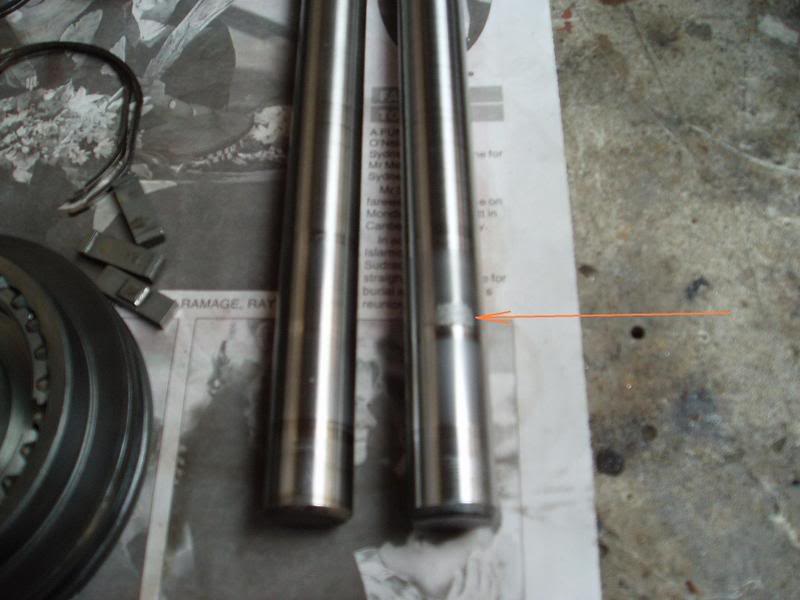
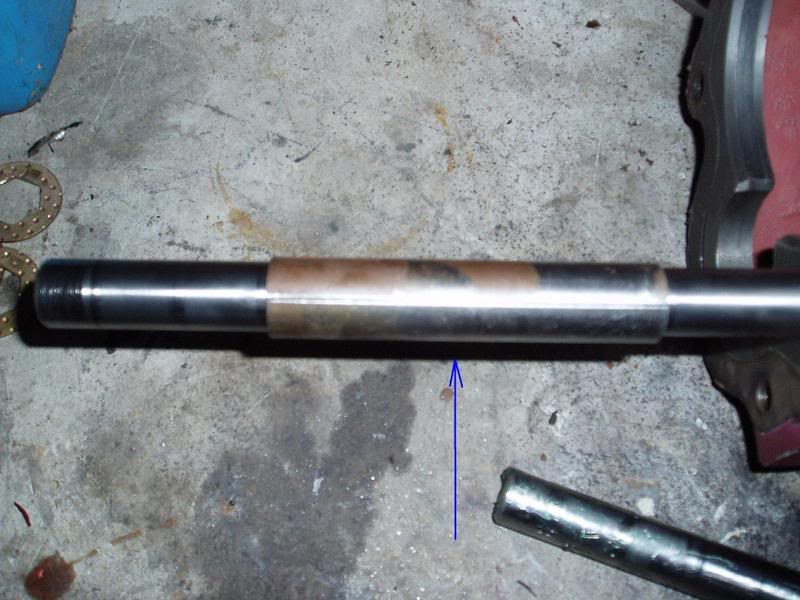
Lay shaft.
This is the shaft that supports the cluster gear. Again the hardening is coming off.
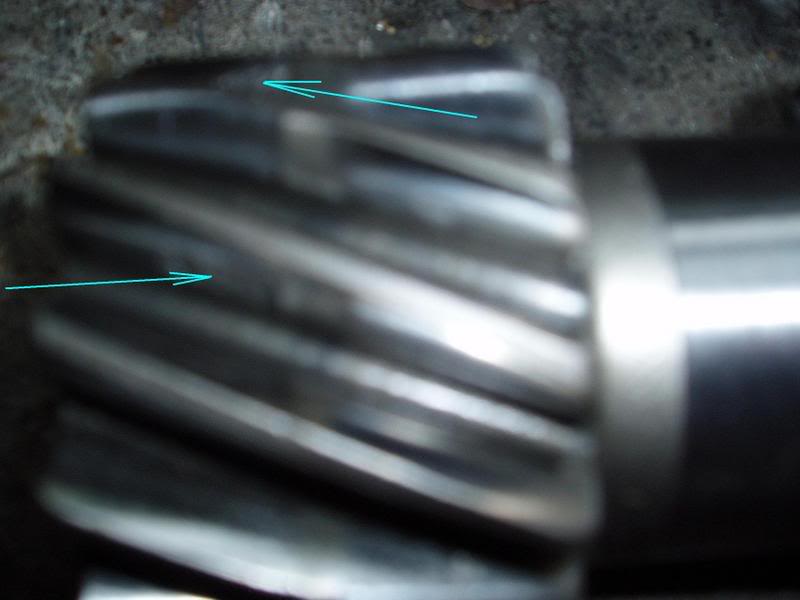
As these bits wear, and also the needle rollers, the gears begin to run out of mesh and the hardening starts to come off the gear teeth indicated with the arrows. This cluster was actually rubbing on the reverse gear idler boss in the housing it was that stuffed.
Another gear that commonly suffers this fate is the input shaft gear if the front bearing has been collapsed and driven for too long. Any gear you find with the hardening damaged is not worth refitting and any gear that it meshes with will also more than likely need replacing.
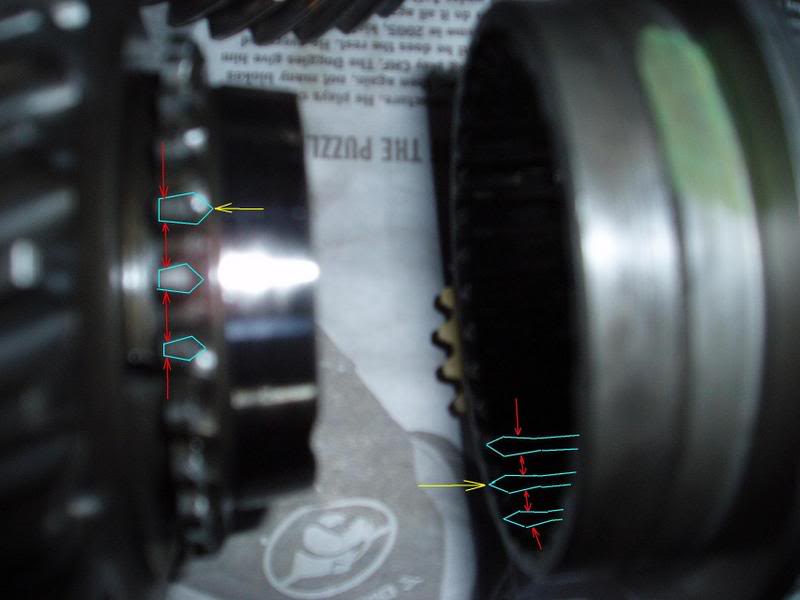
"Dog teeth" and synchros.
Some books call these splines?
This pic shows what good ones look like. They are tapered to "hold" themselves in gear while torque is applied. The pics aren't the best but I hope you can see that if the gear and the coller were engaged and torque applied that they would pull themselves together. The red arrows point to the tapers and the yellow arrows point to the lead in. Any damage on the lead in indicates a synchro problem (crunching).
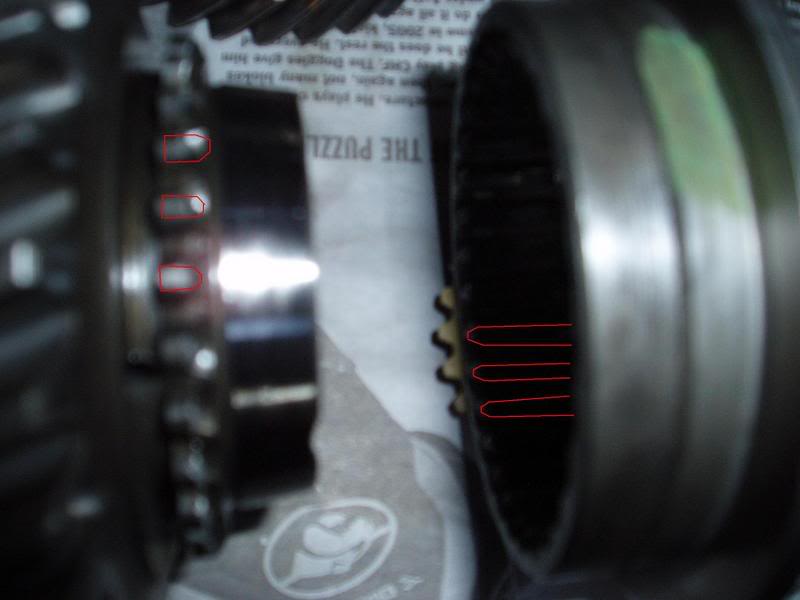
This pic shows worn ones. If you see this type of wear on a dog it should be thrown out as it has been jumping out of gear and will continue to do so. As the tapers are now worn in the opposite direction, these components would try to push each other apart (jump out of gear) when torque is applied and no detent spring will be strong enough to stop it.
Bearings.
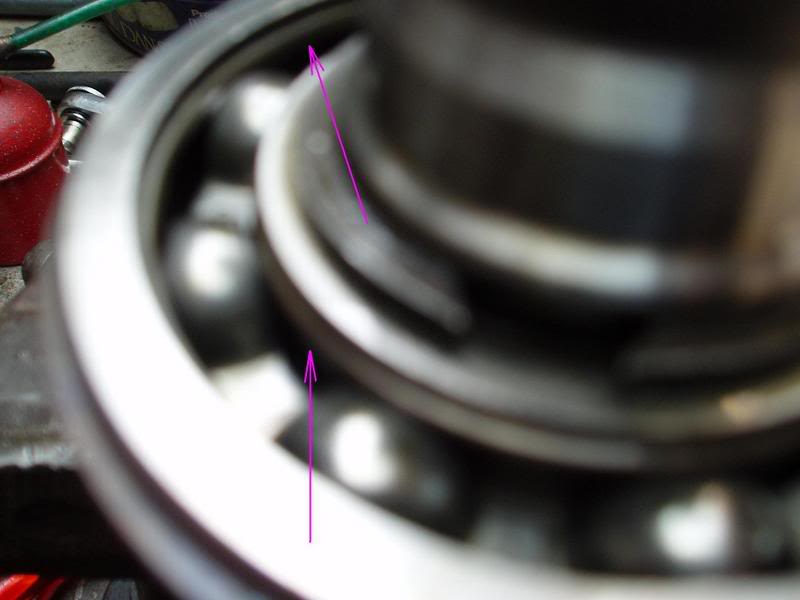
I have built this gearbox out of 3 second hand gearboxes and didn't want to spend money as a better g/box will be built later. This meant finding the best bearings. I saved all the cluster gear needle rollers from the front of the clusters (not the worn ends). The input shaft and output shaft bearings were inspected to find the best. They were washed and dried and taken out in the sunlight and you can see the races and check for hardening coming off by rotating the bearings and looking where the arrows indicate.
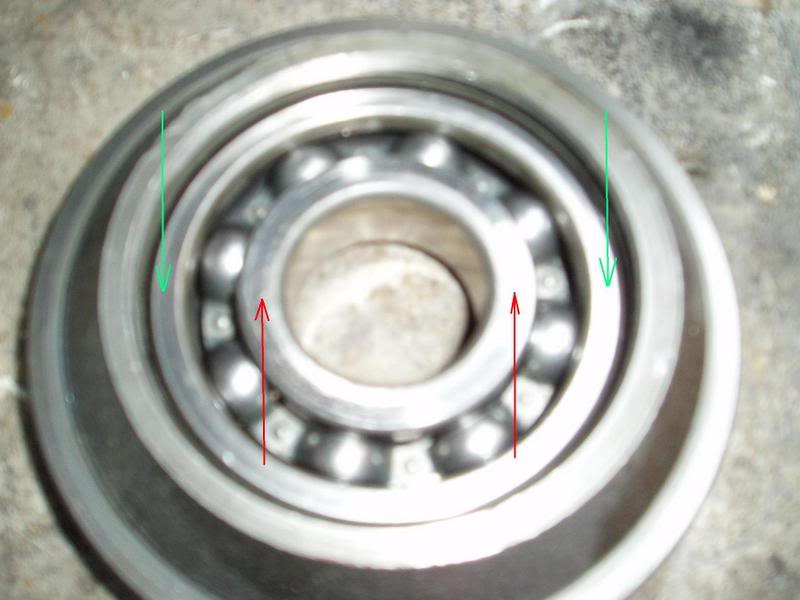
The next pic shows where to hit the bearing when fitting it to a housing (green arrows) and where you would hit to fit this assembly to a shaft (red arrows). If you hit where the red arrows are when you are fitting a bearing to a housing you are using the balls in the bearing to transfer the impact and can damage the bearings. Get it? This applys to any bearing, wheel bearing, alternator bearing etc.
Also applys when pressing bearings on.
Snap rings / circlips.
There were some dodgey g/box bearing kits around (maybe there still are?) that supplied skinny snap rings that didn't fit the grooves in the shafts and housings properly. This can let the gears on the mainshaft "float" and this then upsets gear selection as the synchros don't work as well. It can also lead to gears jumping out.
Check for wear on the sides of any snap rings to be reused as the same faults can happen.
The next pic. shows a snap ring being fitted. The red markings show that the tips of the snap rings have a taper. This is to let the pliers grip them, not so critical when fitting but makes them a bastard to remove if fitted backwards.
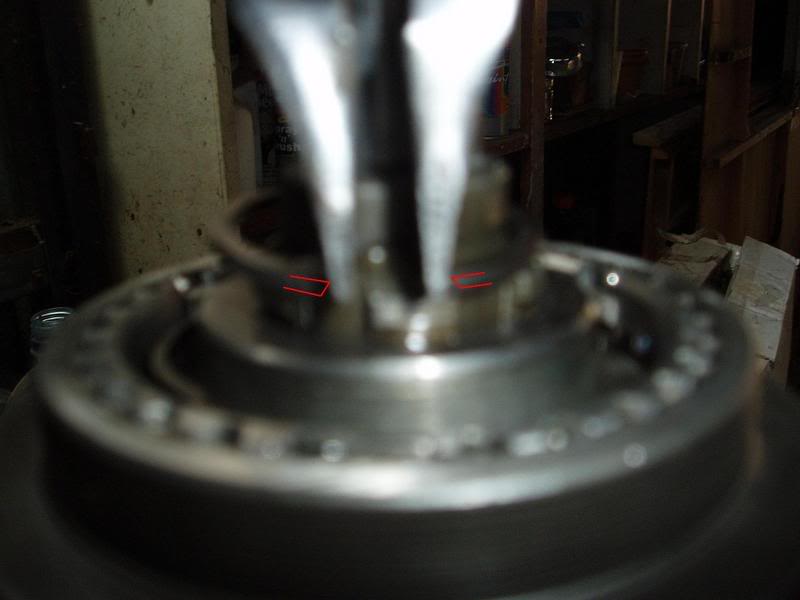
The books usually say about using a "dummy" layshaft when loading the needle rollers into the cluster and fitting it into the housing. I use grease. Pack it in well and take care when driving the shaft into the housing and they should stay where they belong.
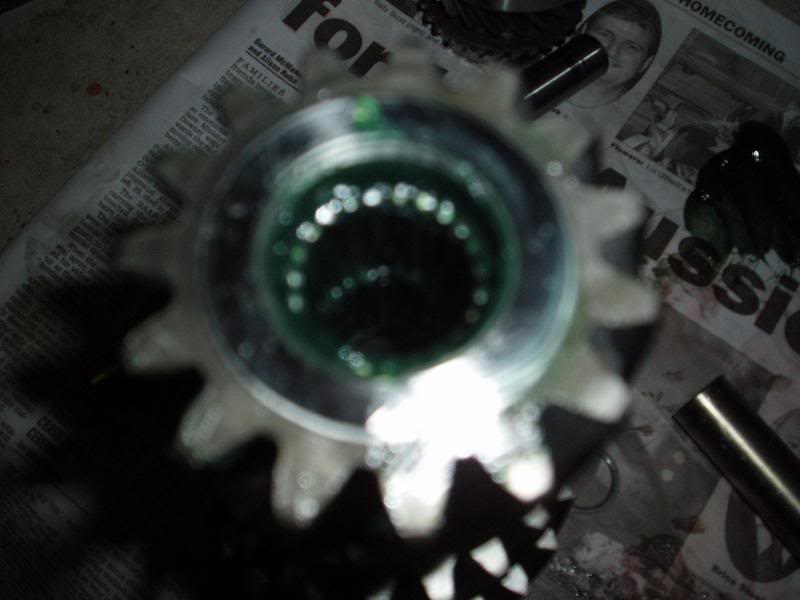
I did however have to do it twice as the separating collar I used had been damaged by the old cluster and the layshaft had difficulty fitting through it.
Maybe check yours isn't damaged before fitting it into your cluster?
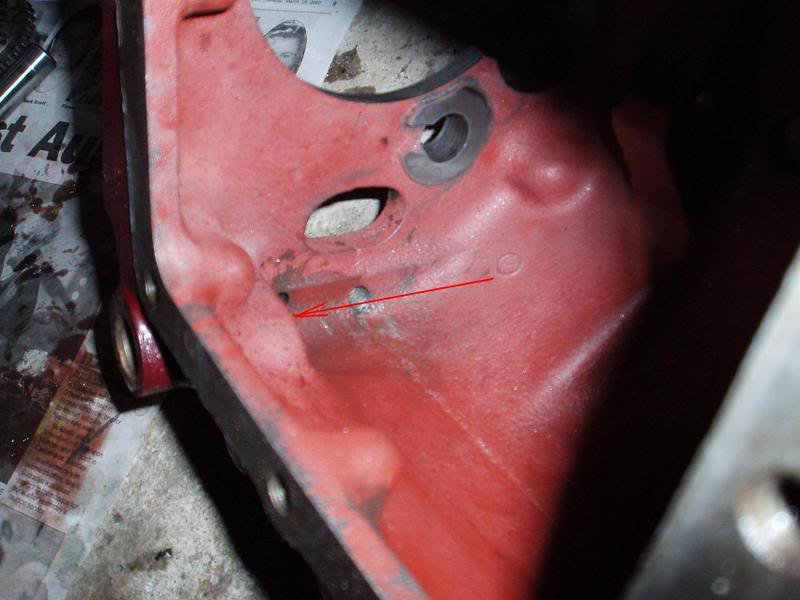
Another thing to look for on an aussie is hidden gremlins. There is a cavity in the housing that all the nasties (broken bits of shrapnel and debris) want to hide in.
So here is the box ready to put back in. Pretty colours huh? The pink bolts are the only bits I have used from the box I pulled out. And that was only to keep Mrs RoDoMo happy. I might paint it black so I can have a "black box" to go with the telemetry read out.
The rest of the bolt holes on the casing are blind with exception of the drain bolt on the extension housing where a copper washer was fitted.
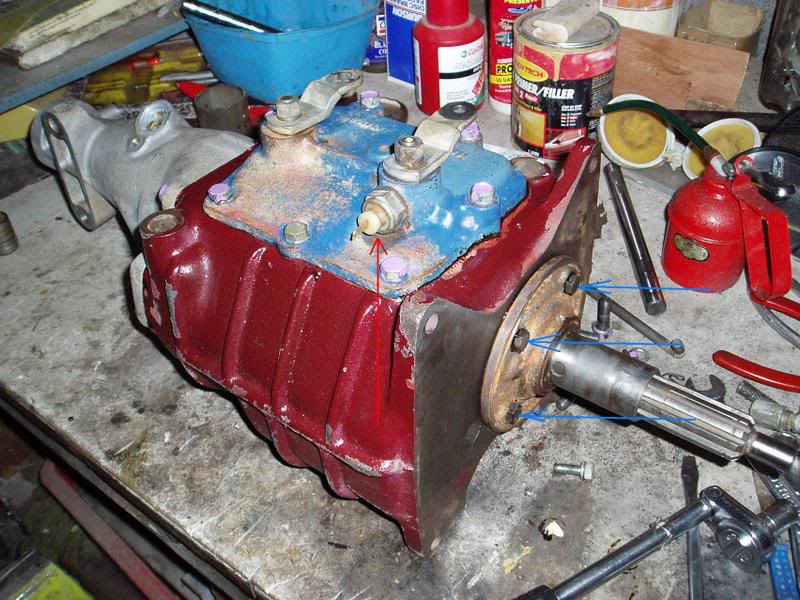
The red arrow points to the nitros interlock switch. This means the nitros will only activate in top gear as the cluster is "delicate".
#103

Posted 22 March 2007 - 10:26 PM
Tip:
Leave the crossmember off until you adjust the gearshift.
(More room to work)
Edited by rodomo, 22 March 2007 - 10:28 PM.
#104
 _@milco@_
Posted 22 March 2007 - 10:33 PM
#105
 _73LJWhiteSL_
Posted 22 March 2007 - 10:35 PM
Thats why i had to replace the cluster when i rebuilt the M20 for the LJ.Cluster gear.
The arrow points to the bearing surface for the needle rollers in the 1st gear (small gear) end of the cluster. With time the hardening comes off this surface and the flakes of metal accelerate the wear process.
I still have the old cluster around somewhere. Should grab it out and take some pics.
Steve
#106

Posted 22 March 2007 - 11:06 PM
I hope so, it's certainly getting there. I try to get everything else done during the week so I can start to spend full weekends on it but something always seems to pop up. This weekend its steering uni and coupling on my son's UC. Should only take a couple of hours though.wooo hoo a update i have been hanging out for this, mmm very good work mate, i like it a lot, so will it be ready for the heathcote day?
#107

Posted 22 March 2007 - 11:14 PM
Don't throw it out. I have made enquirys about resleeving them. Apparently there are a few shops that can/will do them but the success rate varies. I couldn't justify $90 to resleeve one and new bearings on top when I know I have a new cluster to build a better box around later. Having said that I would like to resleeve the remaining cluster and rebuild THIS box again with the resleeved cluster and new bearings and keep it for a spare or dragday box?I still have the old cluster around somewhere. Should grab it out and take some pics.

Steve
#108

Posted 05 April 2007 - 08:49 PM
I got 4 litres of L.S.D oil off e-bay for $10 and removed the back plate off the 10 bolt to let it drain for a few days. (300,000klms diff). While I was under I thought I would read the ratio off the crownwheel just in case someone had changed the flange which reads 2.6:1. As I pushed the crown wheel around I saw a carrier bearing move like it had no pre-load (sideways). Sure enough the carrier is moving .5mm sideways in the housing.
Seems to be 1 step forward and 2 backwards, but we'll get there, won't we?
#109

Posted 05 April 2007 - 09:53 PM
#110
 _@milco@_
Posted 09 April 2007 - 10:35 PM
#111

Posted 09 April 2007 - 11:45 PM
Last week was mounting dash and getting depressed over the diff. (And lost a weekend on boy's car) The loom had been chopped out of the car when I got it so it is basically a rewire.
Should have all the wiring finished by Wed. night. Then I have 4 days off. The plan is to finish everything I've started before I pull anything else off. Some things can wait like fuel sender and reposition battery if time gets short.
2 blocks of 2 diodes had to be fitted to the dash wiring to give me a "dash light test" function. Yellow circles.
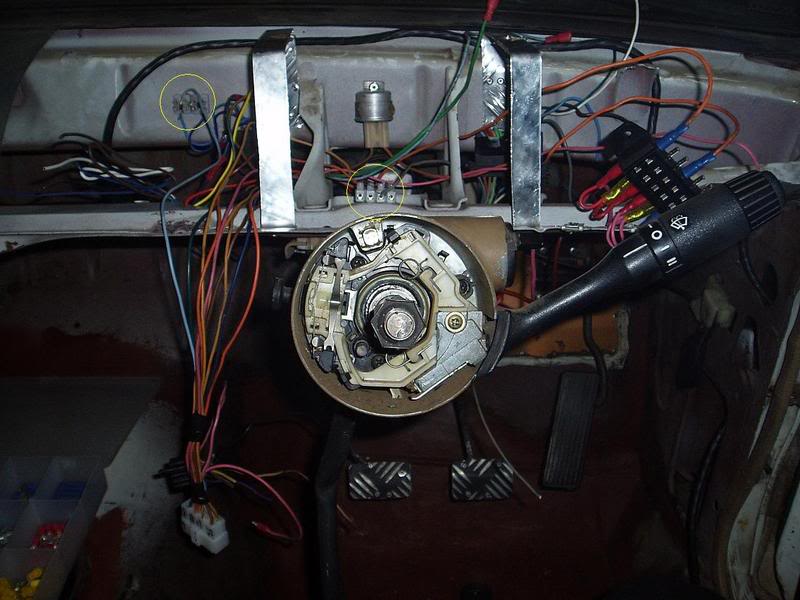
Also tidied up the "console"

Still to do:
Carrier bearings.
Rekit calipers and assemble.
Pick the best of 3 master cyls, rekit and assemble. (Or buy new master if not happy)
Replace all brake hoses. (Has "balloon" type fitted, explain later)
Fit 120y fuel tank.
Fit 3.3 varajet fuel pump.
Tidy up rust, not so much for the drag day but Sandown 29th.
Mow the lawn.
Refit head lights, tail lights and bonnet.
Water pump and harmonic balancer.
2 front window regs. (were electric) and drivers door glass (don't ask)
Fit fire extinguisher for S/Down.
Bonnet pins for S/Down.
And a days worth of "sundries"
Edited by rodomo, 09 April 2007 - 11:47 PM.
#112

Posted 09 April 2007 - 11:55 PM
#113

Posted 10 April 2007 - 03:51 PM
Buy a 3.08 or 3.36 etc instead....
I hope you have as much fun driving this beast as you do working on it, your efforts are amazing.
#114

Posted 10 April 2007 - 04:25 PM
There is a diff plan down the track but for now $37 for 2 carrier bearings is within the budget.Hey, why spend money on a diff with the wrong ratio ?
Buy a 3.08 or 3.36 etc instead....
I hope you have as much fun driving this beast as you do working on it, your efforts are amazing.
Edited by rodomo, 10 April 2007 - 04:25 PM.
#115

Posted 14 April 2007 - 12:13 AM
You remember the leaking fuel tank?
I went to pick-pay & go with a measuring tape to measure up for a small tank to fit closest to above the rear axle. I found 120Y was the most compact and checked out all the ones there, picked what I though was the best one, removed it, payed for it, and took it home. That was about 6 weeks ago. Yesterday I made up the bracket to fit it and nutted out in my brayn what was going where in regards to filler necks and pickup. In this process the tank got jigged around a fair bit and guess what? SUGAR FELL OUT OF IT!
While there is no tank, hence no fuel, I thought it best to repair the rust in the rear of the car.
R/H Quarter.
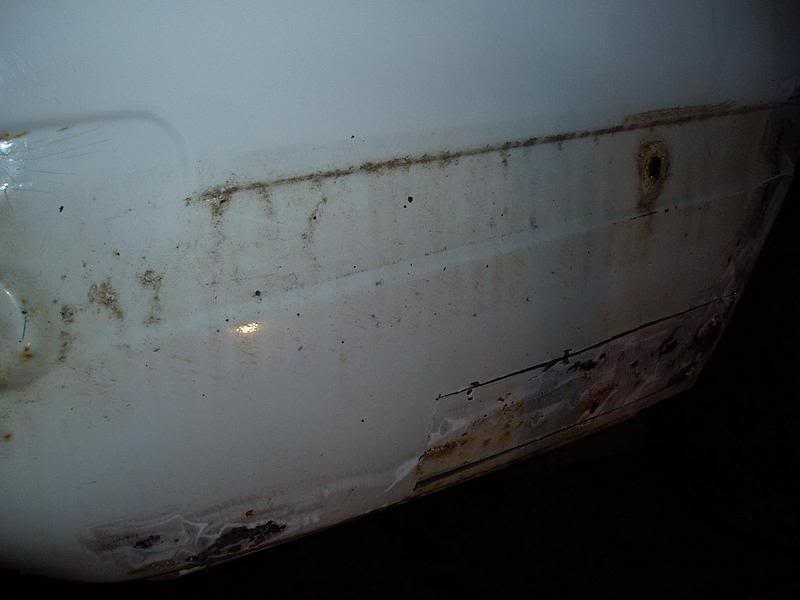
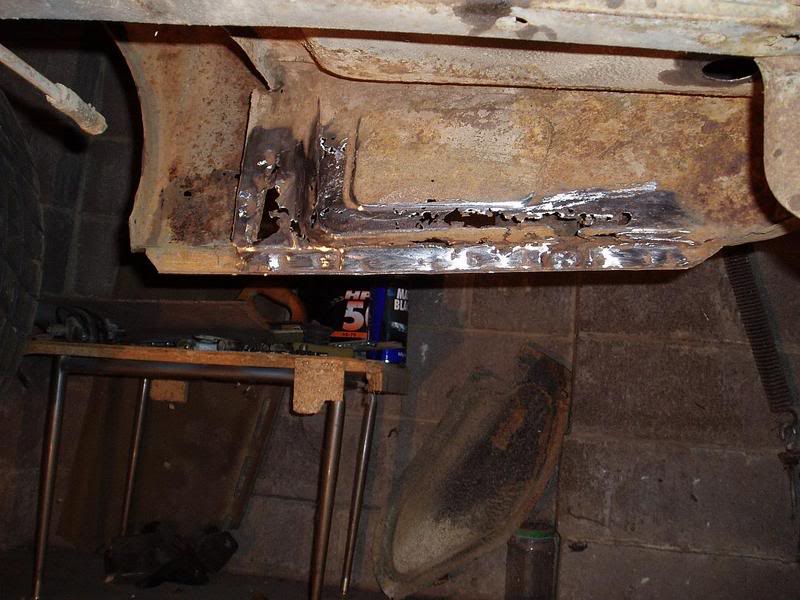
Yellow arrows indicate holes that showed up after heat was applied (don't ya hate that!) and will be fixed using "an alternative method
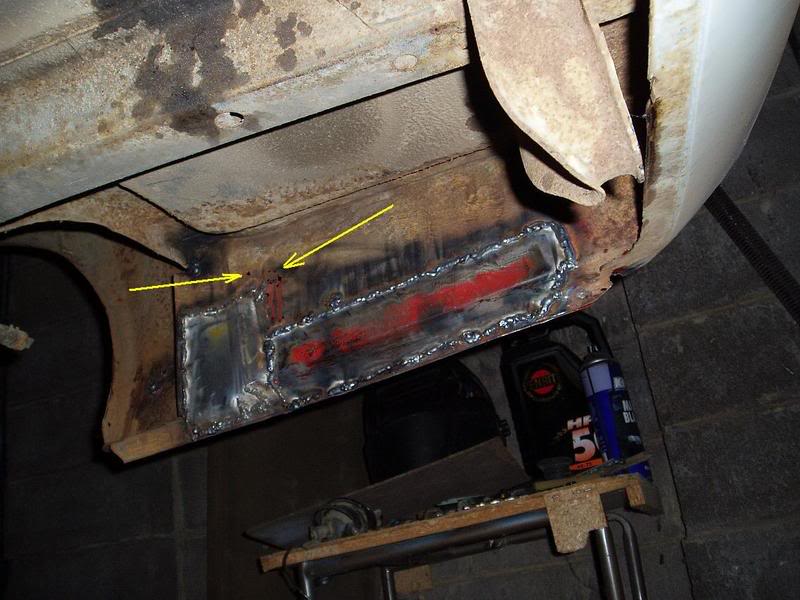
These are "patches" over the rust rather than cutting out and replacing sections as time is a factor here. All exposed sections will be wire brushed and either red oxided or body deadened, should keep the scrutineers happy though.
While waiting for the red oxide to dry I removed the diff centre. This pic doesn't do justice to the size of the pinion in a 2.6 but compare it to the carrier bolt holes. It is huge.
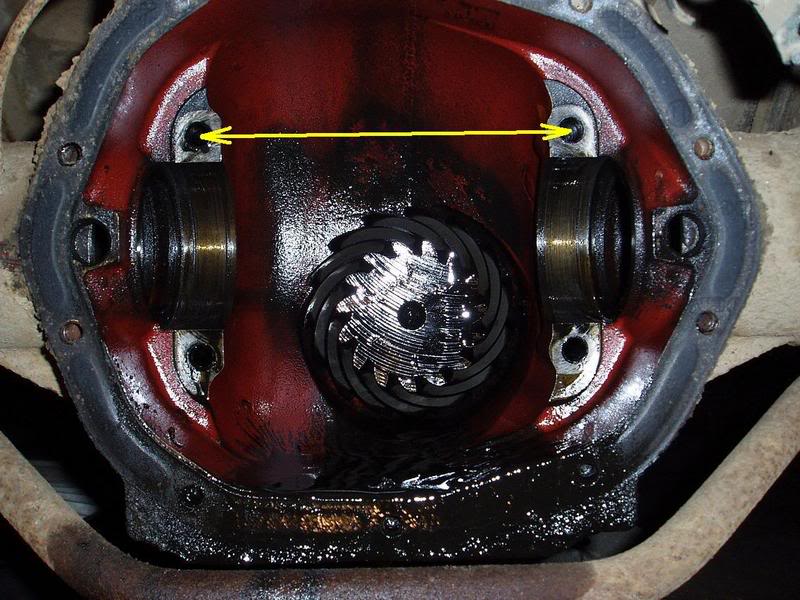
#116
 _CHOPPER_
Posted 14 April 2007 - 02:22 AM
#117

Posted 15 April 2007 - 04:51 PM
#118

Posted 16 April 2007 - 12:25 AM
If I cut out the rust and didn't fix it, I would end up with a MokeWon't fixing the rust add weight to the vehicle?
#119

Posted 16 April 2007 - 08:36 AM
#120

Posted 16 April 2007 - 06:07 PM
#121

Posted 21 April 2007 - 01:32 AM
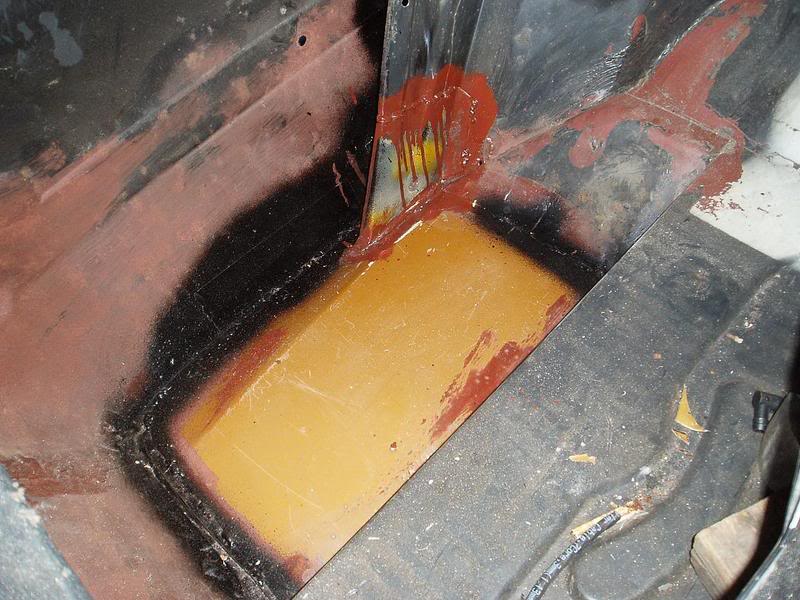
Major issues in the L/H quarter.
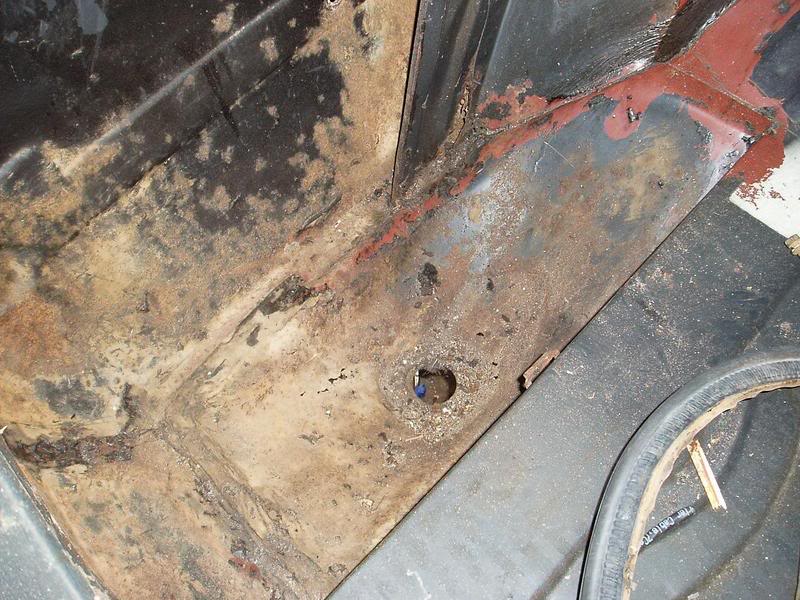
Wheel well :DELETE:
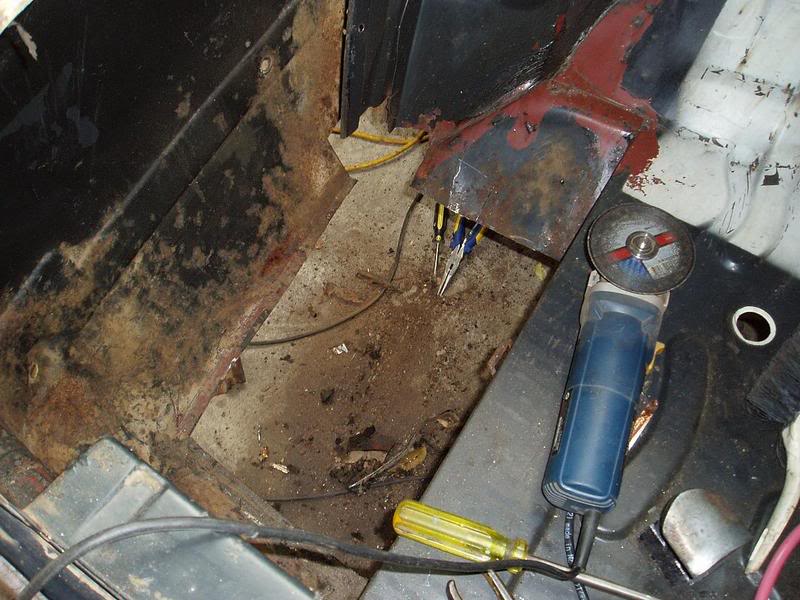
You might notice a bit of "quick fix tape" under the deadener in the quarter.
Thats not rust
The diff centre is back in, the new carrier bearings have eliminated any side thrust but I didn't need a spreader to refit the centre. What this means is backlash is halved but carrier bearings have little pre-load. Should last until budget allows another diff though, no problem, better than some 9"s Iv'e been reading about.
#122

Posted 22 April 2007 - 11:34 PM
I loved my old LX Racecar and the main reason I changed to the Commodore was to get away from the rust.
How are things looking for Sandown ?
#123

Posted 22 April 2007 - 11:58 PM
How are things looking for Sandown ?
Off to Coventry fasteners tomorrow to "beef up" the puller.
I have Thurs, Fri & Sat off though.
Edited by rodomo, 23 April 2007 - 12:04 AM.
#124

Posted 23 April 2007 - 12:10 AM
#125

Posted 23 April 2007 - 12:19 AM
1 user(s) are reading this topic
0 members, 1 guests, 0 anonymous users


