dang those cheese-cutters on the rear need to go lol
Ollie's LH
#76
 _GMH-001_
Posted 09 January 2015 - 08:51 PM
#77

Posted 13 January 2015 - 09:48 PM
Attached Files
#78
 _GMH-001_
Posted 13 January 2015 - 10:17 PM
have you gone the sleeper look with drinking straw exhausts.? ![]() or they just look small
or they just look small
#79

Posted 14 January 2015 - 07:30 AM
#80

Posted 14 January 2015 - 11:19 AM
Hmm... I just skimmed through this thread but I couldn't see anything so I have to ask... what are you using for a fuel tank Ollie?
#81

Posted 14 January 2015 - 01:37 PM
#82

Posted 14 January 2015 - 02:29 PM
Ah that explains it, thanks. Plenty of room under there with no tank, it almost needs a dummy drop tank or something to fill the gap?
#83
 _LHSL308_
Posted 14 January 2015 - 03:23 PM
^ ![]()
#84

Posted 15 January 2015 - 11:30 AM
Bit of rough luck, got given a hq stub axle from the wrecker by accident and my Propshaft hits the exhaust with the new diff install. Don't have time to fix it until after the wedding. So its tools down for the next few weeks.
#85

Posted 03 February 2015 - 08:32 PM
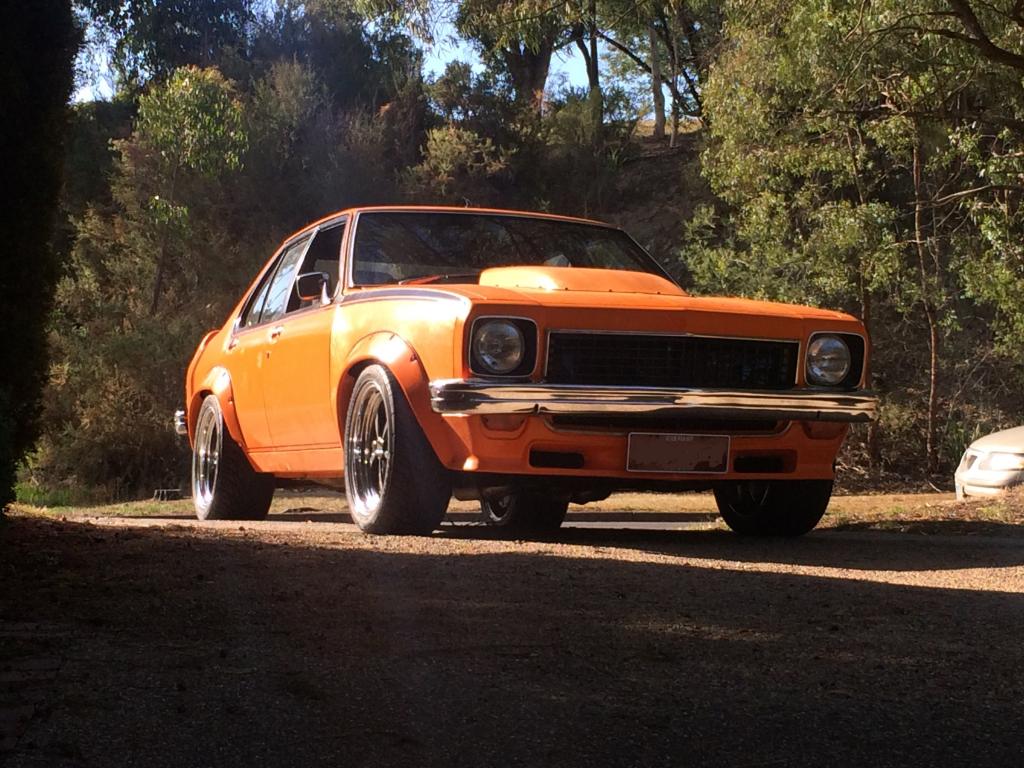
Alright, got the brakes bled, changed the stub axle and we are driving, well sort of.
Got a little off throttle driveline vibration, I think its the slip yoke on the output shaft being too far out but will have to inspect tomorrow. Its sitting at ~36mm out, should be 19-25mm.... Don't know if it could be something else..
Anyway, the day finally came...
#86
 _LHSL308_
Posted 03 February 2015 - 08:41 PM
Your obviously talking about the yolk that comes out of the gearbox onto the tailshaft? I've always wondered how much they should stick out as both mine stick out a fair bit and I would dare say a lot more than 36mm.
Edited by LHSL308, 03 February 2015 - 08:41 PM.
#87

Posted 03 February 2015 - 08:44 PM
yep, that's it.. I'm going to pull the shaft out and measure the spline engagement depth to see how much I actually have. Even so, its not good to have too much overhang as I'm worried about chewing out the output shaft...
#88

Posted 03 February 2015 - 09:14 PM
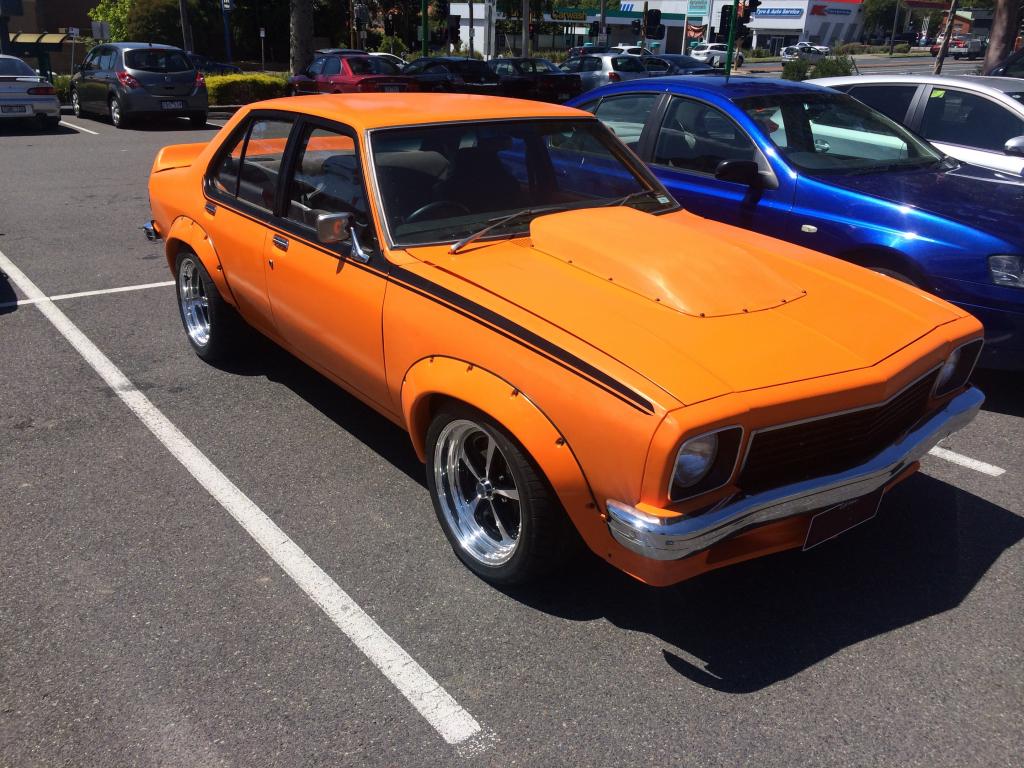
Love those wheels... Well done mate, a true shed build. Good job.
#89

Posted 04 February 2015 - 04:53 PM
Looks great Ollie. Saw a similar looking sedan in Sydney yesterday and it reminded me to check this thread haha.
Can't wait to see it with a good buff!
#90

Posted 12 February 2015 - 02:12 PM
Hey all, I've made a video with a summary of photos from 2007-2015 over the build. Link is below.
I'm calling it. The build is done.
Lots of hard work, but happy with the result.
#91

Posted 12 February 2015 - 02:58 PM
#92

Posted 12 February 2015 - 03:06 PM
Pretty sure I seen you driving in Greensborough last week from the corner of my eye.
#93
 _Matvex_
Posted 12 February 2015 - 03:17 PM
I saw Ollies car in the flesh a few weeks back. A credit to you Ollie. A true shed build done to a high standard. Congrats again.
#94

Posted 12 February 2015 - 04:16 PM
Yep theres nothing like a shed build......I can certainly relate......excellent work.
#95

Posted 12 February 2015 - 04:26 PM
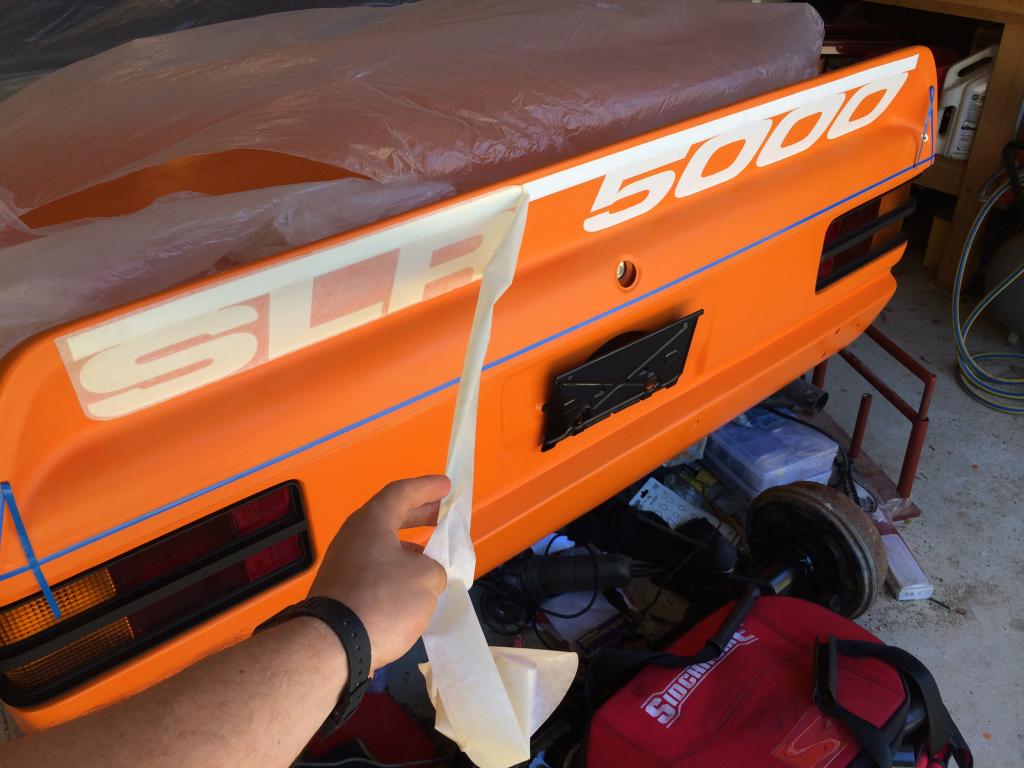
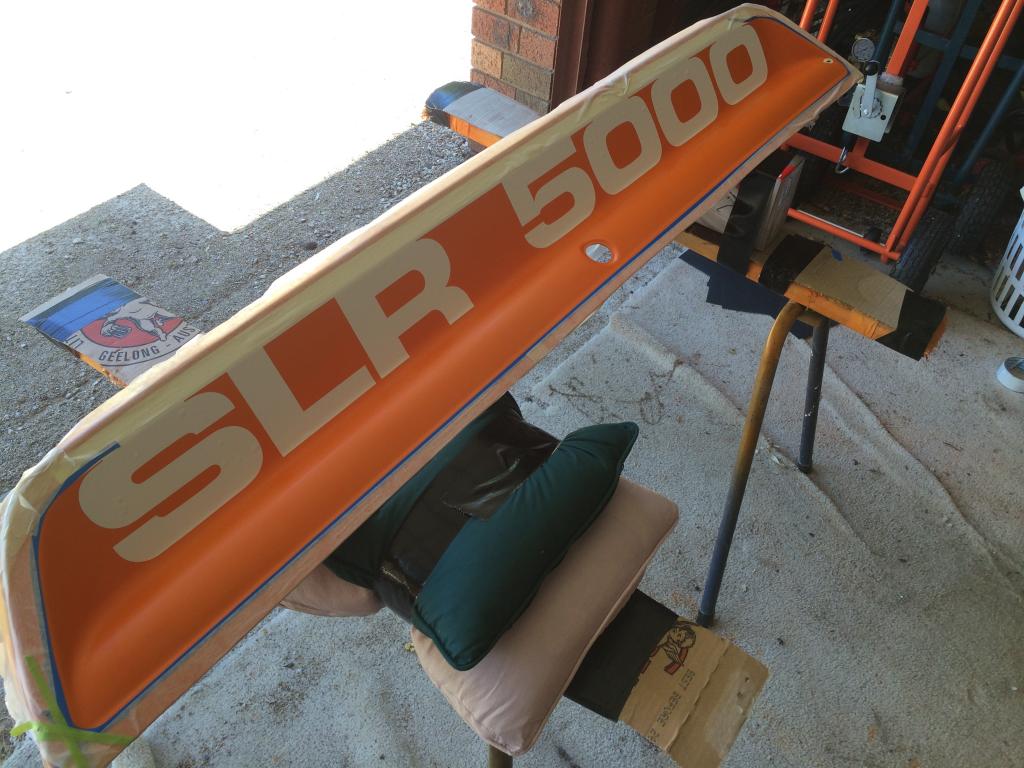
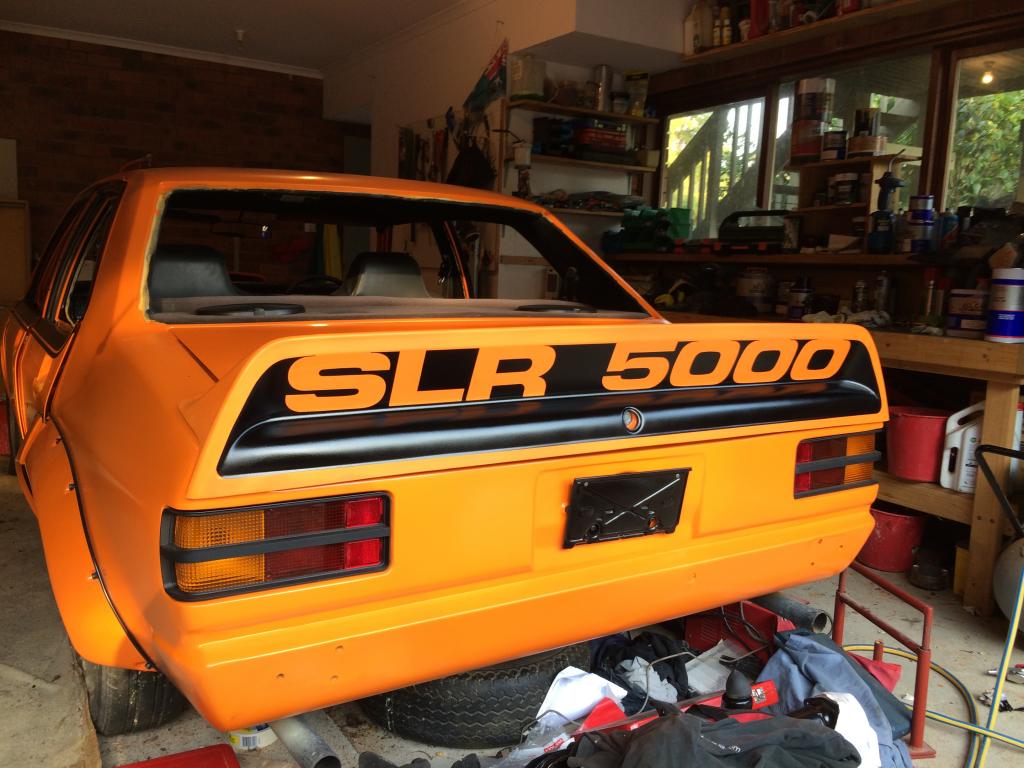
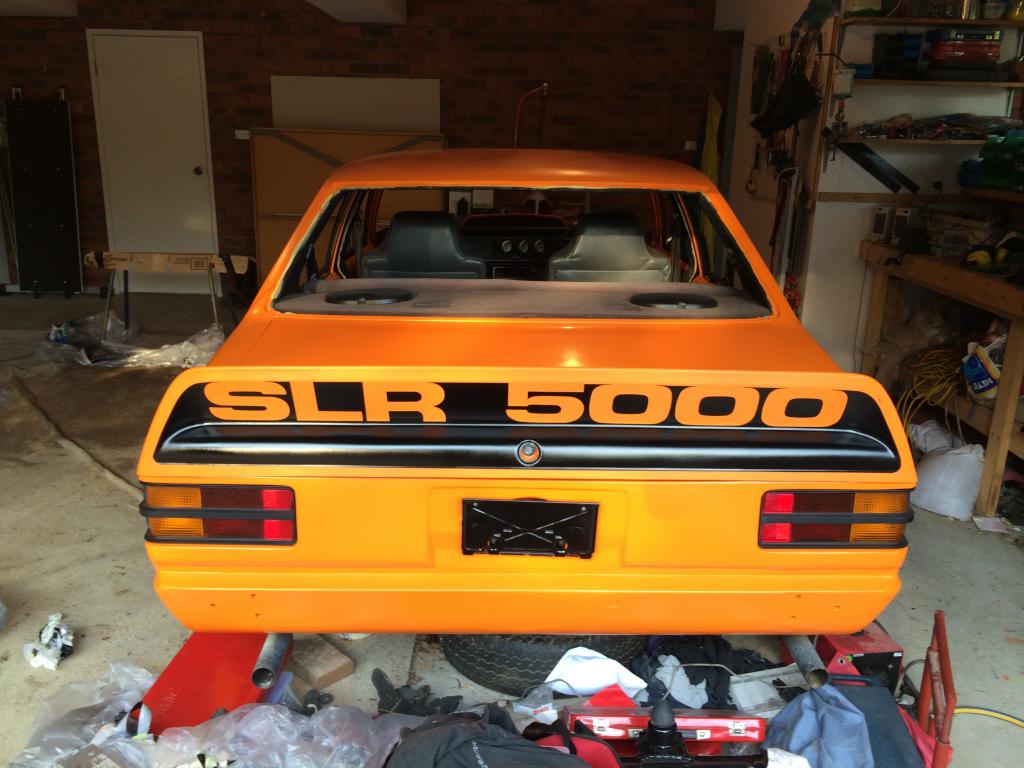
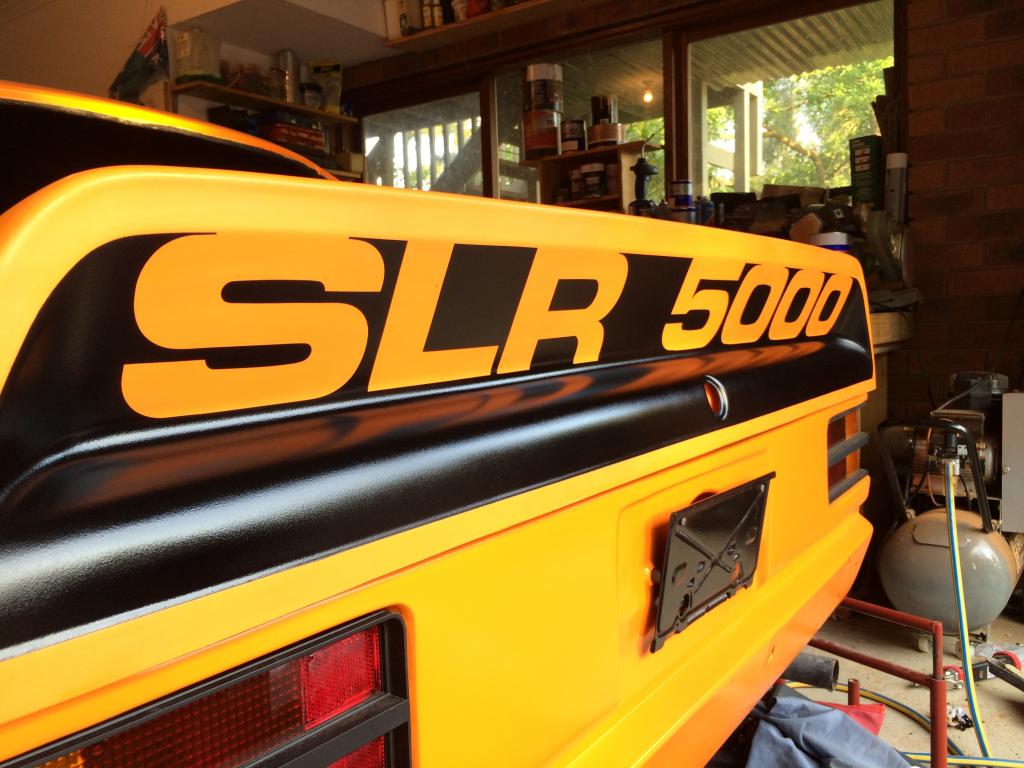
Just a question Ollie, I saw the pics of the SLR 5000 stencil on the rear spoiler........What method did you use to position it correctly and basically how did you go about applying it.
Im attempting my stencils this weekend......although Ive done plenty of painting using fine line tape and what not, Ive never painted a stencil or let alone removed one after painting.
If you could give me a rundown on it ...it would be appreciated
Cheers
Al
#96

Posted 12 February 2015 - 06:04 PM
Thanks guys.. That was me in Greensborough for sure, don't know of any other orange lh's kicking around the area..
No worries Al, can do, give me a sec.
#97

Posted 12 February 2015 - 07:02 PM
The stencil was actually allot easier than I thought it would be. I found it easy to be honest.
The key is to line the top straight part of the stencil correctly, as long as that is in the correct place the SLR5000 numbers/letters fall into place. I would use that top bit to line it all up.
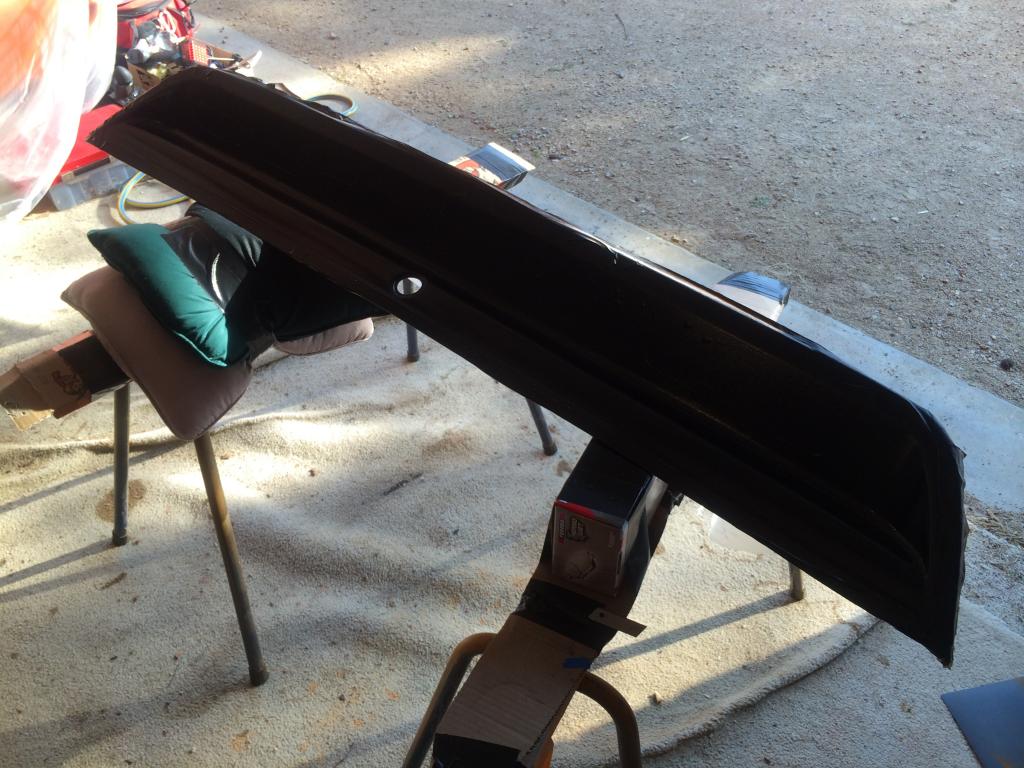
Before you start, you should have a decent layer of colour (not going to rub through), only got one shot.... I'm sure you know this..
You'll see from the photos where I lined it up, there is an inner area with an edge outline.
The straight bit starts on that border where it curves in and goes straight on both sides.
I peeled of the backing, lined up the stencil top with that line, lightly laid down (no pressure), took about 2 goes and then pressed it down and rubbed with a flexible bog card. then the other backing comes off. Easier to line it all up with 2 people.
The fineline follows the same border, just make sure the tight radius on the bottom is done properly (this is the hardest part of the job).
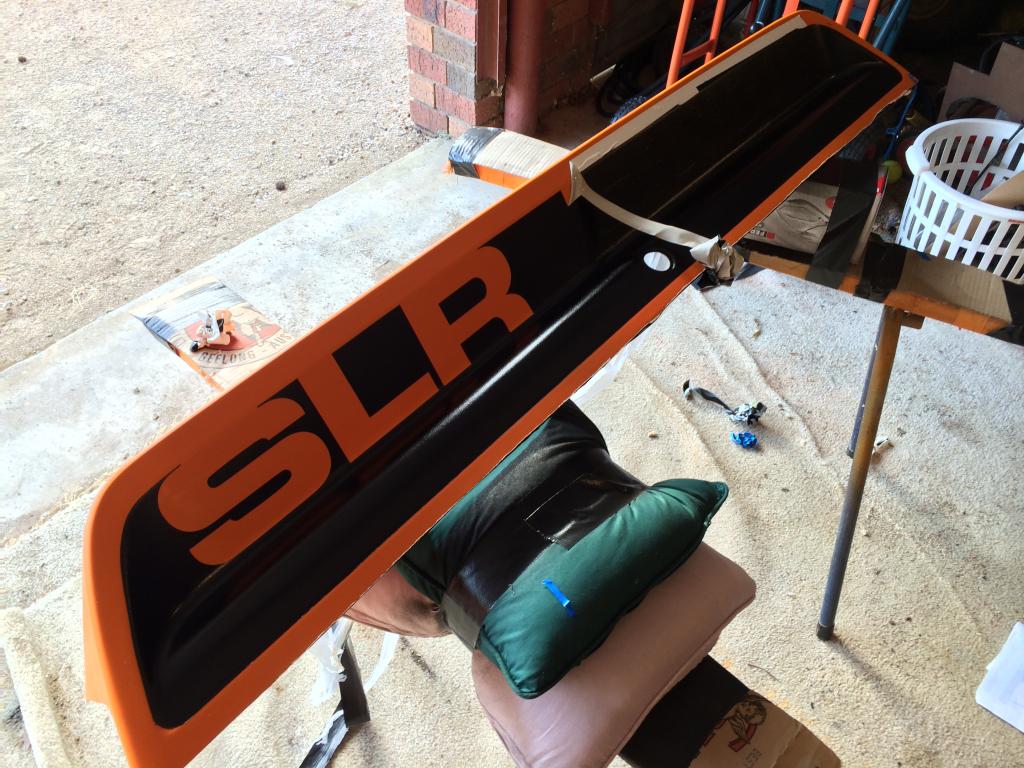
Paint, I recommend a test panel to make sure. People say to use less paint to have less of a step, I much prefer a step with lots of paint than the risk of rubbing throught. I can't really notice the step unless I feel it. My 2 cents...
I used acrylic paint, the paint was touch dry in about 5-10mins, you can feel the dryness on the masking to test. Peel off as soon as it touch dry and it comes off a dream. Don't leave too long or it will lift with the stencil. As soon as its touch dry, go for it, touch test a part of the masking every couple of minutes.
Good luck. Hopefully this is enough info, but let me know if you need more.
#98

Posted 12 February 2015 - 07:04 PM
I had to right click and show pictures, some of them don't appear..
#99
 _LS1 Taxi_
Posted 12 February 2015 - 07:11 PM
#100

Posted 12 February 2015 - 07:53 PM
Excellent Ollie.....looks really good.......nice sharp edges......thanks for the detail and advice.
I'll be using gloss 2k paint on mine but your method of touching the tape and finding the right moment is exactly the same for 2k.......so I'll give it a shot and see what happens.
Im going to do a video as I do mine (mistakes and all) so others can see how to do it as there is a real shortage of info on stencilling for SL/R's.
I will be doing it the same as you basically, solid colour on solid colour so Im expecting a small step as well......they were like that from original anyway.
Ok once again thank you for taking the time to post this up.
Ps I like your colour.........mine is orange as well lol
Cheers
Al
1 user(s) are reading this topic
0 members, 1 guests, 0 anonymous users


 View Garage

