Jump to content


Photo

DIY - paint and panel advice


  • Please log in to reply
27 replies to this topic

#1 hainzy

hainzy

    Forum Fixture

  • Members
  • PipPipPipPipPip
  • 502 posts
  • Location:BALLARAT
  • Joined: 16-April 07

Posted 27 October 2011 - 09:36 PM

Hi guys.

Both my painter mates are having trouble with the council and EPA over their new sheds and booths so my plans to get a mates rates paintjob are on in limbo. Ive been thinking about doing what I can myself for a while now, so I reckon this summer is a good time to have a go...

I have been looking into it all, researching, asking, and googling. Theres some great threads on here too so I dont wanna go over old ground but Id just like a few experienced blokes to le me know if Im on the right track.

OK, so my starting point is an LX which is originally mandarin red, but has been repainted a darker red. Looks like its just straight over the top as theres lots of areas where I can still see the mandarin red. Im not after a concourse job and I am planning to just sand back to the madarin red paint, then repaint it in that colour. Prob go Acrylic as I believe you can get a good finish with a few layers and some decent sanding and its obviously less toxic than 2pac.

Reading different information, ive pieced this plan together. -

Sand back to original paint layer using 120 to 400 on an orbital sander.

Find areas of rust at this time, and have all rust cut out and fixed.

Clean surface with thinners or prepsol

Apply bog where necessary

Sand back using sanding blocks and or orbital – continue until smooth

Apply more bog/putty where necessary and continue sanding etc. until smooth use 120, then 180, then 400.

Clean with prepsol

Spray on primer/undercoat (Acrylic/2pac?) Apply 2 to 3 layers – high build? (name/brand?)

Allow a few days to properly dry.

Sand back with 600 then 800 wet’n dry.

Inspect for pinholes or other blemishes

Spray on filler (also called acrylic putty ?)– (name/brand? – rage gold) to areas which need extra attention

Sand back with 600 then 800 wet’n dry.

Spray on a sealer (name/brand?)

Sand back with 600 then 800 wet’n dry.

Paint - eventually....


Id just like to know if that sounds about right as a plan of attack. I plan to buy a compressor/painting gear etc, and get a mate to weld the new metal in. Ill have lots of other questions down the track but I just want to make sure I have the basic plan right.

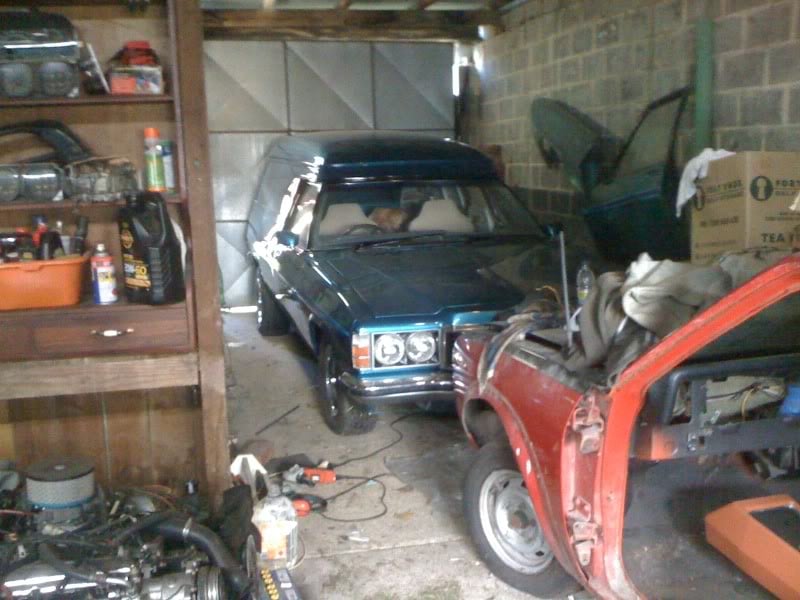
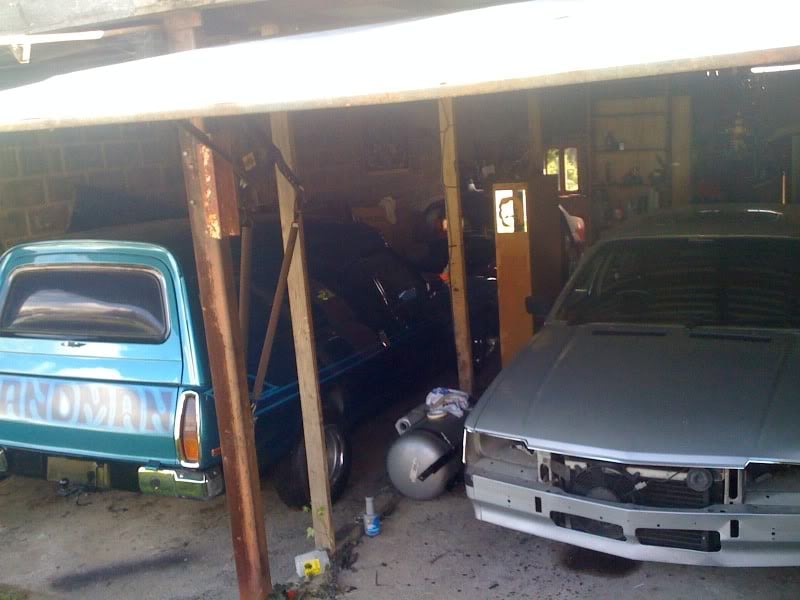
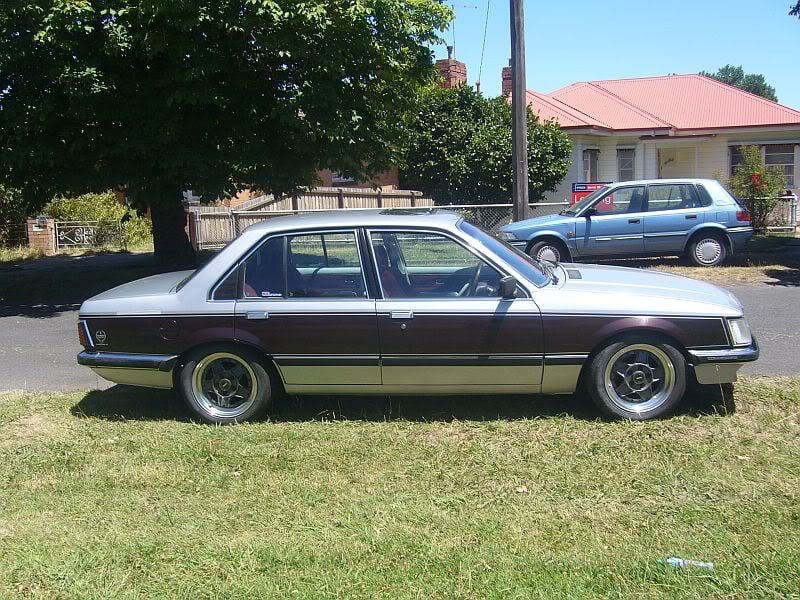
Heres a pic of the torrie as it sits now, with a pic of my VH ive just put an EFI 304 and 5 speed into (big job), and my HZ sandman which a mate painted for a sweet price..
Posted Image
Posted Image
Posted Image
Posted Image

#2 _WantOneNow!_

_WantOneNow!_
  • Guests

Posted 28 October 2011 - 06:17 AM

Hi there, one quick tip I will give you is to please make sure that you don't apply filler straight over bare steel. It is much better for there to be a layer of primer underneath to prevent rust.
Cheers Mick.

#3 hainzy

hainzy

    Forum Fixture

  • Members
  • PipPipPipPipPip
  • 502 posts
  • Location:BALLARAT
  • Joined: 16-April 07

Posted 28 October 2011 - 06:51 AM

Thanks Mick. I did actually have that in there as a question initially but i didnt want to put too much stuff in the first post, so you answered that for me. So wherever steel is exposed or replaced, ill use primer before bog. Cheers.

#4 _Quagmire_

_Quagmire_
  • Guests

Posted 01 November 2011 - 09:15 PM

etch primer.....but yes this is a relativity new thing.....
practice on some old panels first
and read through this forum
many of the questions will have been asked and answered before
nz stato has posted up some half decent you tube videos for cars being sprayed
oh and buy some good ppe
it's your life on the line :)

#5 hainzy

hainzy

    Forum Fixture

  • Members
  • PipPipPipPipPip
  • 502 posts
  • Location:BALLARAT
  • Joined: 16-April 07

Posted 03 November 2011 - 10:27 AM

Thanks Quagmire.
I certainly plan to wear the safety gear. You only get one set of lungs!

I have had a good read through a few posts. thats where i came up with this plan of attack. I just wanna make sure Ive got the right idea. Ill talk to the blokes at the local auto paint shop too. Theyve always been really helpful when ive had various colours matched and spray packs made up.

Theres lots of painting stuff on youtube. Do you perchance have a link to NZstatos stuff? Thanks mate.

So its -

Sand back to original paint layer using 120 to 400 on an orbital sander.

Find areas of rust at this time, and have all rust cut out and fixed.

Clean surface with thinners or prepsol

*Coat exposed areas of metal with etch primer

Apply bog where necessary

Sand back using sanding blocks and or orbital – continue until smooth

Apply more bog/putty where necessary and continue sanding etc. until smooth use 120, then 180, then 400.

Clean with prepsol

Spray on primer/undercoat (Acrylic/2pac?) Apply 2 to 3 layers – high build? (name/brand?)

Allow a few days to properly dry.

Sand back with 600 then 800 wet’n dry.

Inspect for pinholes or other blemishes

Spray on filler (also called acrylic putty ?)– (name/brand? – rage gold) to areas which need extra attention

Sand back with 600 then 800 wet’n dry.

Spray on a sealer (name/brand?)

Sand back with 600 then 800 wet’n dry.

Paint - eventually....

#6 _Quagmire_

_Quagmire_
  • Guests

Posted 03 November 2011 - 09:32 PM

bog still needs a rough surface to "stick" to
ie 36-80 grit...unless that has been updated to ????
finishing with 120-180 grit
2 pack filler like dolphin glaze or u pol hot shot (finishing fillers)
are finer...ie 120-180 start finish off with 240-320-400
and i think you need to apply the "sealer" before the primer not after....but i will have to ask bomber on that

#7 _toranarama_

_toranarama_
  • Guests

Posted 03 November 2011 - 10:53 PM

From Crazy Clarks / Reject shop etc you can buy a pack of 10 White Cotton gloves CHEAP

I use these while sanding so no sweat infects the primed/puttied surface

#8 _nzstato_

_nzstato_
  • Guests

Posted 04 November 2011 - 05:20 AM

bog still needs a rough surface to "stick" to
ie 36-80 grit...unless that has been updated to ????
finishing with 120-180 grit
2 pack filler like dolphin glaze or u pol hot shot (finishing fillers)
are finer...ie 120-180 start finish off with 240-320-400
and i think you need to apply the "sealer" before the primer not after....but i will have to ask bomber on that


Use UPOL lightweight gold filler (or similar) you can sand with 60/100/180 grit (do most of the work with the 100)

And its my youtube channel hes' on about. Not too much about painting stuff on there at the mo, I really need to do an update...

#9 _toranarama_

_toranarama_
  • Guests

Posted 05 November 2011 - 07:40 AM

Apart from all the gear already posted, the numero uno most important thing you must have

is the BEST QUALITY inline Water trap for your airline that you can afford.

#10 hainzy

hainzy

    Forum Fixture

  • Members
  • PipPipPipPipPip
  • 502 posts
  • Location:BALLARAT
  • Joined: 16-April 07

Posted 05 November 2011 - 11:13 PM

Apart from all the gear already posted, the numero uno most important thing you must have

is the BEST QUALITY inline Water trap for your airline that you can afford.


Cheers for that. Ill make sure I look iinto it when I get closer to buying something.

Thanks for all the info guys. Youve given me some great advice there. Ill update my list and go have a good chat to the bloke at the local auto paint shop this week. I need some clarification on the differrences between bog, acrylic putty, filler and hi fill; plus sealer and primer and where everything fits... Total newbie at this but once I get my head around the role of everything Ill get stuck into it. Slowly....

#11 _Quagmire_

_Quagmire_
  • Guests

Posted 05 November 2011 - 11:24 PM

bog/filler...same thing
hi fill-short for hi fill primer....just a sandable primer....normally used after filler (bog)
sealer-seals the surface from paints and other previous nasties ...acy and enemel/2 pack react in horrible ways....if you bare metal/know what type of paint is on the car you don't need this
primer is well primer
hope this helps
al

#12 _toranarama_

_toranarama_
  • Guests

Posted 06 November 2011 - 06:55 AM

Don't drive a primer'd up car around AT ALL as the primer is porous & soaks up everything.

Many LOLs to guys that do, then paint them lots later & the paint errrr well...... FALLS OFF :clap:

#13 _LHSL308_

_LHSL308_
  • Guests

Posted 06 November 2011 - 01:50 PM

Thanks for starting this thread hainzy. I too am thinking about tackling the job of spraying my Torrie after some of the ridiculous prices I have come across so far :banghead:

Edited by Gonedeaf, 06 November 2011 - 01:51 PM.


#14 _Quagmire_

_Quagmire_
  • Guests

Posted 06 November 2011 - 02:31 PM

a extractor fan and carbon filter with ducting will keep most fumes at bay too :)

#15 hainzy

hainzy

    Forum Fixture

  • Members
  • PipPipPipPipPip
  • 502 posts
  • Location:BALLARAT
  • Joined: 16-April 07

Posted 06 November 2011 - 09:30 PM

Thanks guys.

bog/filler...same thing
hi fill-short for hi fill primer....just a sandable primer....normally used after filler (bog)
sealer-seals the surface from paints and other previous nasties ...acy and enemel/2 pack react in horrible ways....if you bare metal/know what type of paint is on the car you don't need this
primer is well primer
hope this helps
al


Thanks Quagmire. Is there a way to tell what type of paint has been used? My car is originally mandarin red. Its now a dark red colour but I can still see the mandarin red under the paint in lots of places. Could i assume then that its prob acrylic as well and that I dont need sealer? Or is there a way to test it?

Toranarama I wont be driving it around. Thats good advice though. Hope my roof doesnt leak!

Gonedeaf yeah I have been playing with my commodore and sandman for a few years and now its the torrys turn so i thought i might learn a new skill and save some cash. Paintjobs are bloody exxy but I can see how much wotk is involved in proper prep work and rust repairs. I was originally thinking of doing all the prep work and getting it totally ready then getting someone else to do the top coat. Might still do that but ill see how i go. Im not sure my shed is clean/dust free enough to pull of a tasty top coat.

Edited by hainzy, 06 November 2011 - 09:30 PM.


#16 _Quagmire_

_Quagmire_
  • Guests

Posted 06 November 2011 - 10:28 PM

wet it down just before you spray....works for me lol
you can wipe thinners over it and see if it reacts,,,,bout the best i can think of......i just spray and hope lol
i'll ask the gibbs street paint guys when i'm there next about testing methods

#17 _toranarama_

_toranarama_
  • Guests

Posted 06 November 2011 - 10:41 PM

If in doubt just spray it all with deactivator/neutraliser primer - It's a special name but having a brain fade atm...

So it's etch prime, sand, neutraliser, sand, prime, sand, spray putty, sand, prime, sand, paint, colour sand,
more paint, colour sand, more paint, colour sand, clear coat, sand then polish !

And that's why guys n gals a real painter charges what he does - It's a LOT of Karate Kid "wax on / wax off stuff" involved !

#18 _Bomber Watson_

_Bomber Watson_
  • Guests

Posted 07 November 2011 - 07:11 PM

Oh righto.

I actually ignored this thread at first without even clicking and having a look as im a bit over replying to "hi i have a car i want to paint it please help" type posts.

But seeing though you have put some time into this i'll put some time into replying.

First things first. Determine whats on the car now. As Quag said rub an area with some thinners and see what happens.

If nothing happens you have 2k. You will not need an isolater to put acrylic over 2k.

If the paint softens and the color comes off on the rag, you have acrylic. You will also not need an isolater.

If the paint blisters and wrinkles you have an enamel. You will probably want to remove this.

Also test the mandarin areas, they will likely be original acrylic, so #2 should apply.

Now assuming its all acrylic, you wont need an isolater, which is nice.

Next test how well adhered the current red is to the old mandarin red. This can be done by sanding with say P80 dry in the hand, look at the scratches, if the existing paint seems to chip away from the edges of the scratches instead of just scratching nicely then its not adhered properly and will all need to come off. If it all seems to be adhered and is an acrylic then you can leave it on there. A screwdriver also works for this test lol.

Next thing, before you do any sanding, prepsol everything. If the car has been polished with a silicone based polish or similar at some stage in its life this will cause you dramas, as when your sanding it might push the silicone into the substrate as such and you will be yelling and swearing a lot. Same thing with wax.

Seeing though your working with acrylic then using thinners as a wipe is out of the question.

Next, be carefull how fine you start sanding, especially with an orby. Acrylic melts as you sand it and balls up, particularly if your using a sandpaper that is to fine.

Personally for the paint your leaving on i would start with P80 on a 12" speed file, then go to P120 on an orby followed by P180. This will be fine to hifill over.

Same as if you are top coating with an acrylic solid color P800 wet is far to fine. P320 wet would be sufficient for your final rub, but going with P600 would also be ok.

Acrylic primers behave the same as acrylic top coats in that they melt a little as you sand them, and the little balls they form with very fine paper can actually scratch the surface worse than just using coarser sand paper.

Also watch how far you jump at a time. I noticed a few times you said 120-180-400 on an orby. This will certainly not work, will take you a month and a day to get the 180 marks out with 400. You will find you will end up with a 90% smooth surface with lots of deep scratches in it. Not cool.

120-180-240-320 would be the order and sized steps i would take.

So basically sand the whole car down 80 on the long board, 120 on the orby, 180 on the orby, bog work, acrylic primer filler, spot putty, 120 on the long board, 180 on the orby, 240 on the orby, acrylic primer filler, spot putty, 240 on the orby, 320 on the orby, acrylic primer surfacer, 240 on the orby, 320 on the orby, 600 wet by hand, top coat. Then with acrylic you will want to go Gordy's advice, top coat, 600 wet, top coat, 600 wet, top coat, 600 wet, top coat, 1200 wet, 1500 wet, buff, masturbate.

If the car is relatively strait and you discover your awesome you wont have to do as many primer/sand stages, but chances are you will end up doing it three times before your really happy.

You will probably tend to get a better finish by doing all the primer sanding by hand, with similar grits in dry paper, tends to get a bit straiter result.

Now, back to putting the bog in, i've never tried putting bog over a 1k primer, only ever done it over 2k's, so im not entirely sure how brilliant of an idea it is over 1k primers...Perhaps someone who has tried it will be able to answer better.

Spot priming with a 2k primer to put your bog over will be to hard, as you will have to try to avoid getting it on the acrylic, so PITA.

Any more questions?

Cheers.

#19 _toranarama_

_toranarama_
  • Guests

Posted 07 November 2011 - 07:36 PM

Isolator - That's it !

After 10:30pm brain turns to mush, bit like enamel with acrylic thinners ;)

#20 hainzy

hainzy

    Forum Fixture

  • Members
  • PipPipPipPipPip
  • 502 posts
  • Location:BALLARAT
  • Joined: 16-April 07

Posted 07 November 2011 - 08:49 PM

Oh righto.

So basically sand the whole car down 80 on the long board, 120 on the orby, 180 on the orby, bog work, acrylic primer filler, spot putty, 120 on the long board, 180 on the orby, 240 on the orby, acrylic primer filler, spot putty, 240 on the orby, 320 on the orby, acrylic primer surfacer, 240 on the orby, 320 on the orby, 600 wet by hand, top coat. Then with acrylic you will want to go Gordy's advice, top coat, 600 wet, top coat, 600 wet, top coat, 600 wet, top coat, 1200 wet, 1500 wet, buff, masturbate.

Now, back to putting the bog in, i've never tried putting bog over a 1k primer, only ever done it over 2k's, so im not entirely sure how brilliant of an idea it is over 1k primers...Perhaps someone who has tried it will be able to answer better.

Spot priming with a 2k primer to put your bog over will be to hard, as you will have to try to avoid getting it on the acrylic, so PITA.

Any more questions?

Cheers.


WOW.
Thanks so much Bomber and Toranarama. Thats awesome! As I said ive looked at lots of info and read heaps of great informative posts, but Ive found it hard to work out the entire process in a straight forward sort of way and thats just the kind of info I was after. Thanks so much for taking the time to write that. I hope it helps out other blokes as well.

Ive had a good read through your posts. There will no doubt be lots of other questions but ill cross those bridges when I come to them.

For now, just wondering:
1 You say sand back then apply bog. Do i need to prime pre bog or is it Ok to put bog over areas of bare metal / old paint? Sorry just not quite clear on that..
2 In between coats layers etc, where im sanding and wet sanding I obviously need to clean the residue for the next coat. Do I prepsol in between?
3 My LX has flares. Is there any change to the process when painting over plastic/fibreglass? Do I need an additive?
4 When you say acrylic primer filler, is this the same thing as etch primer?
5 You didnt mention the clear coat, so just wondering where this fits in with the final sanding?

Thanks again for all this info. I appreciate you taking the time to spell it out.

#21 _Bomber Watson_

_Bomber Watson_
  • Guests

Posted 07 November 2011 - 09:16 PM

1 As i said i have never put bog over an acrylic primer, and am unsure how this goes. Someone else may have done that and may be able to chime in. I wouldnt put it over the old acrylic paint.

2 Yep that will work, or just a good blow down when dry sanding/wash down when wet sanding.

3 No, not really. Over bare plastic a plastic primer is probably best to be used, followed by the primer filler

4 No. I dislike 1k etch primers and would personally just use a good acryilc prime filler strait over the bare steel.

5 Mandarin red is a solid color and wont require a clear. If you wish to clear coat it then just extend the top coat, 600 wet bit with a couple of extras with clear. So say three goes at the color, four coats, block with 600, four coats, block with 600, four coats, block with 600, four coats of clear, block with 600, four coats of clear, fine sand then buff for example

Thats for an awesome finish, you could just bang on a heap of red, say three coats after hiding (when it hides all the little spots and is uniform) then put a heap of clear on and start cutting, way faster (about a week faster actually haha) wont look as nice though.

Cheers.

Edited by Bomber Watson, 07 November 2011 - 09:19 PM.


#22 hainzy

hainzy

    Forum Fixture

  • Members
  • PipPipPipPipPip
  • 502 posts
  • Location:BALLARAT
  • Joined: 16-April 07

Posted 08 November 2011 - 06:37 AM

Great. Awesome info.

Thanks again Bomber.

Just doing a bit of rearranging in the shed and hope to move the torry into stripping down position this week. Then the fun will begin...

When I can find the time in between 1 and a half jobs, a 5 year and 6 month old, a milion house chores and a huge out of control garden.... The zen process of sanding will be my summer sanctuary...

Cheers.

#23 _toranarama_

_toranarama_
  • Guests

Posted 08 November 2011 - 06:52 AM

The zen process of sanding will be my summer sanctuary...


bwahahahahahahahahaaaaaaaaa........

You better learn to be ambidextrous REAL QUICK m'lad, there's nothing Zen like about sanding !

http://www.youtube.c...h?v=rysnm5JIbcc

http://www.youtube.c...h?v=QbU4j3njal8

#24 _Quagmire_

_Quagmire_
  • Guests

Posted 08 November 2011 - 07:58 PM

put finishing filler over acylic primer no probs.....not sure on the normal stuff but

#25 hainzy

hainzy

    Forum Fixture

  • Members
  • PipPipPipPipPip
  • 502 posts
  • Location:BALLARAT
  • Joined: 16-April 07

Posted 09 November 2011 - 10:32 AM

Thanks guys. Again.

Yep youre probably right Toranarama but anything in the shed away from the kids is zen. I even find mowing the lawn a zen process. I just zone out...

And hopefully snap back into it before i run over my foot...


1 user(s) are reading this topic

0 members, 1 guests, 0 anonymous users