Jump to content


Photo
- - - - -

Axistr's Father & Son LH SLR Project.


  • Please log in to reply
333 replies to this topic

#126 axistr

axistr

    Forum Fixture

  • Members
  • PipPipPipPipPip
  • 1,202 posts
  • Location:North west sydney
  • Joined: 19-November 05
Garage View Garage

Posted 01 October 2013 - 06:50 PM

After getting a price on an under dash hydraulic clutch master cylinder set up I decided to make my own. I purchased a pedal box off a FG XR6 and removed the clutch pedal assembly and adapted it to suit the Torana. The only mod I had to do to the Torana was to drill two holes and to make life easy I fitted a flare nut to support the top front of the master cylinder bracket. I had to extend the pedal to line up with the brake pedal and trim off a bracket for the clutch electrical switch but that was about it. Still took around 4 hours but saved me $590.00. I got quoted $870.00 for Mal woods system. And I paid $210.00 for the one off ebay. and 4 hours labour.


Attached File  IMG_20130930_103741_762.jpg   28.01K   27 downloadsAttached File  IMG_20130930_164540_927.jpg   22.51K   20 downloads


Attached File  IMG_20131001_153226_889.jpg   24K   15 downloadsAttached File  IMG_20131001_165703_882.jpg   22.71K   26 downloads


Attached File  IMG_20130930_103749_334.jpg   28.18K   15 downloads


Attached File  IMG_20131001_165615_820.jpg   173.72K   15 downloads


#127 axistr

axistr

    Forum Fixture

  • Members
  • PipPipPipPipPip
  • 1,202 posts
  • Location:North west sydney
  • Joined: 19-November 05
Garage View Garage

Posted 25 October 2013 - 12:43 PM

I decided to fit a more up to date rear seat. The one I am fitting is from a BMW E46 and has rear arm rest which gives me the option of having the through loading system. Only needed minor refinements to get it to fit. 


Attached File  IMG_20130720_115642_956.jpg   67.16K   14 downloadsAttached File  IMG_20130725_112844_238 - Copy.jpg   39.76K   14 downloads


Overhauled the steering column and fitted the UC blinker assemble so I can remove the floor headlight dipper switch. My kids didn't even know how to use the floor dipper switch, they hadn't seen one before, I must be getting old.


Attached File  2013-05-05_16-01-52_844.jpg   219.16K   17 downloads


Trimmed back the inner fire wall seams to help clear the bigger wheels.


Attached File  IMG_20130924_121113_981.jpg   21.02K   16 downloads


File finished to the quarters and cut the small bit of rust out behind the bonnet hinge.


Attached File  IMG_20130918_194904_317.jpg   28.91K   15 downloads

Attached File  IMG_20130918_194912_906.jpg   81.95K   15 downloads


All most ready to go out for paint.


Its been a long time since I had to bike out, Three years in fact, give it a good service three kicks an it was a way. Just have to remember how to ride it again.


Attached File  IMG_20131017_120105_803.jpg   79.21K   16 downloads


#128 axistr

axistr

    Forum Fixture

  • Members
  • PipPipPipPipPip
  • 1,202 posts
  • Location:North west sydney
  • Joined: 19-November 05
Garage View Garage

Posted 20 December 2013 - 04:53 PM

Finally got the body ready for paint. I sent the body to the painters and they reckon around 10 weeks till finish.


Attached File  IMG_20131219_105518_203.jpg   66.54K   14 downloads


Over the next 10 weeks I hope to recondition any parts needed so when it comes back they only needs fitting. I intended to complete the build in 12 months, boy time flyes, been two years already.


I revisited the serpentine belt drive system and made up some more brackets to move the power steering pump forward to drive off the front pulley, Thank Christ I have a mill to do these small jobs. I moved the pump  no because of the water pump  belt contact, but I convinced myself that I may have had slippage on the crank pulley as it only raped around it by 100 degrees. I have also decided to set it up on a stand and start the engine before fitting, just to make sure there aren't any issues. I just hate doing things twice and would hate to have to pull the engine for any reason. 


Attached File  IMG_20131220_094529_889.jpg   69.32K   28 downloads


#129 N/A-PWR

N/A-PWR

    CABIN ENGINE CONTROLS GALORE

  • Members
  • PipPipPipPipPipPipPip
  • 9,630 posts
  • Name:Dave I
  • Location:Wooroloo, 65km's East of Perth
  • Car:'1969' LC RAT TORANA
  • Joined: 08-December 12

Posted 23 March 2014 - 04:38 PM

You have come a long way Lenny,

Good to see a thorough Build. Dave I


#130 BIG KEV

BIG KEV

    Forum Fixture

  • Members
  • PipPipPipPipPip
  • 1,218 posts
  • Name:Kevin
  • Location:SYDNEY
  • Car:LHSLR5000 and The 6LT Project
  • Joined: 02-January 12

Posted 23 March 2014 - 05:02 PM

Great work Lenny ....its looking good

#131 axistr

axistr

    Forum Fixture

  • Members
  • PipPipPipPipPip
  • 1,202 posts
  • Location:North west sydney
  • Joined: 19-November 05
Garage View Garage

Posted 24 March 2014 - 07:47 AM

Update, car has now been painted inside and panels have been now refitted ready this week for paint. Should see it back home very soon.


Attached Files

  • Attached File  slr.jpg   264.69K   14 downloads


#132 N/A-PWR

N/A-PWR

    CABIN ENGINE CONTROLS GALORE

  • Members
  • PipPipPipPipPipPipPip
  • 9,630 posts
  • Name:Dave I
  • Location:Wooroloo, 65km's East of Perth
  • Car:'1969' LC RAT TORANA
  • Joined: 08-December 12

Posted 24 March 2014 - 07:09 PM

Cannot wait to see your Torana back from the Work Shop, Lenny.


#133 SmacT

SmacT

    Forum Fixture

  • Members
  • PipPipPipPipPip
  • 955 posts
  • Name:Sam
  • Location:Sydney
  • Car:LX 4dr 383, TKX, BW
  • Joined: 24-December 08

Posted 24 March 2014 - 10:05 PM

Top work Lenny. The next few photos are going to be excellent!

#134 axistr

axistr

    Forum Fixture

  • Members
  • PipPipPipPipPip
  • 1,202 posts
  • Location:North west sydney
  • Joined: 19-November 05
Garage View Garage

Posted 25 April 2014 - 09:04 AM

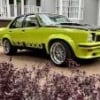
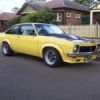
Finally have some more colour. They painted it yesterday and should be able to pick it up next week. I sure will be glad to get it back in my shed.


Attached Files


#135 BIG KEV

BIG KEV

    Forum Fixture

  • Members
  • PipPipPipPipPip
  • 1,218 posts
  • Name:Kevin
  • Location:SYDNEY
  • Car:LHSLR5000 and The 6LT Project
  • Joined: 02-January 12

Posted 25 April 2014 - 09:32 AM

Top work as usual Lenny ....I am so jealous

#136 _Wattsmini_

_Wattsmini_
  • Guests

Posted 25 April 2014 - 09:34 AM

Hi Axistr great build looks fantastic ,
I was wondering if you show me where your running engine loom or where it's going to pass through from inside to engine bay thanks

#137 lxsstorana

lxsstorana

    Forum Fixture

  • Members
  • PipPipPipPipPip
  • 2,499 posts
  • Name:Mick
  • Location:Eastwood, Sydney
  • Car:SS Hatchback
  • Joined: 23-March 06

Posted 25 April 2014 - 10:57 AM

Looks Great.   :spoton:


Can't go wrong with a yellow torana.  :rolleyes: .  


#138 Mort

Mort

    Lotsa Posts!

  • Members
  • PipPipPipPipPipPip
  • 2,760 posts
  • Name:Mort
  • Location:Moranbah, QLD.
  • Car:74 LH SL/R 4.2, 75 LH 4 door 186
  • Joined: 16-December 07
Garage View Garage

Posted 25 April 2014 - 01:28 PM

And it's a Taxi to boot. :stirpot:

Very nice Lenny can't wait to see finished product.

#139 N/A-PWR

N/A-PWR

    CABIN ENGINE CONTROLS GALORE

  • Members
  • PipPipPipPipPipPipPip
  • 9,630 posts
  • Name:Dave I
  • Location:Wooroloo, 65km's East of Perth
  • Car:'1969' LC RAT TORANA
  • Joined: 08-December 12

Posted 25 April 2014 - 01:55 PM

Wow Lenny,

see how smooth the Duco looks, great painter, and Colour. Dave I


#140 A9X

A9X

    A fortunate run

  • Members
  • PipPipPipPipPipPipPip
  • 5,024 posts
  • Name:Welby
  • Location:Perth
  • Joined: 09-November 05
Garage View Garage

Posted 25 April 2014 - 05:23 PM

everyone loves a yellow taxi


#141 N/A-PWR

N/A-PWR

    CABIN ENGINE CONTROLS GALORE

  • Members
  • PipPipPipPipPipPipPip
  • 9,630 posts
  • Name:Dave I
  • Location:Wooroloo, 65km's East of Perth
  • Car:'1969' LC RAT TORANA
  • Joined: 08-December 12

Posted 25 April 2014 - 05:26 PM

Attracts the Bees too,

I had an Aztec Yellow car, and every time I pulled up at the Lights, a Bee would hover around it. Dave I


#142 axistr

axistr

    Forum Fixture

  • Members
  • PipPipPipPipPip
  • 1,202 posts
  • Location:North west sydney
  • Joined: 19-November 05
Garage View Garage

Posted 26 April 2014 - 08:00 AM

G'day wattsmini, I will run the engine wiring harness, coil and a few other bits behind the engine fire wall side heater fan duct. Due to the Air con conversion it was made redundant anyway, so it was only there for show and my intentions from the start were to hide a few things behind it. I will drill a 1 1/2' hole on the underside of the duct to feed the wiring through.


#143 axistr

axistr

    Forum Fixture

  • Members
  • PipPipPipPipPip
  • 1,202 posts
  • Location:North west sydney
  • Joined: 19-November 05
Garage View Garage

Posted 15 May 2014 - 06:39 PM

Finally back in my shed, now I can make some progress, Fitted to door locks & catches, fitted all the lights and blinkers, Converted the head lights to H4 and fitted the drop tank today.


Attached Files


#144 SmacT

SmacT

    Forum Fixture

  • Members
  • PipPipPipPipPip
  • 955 posts
  • Name:Sam
  • Location:Sydney
  • Car:LX 4dr 383, TKX, BW
  • Joined: 24-December 08

Posted 15 May 2014 - 08:33 PM

Nice work Lenny, looks great! What did you use for your fuel filler? I have the old Torana neck, but am not happy with it.

#145 a9x868

a9x868

    maurice mead of hatchbacks

  • Members
  • PipPipPipPipPip
  • 1,417 posts
  • Name:facebook dave
  • Location:perth miles n miles from shiney
  • Car:valencia holden torana a9x hatch ultimate improvement on the barbados L34
  • Joined: 24-July 11

Posted 15 May 2014 - 09:40 PM

looking real good lenny!

#146 _nowaynicko_

_nowaynicko_
  • Guests

Posted 15 May 2014 - 10:00 PM

Looks mint mate. Love the yellow  :rockon:


#147 axistr

axistr

    Forum Fixture

  • Members
  • PipPipPipPipPip
  • 1,202 posts
  • Location:North west sydney
  • Joined: 19-November 05
Garage View Garage

Posted 16 May 2014 - 07:57 AM

Hi Sam,


I Just used the old filler neck and cut it to suit the sharp bend. I also used some hard foam around the top of the neck to insure it doesn't rattle and is better centred in the body hole. 


Edited by axistr, 16 May 2014 - 07:58 AM.


#148 BIG KEV

BIG KEV

    Forum Fixture

  • Members
  • PipPipPipPipPip
  • 1,218 posts
  • Name:Kevin
  • Location:SYDNEY
  • Car:LHSLR5000 and The 6LT Project
  • Joined: 02-January 12

Posted 16 May 2014 - 08:27 AM

You will be spinning tyres before you know it Lenny ....Looks great

#149 SmacT

SmacT

    Forum Fixture

  • Members
  • PipPipPipPipPip
  • 955 posts
  • Name:Sam
  • Location:Sydney
  • Car:LX 4dr 383, TKX, BW
  • Joined: 24-December 08

Posted 16 May 2014 - 12:53 PM

Thanks Lenny, the foam is what I am needing. It's cool looking at what this car was, and is now.

#150 axistr

axistr

    Forum Fixture

  • Members
  • PipPipPipPipPip
  • 1,202 posts
  • Location:North west sydney
  • Joined: 19-November 05
Garage View Garage

Posted 16 May 2014 - 06:01 PM

Bit more progress today, started to hook up the fuel tank hoses and couldn't remember for sure on VT fuel pumps which hoses went where. Its been 18 months since I fitted it into the tank. So my question here is before I have to remove the tank to check, does anyone remember for sure the correct hose connections. I am 90% sure but want to be 100% sure. The left connection is the largest connection pipe and has F on it. The centre connection has nothing stamped on it and is smaller than the left. The last connection is the same size as the centre and has R stamped on the top. I am assuming the F is Fuel pressure, R would be return and the unmarked one is breather to the canister.


And thank Christ for the hoist     

Attached Files


1 user(s) are reading this topic

0 members, 1 guests, 0 anonymous users