Removing LC/LJ Front Panels
#1
Posted 26 November 2006 - 12:43 AM
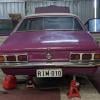
Obviously, I needed to address the issue of the damaged front panels. I found another shell to take the panels' off, to swap them over.
I started off by taking off the grille, headlights, radiator, bumper (and bumper support panel) and the sump guard.
To take the sump guard off, make sure all of the bolts are undone, and jack the car up from under the front crossmember. With a bit of a jiggle, the sump guard should come out.
To take the bumper off, undo the bolts between the chassis and the bracket, not the ones between the bracket and the bumper.
The grille and headlights are pretty simple, just undo the screws. When removing the radiator, make sure you don't let it fall backwards onto the fan.
To get to the welds along the 'A' pillar, you'll have to remove the door(s).To do this, I first removed the little pin in the middle of the door, using a flat bladed screwdriver. For the two big pins at the top and bottom, I used a pair of multigrips and a hammer, like so -
Give the inner rails of the guards a quick wire brush, then go nuts with the paint stripper. Now it should look like this, but with less paint. -
You should be able to see most of the spot welds. I used a drill bit specifically designed for drilling out spot welds. You could do it with a normal 9mm drill bit, but if possible, use the proper bit.
The amount and spacing of spot welds is directly proportional to how the workers were feeling on that particular day in the 70's, I think. This is what my drip rail looked like by the time all of the welds were drilled out. I ran a chisel between the inner and outer guard, to properly pop out the welds.
Along the back edge of the guard, where it is welded to the 'A' pillar, there is a mix of both spot welds and seam welds along the edge. Rather than try to drill out all of the welds, we just cut the guard about 1cm in from the back edge. This cut the guard off pretty cleanly and easily.
The front is where the fun really starts. Around the headlight, you can see that the two panels are crimped and spot welded. Do the same here as you did to the drip rails, drill the welds out and pry the panels apart with a chisel or screwdriver.
This is what the finished product should look like!
I only had to take the passenger guard and the top half of the nosecone off. If you need to do any more, its just a case of finiding the spot welds and drilling them out, really.
I'll elaborate a bit on this tomorrow, I've got another one to do...
RIM
#2
Posted 26 November 2006 - 12:31 PM
This is where I cut the guard around where the headlight surround covers.
This is the back of the guard, where it is welded to the A pillar.
and this is what I have now!
It's a pretty annoying task, but it's not that hard. The only tools you will need are shown here.
and a socket set, a few spanners and a couple of screwdrivers.
RIM
#3 _gtr161s_
Posted 29 November 2006 - 07:14 PM
https://cache.gmh-to...sidefrntend.jpg
https://cache.gmh-to...frontendoff.jpg
like rim-010 says it is an annoying task but if you take your time and do it neatly there is stuff all work left to fit it back on.
i unpicked the good one and bad one then tacked it into place after work over a period of 1 week.
#4
Posted 29 November 2006 - 07:36 PM
RIM
#5 _gtr161s_
Posted 01 December 2006 - 06:44 AM
I had no idea that these front end could come off as one piece, it was one of those jobs i thought i'd give it a go.
#6 _jekyll_
Posted 07 December 2006 - 11:47 AM
a really interesting project you had . I recently did something same to a brookland Blu car went in blind but managed to turn out okay in the end
a very keen eye can only pick up the imperfections well done on the step by step process for un pik the front panels
#7
Posted 30 January 2007 - 02:57 PM
#8
Posted 26 June 2007 - 10:25 AM
Remember, measure twice, tack weld, measure a couple more times, and THEN weld.
Where the nosecone and guard meet, you need to melt away all of the lead before you weld it. (This only applies if you have separated the guard and nosecone, obviously)
We used Tek Screws to jig the panels up, then tack welded in the corners. After you're sure that it's lined up, fill all of the holes in with a MIG. (My guard was previously braze welded, so you could also do it this way)
I haven't finished welding at the A pillar yet, but we will be cutting a strip of metal out to join the gap.
This probably isn't the preferred method of removing the panels, but it worked for me
#9
Posted 29 February 2008 - 10:31 PM
Pics please.
#10
Posted 29 February 2008 - 10:36 PM
Tim
#11
Posted 29 February 2008 - 10:37 PM
So you're slack then?Rob, if there was anything new to post, it would be up here.
Tim
#12
Posted 29 February 2008 - 10:39 PM
Tim
#13 _SnotGobbler_
Posted 06 May 2008 - 12:14 AM
have you finished welding at the A pillar yet? a few pics of the weld would be handy thanks.
#14
Posted 06 May 2008 - 12:25 AM
Haven't finished welding the whole thing on yet... School is kind of getting in the way.
Tim
#15 _SnotGobbler_
Posted 06 May 2008 - 12:36 AM
i wouldnt mind having a go at removing my guards, just dont wanna get stuck with the guards half undone then having to haul it off to the panel shop to have a mess fixed lol
i forgot to ask. to remove the guards whole as one, its the welds in the top of the guard and A piller is all.. no where else, like in the front by light surrounds or battery tray area??
this is gonna be fun.. not
#16
Posted 06 May 2008 - 12:43 AM
Pretty straight forward job. Have a go!
Tim
#17 _73LJWhiteSL_
Posted 11 September 2008 - 11:31 PM
Steve
#18
Posted 11 September 2008 - 11:49 PM
Tim
#19 _gtr161s_
Posted 02 November 2012 - 07:48 AM
Not hard. Just takes time.
You need a spot weld drill (6mm) and a small 4" angle grinder to get the welds where the radiator support panel meets the rails.
#20 _shan620_
Posted 10 November 2012 - 12:31 AM
#21 _shan620_
Posted 19 November 2012 - 04:07 PM
When you spot weld the guards back on how do you grind the spot weld flush in the drip rails?
I was just scuffing mine back to see where the original spot welds were so i can pull mine off and just wondering how i'd go getting it tidy in there again.
#22 _2DR_
Posted 19 November 2012 - 08:32 PM
#23 _shan620_
Posted 19 November 2012 - 08:34 PM
Edited by shan620, 19 November 2012 - 08:35 PM.
#24 _shan620_
Posted 19 November 2012 - 08:37 PM
not much room for a grinder, might be a bit messy and need bog to clean up the deep scratches.grinder
#25
Posted 19 November 2012 - 09:34 PM
http://www.ebay.com....=item2ec33338c2
2 user(s) are reading this topic
0 members, 2 guests, 0 anonymous users