Winton or bust!
#51

Posted 22 January 2007 - 12:43 AM
Will it be done it time? 6 days it cutting it fine! (all nighter the night before? haha)
#52

Posted 22 January 2007 - 11:55 PM
"Grasshopper" was conspicuous by his absence tonight. Might have something to do with "Trixie" "Lexie" "Flossy" "Floosey" or whatever it was written in the dust on the back window of his Torrie a couple of weeks ago?
A bit of fabrication was done on the rear front seat mounts (but no apprentice welder available?)
These pics come from the "I dont throw any thing out" file.
Spot the similarity.
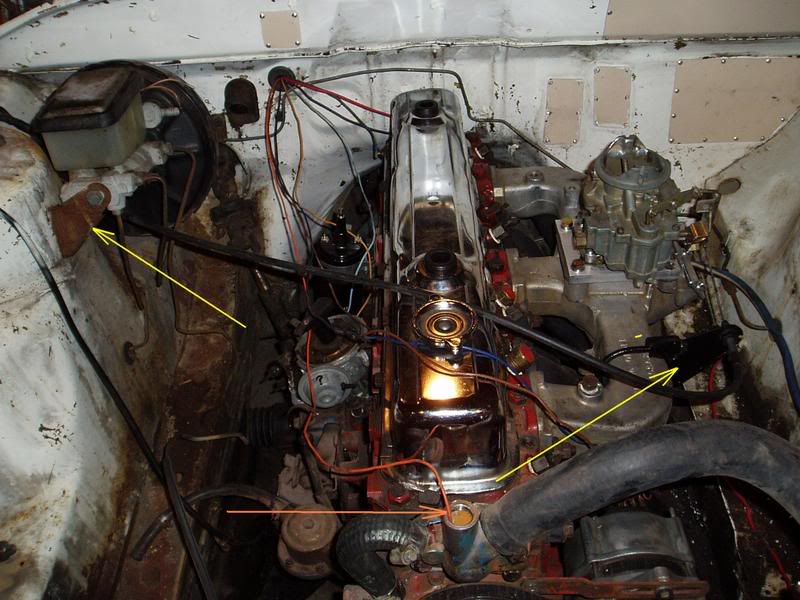
The cable is 253 VC sl/e from pick pay and go. (Mental note: next time at pick pay and go, check to see if 253 HX cable is longer) The bracket is made from an old exhaust clamp welded to a master cly. support bracket.
The "spaghetti" is starting to look a bit like a loom, the orange wire, arrowed, is where the "idiot light" sender is going (if I can find one
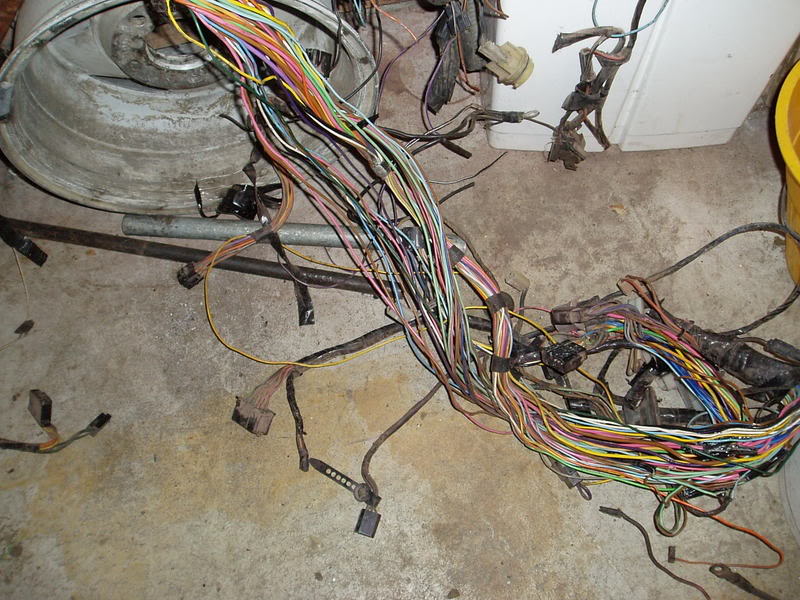
The wires are colour coded to the original colours for a Commodore loom courtesy of a couple of "left over" looms from cars I have wrecked. Again, I dont throw much out but I am running out of room in my shed
#53

Posted 25 January 2007 - 12:43 AM
Maybe 10th Feb Sandown?
#54

Posted 26 January 2007 - 02:29 AM
Cranks off key,
Has oil pressure (guage works)
Has spark,
Has Alt. light.
Pumps fuel,Shell "V" power racing. 100 octane.
If it wasn't 2.30am I might have put the plugs in and run it
#55
 _73LJWhiteSL_
Posted 27 January 2007 - 09:01 AM
Steve
#56

Posted 27 January 2007 - 11:31 AM
The big question has a little answer.So the big question on everyones lips... Is it gonna make it to Winton Rob?

Steve
No.
The main reason being the petrol tank has a hole in it and I'm off to Geelong later today for a family function.
I put 30 litres of "V" power racing in it on Thurs. night. Then yesterday it started leaking. It could have been a disaster as I was welding and grinding at the time. Fortunately it had leaked less than 500mls when I saw it. It has a self tapper with an "O" ring on it bunging the hole temporarily.
The plan had always been to fit a Gemini tank, it should fit above the rear axle where a gas tank would normally mount. This mod will have to move forward in the development now.
The reasons for this mod are:
-Will help the fuel pump as it will siphon better being higher.
-They have an electric pump which might mean I can take the mechanical pump off depending on how much it flows. (Even more horsepower!)
-Will move weight forward directly over the rear axle.
-Should suffer less from surge as the base of the tank is about 1/3rd the area of the Commodore tank. Its volume being in its height.
Also still to be done are:
-Finish the passenger seat mounts (about an hours work)
-Mount the dash, the dash is wired and working but not mounted. Also fit a fuse box to run wipers, indicators and stop lights (this includes running a loom from the dash to the boot). (2 or 3 hours)
-Fit the idiot lights (oil and water) and the fan switch to dash area (hour or so)
-Fill g/box with oil, fit and adjust clutch cable, fabricate and fit shift cover and fit the correct reverse detent spring (this box came with no detent spring and reverse could just fall in as you were driving
-Get the engine to run properly and tune. It ran briefly last night but I had no water in it. (an hour or so)
-Fit brakes. At the moment it has no calipers fitted and no brake hoses. The hoses are being up-graded to VL. (couple of hours)
-Fabricate induction, at the moment it doesn't even have an air cleaner that I could just "throw" on
-Fit sundrie items, bumpers, bonnet, turbo.
"A man of many talents" came over yesterday and fabricated and fitted the front door trims.
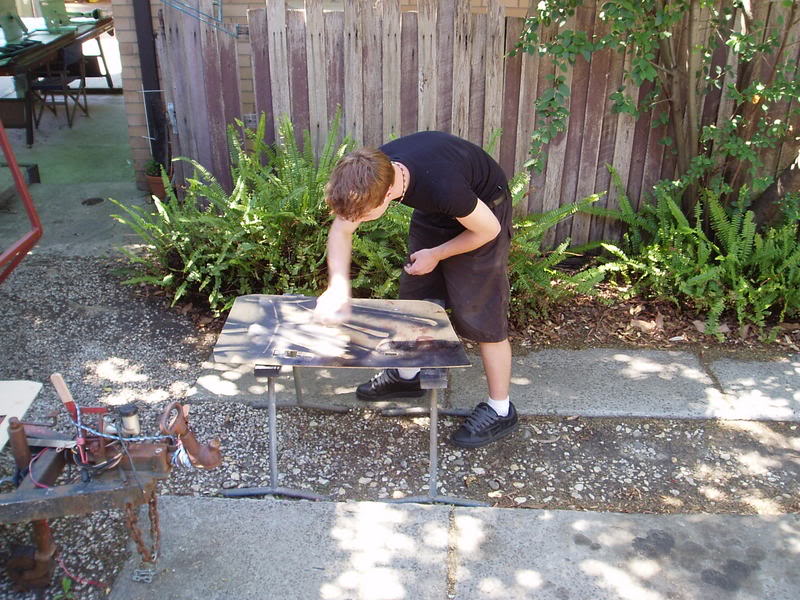
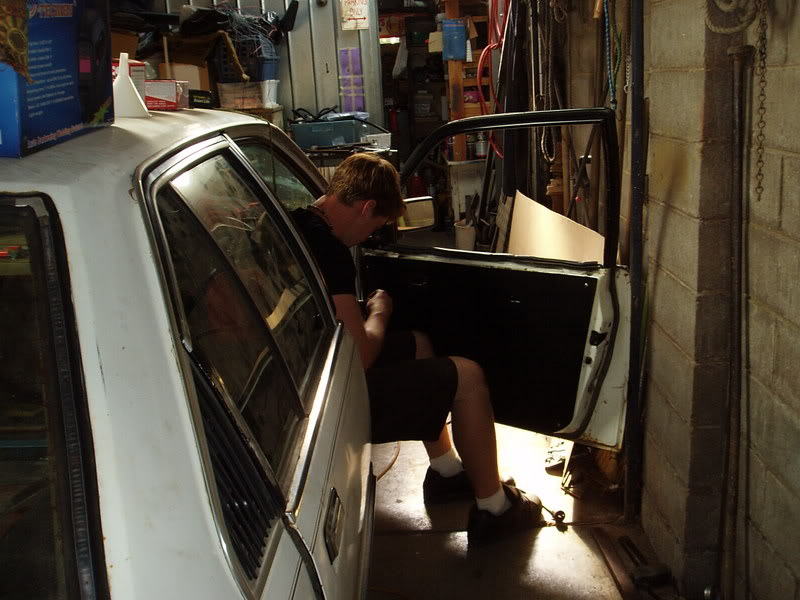
Heath has been a big help in this build and my biggest disappointment is letting him down about Winton.
Although disappointed myself too, logically, Winton could have been a 5hr return drive just to find an un-known problem. (e.g. fuel tank)
The new target is Sandown 10th Feb. (20mins from here) I am not sure what this is about as I was told by a mate. Will find out and post details.
P.S.
I lied about the turbo
#57

Posted 27 January 2007 - 12:16 PM
Also, don't forget to put a hose clamp or something on the oil filter to prevent it undoing. Its embarassing to leave a trail of oil on the track and then spin when it gets onto the rear tyres.
I hate having to learn the hard way, but I'll never let it happen again !
#58

Posted 27 January 2007 - 12:31 PM
The engine still has the original oil and filter until I warm it up then it will be drained (overnight)and refilled using the smaller oil filter, apparently these are less likely to undo due to less weight? Good tip about the hose clamp!
One thing I have learned too is if you take on a project like this, you work out roughly how long it will take, add a couple of days and then DOUBLE IT!
By the way, it turns out it is a VB not a VC, I read the tags for the first time yesterday and had previously gone by the grill.
Edited by rodomo, 27 January 2007 - 12:41 PM.
#59

Posted 29 January 2007 - 12:40 AM
Earlier I mentioned the car ran briefly but had no water.
This involved 2 pumps on the accelerator, hear it fart and shut down.
Today I thought I would make it run and tune it in the "ballpark" (remember the dissy mods will mean the timing will be suck it and see while driving).
I could get it to "fart" and shut down but it wouldn't keep running. Being electronic dissy I moved the dissy backwards and forwards until I could keep it running with the accelerator, the vacuum advance was touching the side plate (way advanced in normal conditions) although I had checked No.1 TDC (down the oil cap) before I fitted the dissy and had allowed for the "helix" of the dissy drive gear when I put the dissy in.
First thoughts were vacuum leaks due to the carby/manifold mods as I had to keep "pumping" the accelerator to keep it running and feeding it excess fuel.
A quick check of the manifold and carby plugs proved all good.
The next check was keep it running and check the ignition timing, maybe I had stuffed up while putting the dissy in?
Here lies the key.
The timing at about 1500rpm was off the scale and about 40 degrees advanced according to the timing light.
Here is a pic of the dissy in the position to get it to run.
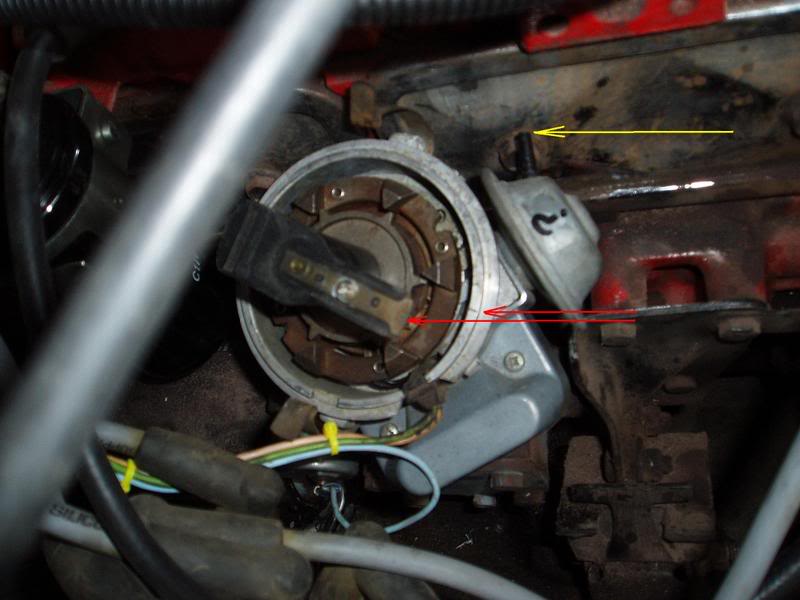
You can see that the mark on the rotor and the dissy body don't line up (red arrows) and the Vac. advance is hard up against the side plate.
I pulled out No.1 plug, stuck a "probe" down the hole and with a bit of rocking to and fro found T.D.C. within a couple of degrees. (the bandaid is a result of one of Mrs Rodomo's projects)
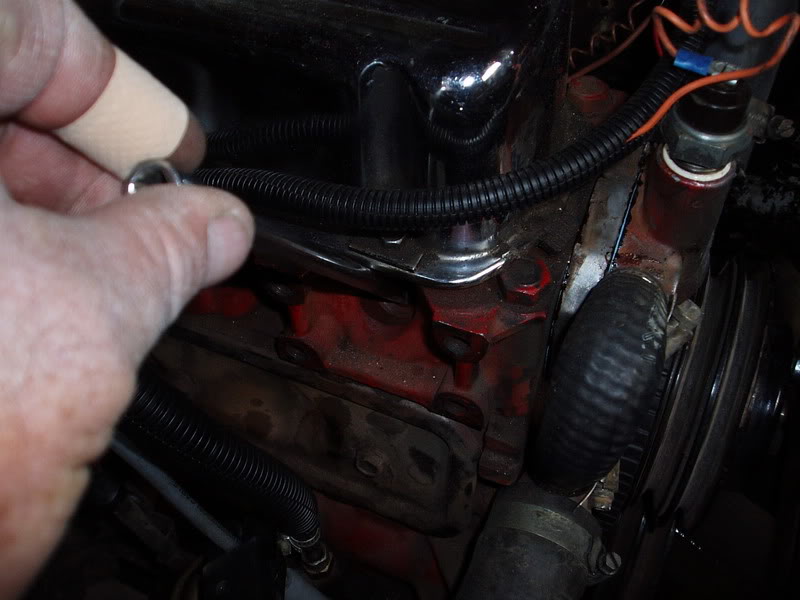
Next, I looked at the timing marks.
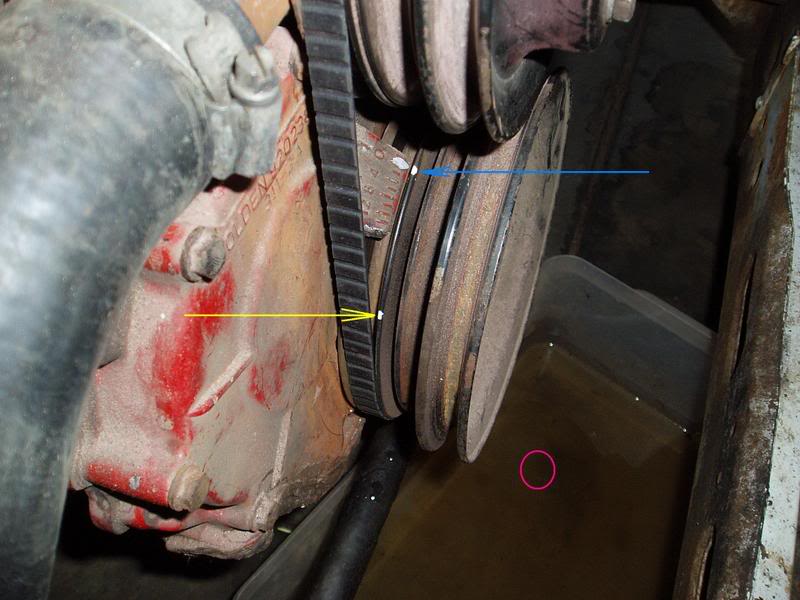
The yellow arrow indicates the "factory" timing mark on the pulley. The blue arrow indicates the "new" timing mark after the T.D.C check. The pink circle indicates the drip tray catching the drips from the "pissing" water pump
What we have is a classic case of harmonic balancer "slip" to the tune of about 30 degrees. This means the "V" belt part of the balancer (and the factory timing mark) have slipped (retarded) around the pulley hub (which is keyed to the crankshaft)about 30 degrees.
After further adjustments (which meant retiming the dissy a tooth or 2) it ran like a dream (albeit a "wet" dream that neads more tuning work) and this is where the dissy ended up.
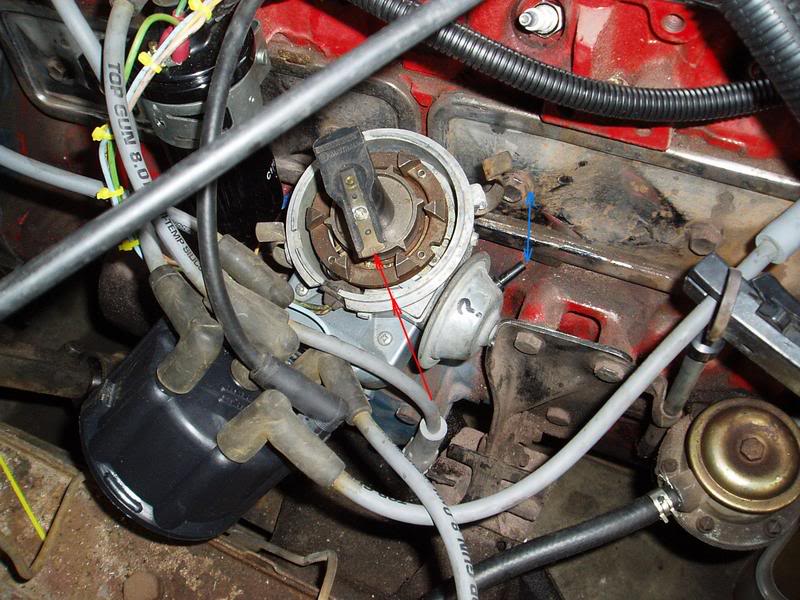
The marks on the rotor and dissy body line up better (red arrows) and there is ample room to advance the dissy towards the side plate.
Now added to the shopping list are new harmonic balancer (this "tip" would get you out of trouble but no good in the long term as it would continue to slip). Obviously a water pump, a bit like master cylinders, not worth mucking around with second hand. And of course a fuel tank.
Edited by rodomo, 29 January 2007 - 12:50 AM.
#60

Posted 29 January 2007 - 10:48 AM
#61

Posted 29 January 2007 - 02:30 PM
#62

Posted 31 January 2007 - 10:52 PM
Seat mounts finished, dud petrol tank removed, shed tidied up and a day off
The Sandown thing involves joining a club and getting a cams licence. This costs about $170 + the day at Sandown, $140, and is out of this weeks budget
The plan now is to slow things down, kiss Mrs Rodomo for being so patient, and doing it all properly and thouroughly to be confident of it's first outing(still at a budget).
#63

Posted 07 February 2007 - 11:40 PM
Induction.
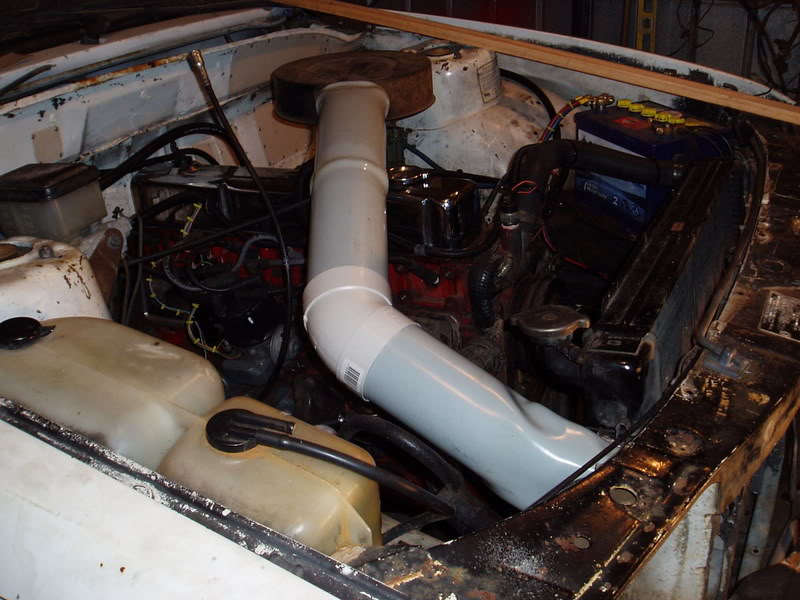
This is the RoDoMo patented ram cold air velocity stack diffused induction system.
First task was to find an aircleaner base to fit the WW2 and not cost an arm and a leg. A wander around pick-pay and go with the verniers found a 2 barrel Valiant base had the same size hole as WW2.
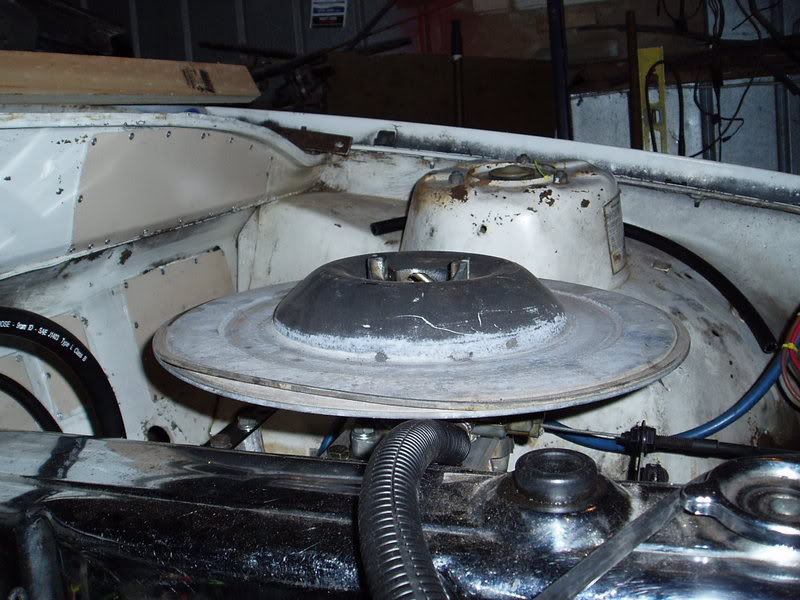
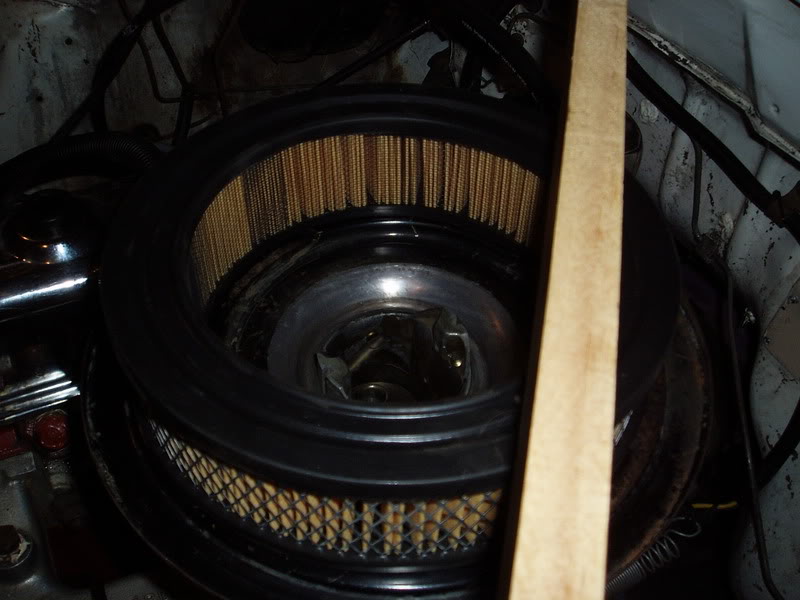
The way this fitted might mean a cheap alternative for others? The element is bigger than an A24 (standard Holden element) and it clears the rocker cover and accelerator pump on the WW2. There are plenty of these at pick-pay and go type wreckers.
But I chopped it up
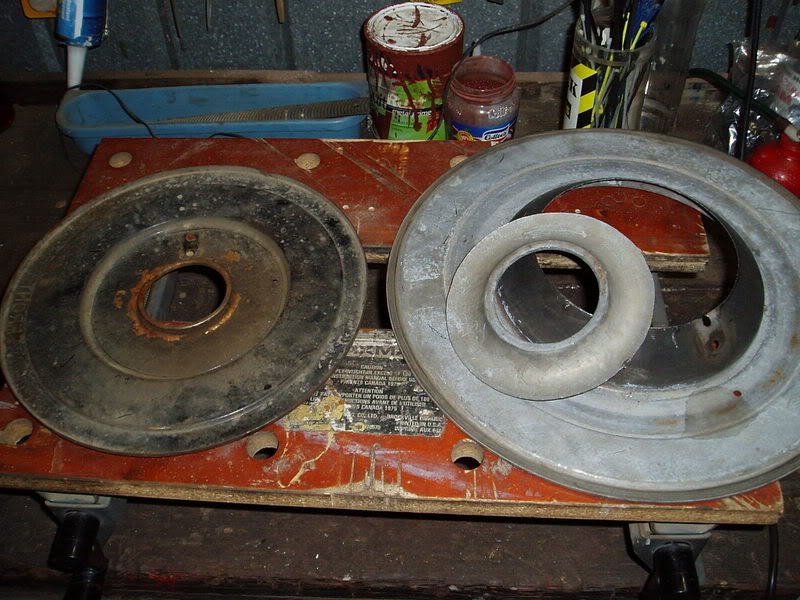
The early 6 cly aircleaners e.g. LJ (the ones with the big clamp handle off to the side) didn't flow too well, but the later ones were better as they are flatter in the base. I also "pressed" the depression in the lid to "aim" the air flow better.
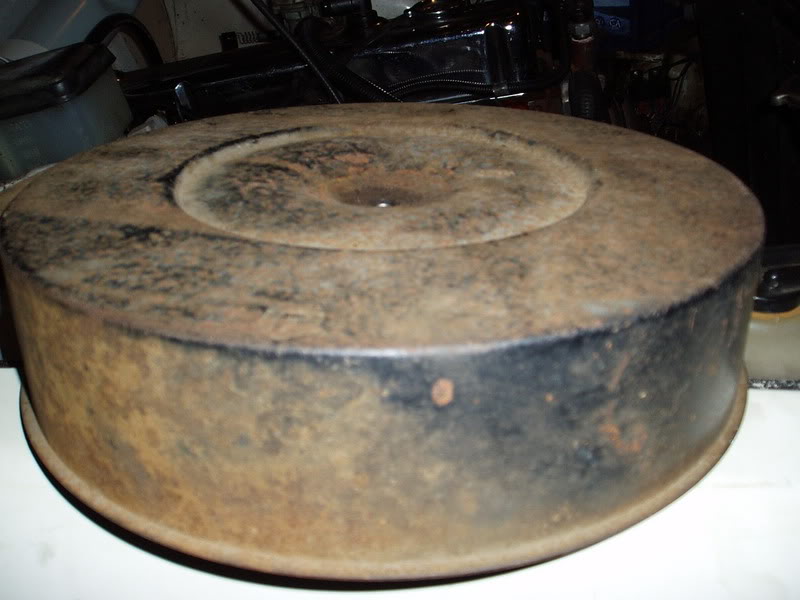

The VB base was also inverted to give another 10mm of height. The lenghth of timber was used to check bonnet clearance.
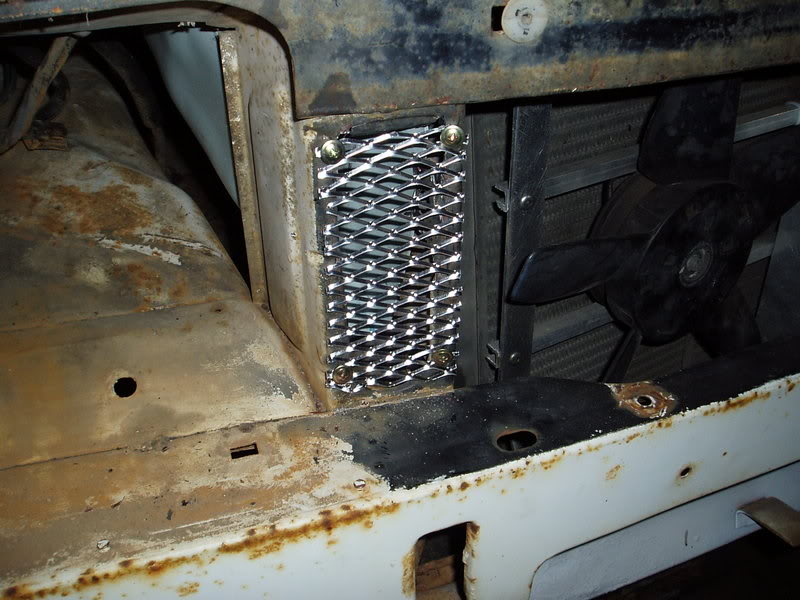
Next the factory hole on the R/H rad. support upright was "adjusted".
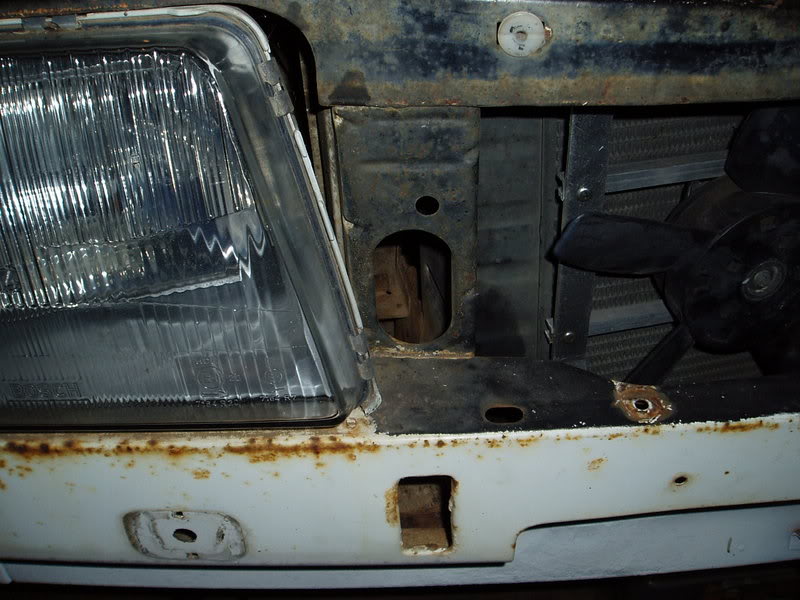
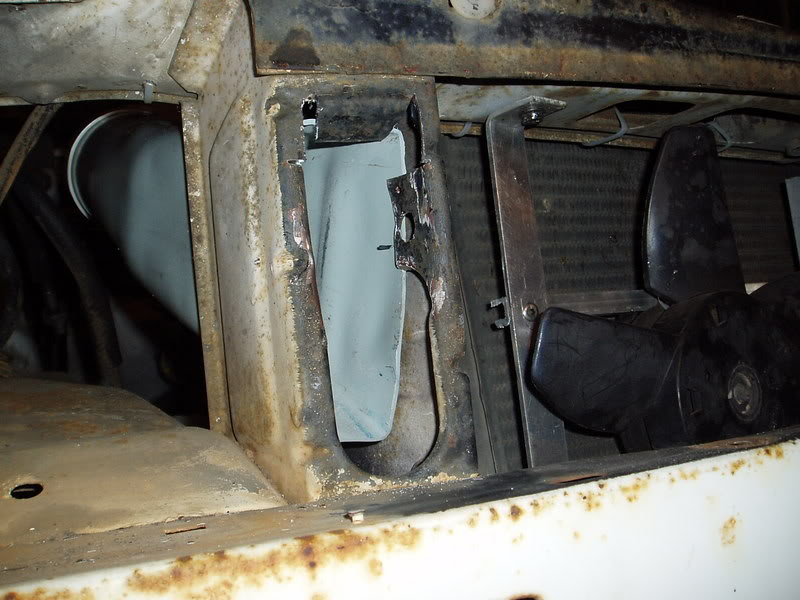
Rather than just chop the hole out I sectioned it and folded it in to retain the tube.
The XU1 even got a run! (I wish it was a real one
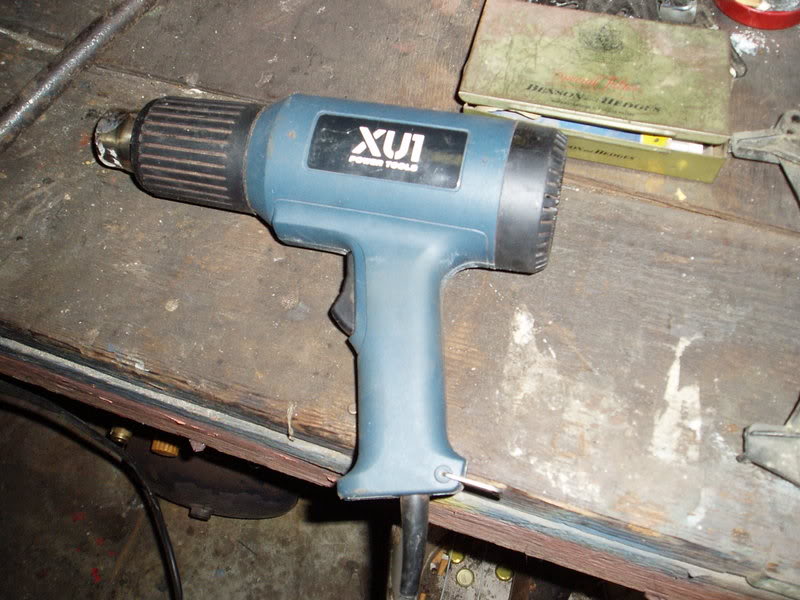
And with a bit of heat the tubes were forged.
Next the "brick catcher" was fitted.
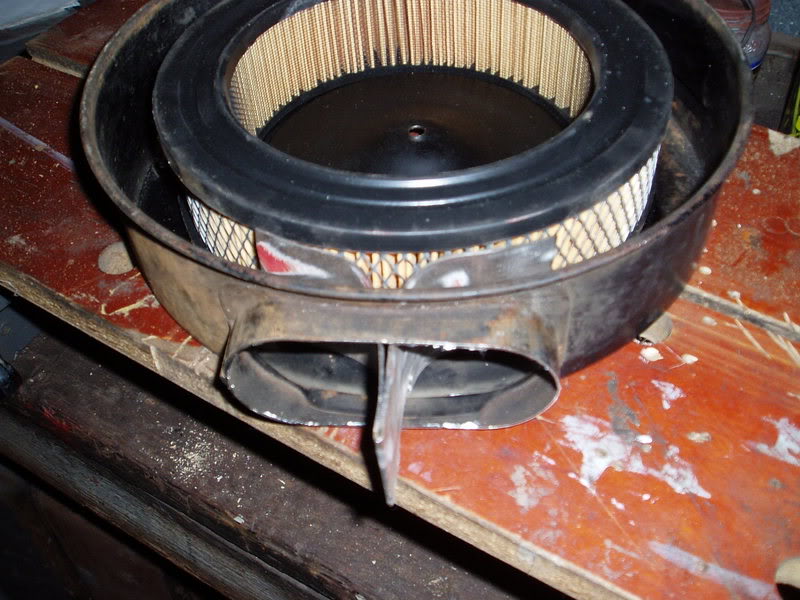
And the "diffuser" to A. protect the element from obliteration from debris and B. direct the flow evenly left and right to hopefully "pressurize" the the aircleaner to a degree. (I'll be happy with 8lbs boost
Remember this pic?
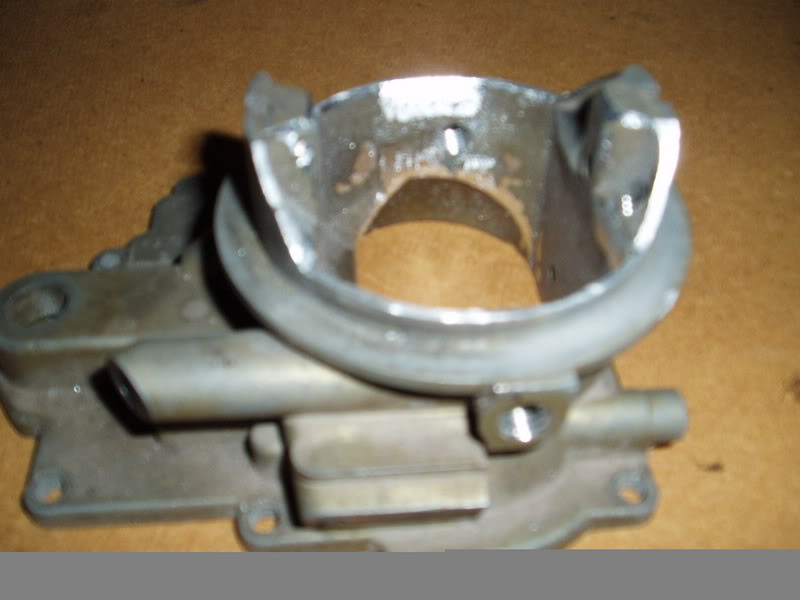
The airhorn was chopped up previously as this A/C mod was always the plan.
Edited by rodomo, 07 February 2007 - 11:47 PM.
#64
 _73LJWhiteSL_
Posted 08 February 2007 - 11:26 AM
You are getting rather serious about this arn't you?
Steve
P.S. got any pipe left over?
#65

Posted 08 February 2007 - 02:09 PM
Just thinking alot about what I do for the best result. Doing what I can on no budget. This induction has cost about $25 including a new element.You are getting rather serious about this arn't you?�

Steve
P.S. got any pipe left over?�
All this stuff will mean nothing with the 2.6 diff I would imagine.
The pipe is $9 and comes in 1 metre lengths from Bunnings.
At the moment I am also scraping all the deadener out of the car. I'm going to weigh it when its all out. I reckon there is about 30kgs of this in an SL/E
I want to get it down to the weight of a 2 door LJ on gas
Edited by rodomo, 08 February 2007 - 02:15 PM.
#66

Posted 08 February 2007 - 02:43 PM
I want to get it down to the weight of a 2 door LJ on gas
I assume you are referring to Steve's car? But that's a 4 door...
I'm liking all of these $0 mods though, should come in handy when we build our next dirt circuit car.
RIM
#67

Posted 08 February 2007 - 04:35 PM
It would be nice to have it as light as an XU1. Then I would have an idea what my LJ will go like, if I every finish it after I ever start it
I might have to weigh the whole car when its finished.
Edited by rodomo, 08 February 2007 - 04:43 PM.
#68
 _73LJWhiteSL_
Posted 08 February 2007 - 09:22 PM
Steve
#69

Posted 08 February 2007 - 11:25 PM
I remember last July when I had boy's car at Winton that I was able to pass only a couple of cars on the straight and a skyline here or there in the corners. (It surprised me how late I could brake in the wet) I'll make sure next time a certain 4 door LJ will be a targetJust cause its a four door doesn't mean it can't be fast.


Steve
#70

Posted 08 February 2007 - 11:51 PM
I know what its like trying to get a car ready in a hurry, the fact that you missed the last day out, and the pressure in now off will probably make the whole thing more enjoyable... Your going about it the right way, and when you do get out there, at least you know you'll have all your bases covered...
Looking forward to hearing how it goes....
cheers,
Sam
#71

Posted 09 February 2007 - 09:34 PM
That manifold wont bolt up to a red head.I have something similar planned... But with a VK EFI Manifold and the GRA carb... so no need for the massive air cleaner.
#72

Posted 09 February 2007 - 10:40 PM
#73

Posted 09 February 2007 - 10:46 PM
#74
 _73LJWhiteSL_
Posted 09 February 2007 - 11:34 PM
That manifold wont bolt up to a red head.I have something similar planned... But with a VK EFI Manifold and the GRA carb... so no need for the massive air cleaner.
I am sure i can make it fit
Ohh yeah I just realised you have a 186 head in the shed, Steve. What's the plan of attack for that?
The plan with that is unless I am incorrect the 186 head has screw in studs, handy for putting adjustable rockers in (which is needed when you rebuild a motor right?) for a 202 I am planning on building.
And once the 202 is run in, I will either stick a 161 head on it, or have the 186 head shaved to bump up the compression and hopefully squease a few more horses out.
Steve
#75

Posted 11 February 2007 - 01:37 AM
I got a bit bored with removing the deadener.
I might have to get a skip in and/or get a miners license
So I thought I might have a look at mounting the dash. This pic was taken with the camera up to my eye with the seat adjusted for me and the dash roughly in the factory position.
This is what I saw (or didn't see, more to the point) with the sports steering wheel mounted.
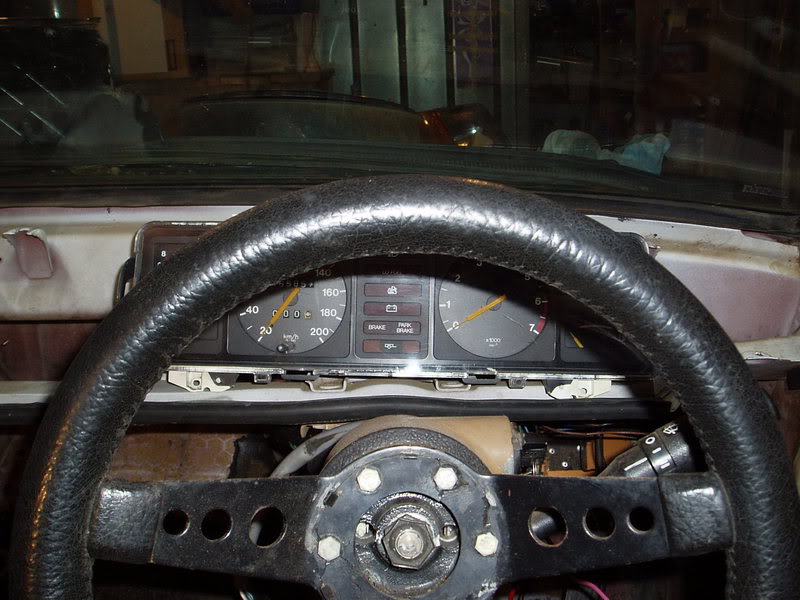
So adjustments were made. Something had to go and I chose the speedo and the factory idiot lights. The whole unit is moved closer to the driver approx. 100mm. I really don't think I'll be towing too many trailers and might be aware if I leave the handbrake on without a light to tell me
High beam lamp? Maybe if I turn to rally but unlikely. Brake fail lamp? I think I'll know something before the light tells me. If not it will probably be too late anyway.
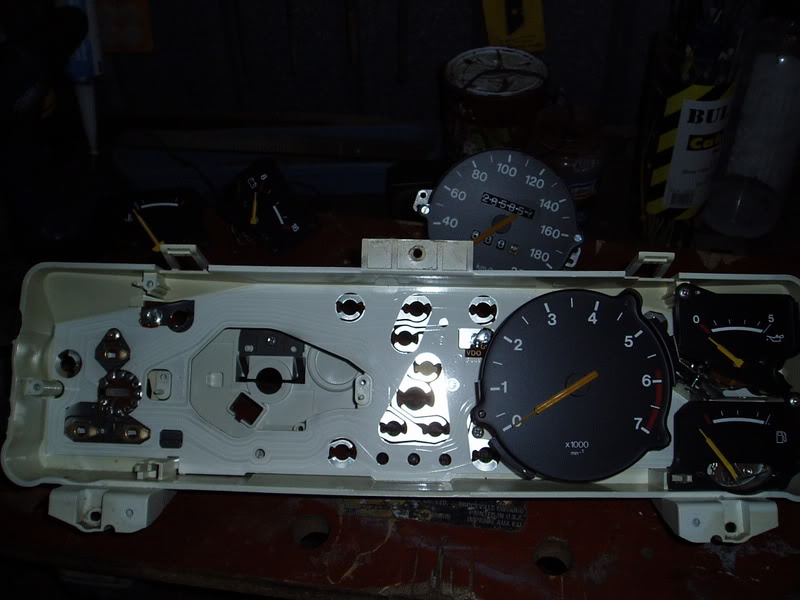
Here is the "rough in"
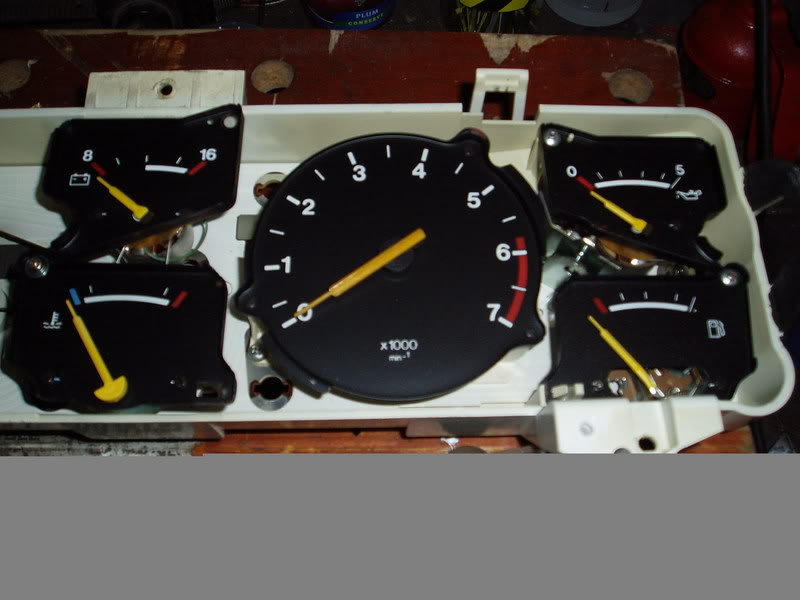
And what I "will" see when it is finished. The area to the left in the yellow triangle will be roughly where the new "idiot" lights will be and also the illuminated fan switch, lights up when fans are on.
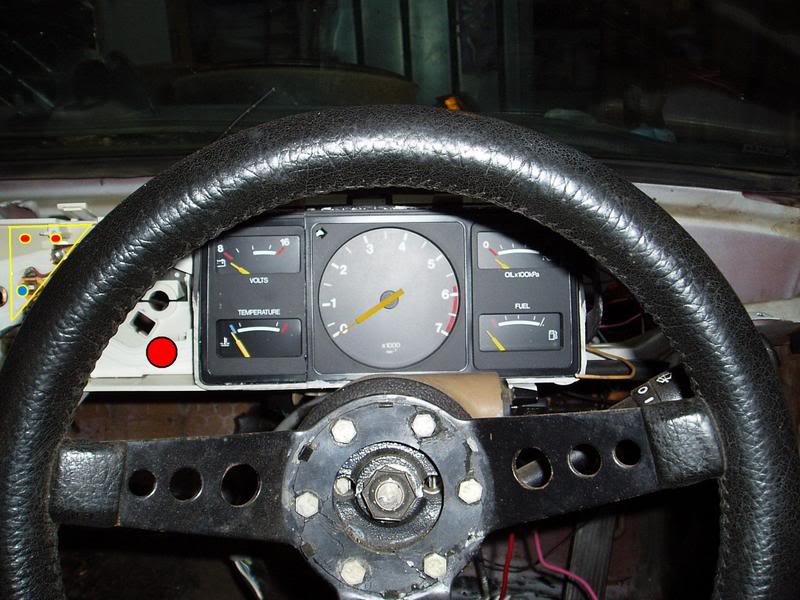
As this mod had to be "thought out" and some high tech methods employed, e.g. glueing, measuring and soldering, I no longer regard this as a dash but more "an on board integrated telemetry readout"
1 user(s) are reading this topic
0 members, 1 guests, 0 anonymous users


 View Garage