
Winton or bust!
#76

Posted 11 February 2007 - 10:57 AM
#77

Posted 17 February 2007 - 08:56 AM
Not much progress over the last week. I have been catching up on servicing the "home fleet" mowing lawns and other stuff that has been neglected of late.
I have removed more deadener from the floor pan (getting there).
I have also been trying to find out the weight of LJ XU1 to get a comparison and have found figures varying from 1100kgs to 1170kgs? Does anyone know for sure?
The weight for a standard VB Commodore is 1220kgs as far as I have found and the SL/E comes in at a staggering 1400kgs.
With an estimated starting weight of about 1220kgs (standard VB 6cyl) minus-
spare wheel, carpets, rear seat, bumpers, dash components, lighter front seats I reckon it would have to be close to 1100kgs?
#78
 _@milco@_
Posted 18 February 2007 - 11:29 PM
#79

Posted 18 February 2007 - 11:55 PM
This doesn't include what was removed from the front floor pans and not weighed.
Still the L/H rear under seat, parcel shelf and the whole boot to go
I'm not sure if this can come into the calculation though? Maybe all VB's had this amount of deadener, not only SL/E?
I should just weigh it when its done
Edited by rodomo, 19 February 2007 - 12:02 AM.
#80
 _@milco@_
Posted 22 February 2007 - 10:09 PM
#81

Posted 22 February 2007 - 11:03 PM
I hate having to do things twice, so the deadener has to be removed so I can finally bolt the seats in and the boot had to be done before the "new" petrol tank can be fitted. I am punishing myself to get this bit done and dealt with so I can start doing some of the more fun bits.
There is going to be a bit of "rework" on some of the stuff. I plan now to move the battery to behind the pass. seat to move some weight backwards and also to "free up" the L/H rad support upright (the battery tray obstructs the upright) so the forced induction can be "stream lined" a bit more.
My biggest problem is I don't stop thinking about and looking at the bloody thing.
Just tonight I was thinking (as I was scraping deadener
I have also fitted the gearbox and shifter but am having a few thoughts to mod. the shifter, and am thinking about another alternator that would drag less power (the sigma one that the pulley came off has a smaller rotor) so again where do I stop?
The plan now is the first run will be at Heathcote for the drag day (28th April)
Then the following day (29th) at Sandown for some flat track. There is another day at Sandown on the 4th of March that I could attend but time is slipping away.
#82
 _@milco@_
Posted 22 February 2007 - 11:33 PM
but dont worry my torrie will prob break down there as well!
even tho it shouldn't as it has just been completely rebuilt..... but i have been having some bad luck lately
#83

Posted 24 February 2007 - 06:12 PM
Which car are you taking and what are its specs? V8? 6?you may make it to sandown if the commo does not breakdown at heathcote.... lol
but dont worry my torrie will prob break down there as well!
even tho it shouldn't as it has just been completely rebuilt..... but i have been having some bad luck lately
The "home fleet" is now serviced and the lawns are all mowed (I do my Dad's too, he is 80 and lives next door). The last service (today) was boy's UC hatch today, just to find the steering coupling has all but chopped out in the last 12 months. It needs a steering uni too.
Later tonight I WILL finish removing the deadener and try to finish the dash cluster ready for mounting.
Tomorrow, the balancer and water pump are earmarked.
Edited by rodomo, 24 February 2007 - 06:22 PM.
#84
 _@milco@_
Posted 25 February 2007 - 08:21 PM
MMM NICE DID YOU AND HEATH GET ANY WORK DONT ON THE WEEKEND?
#85

Posted 25 February 2007 - 08:25 PM
#86
 _@milco@_
Posted 25 February 2007 - 08:29 PM
#87

Posted 25 February 2007 - 11:56 PM
So 1 shifter is being made from 3. But wait! Theres more! When I undid the nut that hold 3/4 lever onto the sideplate the thread came with it
So the new oil will now be drained and the side plate replaced. While the side plate is off, the internals will be "looked at" as that is about as much as you can do through the side plate cover.
I'm glad this is all being found out at "RoDoMo Racing's" workshop rather than on the track
#88

Posted 04 March 2007 - 11:52 PM
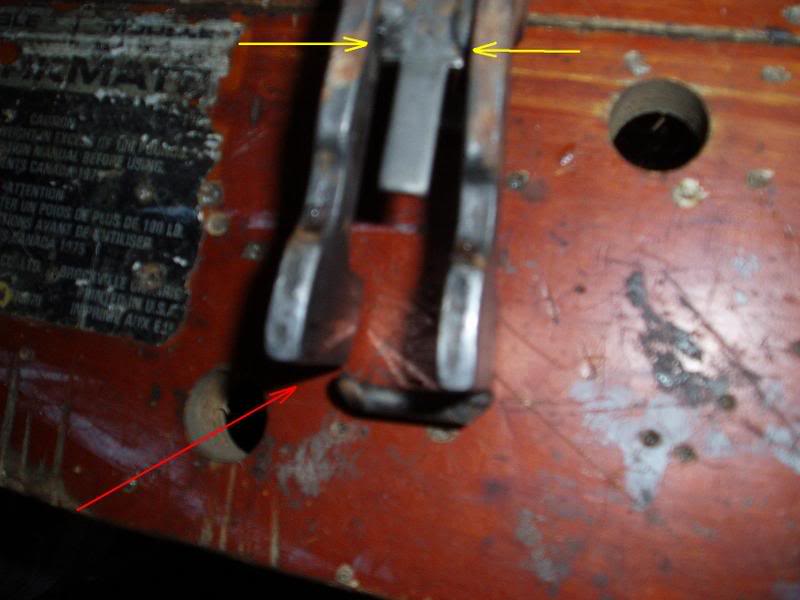
The red arrow indicates where the piece of coat hanger wire had let go, this is how they were from the factory, and the yellow arrows indicate where the welds at the spring locater had also started to split. Some pretty harsh shifting to have caused this.
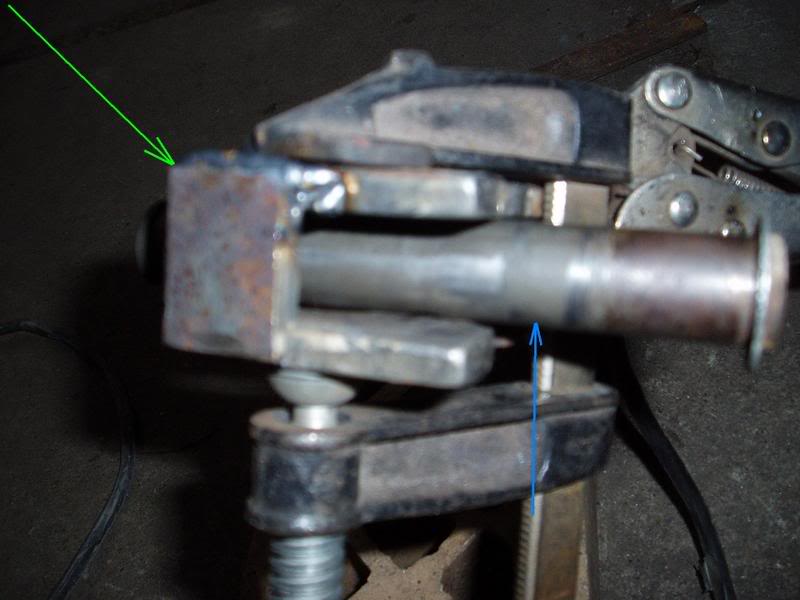
The "through shaft" (blue arrow) from the shifter was used to guage the gap when it was rewelded. A piece of railway track (green arrow) now replaces the coat hanger wire. When it all cooled down it was tight and valve lapping paste had to be used to "work" it and free it up.
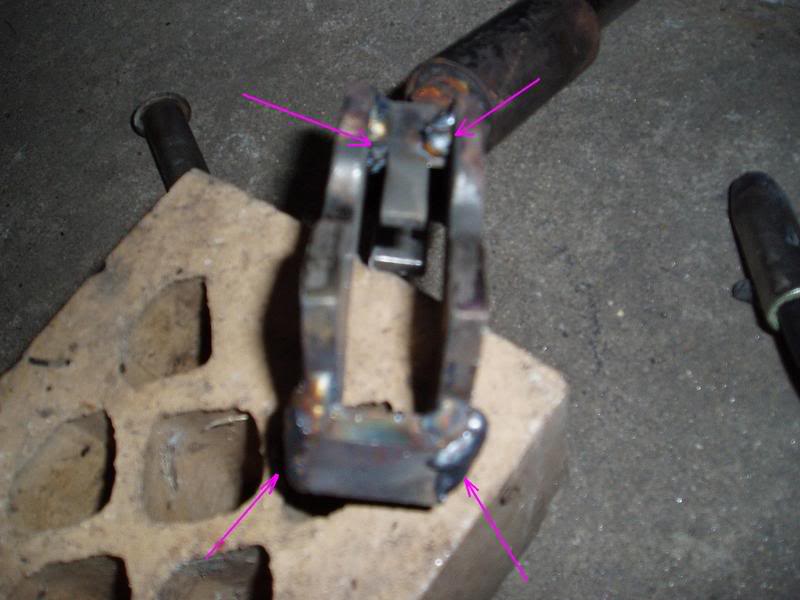
The welds were then beefed up (purple arrows)
The shift thrust washers were broken and replaced with the best I had.
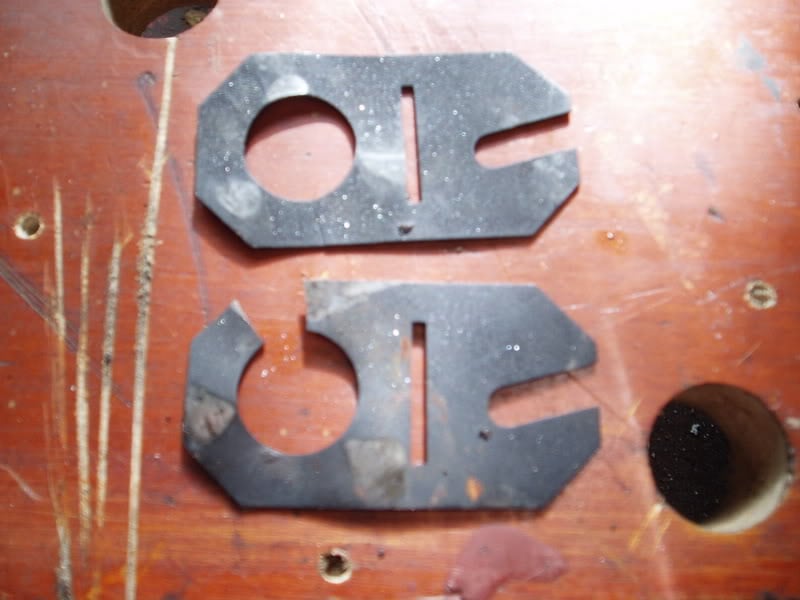
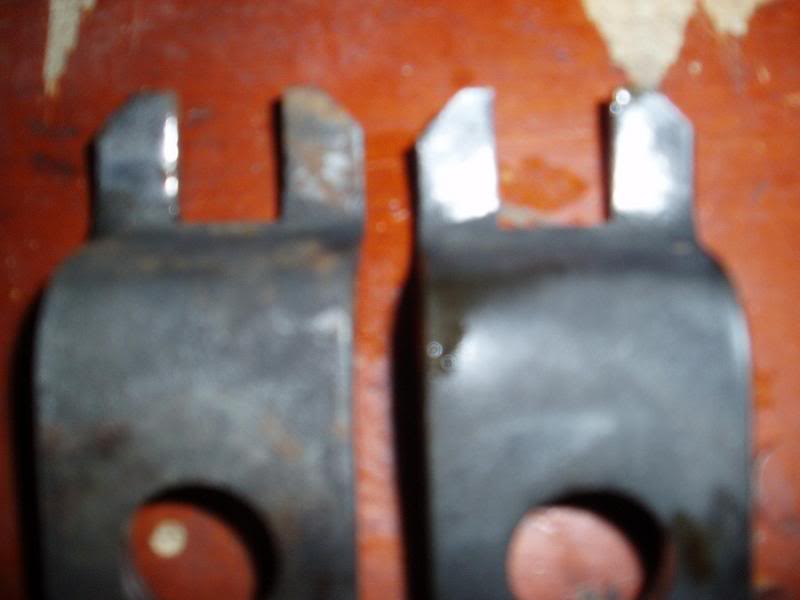
As was the 1st/2nd shift lever. You can see the forks on the R/H lever had started to spread, again from harsh shifting.
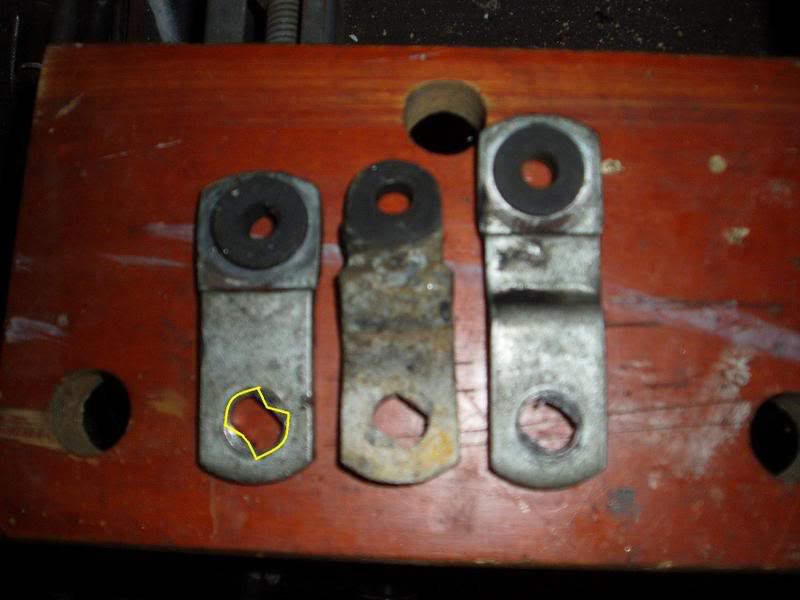
Another thing to look for is wear in the side plate shift lever slotted holes. (Exaggerated in yellow) These have to be a tight fit on the sideplate or they will work loose regardless of how much you tighten the nuts. Also note there are different lengths of these levers if you are mixing and matching shifters.
Fit the wrong bits to the wrong shifter and your gearstick can jump out of the gate. Also worn side plate levers will cause this.
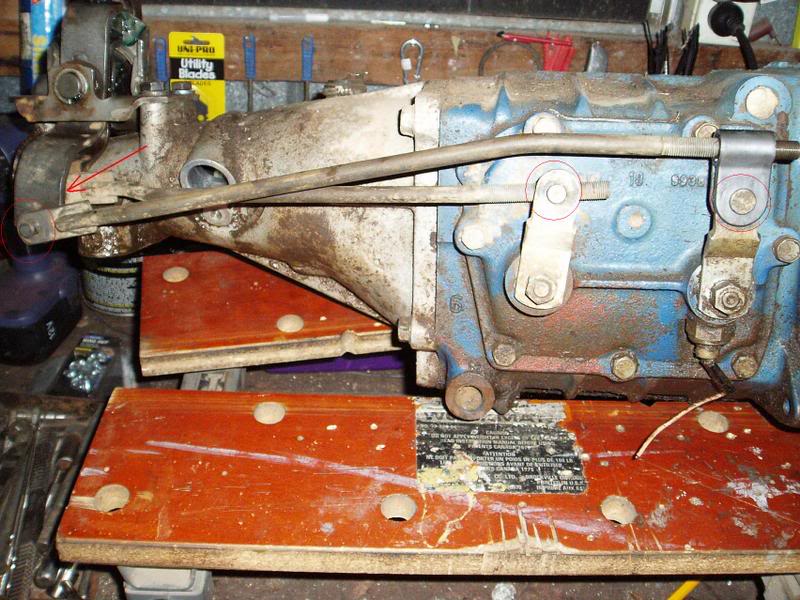
Other wear areas are circled and arrowed below in red. Excessive wear in these holes and pins can make shift alignment a nightmare and again the stick can jump out of the gate.
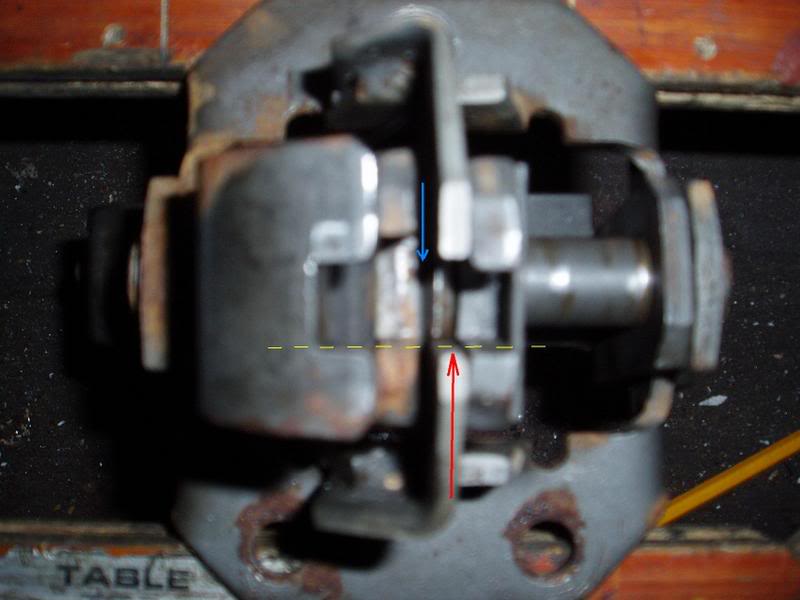
To adjust the shifter, the next pic shows what you are trying to achieve. The yellow dotted line indicates the alignment of the gates, the blue arrow indicates the area that DOES NOT HAVE TO BE ALIGNED as the cutouts in the gearstick dodge around these misalignments. The red arrow indicates the mounting plate that the other shift levers have to be aligned to. I have left the gearstick out at this point for ease of explanation but you can see this alignment through the floor with the shifter in place to make the job easier.
The alignment is adjusted at the trunions on the shift rods.
When you've made your shifter "bullet proof" and done all your adjustments there is one more adjustment left to do
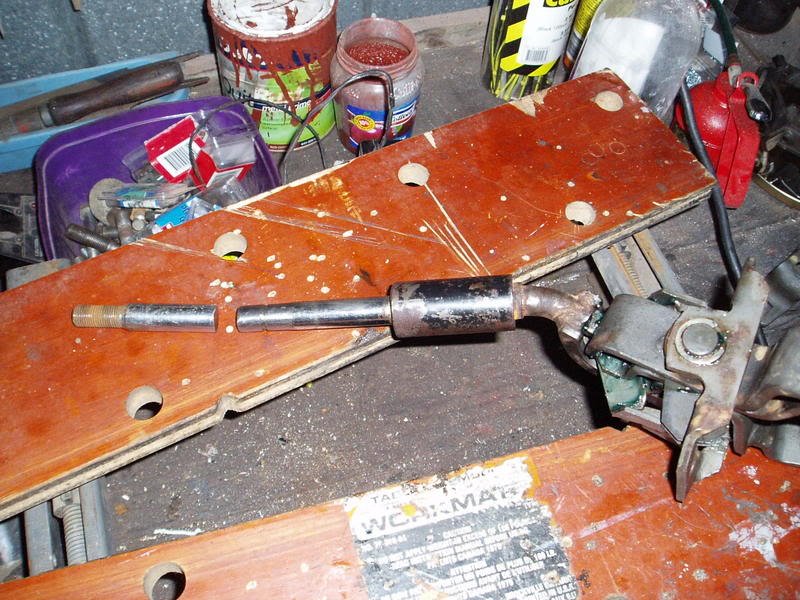
In my last post I mentioned that with the side plate off there isn't much to see but you can "feel" radial play in the cluster. Guess what? gearbox rebuild coming up.
Edited by rodomo, 05 March 2007 - 12:03 AM.
#89
 _@milco@_
Posted 05 March 2007 - 12:05 AM
wanna rebuild a shifter for me? lol
what clutch set up are you running???
do commo's run cable or rat trap style, i am guessing cable....
#90

Posted 05 March 2007 - 12:44 AM
#91

Posted 07 March 2007 - 11:33 PM
Yep, cable. Similar to UC. I had trouble finding the correct cable as the Burson's bloke couldn't read the parts catalogue. Sent me home twice with the wrong cable.what clutch set up are you running???
do commo's run cable or rat trap style, i am guessing cable....
Ended up reading the bloody thing myself and quoting a part number.
Progress report:
I have stripped 2 out of 3 gearboxes and haven't found a good cluster yet
#92

Posted 08 March 2007 - 11:25 PM
All 3 have been sleeved and the sleeves have collapsed.
Can anyone tell me if they have had success with a sleeved cluster?
But I have a plan
Edited by rodomo, 08 March 2007 - 11:36 PM.
#93
 _@milco@_
Posted 12 March 2007 - 11:31 PM
#94
 _73LJWhiteSL_
Posted 13 March 2007 - 12:56 PM
Rodomo, When I rebuilt my M20 box, I brought a brand new cluster. I got the Taiwanese cluster ($250) not the genuine Holden cluster ($500) and covered nearly 100,000 ks with no problems.Score: 3-0 on the clusters

All 3 have been sleeved and the sleeves have collapsed.
Can anyone tell me if they have had success with a sleeved cluster?
But I have a planMore info if it works later.
Steve
#95

Posted 14 March 2007 - 02:10 PM
$237 delivered.
Have a look here:
http://stores.ebay.c...0QQfsubZ9650609
I am going to put a box together with the best of the other clusters and the 2nd best of all the other bits.
Then later build another box with new bearings but use beefier input and output bearings.
Hopefuly this "she'll be right" gearbox will last until I put the 3.5 in it.
#96
 _73LJWhiteSL_
Posted 15 March 2007 - 05:34 PM
I personaly would do the bearing now...
Steve
#97

Posted 16 March 2007 - 07:56 PM
#98

Posted 16 March 2007 - 11:09 PM
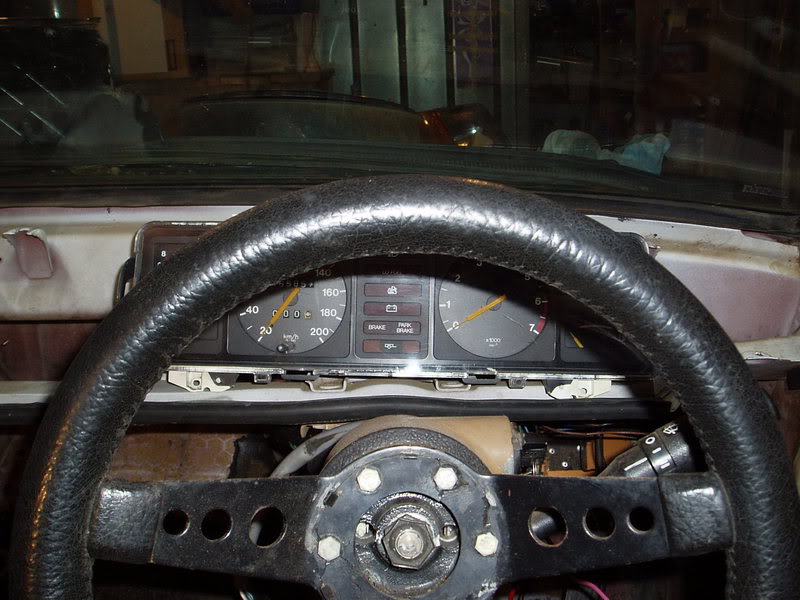
Dash:
Before:
This is what I could see when I went to mount the dash.
After:
This is the modded dash, not perfect but a lot better
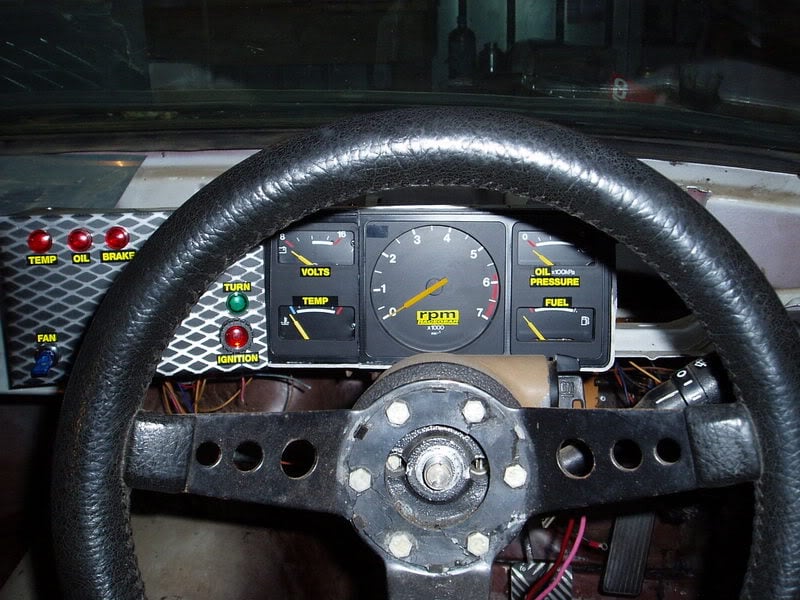
Its still not mounted, I have to fit the fuel tank and recalibrate the fuel guage to suit the 120Y sender before I mount it permanently, but at least some progress.
#99

Posted 16 March 2007 - 11:21 PM
Looks good Rob!
#100
 _CHOPPER_
Posted 17 March 2007 - 07:20 AM
1 user(s) are reading this topic
0 members, 1 guests, 0 anonymous users


 View Garage


