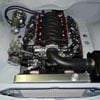
RB25DET in UC torana coupe
#76 _studricho_
Posted 09 May 2008 - 09:36 PM
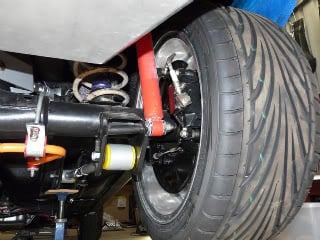
Diff control arms blasted, boxed in, painted and new bushes.
New bearing housing fitted and welded up.
The boys working away using the tig to box up the brackets on the top of the diff.
Hole for the connector rail.
Connector rail going in.
Awaiting for the sway bar to arrive so Joe (Pro Fab) can weld a bracket to bolt the sway bar onto diff instead of the stupid u bolts that come with the kit.
The place where my car is getting all this great work done.
#77 _UNVSM8_
Posted 09 May 2008 - 11:30 PM
once this is all done whats next?
Ben
#78
Posted 10 May 2008 - 02:20 AM
K-MAC and Whiteline have a swaybar similar to the standard UC swaybar with optional U bolts to suit the 9". You should be able to buy the U bolts separately.Does anyone know how to fit a sway bar to the 9 inch in the UC? Do i need to weld brackets, If so I need to do it now.
This is a picture of the K-MAC front mount rear swaybar temporarily fitted to a 9" in an LX. I was planning to weld brackets onto the diff instead of using the U bolts. I also recommend fitting a drain plug to the diff housing.
#79 _studricho_
Posted 10 May 2008 - 05:29 AM
#80 _BoltZ_
Posted 10 May 2008 - 01:32 PM
T1R tyres, very nice
#81 _youngy_11_
Posted 12 May 2008 - 03:16 PM
The work Joe is doing looks nearly identical that the work he has done on my hatch, it looks like we will have two very similar properly done hatches.
It is a good idea to weld the sway bar to the diff its a little late for me but im sure it will be fine.
Good stuff
#82 _studricho_
Posted 12 May 2008 - 05:19 PM
#83 _youngy_11_
Posted 13 May 2008 - 09:53 AM
Engine will go in soon, can't wait until UNI hols .
Cheers
#84 _studricho_
Posted 15 May 2008 - 04:16 AM
#85 _studricho_
Posted 15 May 2008 - 10:00 PM
#86 _UNVSM8_
Posted 16 May 2008 - 07:55 AM
do u recon it will reduce the flow so much that it will have effect on your heater/aircon?
Ben
#87 _studricho_
Posted 17 May 2008 - 12:21 AM
I have no ides about flow, I'll let you know.
#88 _studricho_
Posted 27 May 2008 - 08:16 PM
Tunnel all finished and painted. Just needs hole for gear stick and the brackets to hold console.
Rear chassis connecting beams in, welded and painted.
Diff in. I just need to save some funds for the rear caliper rebuild, different centre and getting some springs/sway bar and shocks painted.
The amazing handy work of Joe from profab. He has turned my pull (clutch cable) clutch pedal to a push (hydraulic cylinder from R33) type system. He machined special bushes and it's all ready to go.
#89 _UNVSM8_
Posted 27 May 2008 - 08:19 PM
did u have much trouble hooking up the handbrake?
#90 _studricho_
Posted 27 May 2008 - 08:40 PM
The rear disc brake set up was on the car when i bought it. I'm pretty sure that the car was optioned with that along with a string of goodies on it.nice ur car has got the goods mate!
did u have much trouble hooking up the handbrake?
I've just had brand new handbrake cables made for it. The olds ones were almost seized.
I did change the rear stud pattern so i used the HZ rear caliper reaction flange (what the torana caliper bolts to) and I'm using the HZ rear disc.
#91 _studricho_
Posted 30 May 2008 - 09:50 PM
I think having the rails sorted and straighten would of helped heaps.
#92 _P51_
Posted 30 May 2008 - 10:43 PM
#93 _dapperUC_
Posted 31 May 2008 - 01:31 AM
#94 _studricho_
Posted 31 May 2008 - 09:12 PM
Hello, just wondering is there any chances to get some photos from underneath on the diff install and the chassis support in front of the diffVery nice stuff there matey......lots of good work happening.....be good to see it finished and tearing up the road....bet it will go like stink......
Yeah, i will have to take it easy when the car is finished. I'd hate to lose the car for 3 months from this new anti hoon laws. My mate nearly lost his 04 SS 5.7L ute for going sideways around a corner today.
The only reason he kept the ute was that he had a very clean record.
What angle are you after? Maybe take a picture of your car and the exact area you want, then i can do the same.
#95 _dapperUC_
Posted 01 June 2008 - 02:31 AM
#96 _studricho_
Posted 01 June 2008 - 07:57 AM
I didn't do this myself, but i paid pro fab to do it for me. It was pricey, but when you see his work, it's the best around.No worries i wont be back until next week i will send them through, it was where you have inserted the RH steel and how you have tied it in and the also the front diff mounts
So you want me to take details pictures of what cost me heaps, so you can save money and do it yourself. Let me think about it, it's just not sitting right with me.
I'm sure there's many other people who have had it done aswell, but i haven't see a thread with detailed pictures on how to do it and save thousands.
Can you see where I'm coming from?
#97 _dapperUC_
Posted 01 June 2008 - 01:13 PM
#98 _studricho_
Posted 01 June 2008 - 01:43 PM
Now i get where you coming from. I get some better pictures up soon then.Mate you have got the wrong idea i only want a few picks to see where the rails have been tied in and how it looks, i was looking at getting rid of my CRS ones and wanted to get a look on how others have been done as you said there is not many photo's of other ones around. I will be getting a fab shop to do it as you understand you cant afford to get this wrong its not a job for the light harted or inexperienced as there is quite a bit of science that goes into doing this properly.
#99 _studricho_
Posted 03 June 2008 - 08:52 PM
They have finished all the chassis/mod work at pro fab. I just need to do some work on the car and it's back on all 4 wheels again. I just need this rain to stop and get it home.
Once the car is home it will really start to take shape very quickly. Everything has been held back cause you want the car as bare as possible when grinding/welding.
I took some pics, but i was so excited that they are out of focus.
#100 _studricho_
Posted 04 June 2008 - 09:26 PM
Motor and engine back in. I was concerned about how the gearbox would sit and how it would affect the motor. I'm so glad that I took my car to pro fab. They have done a perfect job.
There's just enough clearance between the sump and the rack/crossmember on turbo side. These RB sumps have a weird slant.
I took some pics from under the car while it was up on stands. This is looking from the rear and looking up at the passenger side. I had to modify the cross member so the oil dump pipe wouldn't hit.
This is also looking from the rear, but at the drivers side. You can see how I had to use a elbow to move the oil pressure switch otherwise it would hit the turning knuckle. You will notic that the switch is from the UC sports dash.
That's the spinny thing whatch you ma call it.
1 user(s) are reading this topic
0 members, 1 guests, 0 anonymous users