Gemini Coupe Rebuild!!!
#76 _Viper_
Posted 29 December 2009 - 07:26 PM
Welded the aerial hole on the passenger guard.
I bought a pair of VX Clear side indicators, but rather then hunt around the wreckers for some fkd guards to cut the section from I used some carboard and took some measurements making a template then transferred to steel and just made up a section to weld into the guard.
Then stripped the little bits of paint that were left and gave it a coat of Epoxy
#77 _Viper_
Posted 03 January 2010 - 07:51 PM
Stripped the front apron and cut out what was needed for clearance of the front spoiler, then coated the inside with POR15
Welded in the drivers side guard flutes and Clear indicator mount
Hi-filled the flares and front spoiler
Stripped the drivers guard and coated the baremetal sections inside with POR15
Then made a start on stripping the shell
Made up a realistic schedule for whats left to do to see If im gonna make Motorvation.... and I very much doubt it... looks like im gonna need an extra week! ill call em tommorow and see if they will be nice and reschedule the event for me
#78
Posted 03 January 2010 - 08:06 PM
Cheers
Maybe someone could shed some light, When I was launching alot of the times the rear end would bounce and shake about a fair bit, Whats that caused by? I thought that only really happened with leaf spring cars?
this might fix it
#79 _Viper_
Posted 03 January 2010 - 08:28 PM
#80 _doogs_
Posted 03 January 2010 - 11:41 PM
Engine looks great all cleaned up.
#81
Posted 04 January 2010 - 02:52 AM
Not street registrable tho... and not the best handling kit either...
Agree, but my point being that to me the gemmy's seem to suffer from the diff winding up like a spring and when you take off this is transferred to the tyres so maybe look at some form of better restraint.
You only have to jump in an auto and stall it up to see what Im talking about.
#82 _Viper_
Posted 04 January 2010 - 10:16 AM
I dont see where there is any allowance for it to wind up :S
Anyway I fitted semi-slicks after that first meet and it was launching heaps better, .2 second faster 60ft, even got a PB Trap speed of 103mph... but had issues with the tune after they tweaked it and everytime I changed gears it would bog down so not PB ET :/
#83 _Viper_
Posted 04 January 2010 - 10:25 PM
Then pulled the front n back windscreens out.
No rust at all in the front frame, and only a small section in the rear which is good
after removing the roof-lining I found that the center brace was bent and separated from the roof skin.
But I got a shell out the front, so might cut the brace out of that and weld into mine.
Also made a start on the rear passenger guard... about half done.
Coupe might be going for a trip tommorow
#84 _lx5008_
Posted 05 January 2010 - 10:01 AM
#85 _2wild4u_
Posted 07 January 2010 - 12:56 AM
#86 _Viper_
Posted 08 January 2010 - 04:08 PM
Called Stripped bare soda blasters and he came to my house and looked at the car and gave me a quote, to which I was surprised was reasonable, To strip the from cowl, windscreen frames, door frames, rear 1/4 window frames, boot frame and back end with Sandblasting and the roof, fuel flap/vent and sill panel with Sodablast was $300 Then to get the bonnet done was $60 each side for sodablasting.
But yea got it back today
Which also uncovered some surface rust on the roof (sodablast doesnt remove rust) which goes to show... ive had this car for 4 or so years and was never any sign of rust in the roof but it was there.. sitting... hiding.. waiting to be a pain in the ass years on so im happy I decided to go back to metal...you never know whats under there
Found abit more rust in the front window frames as well
So I got plenty of work to do now!
#87
Posted 08 January 2010 - 04:40 PM
#88 _Viper_
Posted 08 January 2010 - 04:47 PM
#89 _Viper_
Posted 09 January 2010 - 03:48 PM
Cheers to Mell (Missus) for giving me a hand applying the Deox.
Heh my first time spraying more then just a single panel, is a fair bit harder, really goto plan the order your going to spray it in and remember the bits you have and havnt done yet and goto remind yaself to breathe!
#90 _LX77SL_
Posted 09 January 2010 - 03:55 PM
ayden
#91
Posted 09 January 2010 - 09:07 PM
Looking really good, cherry black sounds like a good colour to me
#92 _Viper_
Posted 21 January 2010 - 02:06 PM
But all the bolt on panels are ready for paint, just need to finish the shell now and my Paint was finally ready after having to wait a week for the right tinters to come from east states and I was keen to get a preview so I sprayed one of the flares and mmm I really like the color, it really is 2 colors. in the shade its just a nice gloss black but out in full sun is when it really shines and brings out the cherry metallic.
Was pretty hard to capture the effect with my crappy phone camera but here's the best I got.
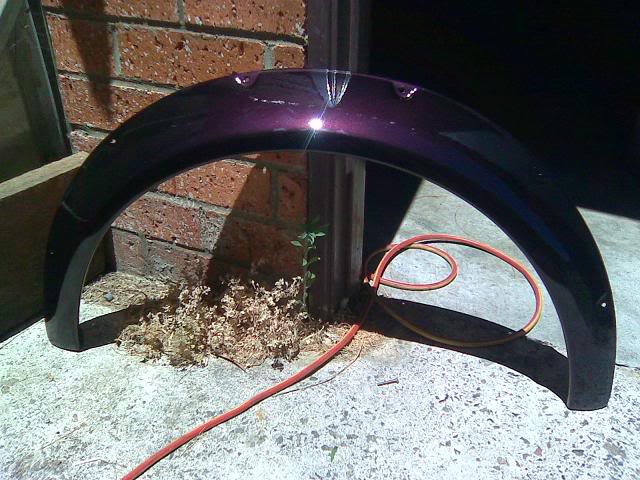
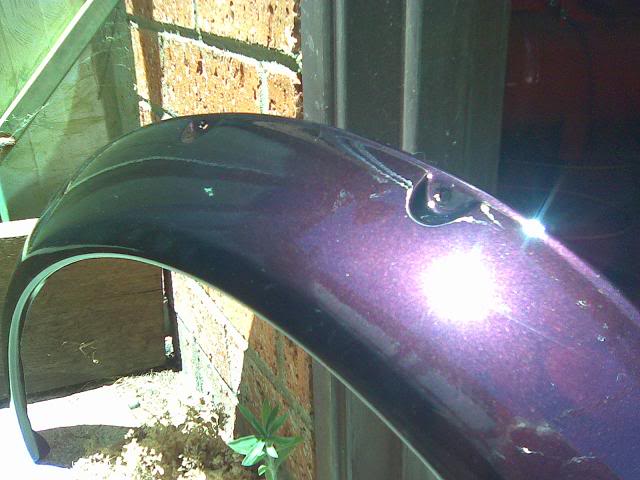
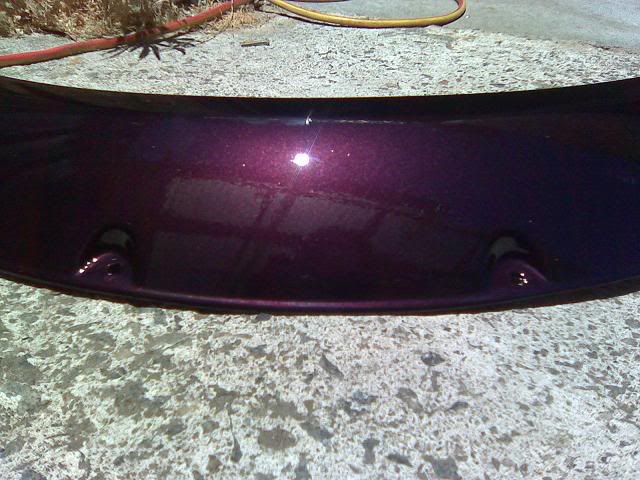
Came out a fair bit orange peely tho which I wasnt happy with.. I think it was a combination of me not putting it on wet enough, my gun not being set properly (i still go no idea how to do that properly) and cos I used Normal thinners which are rated at 20-30'c and it was about 35' on the day which means it dries faster and doesnt have time to flow out nice and level.
But when I spray the rest of it in the booth ill have my mate with me and he will show me how to sort the gun settings and choose the right thinners etc
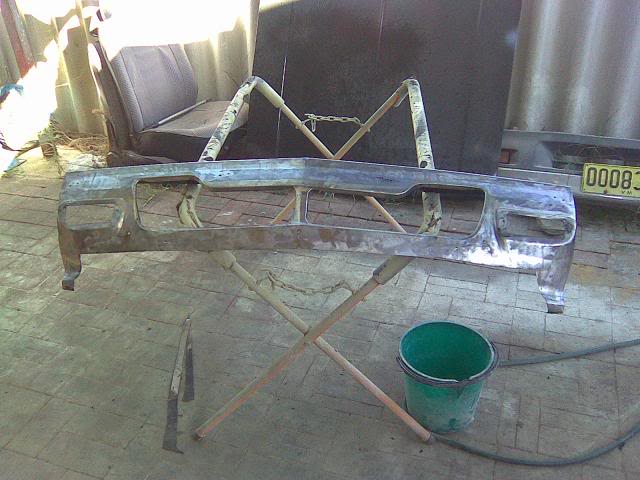
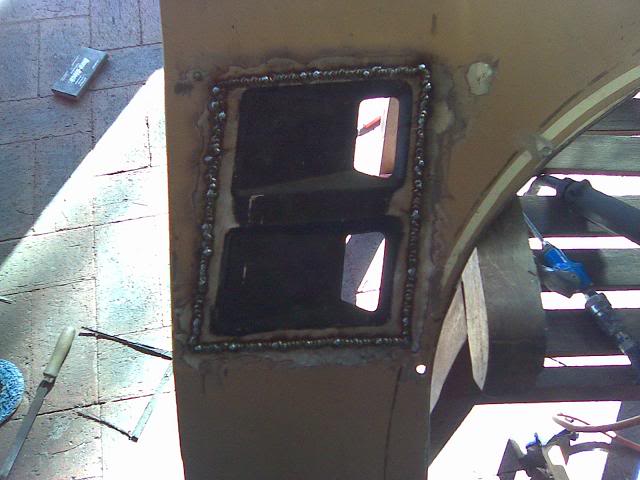
I also filled the sections just below the front windscreen where the cowl meets the A-pillar on both sides...
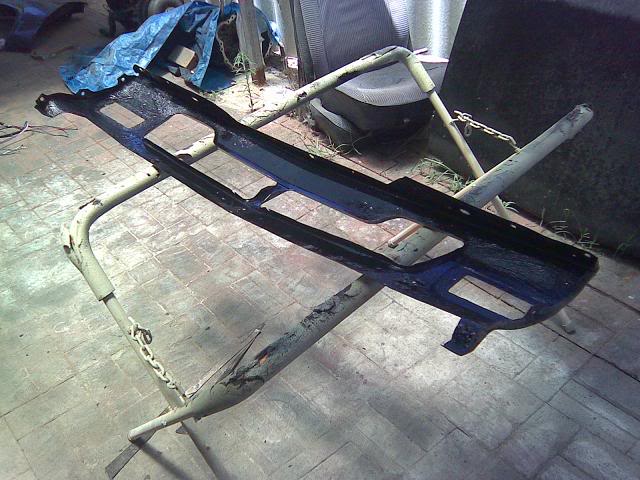
I tried to just mig weld the holes in the window frames from the rust but the rust has made the steel too thin and it just falls away... so looks like I cant cheat and will have to actually cut the sections out and weld in clean steel.
#93
Posted 21 January 2010 - 02:12 PM
Coming along really well mate!
#94
Posted 21 January 2010 - 02:43 PM
#95 _Viper_
Posted 29 April 2010 - 11:28 PM
Anyway he didnt get stuck into it untill about 4 weeks ago and the shell is just about ready I went and visited him on my break and we rubbed back the flare I had painted earlier (too much orange peel) gave the lot a rub quick rub down with 800 and set up the booth, he sprayed 2 flares and give me a few tips and I sprayed the other 2... and wow they turned out awesome, Even he was very impressed (he usually uses protec paints, where this is PPG.. he said he would NEVER get a finish like that off the gun with protec paint... We could spray it alot wetter (then he normally could with protec... he said if he had done it that wet with protec it would of all ended up on the floor)
My reflection
His reflection
We had the flares laying flat tho, gonna wait and see when we do a panel standing up (ie doors) and see if we can still spray it as wet and not get any runs.
He also e-mailed me a couple of pics of some of the rust repairs he done.
Other side was much the same... heres some of the rear windscreen
So yea, im stoked so far... looking forward to doing abit more painting
#96
Posted 30 April 2010 - 07:46 AM
That's a good looking Gemini.
Mick.
#97 _dirtbag_
Posted 30 April 2010 - 09:20 AM
As for the axle tramp issue, first thing to do there is some decent shocks.
Keep the pics coming : )
#98
Posted 30 April 2010 - 11:04 AM
#99 _Viper_
Posted 30 April 2010 - 07:25 PM
#100 _Viper_
Posted 01 May 2010 - 09:55 PM
Doors didnt turn out quite as good as the flares... you can just make out the slight orange peel in the pics, Think it was because they were stood up and we couldnt put it down as wet. But there straight as which was good considering how bad they were when I started.
What it will look like in the sun
Ive got a short video of the doors, but its 9mb and I donno how to make it smaller? Darren?
Will be spraying the shell shortly
1 user(s) are reading this topic
0 members, 1 guests, 0 anonymous users