
I did the diff carrier today...and took all the pics...will do a full step by step and get the mods to do a sticky...it was pretty easy..only one real thing you need to look for.
R
Lokka Installation
Started by
_rorym_
, Apr 05 2008 04:47 PM
40 replies to this topic
#3
 _rorym_
_rorym_
-

- Guests
Posted 19 April 2008 - 10:48 AM
Yeah Yeah...I am getting there..probably be up this weekend.
R
R
#4
_rorym_
_rorym_
-
- Guests
Posted 19 April 2008 - 11:19 AM
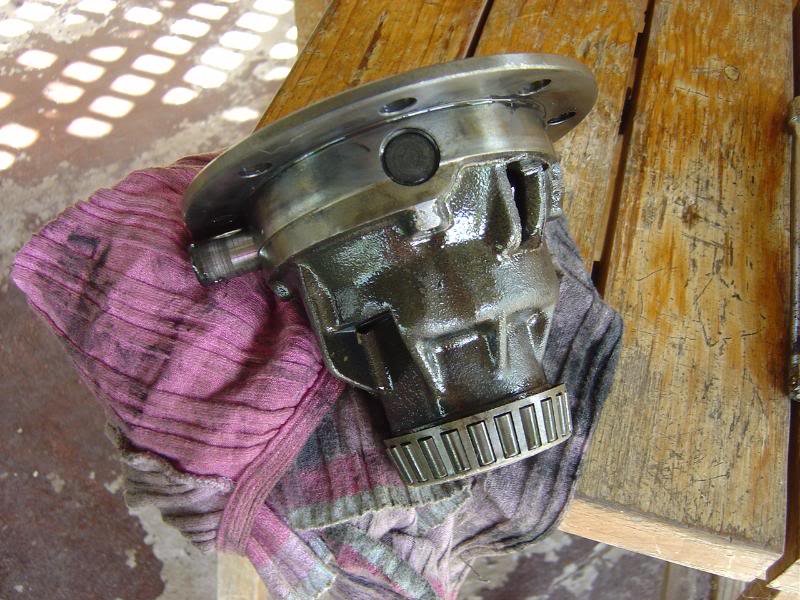
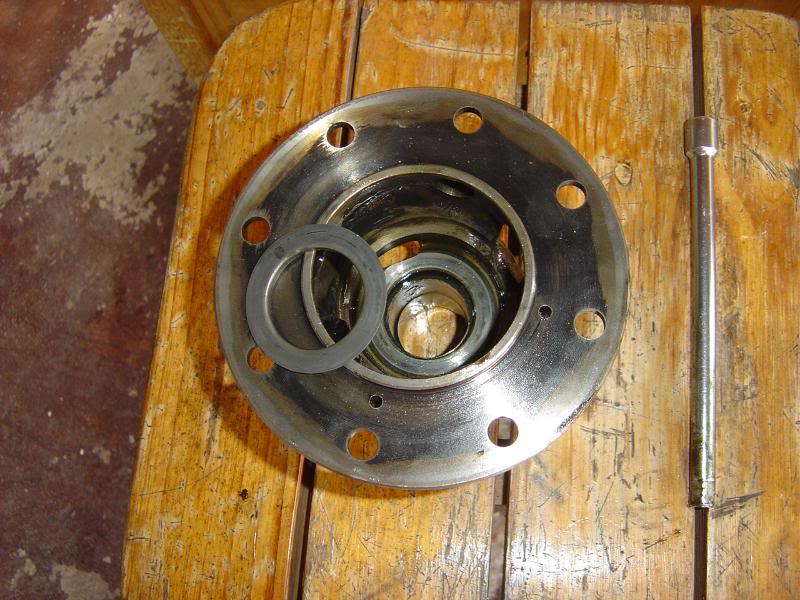
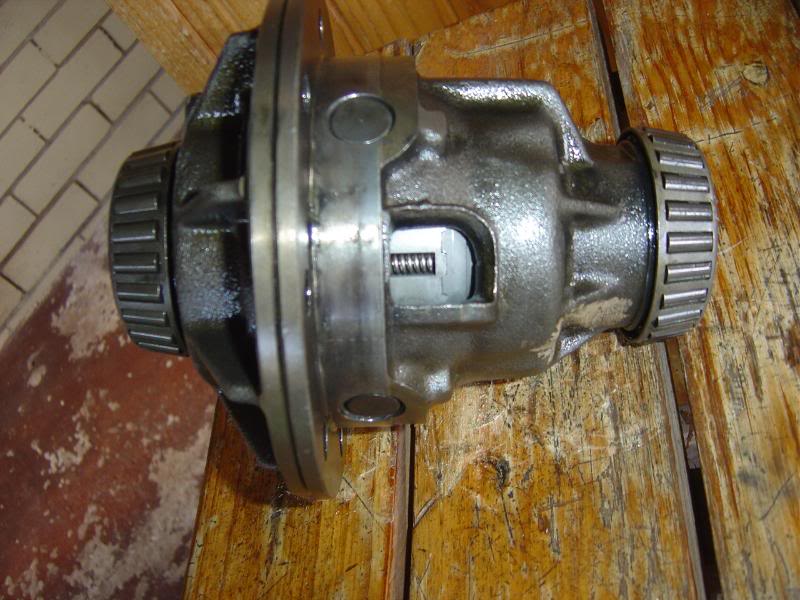
The bare carrier...to get the crown wheel off remember it has left hand bolts...big L on them.
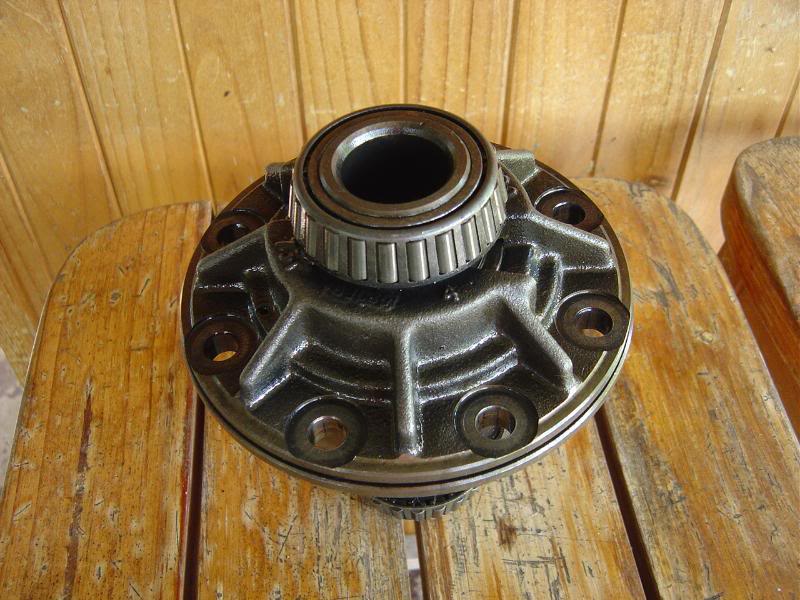
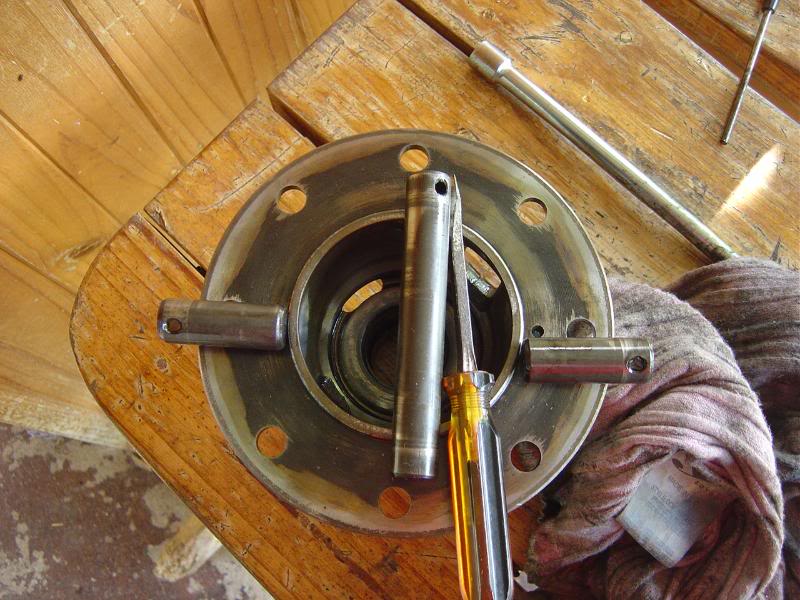
There are 3 pins holding the 2 halves together...punch them out being aware that there are only 3 holes that go all the way through on the bottom half but there are 4 holes on the top half so mark the halves so it goes back together the same way.
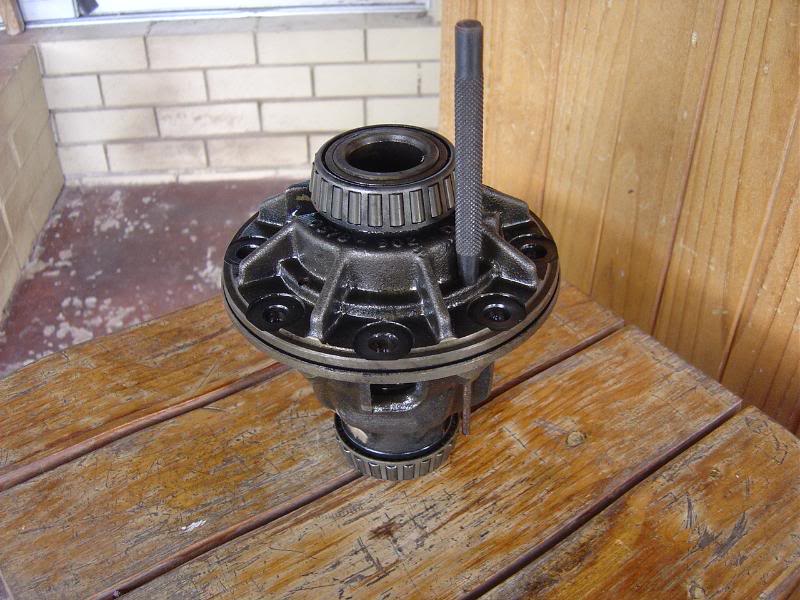
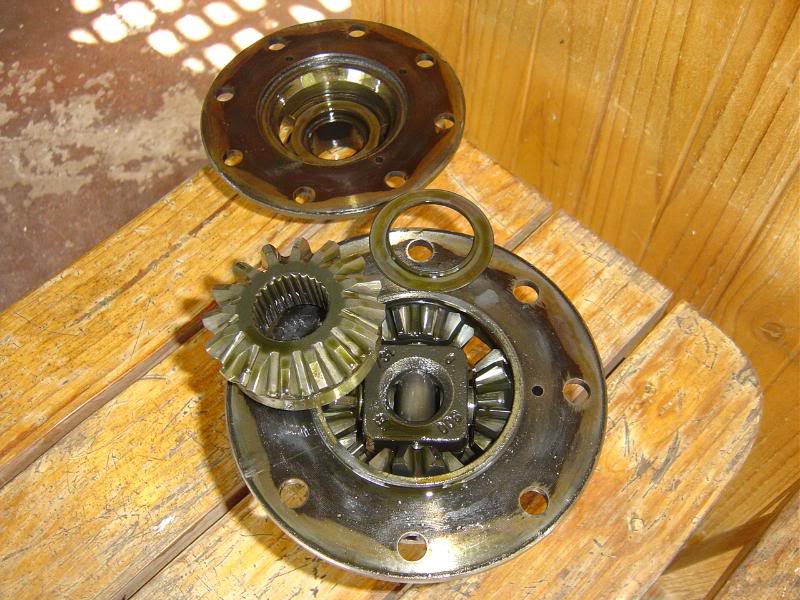
Prise the 2 halves apart.
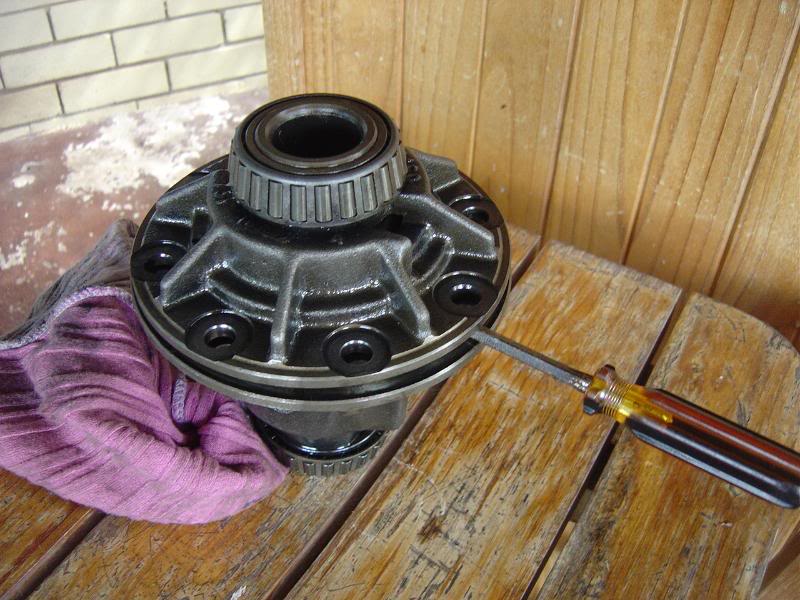
This is what you see..
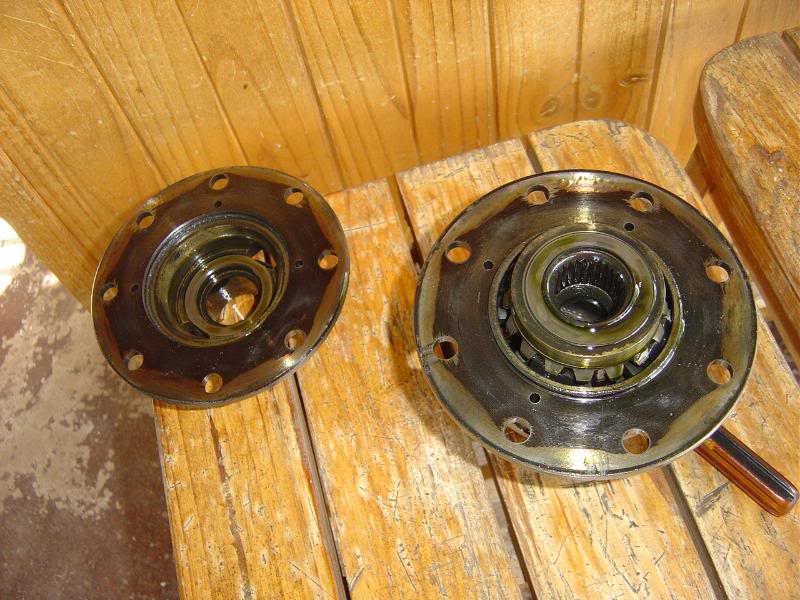
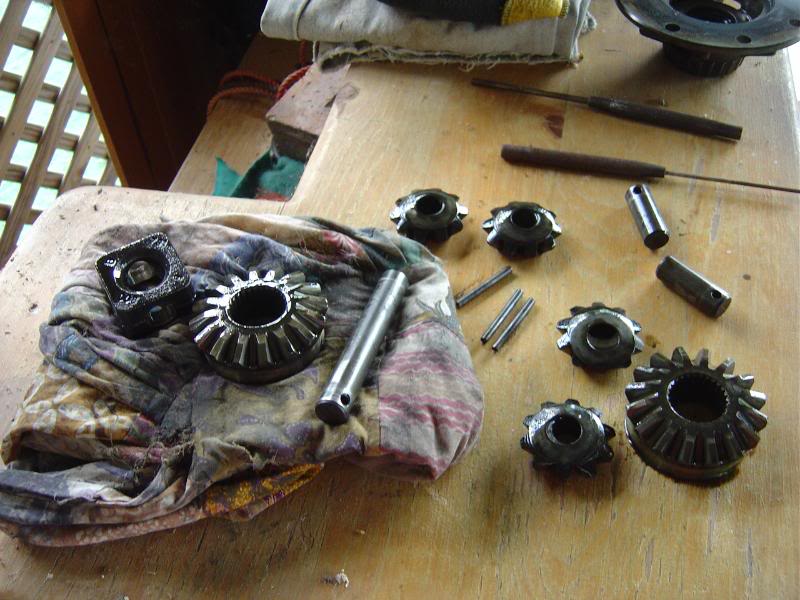
Lift out the top spider gears...making sure you also get the thrust washers from inside...these are vital and must go back in with the Lokka.
Next..knock out the long centre pin right through from one side...same with the half pins...knock one through to the other then out that side.
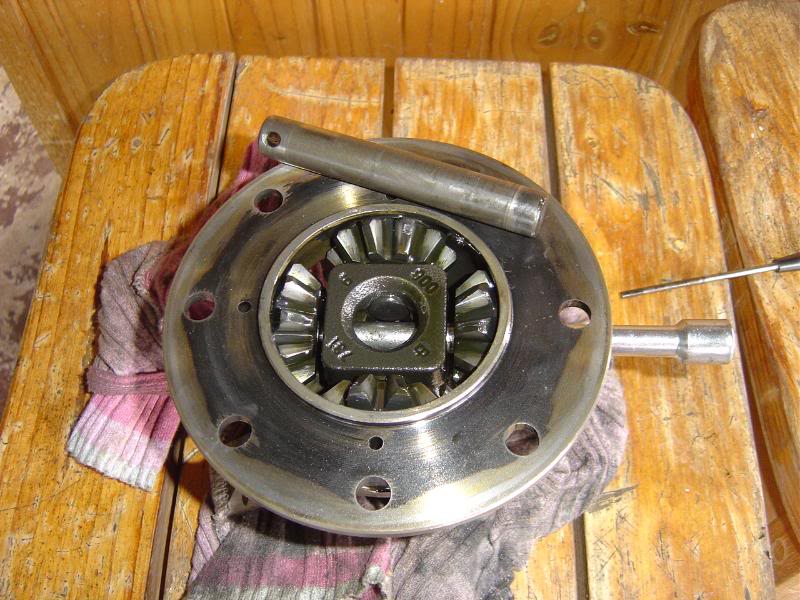
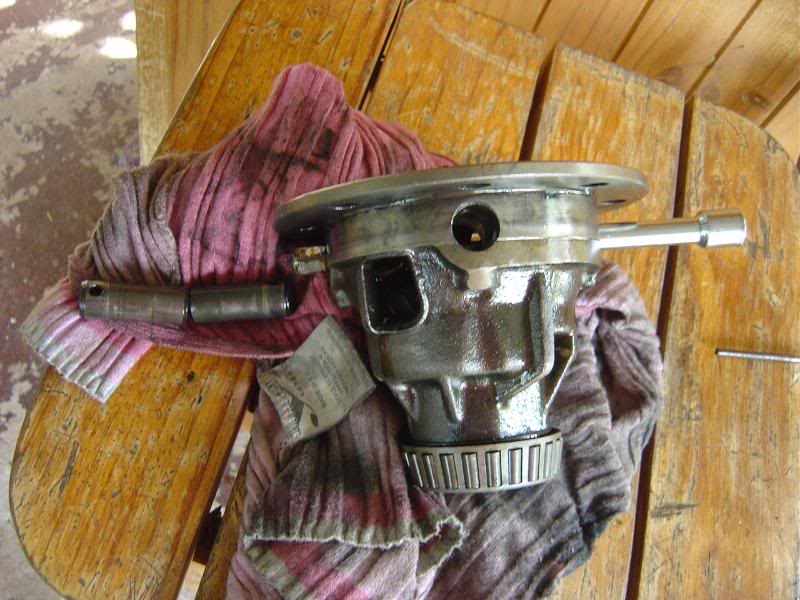
This is what comes out...there are flat thin washers that stick to the inside of the carrier at the ends of the spider gears..makes sure you have the 4 out. Clean the inside of the carrier with a clean cloth.
Clean, gease and replace thrust washers in carrier.
Get new centre pin and old half pins ready.
Install bottom half of Lokka as per instructions...fit centre pin and line up for the joiner pins to go through the end hole.

Fit rest of Lokka as per instructions and 2 short pins also lining them up for pins..
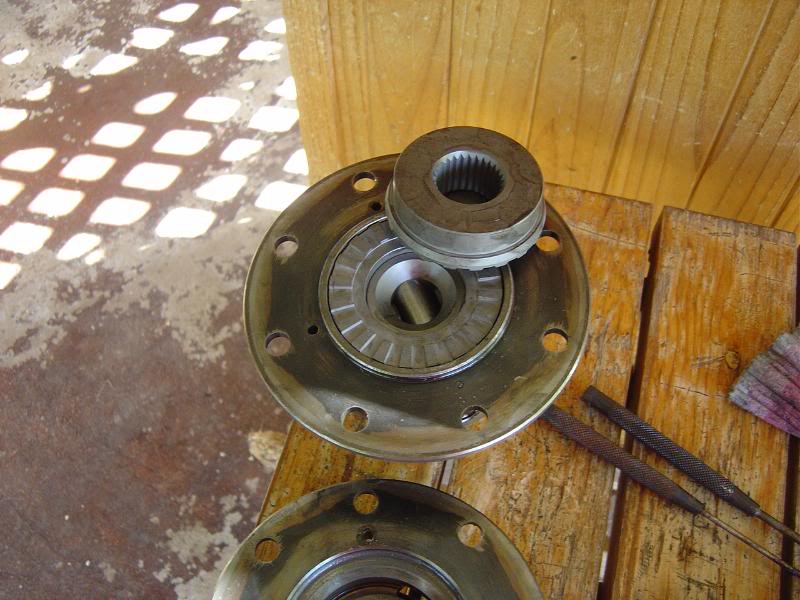
Fit thrust washer to other half...tap together..all the time lining up pin holes to hold 3 centre pins in place..Tap home pins..Bingo!..Finished! Fit crown wheel..remembering the bolts are left hand thread. The measured gap between the 2 Lokka halves should be 4mm...but it is a bitch to measure.
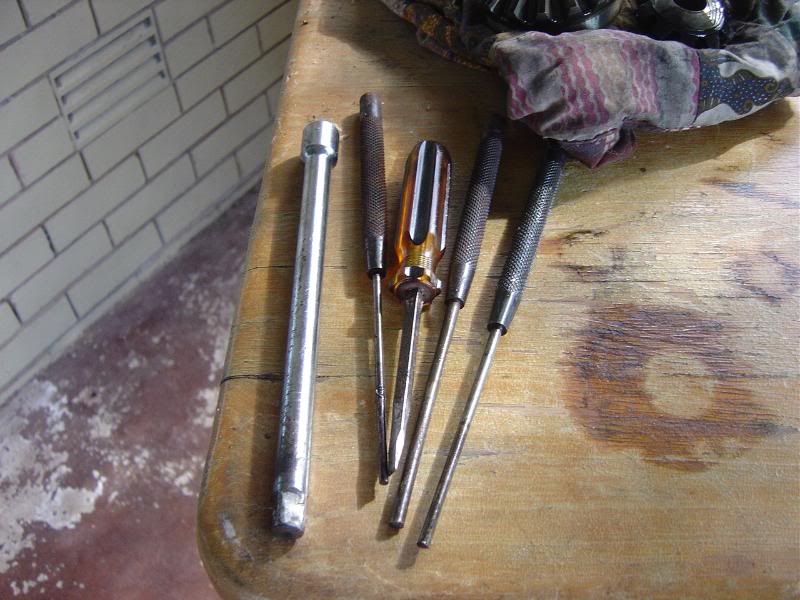
You will need these punches.
R
There are 3 pins holding the 2 halves together...punch them out being aware that there are only 3 holes that go all the way through on the bottom half but there are 4 holes on the top half so mark the halves so it goes back together the same way.
Prise the 2 halves apart.
This is what you see..
Lift out the top spider gears...making sure you also get the thrust washers from inside...these are vital and must go back in with the Lokka.
Next..knock out the long centre pin right through from one side...same with the half pins...knock one through to the other then out that side.
This is what comes out...there are flat thin washers that stick to the inside of the carrier at the ends of the spider gears..makes sure you have the 4 out. Clean the inside of the carrier with a clean cloth.
Clean, gease and replace thrust washers in carrier.
Get new centre pin and old half pins ready.
Install bottom half of Lokka as per instructions...fit centre pin and line up for the joiner pins to go through the end hole.
Fit rest of Lokka as per instructions and 2 short pins also lining them up for pins..
Fit thrust washer to other half...tap together..all the time lining up pin holes to hold 3 centre pins in place..Tap home pins..Bingo!..Finished! Fit crown wheel..remembering the bolts are left hand thread. The measured gap between the 2 Lokka halves should be 4mm...but it is a bitch to measure.
You will need these punches.
R
#5
_Brewster_
_Brewster_
-
- Guests
Posted 19 April 2008 - 11:48 AM
You legend Rory! Exceptional work old timer, now hurry up and thrash the hell out of it to see if it holds together! 
#6
TerrA LX
-

- Members
-

- 14,241 posts
Fulcrum Fixture
- Location:Sid 'n' knee
- Joined: 31-May 06
Posted 19 April 2008 - 12:01 PM
When re installing into the diff is it recommended to have the crown and pinion re lapped?
#7
_rorym_
_rorym_
-
- Guests
Posted 19 April 2008 - 12:15 PM
ALX..I leave that to the diff guys..Its all about crush on the bearing at the front of the pinion to get the backlash right..too bloody technical for me!
Maybe the Mods can make a sticky of it.?
R
Maybe the Mods can make a sticky of it.?
R
#8
ls2lxhatch
-

- Members
-
- 5,332 posts
- Location:Perth
- Car:LX Hatch
- Joined: 29-May 06
Posted 19 April 2008 - 01:11 PM
All the installation instructions I have read state that the crown and pinion do not require re lapping as the bearings have not been disturbed. In theory it should bolt back into the exact same position as before.When re installing into the diff is it recommended to have the crown and pinion re lapped?
#10
_GMV877_
_GMV877_
-
- Guests
Posted 23 April 2008 - 07:01 PM
i have run a lokka in a 4wd for over 5 years now, they are extremely hard to break if setup correct. the only weak point is the interlock pins shear when abused. For this to occur i was jumping the 4wd in comps. I do find they clunk at slow speed mainly parking situations. When the tyre prssures are slightly different ie 1-2psi the vehicle wanders on the freeway and can push the car under hard acceleration to one side. sharp cornering will spin the inside wheel as this is the one driving in a corner, but it will automatically lock the outer straight back in
enjoy it is exciting to drive!
enjoy it is exciting to drive!
#11
_Torrie_Man_
_Torrie_Man_
-
- Guests
Posted 08 June 2008 - 02:49 PM
Where do u get these? and how much do they cost? i cant find anything on google about banjo "lokkas"
cheers
cheers
#12
enderwigginau
-

- Moderators
-
- 2,000,527 posts
Admin Wrangler
- Name:Grant
- Location:Parramatta
- Car:76 LX Sedan, 4 seater
- Joined: 04-February 07
Posted 08 June 2008 - 05:22 PM
How about someone turn it into a Tech Article?
Put it in there and make any extra comments as needed.
What sizes are those punches?
Grant..
Put it in there and make any extra comments as needed.
What sizes are those punches?
Grant..
#13
_rorym_
_rorym_
-
- Guests
Posted 08 June 2008 - 06:07 PM
http://www.4wdsystem.../html/lokka.htm
Dont think there is one for bangos...axles wont take it anyway.
Grant Good idea..
about 4mm, 6mm and 8mm.roughly. Supercheap stuff...they come in a set.
R
Dont think there is one for bangos...axles wont take it anyway.
Grant Good idea..
about 4mm, 6mm and 8mm.roughly. Supercheap stuff...they come in a set.
R
Edited by rorym, 08 June 2008 - 06:08 PM.
#14
Evan
 View Garage
-

- Members
-
- 1,287 posts
Forum Fixture
- Location:Perth Western Australia
- Joined: 14-January 06
View Garage
Posted 29 July 2008 - 01:13 PM
and if you previously had a mini spool installed you wont have thrust washers.
i just rang up the shop that put the spool in and they gave me some for free.
Very happy with the LOKKA and didnt realise how much a spool makes your car handle like poo.
Evan.
i just rang up the shop that put the spool in and they gave me some for free.
Very happy with the LOKKA and didnt realise how much a spool makes your car handle like poo.
Evan.
#16
_@milco@_
_@milco@_
-
- Guests
Posted 07 October 2008 - 08:58 PM
any one knwo if they make them for large salsbury diff's? wouldnt mind one in the hq
#17
Evan
View Garage
-
- Members
-
- 1,287 posts
Forum Fixture
- Location:Perth Western Australia
- Joined: 14-January 06
View Garage
Posted 19 October 2008 - 09:02 AM
doesnt list it on their website.
try give them a call.
Ev.
try give them a call.
Ev.
#18
StephenSLR
-
- Members
-
- 6,714 posts
Oh My, Don't you post alot
- Name:Stephen
- Location:Sydney
- Car:1976 LX SL/R
- Joined: 12-November 05
Posted 31 October 2008 - 11:22 AM
I notice this set up is for 4WD's, can someone explain the benefits of installing them into the diffs of regular cars and what differences in driving to expect?
s
s
#19
_rorym_
_rorym_
-
- Guests
Posted 07 January 2009 - 10:03 PM
Full 2 wheel drive/lockup under power...unlocks outside wheel similiar to an LSD .
R
R
#20
_UNVSM8_
_UNVSM8_
-
- Guests
Posted 24 March 2009 - 11:46 AM
Hey rory whats the price on one of these?
Cheers Ben
Cheers Ben
#21
_Machine_
_Machine_
-
- Guests
Posted 25 March 2009 - 10:34 AM
Cant get Lokka for 12 bolt salisbury.
M.
M.
#22
_UNVSM8_
_UNVSM8_
-
- Guests
Posted 25 March 2009 - 12:28 PM
i know that but i was asking how much this particular one was...

#24
_Machine_
_Machine_
-
- Guests
Posted 25 March 2009 - 02:04 PM
wasnt replying to your post mate, there was an earlier post that said they did 10 & 12 bolts centres; i think it was even on their website.
Cheers, M.
Cheers, M.
#25
_gh20_
_gh20_
-
- Guests
Posted 26 March 2009 - 05:31 PM
Most Group C cars run a Locker, turn in way better than a spool. If your keen on one for a 10 bolt try Harrops


1 user(s) are reading this topic
0 members, 1 guests, 0 anonymous users

