Stolen from L8.com

I like cars.


 View Garage
Posted 03 June 2010 - 11:22 AM
Forum Fixture
 View Garage
Posted 03 June 2010 - 11:45 AM
Admin Wrangler

Posted 03 June 2010 - 12:55 PM
I like cars.
View Garage
Posted 03 June 2010 - 01:11 PM
Admin Wrangler
Posted 03 June 2010 - 01:32 PM

Posted 03 June 2010 - 02:15 PM
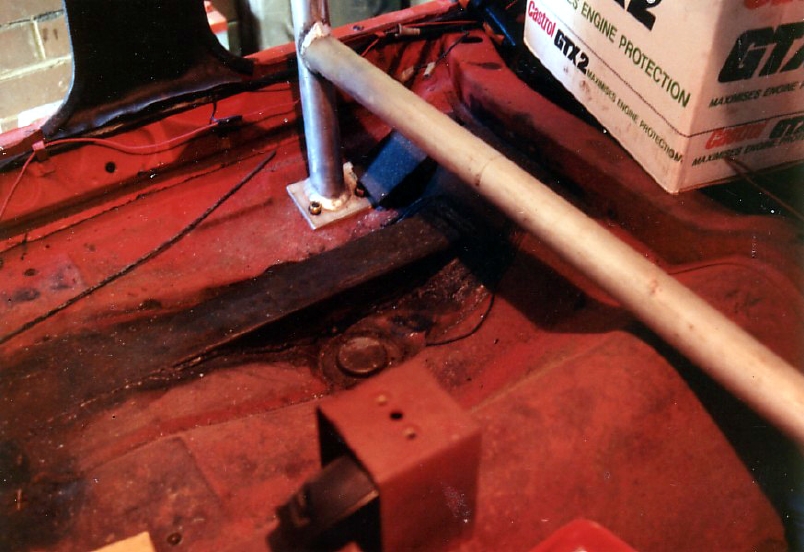
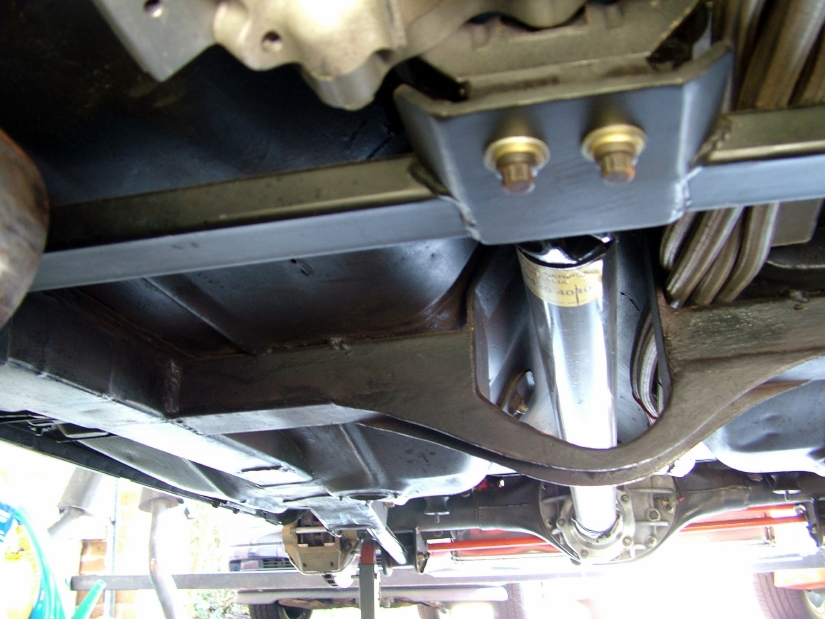
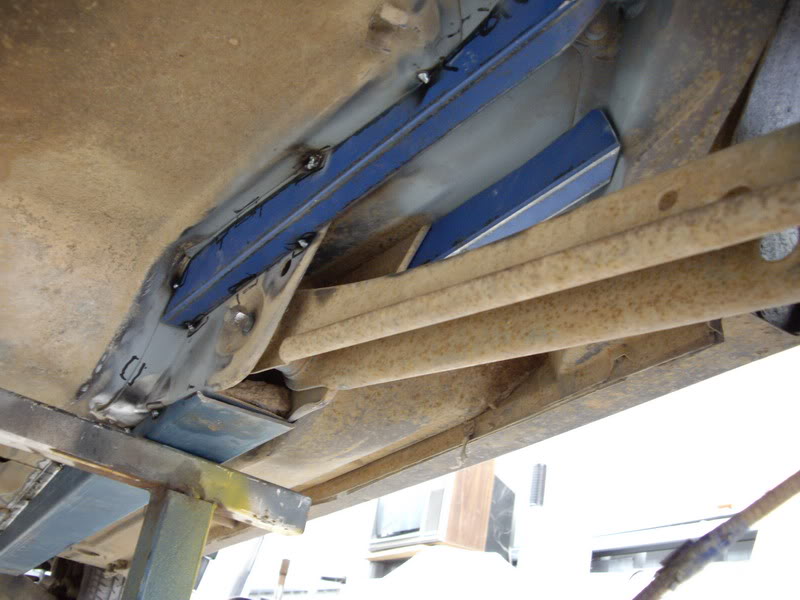
To get the maximum benefit, the chassis rail "extensions' should really tie to the front rails and the rear lower suspension pickup. Mine do.
Edited by ls2lxhatch, 03 June 2010 - 02:16 PM.
Thrillseeker

Posted 03 June 2010 - 08:28 PM
Are you saying that you have run the SHS inside the Torana chassis rail up to the k-frame mount?

Posted 14 June 2010 - 11:02 AM
Edited by BlownOutlaw, 14 June 2010 - 11:08 AM.
Forum Fixture
 View Garage
Posted 14 June 2010 - 05:13 PM
 torana 040.JPG 1.7MB
127 downloads
torana 062.JPG 1.98MB
121 downloads
torana 318.JPG 96.3K
138 downloads
torana 185.JPG 357.06K
127 downloads
torana 040.JPG 1.7MB
127 downloads
torana 062.JPG 1.98MB
121 downloads
torana 318.JPG 96.3K
138 downloads
torana 185.JPG 357.06K
127 downloads
Posted 14 June 2010 - 06:13 PM
Just to throw my two bobs worth in, before I restored my hatch the old 327 chev with only 400hp ripped out the n/s lower contol arm mount from the body(wasn't rusty). I profiled the extensions to the floor which inserted into the end of the original chassis rail and tied them into the lower control arm mounts, I added flanges to the profiled extensions as per original design and then spot welded them to the floor every 15mm and fully welded the extensions to the original rail ends and at the control arm mount, and also spot welded all control arm mounts every 20mm to the body. I was surprised at how much better the car handled through tight corners and rough s bends. Andy is right in saying that the main reason of this design is to inprove the control arm mount strength and that was my main aim but my extensions did much more than that to my surprise it added so much more. Its funny how putting the right bit of metal in the right spot makes all the differance, I recon the engineers at Holden spend untold amount of hours changing brackts and positions ect on new cars designs to reduce twist and unwanted flex.
Forum Fixture

Posted 14 June 2010 - 07:25 PM
Posted 15 June 2010 - 08:09 AM

Posted 15 June 2010 - 07:42 PM
 are you gonna add cross bracing on it somewhere or will it be fine like it is?
Edited by Kush, 15 June 2010 - 07:49 PM.
Forum Fixture
Posted 15 June 2010 - 09:16 PM
Posted 15 June 2010 - 10:13 PM
Posted 16 June 2010 - 09:07 PM
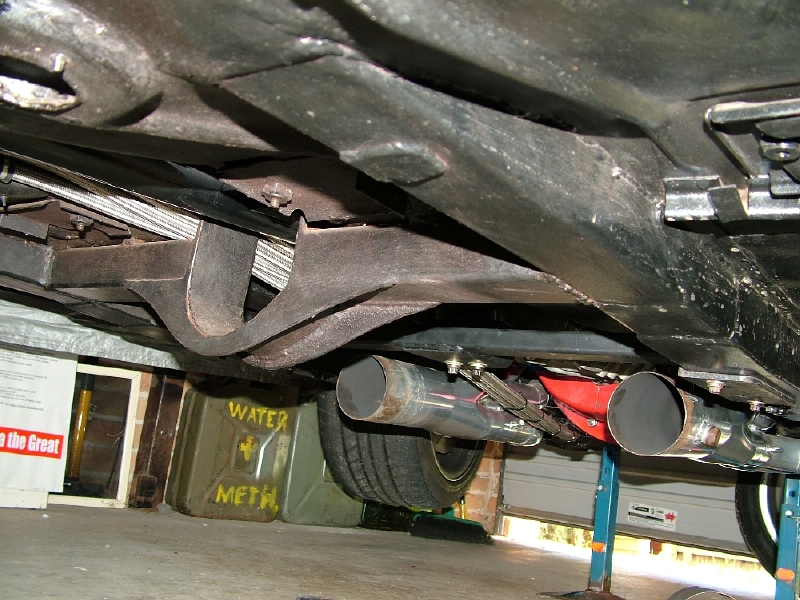
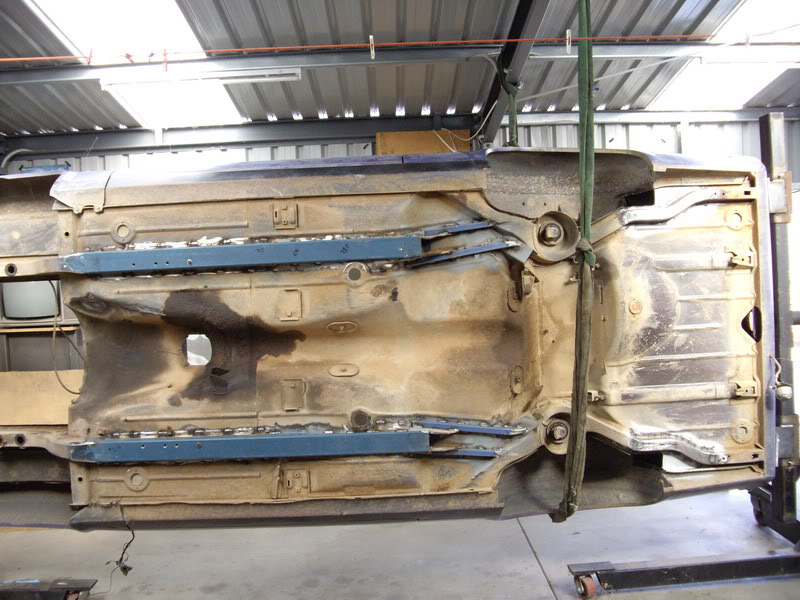
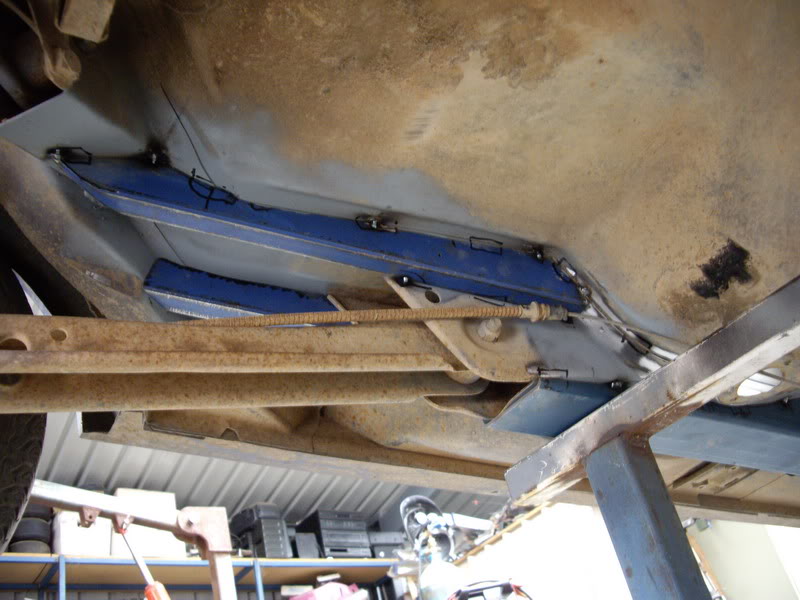
With my hatch i used 89x89x3.5 RHS fitted over the original rail all the way from the front k frame to the rear lower mount cut and shaped to
the profile of the floor. But i also added some 50x25x2 RHS each side of the lower mount to tie it into the upper mount and the sub frame, also
cut and shaped to the profile of the floor. This was all done with the ok of an engineer. Just be aware you may have to modify fuel lines, brake lines
and even hand brake cables.
Forum Fixture
Posted 16 June 2010 - 10:41 PM
Posted 17 June 2010 - 07:46 AM
Fulcrum Fixture

Posted 08 July 2010 - 02:01 PM
Posted 17 March 2014 - 05:03 PM
Hi guys,
I saw on here someone posted a drawing of the steels measurements, but I cant find it anymore,
Does anyone have detailed drawings or measurements?
Cheers
Posted 13 March 2018 - 01:11 PM
With my hatch i used 89x89x3.5 RHS fitted over the original rail all the way from the front k frame to the rear lower mount cut and shaped to
the profile of the floor. But i also added some 50x25x2 RHS each side of the lower mount to tie it into the upper mount and the sub frame, also
cut and shaped to the profile of the floor. This was all done with the ok of an engineer. Just be aware you may have to modify fuel lines, brake lines
and even hand brake cables.
I'm thinking I'll have to do this to a sedan i'm looking at buying, just to give it strength. It has been sitting in a paddock for many years, needs a tonne of work, and I know it'll cost a small fortune to rebuild it, but it will be my forever car, so i'll take my time and build it with my Autistic son, and teach him how to work with his hands. The only part i won't be touching, if I can help it, will be the front rails. Every brace on the floor will be covered over with RHS, so there will be no dramas with the floor. Weld in some new floorpans front and rear, new boot floor, and that will have the bones pretty much complete. Bit of work with some sills, and possibly the bottom of the A pillar.


0 members, 1 guests, 0 anonymous users

