
Thanks lads, glad to be of service. Comments like yours makes it all worth while.
Ruts

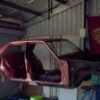
I'll show you how I cut guards from start to finish
Started by
Ruts
, Jul 29 2008 05:27 PM
146 replies to this topic
#76

Ruts
-
- Moderators
-

- 1,118 posts
How Fast!?
- Location:Bargo, NSW
- Car:Blown A9X replica, Black SS hatchback, LH SLR5000
- Joined: 23-December 06
Posted 19 November 2008 - 07:02 PM
#77
Ruts
-
- Moderators
-
- 1,118 posts
How Fast!?
- Location:Bargo, NSW
- Car:Blown A9X replica, Black SS hatchback, LH SLR5000
- Joined: 23-December 06
Posted 15 December 2008 - 07:48 PM
Well we're getting near the pointy end. I just finished glassing the inside of the rear flare that needed to be cut to get the correct gap in the door. Remember this:
 drivers flares 029.jpg 113.49K
6 downloads
drivers flares 029.jpg 113.49K
6 downloads
drivers flares 032.jpg 126.07K
7 downloads
What to do next is to clean the inside of the cut so that the glass mat will have something to stick too. I used my small belt sander,
drivers flares 037.jpg 136.33K
6 downloads
drivers flares 039.jpg 111.34K
6 downloads
drivers flares 040.jpg 82.3K
6 downloads
After cleaning up the glass on the inside I take to it with my fibreglass repair kit
drivers flares 041.jpg 170.12K
6 downloads
This is how I will place the glass mat on the inside when I mix the resin and hardener
drivers flares 042.jpg 91.18K
6 downloads
After it is mixed and put in place I lay it out in the sun to help it dry.
drivers flares 043.jpg 170.84K
6 downloads
drivers flares 051.jpg 123.46K
6 downloads
This is the outside after sanding
drivers flares 038.jpg 74.34K
8 downloads
Ok so after all the repairs are done I applied primer. As there is a bit of paint work to do on this project I decided to send the car to a friends paint shop to have it painted. Here are the repairs after primer.
drivers flares 049.jpg 102.62K
6 downloads
drivers flares 047.jpg 140.54K
8 downloads
drivers flares 046.jpg 133.91K
6 downloads
drivers flares 050.jpg 142.92K
7 downloads
drivers flares 044.jpg 161.54K
7 downloads
Just a quick one here, I spoke with the owner who wanted an old aerial hole welded up in the top of the passengers front guard. Naturally its a good time to this as we have to paint the bonnet and bonnet scoop.
drivers flares 045.jpg 113.44K
7 downloads
I refitted the rear spoiler for transport and its off to the painters tomorrow. Keep watching within the week for the finished product.
drivers flares 048.jpg 127.55K
7 downloads
Ruts
#78
_lx-304_
_lx-304_
-

- Guests
Posted 15 December 2008 - 08:50 PM
excellent work ruts,i love to see someone pay attention to detail,whether it is seen or not.thats why i did mine myself because it is hard to find someone who will put the time and effort in.im sure the owner of the car is very happy with it so far.keep up the good work.
dave
dave
#79
Mort
 View Garage
-

- Members
-
- 2,760 posts
Lotsa Posts!
- Name:Mort
- Location:Moranbah, QLD.
- Car:74 LH SL/R 4.2, 75 LH 4 door 186
- Joined: 16-December 07
View Garage
Posted 16 December 2008 - 09:21 AM
Ruts, can't remember if you have mentioned or if someone else has asked but can you use the fiberfill stuff (fiberglass bog) or is it a better,stronger,neater finish using the repair kit.
Mort
Mort
#80
Ruts
-
- Moderators
-
- 1,118 posts
How Fast!?
- Location:Bargo, NSW
- Car:Blown A9X replica, Black SS hatchback, LH SLR5000
- Joined: 23-December 06
Posted 16 December 2008 - 09:04 PM
G'day Mort, the only place I use the fibrebog is on the outside of the flare. I do this to to firstly hold the end piece in place so that the gap is correct and secondly it finishes well so all you have to do is primer it once you rub it back. I do it in this order:
Cut the flare and get the gap you want
drivers flares 029.jpg 113.49K
8 downloads
Put a piece of tape on the bottom to hold it where you want it and then use your fibrebog to fill the gap, this also hold the flare in place until you finish the fibreglassing on the inside.
drivers flares 032.jpg 126.07K
7 downloads
Glass the inside to add strength
drivers flares 043.jpg 170.84K
7 downloads
Until it dries
drivers flares 051.jpg 123.46K
7 downloads
then finish the fibrebog on the outside
drivers flares 038.jpg 74.34K
7 downloads
Don't forget to grind a sort of V in the cut so that the filler has something to bite too and it makes feathering the edge much easier.
Hope this helps buddy.
Ruts
#81
_sleepy_
_sleepy_
-
- Guests
Posted 22 December 2008 - 08:02 PM
come on ruts the car is back..Where are the pics ?? Slack unit..
#82
Ruts
-
- Moderators
-
- 1,118 posts
How Fast!?
- Location:Bargo, NSW
- Car:Blown A9X replica, Black SS hatchback, LH SLR5000
- Joined: 23-December 06
Posted 22 December 2008 - 10:31 PM
Yeah Sleepy your'e right the car is back, how did you know that, you must know someone. The car arrived back home about 1pm and I put it straight back in the shed so that I can put it all back together over the next few days so that owner can enjoy it. I'm very happy with the way it turned out, what do you guys think.


Next lot of photo's will be the final assembly before it goes back to the owner. RACE CAR NEXT.
Next lot of photo's will be the final assembly before it goes back to the owner. RACE CAR NEXT.
#83

Posted 23 December 2008 - 05:49 AM
Looks great, is there enough clearance for the rear tyres now or will they still touch lightly every now and then?
#84
_sleepy_
_sleepy_
-
- Guests
Posted 23 December 2008 - 07:25 AM
Bit more paint needed inside rear spoiler where the rhs lip goes down the boot lid. Or will that pull in when it is all bolted up and not be seen..Might have to bring my torrie up for u to do it up..LOL I should live so long.!! Sleepy
#85
racean69
-
- Members
-
- 782 posts
Forum Fixture
- Name:Rod
- Location:Central QLD
- Car:LH sedan
- Joined: 07-November 05
Posted 23 December 2008 - 09:16 AM
looking good 
#86
Ruts
-
- Moderators
-
- 1,118 posts
How Fast!?
- Location:Bargo, NSW
- Car:Blown A9X replica, Black SS hatchback, LH SLR5000
- Joined: 23-December 06
Posted 23 December 2008 - 06:27 PM
76LXHATCH: Clearance on the rear should be no problem. But I suppose it may depend on the rear springs and what spring rating they are.
SLEEPY: Yeah bring it up and I'll do it up for you , AGAIN. What colour this time???
Ruts.
SLEEPY: Yeah bring it up and I'll do it up for you , AGAIN. What colour this time???
Ruts.
#87
Ruts
-
- Moderators
-
- 1,118 posts
How Fast!?
- Location:Bargo, NSW
- Car:Blown A9X replica, Black SS hatchback, LH SLR5000
- Joined: 23-December 06
Posted 21 January 2009 - 07:26 PM
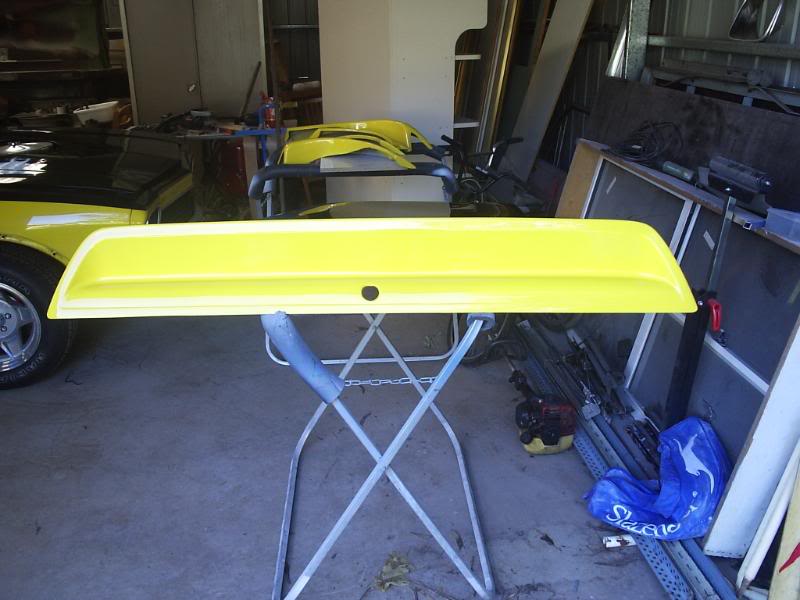
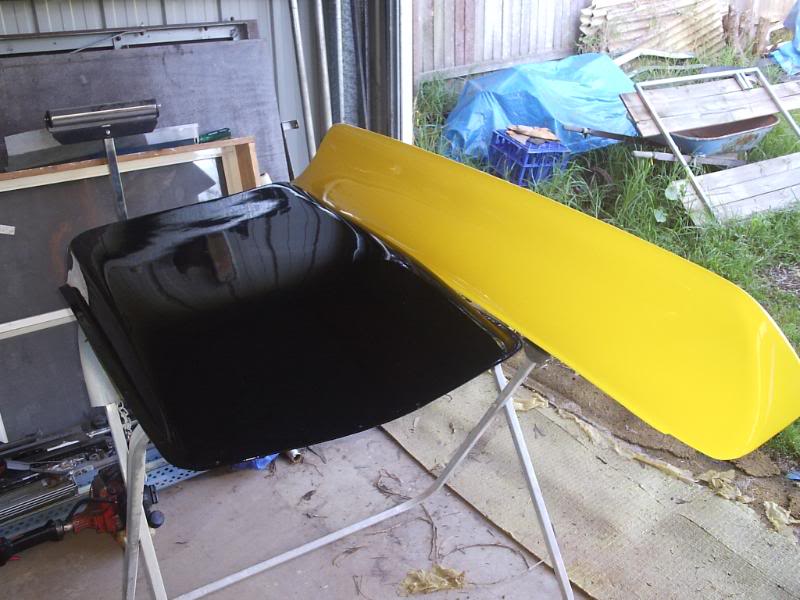
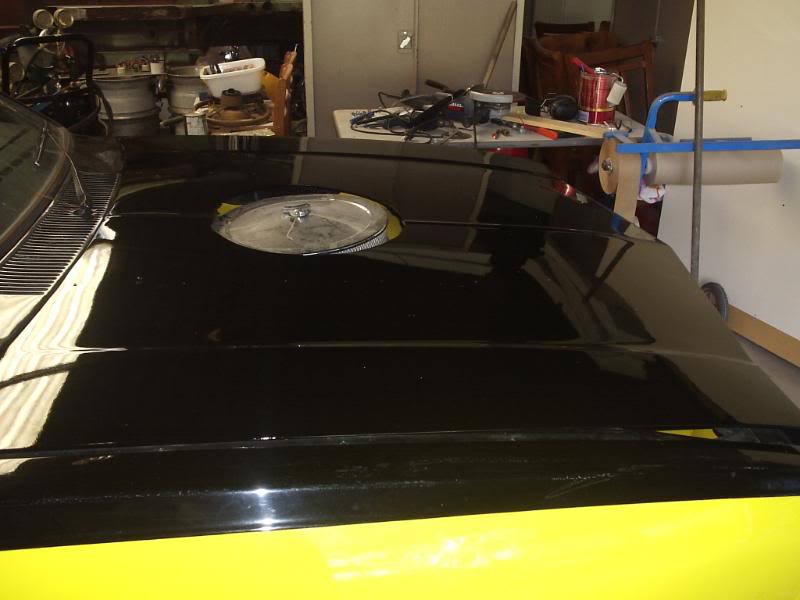
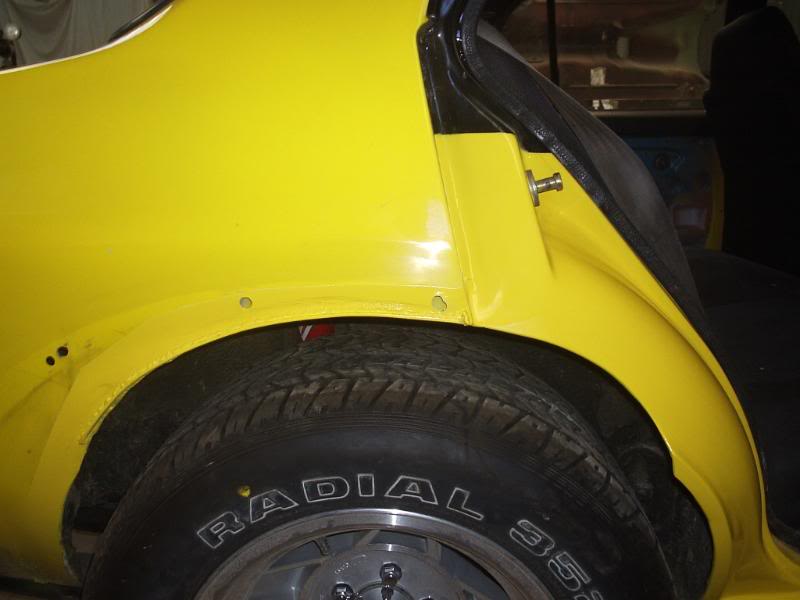
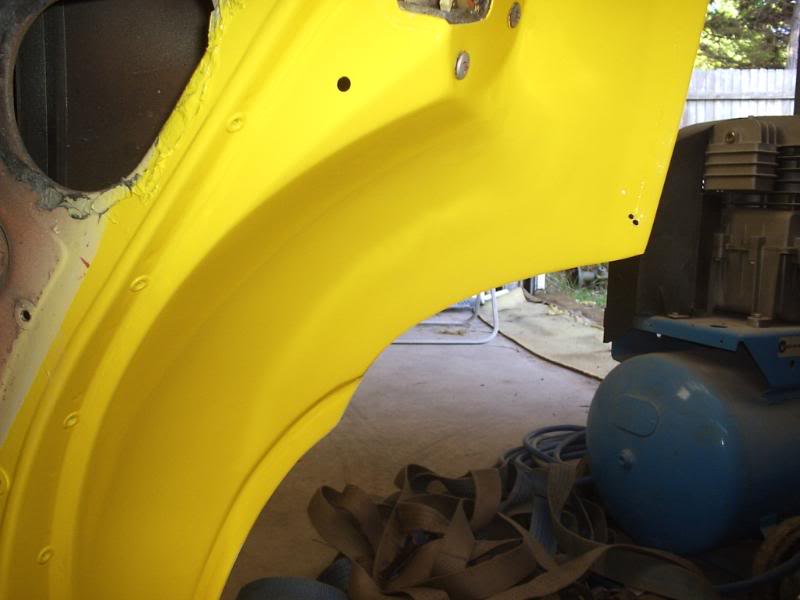
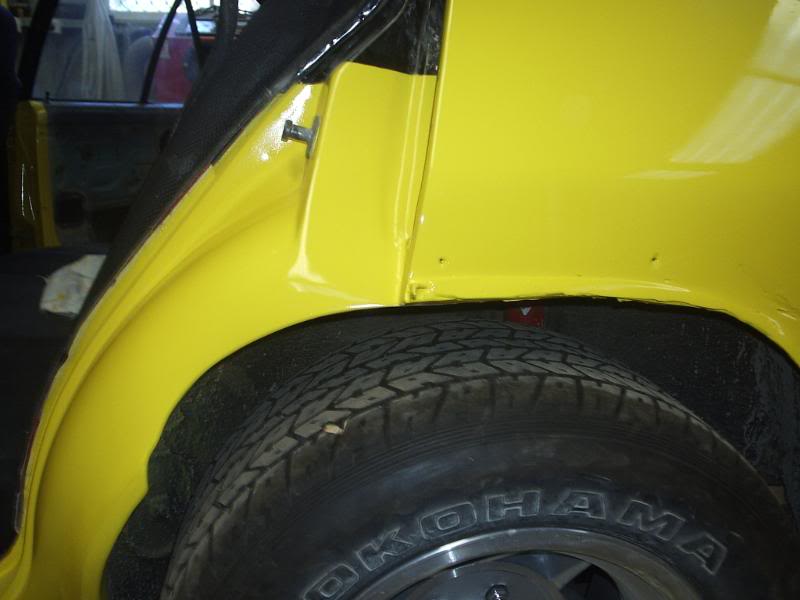
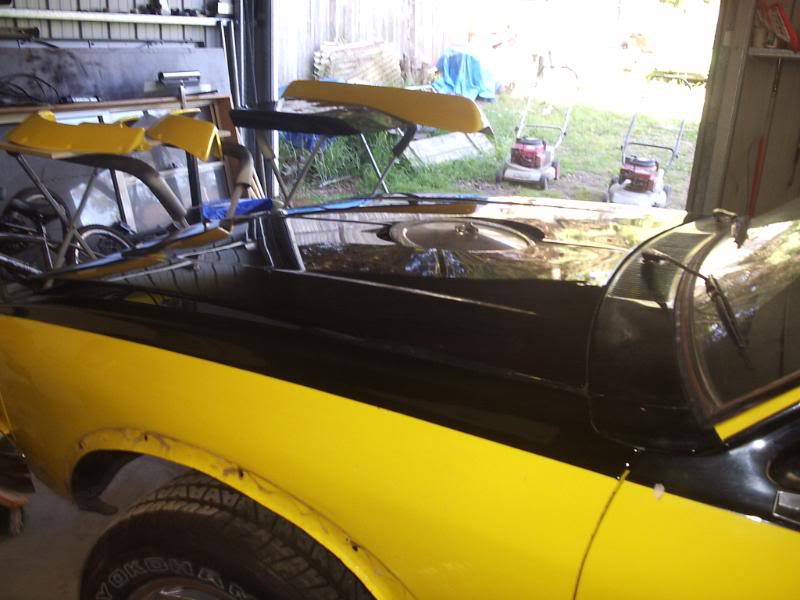
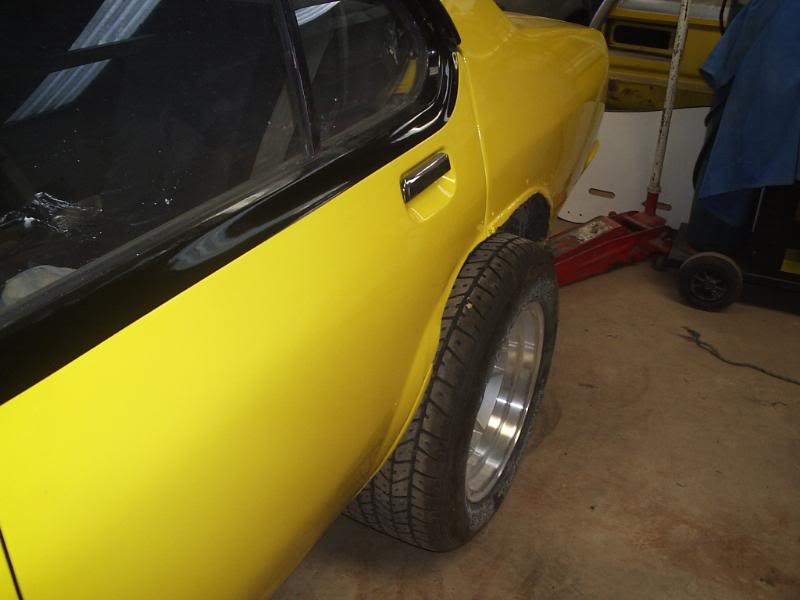
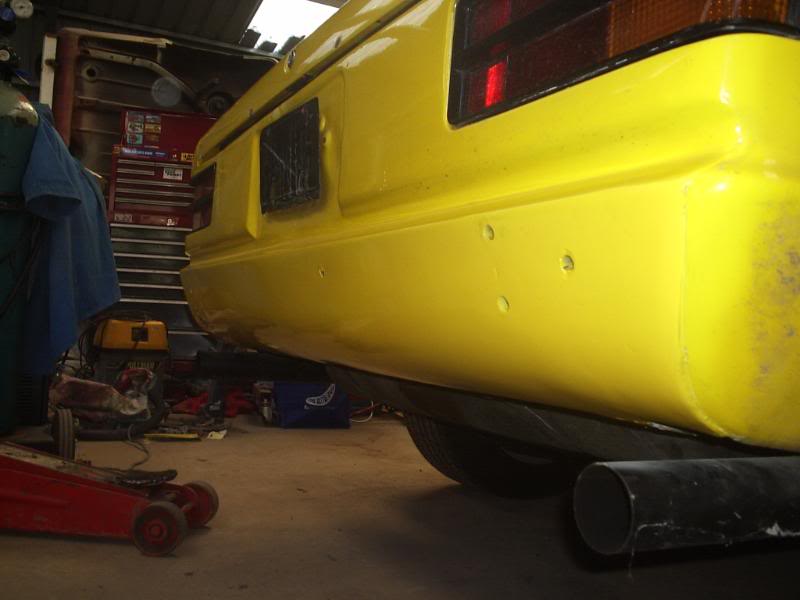
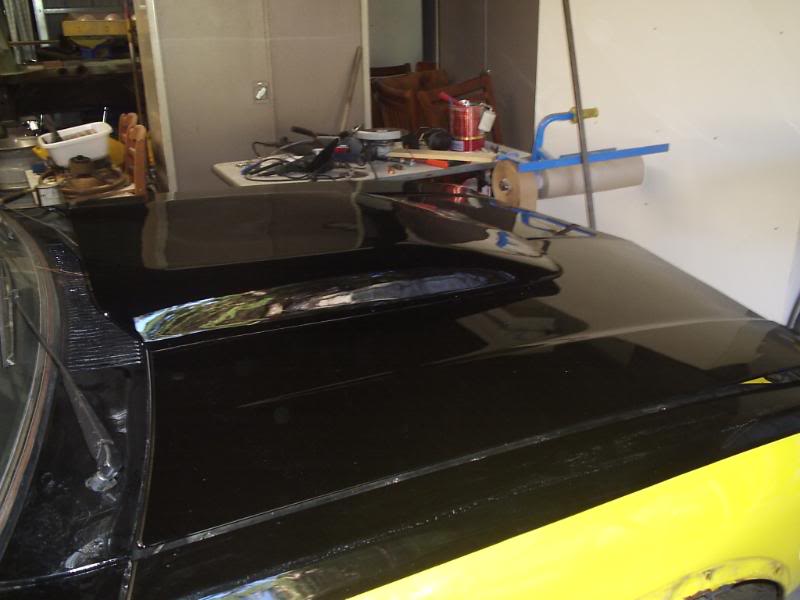
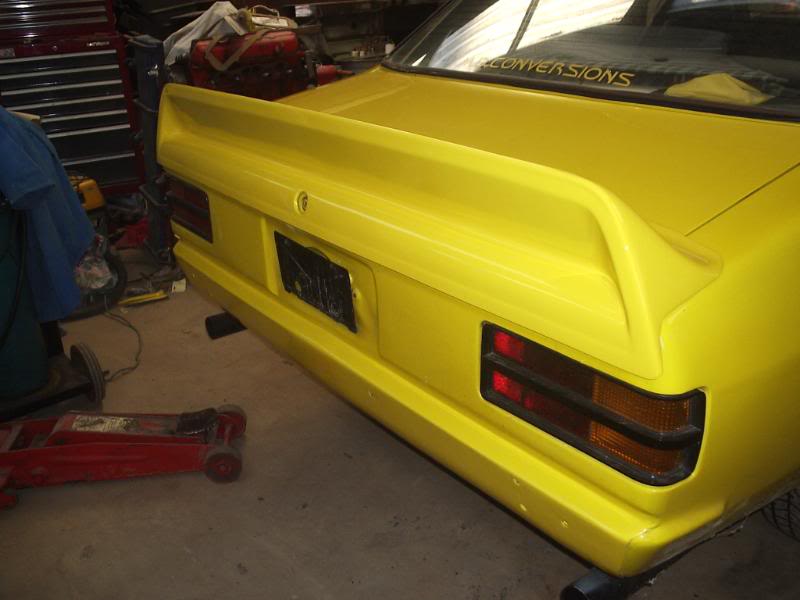
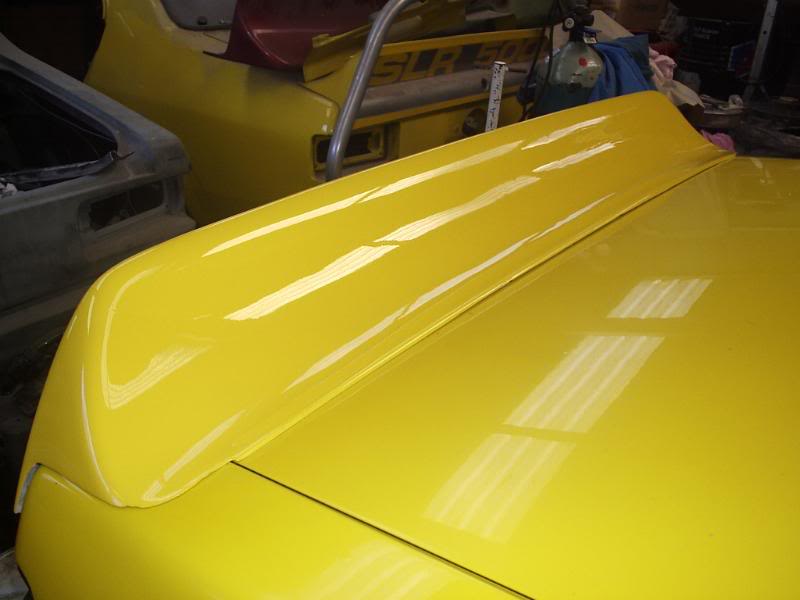
Hi everyone, sorry for taking so long but with Chrissy I've been busy with work and this will be the final entry on this car. I delivered it back to the owner today so I took a heap of photo's of the finished product. I'm very happy with the way it turned and the owner should be as well. When I dropped it off at his father's place he could not believe it was the same car so I guess all turned out well. Please feel free to comment on what you see and if anyone has any ideas that I may use in the future then let me know. I hope some have learn't a few tricks and if only one person can benefit from what I've done then I'm happy. Keep an eye on the panel and paint thread as I plan to do a lot more this year as I am starting on my cars. Please I am happy to answer any questions that anyone has but don't ask me to do any work. I need a break from helping others and I need to get the race replica ready for the Masters so keep an eye on that build. So what does everyone think (be honest)?????
cutting guards 208.jpg 287.11K
7 downloads
cutting guards 209.jpg 316.72K
10 downloads
cutting guards 210.jpg 330.03K
6 downloads
cutting guards 211.jpg 295.62K
7 downloads
cutting guards 212.jpg 225.66K
6 downloads
cutting guards 213.jpg 171.03K
6 downloads
cutting guards 214.jpg 126.87K
7 downloads
cutting guards 215.jpg 267.55K
10 downloads
cutting guards 216.jpg 185.77K
7 downloads
cutting guards 217.jpg 188.61K
7 downloads
cutting guards 218.jpg 295.36K
7 downloads
cutting guards 219.jpg 240.32K
6 downloads
cutting guards 220.jpg 182.42K
7 downloads
cutting guards 221.jpg 125.09K
6 downloads
cutting guards 222.jpg 138.89K
7 downloads
cutting guards 223.jpg 270.48K
6 downloads
cutting guards 224.jpg 226.88K
6 downloads
cutting guards 225.jpg 120.91K
6 downloads
cutting guards 226.jpg 176.59K
6 downloads
cutting guards 227.jpg 198.12K
6 downloads
cutting guards 228.jpg 290.9K
6 downloads
cutting guards 229.jpg 376.93K
6 downloads
cutting guards 230.jpg 385.1K
6 downloads
#88
Ruts
-
- Moderators
-
- 1,118 posts
How Fast!?
- Location:Bargo, NSW
- Car:Blown A9X replica, Black SS hatchback, LH SLR5000
- Joined: 23-December 06
Posted 21 January 2009 - 07:29 PM
By the way I nearly forgot, I told the owner that he needs to shoot a bit of black on the inside of the door flares. Not enough hours in the day and it way too hot in the shed.
Ruts.
Ruts.
#89
Posted 21 January 2009 - 07:45 PM
Overall looks great, everything is straight and even unlike my car! Only thing I can see is that its a pity so much had to be taken off the front of the front flares. I find it surprising that there are no aftermarket flares that are built slightly bigger to cater for bigger wheels and tyres considering so many people have trouble with this. But then again I probably wouldn't notice it if I didn't know it had been done!
#90
Ruts
-
- Moderators
-
- 1,118 posts
How Fast!?
- Location:Bargo, NSW
- Car:Blown A9X replica, Black SS hatchback, LH SLR5000
- Joined: 23-December 06
Posted 21 January 2009 - 09:05 PM
G'day 76lxhatch, you make a good point and your'e right I may have taken a bit too much off the front. When I stood back and looked at it a few times I thought the same but it's best to make more than not enough.
#91
nutboy
-

- Members
-
- 92 posts
Forum Member
- Joined: 04-February 06
Posted 21 January 2009 - 10:04 PM
Looking good Ruts. Ive got my tools ready just call me.
#92
Posted 22 January 2009 - 07:00 AM
I don't see how you could have avoided it, just sad that it doesn't seem to be possible to get great flares, they all seem to need a lot of workG'day 76lxhatch, you make a good point and your'e right I may have taken a bit too much off the front. When I stood back and looked at it a few times I thought the same but it's best to make more than not enough.
#93
MRLXSS
-

- Members
-
- 12,414 posts
The Render Garage
- Name:Matt
- Location:Upwey, Melbourne
- Car:355 LX Hatchback, DeLorean DMC-12, LX SS Hatch, VY Cross8 Crewman
- Joined: 09-November 05
Posted 22 January 2009 - 08:06 AM
Legend mate! Top stuff!!!
Should be made into a Wiki or something!
Thanks mate!
Should be made into a Wiki or something!
Thanks mate!
#94
_LH350_
_LH350_
-
- Guests
Posted 26 January 2009 - 12:49 PM
Ruts, I can't thank you enough for the work you have done. It is a credit to you as a craftsman and as a mate. I look forward to seeing your projects getting off the ground this year.
I know you are not advertising for work but I would recommend you to anyone needing work done to their torry.
Thanks again mate, once the engineers certificate is done I will be seeing you again!!
I know you are not advertising for work but I would recommend you to anyone needing work done to their torry.
Thanks again mate, once the engineers certificate is done I will be seeing you again!!
#96
_keitho5770_
_keitho5770_
-
- Guests
Posted 21 April 2009 - 11:25 PM
well done good to see some one who nose what he is doing with the tools an the computer
#97
mrlctorana
-

- Members
-
- 572 posts
Forum Fixture
- Location:North-West Tassie
- Joined: 17-January 06
Posted 29 April 2009 - 09:14 PM
Top job ruts, nice gaps on the doors and flare. Had to modify my flares aswell to fit the bgger wheels, so know how much work goes into it.
#98
Ruts
-
- Moderators
-
- 1,118 posts
How Fast!?
- Location:Bargo, NSW
- Car:Blown A9X replica, Black SS hatchback, LH SLR5000
- Joined: 23-December 06
Posted 29 April 2009 - 09:27 PM
Just heard from the owner, its fully engineered and registered.
And that my friends is how you do that.
Ruts.
And that my friends is how you do that.
Ruts.
#99
_johnharte_
_johnharte_
-
- Guests
Posted 01 May 2009 - 09:10 AM
Looking forward to your new posts in the Paint & Panel thread RUTS!
Obviously when you start your new projects!
John
Obviously when you start your new projects!
John
#100
_NVS_084_
_NVS_084_
-
- Guests
Posted 26 May 2009 - 12:43 PM
Hey mate im aware this is an old topic but what did you use to sand the rear wing back ? Ive been sanding mine with wet and dry and its just taking too long espicially when theres 15 different colloured coats of enamel ? I havnt been game to hit mine with the sander.


1 user(s) are reading this topic
0 members, 1 guests, 0 anonymous users

