Jump to content


For those about to paint


  • Please log in to reply
26 replies to this topic

#1 _cookinwithal_

_cookinwithal_
  • Guests

Posted 05 November 2008 - 01:47 PM

Hi, been doing a bit of painting today so i thought I would share some pics and tips with you of how to go about painting your car shell. ( doors removed)
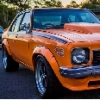
This car I sprayed is not a Torana but a late model Commodore but you will be able to use the same tips for your Torry.

This topic is primarily for people who havent painted before but if you are experienced and want to add to any of this----- go for it.

The paint used was 2k and I wouldnt recomend you do this at home in suburbia as this paint can be deadly and you should only paint this stuff in a booth or well away from homes and people. Im lucky as Im on a property well away from Homes.
Ok here we go

Firstly
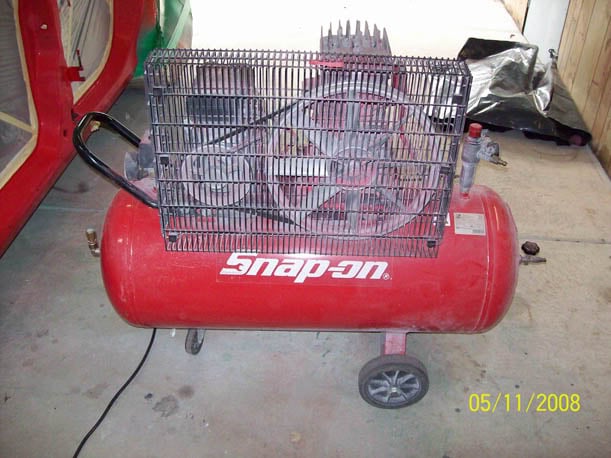
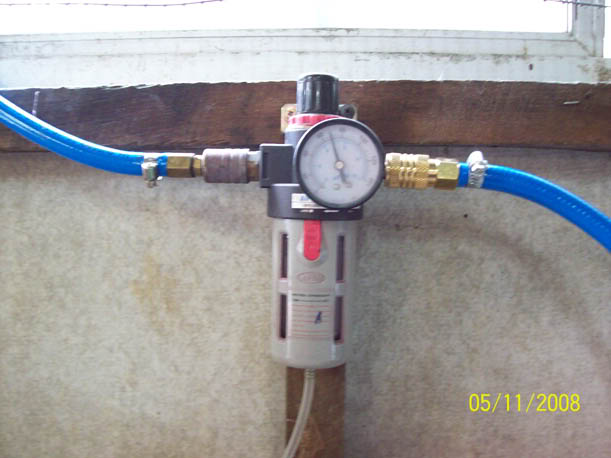
Get yourself a decent compressor as a small one bought from your hardware store will be pushing it.

Posted Image

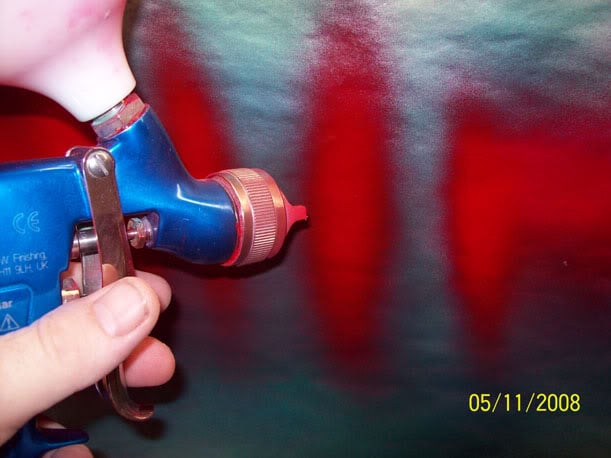
Get yourself a decent spray gun, I use Devilbiss and I bought this one on ebay for $400.00 and i use a 1.3mm tip and use a pressure regulator on the gun for best results.

Posted Image


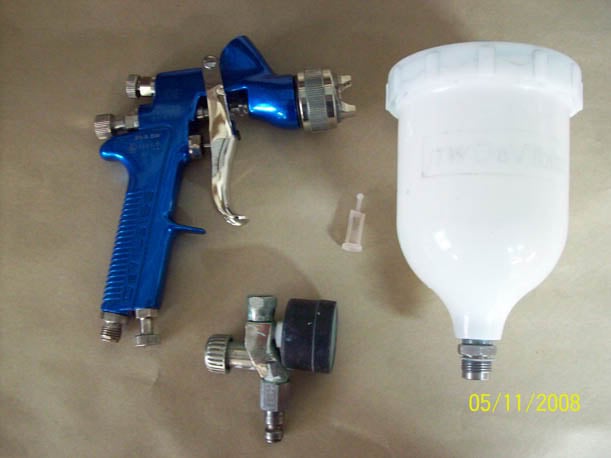
Another necessary peice of equipment is a Water/Oil trap to stop contamination getting to your gun and paintwork.

Posted Image


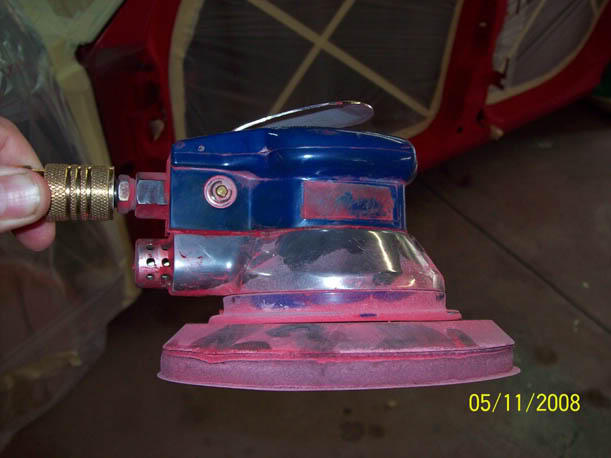
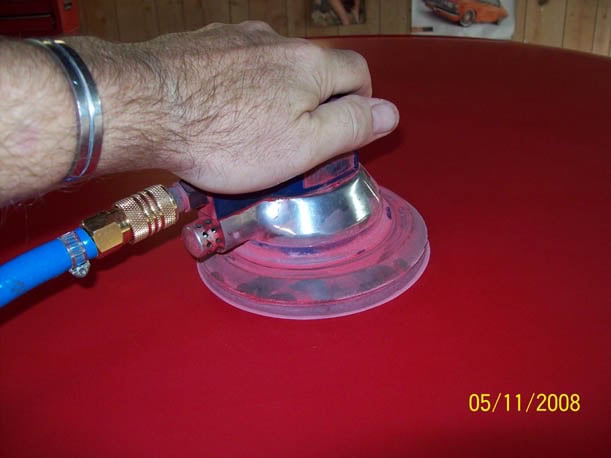
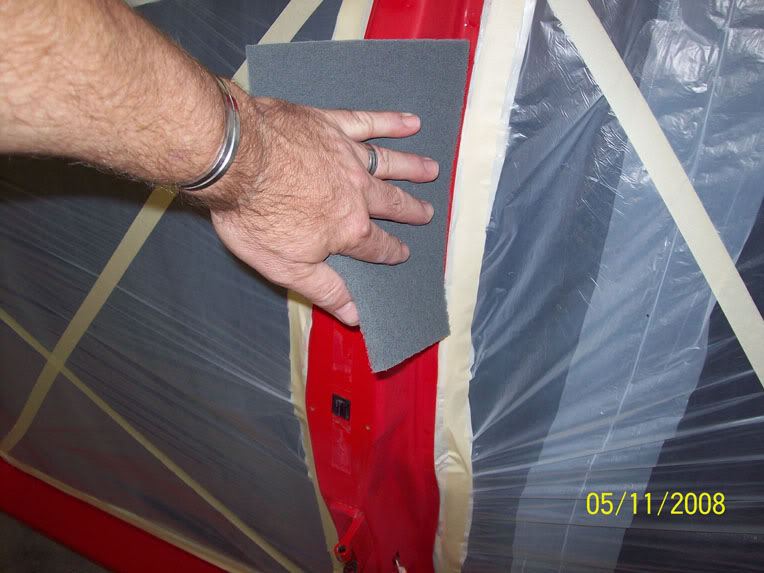
If you would like to make easy work out of sanding get yourself one of these, a wizzer or palm sander.
Notice the soft pad between the wizzer and the sand paper this pad allows you to sand contours without digging in the edge of the sander, helps smooth things out more gently.
Posted Image

Posted Image

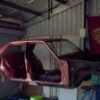
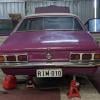
Since the paint on this car was only faded and in reasonably good condition no primer was necessary.
The paint was sanded with 400grit on the wizzer just enough to take the gloss off the original paint being careful not to cut through on any corners or edges.

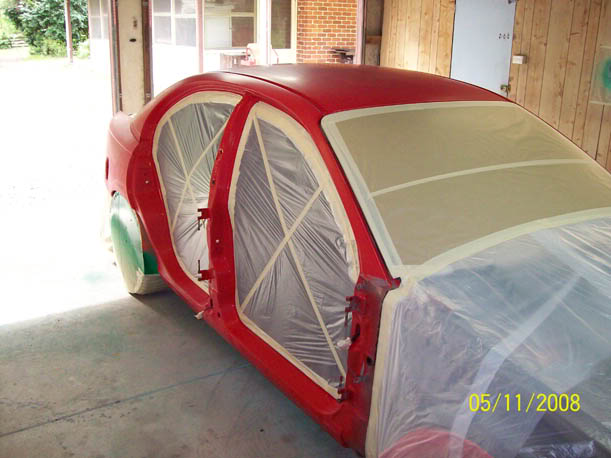
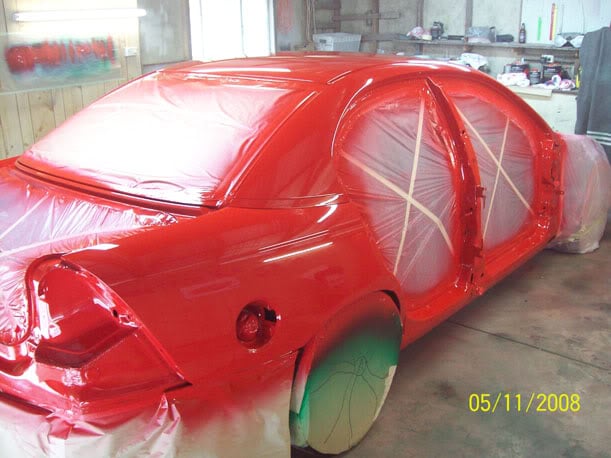
After sanding the car was masked up
Posted Image

Posted Image

Posted Image

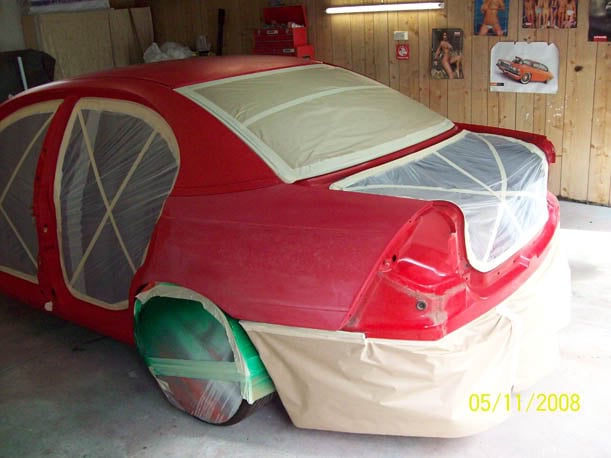
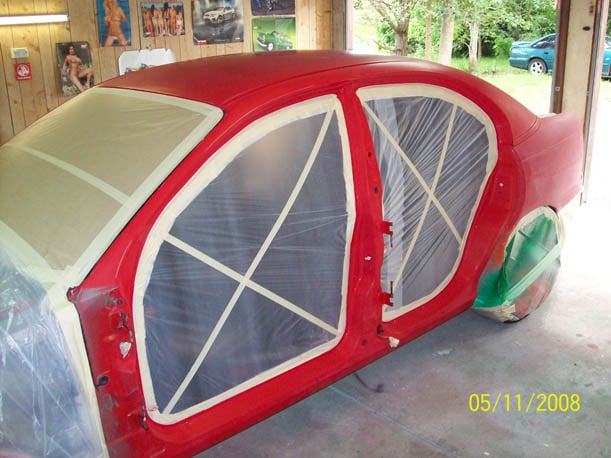
Give around the door jambs a scuff with 400 grit scotchbright pad. Dont use your kitchen green ones as these are to coarse, go get some at a paint dealer.

Posted Image

OK now the car is sanded. scuffed and masked up its time to clean everthing including the shed.
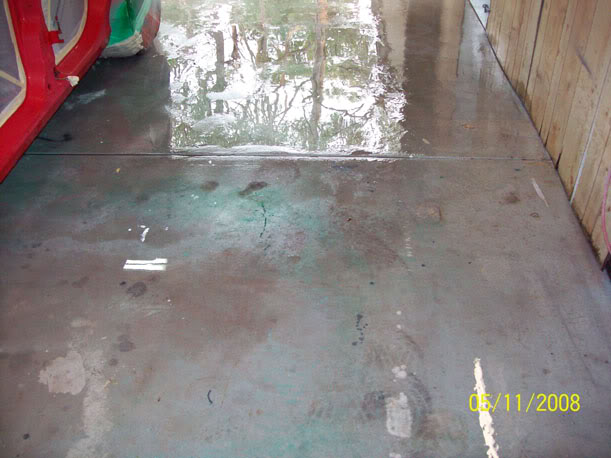
I normally wet the floor first to eliminate dust flying about then i proceed to work on the car itself.
Posted Image
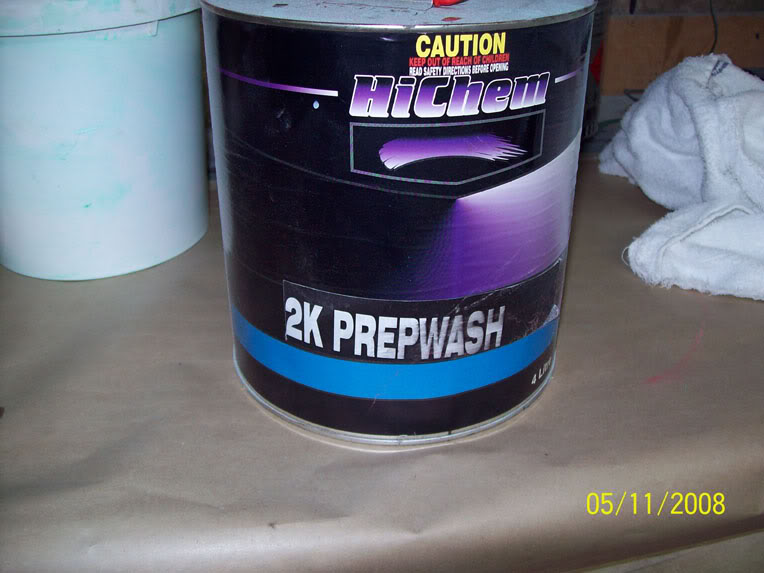
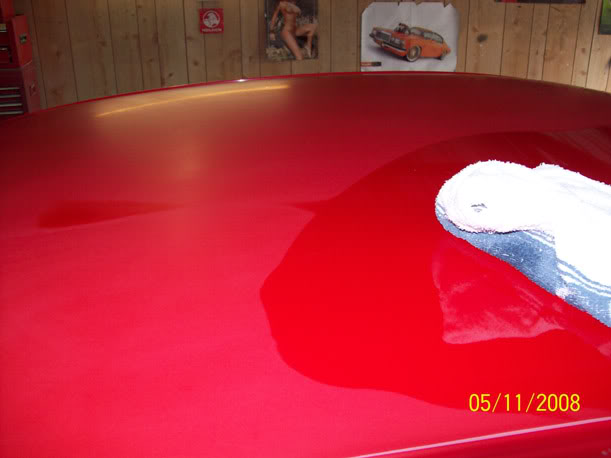
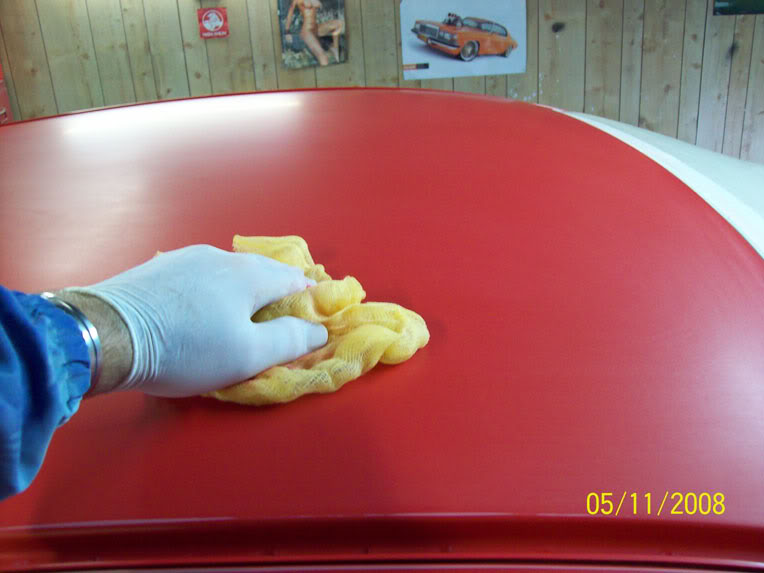
Dust the car down first and then clean the surface with Prep wash, this will remove grease and silicon fron the surface.
Apply with a spray bottle, wipe over surface with a clean rag and wipe off with another clean rag before it dries. Do not touch the surface with anything else at this stage.

Posted Image
Posted Image

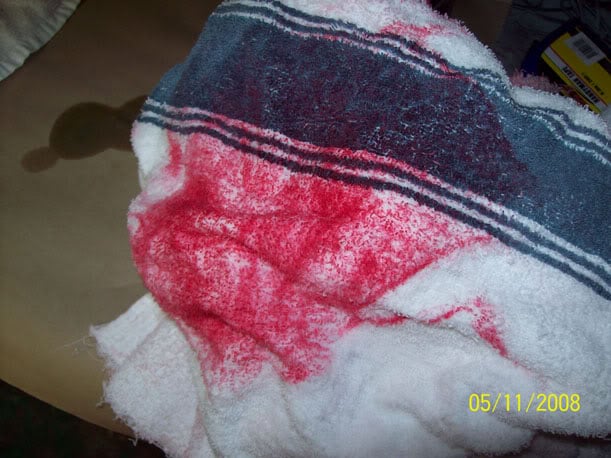
This is what you'll get on your clean rag, as you can see its not what you want in your paint so keep cleaning until there is no more stain on your rag.
Posted Image

Now its time to prepare the paint mix, this is what you'll need, ensuring your mixing container is clean.

Posted Image

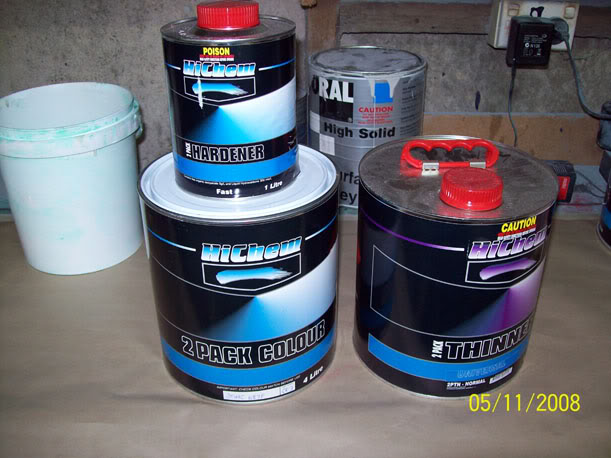
Stir paint for thoroughly before mixing hardener and thinners, Wear latex gloves when handling 2k as the isocyanates in the paint can get through your skin and poison you.
Posted Image


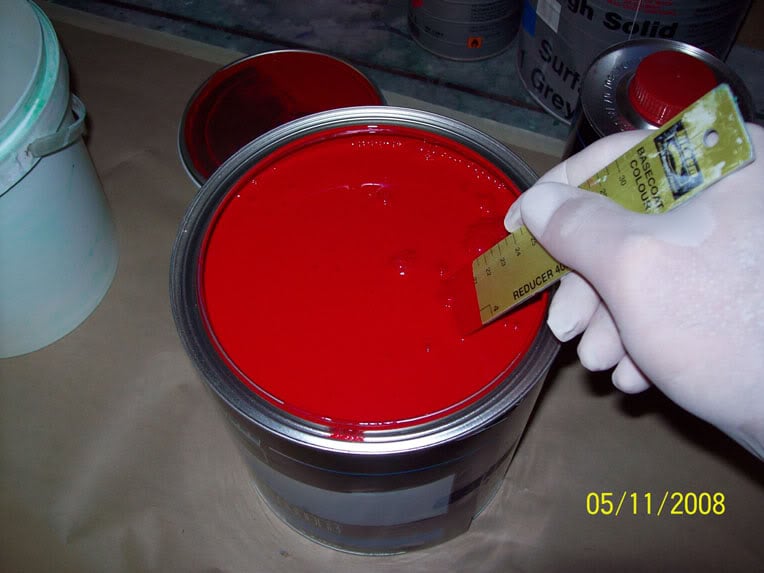
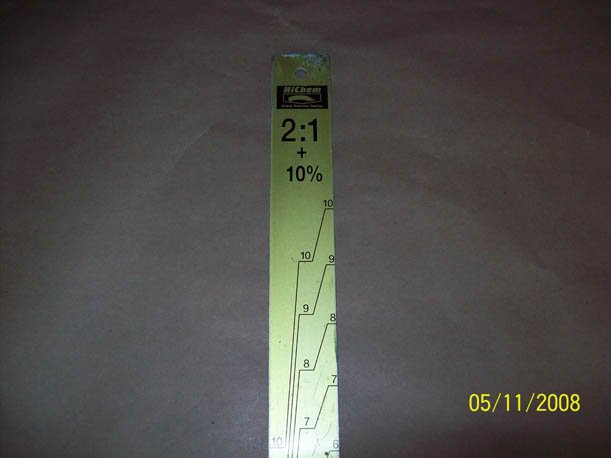
Mix paint according to instruction and make sure you use a mixing stick that is calibrated for your paint system.
Posted Image

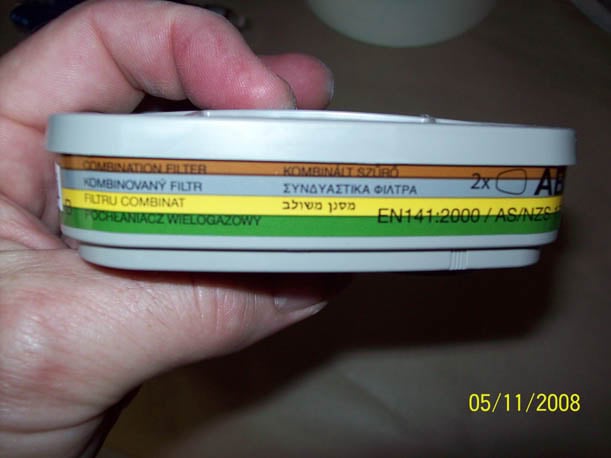
Another safety first peice of equipment is your face mask. It must be rated to filter organic vapours and should have the following colour coding. DO NOT USE ANYTHING LESS THAN THIS if spraying 2 pack.
Posted Image
Posted Image


Posted Image

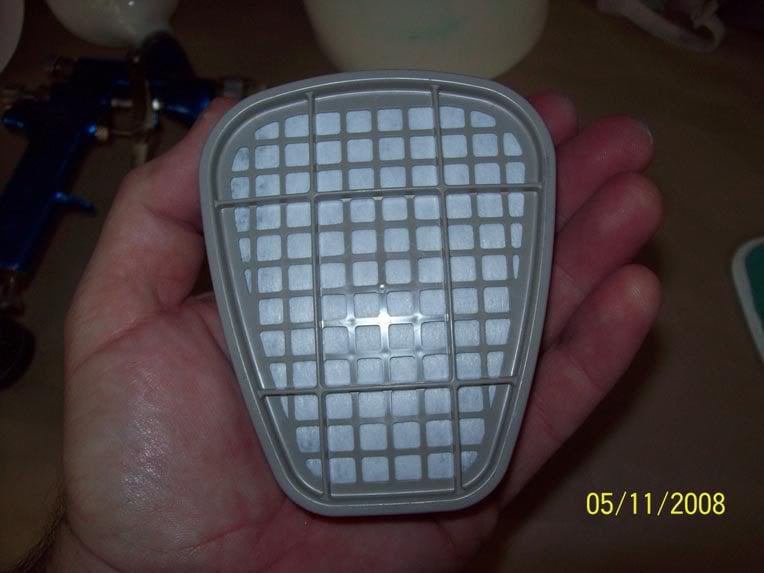
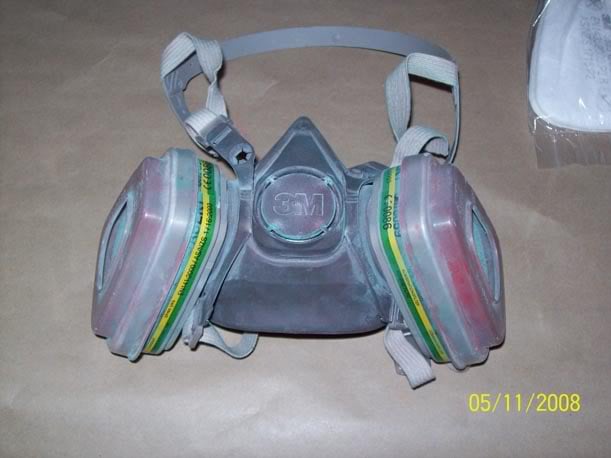
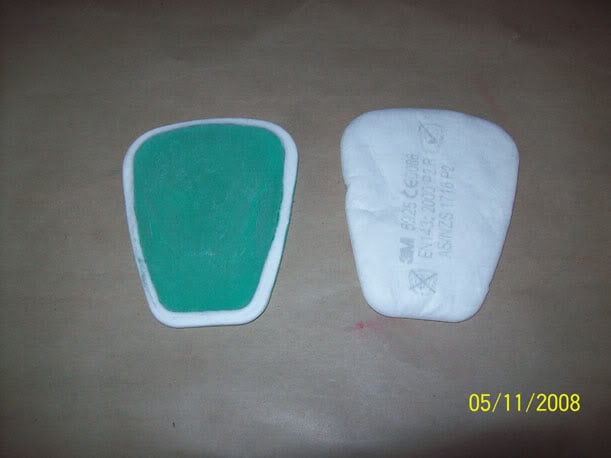
Ensure you put new filter pads over the cartidges before you begin, as you can see in the next pic just how effective these are at catching fine particular matter.
Better in the filter than your lungs
Posted Image

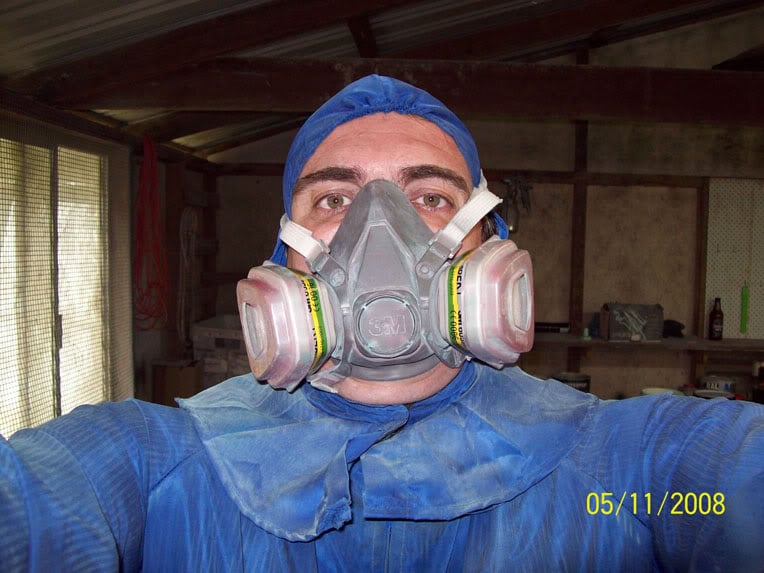
Get dressed for the party, as i said earlier the less paint that gets on you the better so cover up and cover up well.

Posted Image

Now its time to set up your gun.
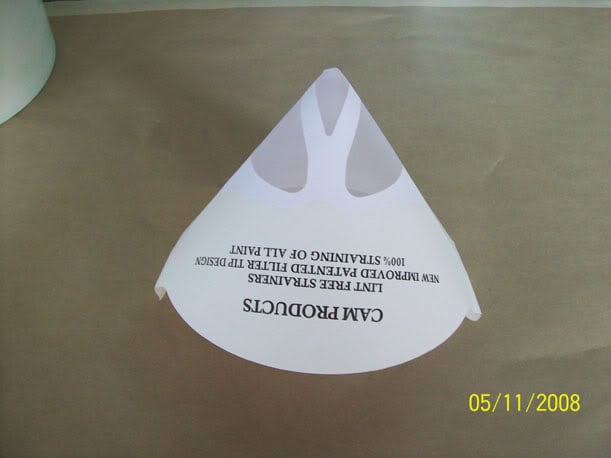
Fill the gun with paint using a fine paint strainer and set the guns pressure to 2 bar on the pressure regulator, do this with the trigger half open ( allowing air to escape but not paint)
Posted Image

Set trigger stop and fan pattern and test spray a short shot about 200mm away from a test board and note the spray pattern.
Adjust gun to suit, try to get a nice oval pattern that is about 8 inches high and 1 1/2 inches wide with no heavy run points in the pattern.


Posted Image

Ok, Once the gun is set its time to tack the surface of the car.
Make sure you have latex gloves on when doing this nect procedure as the oil in your finger tips can contaminate the surface causing fish eyes in your paint.

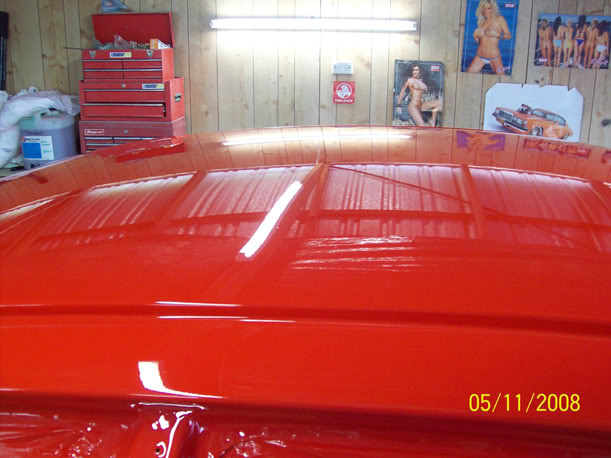
Using a new tack rag lightly wipe the entire car starting from the centre of the Roof turret and working out and down the car, rotate the tack rag surface occasionally as you do this.
Now what ever you do do not touch the car with anything else before painting.

Posted Image

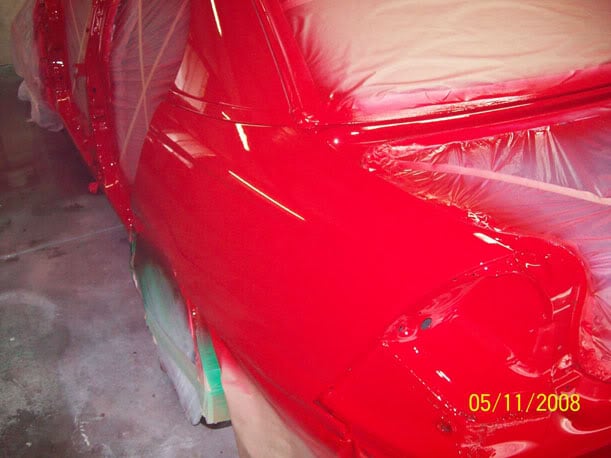
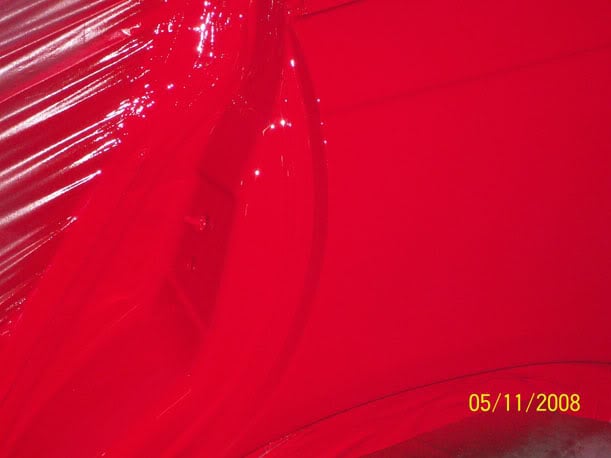
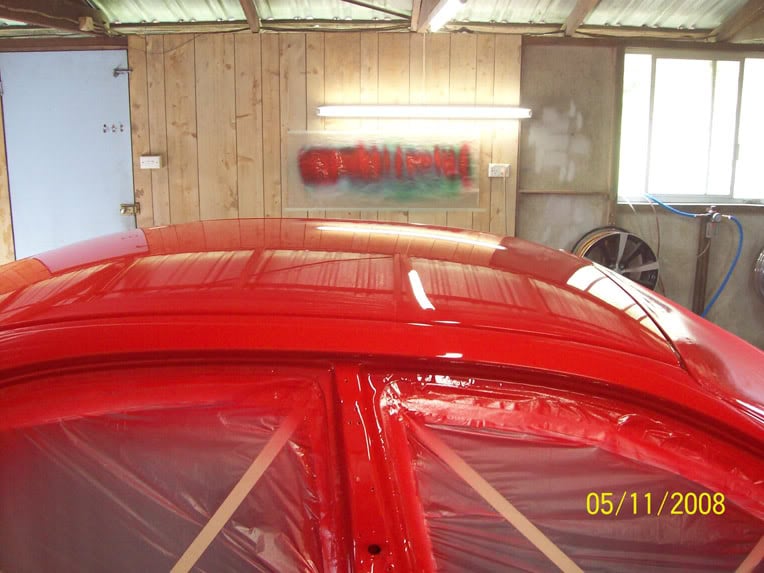
Ok Now your ready to paint. :clap:

#2 _cookinwithal_

_cookinwithal_
  • Guests

Posted 05 November 2008 - 01:53 PM

Ok heres the finished product


Start from the centre of the roof turret working out to the edge aplying paint evenly and overlapping each stroke by 50% dont move the gun to fast or you will get a mottly dry spray but if go to slow it will run.
I Usually count in my head as I spray, 123456 is about the time it takes to cover one stroke of a roof turret from edge to edge ie pull trigger 123456 release trigger and you should of layed down one complete stroke of paint across the roof.
It takes practice but you will get it eventually.
If you doing it right the paint should lay down flat and smooth and gloss over nicely with nil to little orange peel.
Here are some pics of the finished paint, i could show myself actually doing it because i was painting at the time but this is the finished product.

This is three full coats on the body
Posted Image

Posted Image

Posted Image

Posted Image

Posted Image

As you can see you can acheive quite a good finish at home with a little patience and cleanliness.

Ther are a couple of bits of shit in the paint but thats to be expected if your not painting in a booth.
These are easily sanded out and pose no problem.

I will post the doors, bonnet and bootlid tomorrow and after that i will post how to de nib and buff the paint and show you the completed car in the comming week.
Hope this helps some of you and If Ive missed anything or got something wrong please correct this topic and have your say.
Cheers
Allen

#3 _Chriskoss-79uc_

_Chriskoss-79uc_
  • Guests

Posted 05 November 2008 - 03:11 PM

Wow thats a great tutorial mate

Sure cleared up alot of unanswered questions

How much did it cost you all up for the materials (including compressor hire etc)

P.S what car was that? A commodore?

Edited by Chriskoss-79uc, 05 November 2008 - 03:13 PM.


#4 RIM-010

RIM-010

    DON'T PANIC

  • Members
  • PipPipPipPipPipPipPip
  • 8,079 posts
  • Name:Tim
  • Location:Cowell, SA
  • Car:LJ 2 Door - HQ Premier
  • Joined: 01-March 06
Garage View Garage

Posted 05 November 2008 - 03:48 PM

Top guide mate :spoton:

VY/VZ by the looks, Chris... And I'd say that he owns the compressor.

What was wrong with the paint on the car before you started?

Good to see people take a bit of time to help other people. I know it can get tedious taking photos of every step.

Tim

#5 MRLXSS

MRLXSS

    The Render Garage

  • Members
  • PipPipPipPipPipPipPip
  • 12,403 posts
  • Name:Matt
  • Location:Upwey, Melbourne
  • Car:355 LX Hatchback, DeLorean DMC-12, LX SS Hatch, VY Cross8 Crewman
  • Joined: 09-November 05

Posted 05 November 2008 - 04:01 PM

Thats fantastic mate! Great work with all the pics! It will be a great help to all the novice painters out there! :clap:

#6 ollie

ollie

    Forum Fan

  • Members
  • PipPipPipPip
  • 318 posts
  • Location:Eastern Melbourne
  • Joined: 17-June 07
Garage View Garage

Posted 05 November 2008 - 08:14 PM

Nice work, love the cardboard mags,

#7 _Pete_

_Pete_
  • Guests

Posted 06 November 2008 - 09:42 PM

Great post Cookinwithal!! Thanks for taking the time to post it on up for us all to see.

#8 _cookinwithal_

_cookinwithal_
  • Guests

Posted 07 November 2008 - 08:07 AM

No worries guys, the more we share the better I reckon.
Cheers
Allen

#9 lcgtr1970

lcgtr1970

    Forum Fixture

  • Members
  • PipPipPipPipPip
  • 1,702 posts
  • Name:Jordan
  • Location:having a beer, looking at the torana
  • Joined: 13-March 06

Posted 07 November 2008 - 01:46 PM

good stuff :clap: this will help quite a few people (especially myself). thanks for posting.

#10 _Courage_

_Courage_
  • Guests

Posted 07 November 2008 - 02:01 PM

Great post ... can you advise what steps to add/take out when dealing with acrylics?

#11 TerrA LX

TerrA LX

    Fulcrum Fixture

  • Members
  • PipPipPipPipPipPipPip
  • 14,241 posts
  • Location:Sid 'n' knee
  • Joined: 31-May 06

Posted 07 November 2008 - 02:02 PM

Excellent how to.
Got any tips on how to submit a tech article cause you have done well here?

#12 _cookinwithal_

_cookinwithal_
  • Guests

Posted 09 November 2008 - 09:04 PM

Hi Courage, I dont do very much acrylic these days however all the steps are basically the same except for how many coates you apply and how long to wait for the paint to flash off between coats.
Cleanliness and good surface prep make all the difference.

If spraying acrylic apply the first coat a little lighter, dont try to acheive full coverage but keep the paint even in application.
This will help eliminate the chance of fryups in the undercoat beneath your paint, why i hear you ask? Acrylic paint including Acrylic undercoats may dry hard and sandable but if you wipe it with thinners the paint will start to dissolve or melt, Acrylic never acheives what 2pack can and thats resistance to solvents.
So by applying a lighter coat the first time helps set up the bond between the top coat and the undercoat without being to aggresive.
Also dont spray on a day that is less than 20 deg as the flash off time for the thinners in your paint will be extended to the point that the wet paint will stay wet and melt completely into your undercoat causing it to fry up as if you were using paint stripper.

After you have applied the first coat let it flash off until it loses that real glossy look and has hazed a little then start to apply your next coat and so on.
For an average job you will have to apply at least 7 coats and if you would like a finish that can be cut and buffed extremely flat you need about 14 coats, sounds like a lot but the micron coverage of acrylic is far less than 2 pack so more coats are needed to acheive similar results as 2 pack.

You will never get the same off the gun finish as 2k so the paint will have to be cut an buffed, dont do either for at least 4 weeks and dont polish your piant for about 3 months as solvents will still be trying to escape and if you seal the paint to early with polish you run the risk of pin blisters cropping up as humidity changes every other day.

Hope this helps
Cheers

#13 _cookinwithal_

_cookinwithal_
  • Guests

Posted 09 November 2008 - 09:09 PM

Hi ALX76, have no idea how to post a Tech post just experimented on the panel and paint forum for the first time and it came out ok.
I probably rave on a bit but I think its important to let the young fellas know how to tackle some of these painting issues so i thought I
would give it a go.
cheers

#14 racean69

racean69

    Forum Fixture

  • Members
  • PipPipPipPipPip
  • 782 posts
  • Name:Rod
  • Location:Central QLD
  • Car:LH sedan
  • Joined: 07-November 05

Posted 09 November 2008 - 09:36 PM

good stuff mate :spoton:

What you say with the acrylic is good info.....thanks

#15 _HatchmanSS76_

_HatchmanSS76_
  • Guests

Posted 10 November 2008 - 12:44 PM

Nice work :clap: thanks for the great detail.

#16 _HatchmanSS76_

_HatchmanSS76_
  • Guests

Posted 10 November 2008 - 12:47 PM

Nice work :clap: thanks for the great detail.

#17 _P51_

_P51_
  • Guests

Posted 23 November 2008 - 01:33 PM

Good, Solid,Information.....thanks and look forward to more ........ :spoton:

#18 smeer

smeer

    Forum Fixture

  • Members
  • PipPipPipPipPip
  • 1,526 posts
  • Location:Adelaide
  • Car:1970 LC 4-door
  • Joined: 07-November 05

Posted 23 November 2008 - 02:48 PM

always appreciate shared knowledge! thanks mate.

#19 _Batesy_

_Batesy_
  • Guests

Posted 15 December 2008 - 10:02 PM

Acrylic paint including Acrylic undercoats may dry hard and sandable but if you wipe it with thinners the paint will start to dissolve or melt, Acrylic never acheives what 2pack can and thats resistance to solvents.

How are you supposed to clean the surface before painting?

#20 _cookinwithal_

_cookinwithal_
  • Guests

Posted 16 December 2008 - 09:23 AM

Hey Batesy, you've taken that line completely out of contex, I was talking about how the paint coats bond to each other (acrylic) it is the nature of the paint to melt into itself when applying coates. So i meant if you want to clean a mark off your paint dont use thinners as it will melt the paint and destroy your finish. 2 pack is a lot tougher than acrylic and wont melt as easily as it is a urethane and set by chemical reaction and not so much by evaporation like acrylic.
I think what your asking is how to clean the surface before painting, You should use Prep wash or a wax and grease remover before applying any coats of paint or undercoat.
Wax and grease remover is not an acrylic solvent so it wont dissolve any underlying coats of paint it is spirit based (Turps) with a few other additives to remove silicon.
Read the earlier section in this post about cleaning the surface before painting and you might understand a little better.
Cheers
Allen

#21 _Batesy_

_Batesy_
  • Guests

Posted 16 December 2008 - 09:30 AM

Ok just wondering because im just about to paint in acrylic.
How long do you have to wait before you can put clear coat overtop?
What happens if your doing the door jambs and you get over spray on the roof or something do you have to sand it out or can you paint over and sand after?

#22 _cookinwithal_

_cookinwithal_
  • Guests

Posted 16 December 2008 - 11:33 AM

Hi Batesy, you can put clear over the top just as you would put on any other coat, Let the base coat flash off and become slighty hazed then apply the clear as normal.

If your doing the door jambs first and your worried about getting overspray on the roof just let it dry completely and then you can do a couple of things to clean up.
You can use a scotchbrite pad (not your kitchen variety) but a special auto one, use a fine pad and rub up all the panels exposed to overspray and smooth them off, make sure you remove any shine from the paint around the edges of the door apartures so the final external coats will stick properly and then prep wash the whole car again to remove oil and dust.
Or you can wet sand the entire surface of the body which is messy and time consuming, if it where me I would mask and cover as much of the car as possible without leaving hard edge tape lines and then you would only have the edges of the door apartures to worry about.

Do you know how to mask properly? Cause this is the easiest way to keep overspray of things. The trick is not to ever have a hard edge tape line visible.

If you dont know how to tape let me know and I will post some example pics for you to look at.
Cheers
Allen

#23 _Batesy_

_Batesy_
  • Guests

Posted 16 December 2008 - 12:48 PM

No i dont know how to mask properly it would be great if you could help me :D

Edited by Batesy, 16 December 2008 - 12:48 PM.


#24 _cookinwithal_

_cookinwithal_
  • Guests

Posted 16 December 2008 - 04:04 PM

Ok I'll get some pics up for you shortly
Cheers :spoton:

#25 _Batesy_

_Batesy_
  • Guests

Posted 16 December 2008 - 06:57 PM

ok cheers mate :spoton:


1 user(s) are reading this topic

0 members, 1 guests, 0 anonymous users