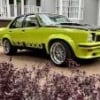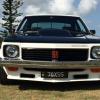
Yet another Hatch rebuild
#126

Posted 04 January 2011 - 10:01 PM
#127
 _THE SS_
Posted 05 January 2011 - 10:48 AM
Dan, have you got a link for those photos you sent me? I would like to see them nice and big on the computer, bloody failing eyesight.
No i havnt Paul they are from my phone !Did you get all 3 that i sent you and the long text ? Ive got heaps but need to get sorted !
cheers Dan
#128

Posted 05 January 2011 - 12:00 PM
Cheers.
#129

Posted 17 May 2011 - 10:07 PM
Relocated the light and horn relays to behind the bumper.

Then relocated them again as the bumper bracket clashed with the relays.

New 3" tail shaft in.

Lights and wires tidied up.


Over riders on and bump strip in, now I'm getting excited, starting to see how good this thing is going to look.

Bonnet scoop on, its in the wrong position, its about an inch & half forward of the bonnet edge, thats the way it was when I bought the car and now that it is on I don't mind the look.

Purchased an alloy radiator from eBay, it was one of those buy it now or make an offer auctions, they had $380 buy it now, I kept offering $200, after the fifth time they accepted the offer, about time I had a win.


This is how the clutch reservoir and master cylinder use to look.

And this is how it looks now..... a slight improvement.

I purchased two of these reproduction rear hatch lights, they look awesome.

I mounted the ignition module under the dash, when the fan cowl goes on you cant see the bolts (unless you look for them)


Front and rear windscreens went in.

Back inside the car, and the underlay is going in.


Then trial fit the carpet before gluing it down.


I couldn't help myself..... I grabbed the console and seat and sat for ages.... This is flocking great.

I Had a moment where I struggled to sort the wiring out

I started putting the dash in.


Its a plain, simple dash, but shit it looks good.
And this is just now, turning the lights out after sitting in the seat again. lol

Cheers Paul.
#130

Posted 17 May 2011 - 10:20 PM
Meant to also say (damn iPhone) how does the quality seem on the radiator? Did it fit no worries? Been eyingthem off, but always wary of eBay stuff, even though half my bits are from there!
#131
 _Kush_
Posted 17 May 2011 - 10:25 PM
It looks fantastic
#132
 _Yella SLuR_
Posted 17 May 2011 - 10:26 PM
The car is looking good.
Edited by Yella SLuR, 17 May 2011 - 10:26 PM.
#133

Posted 17 May 2011 - 10:28 PM
Radiator is pretty good, had a slight twist in it, but it straitened out with no problems.
yeah I know what you mean about eBay, I have a pile of junk from eBay sitting in the corner.
Cheers
#134

Posted 17 May 2011 - 10:34 PM
Cheers
[/quote]
At least you know you can put it back on there and maybe get your money back :-) did it come with the mounting plates on, or did you have to weld them on there?
#135

Posted 17 May 2011 - 10:36 PM
Your going to have to take your right hand front wheel off to change plugs 7 and possibly 5 as well with that master cylinder (He says after just changing his plugs on the w/e).
The car is looking good.
I'm glad its an easy job then Yella, I do remember years ago hearing story's about jacking the engine up to get to the plugs, don't know if it is true or not. did you run the proportioning valve with yours?
Thanks Kush, Im pretty happy with how its coming along.
#136

Posted 17 May 2011 - 10:44 PM
yeah I know what you mean about eBay, I have a pile of junk from eBay sitting in the corner.
Cheers
At least you know you can put it back on there and maybe get your money back :-) did it come with the mounting plates on, or did you have to weld them on there?
Nah mate, I couldn't do what some of the scumbags do on eBay, the shit will more than likely go in the bin.
The radiator comes with two angles welded down the sides, just drill your holes where you want and bobs your uncle....
Talk to Dirtbag or Simon with regard to the performance of the radiator, its the same one that he put in his brothers car, I don't think Simon has had any issues with it.
#137

Posted 18 May 2011 - 05:35 AM
It's looking fantastic! It's not far from the finish line now.
I may have to come over again to get you all revved up for a Toranafest trip this year.
Do you reckon you might want to join the convoy down with us?
#138

Posted 18 May 2011 - 06:46 AM
Mate your welcome to come up any time, As faf as Toranafest goes, I would love to join the convoy down, but 4 months out it looks highly unlikley with the Hatch.
We'll have to catch up again, and have a look at the drop tank & scoop on yours.
#139

Posted 18 May 2011 - 11:48 AM
#140

Posted 18 May 2011 - 08:16 PM

#141
 _A9XOSS_
Posted 23 May 2011 - 08:01 PM
the over riders put a nice touch on it too.
Edited by A9XOSS, 23 May 2011 - 08:01 PM.
#142

Posted 23 May 2011 - 08:38 PM


#143

Posted 23 May 2011 - 10:02 PM
#144
 _cruiza_
Posted 23 May 2011 - 10:02 PM
the car is a real credit to you, very nice job
#145

Posted 07 August 2011 - 03:06 PM
Have done sweet FA, the money tree wont grow during winter
sprayed up the clips.

Put the rear seat in.

Put the quarter panels in and carpet but not fixed in as yet, need to purchase some clips.


I tried my hand at cut and polishing, I have never done it before, sanding a shine away & buffing it back again was just nerve racking, but came up smooth and shiny.

I just did the rear quarter flare and passenger door so far.

Edited by lx8vd77, 07 August 2011 - 03:17 PM.
#146
 _Bomber Watson_
Posted 07 August 2011 - 03:25 PM
Cheers.
#147

Posted 07 August 2011 - 03:56 PM
This is where the issue lies, note the car is on stands, no weight on the stubs. the calliper clashes with the UCA.

This is one option I have, but don't really want to go down that path.

So I made this.


Moved my UCA to the upper holes.

And remounted the upper ball joint like this.

In the hope to get clearance like this.


Now I may have opened up the proverbial can of worms with this, my setup is as follows, HX stubs, UC rack, UC upper control arms, UC cross member (this I think was a mistake, should have stuck with the LX), Harrop steering arms & yes crap ball joints, that will be changed for Moogs (spelling?).
I raised the UCA to the top hole and lowered the top ball joint both by about 22mm, but don't know what that will do in relation to bump steer. I'm hoping that some of the smart people out there may be able to steer me in the right direction (no pun intended).
Cheers Paul.
#148

Posted 07 August 2011 - 05:06 PM
As said, don't know if you thought of this just some simple things get overlooked sometimes.
#149

Posted 07 August 2011 - 05:19 PM
I figure that situation under normal circumstances wont happen.
#150
 _cruiza_
Posted 07 August 2011 - 06:02 PM
but as for your brake caliper issues I personally feel you have a real problem there more so then I think you realize, sorry to be a downer on you. You can not afford to have it bind anywhere under any circumstances, maybe some bigger bump stops to limit travel
I would also consider talking to Dattoman as he really is a guru on suspension and brakes, looking at the photo the caliper does not look like it is mounted correctly but that just maybe the angle photo taken on
sorry for the downer comments just trying to help
3 user(s) are reading this topic
0 members, 3 guests, 0 anonymous users


 View Garage


