Jump to content


- - - - -

Tuxedo Black L31 SLR 5000 restoration


  • Please log in to reply
209 replies to this topic

#76 _DrFegg_

_DrFegg_
  • Guests

Posted 08 June 2009 - 11:18 AM

Managed another day on the car over the weekend so Ive got more photos if anybody is interested.
Posted Image
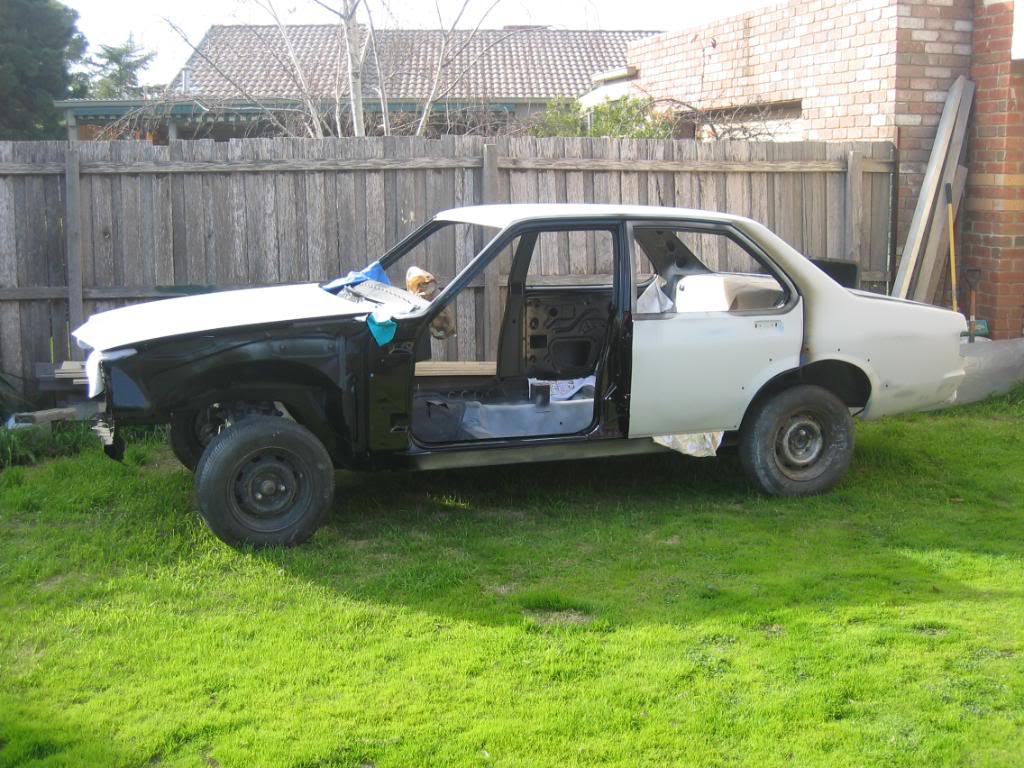
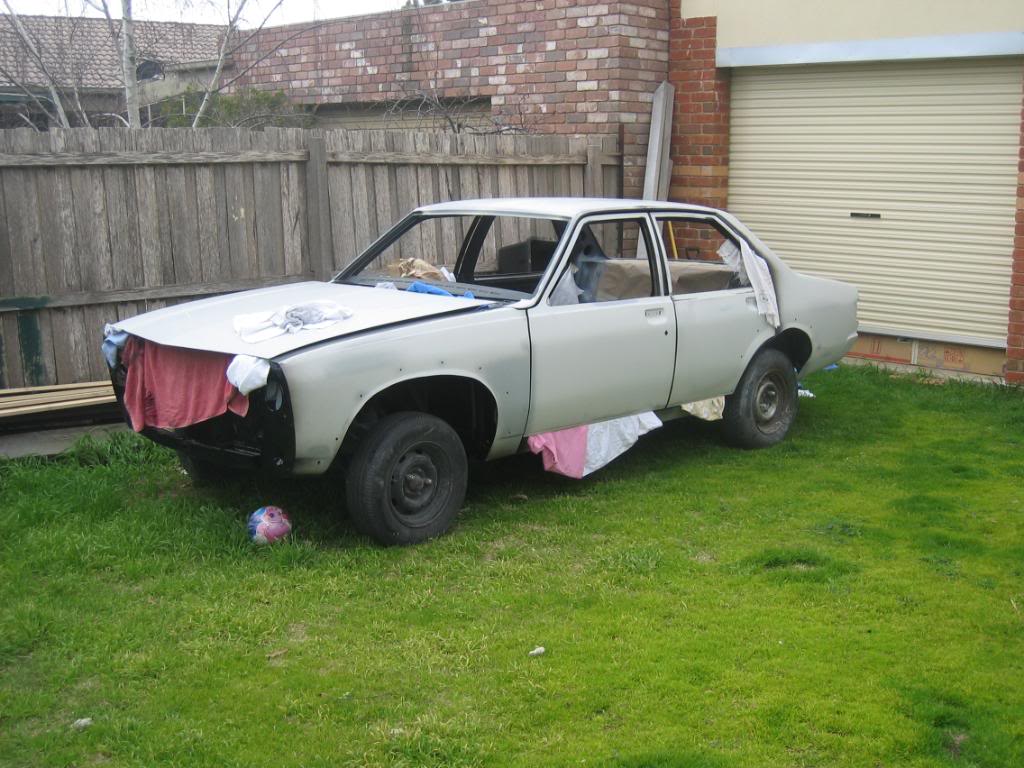
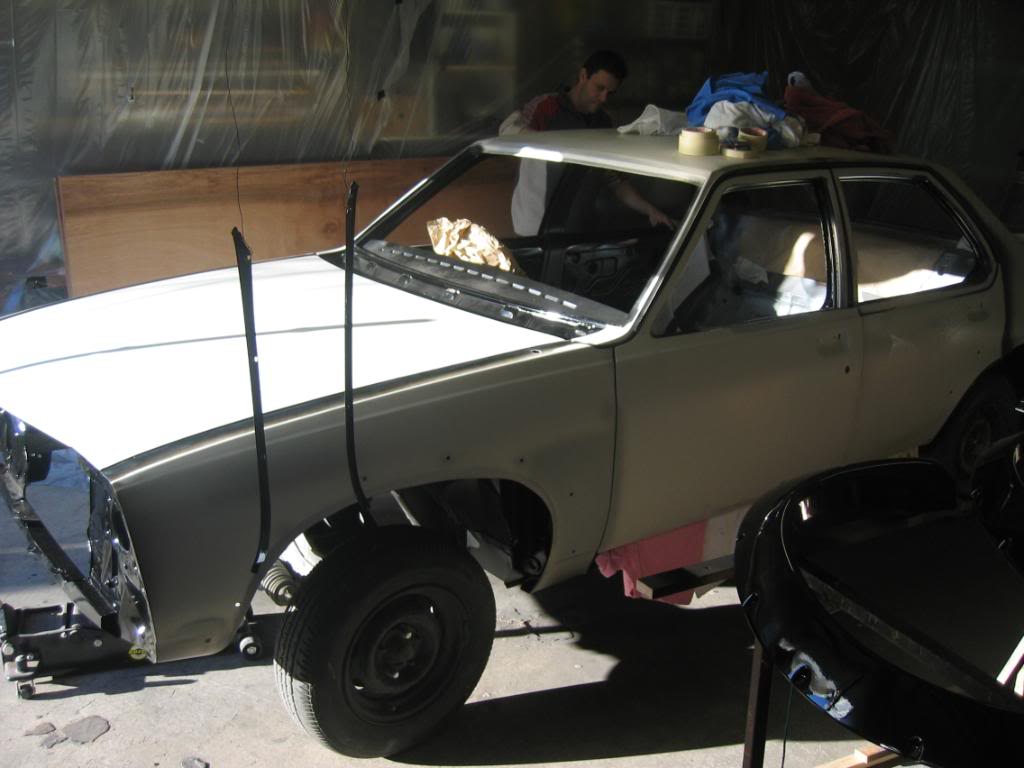
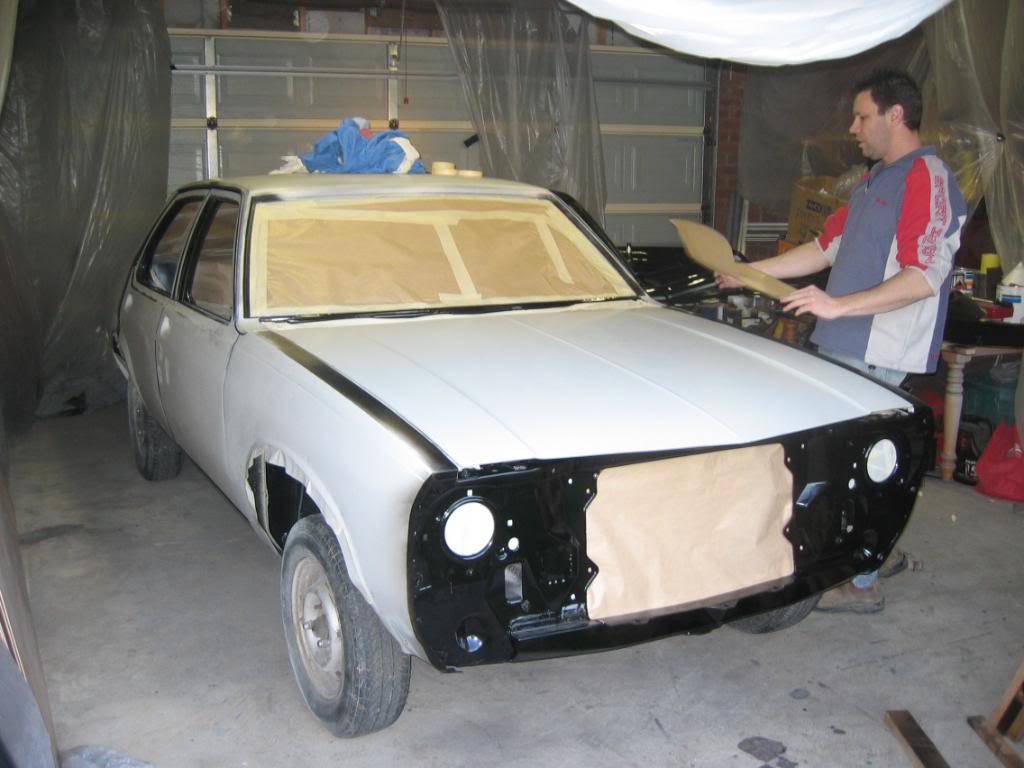
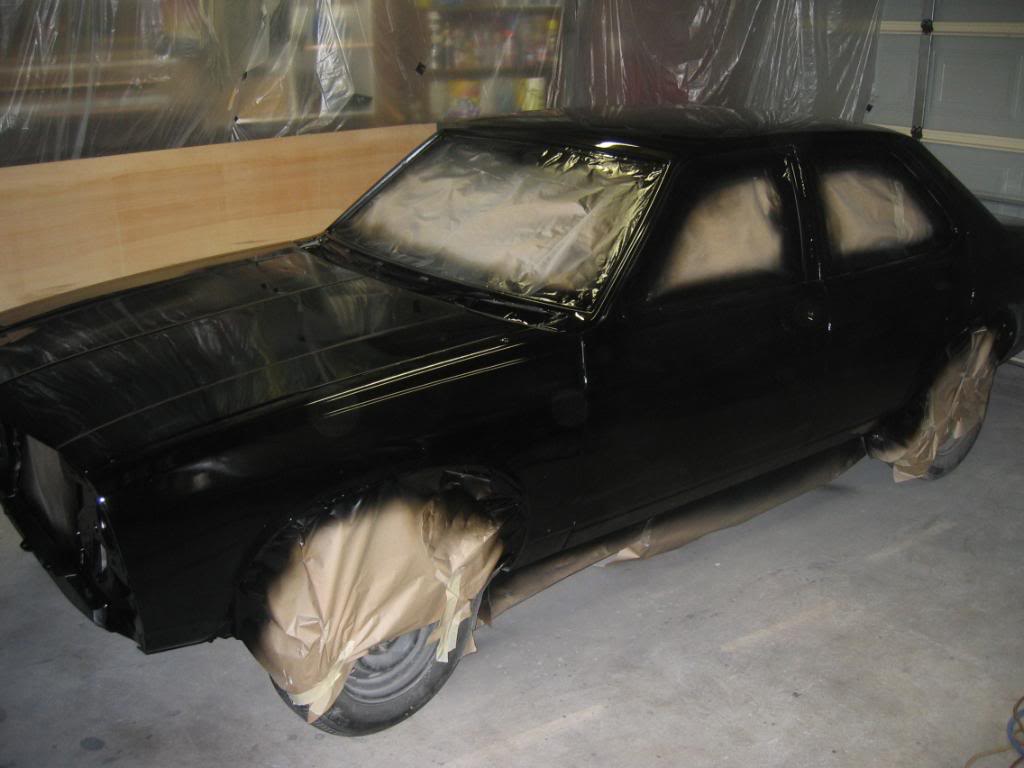
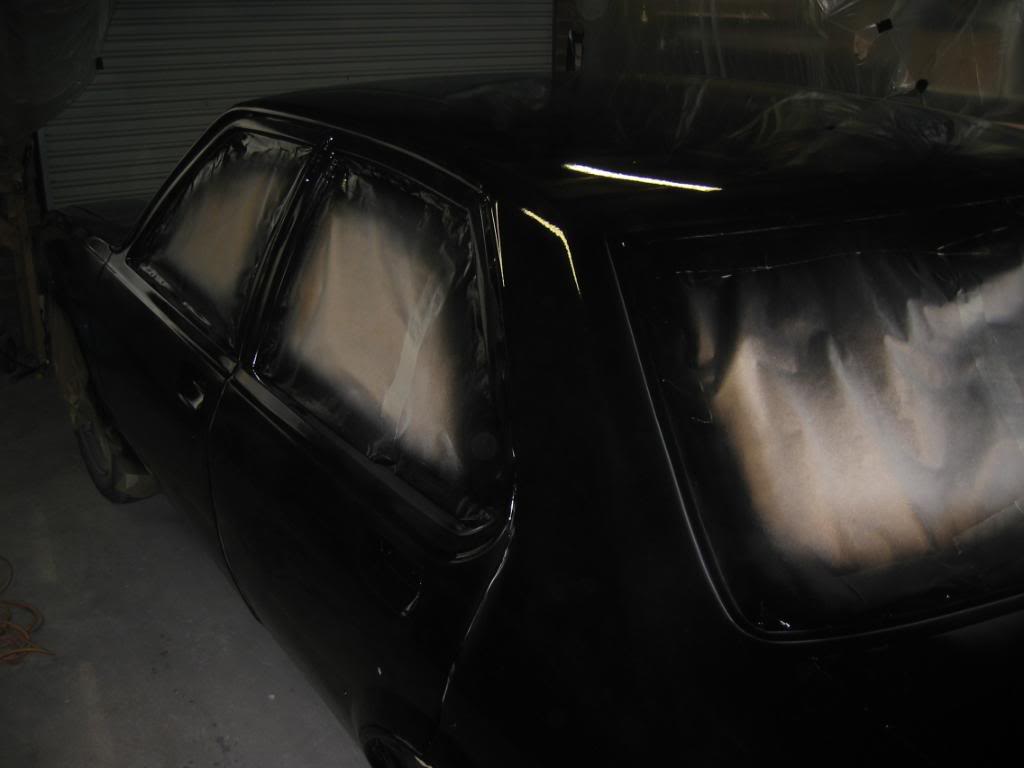
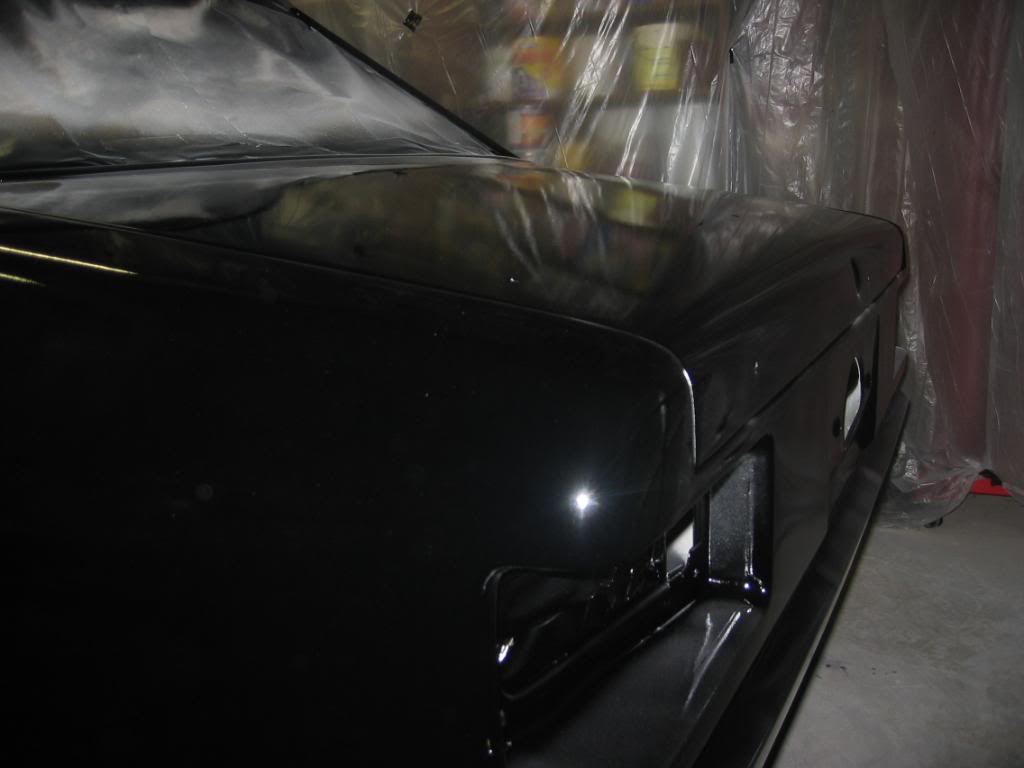
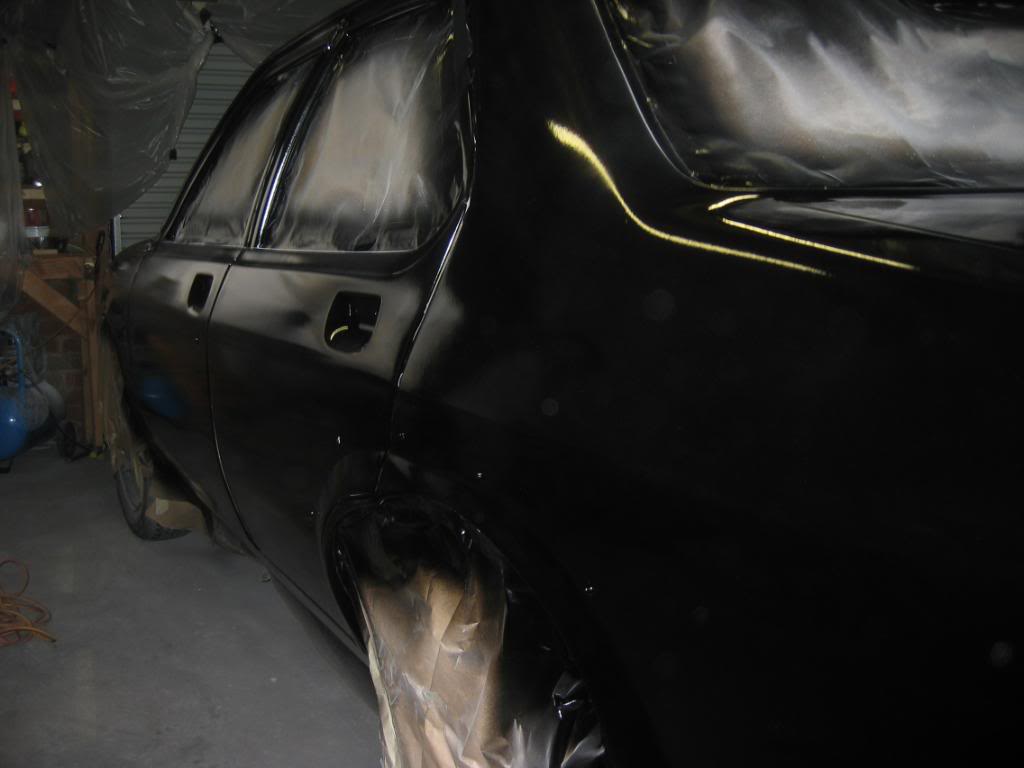
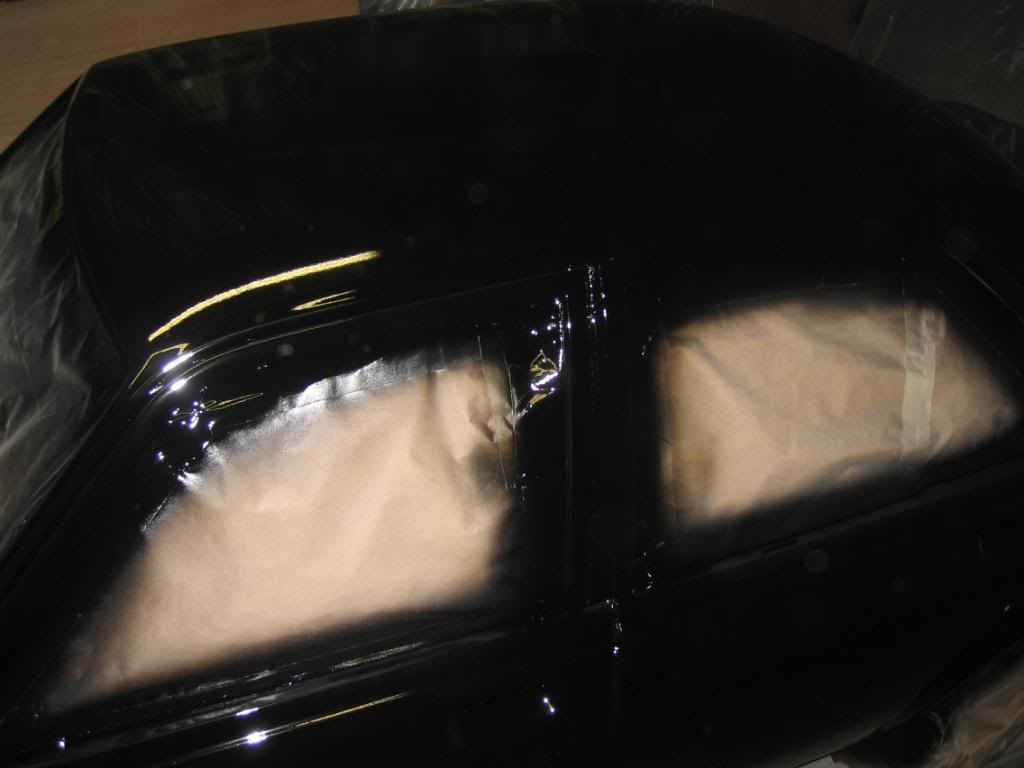
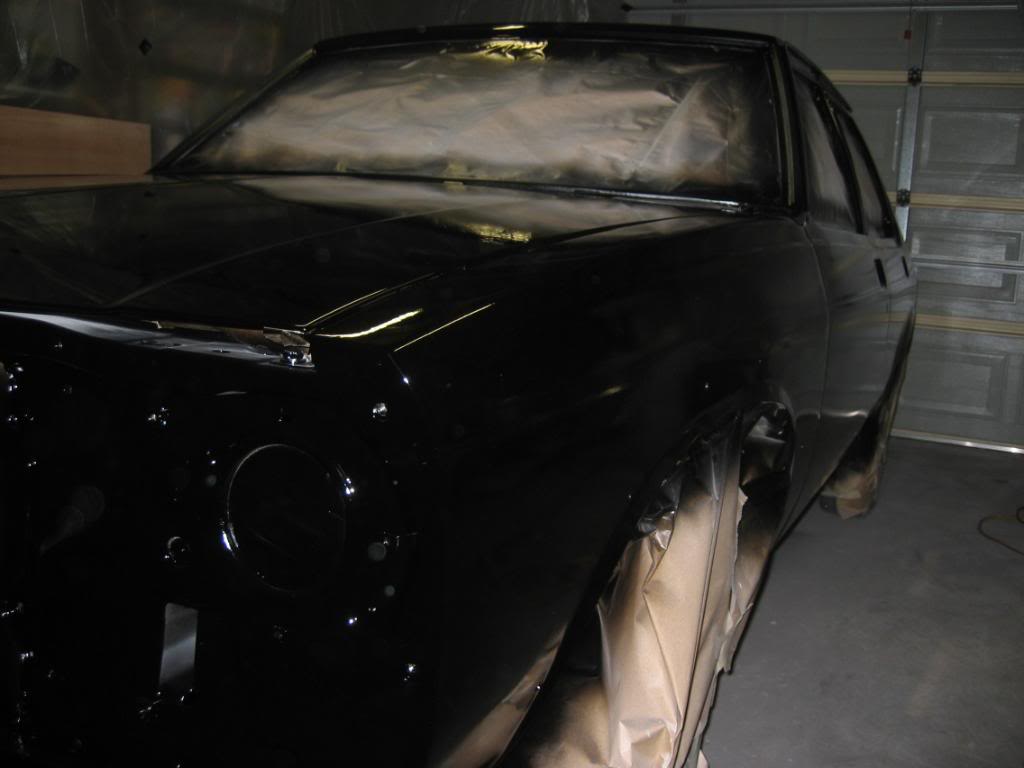
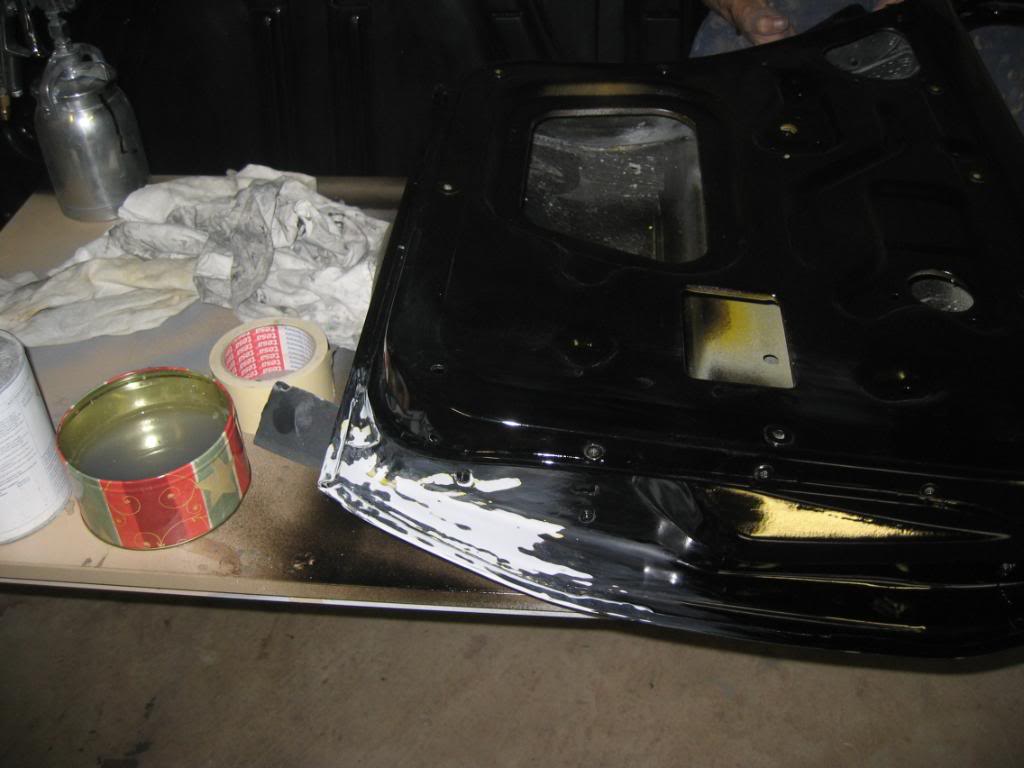
Its proving a slow time consuming process. Having a fairly averaged sized garage isnt helping as we can either do the body or parts. The body needs to dry before wheeling out and then we do what parts we can. It does help having a big gas blower/heater though to keep the temperature up. On the body, the door jambs and the drain trough around the bootlid were done. Also a couple of little hard to get areas within the engine bay were hit again as I wasnt happy with the paint coverage. I also etch primed the POR15 areas inside the cabin and on the parcel shelf. Bloody lot of time is taken up with masking!
Posted Image
Posted Image
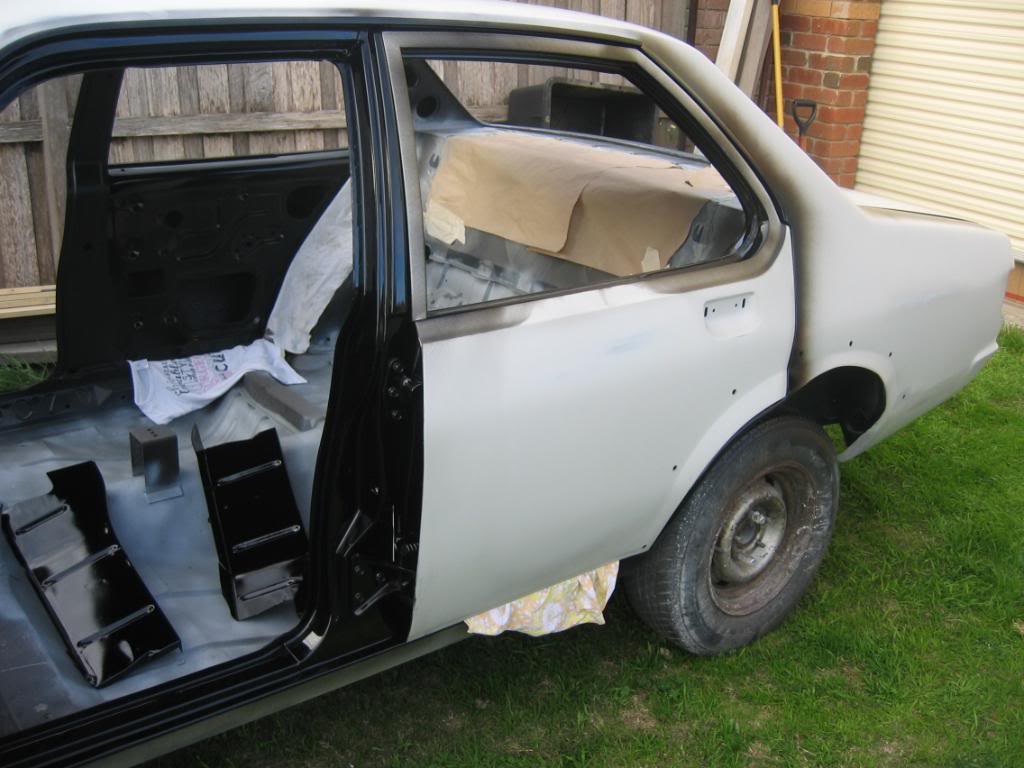
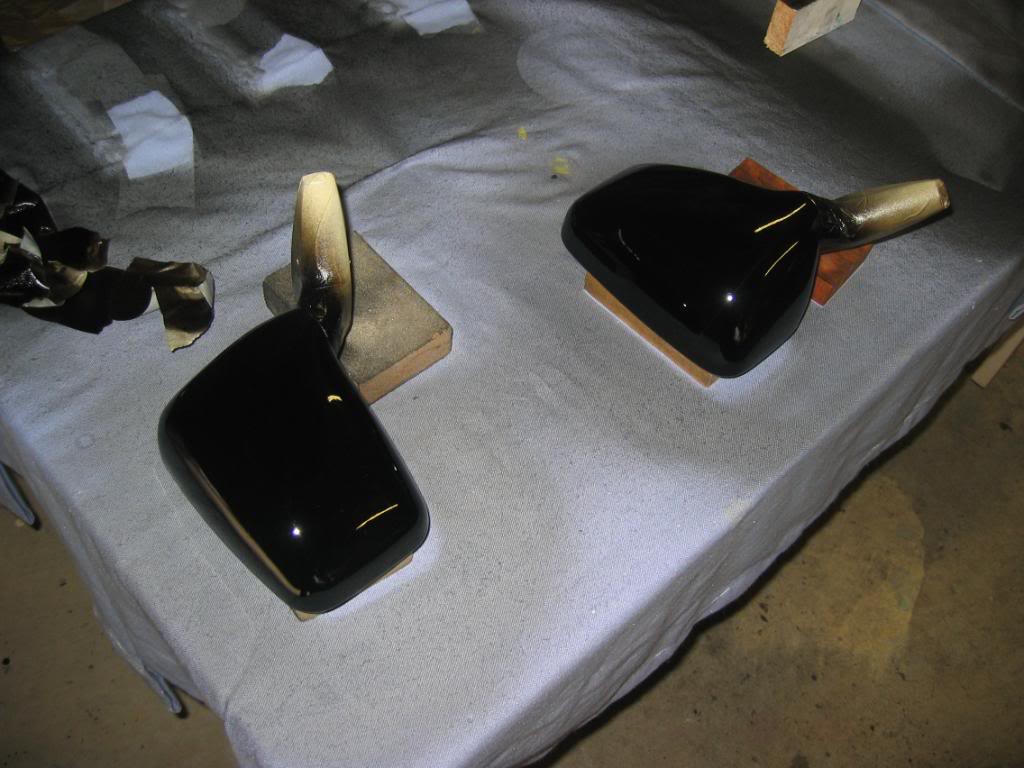
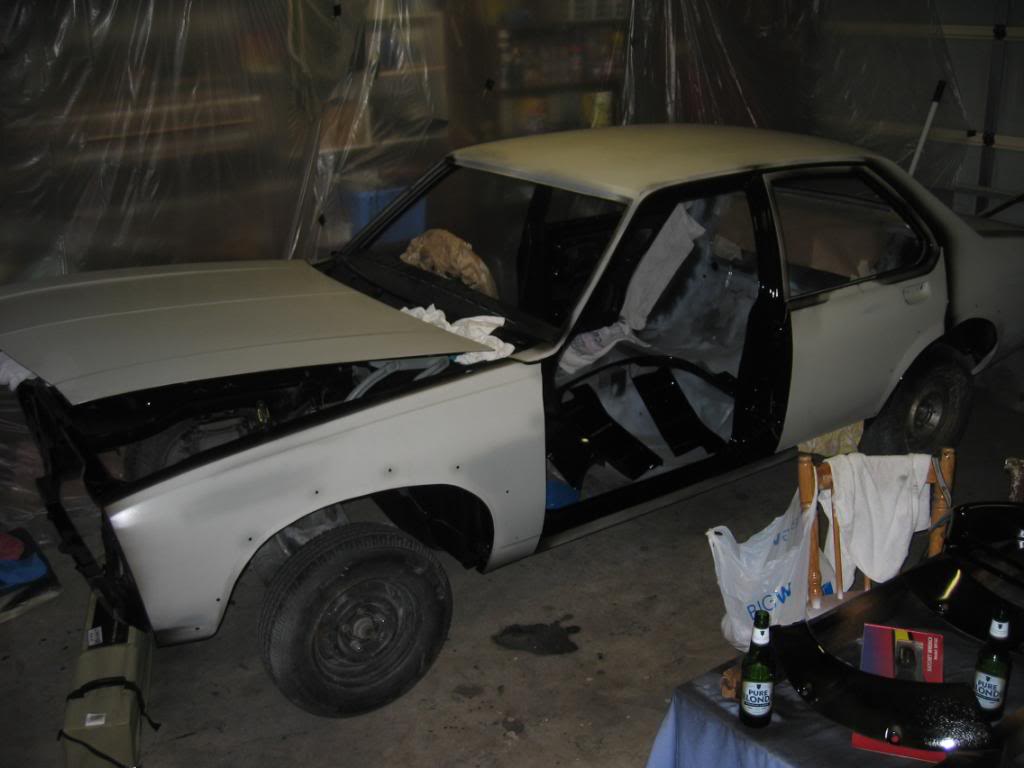
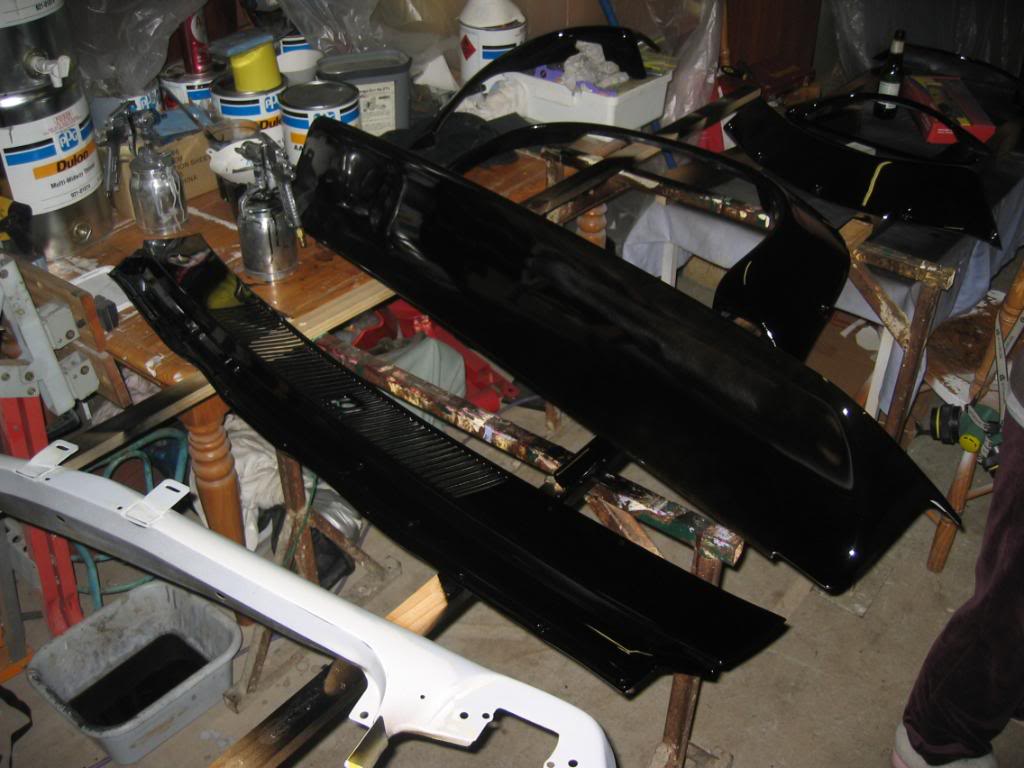
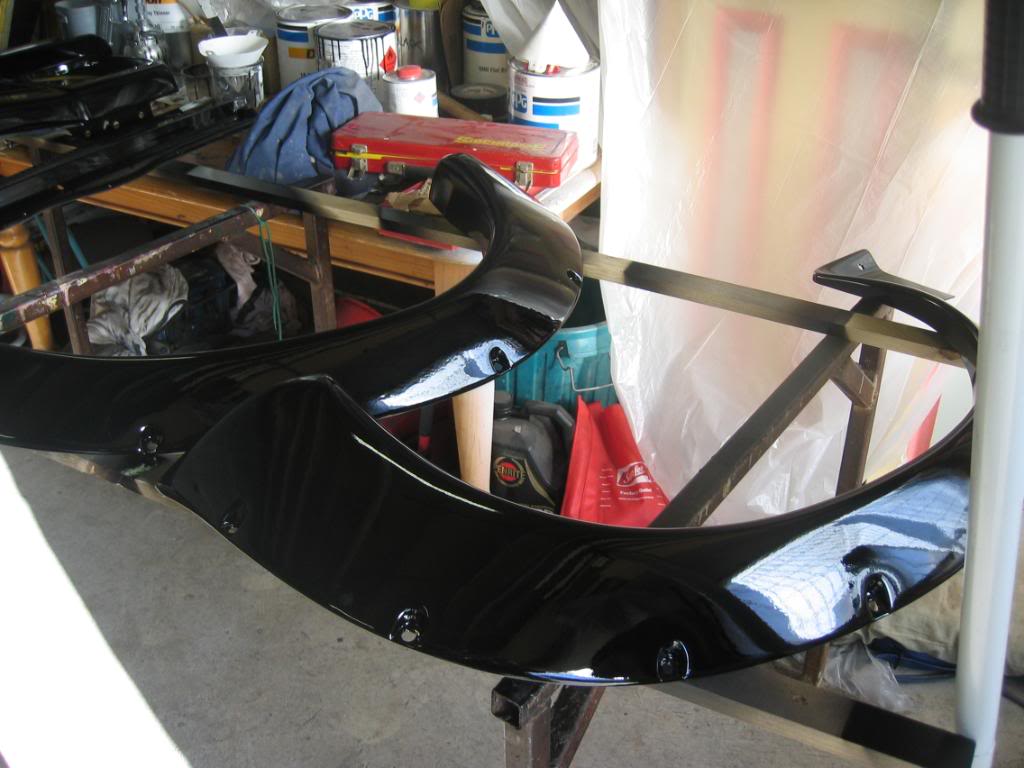
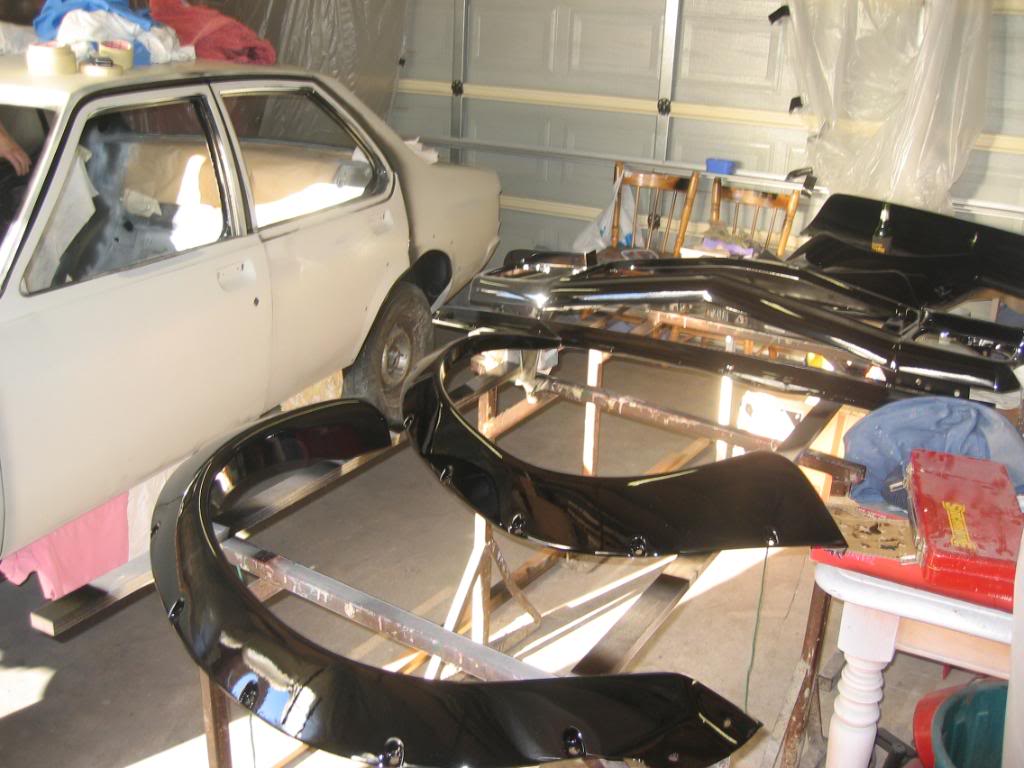
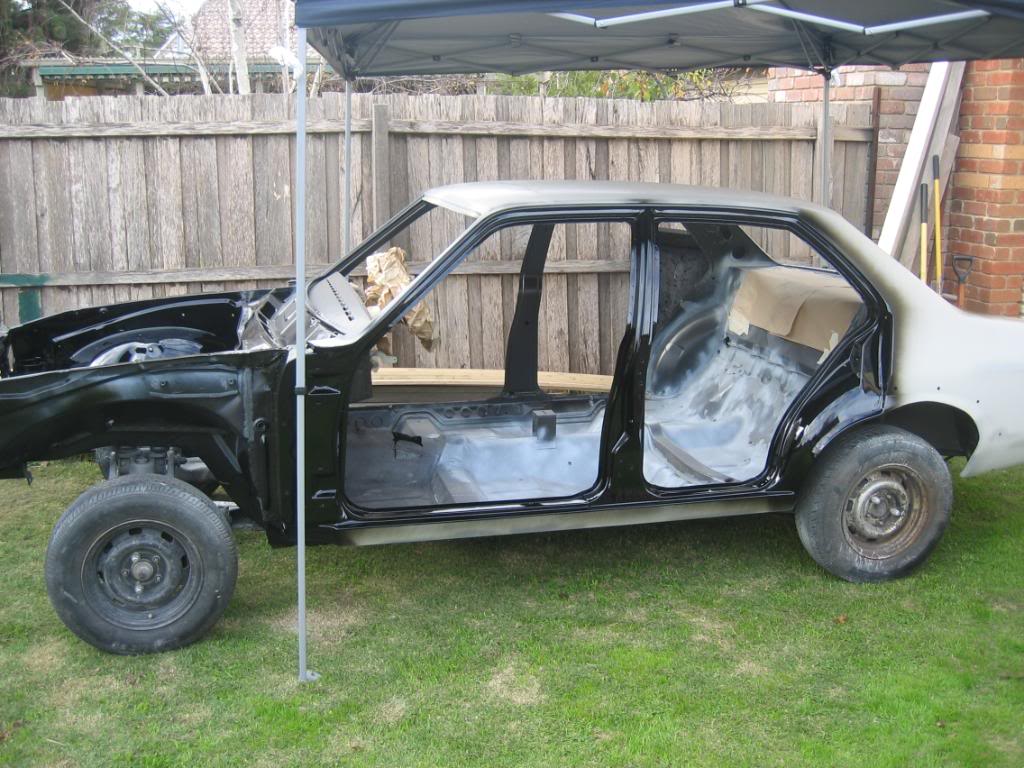
We managed to get all the hinges done and the inside of both the back doors. During the week I sanded the inside of the hood down as there was a lot of crap that had blown out onto the paint, during the first hit. Thats been re-painted also and has turned out really good, though I will need to get a brush through into all the holes in the inner, so that you cannot see any non-black areas. All the panels will dry for the week and then next weekend Ill hang them on the car, to be ready for the exterior paint. Might strip and paint a whole lot of bolts too, for the hinges. Heres a tip. never sand using thinners. I was re-sanding one of the door inners as the paint had reacted with some of the deadner in a small area, and i was using a cup full of water (or so i thought) wwhen sanding. Little did i know my mate had piffed the water and was using that mixing cup to add thinners to paint! Here I am wondering why the paint was all going sticky!! Should of smelt it, but it was quite hard to smell anything after spraying all day.
Posted Image
guess you have to laugh about it but it ended up wasting a fair bit of time. turned out good in the end.
Posted Image

#77 76lxhatch

76lxhatch

    That was easy!

  • Members
  • PipPipPipPipPipPipPip
  • 7,205 posts
  • Location:Unzud
  • Car:SS
  • Joined: 04-August 08
Garage View Garage

Posted 08 June 2009 - 11:47 AM

It does look good, I'm sure you'll be happy about spending time on getting the door jambs and all the little extras right when you get to the finished product!

#78 Heath

Heath

    I like cars.

  • Administrators
  • PipPipPipPipPipPipPip
  • 18,383 posts
  • Name:Heath
  • Location:Eastern Suburbs, Melbourne
  • Car:Heavily Modified UC Sunbird Hatchback
  • Joined: 07-November 05
Garage View Garage

Posted 08 June 2009 - 12:11 PM

Woah that is glossy off the gun, sweet!

#79 _darrenmark1_

_darrenmark1_
  • Guests

Posted 08 June 2009 - 12:12 PM

Looks great mate, did you pull the hinges apart to paint them, i sandblasted mine apart then painted them,
what a pain in the ass but it comes up great in the end.

Darren

#80 _DrFegg_

_DrFegg_
  • Guests

Posted 08 June 2009 - 12:20 PM

Darren, nah didnt, thought about it but it seemed like too much of a pain to do. Just sandblasted them ,primer ,sanded and painted. Hope the paint doesnt chip off when in use. May have to do them same as you later on. Bloody hope not. time will tell.
By the way, did you end up getting that manifold. If so can you send me some photos? Im starting to believe that these things dont exist!!!Does the casting number end with a 3 or a 4?
Ta.

#81 _DrFegg_

_DrFegg_
  • Guests

Posted 08 June 2009 - 12:27 PM

Yeah heath,
its come up tops. Photos dont quite show how good. The guy is a gun with the gun!!! Was watching him as he was doin the top coats, I reckon im ok with the gun, but he really made me look like the rank amatuer that i am. Probably have given it a go myself if it wasnt the car that it is, and i might do one in the future to see how good i can get it, but i tell you, there is definitely an art to it. And the black itself is your own worst enemy. To think that it will only get better after cutting/polishing.
drool...... Going to be to nervous to drive it.

#82 _darrenmark1_

_darrenmark1_
  • Guests

Posted 08 June 2009 - 12:38 PM

Yes mate,

it looks rough in the pics but just needs a bit of a clean! the water jackets are excellent, they had the correct carby on evilbay last week aswell.

slr5000 carb

Posted Image

It is only for my spare motor, so i will give it a clean and wack it on.

Daz

Edited by darrenmark1, 08 June 2009 - 12:39 PM.


#83 _cruiza_

_cruiza_
  • Guests

Posted 08 June 2009 - 01:17 PM

Hi DeFegg keep it up looks like it is starting to come togetheir, you are a brave doing black I never could put up with all the work involved

#84 _DrFegg_

_DrFegg_
  • Guests

Posted 08 June 2009 - 03:02 PM

Hey cruiz,
not really brave, its the colour on the plates so thats the colour it must be. If i had a choice i wouldnt pick it either, like you said, too much work. :cry:

#85 _The Baron_

_The Baron_
  • Guests

Posted 09 June 2009 - 02:05 PM

You must be starting to get exited by now!!

Come on, bring out the Tuxedos.

#86 _DrFegg_

_DrFegg_
  • Guests

Posted 09 June 2009 - 09:00 PM

Yeah Baron, i do get a bit excited. Its hard because i know i have to be patient and wait until the next time the painter can get down, which is probably 3 weeks away. :ZZZ: So progress is going to be slooooooow. I will amuse myself until then with stripping/painting bolts and trying very hard not to scratch panels as i carefully put them back on the body.

#87 _DrFegg_

_DrFegg_
  • Guests

Posted 27 June 2009 - 06:00 PM

Another day spent on the paint today. Got a lot of the parts ready to be hung on the body. During the week we hung the rear doors, decklid and hood. Done today were the inside of both front doors, front hinges, insides/catwalks of both front fenders, cowl grill, flares , rear spoiler, mirrors and door handles. A fair bit which doesnt quite come across in the photos. Last week i also cleaned/stripped all my bolts. i then painted them in the POR15 topcoat paint, is satin black, doesnt match perfectly but its pretty hard to spot the difference. The benefit here is when we were adjusting the doors, the paint hasnt chipped! Its bloody tough paint, almost like a ceramic coating and stood up to a lot of abuse. The only downside is that you need a black car to match your bolts. More in a couple of weeks.
Posted Image
Posted Image
Posted Image
Posted Image
Posted Image

#88 _mello92_

_mello92_
  • Guests

Posted 27 June 2009 - 07:14 PM

Looking good!
Good point about the POR15 topcoats, though Im sure its possible to get other colours here. I imagine chromed bolts wouldnt look to bad either.
Any particular reason why you didnt cut the rear guards more?

Cheers.

#89 _DrFegg_

_DrFegg_
  • Guests

Posted 28 June 2009 - 12:09 PM

Gday mello,
didnt know you could get the topcoat in other colours. Definitely recommend it though. The rear gaurds are cut to suit 14" rims. Thats what it had before and was happy with it, didnt scrub. I want the 'old school' look and have a nice set of 14" hotwires to go on. Not a lot of peoples cup of tea but I really like the classic look.

#90 Litre8

Litre8

    Thrillseeker

  • Administrators
  • PipPipPipPipPip
  • 2,399 posts
  • Name:Howard
  • Location:Melbourne, Victoria
  • Car:1976 LX SLR8000
  • Joined: 05-February 07

Posted 28 June 2009 - 12:26 PM

Should look tops when its all completed!

#91 _DrFegg_

_DrFegg_
  • Guests

Posted 25 July 2009 - 09:47 PM

Havnt posted an update for a while, project is moving forward, although slowly, its getting there. Ive spent my spare time preparing the body and panels for paint. A lot of work was involved sanding the overspray on the doors, qtr panels and fenders. There was quite a lot of paint and in some areas and was quite thick. All bolts were stripped, cleaned and repainted. Sealer was applied into the drip moulding, what a messy , sh!tty job that is! Its almost impossible to get the sealer into the small channel without smearing it over half the car. Thank god for prepsol. I also roughly fitted the front doors ,and fenders. All the add on panels, including the flares were re-sanded again, got them really smooth without any blemishes. The fibreglass seems to get a bit of static charge in them and attracts the dust/crap like crazy while spraying. Being black its bloody irritating, every imperfection shows so im sanding/painting each panel at least twice. Im going to have to live with a few blemishes until the final buffing. Heres the car with all the panels roughly fitted
Posted Image
Today we spent a good few hours getting all the gaps correct. As i will be using a stencil kit to paint the "slr 5000" blackouts, its really critical we get the panels in their correct positions. We will only get one shot at it.
Posted Image
Ive included a couple of pics of the deep black on the flares. mmmmmm shiny.
Posted Image
Posted Image
Overall im pretty happy with the amount done today. All the parts were re-painted, panels now fit sweetly and we got most of the masking done on the body. Best yet, theres only a little bit of sanding left for me to do.
The local stupidcheap wont be happy to lose its best customer... no more sandpaper!!
Next sunday, the body gets painted...
Posted Image

#92 fatslr

fatslr

    Forum Fixture

  • Members
  • PipPipPipPipPip
  • 1,247 posts
  • Name:Garth
  • Location:Dunsborough W.A.
  • Joined: 17-July 07
Garage View Garage

Posted 25 July 2009 - 11:55 PM

Looking awsome mate :clap:
I can't wait to see it painted i have always said remeber the six "P"s


Prior
Preparation
Prevents
Piss
Poor
Performance

It would seem your preparation is pedantic lol

Garth

#93 _cruiza_

_cruiza_
  • Guests

Posted 26 July 2009 - 07:59 AM

Looking good DrFegg cann't wait to see some colour on those panels

#94 _DrFegg_

_DrFegg_
  • Guests

Posted 26 July 2009 - 09:49 AM

Thanks fellas. Im taking my time with everything to get it right. This colour keeps me honest, knowing that if i cut corners its going to show up badly when the paint goes on. I seem to have more patience than I thought i would, im actually enjoying some of the more labourious jobs. I reckon i will get a tad more impatient once the car is closer to being driven....
just looking into that deep, shiny black on those panels gets the blood going....

#95 its Paul

its Paul

    Formerly lx8vd77

  • Members
  • PipPipPipPipPip
  • 1,577 posts
  • Name:Paul
  • Location:Gold Coast
  • Car:LXSS, VUSS, VESSv & the mighty HB
  • Joined: 07-January 08

Posted 26 July 2009 - 11:41 AM

Mate, your car is turning out fantastic, makes me wish that mine had Tuxedo tags on it. Great work, cant wait to see it finished.
Keep posting heeps of photos.
Cheers Paul.

#96 _DrFegg_

_DrFegg_
  • Guests

Posted 02 August 2009 - 05:52 PM

Big day for me, the car is now painted. finally. Its not perfect, there are a few imperfections as usual, but these will all be buffed out. There are also a couple of sags, which again can be cut out, but overall im pretty happy with it. Its very deep, already very very shiny and will only get better. It looks bloody good!!! Best of all, with the colour on you can see how straight the panel work is. Im very pleased .Its a pity the photos dont come out so good, the lighting isnt very good and i dont want to get it out into the sunlight for a while yet. Anyways enough words, heres some pics.
Before.
Posted Image
after.
Posted Image
Posted Image
Posted Image
Posted Image
Posted Image
Posted Image
Posted Image
next , the silver goes on. got to get some accurate measurements off the old original panels i have. First we will do the silver "blackouts " on the body, then we will fit all the flares and im going to continue the silver over the flares too. Could be a couple of weeks till that point.

#97 Ruts

Ruts

    How Fast!?

  • Moderators
  • PipPipPipPipPip
  • 1,118 posts
  • Location:Bargo, NSW
  • Car:Blown A9X replica, Black SS hatchback, LH SLR5000
  • Joined: 23-December 06

Posted 02 August 2009 - 06:18 PM

Great Job, bet you'll sleep well tonight.

#98 _Lxrana_

_Lxrana_
  • Guests

Posted 02 August 2009 - 06:58 PM

Looking good Bruno. Top work mate.

#99 _cruiza_

_cruiza_
  • Guests

Posted 02 August 2009 - 08:42 PM

concratulations on the paint you must befeeling very pleased with reaching this milestone, wel done keep it up

#100 _mello92_

_mello92_
  • Guests

Posted 02 August 2009 - 09:58 PM

This is when all those hard hours start to pay off mate.
Its looking great, seriously cant wait to see this finished!


2 user(s) are reading this topic

0 members, 2 guests, 0 anonymous users