
OH WOW!!!!!!!!!!!!!!!!!! THAT IS GORGEOUS!

Tuxedo Black L31 SLR 5000 restoration
Started by
_DrFegg_
, Feb 03 2009 06:44 PM
209 replies to this topic
#126

MRLXSS
-

- Members
-

- 12,408 posts
The Render Garage
- Name:Matt
- Location:Upwey, Melbourne
- Car:355 LX Hatchback, DeLorean DMC-12, LX SS Hatch, VY Cross8 Crewman
- Joined: 09-November 05
Posted 10 December 2009 - 12:30 PM
#127
_purpleLC_
_purpleLC_
-

- Guests
Posted 10 December 2009 - 06:13 PM
OH WOW!!!!!!!!!!!!!!!!!! THAT IS GORGEOUS!
Agree 100%
#128
_DrFegg_
_DrFegg_
-
- Guests
Posted 10 December 2009 - 08:35 PM
Yes, there havnt been any updates for a while. Its funny how you can lose momentum and then its hard to get it back. Probably havnt touched the car for over a month now. Been getting distracted with helping friends with their projects. In the last couple of weeks ive sprayed a mates camper trailer (black of course) and helped sand the hull of a bloody big boat (if anybody ever asks for your help to sand a boat, dont do it, its a bastard of a job!!) The car is currently sitting in the garage with the front end out in pieces. Ive got a lot of the pieces down to bare metal, including the springs and the gearbox, and was in the process of painting the components with the POR 15 ,hammer tough chassis coat. Also gave under the gaurds and around the tunnel another coat with the POR, as well as re-sealed the weld flanges. Last thing i was doing was trying to sort out a spring compressor to allow me to get the springs back into the front end. Still got to do that one. On a better note, Ive got my reconditioned booster and master cylinder back from hoppers stoppers. Bit disappointed that they dont do it themselves, but send the work out. Hate paying people to do nothing, bloody middle men. Got all new bushes for the front end to put in, new shocks, clutch kit to suit the super T10. Also the engine comes back the end of next week, splurged a little bit more than i wanted to and got it balanced. Figure its worth the extra coin. All up ive got a lot of nice shiny bits to go back onto the car, not much time and to be honest, not a lot of motivation at the moment. Im hoping to get some time over christmas to finish the front suspension, but the kids are already making other plans for me. Must extract the digit.....
#129
Swarbs
-

- Members
-
- 1,671 posts
Forum Fixture
- Name:Dave
- Location:North West WA
- Car:LX 5000
- Joined: 18-April 07
Posted 10 December 2009 - 11:13 PM
AHHhhh!! -- feel better now
Yeah know the feeling -- stick with it
D
Yeah know the feeling -- stick with it
D
#130
_Driver 73_
_Driver 73_
-
- Guests
Posted 21 December 2009 - 08:23 PM
WOW 13 Years storage!! Great thread Dr Fegg kepp it up, car looks great.
Edited by Driver 73, 21 December 2009 - 08:23 PM.
#131
_DrFegg_
_DrFegg_
-
- Guests
Posted 11 January 2010 - 06:14 PM
Havnt posted pics for a while, so here goes,
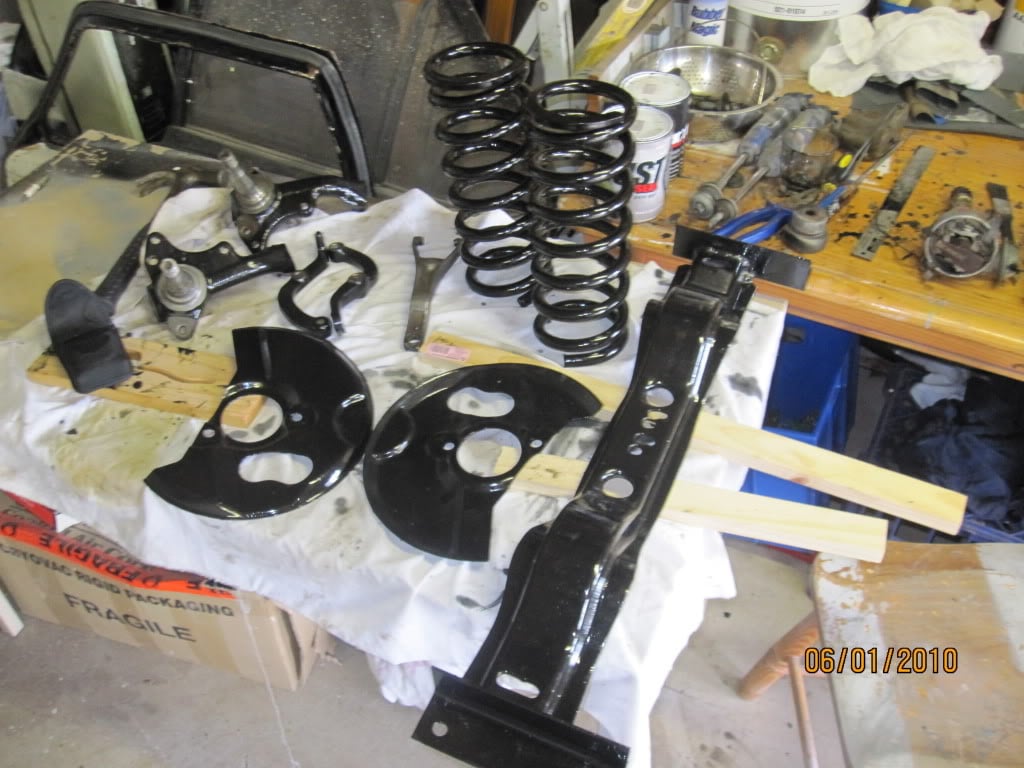
All parts were stripped with a wire wheel, then coated with KBS hammercoat(?). Reckon they come up pretty well and look fairly good too.Is a bit bubbly and they wouldnt pass on a show car, but they should be well protected.
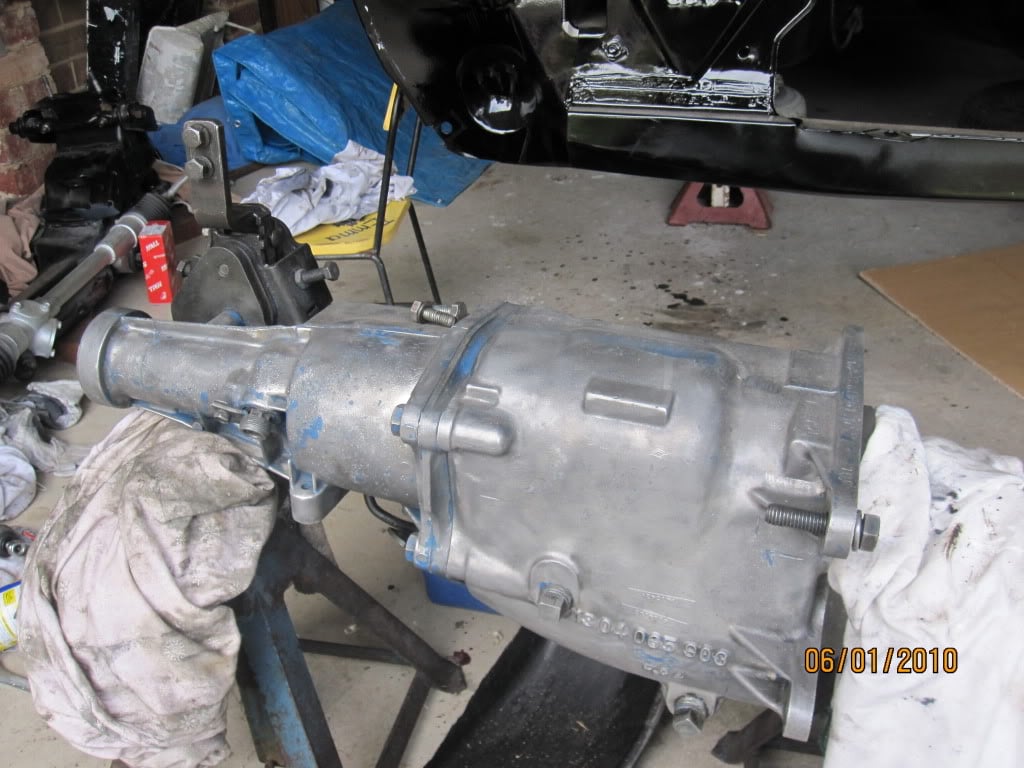
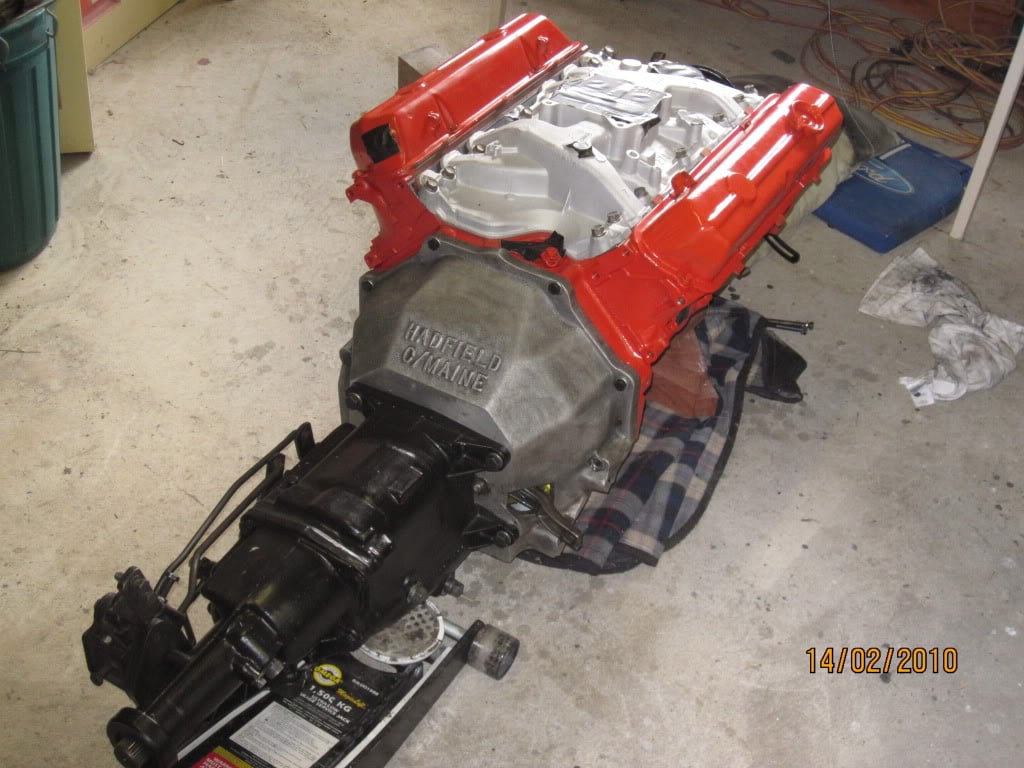
Second photo is the stripped down T10. Still needs a bit of work in hard to get areas, and will probably go black with the KBS. It changed well when in the car (13 years ago) but im wondering if i should get it inspected, and I have no idea of who to bring it to. Not many with experience of these boxes, i would think. If anybody has a suggestion of somebody in melbourne, let me know.
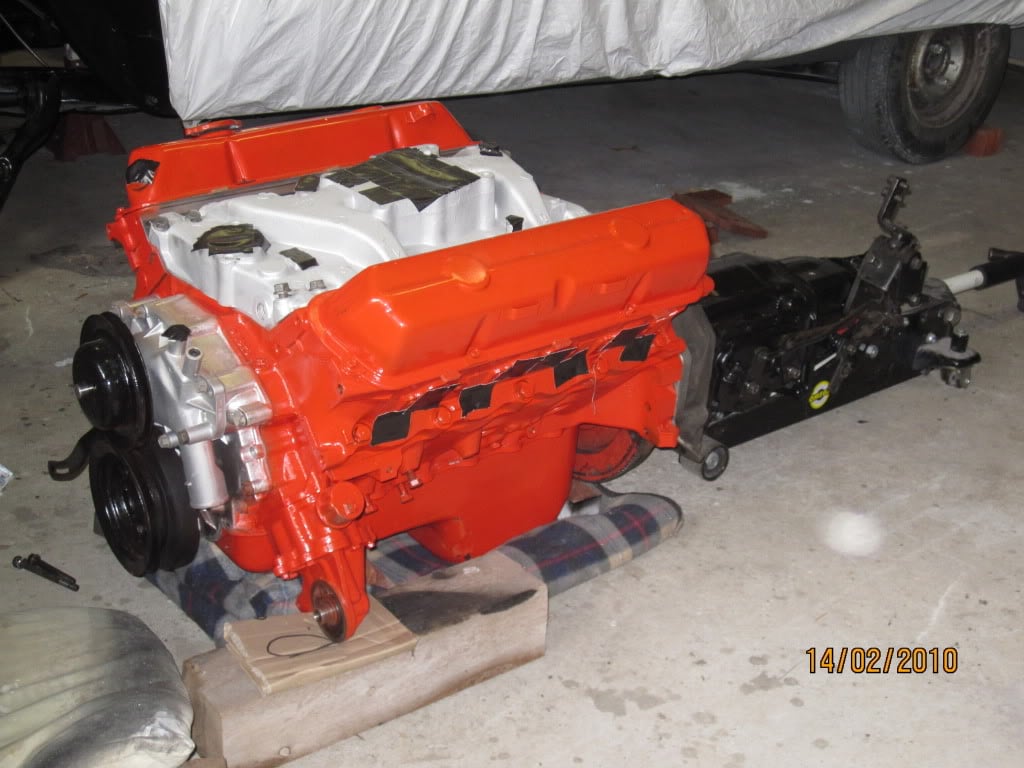
The motor has finally arrived, looks pretty good but there are a few chips on the paint already which will need touching up, not to mention some overspray on the timing cover. Not happy about that, reckon the apprentice got that job. Will try scrubbing at it with some thinners, the wire wheel will get it off but will probably shine the casting too much and will stick out like a sore thumb. Also thought it looked very orange to me, i hope they used the correct colour. If you think it looks wrong, let me know!
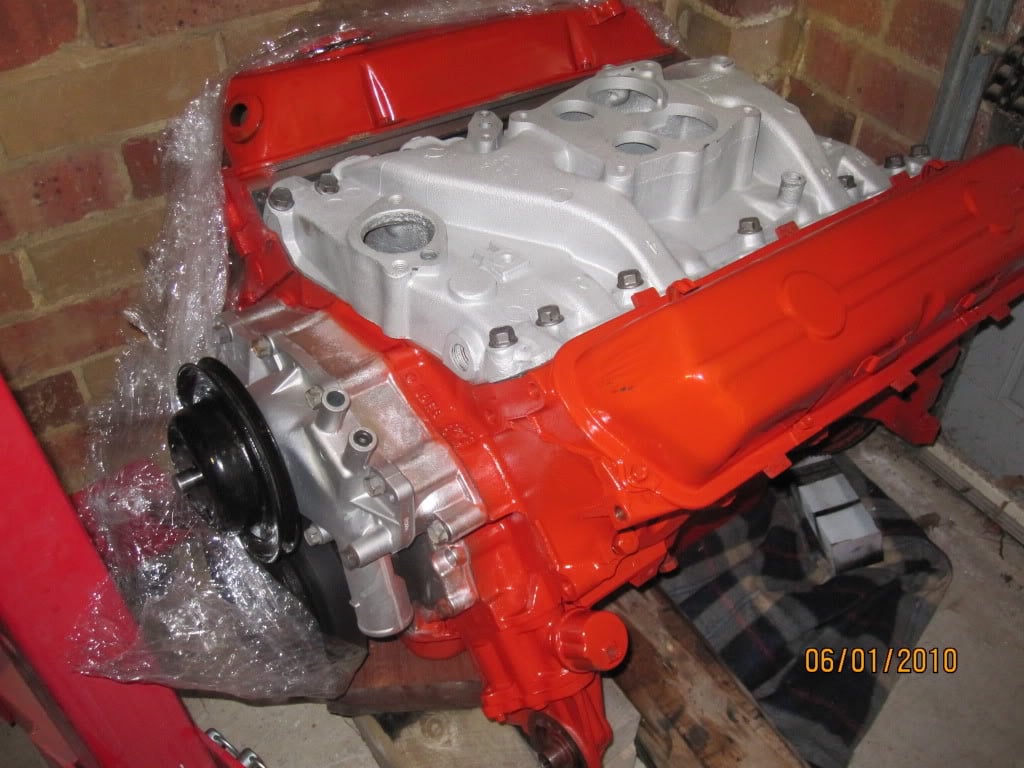
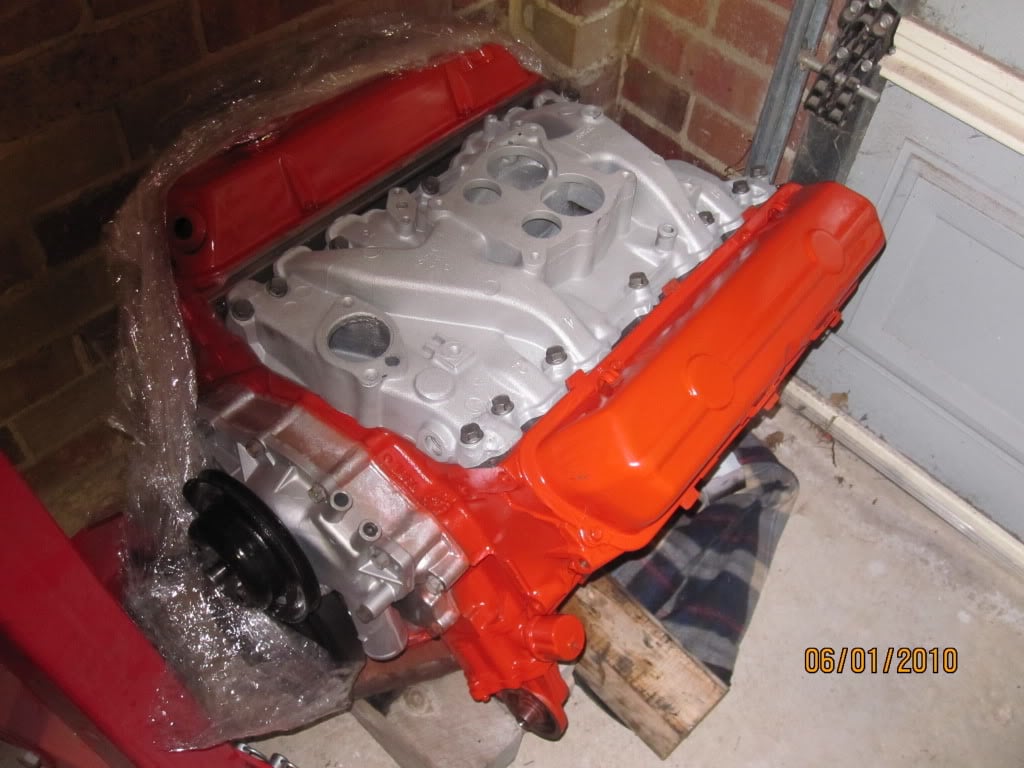
Engine got all the usual work, balancing, completely dipped and stripped, new pistons,rings,cam etc. Valves are done so she will run on unleaded, manifold was cleaned and welded, crank ground, new water pump and balancer. Also Made sure that when they decked the block, they avoided the original stamped numbers, didnt want them have to be re-stamped.
K frame to go in next, nearly done, just have to fit the tie rod ends, and then she can go in. I really need to get the front suspension back together so i can move the car when i need to. Hopefully if this heat p!sses off i can get cracking.
All parts were stripped with a wire wheel, then coated with KBS hammercoat(?). Reckon they come up pretty well and look fairly good too.Is a bit bubbly and they wouldnt pass on a show car, but they should be well protected.
Second photo is the stripped down T10. Still needs a bit of work in hard to get areas, and will probably go black with the KBS. It changed well when in the car (13 years ago) but im wondering if i should get it inspected, and I have no idea of who to bring it to. Not many with experience of these boxes, i would think. If anybody has a suggestion of somebody in melbourne, let me know.
The motor has finally arrived, looks pretty good but there are a few chips on the paint already which will need touching up, not to mention some overspray on the timing cover. Not happy about that, reckon the apprentice got that job. Will try scrubbing at it with some thinners, the wire wheel will get it off but will probably shine the casting too much and will stick out like a sore thumb. Also thought it looked very orange to me, i hope they used the correct colour. If you think it looks wrong, let me know!
Engine got all the usual work, balancing, completely dipped and stripped, new pistons,rings,cam etc. Valves are done so she will run on unleaded, manifold was cleaned and welded, crank ground, new water pump and balancer. Also Made sure that when they decked the block, they avoided the original stamped numbers, didnt want them have to be re-stamped.
K frame to go in next, nearly done, just have to fit the tie rod ends, and then she can go in. I really need to get the front suspension back together so i can move the car when i need to. Hopefully if this heat p!sses off i can get cracking.
#132
_THE SS_
_THE SS_
-
- Guests
Posted 11 January 2010 - 07:33 PM
Congrats there you are doing an awesome job !!!!! BET YOU CAN'T WAIT ?
#133
_torana_umunga74_
_torana_umunga74_
-
- Guests
Posted 11 January 2010 - 07:45 PM
that orange looks well bright. id look into it. payin for half assed job is crap.
#134
_beergut_
_beergut_
-
- Guests
Posted 11 January 2010 - 10:39 PM
that orange looks well bright. id look into it. payin for half assed job is crap.
yeah looks a bit chevy orange not holden rocket red to me
especially the left? (closest )rocker cover
common supa crud mistake
#135

 View Garage
Posted 12 January 2010 - 06:42 AM
The red looks pretty good to me, the camera flash was used in those pics by the looks of it.
Anyone with half a clue should be able to check out the T10, they're not a complex box by any means.
Anyone with half a clue should be able to check out the T10, they're not a complex box by any means.
#136
_LH SLR 3300_
_LH SLR 3300_
-
- Guests
Posted 12 January 2010 - 08:20 AM
Hi.
Your car looks awesome, great job . Cheers Matt
Your car looks awesome, great job
. Cheers Matt
#137
_DrFegg_
_DrFegg_
-
- Guests
Posted 14 February 2010 - 07:48 PM
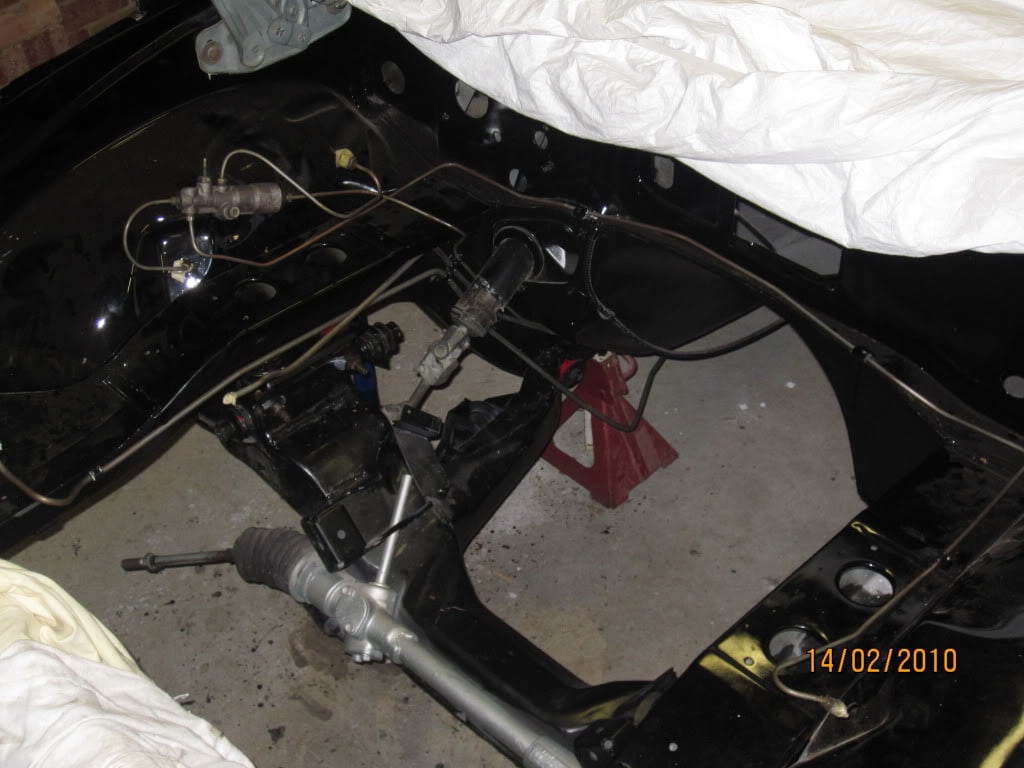
Got a bit more work done today. Finally the front end is back in, what a b@stard of a job. Even following every bit of advice i could from the wise people on this forum, it was still a turd of a job.Got a mate over to help me and after lots of cursing, bashing, pushing,prying, it slipped (was bashed) in. I guess there are a few tricks to it, and ive learnt a few lessons too. Lesson #1. Dont accidently drop the bush as your trying to sit it onto the bolt, inside the rail. You can almost gaurantee that it will somehow bounce its way back up the rail and then fall down the kickup, never to be seen again. I couldnt have done that if i tried. Mate says he has a flexible gripping tool that may get it out, but i reckon its there to stay. So had to use one of my old ,worn ones until i can get a replacement nolothane one (anyone happen to have a spare one??) or until i can perform a miracle and retrieve the other one. (no chance) So now i can progress to fitting the hubs/brakes etc. Lesson #2. Extreme violence is required, therefore dont spend too much time painting the k frame/ the rails around the mounting points, you will be painting them again! We also got the chance to fit the new clutch and bolt up the gearbox to the engine. Does anybody happen to know the torque specs for the gearbox to housing, housing to engine?? I know its not the standard gearbox but the specs should be pretty much similar. During the week ,whilst planning the work for this weekend, I thought I might have a quick look at the new clutch plate I had bought a few months ago. What do you know ,repco had ordered the wrong clutch. As i got this one cheap because they were trying to move old stock, the correct one ended up costing me another $300+ to order in. Bugger. Overall though it was a good days work and I can now get on with getting the front wheels back on.
#138
_LH8VD69_
_LH8VD69_
-
- Guests
Posted 14 February 2010 - 08:14 PM
Nice car man ! Gotta love black !!!!!! Look forward to seeing the end result 
#139
_Driver 73_
_Driver 73_
-
- Guests
Posted 18 February 2010 - 09:56 PM
Really commming together now
Very very nice car mate gota love the Black a REAL BEAST!!!!!!!!!!!!
Very very nice car mate gota love the Black a REAL BEAST!!!!!!!!!!!!
#140
Swarbs
-
- Members
-
- 1,671 posts
Forum Fixture
- Name:Dave
- Location:North West WA
- Car:LX 5000
- Joined: 18-April 07
Posted 03 June 2010 - 10:33 AM
Hey DrFegg
Hows things traveling??
D
Hows things traveling??
D
#141
LHSL
-
- Members
-
- 995 posts
Forum Fixture
- Name:Phillip
- Location:SYDNEY
- Car:1974 LH SL; 2 x 1975 LH S Toranas
- Joined: 30-March 07
Posted 27 August 2010 - 04:12 PM
Hi DrFegg,
Awesome job you have done. Any further updates? Your project is one of my favourites on the forum.
Cheers,
phillip
Awesome job you have done. Any further updates? Your project is one of my favourites on the forum.
Cheers,
phillip
#142
_DrFegg_
_DrFegg_
-
- Guests
Posted 06 November 2010 - 05:28 PM
Sorry fellas for the lack of reply, must have been a period where i wasnt checking the forum.
I finally have an update, and a few pics.
Over winter i pretty much didnt get to work on the car. Family and work issues pretty much ate up all of my time, not to mention who wants to be out in the garage in the dark and cold.
But now its sunny and bright (although i wish this bloody hayfever would F@CK RIGHT OFF!!!) and ive a bit more determined to actually get to drive this thing while the weather is good.
Firstly I begun by thoroughly cleaning underneath the dash sheetmetal as a lot of residue from the media blasting was still up there and i hit the areas i could reach with a coat of killrust, for good measure. This led to me deciding the steering column to come out as this had a lot of caked on sh!t. Ive stripped it down, bought new bearings (my ass still hurts from rare spares) and cleaned/repainted what was needed . I also stripped and cleaned the ignition switch (thanks LAMO).
Next i cleaned and pruned my wiring harnesses. Got rid of redundant wires (such as old alarm wires) re-taped it and tidied it up. They have been laid into the car ready to be connected.
I also found the threaded rod/nuts for the retention of my tail lights, terribly corroded. Ive sourced new threaded rod and nuts for these as you cant purchase the fasteners, although you can buy new taillamps(???) If any body needs these PM me as ive got a lot of left over rod.
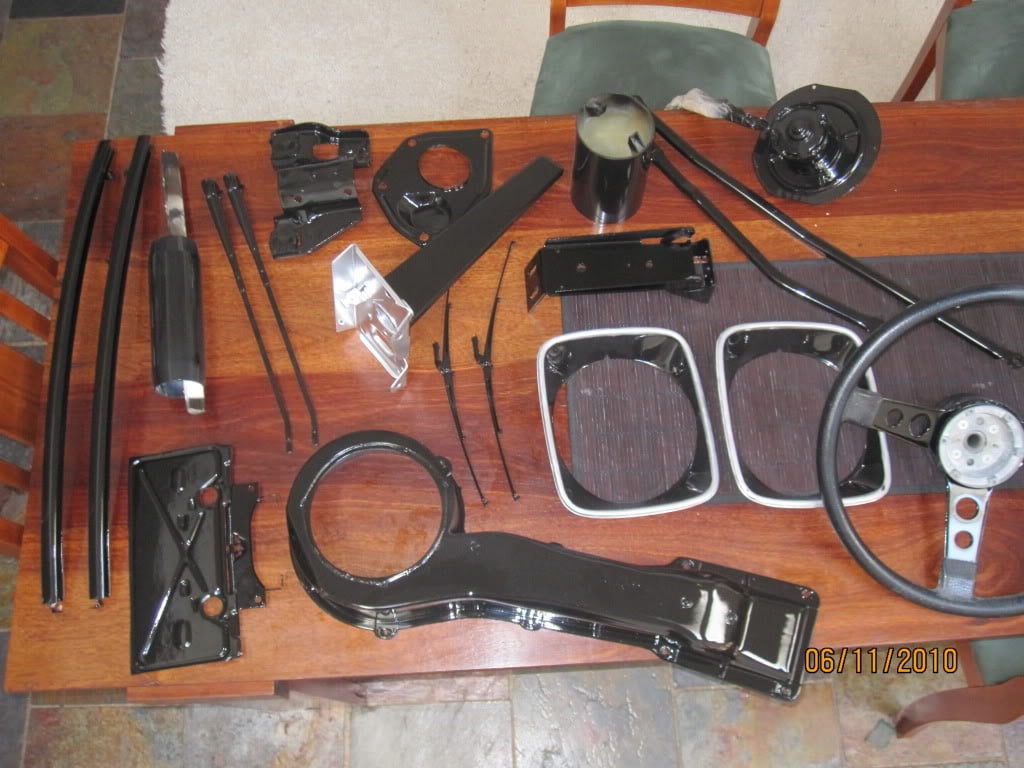
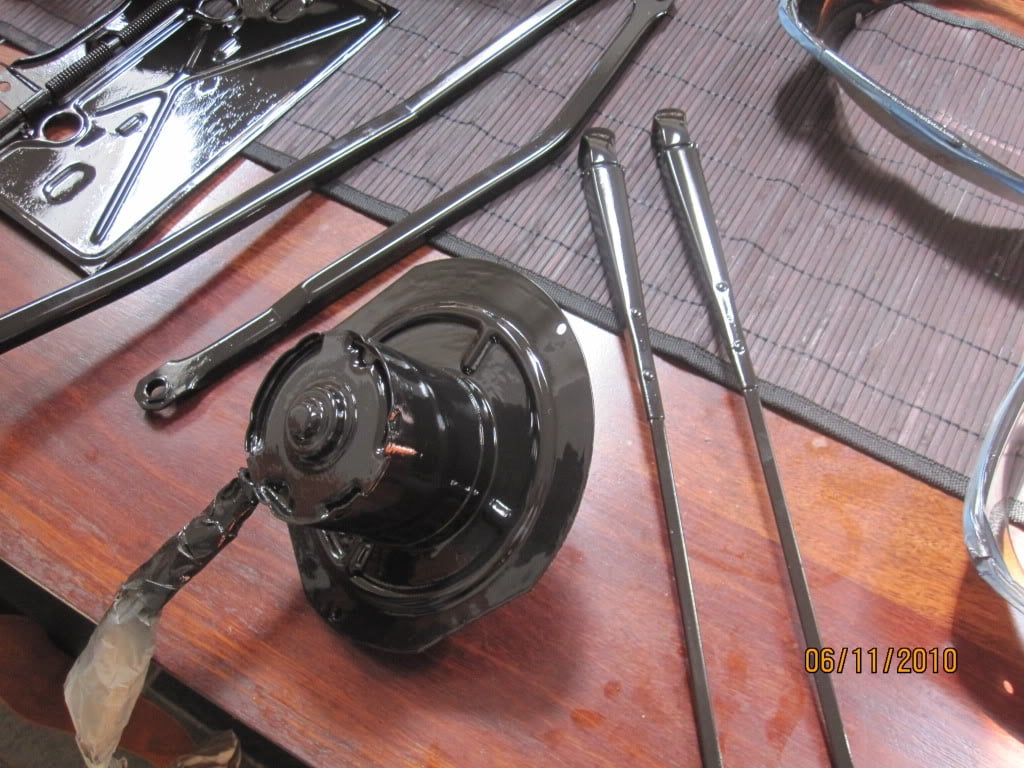
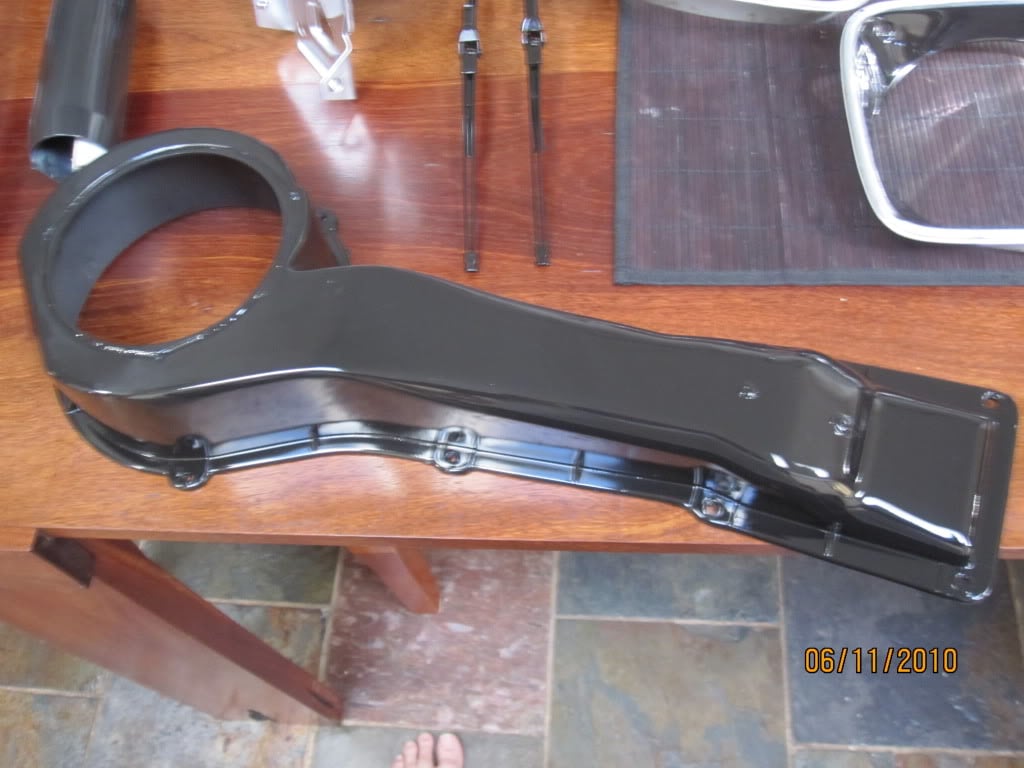
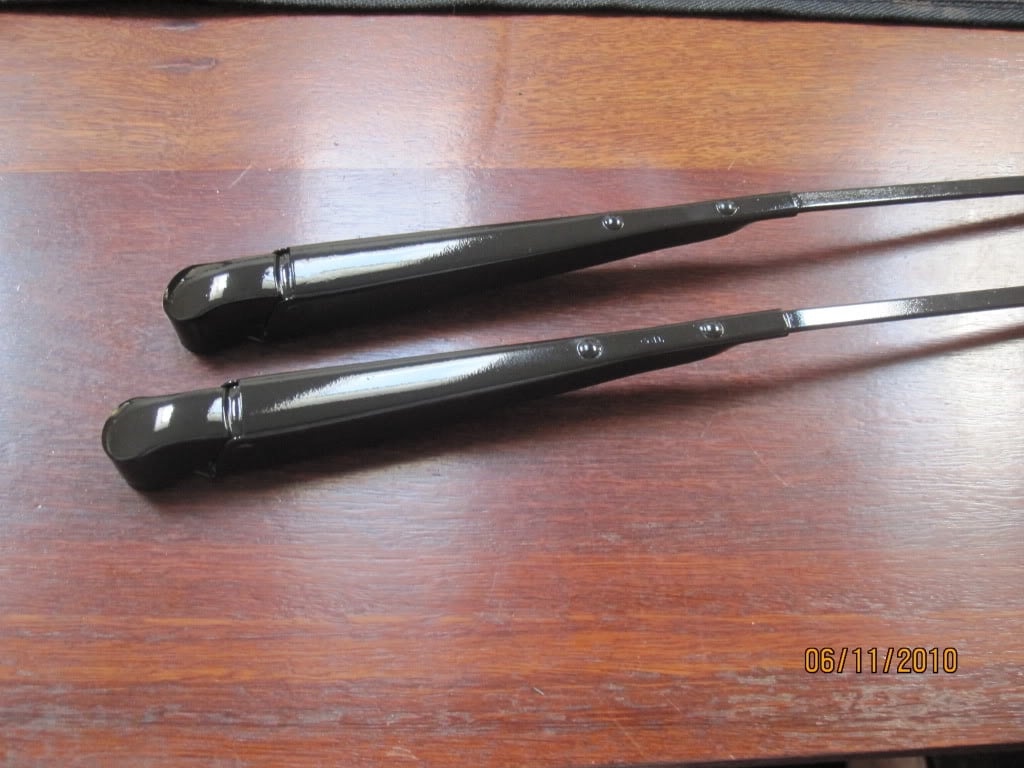
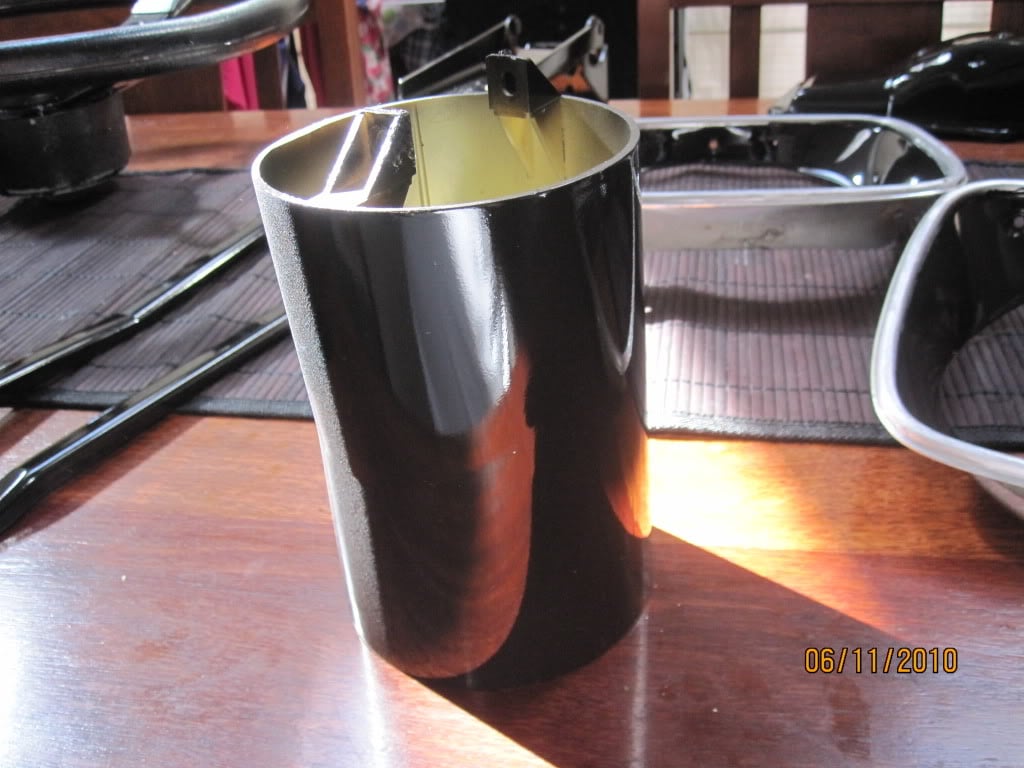
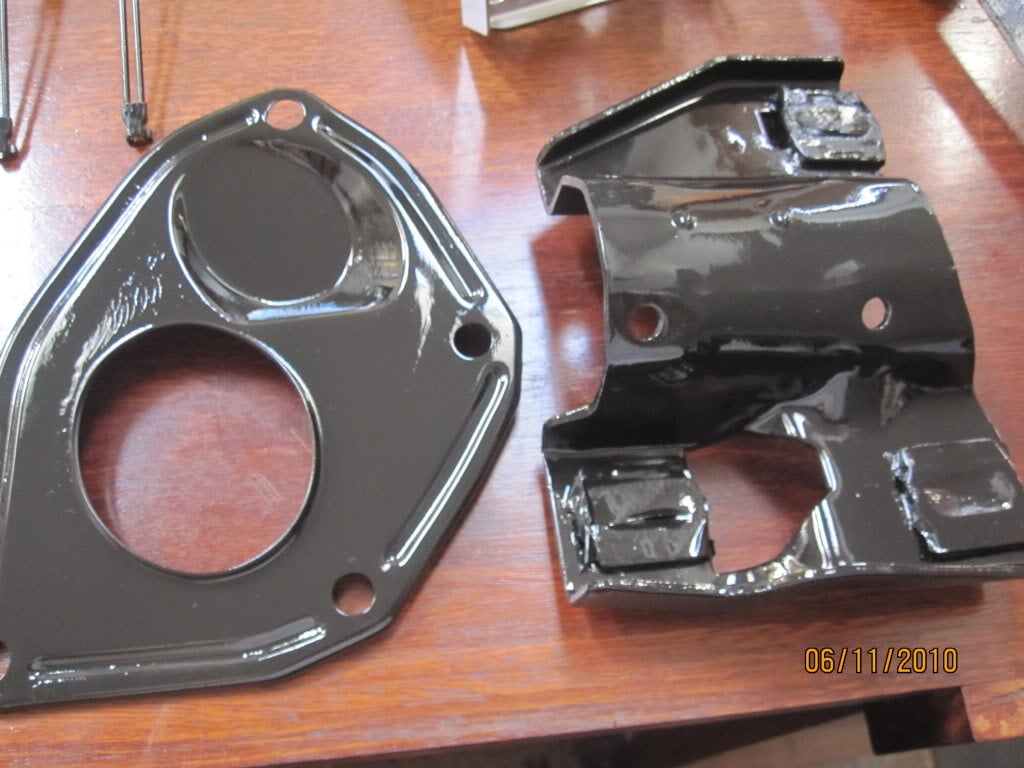
Ive been getting all my parts ready to put back onto the car. Everything that needed to be painted ive stripped, sanded and begun to paint. Today I finished all of the gloss black items and undercoated the booster, aircleaner/lid and fan shroud, ready to apply satin black next weekend. All of the parts copped about 3 coats of undercoat, 4 of topcoat, and a couple of blasts of clear. Im fairly happy with most of the outcomes, they are pretty good straight off the gun, but i may decide to cut some of the parts later.
Did a lot of bloody fiddly parts, quite hard to paint. The heater box also needed a coat of plasti bond to fill all the scratches/ gouges that are always in these parts. This thing was a real mess before i started so im rapt how it came out. To be honest im a bit disappointd in the steering wheel, still looks a bit "chippy" and the vynil is going to need a real good clean up. Does any body have recommendation how to really get the vynil to come up new? Unfortunately its got a little bit of undercoat overspray and i need to look at trying to remove it. ANy ideas would be welcome....

I finally have an update, and a few pics.
Over winter i pretty much didnt get to work on the car. Family and work issues pretty much ate up all of my time, not to mention who wants to be out in the garage in the dark and cold.
But now its sunny and bright (although i wish this bloody hayfever would F@CK RIGHT OFF!!!) and ive a bit more determined to actually get to drive this thing while the weather is good.
Firstly I begun by thoroughly cleaning underneath the dash sheetmetal as a lot of residue from the media blasting was still up there and i hit the areas i could reach with a coat of killrust, for good measure. This led to me deciding the steering column to come out as this had a lot of caked on sh!t. Ive stripped it down, bought new bearings (my ass still hurts from rare spares) and cleaned/repainted what was needed . I also stripped and cleaned the ignition switch (thanks LAMO).
Next i cleaned and pruned my wiring harnesses. Got rid of redundant wires (such as old alarm wires) re-taped it and tidied it up. They have been laid into the car ready to be connected.
I also found the threaded rod/nuts for the retention of my tail lights, terribly corroded. Ive sourced new threaded rod and nuts for these as you cant purchase the fasteners, although you can buy new taillamps(???) If any body needs these PM me as ive got a lot of left over rod.
Ive been getting all my parts ready to put back onto the car. Everything that needed to be painted ive stripped, sanded and begun to paint. Today I finished all of the gloss black items and undercoated the booster, aircleaner/lid and fan shroud, ready to apply satin black next weekend. All of the parts copped about 3 coats of undercoat, 4 of topcoat, and a couple of blasts of clear. Im fairly happy with most of the outcomes, they are pretty good straight off the gun, but i may decide to cut some of the parts later.
Did a lot of bloody fiddly parts, quite hard to paint. The heater box also needed a coat of plasti bond to fill all the scratches/ gouges that are always in these parts. This thing was a real mess before i started so im rapt how it came out. To be honest im a bit disappointd in the steering wheel, still looks a bit "chippy" and the vynil is going to need a real good clean up. Does any body have recommendation how to really get the vynil to come up new? Unfortunately its got a little bit of undercoat overspray and i need to look at trying to remove it. ANy ideas would be welcome....
#143
_jameslx_
_jameslx_
-
- Guests
Posted 07 November 2010 - 03:04 PM
you have done a grate job its gunna look amazing carnt wait to see it finished
#144
Swarbs
-
- Members
-
- 1,671 posts
Forum Fixture
- Name:Dave
- Location:North West WA
- Car:LX 5000
- Joined: 18-April 07
Posted 08 November 2010 - 09:40 PM
Dr Fegg
Stick with it -- the home straight is in front of you
All is coming together for start up day
Paint is on and loookin guuurd so the next big milestone has to be met
Thanks for the update
D
Stick with it -- the home straight is in front of you
All is coming together for start up day
Paint is on and loookin guuurd so the next big milestone has to be met
Thanks for the update
D
#145
_DrFegg_
_DrFegg_
-
- Guests
Posted 13 November 2010 - 02:21 PM
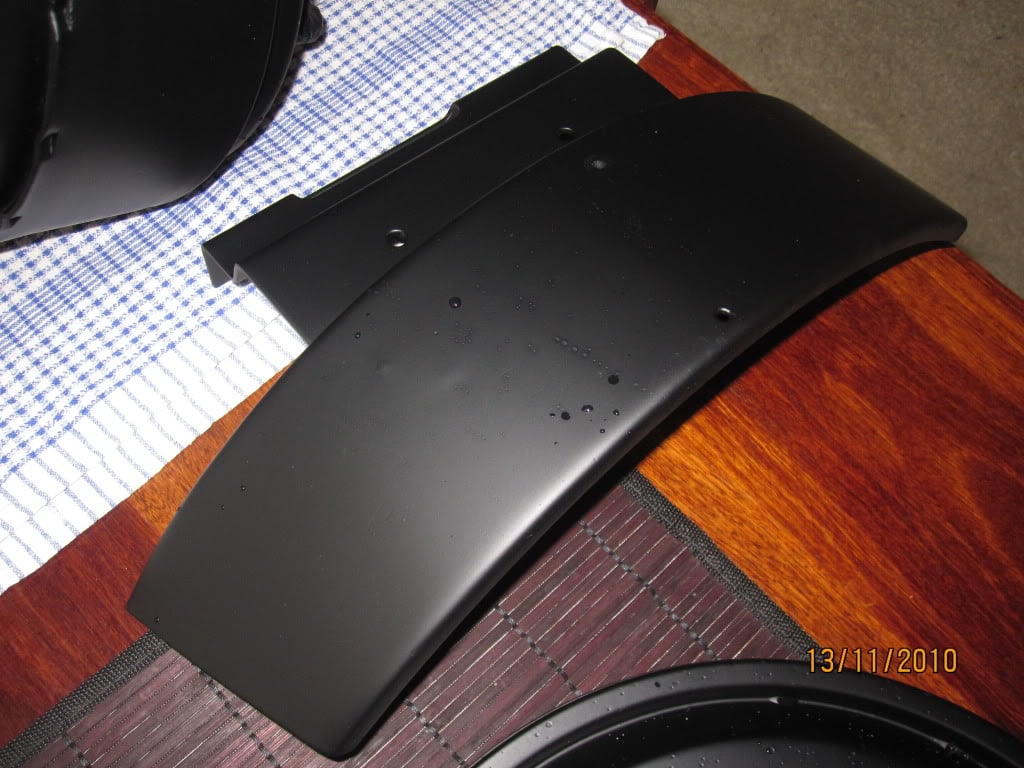
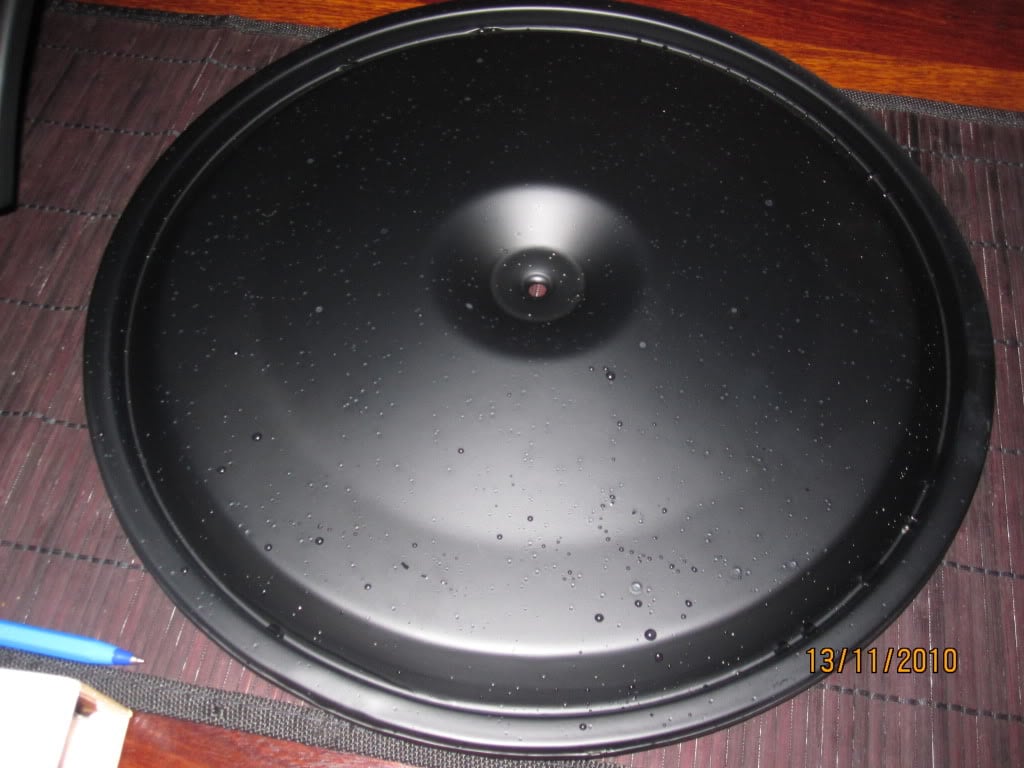
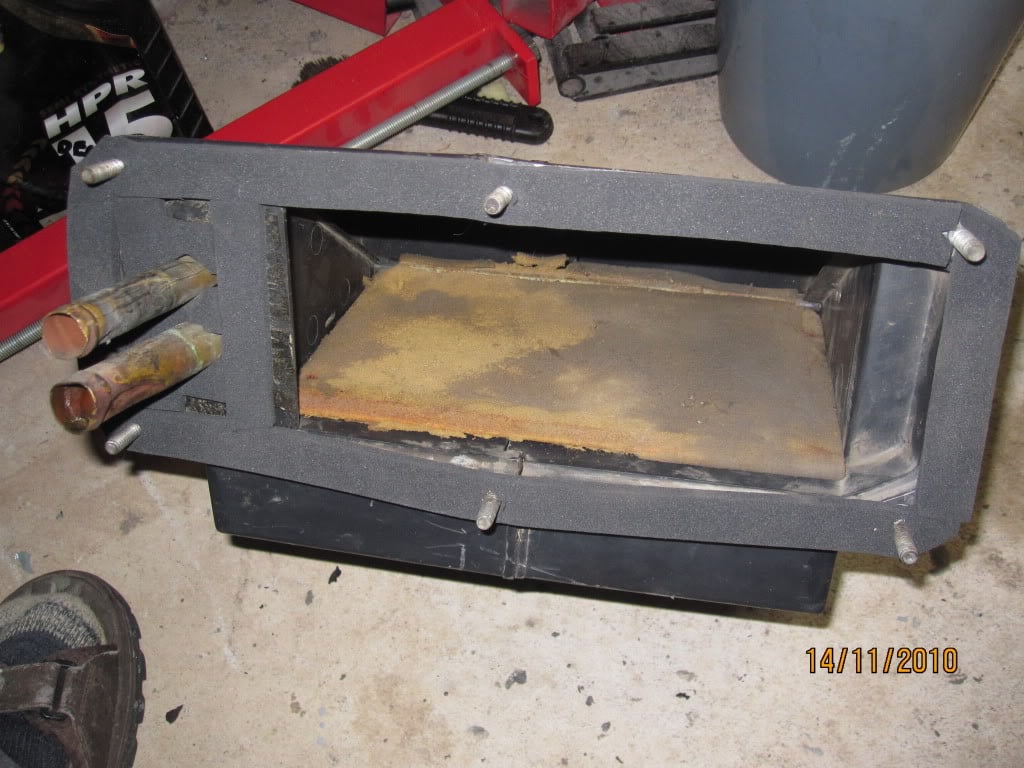
Painting the satin black items today. Terrible weather in Melbourne, drizzled or p!ssed down all day, made it trying conditions for spraying. Had a bit of success, and some diaster today. The Brake booster came out really good, i was very pleased but that was about it( bit of white dust in photos). The air cleaner, i completely f@#$!d up. I was cleaning my gun out a little way (up wind)from the drying air cleaner, seems like the thinners travelled and ive ended up with completely pitted parts. The fan shroud also copped a little bit but that will have to do for now, it can go on the car as is, and i will fix later.
Pissed off with myself, another 2 steps forward 1 back.
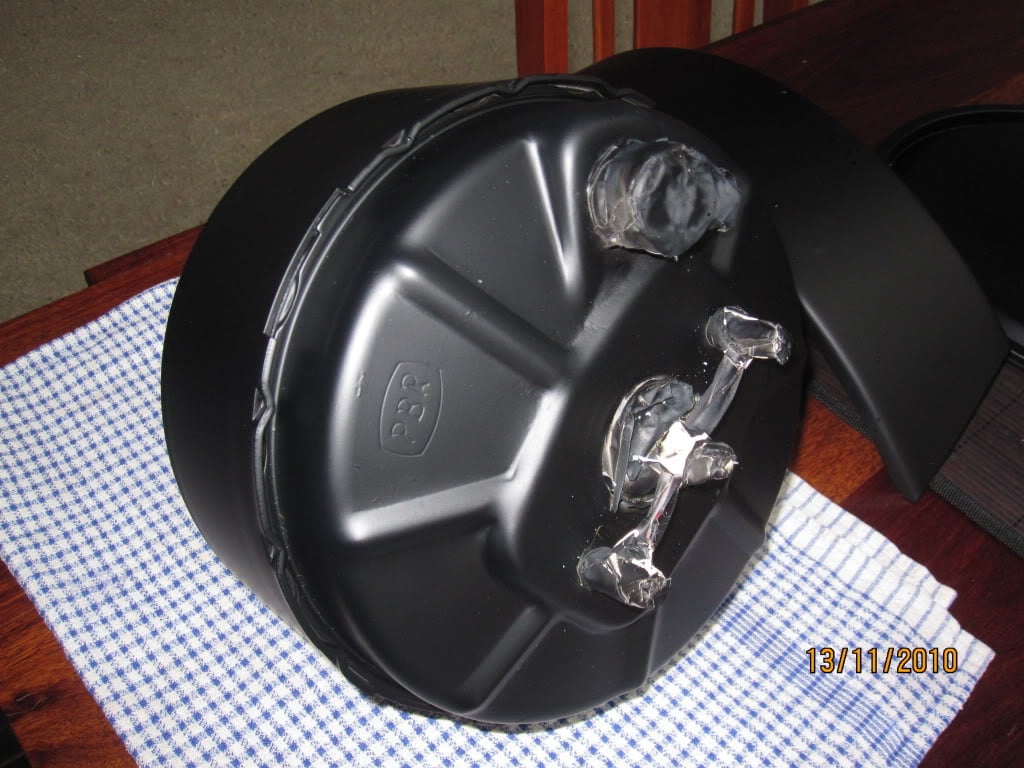
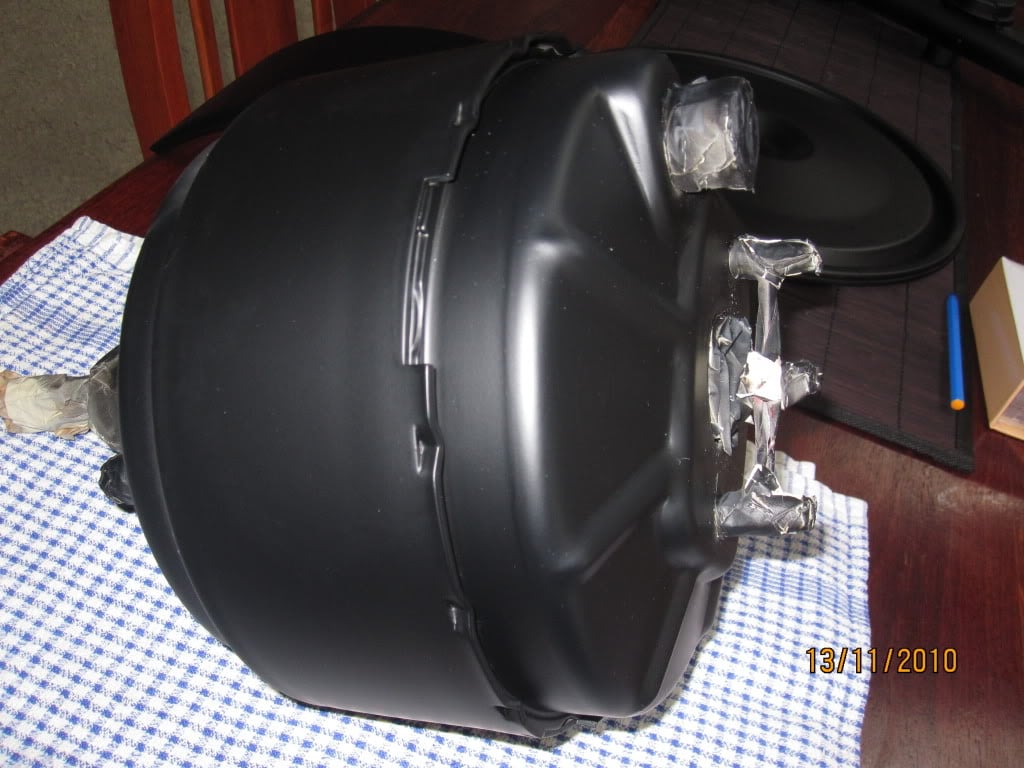

Pissed off with myself, another 2 steps forward 1 back.
#146
_AD_75_
_AD_75_
-
- Guests
Posted 13 November 2010 - 05:14 PM
Keep at it mate must be getting fairly close now! keep the updates coming.
must be getting fairly close now! keep the updates coming.
#147
_DrFegg_
_DrFegg_
-
- Guests
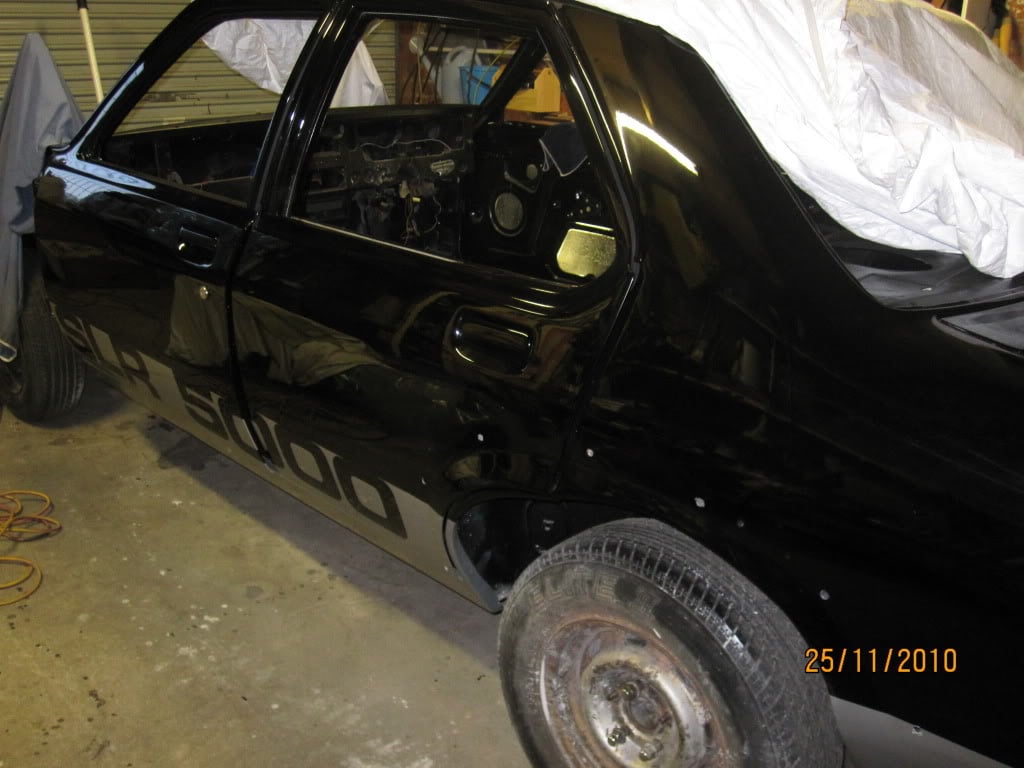
Posted 25 November 2010 - 08:01 PM
Update time.
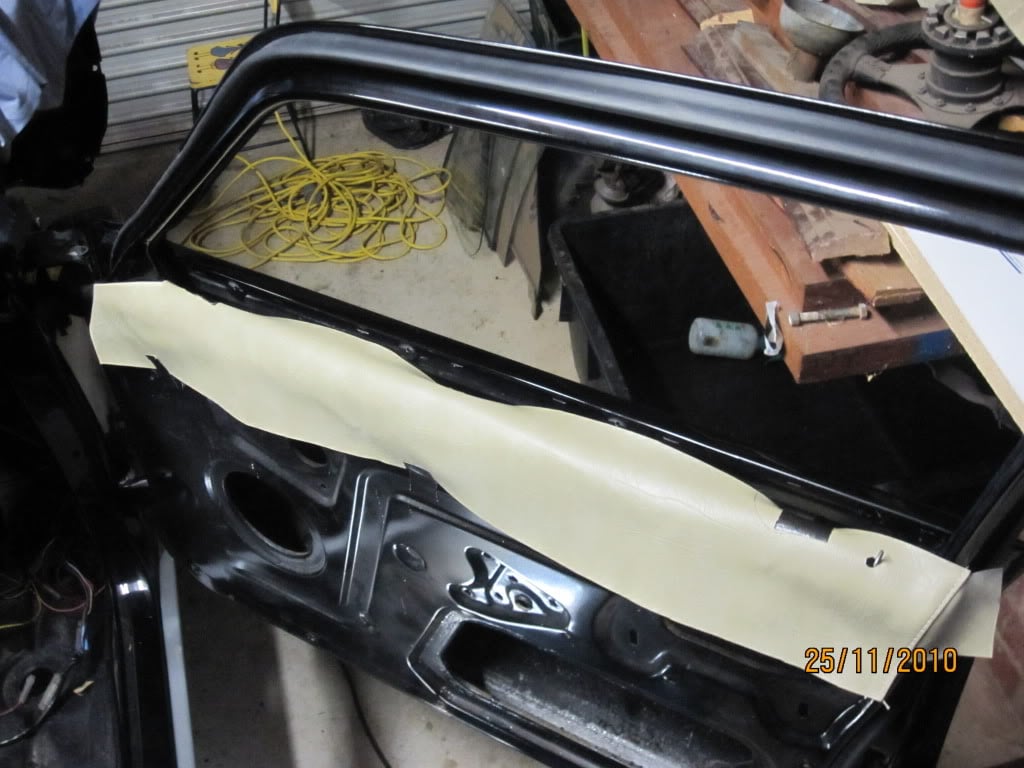
Ive been putting a few hours in most nights trying to get the multitude of little fiddly things done. Have pretty much got the steering column re-assembled, bar inserting the center shaft. Cannot do that until ive patched/soldered some of the wires on the indicator loom that needed doing and i cant find my bloody soldering iron anywhere so im borrowing a mates tomorrow. The lock barrel is in (bit of a prick to get it in properly) and the new bearings have been put in, with the upper being glued in with a special bearing loctite. I also replaced the foam sealers around the shaft with stuff sourced from that handy shop clarks rubber, who by the way have much of the door seal extrusions sold by the meter. Heater box is now installed with new seals around the openings (clarks rubber again), fan box installed and most of the wiring routed in place, but not connected. Door handle and locks are also in and ive made a start installing the flocked window channeling and window seals. These are a bit of a bastard to put in and im pretty curious to see how the windows fit within and wether they seal well or not. The whole rubber kit is a rares spares item that i purchased some time ago.
Taillamps have also been pulled apart, resprayed and now back in the car. I would like to get the vynil upper door coverings on before I install the window seals (i think the clips will help retain the vynil) but ive got no idea how to start. Got to get this done so i can install seals the all the glass. Heres some pics...
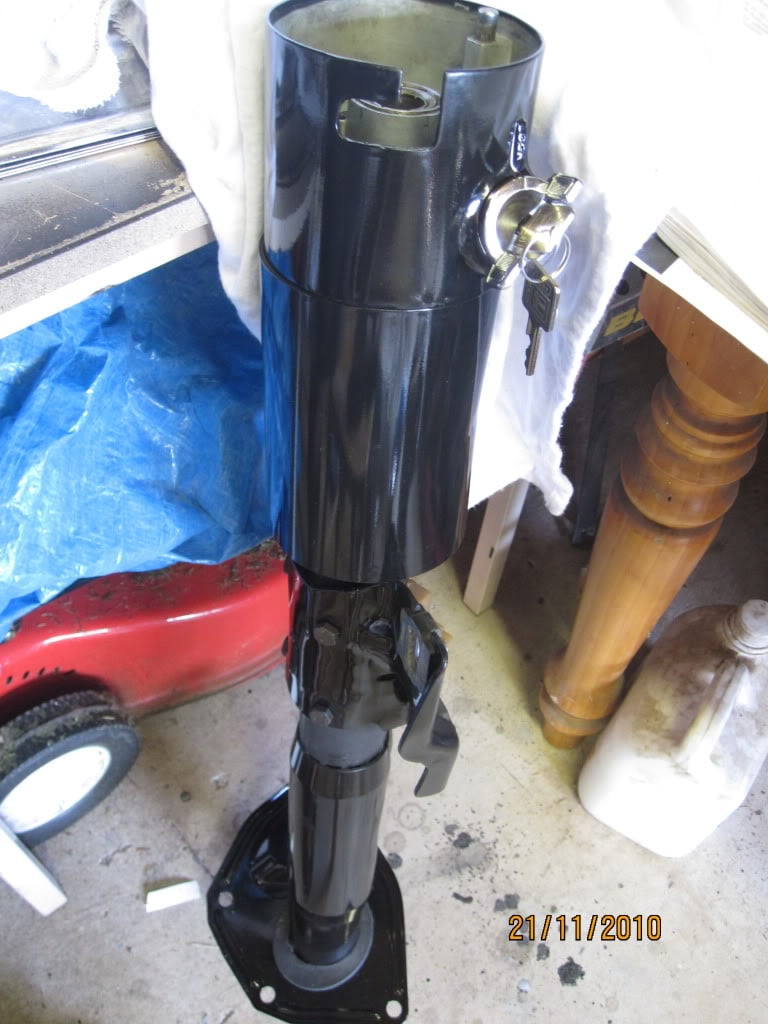
#148
lcgtrrob
-
- Members
-
- 207 posts
Forum Member
- Name:Rob
- Location:wollongong
- Joined: 29-December 06
Posted 26 November 2010 - 08:03 AM
i'm in love (with the car) well done
#149
_hatch76_
_hatch76_
-
- Guests
Posted 02 December 2010 - 07:53 PM
Painting the satin black items today. Terrible weather in Melbourne, drizzled or p!ssed down all day, made it trying conditions for spraying. Had a bit of success, and some diaster today. The Brake booster came out really good, i was very pleased but that was about it( bit of white dust in photos). The air cleaner, i completely f@#$!d up. I was cleaning my gun out a little way (up wind)from the drying air cleaner, seems like the thinners travelled and ive ended up with completely pitted parts. The fan shroud also copped a little bit but that will have to do for now, it can go on the car as is, and i will fix later.
Pissed off with myself, another 2 steps forward 1 back.
I know how you feel with the 2 steps foward and 1 back. I've painted the same door on my hatch 3 times now due to stupid little things. If I have to do it once more, it goes in the bin and the car will be the first hatch driving the streets with one door!
Top project so far though. I'm a big fan of black cars, they looks tough.
Cheers Dan
#150
_DrFegg_
_DrFegg_
-
- Guests
Posted 21 December 2010 - 06:28 PM
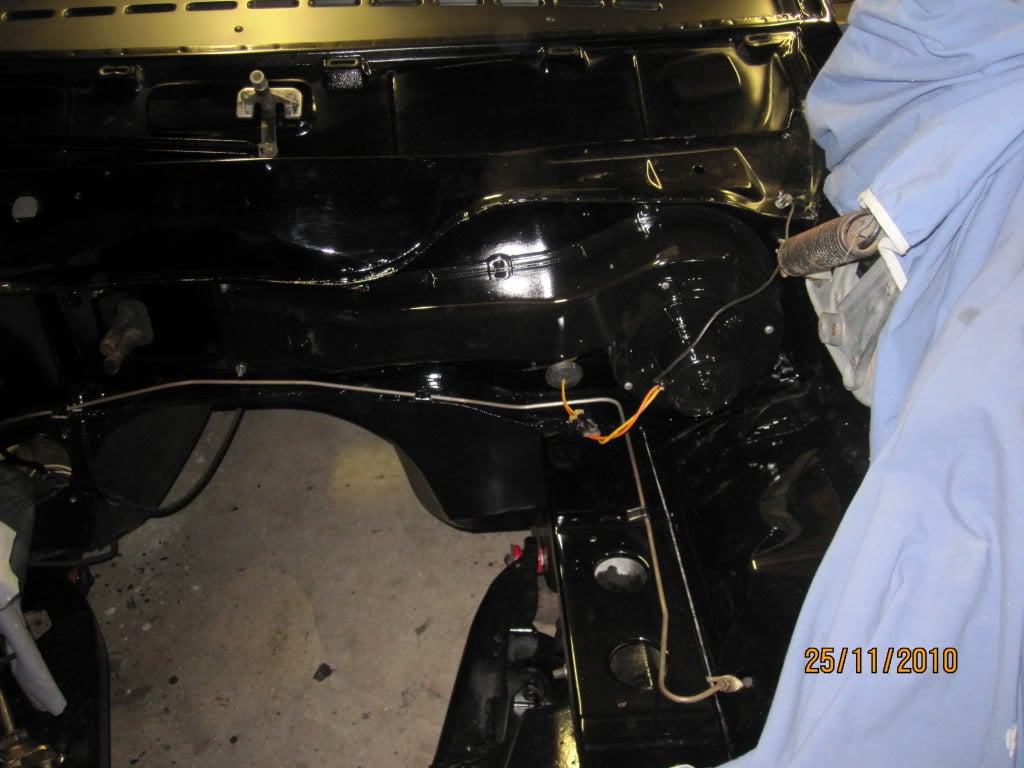
Update time...
Firstly thanks Dan for your comments, they were sandwiched between a lot of my iamges, didnt catch it until now.
Motor and Gearbox is in! (Not started or properly hooked up though) All Glass ,locks, winders are also done. Steering coloumn is in and all the cotter pins are nipped up. Bent a couple trying to push them in with a homemade clamp but luckily i had spares and another Uni-joint.
Even got the bonnet on to cover things up. Photos.....
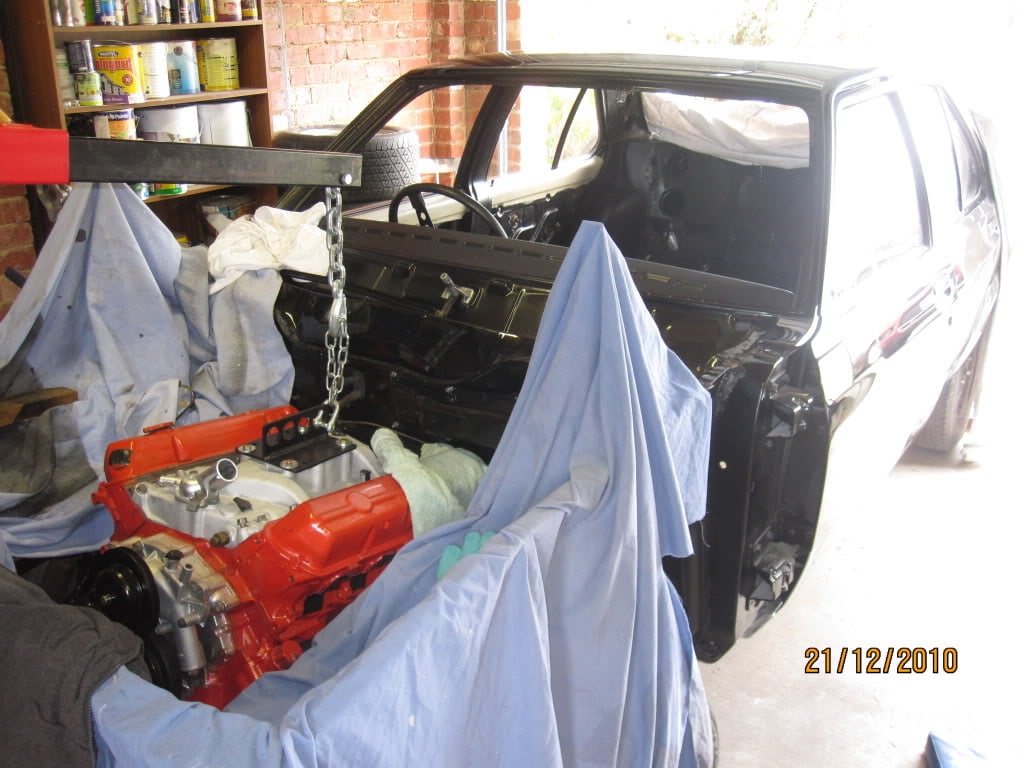
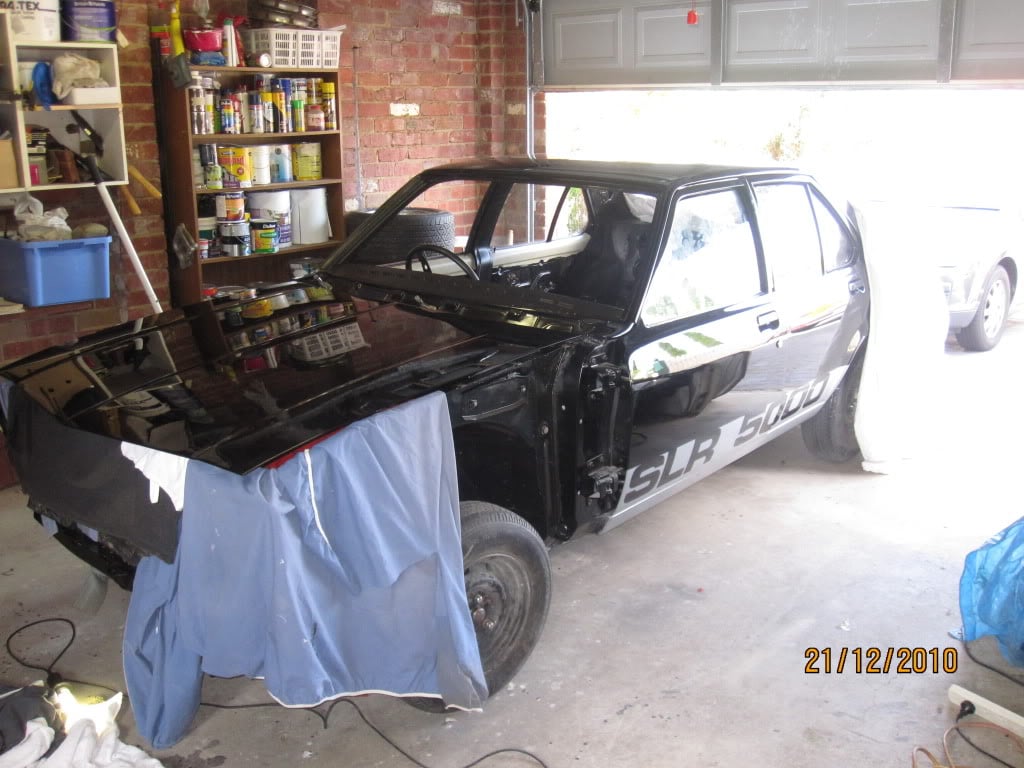


3 user(s) are reading this topic
0 members, 3 guests, 0 anonymous users

