Where are the rest of the numbers? ![]()

SS Hatch
#251
 _LS1 Hatch_
Posted 14 May 2015 - 10:07 AM
#252

Posted 14 May 2015 - 10:30 AM
#253

Posted 14 May 2015 - 10:35 AM
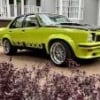
Ohhhhhhh yeaahhhhhh. I love this car, and yes TKO FTW.
Although you are making me think I went a bit conservative with the arch cutting in mine! ![]()
Edited by Heath, 14 May 2015 - 10:35 AM.
#254

Posted 14 May 2015 - 03:42 PM
The clutch needed doing anyway:

The ceramic side is completely gone, its just starting into the metal plate. The pressure plate has a big groove worn into it from the ceramic too, that is a lip you can see. Its been in there just over two years (not many kms though), the stupid thing is the organic side and the flywheel are like new still, you can still see the grinding marks on the flywheel. Apparently this is normal, and some guys only get 6 months out of a clutch!! Wish I'd been told that when I bought it, back to heavy duty organic for me.
Unfortunately the Muncie bearing retainer that mounts the thrust bearing doesn't fit the TKO. I decided it was easiest to just cut the screw section off and bore it out for a light press fit on the TKO retainer. Also added the two screw holes for the pin that stops it rotating.


Checked runout on bell housing, Tremec says 5 thou max so I'm just inside that

Edited by 76lxhatch, 21 July 2017 - 11:32 PM.
#255

Posted 14 May 2015 - 05:44 PM
#256

Posted 19 May 2015 - 03:21 PM

And a stick to go with the shift knob

Ran into a bit of an issue... the TKO does not fit without cutting. Could maybe leave it hanging down around 50mm too low at the back and modify or custom make headers that don't foul on the front cross member outriggers etc, but would still end up with driveline angle issues. I've cut the tunnel just inside the line of the console so there won't be too many issues refitting that. It needs very little extra height in the centre (with the exception of the shifter), but needs a flatter top with more height at the outsides to match the trans.

Edited by 76lxhatch, 21 July 2017 - 11:33 PM.
#257
 _j.e.d._
Posted 20 May 2015 - 11:38 AM
I'll buy your old cross member if it works for me ![]() unless of course you just altered what you already had for the tko.
unless of course you just altered what you already had for the tko.
Great work as usual mate ![]()
#258

Posted 20 May 2015 - 03:28 PM
The pieces of the puzzle are starting to come together (ignore the exhaust its just tied up out of the way for the moment)

At least 20mm clearance all round the 1330 series yoke, it happens to fall right in the area where the floor reinforcement is

And some CAD (cardboard aided design) for the tunnel patch

Edited by 76lxhatch, 21 July 2017 - 11:33 PM.
#259

Posted 20 May 2015 - 03:58 PM
#260
 _LS1 Hatch_
Posted 20 May 2015 - 04:13 PM
CAD (cardboard aided design)
LOL...nice...
#261

Posted 20 May 2015 - 04:28 PM
#262

Posted 21 May 2015 - 02:32 PM
#263

Posted 21 May 2015 - 07:25 PM
Tunnel patch roughed out, fit isn't too bad

Fits inside the console but only just, fingers crossed the carpet will sneak in there too

The front console mount will be left out and the console will mount directly to the new piece. After that it just needs a final tidy up and I can weld it in (with appropriate fire protection in place!)
Edited by 76lxhatch, 21 July 2017 - 11:34 PM.
#264

Posted 21 May 2015 - 08:47 PM
The tunnel mod looks good and I love that gearbox crossmember. Nice work as usual.
I took LX Chev's advice and started reading this thread from the beginning - some great stuff in there! In particular the rear sway bar (Commo-style) you mounted up. I can do something similar as I have a BW diff with the mounts still there and still have the Commo swaybar. Where did you get the linkages from for mounting to the arm mounts, though? If you have another pic of how you mounted them, that would be great. No stress if not, it looks straightforward.
Love this build - keep the updates coming!
#265

Posted 21 May 2015 - 10:09 PM
I did carefully straighten the ends of the bar in the press so the links pointed upwards, and they are simply attached through the front of the upper arm mounts (there is some extra space in front of the arm pivot).
Can't find any decent photos sorry, but in this one you can see the bottom half of the links

and here you can just barely see the very top poking through the upper arm mount at the right of the photo which gives some idea of where it is mounted

If that's not clear I can take another photo tomorrow, its still up on stands with pieces missing at present
Edited by 76lxhatch, 21 July 2017 - 11:34 PM.
#266

Posted 21 May 2015 - 10:44 PM
That's great, thanks mate.
Edited by SmacT, 21 May 2015 - 10:48 PM.
#267

Posted 25 May 2015 - 03:19 PM
Shortened the slip yoke (left a fair amount of length to make it easy to align) and cleaned it up, and spun up a sleeve to suit


They are both a nice tight fit into the driveshaft tube, which was cut to the appropriate length

and welded all three together in one go

Reassemble the lot with a new uni joint up front and install... thought I was going to have to disassemble the front safety loop for a minute but some brute force and ignorance got it through (can't say the same for the rear loop, CV won't fit through that with the bolts in it!)

Angles are all good, 2.2 degrees at the rear of the trans and 2.4 at the diff. Just have to fill the trans and bleed the clutch and I'm done under the car.
Edited by 76lxhatch, 21 July 2017 - 11:35 PM.
#268

Posted 26 May 2015 - 02:53 PM

Edited by 76lxhatch, 21 July 2017 - 11:35 PM.
#269

Posted 27 May 2015 - 04:27 PM

Welded and seam sealed. No major fires :-)

Edited by 76lxhatch, 21 July 2017 - 11:36 PM.
#270
 _greg2240_
Posted 27 May 2015 - 09:46 PM
good job, well done
#271

Posted 28 May 2015 - 04:13 PM

A good coat of sound deadener / underseal on the tunnel

Refit (what's left of) the underfelt, I also put a piece inside the console once finished that fits snug around the shifter

Not sure whether it was bad luck or good (finding it) but the heater core was leaking. It actually turned out to be somewhere inside the core itself rather than one of the end tanks so I ordered a new one from Rare Spares. Interesting that its all aluminium, the one in their photos is brass. Looks fine though and it fit without too much hassle.

Also, the carpet and console fits! Just. Photos are getting bad due to it being dark

Shifter came out quite good I think, throw is relatively short so it finds all gears without getting close to the edges of the boot/console.

Edited by 76lxhatch, 21 July 2017 - 11:36 PM.
#272

Posted 29 May 2015 - 04:06 PM
Have only driven it a short way but everything seems OK, clutch feels a bit light compared to the old one and the new gearbox seems a bit strange (not sure on the shifter length as yet) but so far so good. Supposed to drive the trans nicely for a 500 mile break-in period, no high rpm shifts or anything :-(
#273

Posted 30 May 2015 - 01:38 AM
#274

Posted 30 May 2015 - 02:45 AM
~ It's weird seeing a car being improved on like you do it with everything still in the car ~
Too true but at least you get to enjoy the fruits of your labour straight away, not six years later when it finally sees daylight again!
#275

Posted 30 May 2015 - 07:05 AM
1 user(s) are reading this topic
0 members, 1 guests, 0 anonymous users


 View Garage


