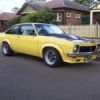
This thing is looking wild. I too would paint the door handles black to break up the sexy green

Yep, one more UC with a SBC project !!!
#276

Posted 05 March 2012 - 08:52 PM
This thing is looking wild. I too would paint the door handles black to break up the sexy green
#277
 _keitho5770_
Posted 05 March 2012 - 09:30 PM
#278
 _2wild4u_
Posted 05 March 2012 - 11:38 PM
cheers
#279

Posted 06 March 2012 - 06:30 PM
looking good, whats the go with the front and rear screens? do they build it up to that height with urethane so that theyre level with the body? also what covers the edge inside the car where the old rubber normally wraps around?
cheers
Yes, urethane bead is about 6-8 mm tall and screen gets pushed down until flush.
On my inside edge I dont have anything, the headlining and trim goes right up to the edge and it does look a little untidy. Stud Richo had a specialized trim that covered this edge but I couldn't locate any. I'm looking at getting a pinchweld type product and trimming one side almost off so it tucks in under the glass. I'd then glue that in place. If the screen had a little more overlap on the metal you could use the pinchweld and urethane the screen inside that. Hope that explains it.
#280
 _T0rana_
Posted 07 March 2012 - 08:39 AM
#281
 _2wild4u_
Posted 07 March 2012 - 09:33 AM
#282

Posted 09 March 2012 - 02:34 PM
 P1020493.JPG 81.91K
4 downloads
 P1020494.JPG 96.09K
2 downloads
P1020494.JPG 96.09K
2 downloadsThink I'll go with the black handles. New ones cost too much and there isn't any other chrome on the body.
looks like a beast what colour green is it?
It is a custom mix to match a sample I found. I have the Dulux recipe if you want to mix some up.
#283
 _keitho5770_
Posted 12 March 2012 - 08:24 PM
#284

Posted 28 April 2012 - 08:59 PM
I have tried to spend a good 3 or 4 hours a day, 4 or 5 days a week on this beast for the last 3 weeks (school holidays got in the way a bit !)
I have, as of today, finished with the body work and paint. Only really some minor reassembly tasks left, wheel alignment etc.
I ended up painting the door handles body colour after painting them black and not liking the look.
A picture tells a thousand words so I'll let them do the talking.......
 P1020496.JPG 102.95K
4 downloads
P1020496.JPG 102.95K
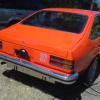
4 downloadsI reckon the rear looks great with body colour bar and black strip.
 P1020498.JPG 113.27K
3 downloads
P1020498.JPG 113.27K
3 downloadsInside of the doors got as much love as the outside, painful to sand but worth it in the end. All door hardware is the old stuff cleaned up and reused. The whole car had never been repaired and was really good for rust. The doors were spotless inside. Almost a shame to fit a trim to it ! I reused the dust seals but fitted new bailey channel, window seals etc.
 P1020501.JPG 100.95K
4 downloads
P1020501.JPG 100.95K
4 downloadsAs the door gap and alignment wasn't too bad before I pulled it apart I drilled little holes through all the hinges and in the top edge of the guards, boot/bonnet hinges to make realignment a bit easier.
 P1020500.JPG 106.05K
2 downloads
P1020500.JPG 106.05K
2 downloadsCome time to reassemble I just slipped a couple of pop rivets in the holes to line them back up again, did the bolts up and slid the rivets back out.
 P1020503.JPG 83.21K
5 downloads
P1020503.JPG 83.21K
5 downloadsThis is where I'm at now, just need to fit the bonnet and scoop and front bar and it should be looking smart !
#285
 _LJ355_
Posted 29 April 2012 - 10:05 AM
cant wait to see it in action will it be ready for the forum drag day ?
#286

Posted 29 April 2012 - 12:54 PM
best looking uc by far mate
cant wait to see it in action will it be ready for the forum drag day ?
Thanks Lee, I hope to have it at the track sometime next month.
#287

Posted 01 May 2012 - 08:53 PM
I still need to hook up the bonnet catch so the bonnet is not yet fully closed and the grille isn't fully screwed in.
 P1020517.JPG 67.56K
4 downloads
 P1020519.JPG 69.42K
7 downloads
P1020519.JPG 69.42K
7 downloadsAnd for those who wanted to hear it my son taped it on his iPod and posted it to youtube....
#288

Posted 01 May 2012 - 09:51 PM
#289
 _LJ355_
Posted 01 May 2012 - 09:56 PM
i think the taillight trim would look good black also
#290

Posted 01 May 2012 - 10:45 PM
#291
 _greenmachine215_
Posted 02 May 2012 - 11:14 PM
Cant wait to see some footage in full swing
Cheers!
#292

Posted 03 May 2012 - 06:07 AM
#293

Posted 03 May 2012 - 08:18 AM
I just need to swap diff centres, get a wheel alignment and finish off the interior to have it all finished. I'm booked in for an ANDRA tech inspection next week so a trip to the track isn't too far off !
Thanks again
#294

Posted 03 May 2012 - 10:54 AM
#295
 _AD_75_
Posted 03 May 2012 - 04:02 PM
#296

Posted 03 May 2012 - 07:18 PM
sounds tuff... when are we going to see some quarter mile times?
#297

Posted 03 May 2012 - 08:34 PM
I haven't had a chance to check out the threads Andrew, but please let us know when you make it to WSID! Would be great to catch up!
No prob Tiny, it would be good ! Will probably give it a few half track passes on a Wed. night later this month (still haven't got an ANDRA UDL). Will let you know for sure.
This car has turned out real nice struggler! the only thing it loses marks for in my book is the wheels. I could imagine a nice set of convo's on this machine..join the convo army you know you wanna!
Thanks Adrian. I have several good (personal) reasons for going with the Challengers.... the sizes and offsets were perfect; they take a tapered wheel nut, not some dirty shanked mag wheel nut; the centre is big enough to fit hub locators into; they are a little different to most and most importantly.... they are 100% Australian !
Besides Welds, Convos etc just aren't for me.
its a drag / burnout car........ no one worries about the looks of the rims at it hurtles down the strip.
sounds tuff... when are we going to see some quarter mile times?
Hi Jim, I want to get to the track for a street meet sometime this month but may not make it until next month due to work commitments. Good or bad I'll post the outcome here !
#298
 _TJ355_
Posted 03 May 2012 - 09:39 PM
#299

Posted 04 May 2012 - 08:09 PM
 P1020527.JPG 76.43K
2 downloads
P1020527.JPG 76.43K
2 downloadsFor those unfamiliar with a floating rear end. The axle is splined on both ends and the wheel bearings fully support the hub (totally independant of the axle). To remove the centre I only have to remove a dust cap and slip the axle out of the centre. The axle has a threaded hole in the end of it to enable removal. I can remove the axle without having to remove the wheel. In fact I can totally remove one axle and drive the car with power going to just one wheel ! Removing both axles makes the car very easy to push in and out of the garage.
 P1020528.JPG 73.79K
2 downloads
P1020528.JPG 73.79K
2 downloadsDue to my erratic driving style I fitted baffles to the axle tubes to stop the oil getting flung away from the gears when doing doughnuts/high speed U turns.
 P1020529.JPG 84.68K
2 downloads
P1020529.JPG 84.68K
2 downloadsDue to old age and basic lazyness I made this wild looking device out of some scrap. The studs at the front locate on the diff pinion and the legs at the rear support the carrier. The exhaust tube at the bottom locates on my jack. This allows me to lift the centre in and out relatively easily (definately easier than doing the bench press thing !). The next pic shows it in action....
 P1020530.JPG 82.33K
3 downloads
P1020530.JPG 82.33K
3 downloadsIts all back together now. The hardest part is getting oil back into the housing. Before the flash paint job I would just jack the car right up on one side and tip oil down the high side axle hole. I'm too scared to do that now so had to pump it in by hand using an old hand cleaner pump out of a plastic container. Takes a bit longer but is heaps cleaner and more accurate.
Getting closer to the track now !
#300
 _greenmachine215_
Posted 07 May 2012 - 12:06 AM
Nothin worse than tryin to bench press a 9" in place on ur back
2 user(s) are reading this topic
0 members, 2 guests, 0 anonymous users


