Jump to content


- - - - -

LX under construction


  • Please log in to reply
250 replies to this topic

#1 _nial8r_

_nial8r_
  • Guests

Posted 10 May 2009 - 12:18 PM

hey all i thought it was about time i put up a couple of pic's of the LX that took me a million yrs to find, and well now its here and under construction

just arrived on the truck from VICPosted Image

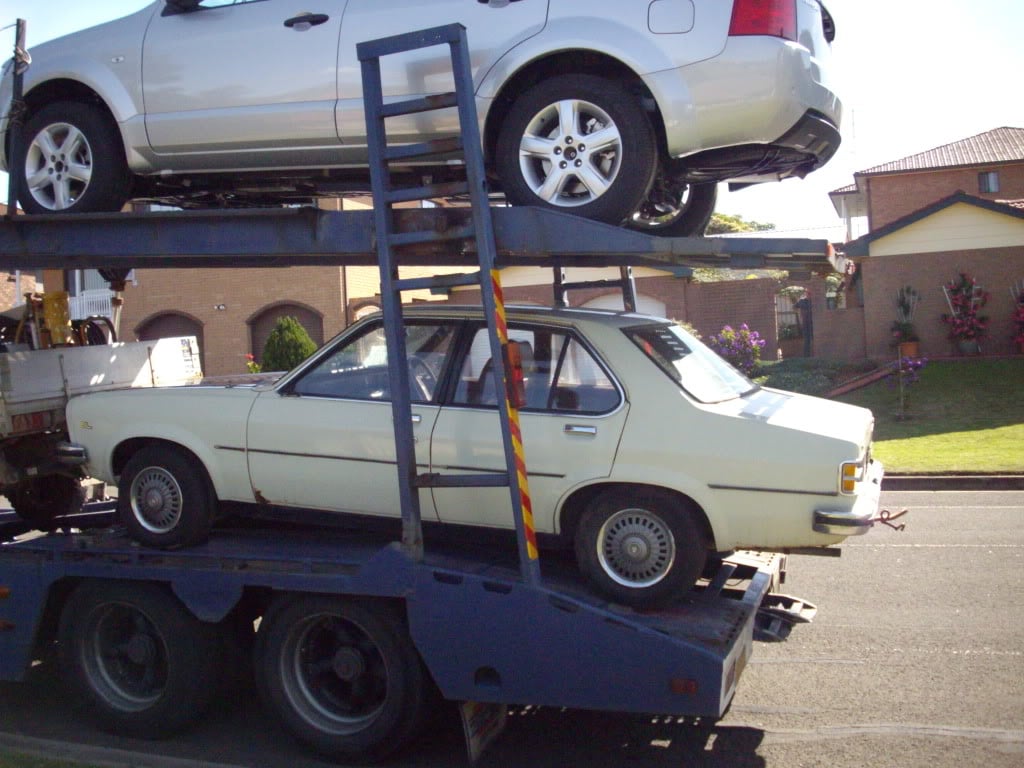
off the truck in one peice
Posted Image

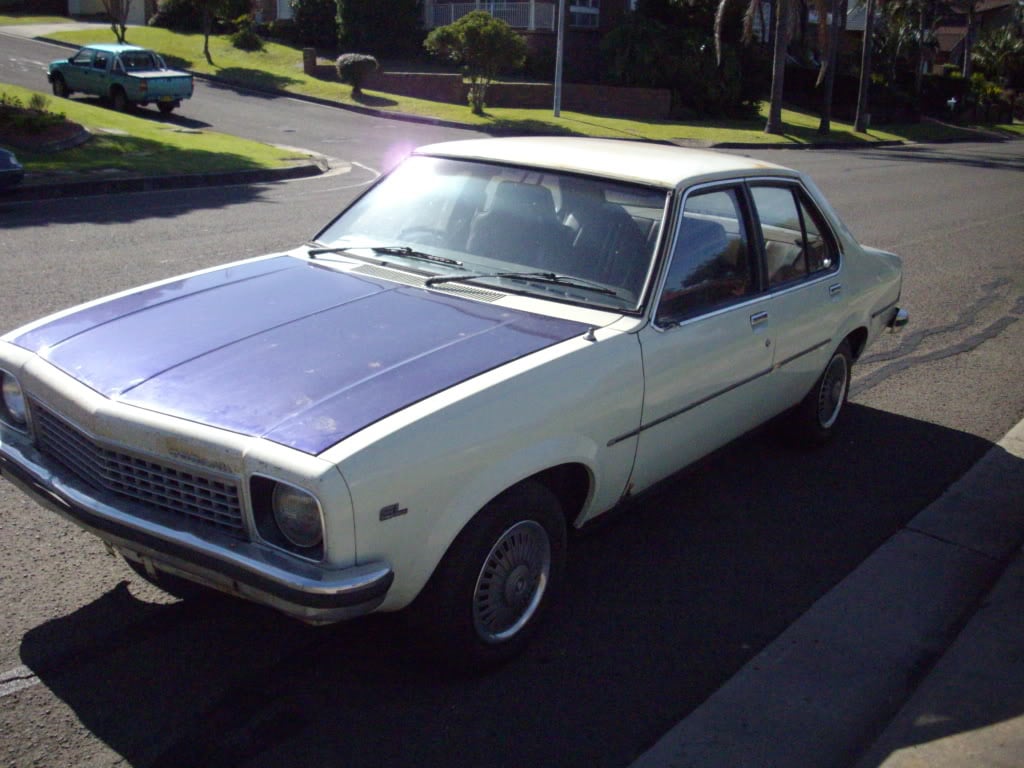
the young bloke taking it for a test drive around the back yard
Posted Image

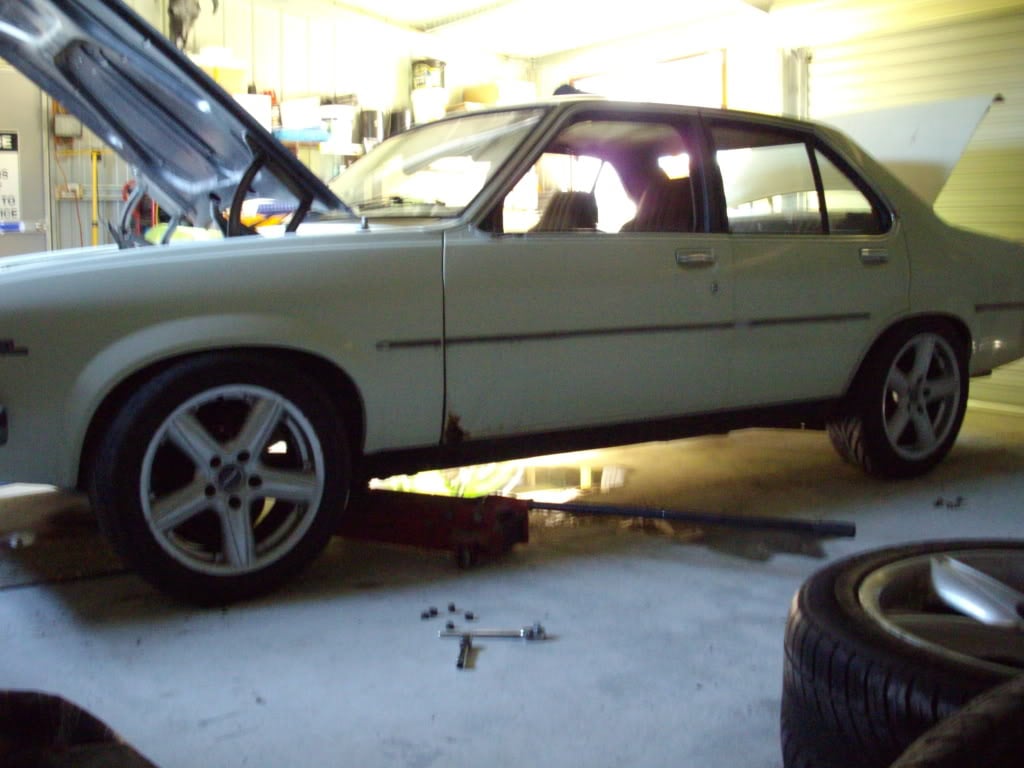
couldnt help my self, had to sit the mags under one side to see what i thought of em as i only paid 150 clams for the 4 of em with rubber
Posted Image

here you can see the massive off-set from the back to front
Posted Image

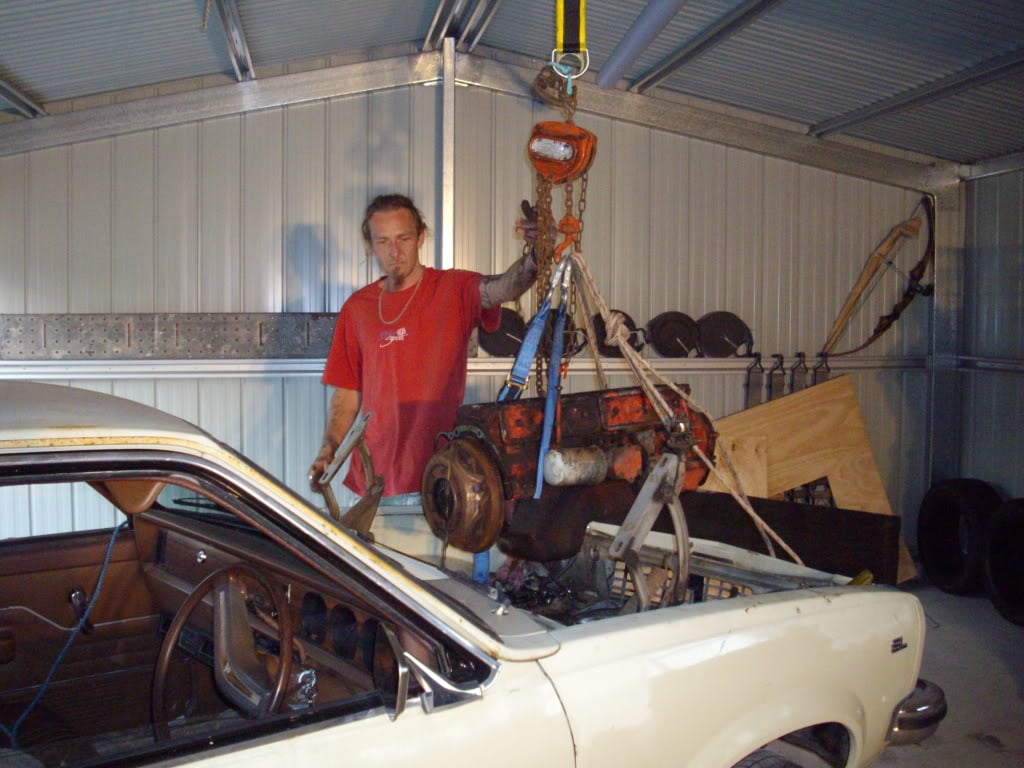
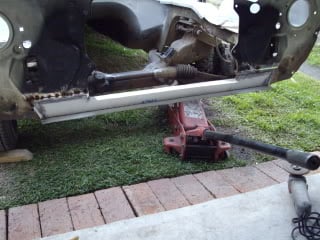
second day home and the old 173 was getting ripped out
Posted Image

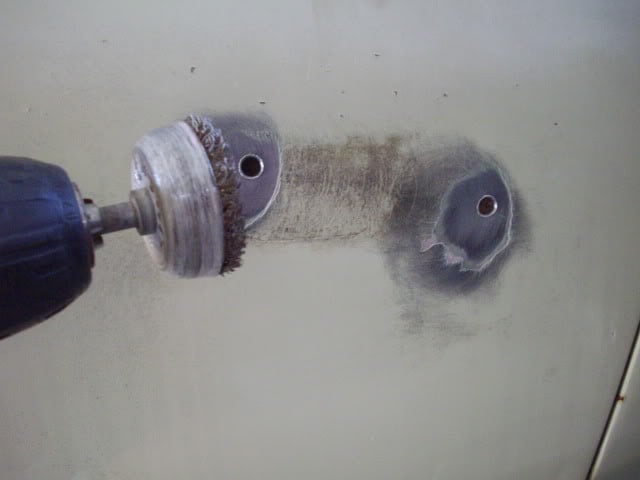
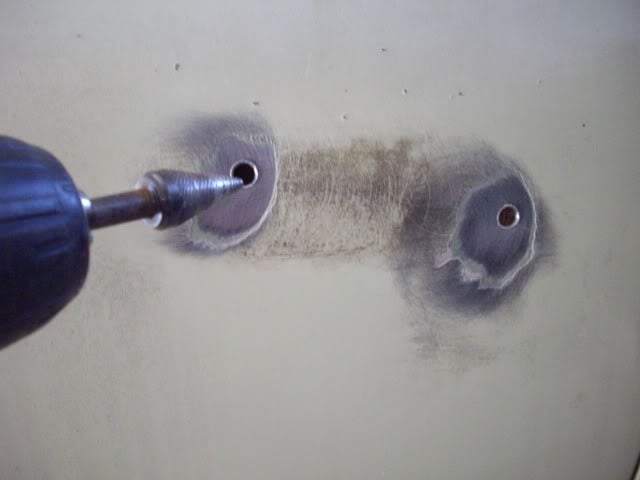
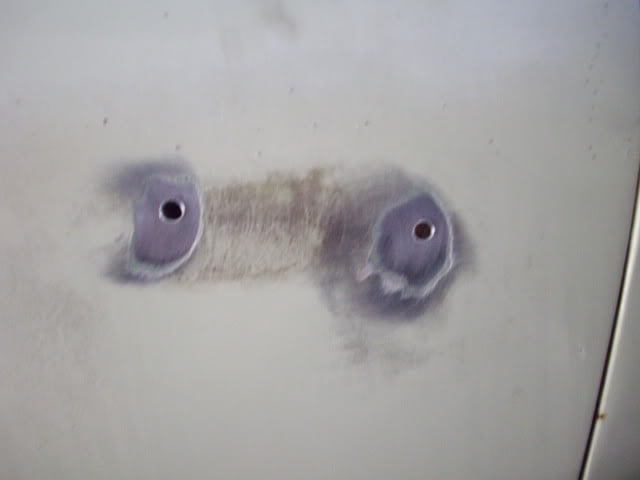
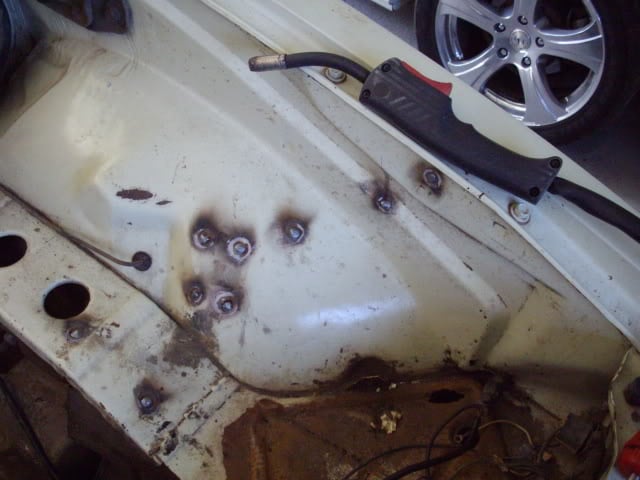
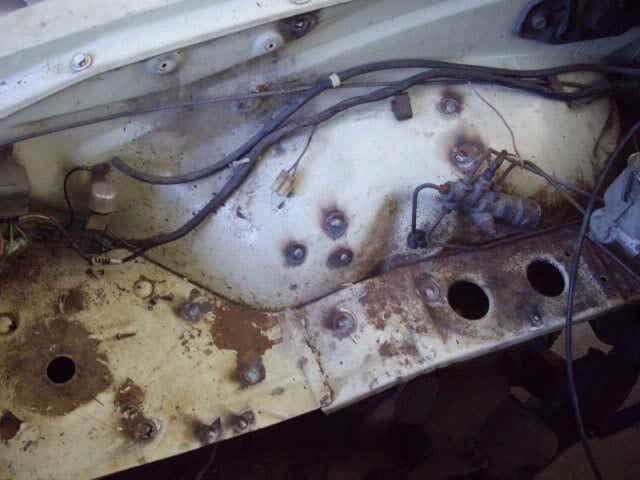
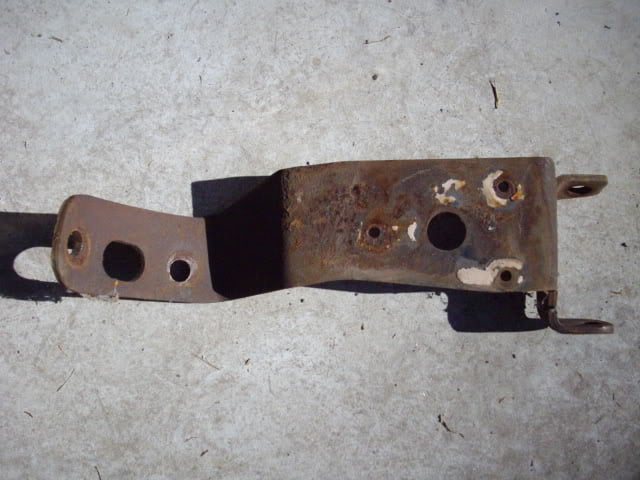
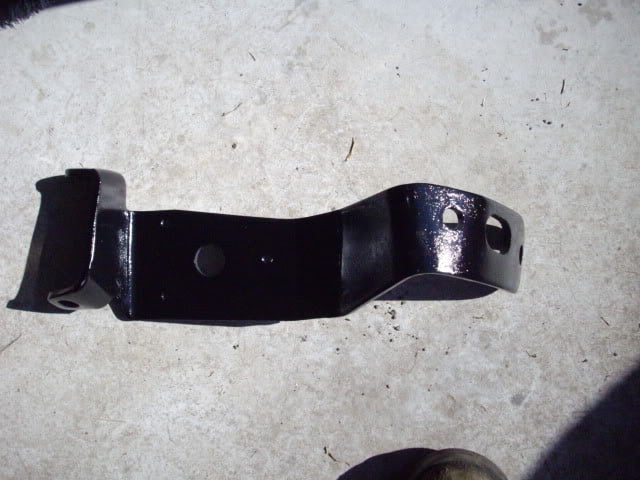
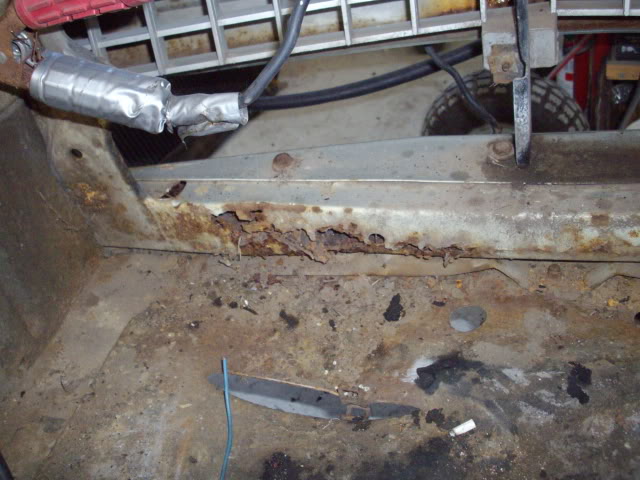
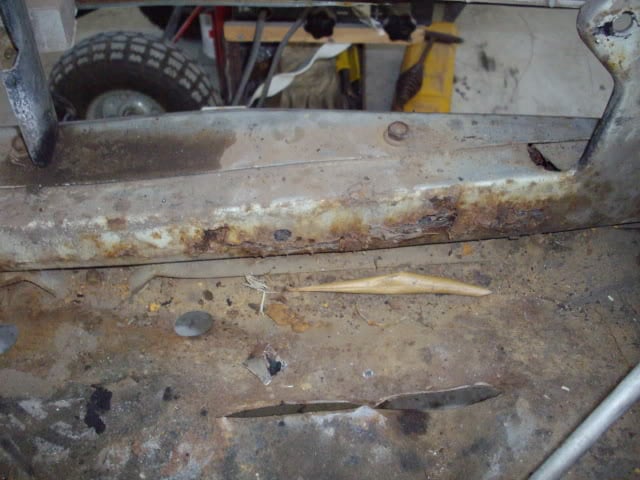
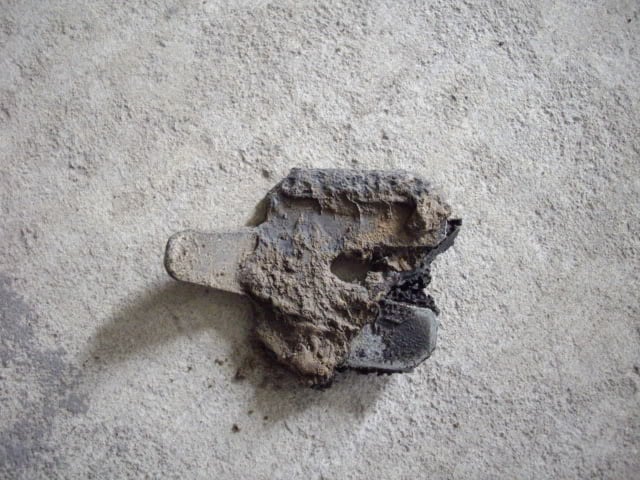
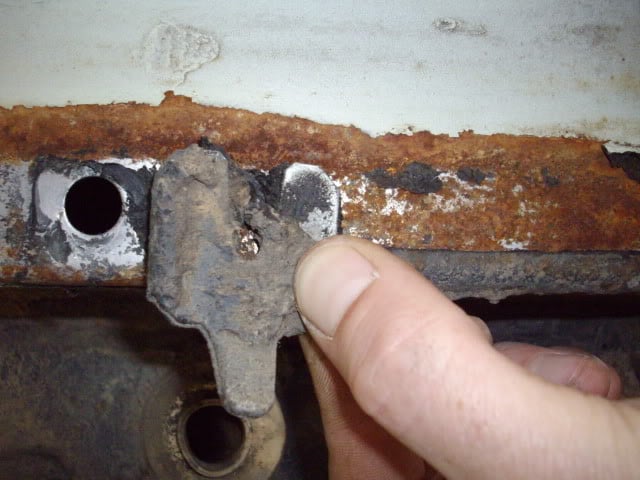
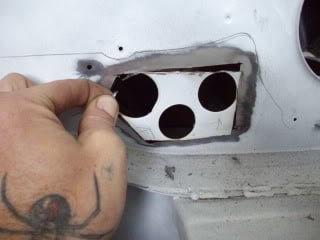
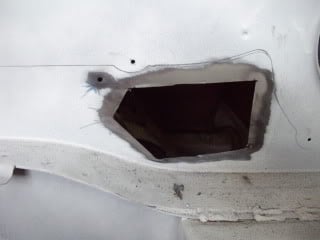
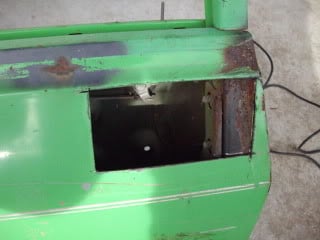
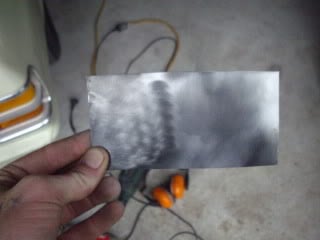
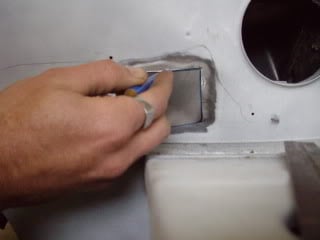
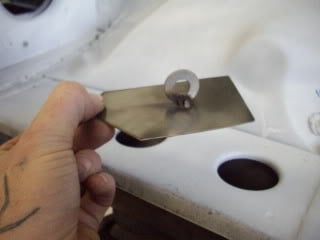
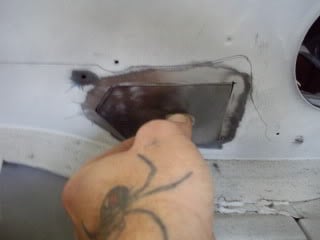
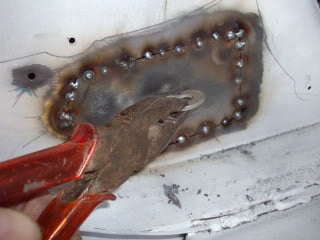
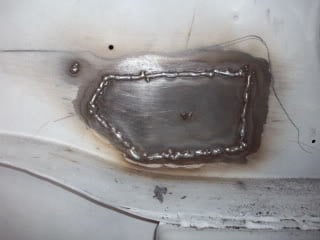
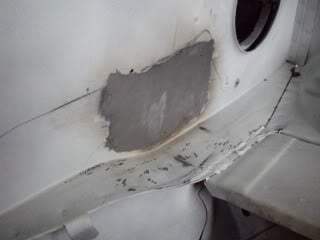
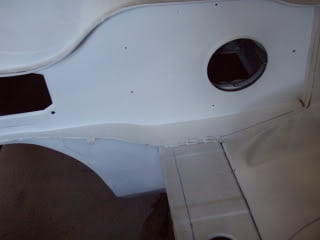
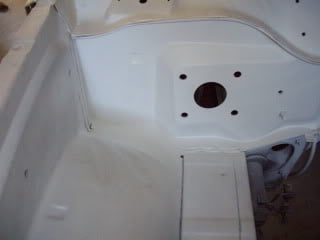
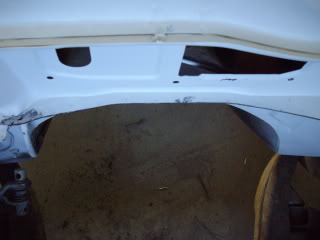
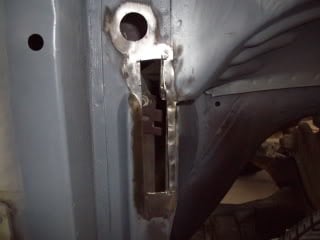
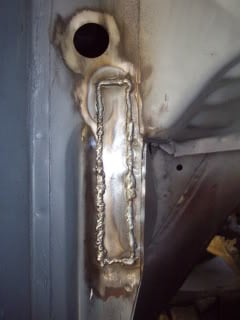
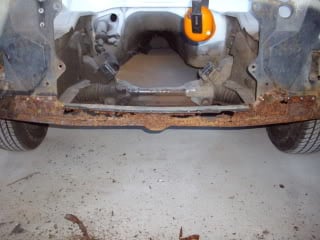
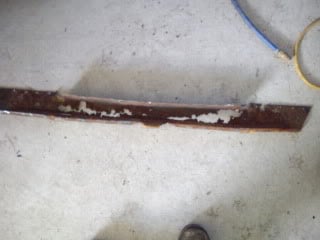
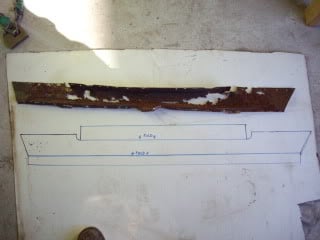
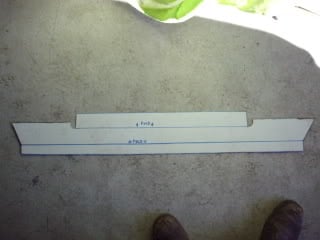
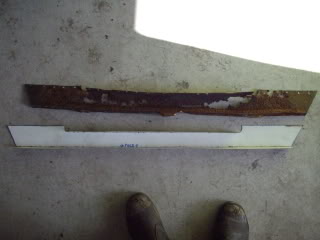
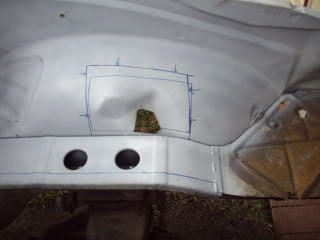
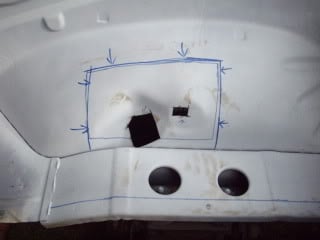
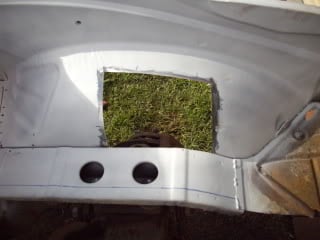
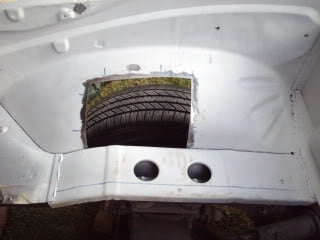
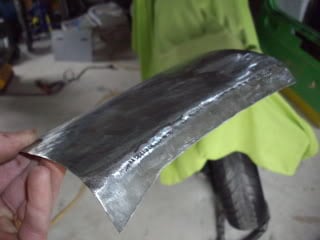
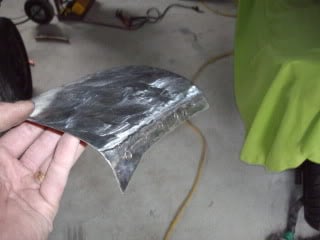
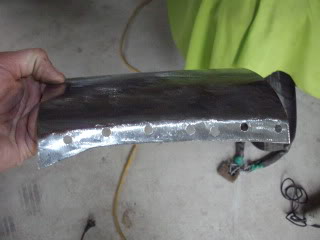
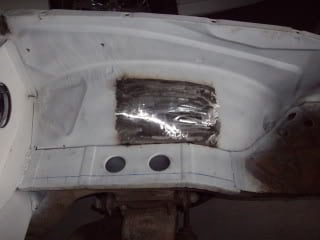
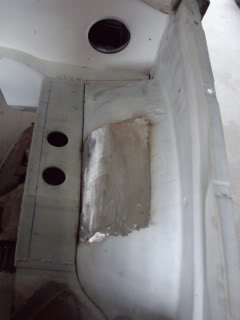
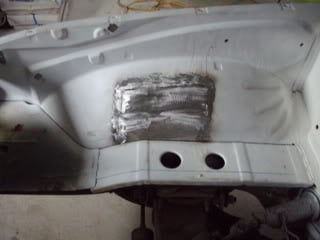
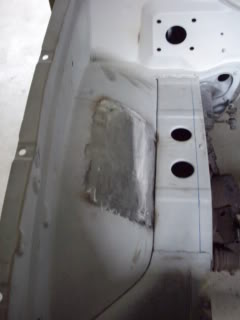
i will post more pic's up soon as i have the car stripped right down now ready to start on the rust repairs, mini tubs, also gotta fill in the old fuel filler hole behind the number plate and R/R radiator support as normal the whole bottom is..... well not there lmao like i sid i got a long way to go but it will get done sooner rather than later :D

#2 _torana_umunga74_

_torana_umunga74_
  • Guests

Posted 10 May 2009 - 12:40 PM

sweet not wastin time then lol. wats the plan?

#3 _mowie_

_mowie_
  • Guests

Posted 10 May 2009 - 02:29 PM

In the 5th pic those mags really suit the car.
Looks like a really good base.

Tom

#4 _nial8r_

_nial8r_
  • Guests

Posted 10 May 2009 - 04:13 PM

thx hey, the plan is a LS1 now, i was looking at the LS7 Crete motor but for 13k just for the block was a bit outta my price range :cry: but 552hp stock does sound good, the body isnt really that bad hey after looking at about 20 LX's this was the cleanest one i could find so yeah it is a pretty clean base to start with, i think i will be able to sort all the rust repairs out in 2 solid days as i am scrapping 3 of the 4 door only cause they are to far gone or i just dont wanna spend a whole day on one door, fllor pan is clean as, not a single spot of rust in it same as the boot pan. 2 gaurds are clean and both 1/4's are at about 95% clean but hey we all know that Torana's came stock with rust in the rear 1/4's lmfao, anyways will post more pics soon opps and im stil not real sure on them rollers yet same as the colour im gonna paint it ??? the wife says for me to paint it black like my old one, maybe she thinks she will find something that she lost in my old one about 14 yrs ago :spoton: but i have news for her and its alllllllllllllllllll bbbbaaaaaaaaaddddddddd !!!!! B)

Cheers Lee

Edited by nial8r, 10 May 2009 - 04:21 PM.


#5 _nial8r_

_nial8r_
  • Guests

Posted 13 May 2009 - 12:13 PM

well today i had a busy day planned, but it backfired on me... i ran outta gas for the mig so it all came to a crashing holt, but there is always something else to do anyways, here are some pic's of this mornings progress :huh:

got rid of the badges and cleaned up around the holes with the trusty wire wheel on the drill
Posted Image

cleaned up inside if the holes with the milling bit, dont want and rusty shit left in the hole now
Posted Image

ends up looking like this, ready for welding..
Posted Image

started to fill in the 40 million holes that the old owner had made, most of them were screw holes for relays and crap :blink:
Posted Image

started on the other side of the engine bay and that when i ran outt'a gas.. not happy, but as you can see i havent even finished stripping the engine bay yet so still got something to do hey..
Posted Image

with no more gas i decided to clean up one of the rear bar supports and paint it, not happy with it so it will be getting redone again, i think today was just not meant to be..

before-
Posted Image

and after-
Posted Image
will have the rest of the day off i think :spoton:

#6 MRLXSS

MRLXSS

    The Render Garage

  • Members
  • PipPipPipPipPipPipPip
  • 12,399 posts
  • Name:Matt
  • Location:Upwey, Melbourne
  • Car:355 LX Hatchback, DeLorean DMC-12, LX SS Hatch, VY Cross8 Crewman
  • Joined: 09-November 05

Posted 13 May 2009 - 12:16 PM

Going well mate! Nice work!

What size are those wheels? And are they Torana Stud Pattern?

#7 _nial8r_

_nial8r_
  • Guests

Posted 13 May 2009 - 01:17 PM

thx MRLXSS like i said today just wasnt meant to be !!! the chrome whells are on my VXSS but the ones in the pics of the Torana with the mags sittin on it there the ones i picked up for 150 clams with rubber 235/45/17's, nope not Torana stud pattern gonna change it all over to commodore, plenty of hr fun for me huh, it been yrs since i done a full resto and it show cause its takin a bit of time for it all to come back into my head, and a word of advive to all those out there with all there own tools dont lend em out to just who ever, i think i wil start takin deposits for loaned tools as half of my panel and paint gear is " GOOOOOOOOONE " and shit like that isnt cheap to replace as you would all know !!!! anyway i forgot to post these pics of the lower radiator support also, not looking forward to this one....

pasenger side of support eh!
Posted Image

and driver side of the support eh! eh! :huh:
Posted Image

once all the repairs are done and it strppied down to nothing its off to the blasters,

Cheers Lee

Edited by nial8r, 13 May 2009 - 01:19 PM.


#8 DanWA

DanWA

    Forum Fixture

  • Members
  • PipPipPipPipPip
  • 2,440 posts
  • Location:Southwest W.A
  • Car:LS1 LX 4 Door
  • Joined: 27-April 06

Posted 13 May 2009 - 01:36 PM

That is some good progress!

#9 _mello92_

_mello92_
  • Guests

Posted 13 May 2009 - 03:41 PM

Good quick process mate, you dont stuff around.
Will keep an eye on how this one goes.
Cheers

Edited by mello92, 13 May 2009 - 03:42 PM.


#10 _nial8r_

_nial8r_
  • Guests

Posted 13 May 2009 - 04:32 PM

thx hey all, i got stopped dead today when i ran out of gas but like i said it must have gonna been one of those days, but........... TOMORROW IS A BRAND NEW DAY !!!! once i start someting i like to keep at it i just hope the wife dont look up at the house roof and remember that i havent finshed painting it as i dropped my gun and busted it opps just when the Torana arrived he he :spoton:

Cheers Lee

#11 _studricho_

_studricho_
  • Guests

Posted 20 May 2009 - 07:48 AM

It's good to see that you have finally got your beast to work on Lee. Like I said before, just give me a buzz and I'll come around and help you when I can.

#12 _nial8r_

_nial8r_
  • Guests

Posted 20 May 2009 - 11:33 AM

thx paul, will have to get ya around sometime for a look see :spoton:

now for some more pic's and maybe some help on something if possible ???
here goes...... i found the bit when i took the left gaurd off but there wasnt one on the right side but by the looks of things it goes here???? any ideas ???

this bit
Posted Image
and i think it goes here on the pillar were the 2 gaurd bolts go through from inside the kick panel but whats it for ??
Posted Image

and i thought i would chuck this pic in, its all the dirt from just under the 2 gaurds and the nose cone :o and yes that is a blue ciggy lighter for size reference, all up there was 5 dust pans full no shit !!
Posted Image

Lee

#13 Rockoz

Rockoz

    Lotsa Posts!

  • Members
  • PipPipPipPipPipPip
  • 3,999 posts
  • Name:Rob
  • Location:Cowra NSW
  • Joined: 21-September 08

Posted 20 May 2009 - 11:48 AM

That piece is for aligning the guards. Dont throw it away, you may find it handy.

#14 _nial8r_

_nial8r_
  • Guests

Posted 20 May 2009 - 12:04 PM

That piece is for aligning the guards. Dont throw it away, you may find it handy.


thx for the quick reply Rockoz :spoton: i didnt chuck it for just incase reasons :<_<: it went into the box of bits to keep thx again hey

Lee

#15 _nial8r_

_nial8r_
  • Guests

Posted 14 June 2009 - 06:51 PM

Hey kids hooked in this week end and got a bit done, its been a while since i posted any pic's of my Torana and the work i have been doin which isnt much so here go's

here are the holes where the A/C hoses went,
Posted Image
and now one big hole,
Posted Image
the donor door for some metal, yes the door was stuffed :tease:
Posted Image
new piece cleaned up
Posted Image
stuck it behind the firewall to mark it out for the cut,
Posted Image
tacked a washer on it so i can hole it in the perfect spot and NO burnt finger either
Posted Image
see easy to hold, :clap:
Posted Image
stitched in place,
Posted Image
only a little tac on the washed so it just snaps off easy and no damage,
Posted Image
see easy huh
Posted Image
welded and cleaned up no more holes
Posted Image
hit with a couple of coats of Etch and wall'a
Posted Image
heres the other side where the loom, accelerator cable and clutch rod holes where,
Posted Image
and a bit of a front view of the firewall done and all etched
opps forgot this one of the firewall seem that i trimmed, it had the biggest overlap i have ever seen,,
Posted Image
drivers side pillar behind the gaurd, started as a pin hole of rust but after i chased the rust on the inside this is what i ended up with,,, :huh:
Posted Image
new piece in :spoton:
Posted Image
the lower section of the support
Posted Image
cut the sucker out ready o make up a new one
Posted Image
the missing piece
Posted Image
drew up a new piece,
Posted Image
cut it out
Posted Image
and all bent into shape
Posted Image
and here it stitched in but not happy with it at all so im getting a whole donor support from Matt and the little lower section from paul who has feb'ed up many of these thx heaps to you both :spoton:
Posted Image
more pic's to come :spoton: :spoton: :spoton:

#16 _nial8r_

_nial8r_
  • Guests

Posted 14 June 2009 - 07:00 PM

And here are the rest of the pic's of this weekends effort
marked out the inner gaurds feadt to be cut and smoothed out left and right side,
Posted Image
Posted Image
both sides cut out,
Posted Image
Posted Image
shaping the new pieces, what fun that was
Posted Image
Posted Image
holes drilled so it could be plug welded to the rail like the rest of the inner,
Posted Image
left one in
Posted Image
Posted Image
right one in
Posted Image
Posted Image
now i just have to hit em with the dolly and file and then start on the support and the battery tray and other side and then i have been given my orders to finish the roof on the house, i have gurni'ed it and re-caped it all just gotta paint in about 2 days work then back into the Torana :spoton: :spoton: :spoton: if anyones see's anything that might need some more attention please let me know, but be sure to let me down gently :D :D :D

#17 _ass308_

_ass308_
  • Guests

Posted 14 June 2009 - 08:07 PM

u have done a lot of hard work there.looks good

#18 _nial8r_

_nial8r_
  • Guests

Posted 14 June 2009 - 08:14 PM

Thx ass308 the inners were the hard part, dont think i will be doing that job again in a hurry :<_<:

#19 _noslx_

_noslx_
  • Guests

Posted 14 June 2009 - 08:48 PM

great job there mate :D i,m likeing the way your goin :spoton:

#20 its Paul

its Paul

    Formerly lx8vd77

  • Members
  • PipPipPipPipPip
  • 1,577 posts
  • Name:Paul
  • Location:Gold Coast
  • Car:LXSS, VUSS, VESSv & the mighty HB
  • Joined: 07-January 08

Posted 14 June 2009 - 09:02 PM

Hi Lee,
I like the way you've made and welded in thoes patches, its starting to look very smooth, looks like its turning out to be a nice torry.

Cheers Paul.

#21 _homer_

_homer_
  • Guests

Posted 14 June 2009 - 09:23 PM

Very nice. I'm going to have to keep watching this build I think.

#22 _nial8r_

_nial8r_
  • Guests

Posted 15 June 2009 - 08:04 AM

thx fella's im geting there slowly as i havent done any serious panel work for a few yrs now but it coming back to me, i just gotta stop thinking 3 steps ahead all the time as its slowing me down and the fact that i dont only have my 2 skid lids and more, we just got to kids that came into our care from doc's so now there are 4 so fitting in kid time car time dog time and "wife time" house time im starting to get a little snowed under but i am making the most of it all.... and made a deal with the wife last night, and now i will be finishing the engine bay before i finish the house roof :spoton: but dont ask me what it cost me !!!! :tease: :tease: :tease: :tease: :tease:

#23 Heath

Heath

    I like cars.

  • Administrators
  • PipPipPipPipPipPipPip
  • 18,359 posts
  • Name:Heath
  • Location:Eastern Suburbs, Melbourne
  • Car:Heavily Modified UC Sunbird Hatchback
  • Joined: 07-November 05
Garage View Garage

Posted 15 June 2009 - 08:10 AM

lol

Looks awesome. Very nice repairs on the inner guards. I wanna know what they'll look like with paint over the top haha

#24 _studricho_

_studricho_
  • Guests

Posted 19 June 2009 - 10:48 PM

You have been a busy little boy haven't you Lee?

#25 _doogs_

_doogs_
  • Guests

Posted 22 June 2009 - 08:58 PM

Nice project mate, good progress.
Particularly like the way you used the washer on the peice you were welding in.


4 user(s) are reading this topic

0 members, 4 guests, 0 anonymous users