
Good stuff mate, coming on well.
Gee that's some dodgy repairwork there with the T-shirt ! When a mate of mine stripped back his XW ute he found; chicken wire, newspaper and bread, all cover in a thick layer of bog !
You really don't know what's there untill you take the paint off hey !

LX under construction
Started by
_nial8r_
, May 10 2009 12:18 PM
250 replies to this topic
#102
 _nial8r_
_nial8r_
-

- Guests
Posted 17 April 2010 - 08:26 AM
ya not wrong about not knowing whats under the paint till its all gone as i found some more bog that i doubt i would have found if i didnt strip it back and it was in a couple of good size dents that i will knock out and they should only need a very light skim not a shovel full 
#103
_LH SLR 3300_
_LH SLR 3300_
-
- Guests
Posted 18 April 2010 - 06:00 PM
Looking good Lee The body shell looks to be in really good condition in it's birthday suit, better than what i started with. I know what you mean about the T5 conversion, watching you doing it to your car has put me right off doing the same to mine. I'll stick with the TH700  . The rust around the back screen aperture doesn't look too bad, considering you skills & what you've done with the car so far. Still, that t-shirt shoved in there must've been a nasty surprise. Reminds me of a Torana i owned once that had two inch masking tape with a skim of bog over it covering rust in the same spot as yours. Sorry mate but being in the trade i can't help but laugh at some of the dodgy work i come across from time to time, that t-shirt though will have to be in the top ten for sure
 . Good to see you're having a go with the 2K, i always admire someone who steps outside the square & tries something new. Looks like things are starting to happen fast with the car now, keep up the excellent work mate.
Cheers Matt
The body shell looks to be in really good condition in it's birthday suit, better than what i started with. I know what you mean about the T5 conversion, watching you doing it to your car has put me right off doing the same to mine. I'll stick with the TH700 . The rust around the back screen aperture doesn't look too bad, considering you skills & what you've done with the car so far. Still, that t-shirt shoved in there must've been a nasty surprise. Reminds me of a Torana i owned once that had two inch masking tape with a skim of bog over it covering rust in the same spot as yours. Sorry mate but being in the trade i can't help but laugh at some of the dodgy work i come across from time to time, that t-shirt though will have to be in the top ten for sure . Good to see you're having a go with the 2K, i always admire someone who steps outside the square & tries something new. Looks like things are starting to happen fast with the car now, keep up the excellent work mate.Cheers Matt
#104
_nial8r_
_nial8r_
-
- Guests
Posted 18 April 2010 - 07:32 PM
thx Matt it does fell like im getting somewhere with it now,and the T-Shirt was a good suprise after i took them pic's i also found another piece i there too, using the 2K is a how new ball game and it was only Etch so i dont think i will be throwing the colour on it thats for sure  but i will be sticking with the 2K now as like i said to you on the phone the underside of your bonnet did it to me with the shine straight off the gun next step will be to fill in the little holes on the quarters and around the tail lights oh and i can rip the motor back out now then a couple of rust repairs under the scuff plates and the L/H lower quarter and scub up the new radiator suport and get it back on clean up the floor pan as it will only take about 2hrs as there isnt any rust there then hit the boot floor, notice im avoiding that massive repair under the plenium were that heater box thingo is lol ill wait till the rotissory get here there i wont be weld it up lying on my back eating hot rocks lol sounds like a heap to do but not really i just need to be able to get at it in full days as i hate starting on it at lunch time or getting interupted in the middle of it ..........
but i will be sticking with the 2K now as like i said to you on the phone the underside of your bonnet did it to me with the shine straight off the gun next step will be to fill in the little holes on the quarters and around the tail lights oh and i can rip the motor back out now then a couple of rust repairs under the scuff plates and the L/H lower quarter and scub up the new radiator suport and get it back on clean up the floor pan as it will only take about 2hrs as there isnt any rust there then hit the boot floor, notice im avoiding that massive repair under the plenium were that heater box thingo is lol ill wait till the rotissory get here there i wont be weld it up lying on my back eating hot rocks lol sounds like a heap to do but not really i just need to be able to get at it in full days as i hate starting on it at lunch time or getting interupted in the middle of it ..........
#105
_LH SLR 3300_
_LH SLR 3300_
-
- Guests
Posted 18 April 2010 - 07:57 PM
Yeah once you see the finish of fresh 2K you'll be glad you decided to go with it. I love the fact that my LH looks as good now as it did when it was first painted & all i've done is wash it it now & then. I might be going to Harry's Liverpool next saturday, if you can get a loan of a car & you have nothing planned, let me know & we can meet up for a chat if you like.
#106
_SS Hatchback_
_SS Hatchback_
-
- Guests
Posted 22 May 2010 - 07:28 PM
First time ive seen this thread , where have i been :( Great work Lee will be good to see another Torry getting around locally.
#107
_billywest_
_billywest_
-
- Guests
Posted 23 May 2010 - 08:55 AM
thx Matt it does fell like im getting somewhere with it now,and the T-Shirt was a good suprise after i took them pic's i also found another piece i there too, using the 2K is a how new ball game and it was only Etch so i dont think i will be throwing the colour on it thats for sure
hi lee your getting closer by the day i hope the house is getting closer aswell, by the way lee if ya need a extra pair of hands i am always floating around cheers lee and i reckon the best way to get exsperience is to help other guys out so you can get a bit of knowledge on mig welding and stuff like that, i can imagine me mig welding and some way or form burnin the house down lol , once well done the rebuild
#108
_nial8r_
_nial8r_
-
- Guests
Posted 23 May 2010 - 08:58 AM
thx SS Hatchback, the Torana is now on a rotisserie so i could clean up the under floor pan and weld up the under side of the tunnel, also cut al the tank mounts off as well as the fuel rail clamps, i just wanna cut the boot floor out now and replace it with a flat boot floor, i will post some pic's up soon as i can do anymore welding for a few days as i copped a good flash again
#109
_nial8r_
_nial8r_
-
- Guests
Posted 23 May 2010 - 03:00 PM
Hi billywest, thx for the offer and i will keep it mind too... your very right in what you say about the best way to learn is helping others that way you get to see how things go 1st hand, i have retired from the house for a while now after i got the entertaining area to lock up stage although i have done some electrical work on it and fitted some decent lighting to it and done a cheap quick fix on the retaining wall out the front but other than that i just do snoopy patrol ( pick up the dog cukka ) morning and arvo and keep on top of the lawns and its all Torana as it just sat in the shed on stands for a good 6 mths thx again for offering your hands mate
thx again for offering your hands mate
#110
_LH SLR 3300_
_LH SLR 3300_
-
- Guests
Posted 23 May 2010 - 05:54 PM
Have ya finished scrubbing the 30+ year old deadner off the floorpan yet Lee Sux big time i know, at least you had the sense to do it with the car on a rotisserie lol. I did it the hard way lying under the car. Oh well, you must be getting close now, looking forward to seeing some pics.
Sux big time i know, at least you had the sense to do it with the car on a rotisserie lol. I did it the hard way lying under the car. Oh well, you must be getting close now, looking forward to seeing some pics.
#111
_nial8r_
_nial8r_
-
- Guests
Posted 23 May 2010 - 07:57 PM
Hi Matt yeah mate i have all the deadener off and the tank brackets are cut off as well as the fule rail clamps, done some solid welds on the trailing arm brackets too, the old spot welds didnt look to strong, also put a fresh wipe of seam sealer in the rear arches where the centre seem is and the whole under floor pan has been etched and primmed ready for the shiltz, just got to weld up the holes where the old tow bar was in the rails then unpick the boot floor and get a nice flat floor in there, so the of course the boot floor isnt etched or anything till the new floor goes in, mate i could emagine the state you were in doing it on ya back by the time i was done i could have passed for a black fella lol and the sh*t was everywhere, i will have to get some pic's up tomorrow and the rotisserie makes doing a resto so much easyer, its the 1st time i have used one and i think they are the way to go welding laying on ya back isnt much fun at all 
welding laying on ya back isnt much fun at all
#112
Statler
-

- Administrators
-

- 6,294 posts
Heckler Extraordinaire
- Name:Col
- Location:Mackay Qld. Whitsundays for all you back packers!
- Joined: 20-May 06
Posted 23 May 2010 - 08:20 PM
i can do anymore welding for a few days as i copped a good flash again
Here's a tip m8.
It has zero medical approval...but somehow still works. Don't ask me why, i was sceptical at first too.
When you get a flash...[& we all know when we get them!].... close your eyes...tight.
You will still be able to see the bright light in your eyes. Focus on that light!
It will start to break up, blue haze around the outside. Keep focusing on the light.
Soon the light will disappear. DONT OPEN YOUR EYES!... it comes back! [within 3 seconds]
When it goes the second time, you will actually feel better!
All good to go again!....without the 2am sandpaper eye syndrome.
The same principle works for those of us who tack without a shield. [ not that i would do that
 ]
]As i said....don't ask me why...it works.
#113
_nial8r_
_nial8r_
-
- Guests
Posted 24 May 2010 - 07:49 AM
thx for the tip col il remember that for next time cause im pretty sure this isnt the last time thats for sure im also guilty of tac'ing without my mask on  and the lovley mig burn face too
im also guilty of tac'ing without my mask on and the lovley mig burn face too
#114
_Kush_
_Kush_
-
- Guests
Posted 24 May 2010 - 08:17 AM
Ha ha! That's what I do! But I do it to try and make the blindness go away quicker. I don't tend to get flash anymore, I just figured that it's because my eyes had gotten used to the flash.
#115
_nial8r_
_nial8r_
-
- Guests
Posted 24 May 2010 - 07:03 PM
my eye has just started to come good today, i managed to do a small job on my daughters ATV as i snapped the rear hay bail rack, but no mask and just tac'ed it together i think i should be right to get stuck back in to the Torana again tomorrow only one way to find out i guess
#116
_hatch76_
_hatch76_
-
- Guests
Posted 24 May 2010 - 09:55 PM
Hi Lee,
nice project so far dude, should look awsome when finished. It's amazing what you find when their stripped back. I found that much aluminium foil that I could have wraped my lunch in it! Do you have any ideas on colour and wheels yet or not sure.
Top stuff, keep it up.
Cheers Dan
nice project so far dude, should look awsome when finished. It's amazing what you find when their stripped back. I found that much aluminium foil that I could have wraped my lunch in it! Do you have any ideas on colour and wheels yet or not sure.
Top stuff, keep it up.
Cheers Dan
#117
_nial8r_
_nial8r_
-
- Guests
Posted 25 May 2010 - 09:33 AM
Hi Dan and thx, im just glad thats was the worst that i have found so hopfully it should be smooth sailing from here on in i have an idea on the colour but its getting it as its the colour on the rims of the Repsol Honda GP bikes and another thing with that colour i think it might be a bit in ya face over such a big area
  here is a pic i got of some rims but there a lot more fluroesent the the ones in the pic so the colour could really end up anything yet
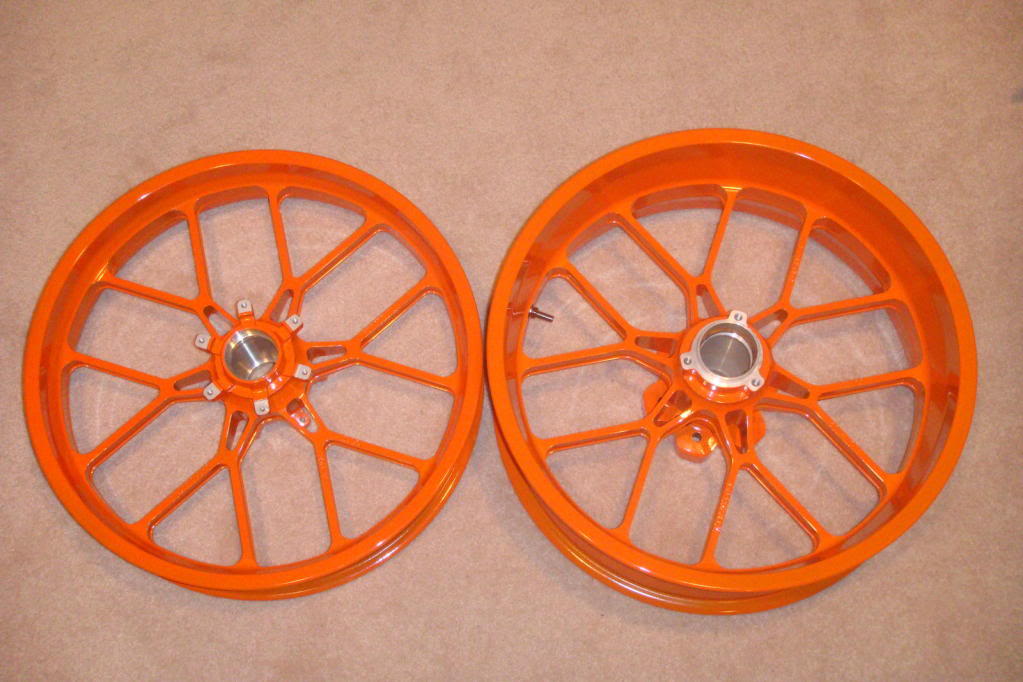
and with the rims im pretty sure i will be going with one of these sets of rims but the more Toranas i see the more of these rimes i see on them

or these

i have an idea on the colour but its getting it as its the colour on the rims of the Repsol Honda GP bikes and another thing with that colour i think it might be a bit in ya face over such a big area here is a pic i got of some rims but there a lot more fluroesent the the ones in the pic so the colour could really end up anything yet and with the rims im pretty sure i will be going with one of these sets of rims but the more Toranas i see the more of these rimes i see on them
or these
#118
orangeLJ
-

- Members
-
- 10,261 posts
Yes, yes I do post alot!
- Joined: 02-May 06
Posted 25 May 2010 - 10:28 AM
hahaha, everyone loves orange!
#119
_nial8r_
_nial8r_
-
- Guests
Posted 25 May 2010 - 10:45 AM
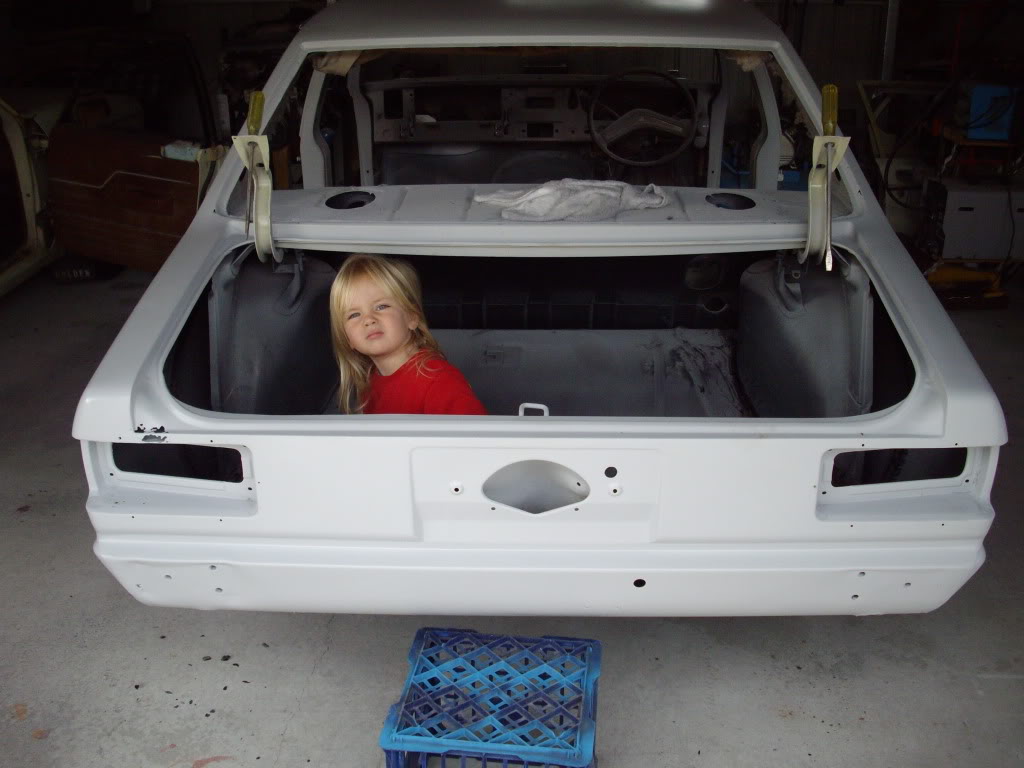
heres where im at now with the build
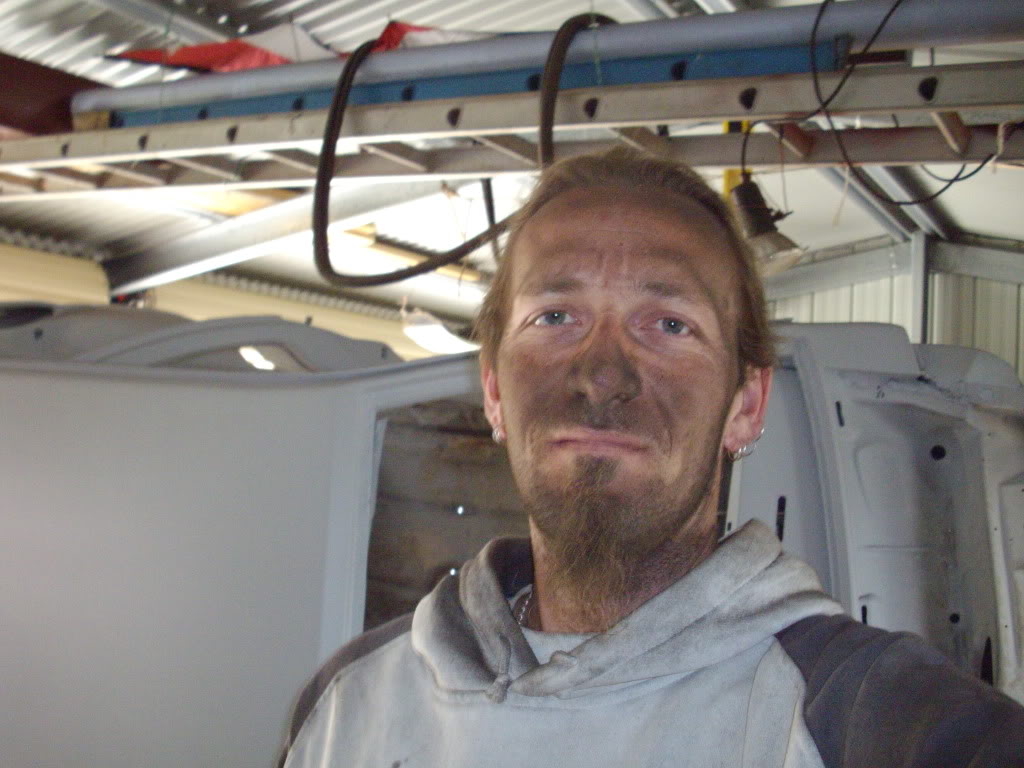
the young bloke scaping all the old seam sealer outta the boot so i can get ready to unpick the boot floor and delete the fuel filler neck hump so i can fit up a flat foor right up the the diff hump
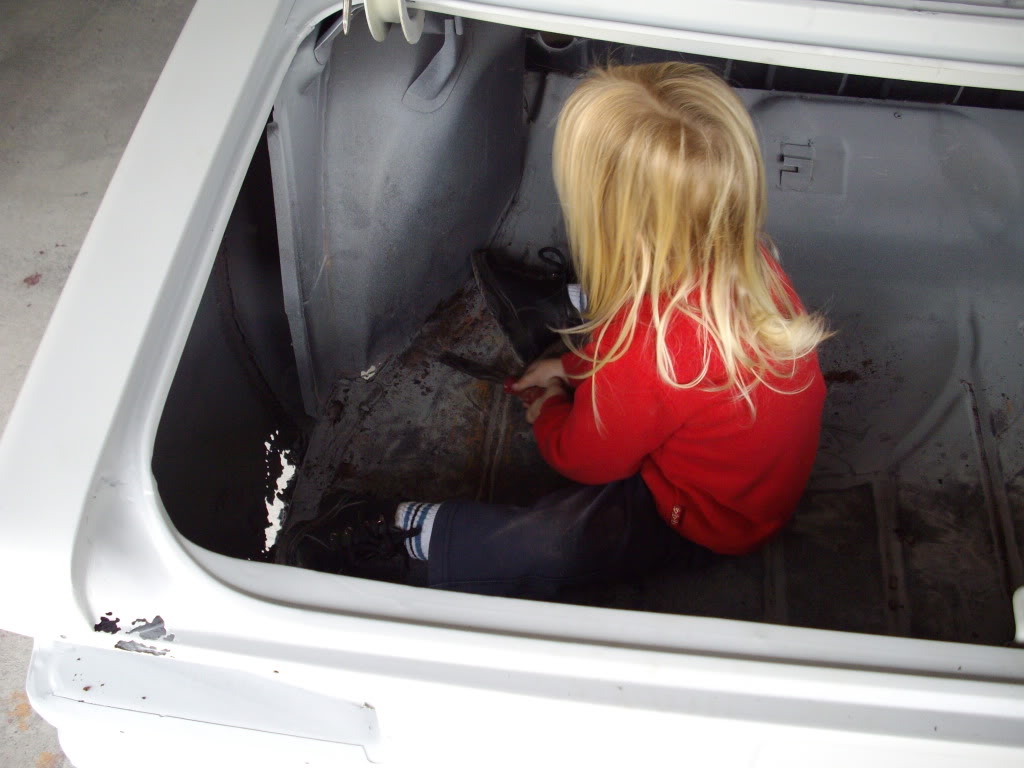
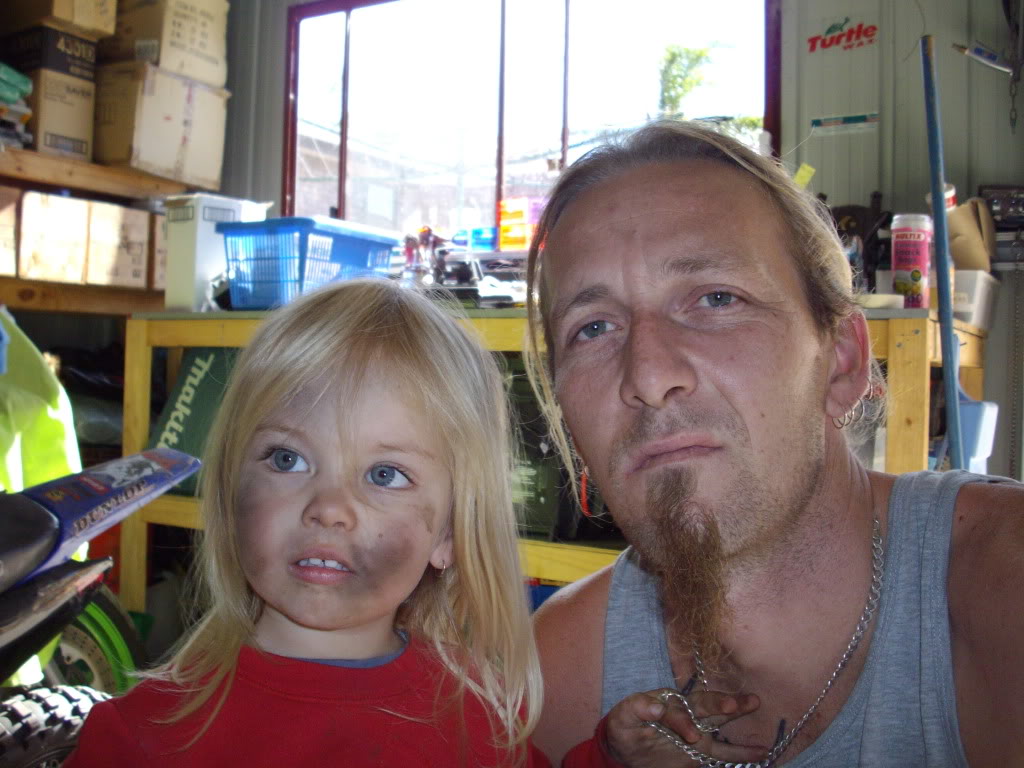
he got pretty dirty but i stayed clean some how
here's what i loooked like after i cleaned all the deadner from the rear wheel arches
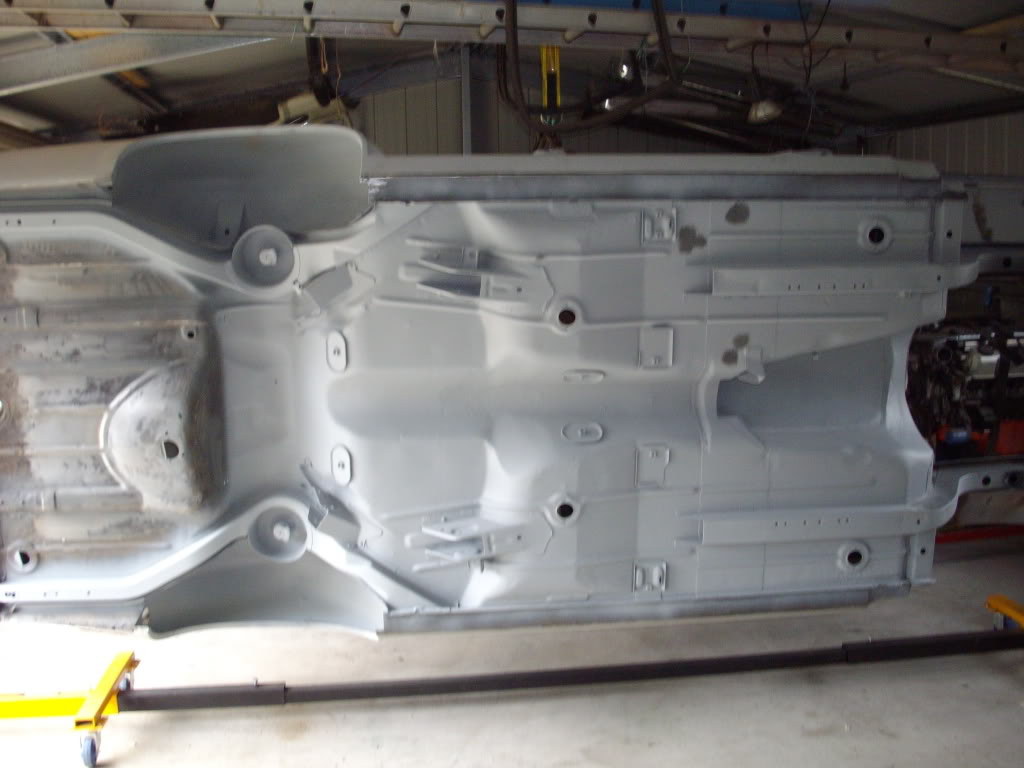
the whole under side now in etch and except the boot floor, once its done i will shiltz the whole under body
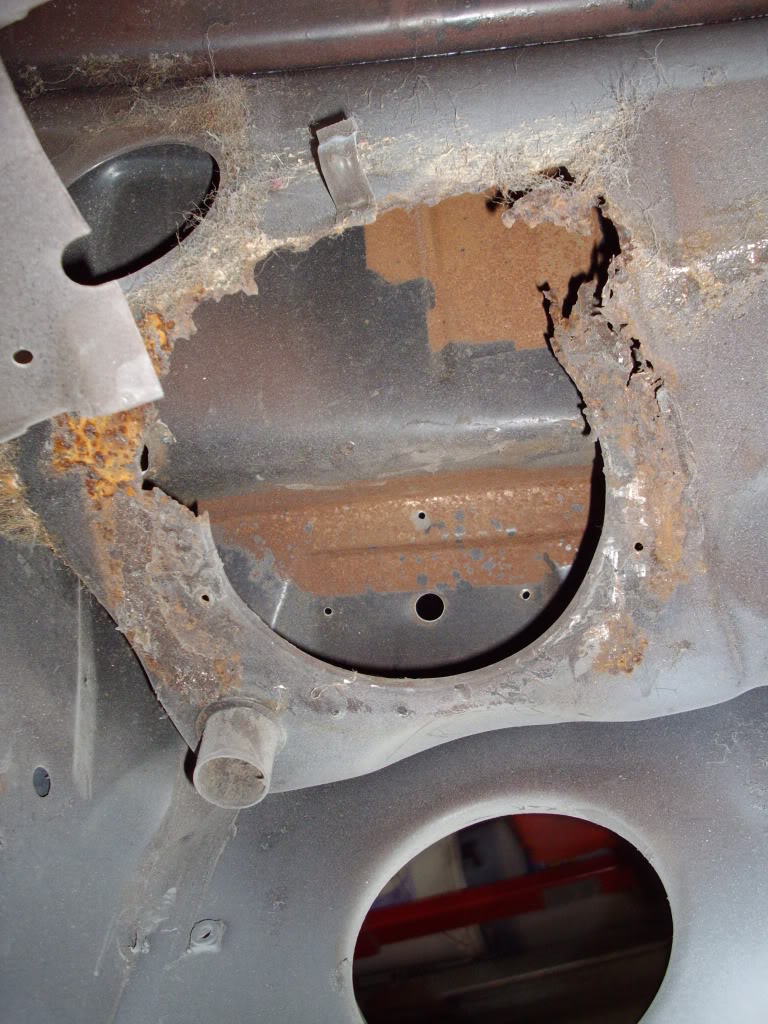
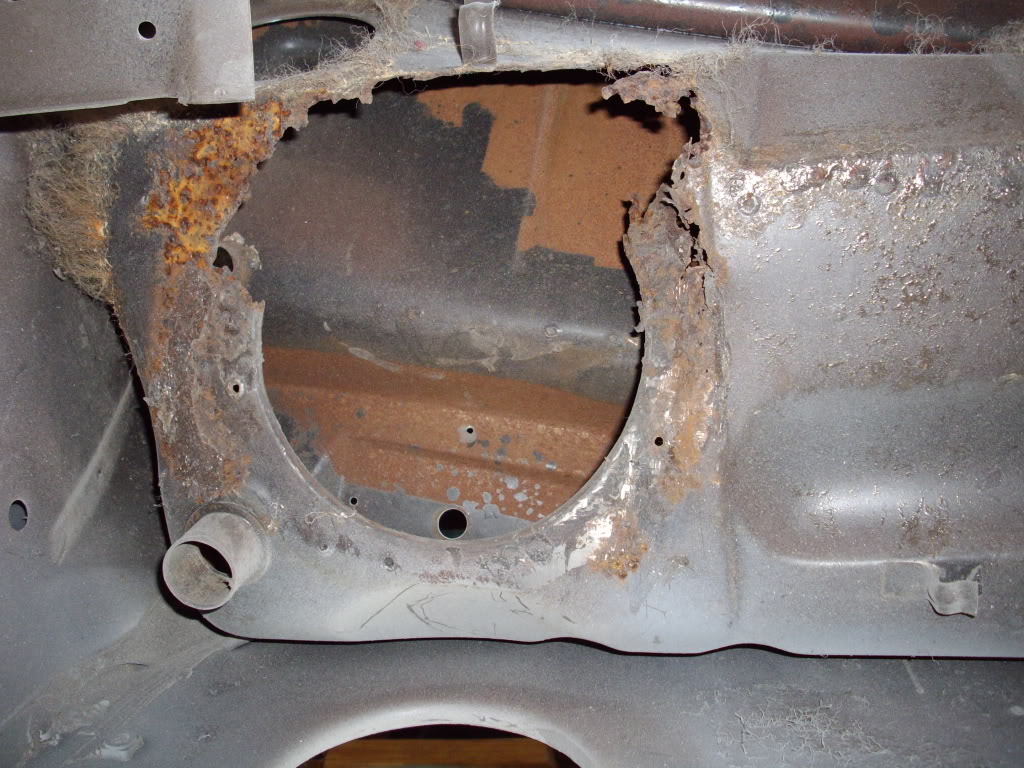
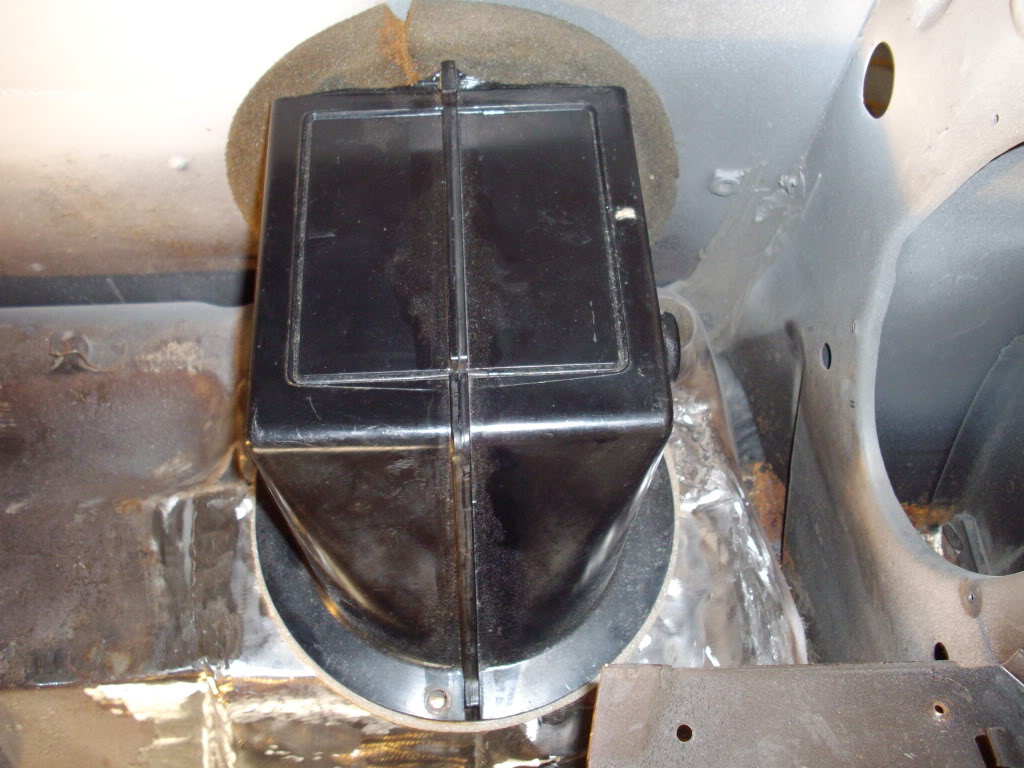
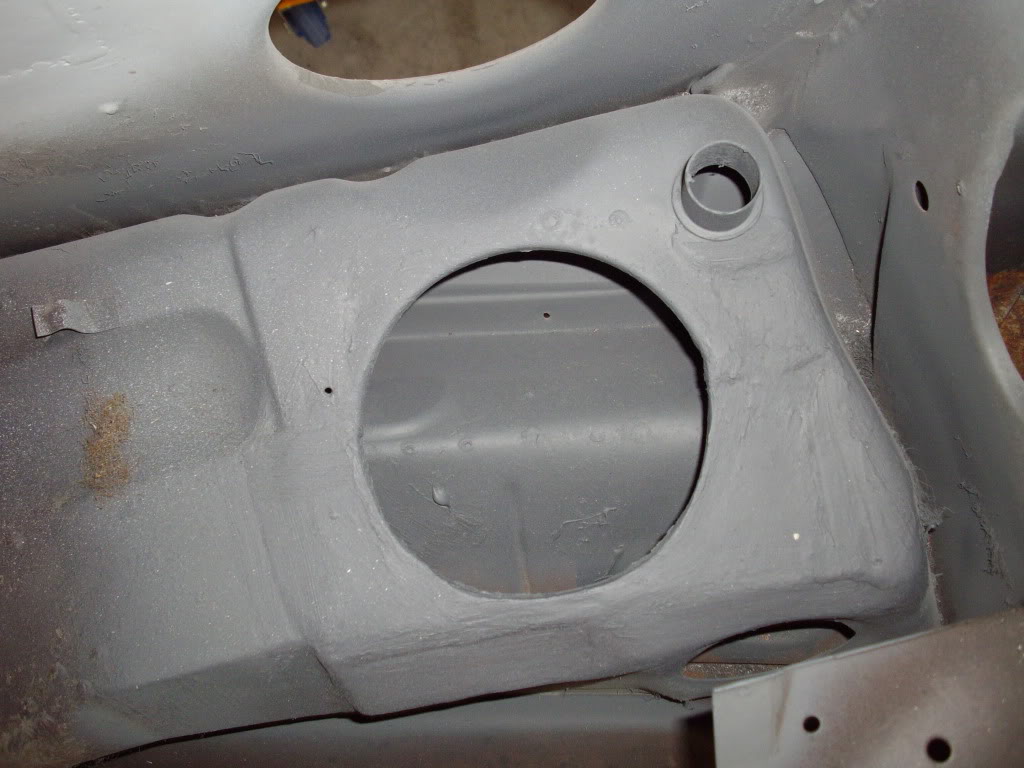
and this is the worst of it all that i have been avoiding, its where the heater box thingo goes, im gonna mark it out today and see what the best way of attack is
the young bloke scaping all the old seam sealer outta the boot so i can get ready to unpick the boot floor and delete the fuel filler neck hump so i can fit up a flat foor right up the the diff hump
he got pretty dirty but i stayed clean some how
here's what i loooked like after i cleaned all the deadner from the rear wheel arches
the whole under side now in etch and except the boot floor, once its done i will shiltz the whole under body
and this is the worst of it all that i have been avoiding, its where the heater box thingo goes, im gonna mark it out today and see what the best way of attack is
Edited by nial8r, 25 May 2010 - 10:48 AM.
#120
_nial8r_
_nial8r_
-
- Guests
Posted 25 May 2010 - 10:55 AM
hahaha, everyone loves orange!
lol i orange has always been my fav colour but i wanted a different shade of orange and i really like the floro type orange but might have to add a flake or something if its gonna be to in ya face
my old Torana was Black and the wife keeps telling me to go black again  but i dont wanna be driving around in a over in summer again
#121
_marshallLX_
_marshallLX_
-
- Guests
Posted 25 May 2010 - 08:34 PM
heres where im at now with the build
the young bloke scaping all the old seam sealer outta the boot so i can get ready to unpick the boot floor and delete the fuel filler neck hump so i can fit up a flat foor right up the the diff hump
he got pretty dirty but i stayed clean some how
here's what i loooked like after i cleaned all the deadner from the rear wheel arches
the whole under side now in etch and except the boot floor, once its done i will shiltz the whole under body
and this is the worst of it all that i have been avoiding, its where the heater box thingo goes, im gonna mark it out today and see what the best way of attack is
Hey champ do you think you could put up some photos of ur car stand cause im looking at making 1 for my car cheers dude PS ur car is coming along alsome
#122
_nial8r_
_nial8r_
-
- Guests
Posted 26 May 2010 - 08:28 AM
no worries Andrew i will get some shoots of it today for ya and post em up, i reckon it would take a weekend to knock this one up as its a pretty basic set up but cant fault it at all and its very sturdy thats for sure
#123
_nial8r_
_nial8r_
-
- Guests
Posted 02 June 2010 - 08:13 PM
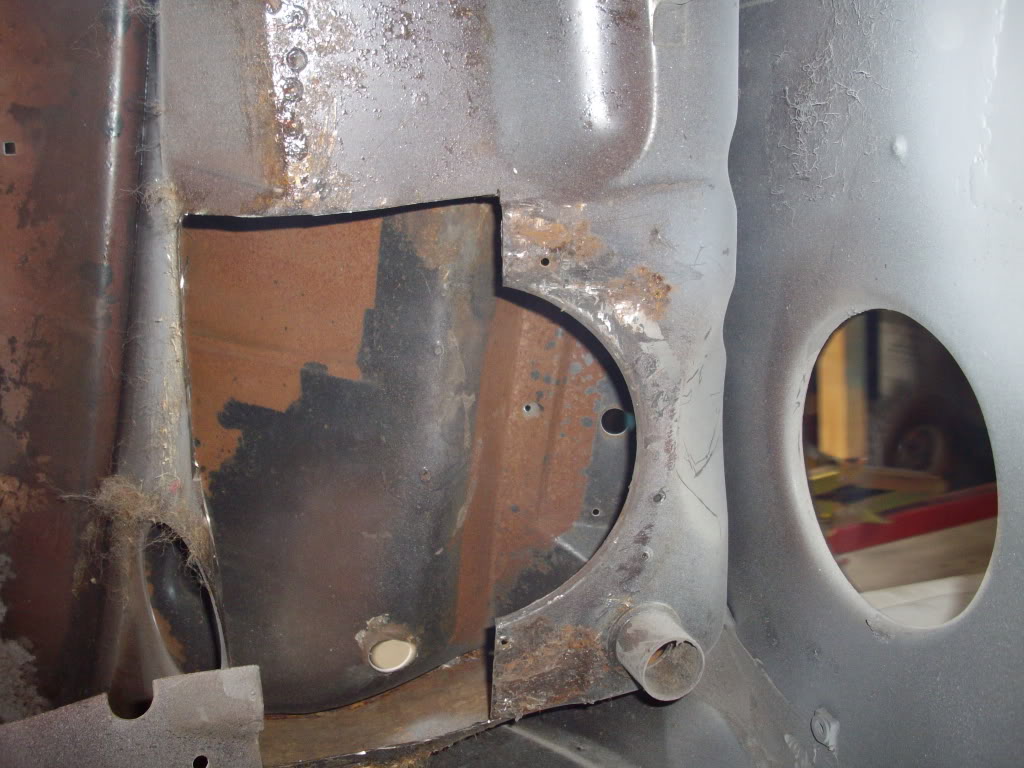
well i have finished the dredded rust job under the dash that i was avoiding and belive it or not it wasnt that scary after all lol anyways here are some pic's..
heres what it looked like before
after i did some marking out with the texta and cut it out, no turning back now lol
the 1st piece in, i had to do it in 3 sections and making templets out of cardboard
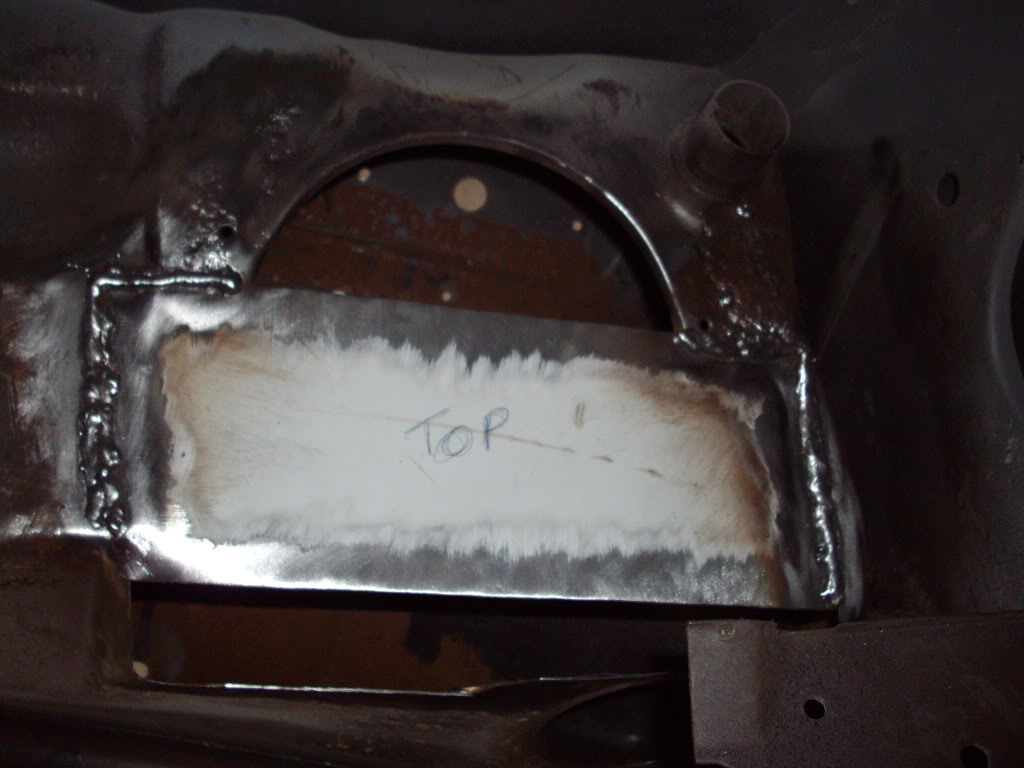
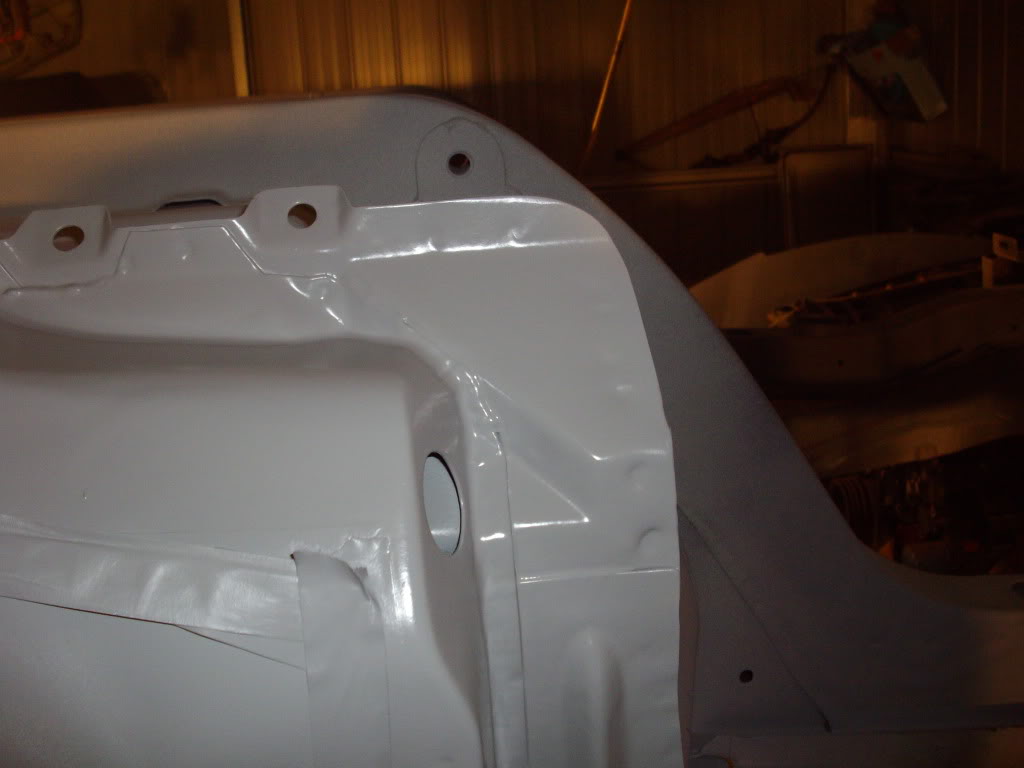
all 3 pieces in place and the little lip i also had to weld in, you can just see the left over bit that i had to trim off
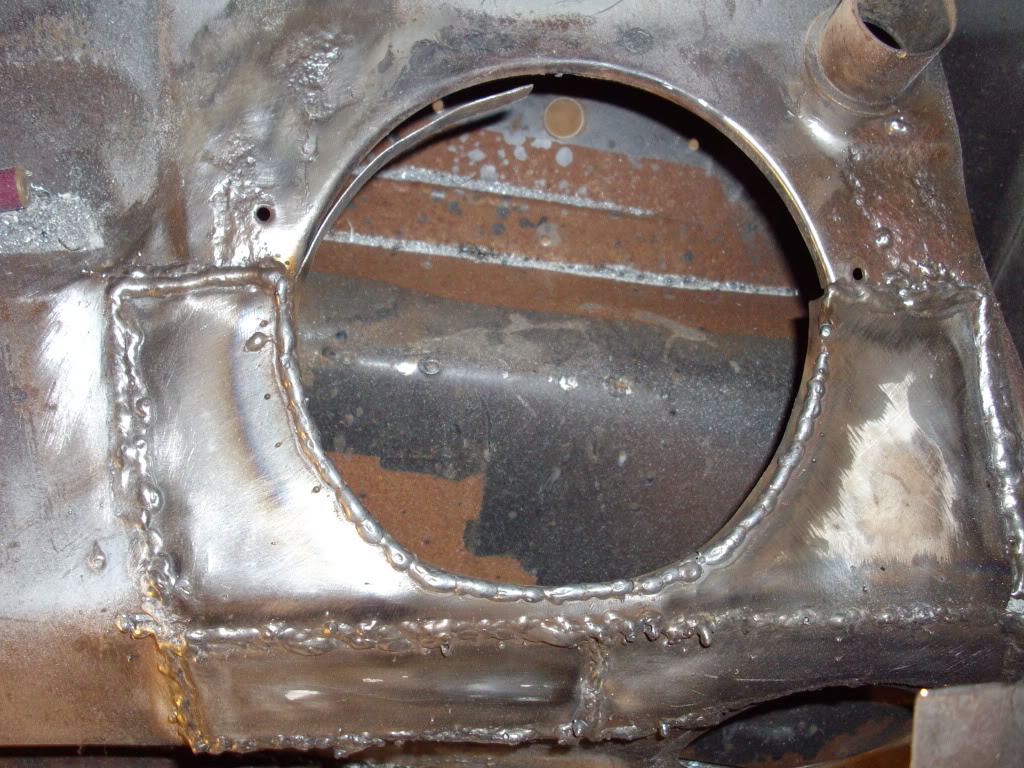
all the welds cleaned up, pretty happy with the out come ( sort off )
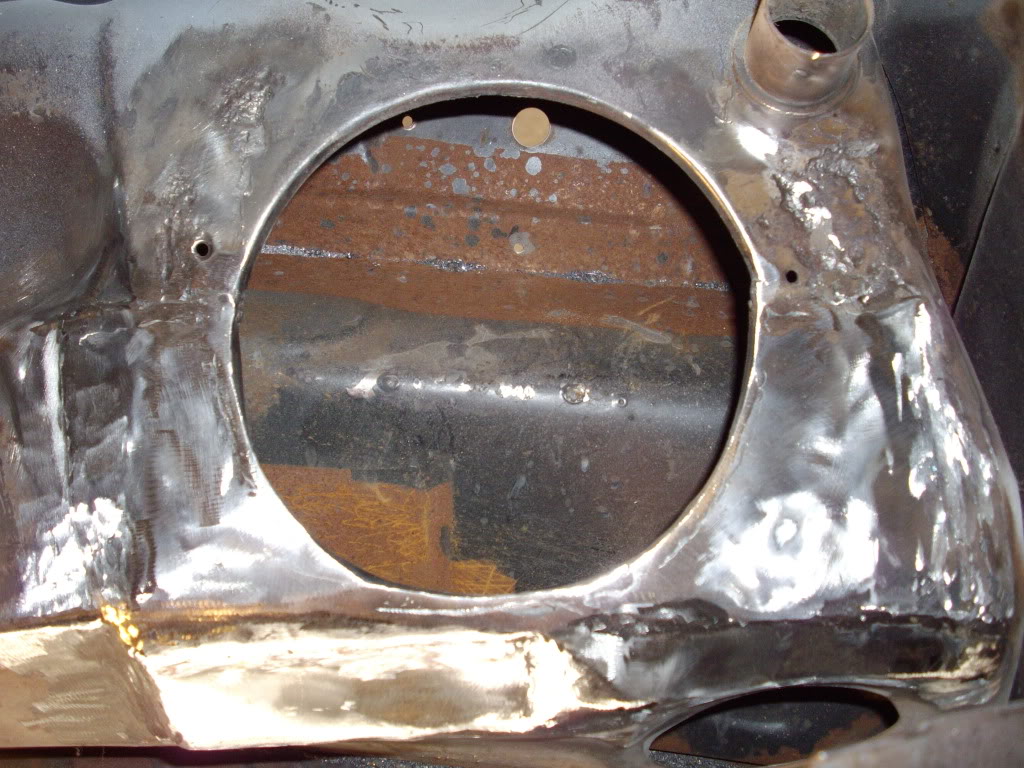
heater box thingo fits nice and tight
blew some etch over it and then gave it a wipe with some seam sealer, doing the inside was real fun but at leats i know its not gonna be leaking or rusting out any time soon
now all i have to do is give the rest of the uderside of the dash a good clean up and i will blow some Acrylic primer over it then a quick lick of black and its done, oh and i finally got the 2k etch to go down and sit flat for the 1st time ( very new to 2k spraying ) but here is a quick pic i snapped not that it shows much as its the under side of the sill's
tomorrows effot is um ............... dunno yet have a tidy up in the shed 1st i think before i start to loose stuff
heres what it looked like before
after i did some marking out with the texta and cut it out, no turning back now lol
the 1st piece in, i had to do it in 3 sections and making templets out of cardboard
all 3 pieces in place and the little lip i also had to weld in, you can just see the left over bit that i had to trim off
all the welds cleaned up, pretty happy with the out come ( sort off )
heater box thingo fits nice and tight
blew some etch over it and then gave it a wipe with some seam sealer, doing the inside was real fun but at leats i know its not gonna be leaking or rusting out any time soon
now all i have to do is give the rest of the uderside of the dash a good clean up and i will blow some Acrylic primer over it then a quick lick of black and its done, oh and i finally got the 2k etch to go down and sit flat for the 1st time
( very new to 2k spraying ) but here is a quick pic i snapped not that it shows much as its the under side of the sill'stomorrows effot is um ............... dunno yet have a tidy up in the shed 1st i think before i start to loose stuff
#124
_LH SLR 3300_
_LH SLR 3300_
-
- Guests
Posted 03 June 2010 - 04:48 PM
Good work there Lee . While you have the spray gun out, be sure to blow as much paint as you can up inside the plenum where you welded the new sections in so both sides are protected from the tin worm. Cheers Matt
. While you have the spray gun out, be sure to blow as much paint as you can up inside the plenum where you welded the new sections in so both sides are protected from the tin worm. Cheers Matt
#125
_nial8r_
_nial8r_
-
- Guests
Posted 03 June 2010 - 06:49 PM
thx Matt, while i was cleaning the rest of the underside up today i came arcoss a couple of little holes right next to the peddle box brackets so that set me back abit but if i never bothered to clean up the rest of the under side i would have never seen them till i got the dredded drip on my foot ... good thing was though the holes werent big enough to warrent a cut and replace and i could get a good look at the inner side as well cause i could see through were the wiper motor hole is and the rest was clean, i also got as etch up in there as i could with the gun, once i have sorted out the rest of the top of the plenium im gonna use my fish oil / shiltz gun and use the long fish oil tube and feed it up inside the plenium and blast it with some of the rust gaurd that you spoke to me about that you used on the floorpan in you LH. i will just blast it a slowly pull the tube out and hopfully it gets it all


1 user(s) are reading this topic
0 members, 1 guests, 0 anonymous users

