


LX under construction
Started by
_nial8r_
, May 10 2009 12:18 PM
250 replies to this topic
#151
 _patch_
_patch_
-

- Guests
Posted 23 June 2010 - 06:18 PM
nice work. and after ya shout the kids to ice cream ya can shout the rest of a beer or to lol
#152
Neils LX
-

- Members
-

- 2,074 posts
Forum Fixture
- Name:a
- Location:North west NSW
- Joined: 18-March 07
Posted 23 June 2010 - 06:19 PM
Looks like your burnout car has a brother
I wonder if my tired old 173 has the guts to do the same job
I wonder if my tired old 173 has the guts to do the same job
#153
_dirtbag_
_dirtbag_
-
- Guests
Posted 23 June 2010 - 06:23 PM
Looking really good Lee. I love the GMH black on the inside. Finishes it off perfectly.
Good job man!
Good job man!
#154
_nial8r_
_nial8r_
-
- Guests
Posted 23 June 2010 - 07:56 PM
lol Neils LX only one way to find out mate  hey buy the way what are the gutter moulds like on that one ?? i have a set but at some stage they have had roof racks bolted over them and are a little dented up !!
thx Tim the GMH Black does finish it off nice although it will be covered with carpet down the track.... i was gonna just leave it in primer but i couldnt bare to look at it as to me it looked unfinished
hey buy the way what are the gutter moulds like on that one ?? i have a set but at some stage they have had roof racks bolted over them and are a little dented up !!thx Tim the GMH Black does finish it off nice although it will be covered with carpet down the track.... i was gonna just leave it in primer but i couldnt bare to look at it as to me it looked unfinished
#155
Neils LX
-
- Members
-
- 2,074 posts
Forum Fixture
- Name:a
- Location:North west NSW
- Joined: 18-March 07
Posted 23 June 2010 - 08:10 PM
Hi
Im not sure if the gutter moulds are good on it or the white one. One set of them was ok as i was going to use them on my LX but now im not going to.
Chears Neil
Im not sure if the gutter moulds are good on it or the white one. One set of them was ok as i was going to use them on my LX but now im not going to.
Chears Neil
#156
notna
-

- Members
-
- 706 posts
Forum Fixture
- Name:Reverse of username
- Location:Sydney
- Car:1976 LX L32 SL/R
- Joined: 21-May 07
Posted 25 June 2010 - 10:13 PM
My first read of this thread.... damn impressive sheet metal work! Impressive smoke from that rear bag too! You're setting the benchmark for my resto.... thanks a lot... lol!
#157
_nial8r_
_nial8r_
-
- Guests
Posted 29 June 2010 - 07:21 PM
well i have done a bit more but it did take me 2 and a bit days to finish it as i kept getting interupted but its done now just needs a lick of some 2K etch and i can move on then i will shape it up with some filler when it comes time to do the rest of the dents and little inperfections, here are a couple of pic's i didnt get to many as i just wanted to get it done 
i had to unpick the tail light bucket as it was rusted on the top of it as well as around the lip so i cut the lip off and replaced it as well as 3 repaires on the bucket it self
looks messy huh
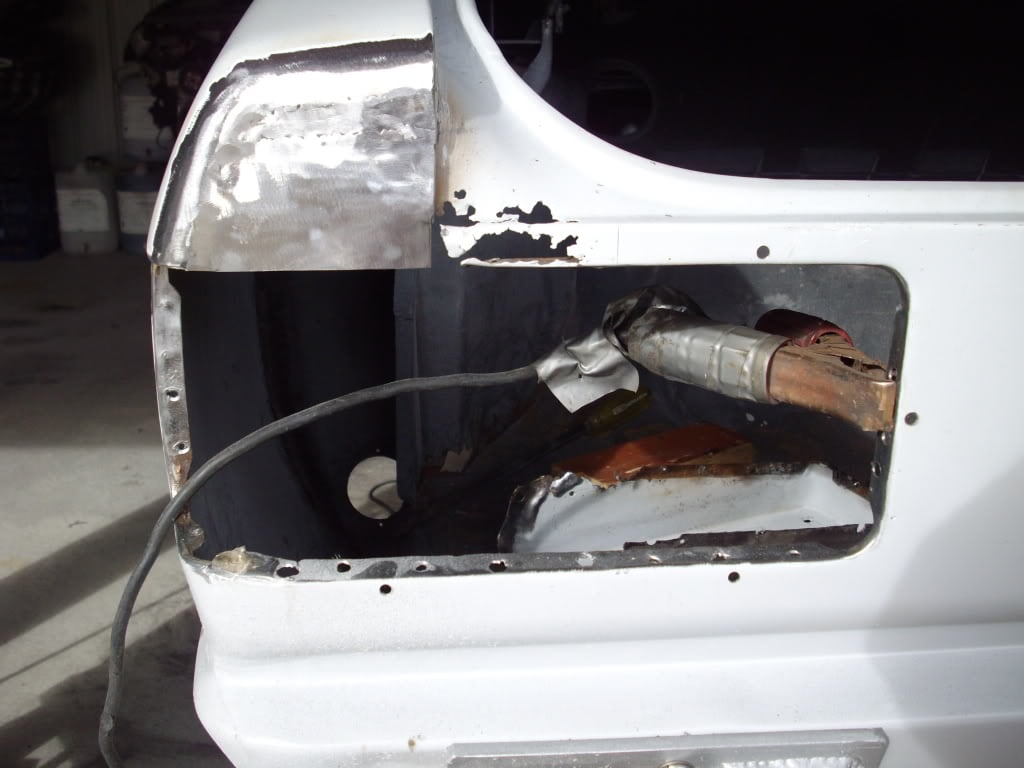
and after stuffing around making sure the light was sitting right and plug welded the bucket back in and it seems to sit good but like i said just needs a bit of filler and it should be all good ( i hope )
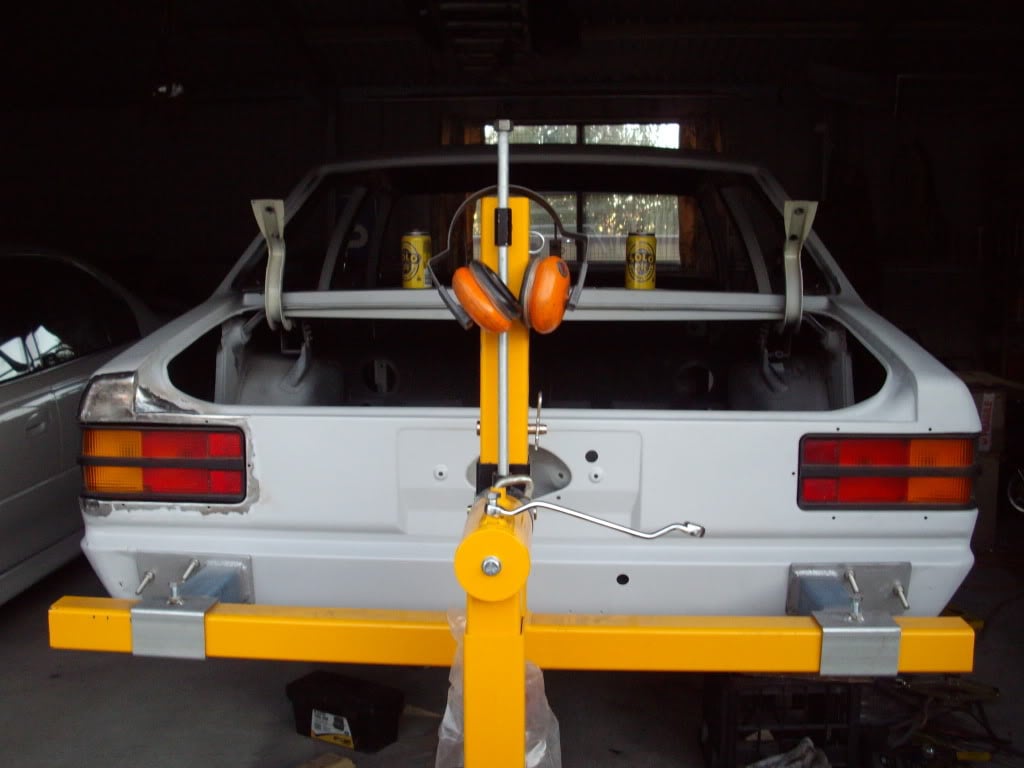
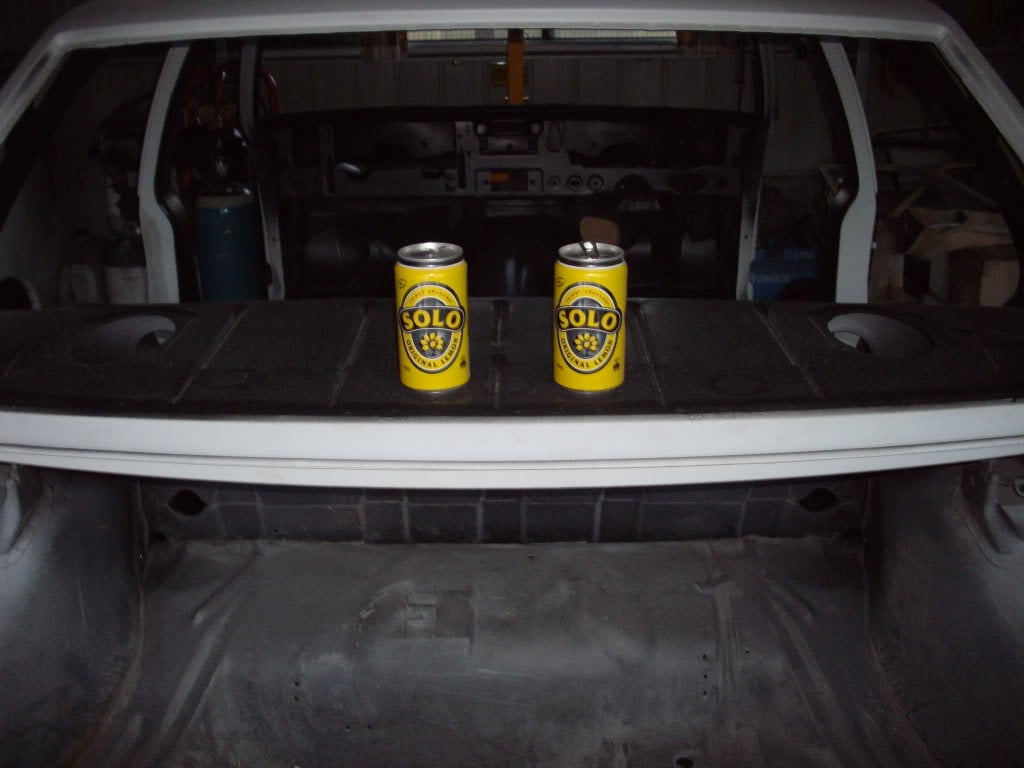
and well i had to snap this one off this arvo when i seen my cans sitting there i thought of the Solo Add on Tele and thought i might start making my own add as there where a few torana's in that add LMAO
Tomorrows plan = clean up the shed before i start again
i had to unpick the tail light bucket as it was rusted on the top of it as well as around the lip so i cut the lip off and replaced it as well as 3 repaires on the bucket it self
looks messy huh
and after stuffing around making sure the light was sitting right and plug welded the bucket back in and it seems to sit good but like i said just needs a bit of filler and it should be all good ( i hope )
and well i had to snap this one off this arvo when i seen my cans sitting there i thought of the Solo Add on Tele and thought i might start making my own add as there where a few torana's in that add LMAO
Tomorrows plan = clean up the shed before i start again
#158
_LH SLR 3300_
_LH SLR 3300_
-
- Guests
Posted 29 June 2010 - 09:16 PM
You're getting quite good at rust repair & panel fabrication Lee, well done  . The quality of work & attention to detail is impressive for someone who doesn't do this work for a living, can't wait to see the next instalment. Watching your work is giving me inspiration to get stuck into rust busting the burnout car lol. Keep up the good work. Cheers Matt
. The quality of work & attention to detail is impressive for someone who doesn't do this work for a living, can't wait to see the next instalment. Watching your work is giving me inspiration to get stuck into rust busting the burnout car lol. Keep up the good work. Cheers Matt
#159
_nial8r_
_nial8r_
-
- Guests
Posted 30 June 2010 - 07:47 AM
thx Matt shaping up that corner section of the boot aperture just above the tail light bucket was a bit of a pain in the ass as i wanted it as close as possible so there is gonna be minimal filler there. and i think they way you work when you get going you could wait another 2 months and still breeze past me on your new build i cant wait till all the repairs are done so that i can start shaping up the rest of the car getting it nice and straight, at the moment all its been is weld, grind,weld, grind will be good to start doing some filler, sand, filer sand lmao
i cant wait till all the repairs are done so that i can start shaping up the rest of the car getting it nice and straight, at the moment all its been is weld, grind,weld, grind will be good to start doing some filler, sand, filer sand lmao
#160
_patch_
_patch_
-
- Guests
Posted 30 June 2010 - 04:41 PM
looking good champ! im borrowing a welder of one of my brothers mates that brought it brand new and has neve used it
so hopefully ill get as good as you one day lol but the only prob is i think its a stick welder instead of a gas less mig.
so hopefully ill get as good as you one day lol
but the only prob is i think its a stick welder instead of a gas less mig.
#161
_Kush_
_Kush_
-
- Guests
Posted 30 June 2010 - 05:20 PM
looking good champ! im borrowing a welder of one of my brothers mates that brought it brand new and has neve used it
so hopefully ill get as good as you one day lol
patch, if it's a stick welder don't use it. It's the wrong tool for the job.
#162
_LH SLR 3300_
_LH SLR 3300_
-
- Guests
Posted 30 June 2010 - 05:54 PM
I agree, MIG is better, TIG even better yet, less heat & distortion & easier welds to sand. Lee, a trick i use when making tricky shaped panels like that is to get the basic shape using templates hammer & dolly etc, then fit it over the original panel & use that to "dress" it into shape. Sometimes i'll self tapper the new panel to the original to assist in doing this & once the shape is good, i cut around the edge of the panel so that both can be removed together. Then one i remove the self tappers & the original rusted panel, the new one fits straight in ready for welding. Then just fill the self tapper holes with the MIG. Much easier & quicker than hitting, grinding & trimming a new section to fit where you've cut the old one out & because you've used the original panel to help shape the new one, chances are very little filler will be needed. A few weeks ago i hand made the complete LHR outer wheel arch section for a HDT VK at work using this method & i was very near to metal finishing it.
#163
_patch_
_patch_
-
- Guests
Posted 30 June 2010 - 06:44 PM
looking good champ! im borrowing a welder of one of my brothers mates that brought it brand new and has neve used it
so hopefully ill get as good as you one day lol
patch, if it's a stick welder don't use it. It's the wrong tool for the job.
thats what i thought. ive used a gas mig before in a weeks welding coarse i did but i was welding 5mm thick plate not the thiner
metal used as car panels. how hard is it to use a tig???
Edited by patch, 30 June 2010 - 06:46 PM.
#164
_dirtbag_
_dirtbag_
-
- Guests
Posted 30 June 2010 - 07:11 PM
I've just started a body resto on a 69 camaro, and it seems pop rivets are a popular way of joining metal. Maybe give that a go hahahaha : )
#165
_Kush_
_Kush_
-
- Guests
Posted 30 June 2010 - 07:27 PM
looking good champ! im borrowing a welder of one of my brothers mates that brought it brand new and has neve used it
so hopefully ill get as good as you one day lol
patch, if it's a stick welder don't use it. It's the wrong tool for the job.
thats what i thought. ive used a gas mig before in a weeks welding coarse i did but i was welding 5mm thick plate not the thiner
metal used as car panels. how hard is it to use a tig???
erm....... TIG takes the most practice and many people consider it too hard(most of the boilies at my work cant do it neatly). MIG is the go for car panels, you cant go wrong with it. nice and slowly and allow the weld to cool so you dont put too much heat into to steel. Stick welding on car panels will just make a mess, too much heat and will likely blow holes through everything.
#166
Heath
 View Garage
-

- Administrators
-
- 18,359 posts
I like cars.
- Name:Heath
- Location:Eastern Suburbs, Melbourne
- Car:Heavily Modified UC Sunbird Hatchback
- Joined: 07-November 05
View Garage
Posted 30 June 2010 - 10:13 PM
Oxy is better in theory because there is nothing in the metal afterwards that wasn't there before i.e. you can still panel beat it etc.
But in practice, it's hard to go past a MIG.
But in practice, it's hard to go past a MIG.
#167
_youngy_11_
_youngy_11_
-
- Guests
Posted 01 July 2010 - 08:50 AM
Hey lee. Only just read the last couple of pages.
Project is coming along well mate, Where did you get that tunnel mod idea from
It came up real good
Love the skid too

Project is coming along well mate, Where did you get that tunnel mod idea from
It came up real good
Love the skid too
#168
_nial8r_
_nial8r_
-
- Guests
Posted 01 July 2010 - 08:56 AM
thx for the heads up Matt, but i wouldnt have been able to bo that method as the only thing holding that section together was rust and lead so i was pretty much going blind but i did have the other side to work of wich made it a bit easer, i have to admit i thought i was gonna to call in a Favour but i got it done so i will save that one for playing with all the wires hey
Patch what ever you do dont try and use a stick welder on your car your will make one hell of a mess, mig is your best bet mate its more or less just a point and shoot method pretty straight forward ...
Tim my mates HR doors (all 4 of them) had the lower sections have been pop rivited and um well they still are seems to be the going method these days instead of bog
righto you lot of keyboard jockeys im of to the shed to weld up all the little chrome moulds holes around the tail lights and quarters yay fun 
Patch what ever you do dont try and use a stick welder on your car your will make one hell of a mess, mig is your best bet mate its more or less just a point and shoot method pretty straight forward ...
Tim my mates HR doors (all 4 of them) had the lower sections have been pop rivited and um well they still are seems to be the going method these days instead of bog
righto you lot of keyboard jockeys
im of to the shed to weld up all the little chrome moulds holes around the tail lights and quarters yay fun
#169
_nial8r_
_nial8r_
-
- Guests
Posted 01 July 2010 - 09:02 AM
hey there Ryan, the tunnel mod is a beauty hey it was my design all the way nah thx for sharing it with me hey it has come up a treat and stuffed if i know what i would have came up with if you didnt show me yours but i doubt i will ever do another one lol, and the skid car has gone to a better home now LH SLR 3300 now has it and im sure he will start a new project thread soon enough
nah thx for sharing it with me hey it has come up a treat and stuffed if i know what i would have came up with if you didnt show me yours but i doubt i will ever do another one lol, and the skid car has gone to a better home now LH SLR 3300 now has it and im sure he will start a new project thread soon enough
#170
_youngy_11_
_youngy_11_
-
- Guests
Posted 01 July 2010 - 09:16 AM
No worries mate, it will be worth it when you can get to drive it with a manual transmission
Looking forward as Rob (SS Hatchback) has said aswell, to have another local torana on the road.
When you thinking of having it done realistically?
Late 2011?
Looking forward as Rob (SS Hatchback) has said aswell, to have another local torana on the road.
When you thinking of having it done realistically?
Late 2011?
#171
_patch_
_patch_
-
- Guests
Posted 01 July 2010 - 05:17 PM
Patch what ever you do dont try and use a stick welder on your car your will make one hell of a mess, mig is your best bet mate its more or less just a point and shoot method pretty straight forward ...
point and shoot huh.... well everyone's good at that lol

#172
_LH SLR 3300_
_LH SLR 3300_
-
- Guests
Posted 01 July 2010 - 05:26 PM
No probs Lee, if you ever get stuck you only have to give me a call mate.
#173
_nial8r_
_nial8r_
-
- Guests
Posted 01 July 2010 - 09:11 PM
No worries mate, it will be worth it when you can get to drive it with a manual transmission
Looking forward as Rob (SS Hatchback) has said aswell, to have another local torana on the road.
When you thinking of having it done realistically?
Late 2011?
Hi Ryan i am getting to the point where i just wanna get it finished and on the road and if all goes to plan im hoping it will be done for the NAT's, i dont really have any major mod's to do just the boot floor and the rest is the pain in the ass tiny repairs but im getting through them and then i still have the motor to build wich will be last of all

Patch what ever you do dont try and use a stick welder on your car your will make one hell of a mess, mig is your best bet mate its more or less just a point and shoot method pretty straight forward ...
point and shoot huh.... well everyone's good at that lol
yeah Patch just point & shoot, just point and shoot,
No probs Lee, if you ever get stuck you only have to give me a call mate.
thx Matt i just get stressed when it dont work out the 1st time but im slowly learning to take a minute to think about it instead of doin me nut over something pretty straight forward, and it only happens when i start to rush like i want it done last week

#174
_nial8r_
_nial8r_
-
- Guests
Posted 30 October 2010 - 01:45 PM
Hi all its been a while but i forgot i hadnt posted the last lot of repairs i did so i thought i would post em up now, better late then never
after unpicking the beaver i found the tin worm had got the the ends of both rails so i had to sort them both out before the new beaver went on, there has been a couple of places on this build that i have foung the unwanted when doing other repair which is a good thing but it does slow ya up a bit, anyways here some pic's.
R/H rair repaired
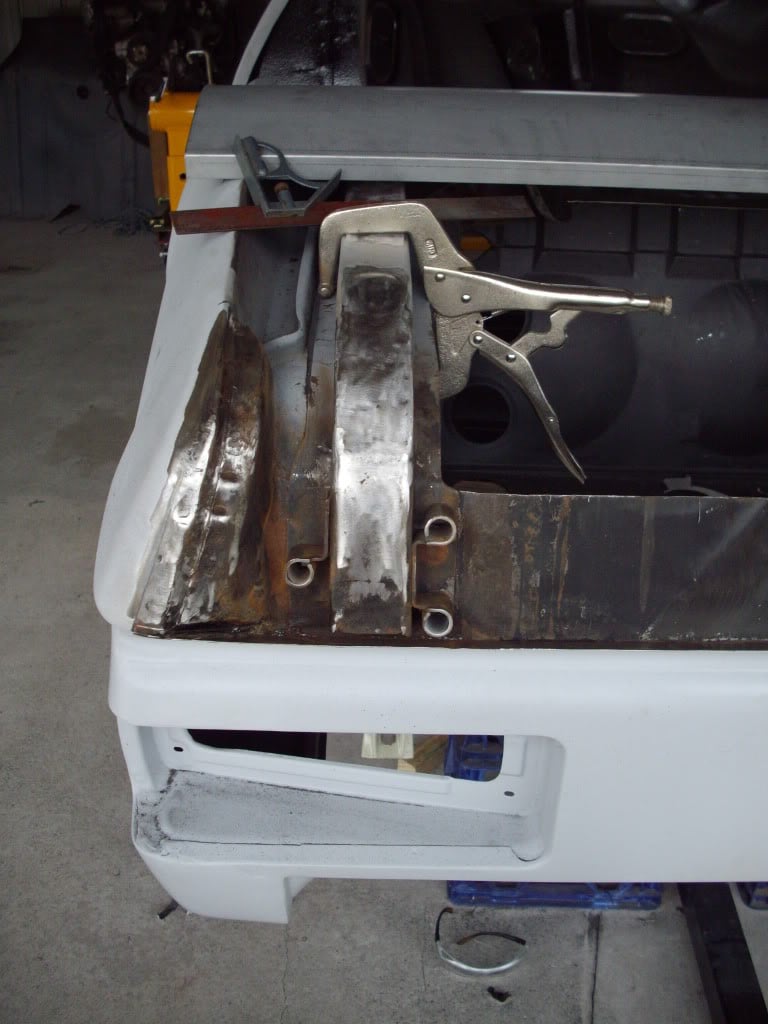
L/H rail repaired
both sides
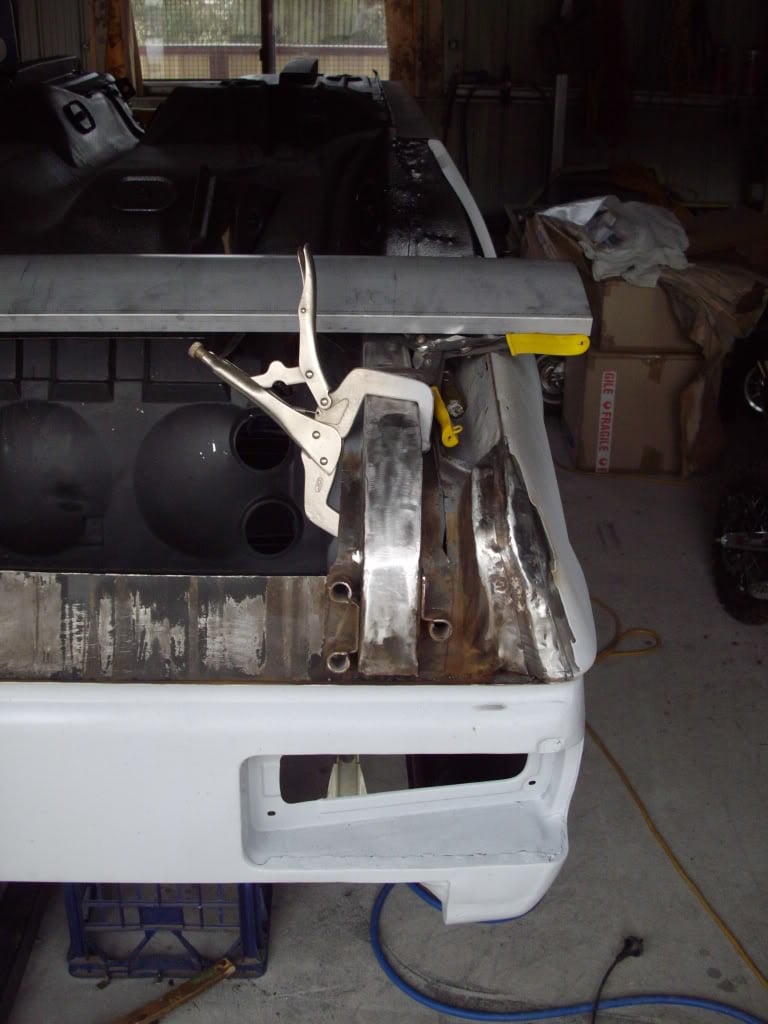
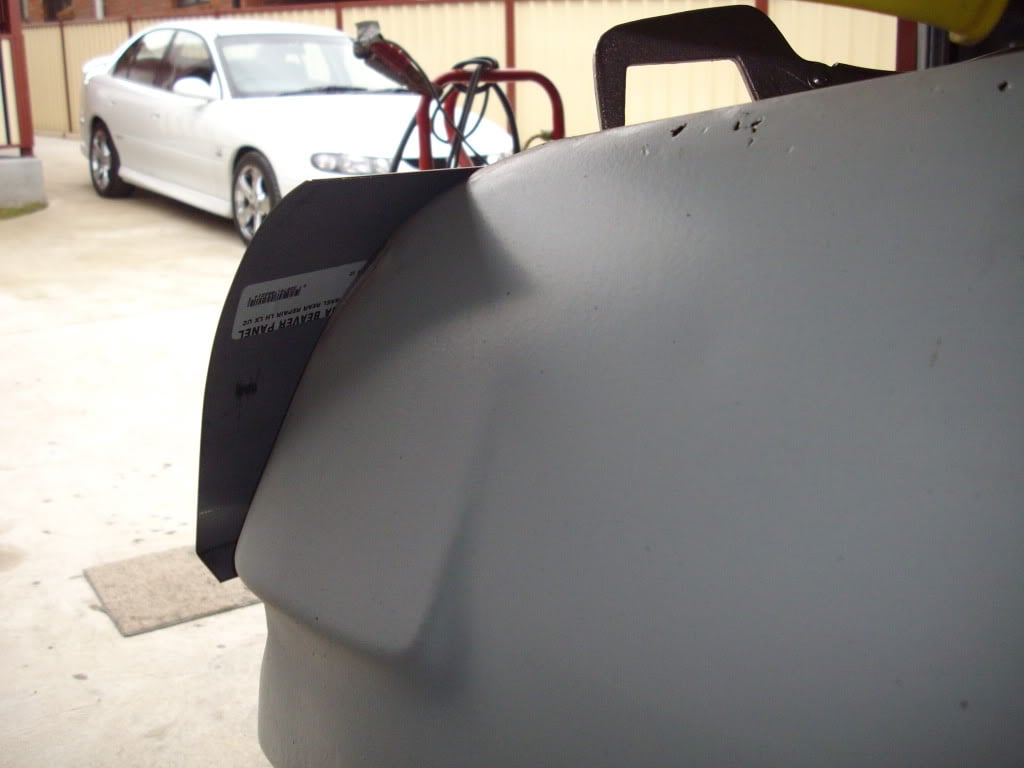
the new beaver wich i had to do a lot of measuring and trimming to get it to sit right
you can see here how much over hang there was, it was the same on both sides
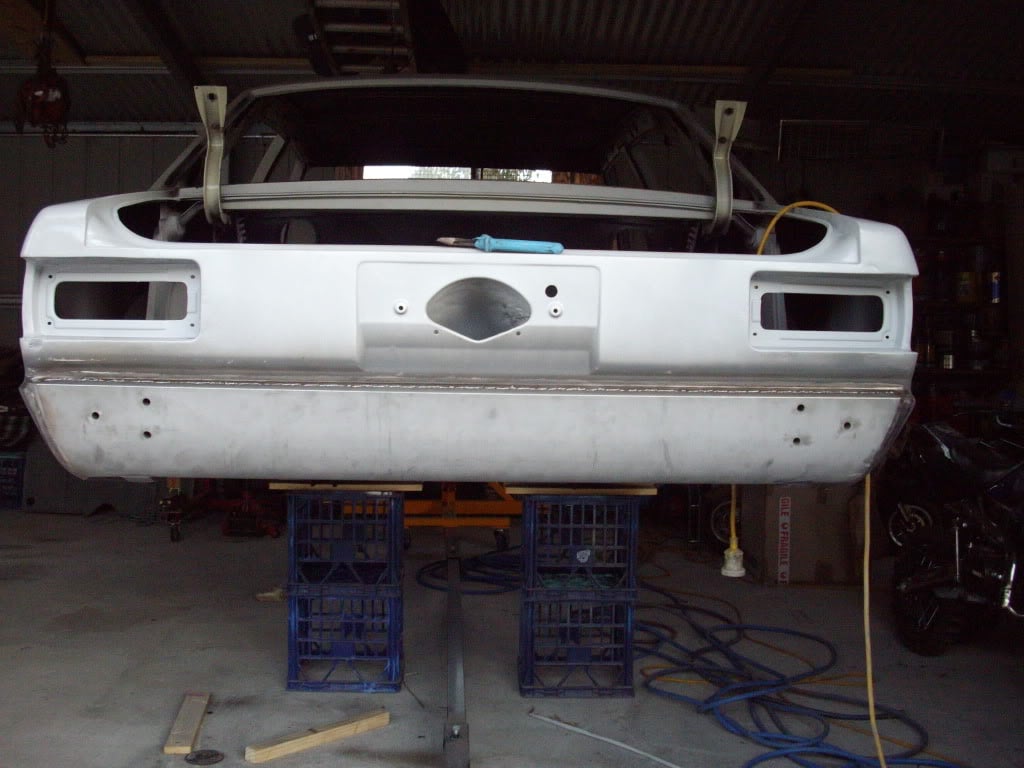
the final fit before it got tac'ed in place
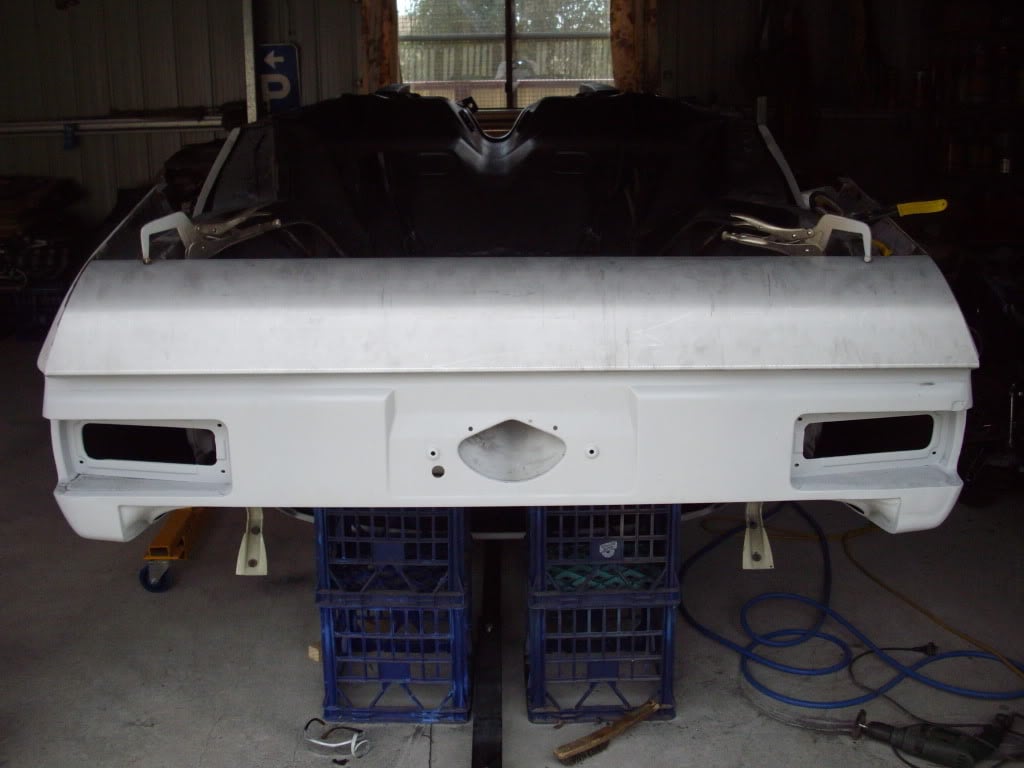
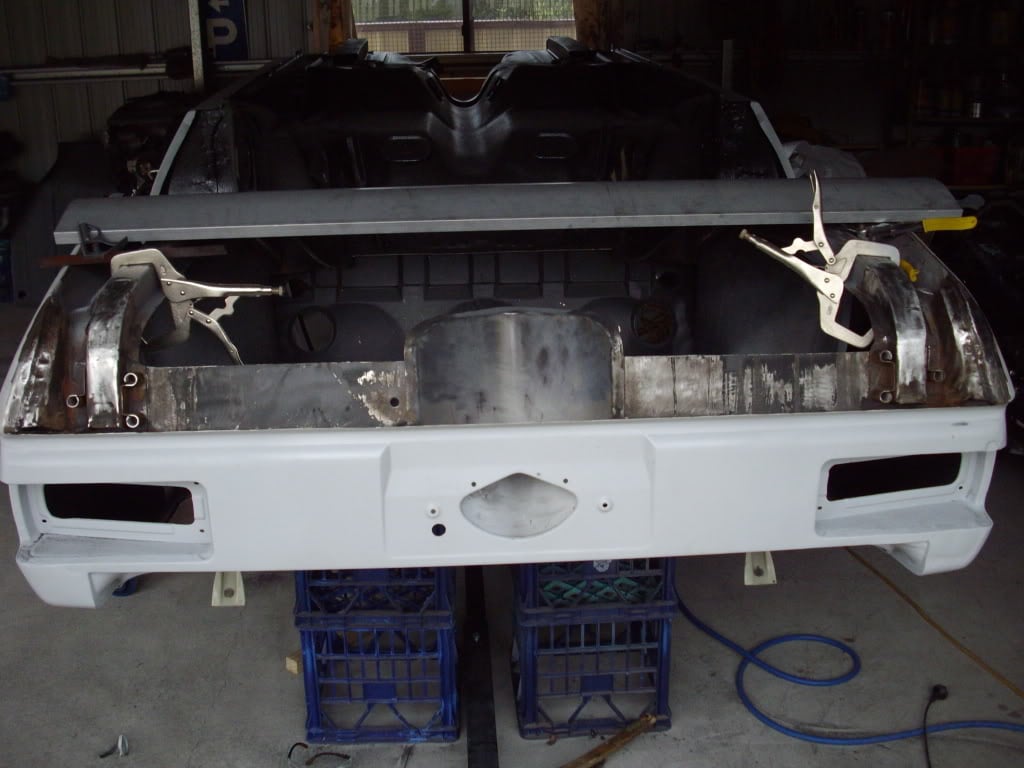
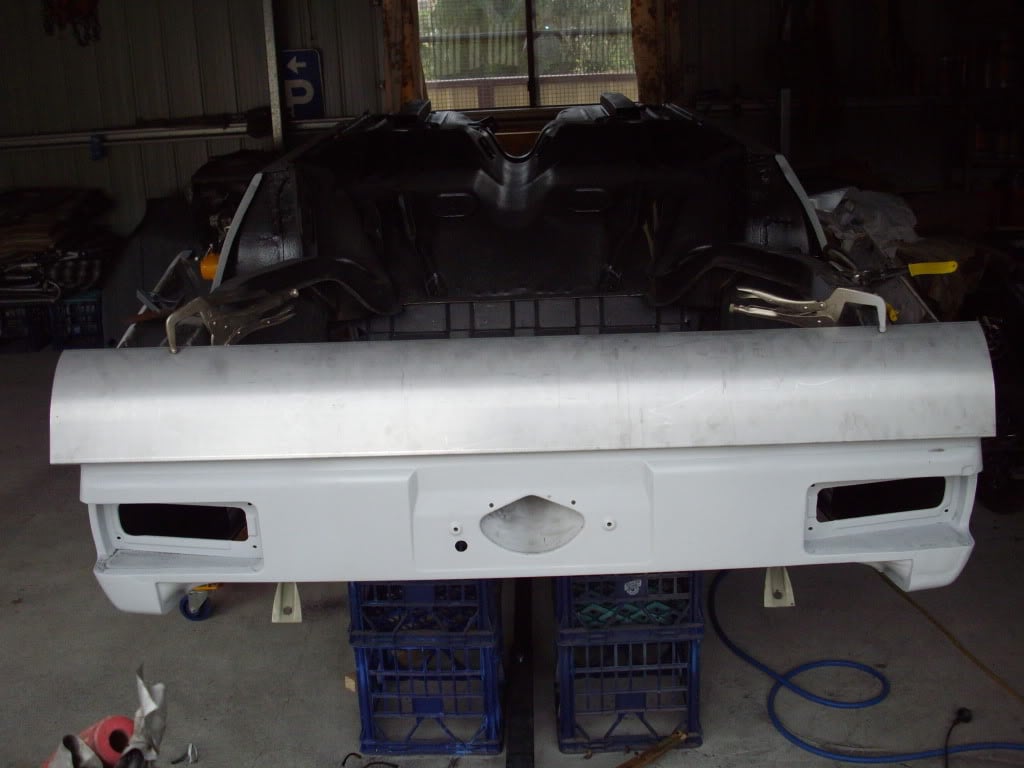
and here it is all on and the bar iron holes redrilled
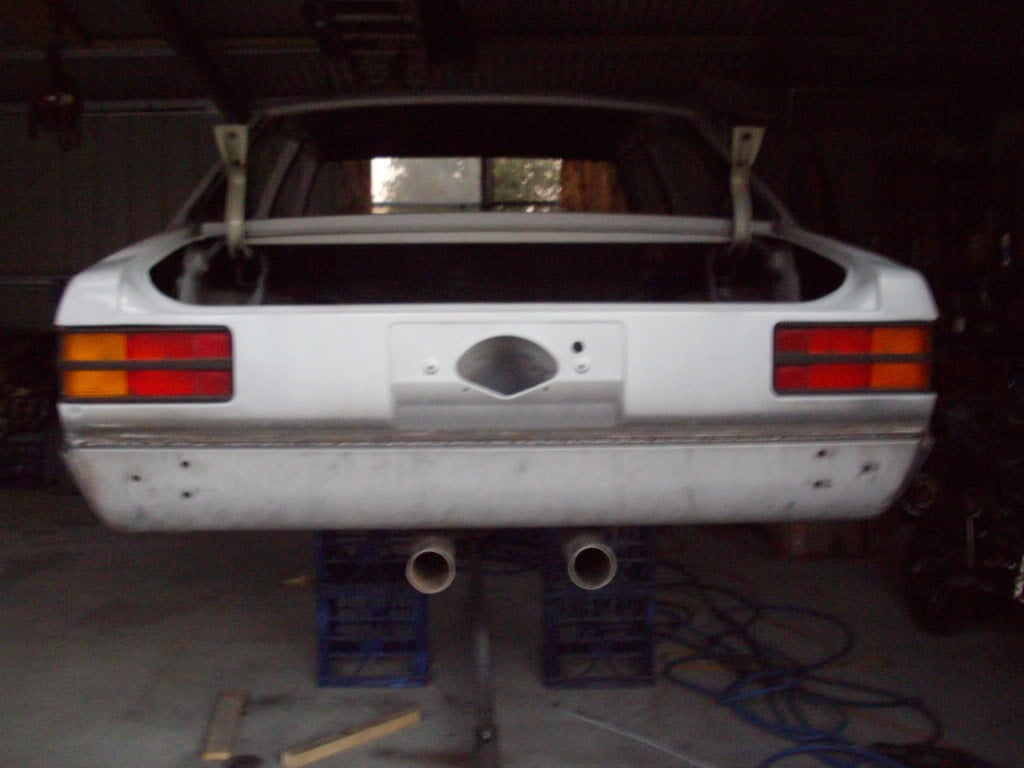
thought i would chuck the tail lights in to see how things looked and had a piece of 3" stainless tube so icut it down and fitted it up where my pipes will sit, and i pretty pleased with the look only the 3" will get swapped for 4" stainless pipes
now the mission is after my daughters B-Day on the weekend is to sort out the rad support and get it back on the car, that shoule be fun with all the measuring to make sure it goes on nice and square
after unpicking the beaver i found the tin worm had got the the ends of both rails so i had to sort them both out before the new beaver went on, there has been a couple of places on this build that i have foung the unwanted when doing other repair which is a good thing but it does slow ya up a bit, anyways here some pic's.
R/H rair repaired
L/H rail repaired
both sides
the new beaver wich i had to do a lot of measuring and trimming to get it to sit right
you can see here how much over hang there was, it was the same on both sides
the final fit before it got tac'ed in place
and here it is all on and the bar iron holes redrilled
thought i would chuck the tail lights in to see how things looked and had a piece of 3" stainless tube so icut it down and fitted it up where my pipes will sit, and i pretty pleased with the look only the 3" will get swapped for 4" stainless pipes
now the mission is after my daughters B-Day on the weekend is to sort out the rad support and get it back on the car, that shoule be fun with all the measuring to make sure it goes on nice and square
#175
_LH SLR 3300_
_LH SLR 3300_
-
- Guests
Posted 31 October 2010 - 08:14 AM
Well done Lee, been wondering when you would surface again with more progress on your Torana. Great stuff


2 user(s) are reading this topic
0 members, 2 guests, 0 anonymous users

