
Fantastic thread Lee! Congrats on all the hard work. I'm away working on an oil rig at the moment and reading this build is killing! Wanna work on my Torrie so bad!!! Oh well, will soon be home and can get stuck into it again with my new found inspiration!
By the way, how have you been stripping the paint off your panels? Wire wheel?
Seems you stripped back your whole car very quickly and efficently.
Thanks John.

LX under construction
Started by
_nial8r_
, May 10 2009 12:18 PM
250 replies to this topic
#202
 _nial8r_
_nial8r_
-

- Guests
Posted 08 June 2011 - 02:22 PM
thanks John, for the large sections of the body i used a strip & clean wheel that goes on to my 7" or 9" grinder, got it from Bunnings, for the tight spots i have a few different size and shaped wire wheels that go on my drill and also a twist knot wire wheel that goes on my 4" grinder. if your not to heavy handed you can also use 60, 80 or 100 grind sanding disks that go on to a 7" or 9" grinder but i prefer to stay away from them. also the trusty old paint stripper works wonders as it only leave very little to clean up to bare metal.
#203
_nial8r_
_nial8r_
-
- Guests
Posted 08 June 2011 - 02:45 PM

well now i can update my build thread not that its much but it was a bloody challenge thats for sure, well for me anyway. i even had to call and get some phone help and advice from Matt ( LH SL/R 3300 ) thanks again Matt
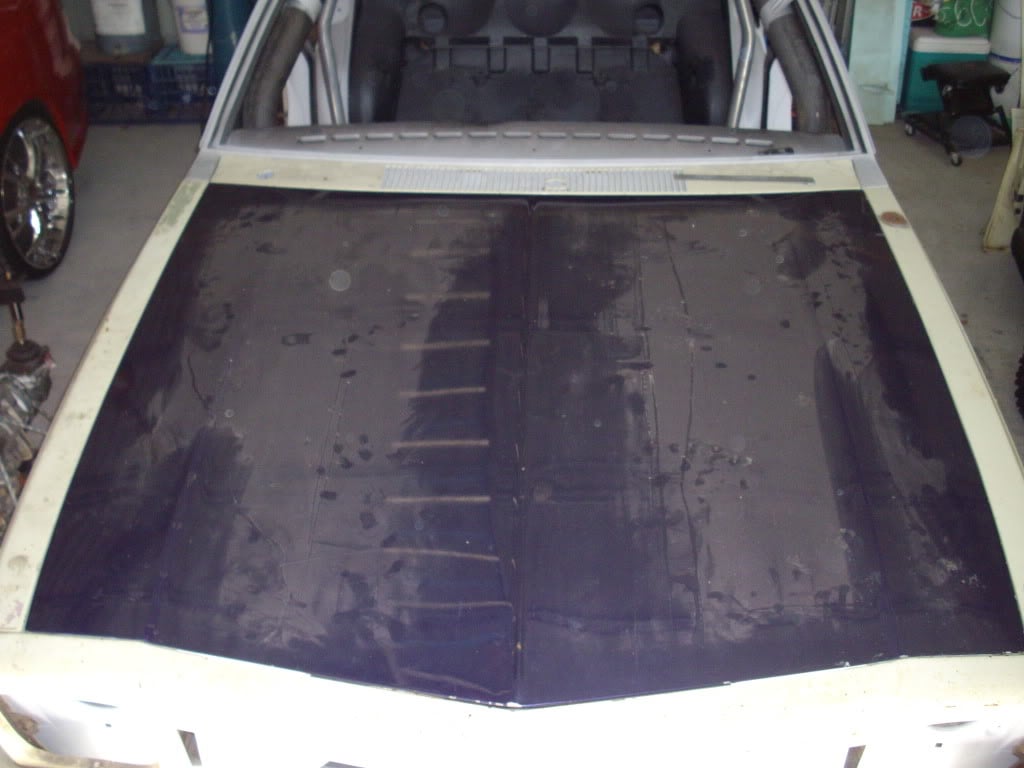
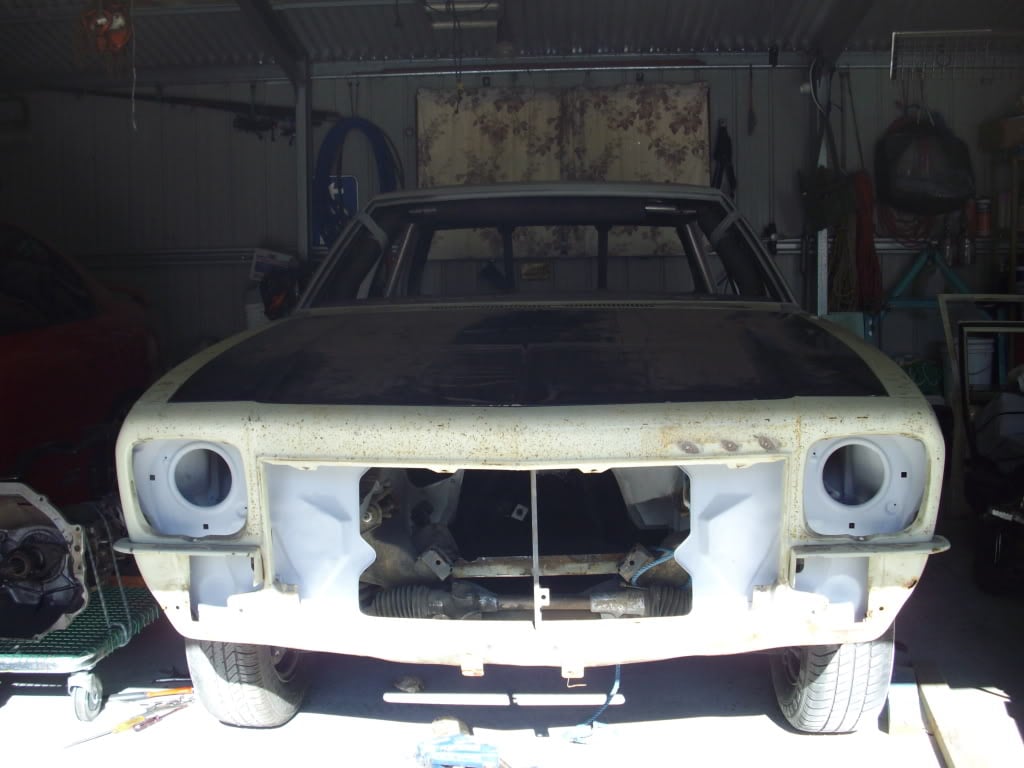
 . after 3 goes at it i finally got in sorted and the whole front end is square and all panels line up and with a very last fine tune on the bonnet it will be sweet is brew.
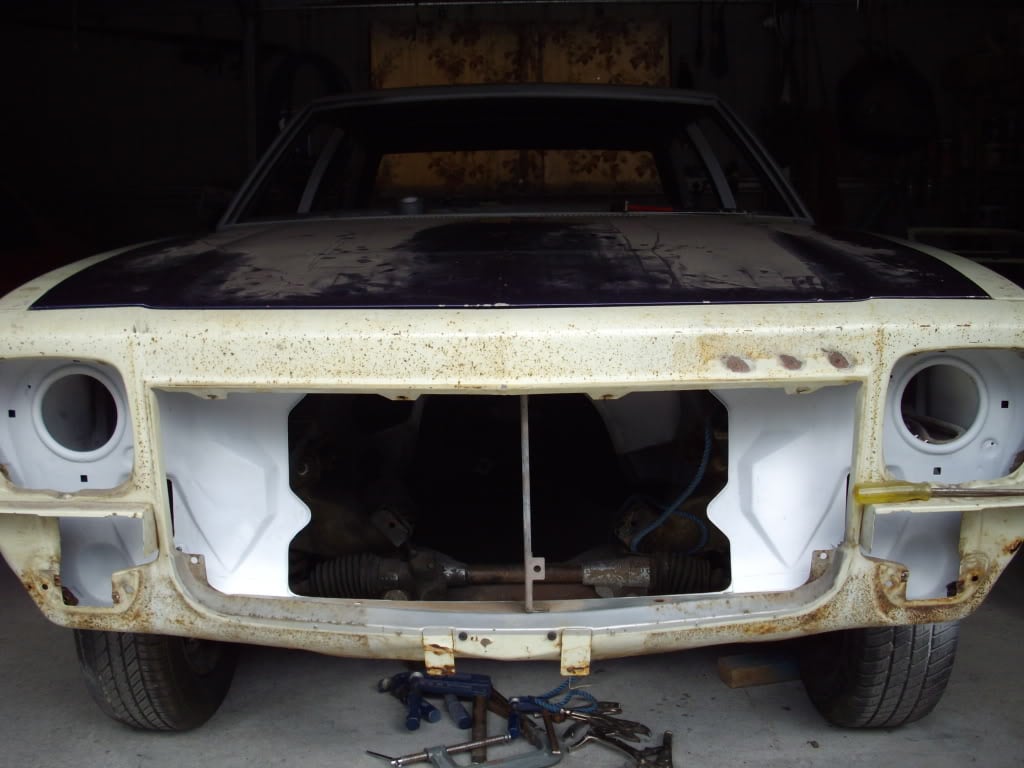
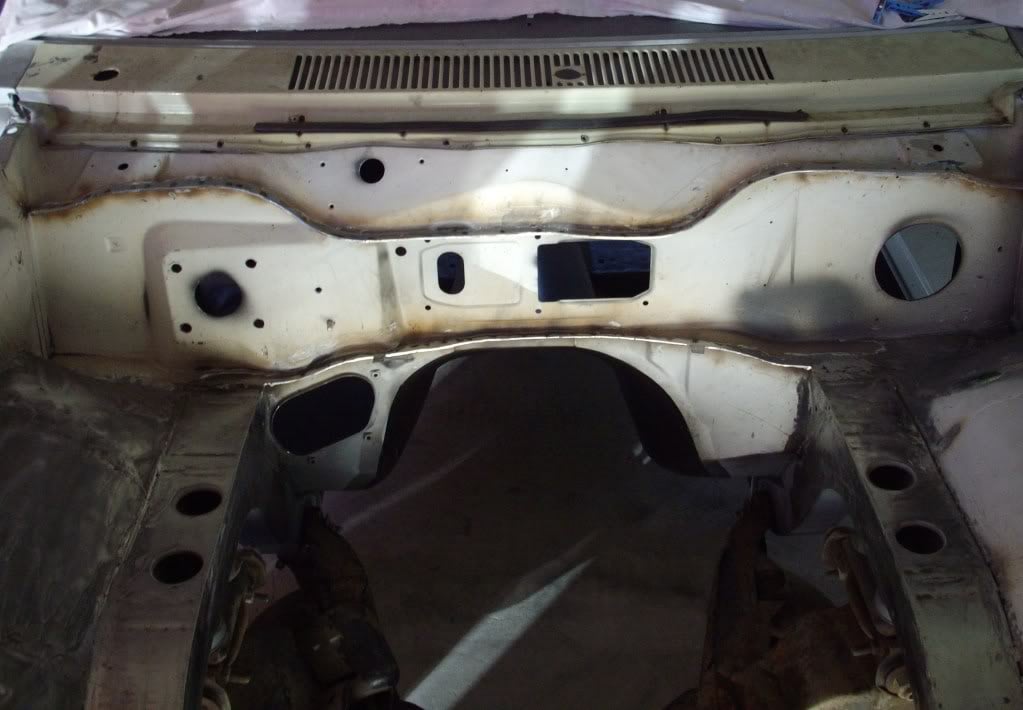
 anyways first of all i tec srewed the support in place and it was 4mm out and for the life of me i couldnt get it any less so i thought 4mm isnt that much so i bolted it all up and it was out 9 ways from sunday so i had a second go at trying to lessen the 4mm but it wasnt going to happen so thats when i called on Matt. he pointed me in a few different directions as to why it wont budge and the next morning i ripped it all appart again and even took the support right off. did some more measurments and had to sort out the skirts on top on the inner gaurds cause thay had be lent on and what not wheil it had just been sitting around then i found that the very end of both skirts had dropped too so out with a block of timber and the 3T trolley jack and up they both went untill i got them right, then i got the wife down to give me a hand to square up the support again. we worked as a team swapping and passing the tape measure back and forth un till we had the perfect measurments, clamped both sides re measured again & again & again then redrilled and tec srewed it back in place. took the clamps off and it had only move 1/2 mm and i was over the moon, bolted it all back up, and its great no i get to strip it all down and plug weld it so its not going anywhere now anyway here's some pic's
great idea this was

even gaps
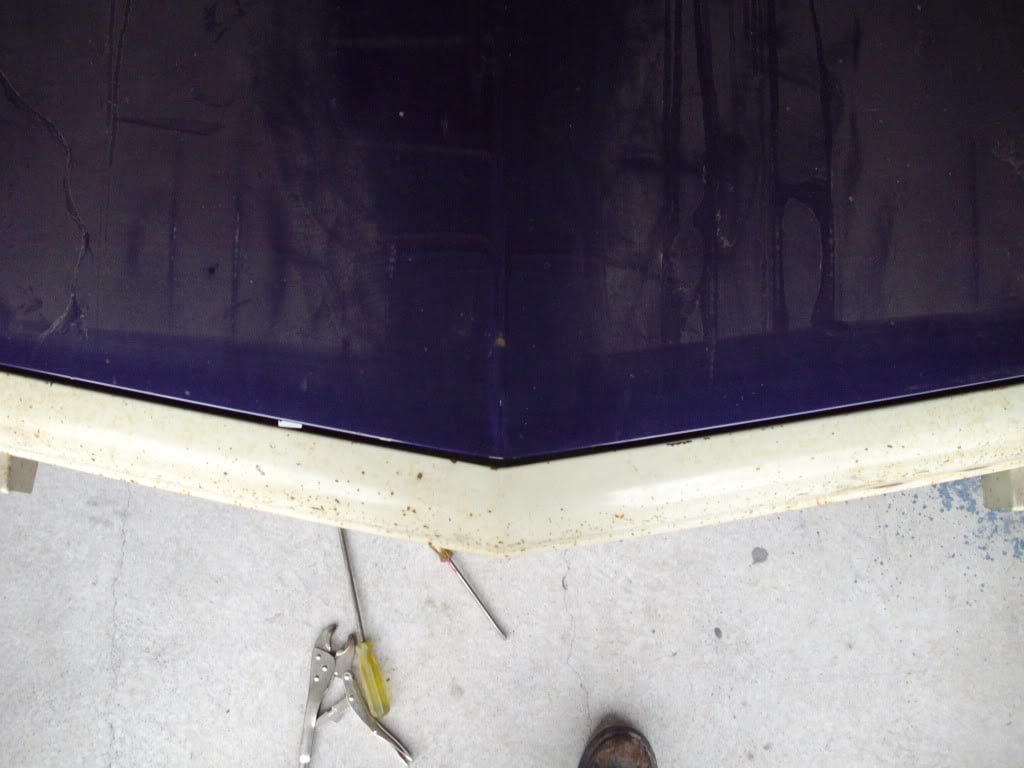
these are the best pic's i could get and it dont help the bonnet being purple and gaurds baige
#205
_nial8r_
_nial8r_
-
- Guests
Posted 08 June 2011 - 02:52 PM
Yep, that certainly is a lined-up nose!
sure is and now i get to rip it all apart again
 at one stage i almost rammed a srew driver through the bonnet
#206
notna
-

- Members
-

- 706 posts
Forum Fixture
- Name:Reverse of username
- Location:Sydney
- Car:1976 LX L32 SL/R
- Joined: 21-May 07
Posted 08 June 2011 - 02:58 PM
i found that the very end of both skirts had dropped too so out with a block of timber and the 3T trolley jack and up they both went untill i got them right,
hahahaha... that's EXACTLY what i had to do!!!

Those pics Lee are a credit to you. Those gaps are perfect to my eye. Awesome job mate!
#207
_SLR Torrie_
_SLR Torrie_
-
- Guests
Posted 08 June 2011 - 03:01 PM
Cheers Lee. I've just been paint stripping all outside bady panels and wire wheeling bit's like door jams, sills, boot sills ect. Might have a look at strip & clean wheel like you said. Tried sanding disks but yeah like you said, if you have a careless moment, can take off a little more then just the paint!
#208
_nial8r_
_nial8r_
-
- Guests
Posted 08 June 2011 - 03:18 PM
Thanks anton matt even had to tell me to take a chill pill when i told him i almost rammed a screw driver though the bonnet 
yeah you have the right idea there John with the paint stripper and wire wheels. think the strip and clean wheels are only about 15bucks each just watch you dont create to much heat as you might get a bit of warping, but im sure you will be right once you get the feel of it. i think Dirtbag uses the sanding disks to clean up to bare but i think i woul have a moment and take off more than just paint also
yeah you have the right idea there John with the paint stripper and wire wheels. think the strip and clean wheels are only about 15bucks each just watch you dont create to much heat as you might get a bit of warping, but im sure you will be right once you get the feel of it. i think Dirtbag uses the sanding disks to clean up to bare but i think i woul have a moment and take off more than just paint also
#209
_nial8r_
_nial8r_
-
- Guests
Posted 04 July 2011 - 09:22 AM
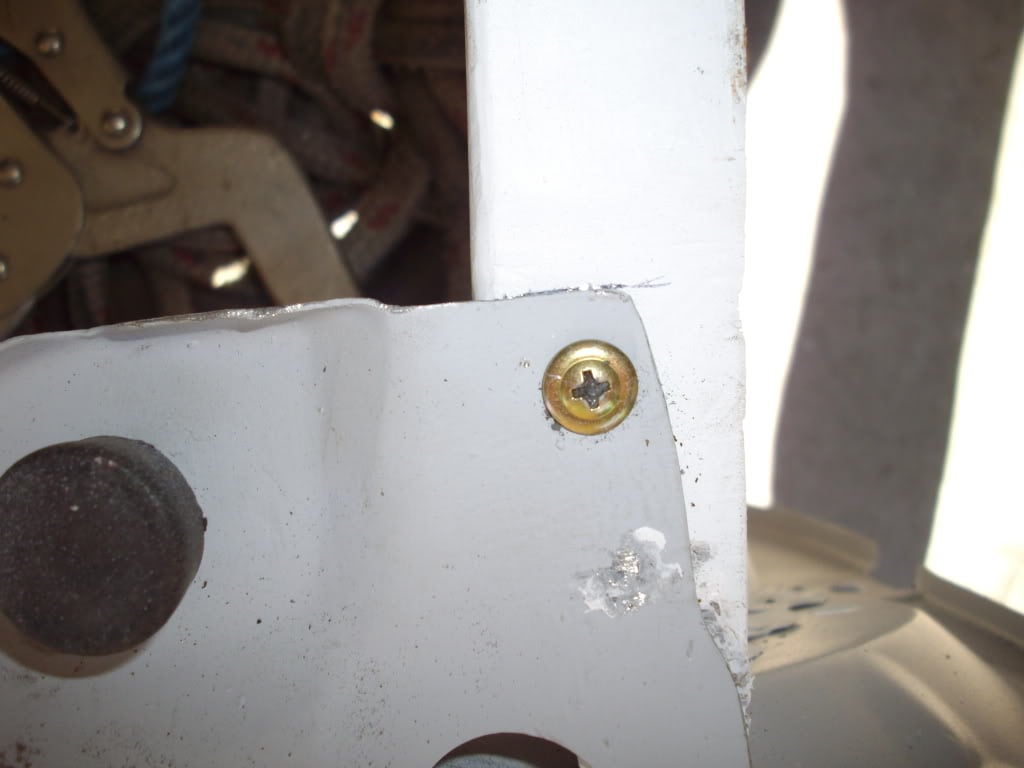
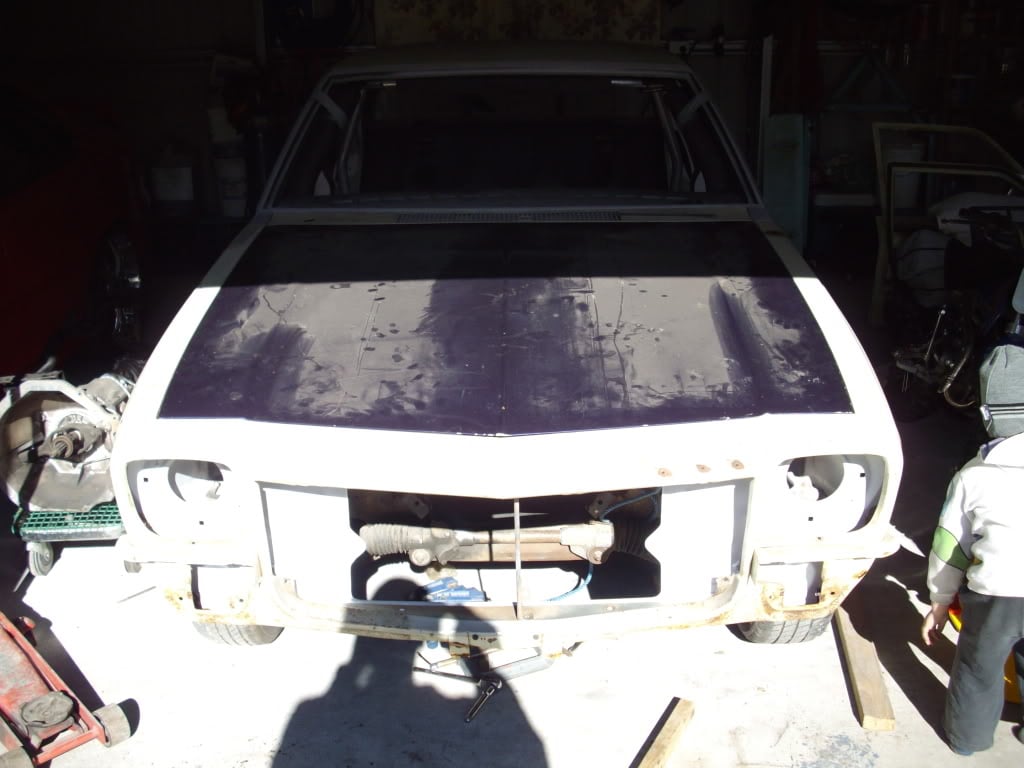
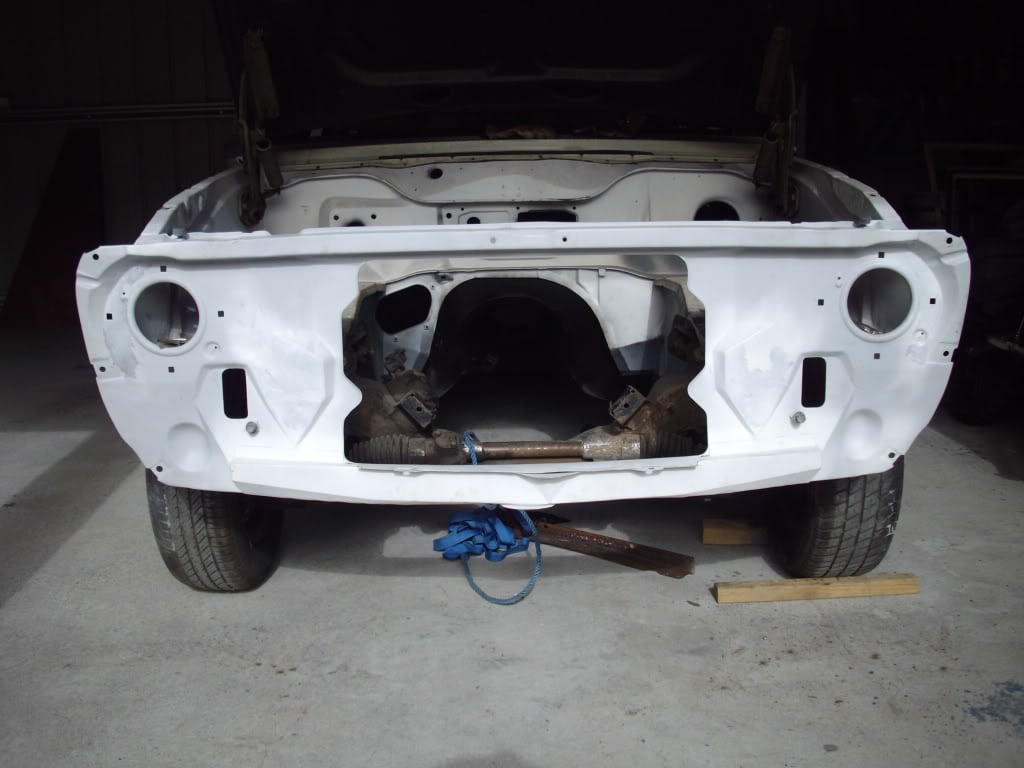
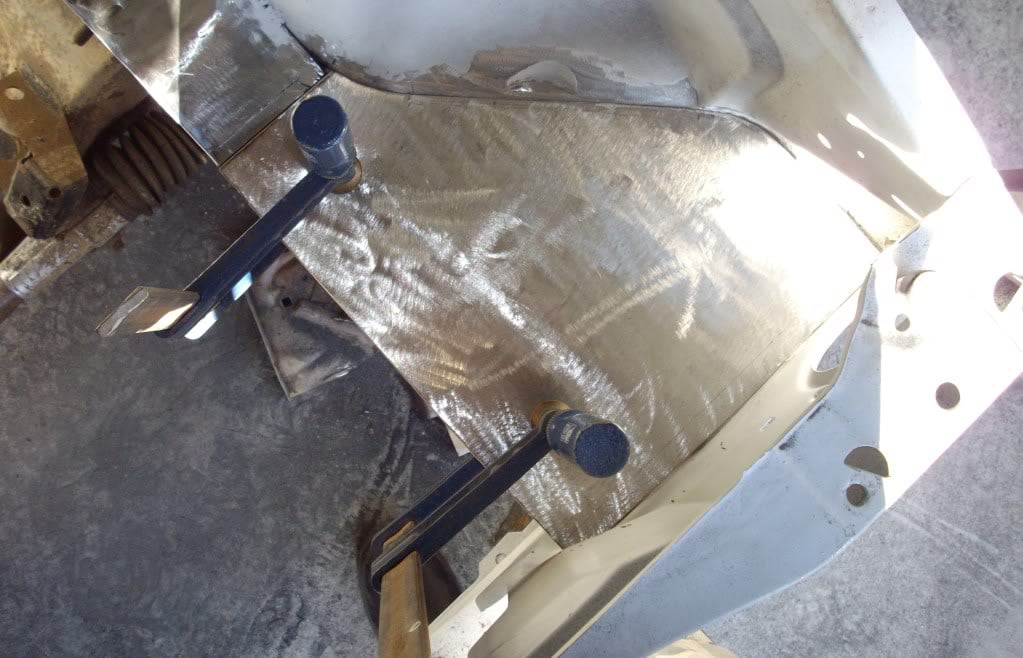
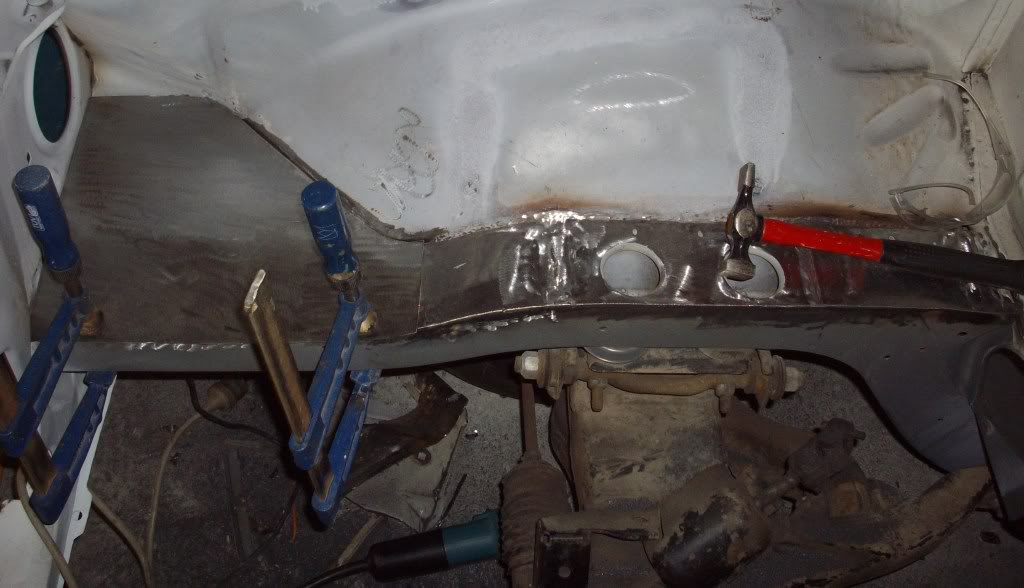
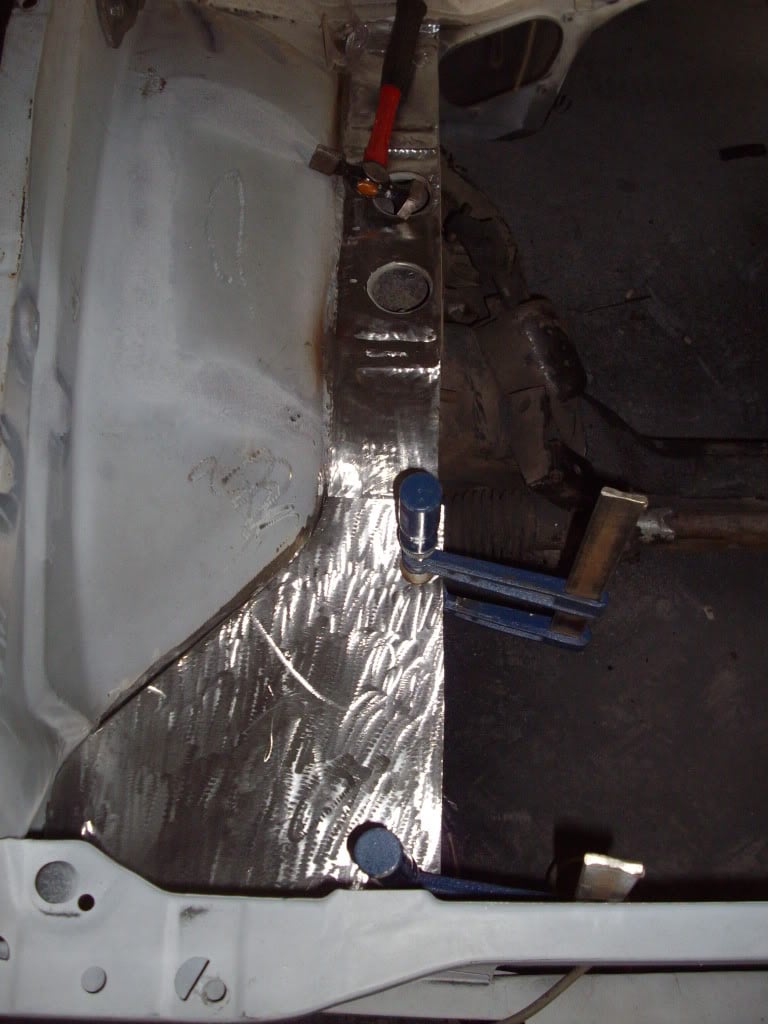
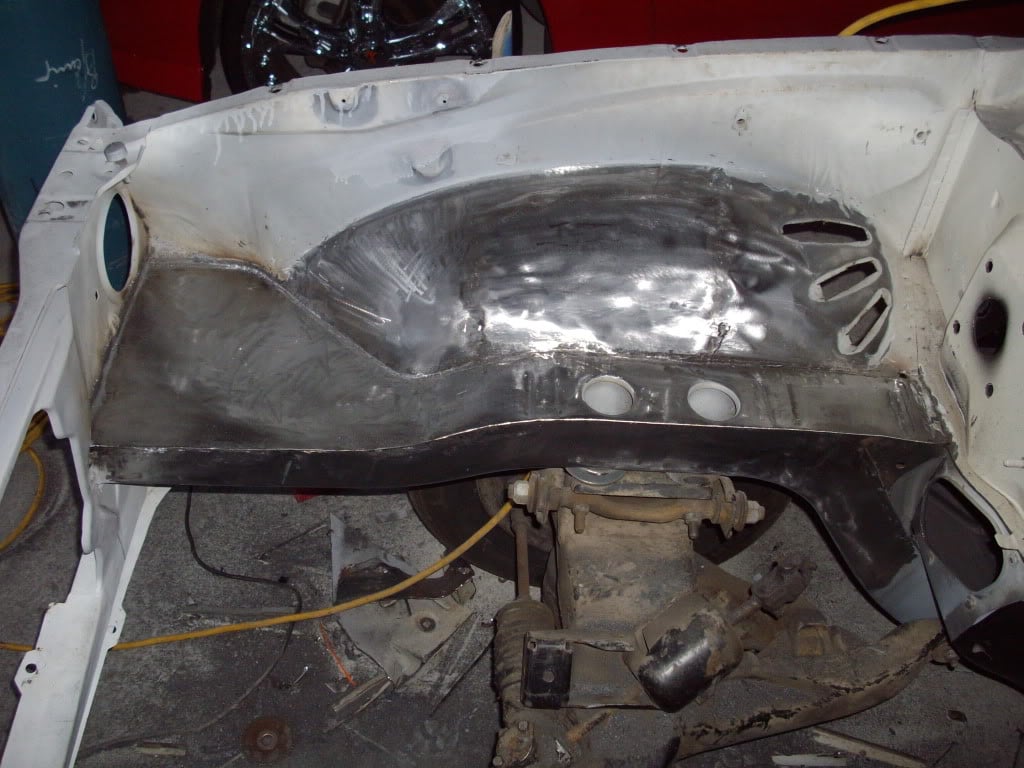
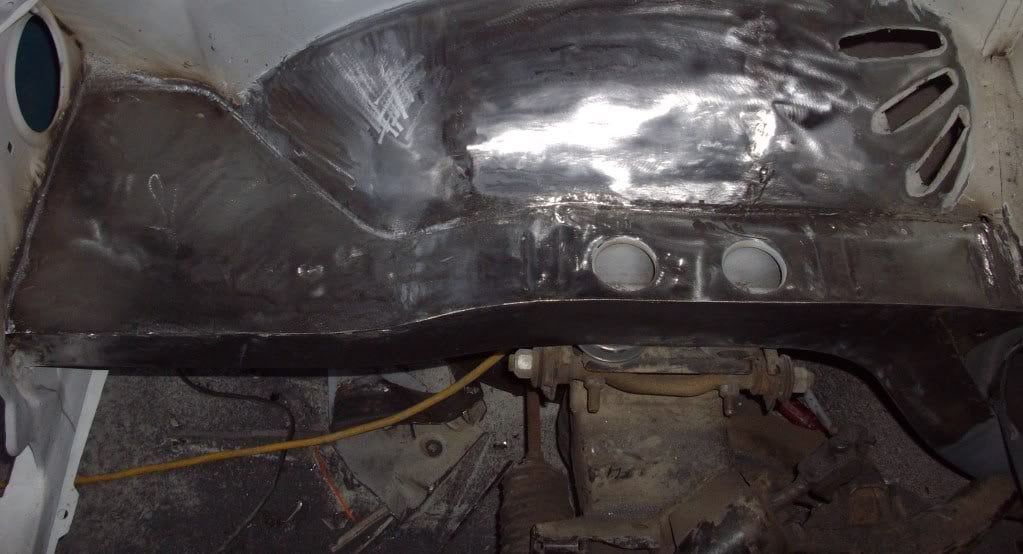
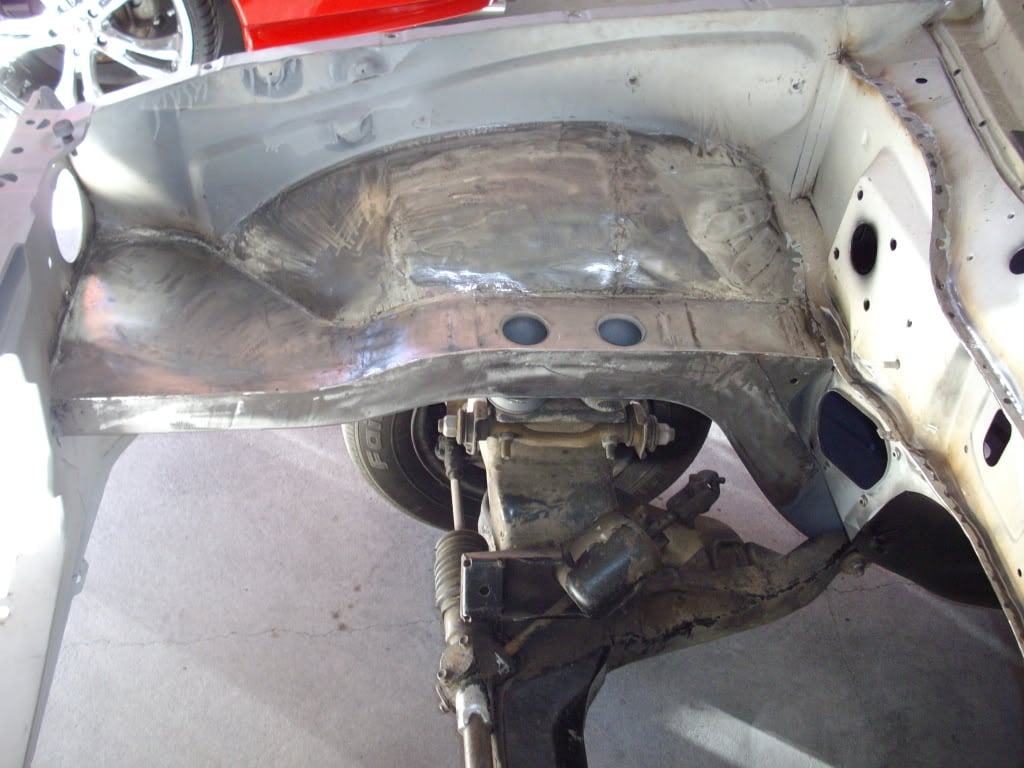
well i have a little update, finally welded the support in place now so its no going anywhere ( i hope ) and also trimmed the rails, replaced the battery tray with a flat piece and the same on the other side, trimmed the rain gutter on the firewall and weled it up. now just have to weld in to small pieces where the rail meets the firewall so it can also be smooth and then i can strip the last bit of pressure pak etch and blow some 2k etch in the bay, then i only have the boot floor to go in and the i will go over the car and apply a few good coats of 2k highfill and can start on the hanging panels anyways here are some pic's.
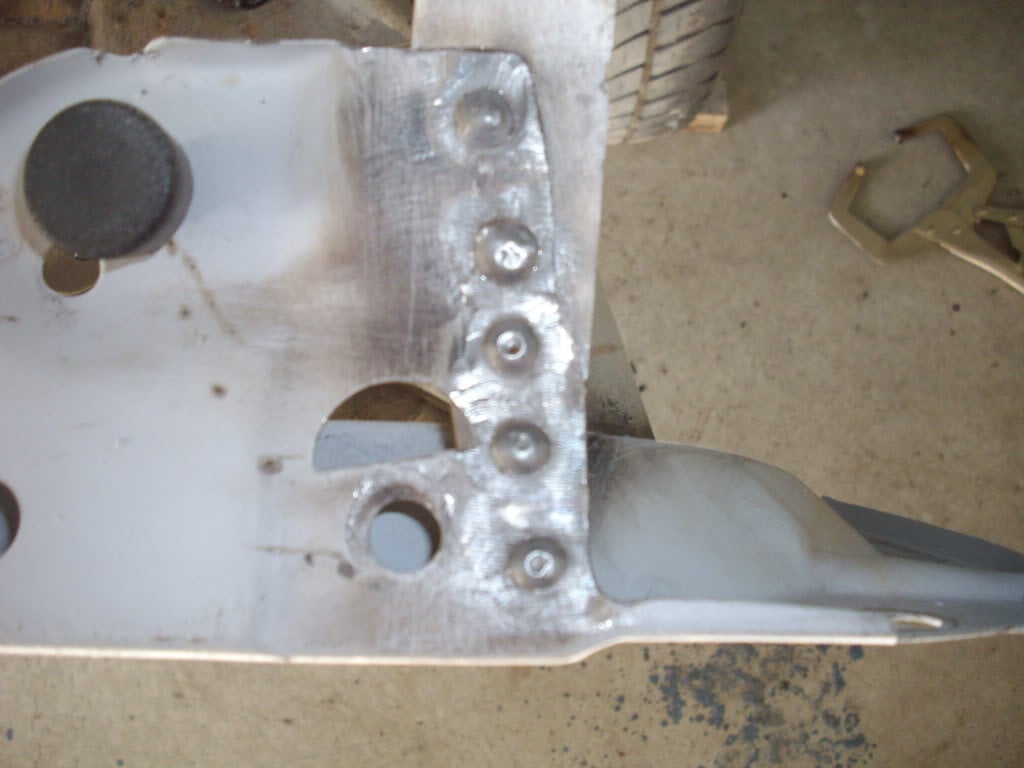
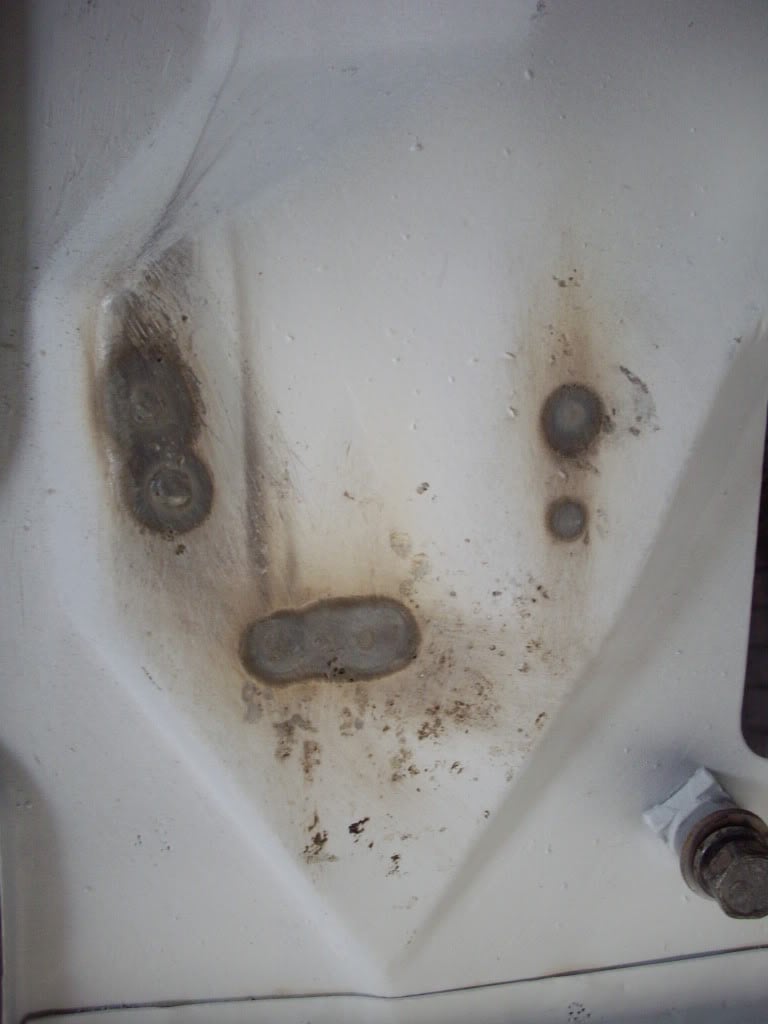
i plug welded from the back but you can see i got good penatration
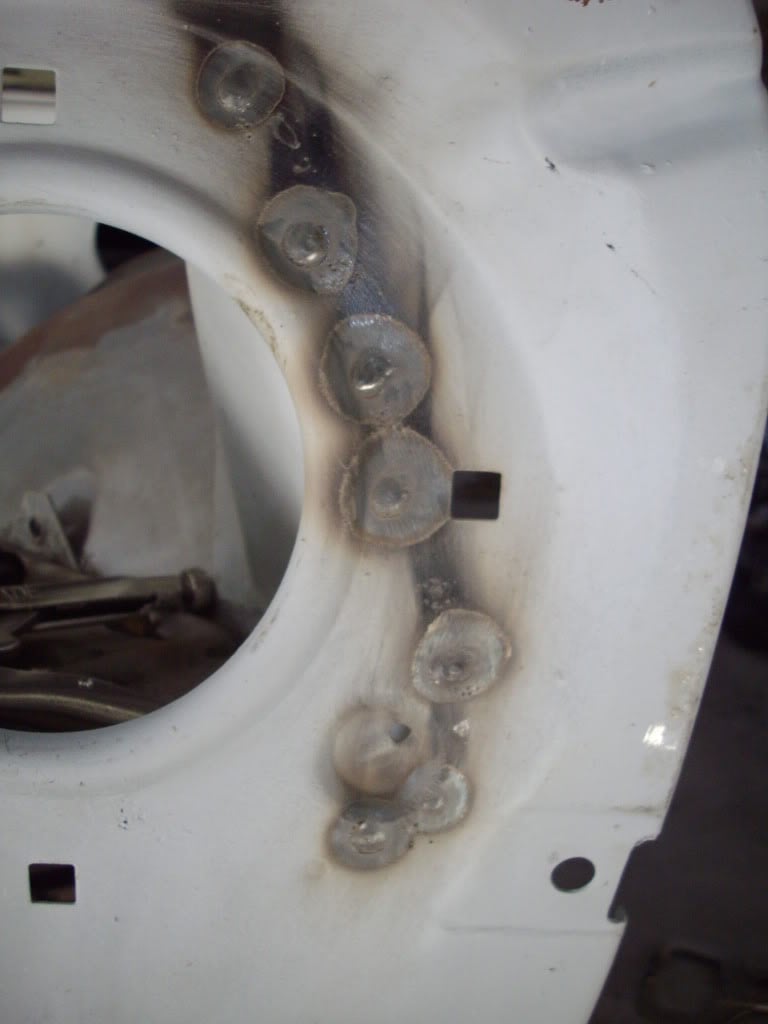

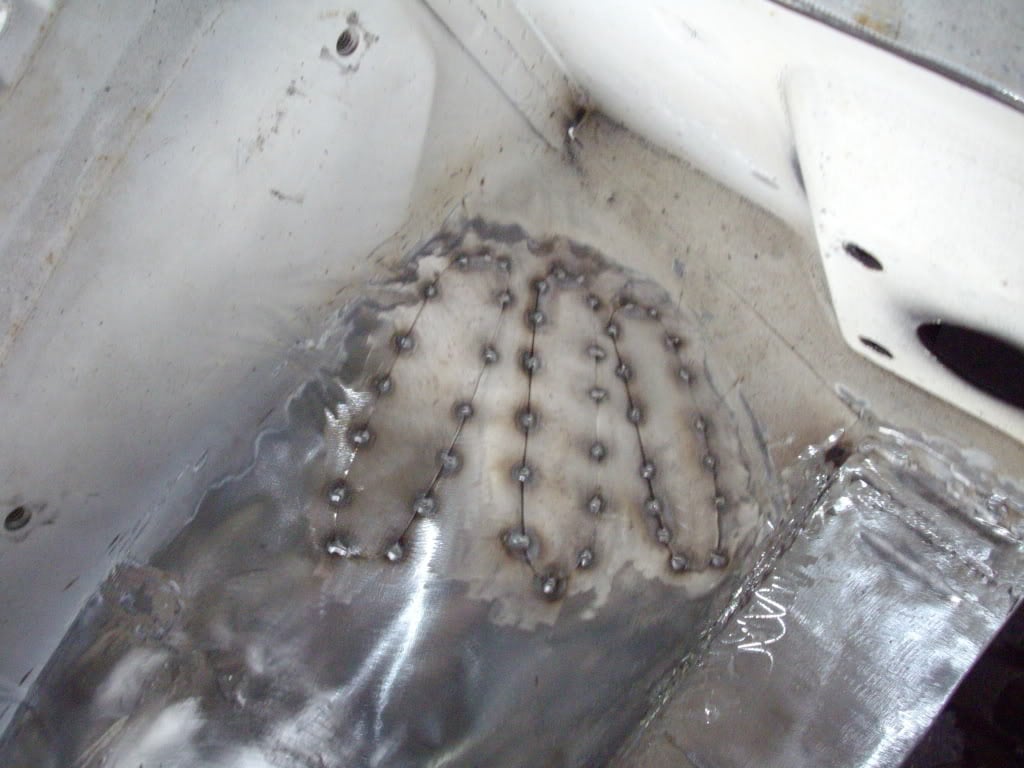
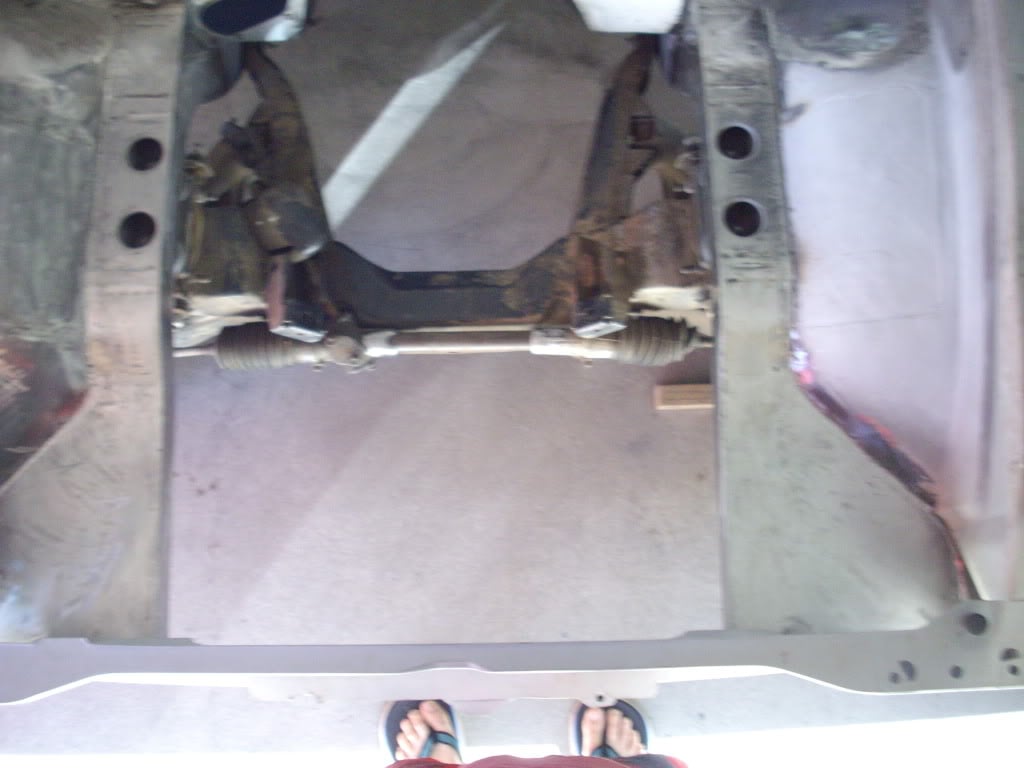
and thats that. when photobucket stops being gay i will upload some other pic's
i plug welded from the back but you can see i got good penatration
and thats that. when photobucket stops being gay i will upload some other pic's
#210
notna
-
- Members
-
- 706 posts
Forum Fixture
- Name:Reverse of username
- Location:Sydney
- Car:1976 LX L32 SL/R
- Joined: 21-May 07
Posted 04 July 2011 - 09:33 AM
Well that's certainly the beginnings of a nice smooth bay! I like your safety boots in that last pic mate. How long in a day do you spend welding and grinding, before you can't take the smell and itchy feeling any more? Keep up the good work mate. I like what you are doing.
#211
_Kush_
_Kush_
-
- Guests
Posted 04 July 2011 - 10:20 AM
Thongs are worn by only the best car crafters. Footy shorts too. You've never lived until you've had ray-burn on your nutsack 
It sure looks good Lee!
Feels good too I bet
Keep it up
It sure looks good Lee!
Feels good too I bet
Keep it up
#212
kingsly
-

- Members
-
- 235 posts
Forum Member
- Location:Adelaide
- Joined: 10-July 08
Posted 04 July 2011 - 10:50 AM
You've never lived until you've had ray-burn on your nutsack
Haha quote of the week so far!
Good stuff nial8r. Great progress
#213
notna
-
- Members
-
- 706 posts
Forum Fixture
- Name:Reverse of username
- Location:Sydney
- Car:1976 LX L32 SL/R
- Joined: 21-May 07
Posted 04 July 2011 - 10:53 AM
LOL.... Made me laugh!
#214
_nial8r_
_nial8r_
-
- Guests
Posted 04 July 2011 - 12:00 PM
Thanks for the comment fella's
F**K kush i almost spat my mouth full of solo over my phone ya cunnyfunt
i can go all day Anton but as soon as im done i run for the shower, the grinding smell dont bother me its the welding smell, it gets stuck in ya hands till you have washed them a few times lol that last pic was taken yesterday arvo after i had a shed clean up, there was sh*t everywhere and was starting to get to me
yeah it does feel good kush only because i know im getting closer to not sitting in the engine bay for hours on end i bet you spent a few hrs sitting in yours too??
F**K kush i almost spat my mouth full of solo over my phone
ya cunnyfunt i can go all day Anton but as soon as im done i run for the shower, the grinding smell dont bother me its the welding smell, it gets stuck in ya hands till you have washed them a few times lol that last pic was taken yesterday arvo after i had a shed clean up, there was sh*t everywhere and was starting to get to me
yeah it does feel good kush only because i know im getting closer to not sitting in the engine bay for hours on end
i bet you spent a few hrs sitting in yours too??
#215
Swarbs
-

- Members
-
- 1,667 posts
Forum Fixture
- Name:Dave
- Location:North West WA
- Car:LX 5000
- Joined: 18-April 07
Posted 04 July 2011 - 02:38 PM
Nice work Lee
Bit of paint in there and sit back with a beer and admire
Stupid comment maybe .. but chassis number?? - seen them thrown out before
Bit of paint in there and sit back with a beer and admire
Stupid comment maybe .. but chassis number?? - seen them thrown out before
#216
_LH SLR 3300_
_LH SLR 3300_
-
- Guests
Posted 04 July 2011 - 04:34 PM
Nice work Lee, now that the welding/grinding is nearly finished, you must be looking forward to spending a few days wiping in & sanding out nikki to get it really smooth  . Don't know about you, but i much prefer the metal craft over the nikki craft, can't stand the feeling of bog dust on my skin. To me it's like someone running their fingernails down a chalk board.
. Don't know about you, but i much prefer the metal craft over the nikki craft, can't stand the feeling of bog dust on my skin. To me it's like someone running their fingernails down a chalk board.
#217
_nial8r_
_nial8r_
-
- Guests
Posted 04 July 2011 - 05:32 PM
Nice work Lee
Bit of paint in there and sit back with a beer and admire
Stupid comment maybe .. but chassis number?? - seen them thrown out before
Thanks Swarbs, i still have the chassis number, when i cut that section out i then cut the number out and chucked it to the missus and asked her to put it with the other 3 plates.......... although now that you have me worried that she might have got side tracked best i check

#218
_nial8r_
_nial8r_
-
- Guests
Posted 04 July 2011 - 05:40 PM
Nice work Lee, now that the welding/grinding is nearly finished, you must be looking forward to spending a few days wiping in & sanding out nikki to get it really smooth
Thanks Matt, im starting to see some light at the end of the tunnel now
 after im done with the welding/grinding im going to chuck the motor and tranny back in and work out where im going to run/hide the main loom and any other measurments just to be on the safe side.
im not keen on the sanding of filler either but i think i would rather it over grinding, i like welding if only i could get someone to do the grinding for me

#221
torana_nick
-
- Members
-
- 759 posts
Forum Fixture
- Name:Nick
- Location:victoria
- Car:LH Torana Project
- Joined: 11-December 11
Posted 17 February 2012 - 10:23 PM
Hey mate, top work.
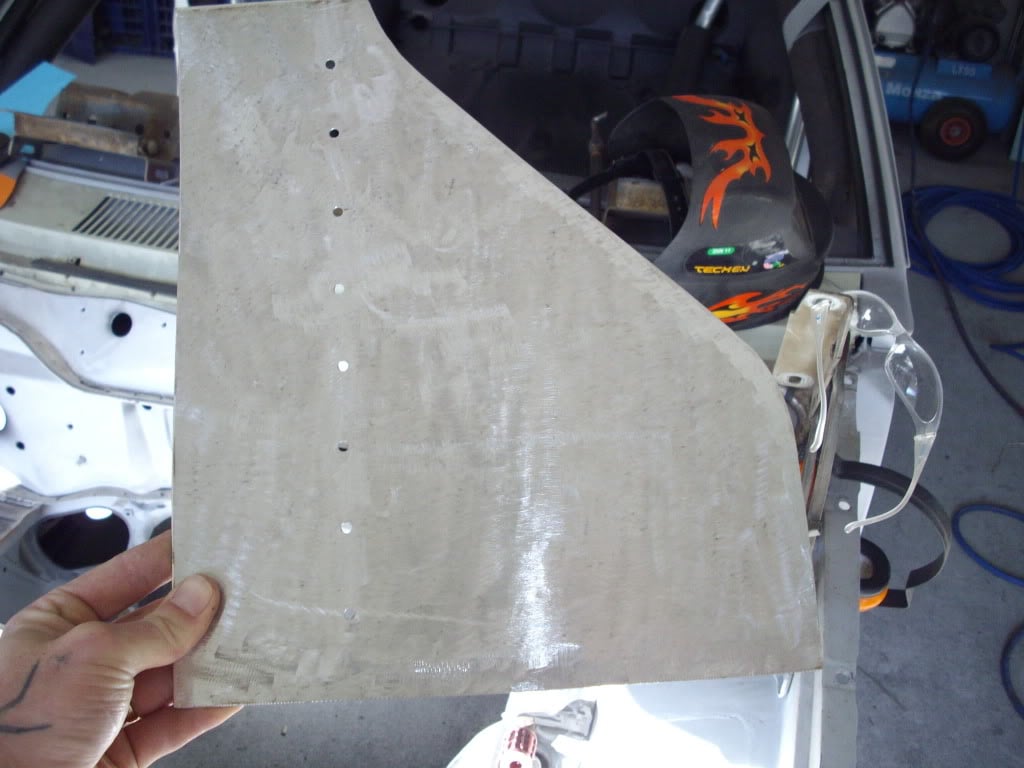
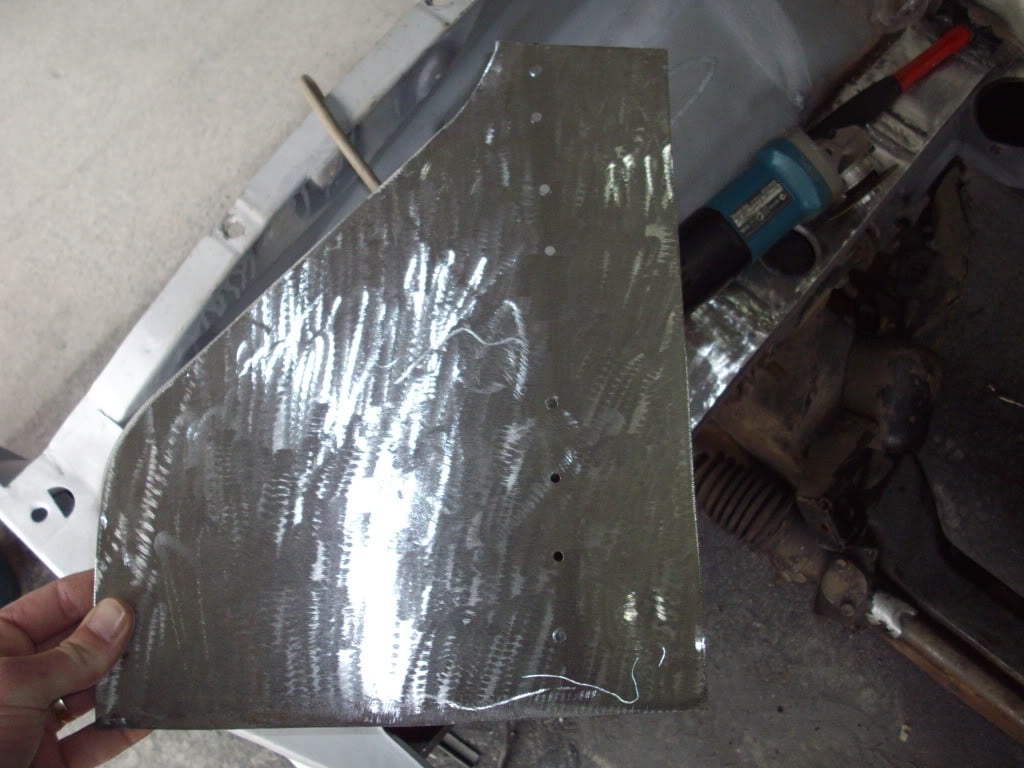
I am about to attempt my rust repairs on my LH I have never welded before or fabricated panels. But I gonna give it a go, I am a tradie so should be ok... Lol. One of the areas is behind the bonnet hinges it's actually pretty big I am
Gonna have to remove the backing plate also to repair a small section on that. My question is do I cut the rust out first before I fab a new section or after?
Cheers nick
#223
_nial8r_
_nial8r_
-
- Guests
Posted 06 March 2012 - 01:25 PM
Hey mate, top work.
I am about to attempt my rust repairs on my LH I have never welded before or fabricated panels. But I gonna give it a go, I am a tradie so should be ok... Lol. One of the areas is behind the bonnet hinges it's actually pretty big I am
Gonna have to remove the backing plate also to repair a small section on that. My question is do I cut the rust out first before I fab a new section or after?
Cheers nick
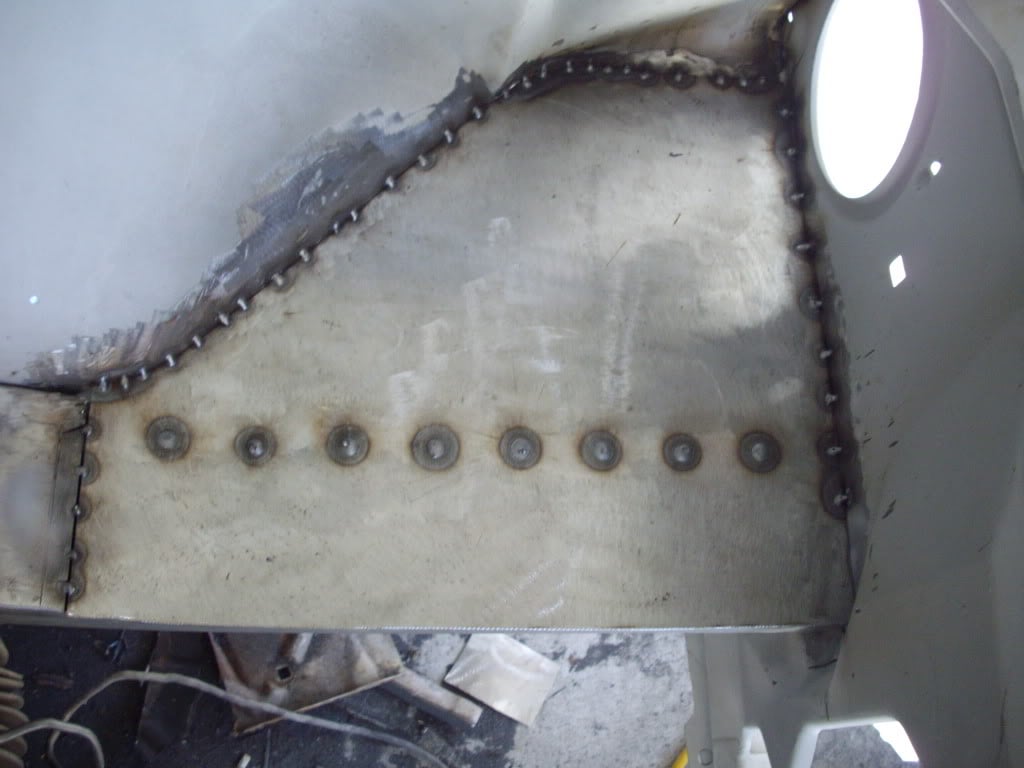
sorry for the late peply, what i learnt from a good mate LH SLR 3300 is to tec screw the new section over the shagged section then do your cutting then you will have the almost perfect replacmnet section, then go on to removing the backing plate and get it cleaned up. dont forget to mark your holes were the hinge bolts go before you take the tec screws out. then weld your new sections in then you should be able to put your hinge bolts through and nip them up on to the backing plates to get the in the right spots then a couple of tac welds on the plates then you will be right to remove the bolts. also dont forget to treat the 2 sufraces between the backing plate and the new section before you weld them in place otherwise you will be doing the same repair in a couple of years.
i will be trimming the whole lip that goes around the backing plate and running a bead of weld right the way around then i will seam seal around it and stone gaurd and that should stop any future problems " i hope "
#224
torana_nick
-
- Members
-
- 759 posts
Forum Fixture
- Name:Nick
- Location:victoria
- Car:LH Torana Project
- Joined: 11-December 11
Posted 06 March 2012 - 07:12 PM
So far so good then... i have shaped some steel up hoping to get a welder in the next few weeks or sooner and i will be attempting it all. Also noticed an air hacksaw works well to..
Whats best to treat the area with? any type of rust converter is ok?
cheers.
Whats best to treat the area with? any type of rust converter is ok?
cheers.
#225
_Liam_
_Liam_
-
- Guests
Posted 06 March 2012 - 08:43 PM
You mongrels! I thought you had an update Lee!! 


2 user(s) are reading this topic
0 members, 2 guests, 0 anonymous users

