Jump to content


- - - - -

LH SL TORANA 173 TO EFI 5L TH700 BW 3.45 LSD


  • Please log in to reply
370 replies to this topic

#76 _LH SLR 3300_

_LH SLR 3300_
  • Guests

Posted 23 August 2009 - 10:03 PM

i cant believe you couldnt find a bonnet. i sold two for 50 bucks each. no rust to write home about.crazy. looks like its comin along great mate!


Thanks mate. Oh yeah i like your personal statement too. I do play some Slayer & I'm going to see them play with Megadeath in OctoberPosted Image . I wish i'd known you had some Torana bonnets for sale, I didn't repair mine for the fun of it, just got sick of trying to bid on them on evilbay only to get outbid in the last 30 seconds for BS amounts like $340. Story of my life when it comes to finding parts for this car. Pay top dollar for parts I used to throw out years ago when I first started playing around with these cars.

#77 _torana_umunga74_

_torana_umunga74_
  • Guests

Posted 23 August 2009 - 11:43 PM

if slayer are coming then my brother will kno an he'll get me tix :spoton: ive given up tryin to buy ebay it used to be a good place to find a bargain now every dumb bastard with a mac is there

#78 _LH SLR 3300_

_LH SLR 3300_
  • Guests

Posted 26 August 2009 - 07:27 PM

Been getting stucjk into my Torana this week & slowly making progress. Earlier in the week I wire wheeled the minor surface rust on the inside of the floorpan & treated it with rust converter, so yesterday I gave it a good clean & painted it with Rustguard red oxide primer.
Posted Image
Posted Image
I didn't paint the console mounting brackets as i will be removing them later as i can't afford to spend over $350 on a good console & will probably just have a Hurst or B&M shifter instead.
Another area I gave attention to was the inner wheel wells. I used the wire wheel on my angle grinder to remove the bulk of the dirt & old stoneguard, followed by thinners & some scotchbrite pads. This is what they looked like as I was near the end of the clean up.

Posted Image
Posted Image
Posted Image
Posted Image
I then masked the surrounding areas before spraying an etch primer to seal the panels. Once the etch was dry, I sprayed plenty of stoneguard.
Posted Image
Posted Image
Posted Image
In these pics you can see the mod I had to do to accomodate the larger wheel/tyre combo I plan to fit later down the track.
Posted Image
Posted Image
The pics also show that instead of the usual black that stoneguard is coloured, this stoneguard is white. This is because unlike alot of bodyschutz/stoneguard products, this one is designed to be over painted, which i'll be doing tomorrow once it's had time to cure. The photos aren't the best either as 90% of this build is being done in my carport & by the time i'd primed, masked & sprayed the stoneguard, it was dark outside.

#79 _doogs_

_doogs_
  • Guests

Posted 26 August 2009 - 10:26 PM

Nice job.
I am sure this will improve the look nicely as well as preventing further rust.

#80 _LH SLR 3300_

_LH SLR 3300_
  • Guests

Posted 27 August 2009 - 06:50 PM

Nice job.
I am sure this will improve the look nicely as well as preventing further rust.


Thanks doogs Posted Image Any & all comments regarding my project are appreciated. Cheers Matt

#81 _LH SLR 3300_

_LH SLR 3300_
  • Guests

Posted 27 August 2009 - 07:00 PM

Thought I might add a small update to this part of my resto. The stoneguard i applied last night was well & truely cured by the time i got home from work today, so i decided to add some colour to it. I've seen some cars where the owners spray the floorpan/underside body colour, but as this will be a go car not a show car i decided to paint it 2K black. I could've also just applied black stoneguard & be done with it, but spraying 2K over the stoneguard means it can be cleaned like the exterior of the car so top to bottom I can always keep the car looking it's very best. I'll never win any trophies or such but it will be good enough to enter in small shows & club meets etc......well I hope anyway.
Posted Image
Posted Image
Posted Image
Posted Image
Posted Image

#82 _nial8r_

_nial8r_
  • Guests

Posted 27 August 2009 - 07:41 PM

looks good Matt, i know what ya mean about being able to keep it clean unlike shiltz, but im a big fan of the shiltz as its good at hidding little inperfections, but it does dull pretty quick so your way is a good idea for keeping it clean just like the rest of the carPosted Image

#83 Heath

Heath

    I like cars.

  • Administrators
  • PipPipPipPipPipPipPip
  • 18,365 posts
  • Name:Heath
  • Location:Eastern Suburbs, Melbourne
  • Car:Heavily Modified UC Sunbird Hatchback
  • Joined: 07-November 05
Garage View Garage

Posted 27 August 2009 - 07:50 PM

Mmmm interesting choices with the paint under there. Sounds like a winner to me

#84 _LH SLR 3300_

_LH SLR 3300_
  • Guests

Posted 30 August 2009 - 10:34 PM

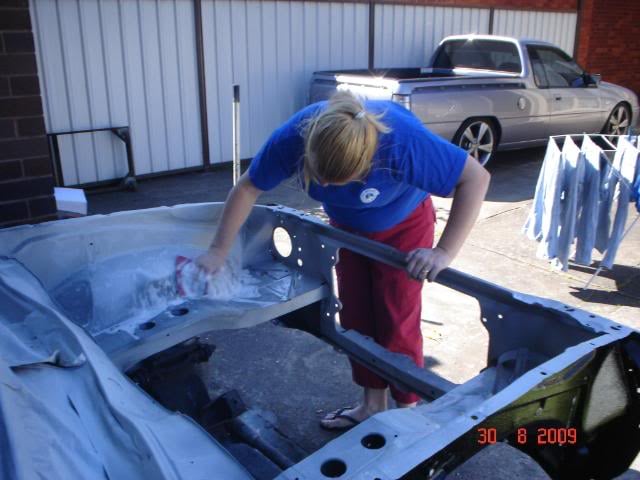
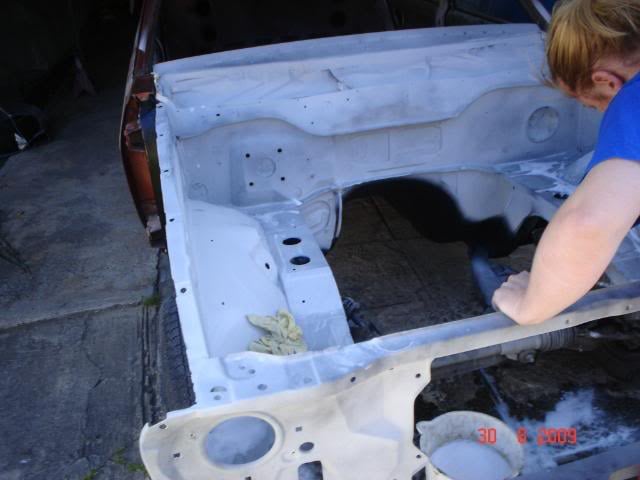
After weeks of prepping etc, today was the day the engine bay finally got a coat of paint. Started sanding the hi-fill at lunch & there was alot to do so i even got the wife to give me a hand.
Posted Image
Posted Image
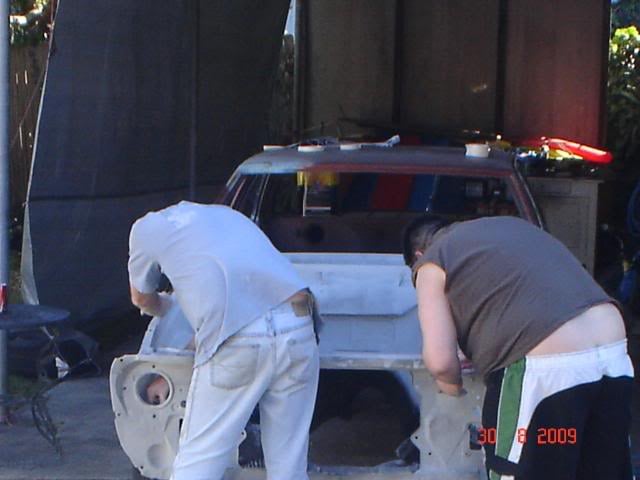
Then a good mate came by, so he ended up with a bit of wet & dry in his hand too. My wife took this rather unflattering pic of us that i didn't know about until I down loaded them on to the computer. Ah well thought I'd post it anyway.
Posted Image
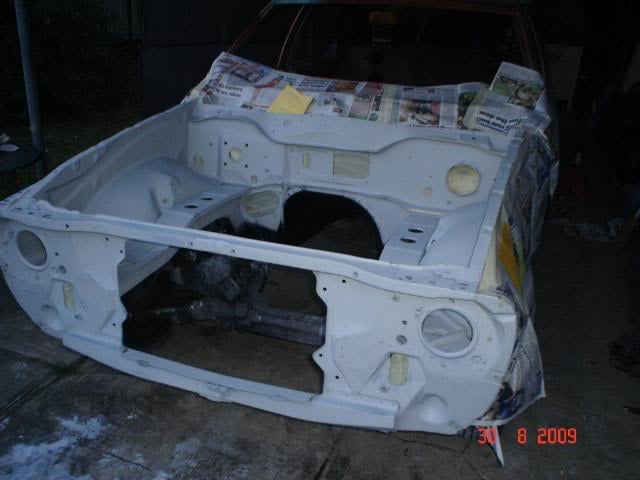
By around 4pm it was almost ready for the paint.
Posted Image
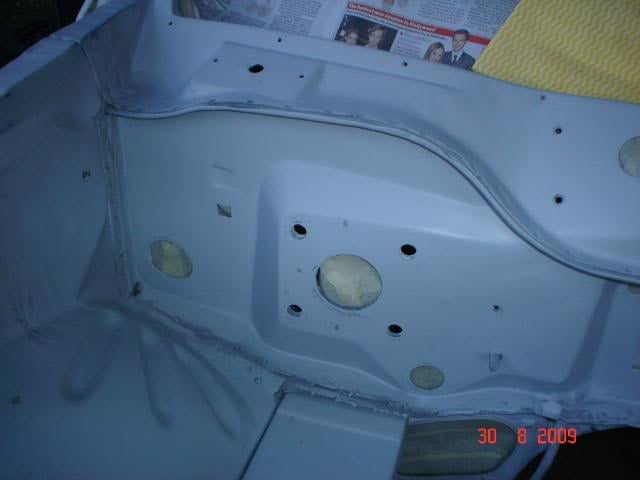
During the repair process, i removed all the seamsealer from around the firewall etc, & as I'm trying to replicate the original factory look for the engine bay I had to re-apply it. This is the before pic.
Posted Image
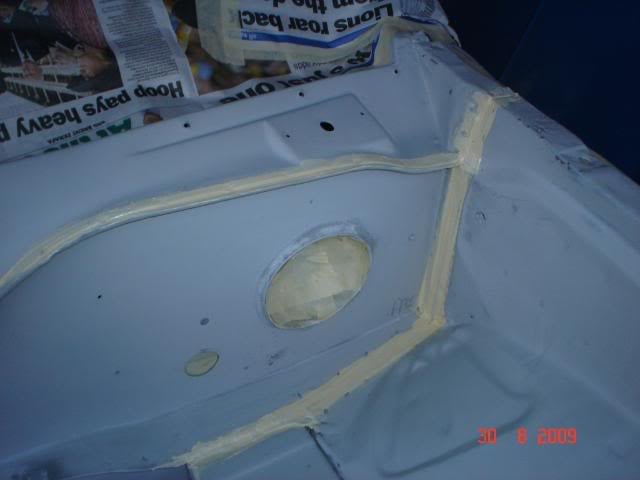
This is after the seamsealer has been applied.
Posted Image
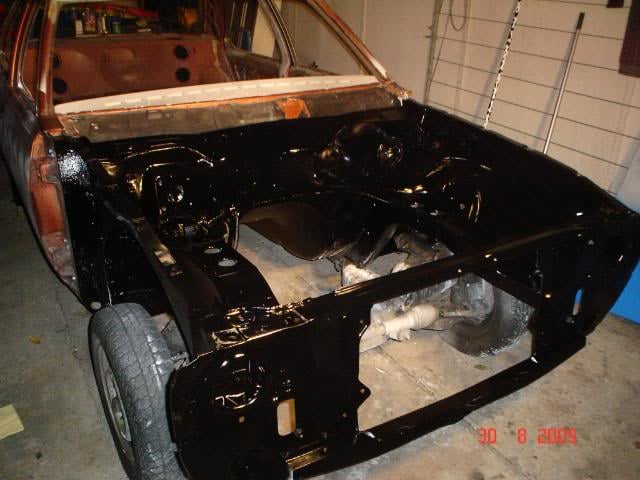
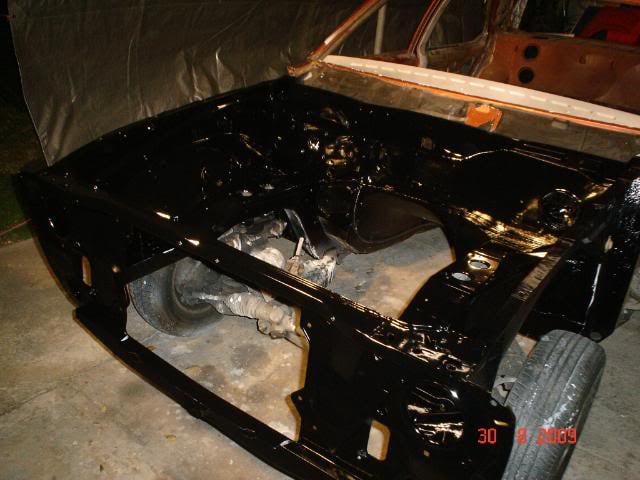
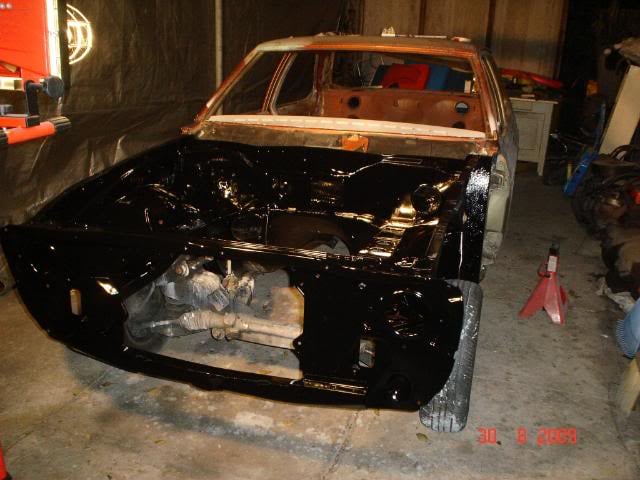
As mentioned, I want the engine bay to have a factory original appearence of satin black. I didn't want to use acrylic GMH black though as it isn't a very hard wearing finish, so I decided to use 2K instead. I used a flattening base in 2K solid black to take some of the gloss out & ended up with a satin black finish. Here is the engine bay after the final coat has been applied.
Posted Image
Posted Image
Posted Image
I'm not 100% happy with the job but as the car will be a go car, not a show car I think I'll leave it for now. I did a test spray when it was still daylight, & it looked good, but under the fluro light, it appears too shiny. Oh well, i'll see what it looks like tomorrow during the day once it's fully cured & hopefully it'll dull off a little more.

#85 _doogs_

_doogs_
  • Guests

Posted 31 August 2009 - 12:08 AM

Nice progress.
The bay looks to have come up well in the pics.

#86 _nial8r_

_nial8r_
  • Guests

Posted 31 August 2009 - 07:36 AM

shit your getting there now Matt, well done Posted Image that black does still seem to be pretty glossy hey, i have seen a mate dull black out when he wanted a satin finish but only had gloss jet balck, it was pretty wild but it worked, he mixed up a pot of clear and before he took to the car he made sure the materials fan was hugh and still held the gun pretty far away from the job and sprayed 2 coats ( i think ) as it was almost going down dry and it gave it that satin look, but i like my really high gloss jet black Posted Image i think your engine bay looks good mate keep up the good work and keep the pic's coming too Posted Image

#87 _LH SLR 3300_

_LH SLR 3300_
  • Guests

Posted 31 August 2009 - 05:09 PM

Thanks Lee & doogs Posted Image Well I just got home from work & wheeled the Torana out of the carport to check out the finish of the engine bay in the daylight. Still not happy with it, though pretty happy with how my repairs turned out. I'm in two minds whether to sand the bay back & have another attempt at it or to just put up with it how it is. I sprayed the side of my wife's Phantom Black VX Calais on friday night & the finish I got is a mile ahead of the Torana. Can only put it down to different paint products. I used PPG on the wife's car but used Dulux on the Torana. Oh well back to contemplating a repaint of the engine bay again
Posted Image
Posted Image
Posted Image
Posted Image
Posted Image

#88 _nial8r_

_nial8r_
  • Guests

Posted 31 August 2009 - 06:38 PM

the repairs came up good Matt and i think you got the factory look you were after althought that bay is still pretty shinny mate. looks pretty Posted Image i would almost bet my balls on it that you will chop it and re do it cause it will be PLAYING ON YA MIND !!! Posted Image

#89 _LH SLR 3300_

_LH SLR 3300_
  • Guests

Posted 31 August 2009 - 09:08 PM

the repairs came up good Matt and i think you got the factory look you were after althought that bay is still pretty shinny mate. looks pretty Posted Image i would almost bet my balls on it that you will chop it and re do it cause it will be PLAYING ON YA MIND !!! Posted Image


Well you almost won that bet mate, but alas, I thought bugger it. I started putting things in the bay like the headlight harness, brake lines etc so it's all systems go. What the hell it aint a genuine low km SLR5000 or such so who cares it's not 100% original? Not I Posted Image besides I don't remember any LH or LX Toranas coming from factory with EFI 5.0Ls so it'll be far from original anyway, even though my plan is to try & make it appear that it came from GMH with an EFI 5.0L. But you know me too well Lee. It's still playing on my mind alright & I won't be using Dulux 2K paint products on this car again. Oh yeah, when am I going to pics of your project update Posted Image ?

#90 fatslr

fatslr

    Forum Fixture

  • Members
  • PipPipPipPipPip
  • 1,247 posts
  • Name:Garth
  • Location:Dunsborough W.A.
  • Joined: 17-July 07
Garage View Garage

Posted 31 August 2009 - 10:56 PM

Hey Matt
The Torrie seems to be coming along nicely and i don't doubt it will be a "go" car good enough to "show" on occassion.

You will probably find once the engine brakes radiator etc etc are in that only you will notice the imperfections that are bugging you and the majority will be :rolleyes:
Like when i walked from the back of your torrie to the engine bay at WSID and went :spoton: mate that is spot on .
Keep up the good work.

Garth

#91 _nial8r_

_nial8r_
  • Guests

Posted 01 September 2009 - 07:34 AM


the repairs came up good Matt and i think you got the factory look you were after althought that bay is still pretty shinny mate. looks pretty Posted Image i would almost bet my balls on it that you will chop it and re do it cause it will be PLAYING ON YA MIND !!! Posted Image


Well you almost won that bet mate, but alas, I thought bugger it. I started putting things in the bay like the headlight harness, brake lines etc so it's all systems go. What the hell it aint a genuine low km SLR5000 or such so who cares it's not 100% original? Not I Posted Image besides I don't remember any LH or LX Toranas coming from factory with EFI 5.0Ls so it'll be far from original anyway, even though my plan is to try & make it appear that it came from GMH with an EFI 5.0L. But you know me too well Lee. It's still playing on my mind alright & I won't be using Dulux 2K paint products on this car again. Oh yeah, when am I going to pics of your project update Posted Image ?


ill try and get some today, i have been flat out in the yard trying to get shit happening with the entertaining area, i wanna get the slab down before summer gets here and have it up so that we can use it but first i have all the plumbing to do, gotta get hot & cold water from the house to the entertaining area and down down to my shed so that i can use the shit house in the shed Posted Image as well as run the plumbing for the gas so there is plenty of digging to be done thats for sure, just gotta move this last 2.5 Tonne of dirt first, i have that support together but still gotta clean it up ( the welds ) im trying to make it look like it hasnt had the light bucket replaced at all, the front side you cant really see as its behind the appron but the back is what im stressing over as you will be able to see it cause there will be no battery in the bay or wirers to hide any wobbley bits, Posted Image

#92 MRLXSS

MRLXSS

    The Render Garage

  • Members
  • PipPipPipPipPipPipPip
  • 12,400 posts
  • Name:Matt
  • Location:Upwey, Melbourne
  • Car:355 LX Hatchback, DeLorean DMC-12, LX SS Hatch, VY Cross8 Crewman
  • Joined: 09-November 05

Posted 01 September 2009 - 01:36 PM

Coming along great!!! Keep up the good work mate. The engine bay looks nice and clean now!

#93 orangeLJ

orangeLJ

    Yes, yes I do post alot!

  • Members
  • PipPipPipPipPipPipPip
  • 10,261 posts
  • Joined: 02-May 06

Posted 01 September 2009 - 02:24 PM

ill try and get some today, i have been flat out in the yard trying to get shit happening with the entertaining area, i wanna get the slab down before summer gets here and have it up so that we can use it but first i have all the plumbing to do, gotta get hot & cold water from the house to the entertaining area and down down to my shed so that i can use the shit house in the shed Posted Image as well as run the plumbing for the gas so there is plenty of digging to be done thats for sure, just gotta move this last 2.5 Tonne of dirt first, i have that support together but still gotta clean it up ( the welds ) im trying to make it look like it hasnt had the light bucket replaced at all, the front side you cant really see as its behind the appron but the back is what im stressing over as you will be able to see it cause there will be no battery in the bay or wirers to hide any wobbley bits, Posted Image


If you need a plumber, give gaz a ring! Im about to hit his dad up to do some cash work at our house too!

Seems like you are progressing well though and doing a brilliant job as usual hey!

What brand was the stonegaurd stuff that you used? Im half tempted to do the bed of the ute in stonegaurd.

#94 _LH SLR 3300_

_LH SLR 3300_
  • Guests

Posted 01 September 2009 - 07:02 PM

This is the part of building cars I enjoy most, putting the bits & pieces back together rather than taking them off. It means you're that little bit closer to finishing the project & ready to enjoy it Posted Image .
Posted Image
Posted Image
I picked these up today NOS in the original box.
Posted Image
Only thing is, my Torana is a LH so it had square headlights from factory & to be honest I really like the standard LH look with the square lights & the Torana letters across the front apron. I don't whether to run the square or round headlights now.

#95 _nial8r_

_nial8r_
  • Guests

Posted 01 September 2009 - 07:16 PM

shit it is coming together now Matt ya even got the tags on to Posted Image i think i them same with the head lights LH=square LX=round but thats just my opion

#96 _BCR42Y_

_BCR42Y_
  • Guests

Posted 01 September 2009 - 10:53 PM

Looks to be coming along nicely Matt!

My car is also a LH, so is meant to have the square headlights, but I prefer the round lights on them and it would look good with the letters across the front with them.

#97 _LH SLR 3300_

_LH SLR 3300_
  • Guests

Posted 09 September 2009 - 08:00 PM

After a two week wait, my Torana's k-frame & associated parts were finally ready to be collected from the sandblaster, so I went on a shopping spree buying balljoints, bushes, springs, shocks etc. I had the k-frame etc sprayed in an etch primer so they wouldn't rust as I planned to press the bushes & ball joints in before painting them.
Posted Image
If I'd powder coated or painted them before, the finish would've been short lived after the parts had been in the 30ton hydraulic press I used to press the bushes in. I'd never done this before so it was a bit of learning curve for me but I had a good mate who is a mechanic helping me along the way & now i've done it, i'll never pay for labour on rebuilding car suspension again. I started with the lower arms as they were the easiest to do. The important thing to remember when pressing the bushes in is that the arms are a "U" channel shape so something needs to be placed in between the channel to stop the arm being crushed as you press the bush in. These are the tools I used, along with some old sockets & bits of pipe.
Posted Image
Posted Image
Placing the "U" shaped tool between the channel, a large bit of pipe over the top of the bush & under, it's ready to be pressed in.
Posted Image
One done, another three to go.
Posted Image
The same proceedure is applied for pressing the lower balljoints in, though the "U" shaped tool isn't needed.
Posted Image
The finished product ready for paint.
Posted Image
The top arms are a little trickyier.I started by pressing in one of the bushes on each arm.
Posted Image
I then fed the pivot arm that goes through the arm & both bushes into the arm, sat the second bush over the pivot & after a little juggling with various bits of pipe & the "U" shaped tool, pressed home the second bush. Here is one of the finished arms ready for paint.
Posted Image
I would've liked to take more step by step pics, but I borrowed the equipment & tools to do the job & was pressed for time, so I just got in & done it. Hopefully i'll be painting them 2K gloss black on friday after work & fitting the front end up saturday Posted Image

#98 _LH SLR 3300_

_LH SLR 3300_
  • Guests

Posted 11 September 2009 - 10:17 PM

With all the bushes & balljoints pressed into the control arms & the other suspension parts ready to go, today i splashed some colour on them. Even though the sandblaster sprayed an etch primer on them, this was only to stop them rusting & the arms in particular had scratches etc from pressing the bushes in, so i had to sand & re-prime them. I'm using a method called "wet on wet" where i spray an epoxy etch primer, let the primer tack off, then spray the colour straight on. This saves me time & as the car will be a go car not a show car, i didn't see the point in hi-filling, sanding etc. The 'wet on wet" finish will be neat & functional enough for me. Here are some of the parts before epoxy priming.
Posted Image
Posted Image
Now with the epoxy primer.
Posted Image
Posted Image
Posted Image
And now with a couple of coats of 2K gloss black.
Posted Image
Posted Image
Posted Image
Posted Image
A quick bake, load them in the boot of my car & tomorrow is assembly time. Can't wait to see the new twin spot calipers & 290mm grooved discs bolted on Posted Image

#99 _nial8r_

_nial8r_
  • Guests

Posted 12 September 2009 - 07:58 AM

they look to have came up relly good Matt, and dont worry about the wet on wet your not the only one that uses that method and to be honest 99% of ppl wouldnt even know, i do the same with colour and clear everytime Posted Image everytime i se your project it keeps on telling me to paint mine high gloss jet black, i love the look hmmmmm shinny Posted Image hey and you get a chance sometime over the week end can you try and get a pic of the HQ engine braket so that i can see if it is the same as the Torana V8 ones i have ???

#100 _ass308_

_ass308_
  • Guests

Posted 12 September 2009 - 08:03 AM

nice work matt.

are u going to toranafest,and are u takeing a car ?


1 user(s) are reading this topic

0 members, 1 guests, 0 anonymous users