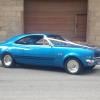
LH SL TORANA 173 TO EFI 5L TH700 BW 3.45 LSD
#126
 _Marco72_
Posted 26 September 2009 - 09:38 AM
#127
 _LH SLR 3300_
Posted 02 October 2009 - 09:03 PM

What a nightmare getting this crap off was. I started with a heat gun to soften it up, then used a scrapper to remove the bulk of it, followed by scotchbrite pads & multi thinners.

This is after about an hour of heating, scrapping & scouring. I would've got it blasted but as it had residual fuel vapours, the blaster wouldn't touch it. What a relief once the last of the deadner crap was gone.

Once it was all clean of the deadner crap, i took it into work to rub it back & prep it for painting. It only had minor dents, so i bogged them up & hi-filled it. Then tonight i rubbed back the hi-fill starting with P320 then P500 then a final rub with P800. Once it was all smooth, i sprayed it with straight fine silver tinter, followed by a couple of coats of clear. I sprayed the mounting straps gloss 2K black a couple of weeks ago, so all i need before i can fit the tank to the car is a new sender unit & some fuel line


#128
 _LJ355_
Posted 03 October 2009 - 08:54 AM
#129
 _nial8r_
Posted 03 October 2009 - 10:04 AM
#130

Posted 03 October 2009 - 10:36 AM
#131
 _LH SLR 3300_
Posted 04 October 2009 - 11:17 AM


I also paint stripped, prepped & painted the heater fan too.

Some other parts i painted were the engine pulleys, part of the alternator bracket & the hi-low note horns. I pulled the horns apart & paint stripped them, what a prick of a job that was, & for something different i painted the metal disc behind the grille of the hi-note horn silver.

I was going to paint the fuel rail & throttle body covers too, but it was 8pm by the time i finished painting all the other parts so i thought i'd leave them for another day. I starting to run out of parts to paint, so hopefully the rest of the painting i do will be on the car itself
#132
 _gen3torrie_
Posted 04 October 2009 - 11:42 AM
edit now they are
i love the fuel tank
#133
 _BlownOutlaw_
Posted 05 October 2009 - 11:41 AM
I never saw this build thread until today, im trying to be a bit more active on the forum. I thought you were fixing up the silver job for starters.
All looks really good and will keep an eye on your progress.
#134

Posted 05 October 2009 - 01:16 PM
I'm itching to see more progress pics
PS. Great plans for the car too - it will make a great driver with that driveline.
Cheers.
#135

Posted 06 October 2009 - 07:42 AM
#136
 _LH SLR 3300_
Posted 07 October 2009 - 07:23 PM
Blown Outlaw, i still have the silver Torana & i am still building it up, but plans have changed slightly & once this car is finished i'm pulling the silver one down & redoing some areas i'm not happy with. Learning alot with this car & will use some of the ideas from this car on the silver Torana such as the wiring.
LXCHEV, i have checked out your build thread & i'm impressed. A very high quality build with super tough running gear & a credit to you. I have even greater respect for what you've done because most of it was done in a carport & driveway, which i can relate to. Most of the work done on my Torana has been in a carport, apart from some welding & parts i painted at work (don't think the neighbours would appreciate me painting 2K outside every weekend).
OrangeLJ, nah i didn't bring any Pro-Comp gear back from China. Not a big fan of Pro-Comp parts, had a bad experience with a SBC dizzy i bought from them awhile back. What i did bring back from China was a desire never to go there again
#137
 _LH SLR 3300_
Posted 07 October 2009 - 07:39 PM

In the mean time, using a heat gun, some scrapers & a wire wheel on my angle grinder, i removed 30+ years of mud & grime & all the factory sound deadning from the rear wheel wells. I then primed them & sprayed stone guard as i did on the front wheel wells.


Tomorrow i'll spray them gloss 2K black so by the time the diff is back from the diff shop i can bolt it all up brakes & all & the under side of the car is finished & i can start putting the EFI 5.0L & auto in.
#138

Posted 08 October 2009 - 07:10 AM
you missed a good shindig though, Gary and Renees wedding was good fun.
When you are pulling all that stone gaurd/ sound deadener out, try using dry ice and the back of a panel hammer.
The dry ice freezes it, then it just chips away, apposed to having to scrape all the gooey mess off.
Then just clean up with turps or thinners and away you go!
Works for floors, inner gaurds, basically anywhere they spray the stuff.
#139
 _LH SLR 3300_
Posted 13 October 2009 - 07:31 PM

As there was material build up & generaly poor paint finish, which was crazy cracked in alot of spots, i decided to paint strip the panels & start from scratch. This way i won't get sink back or blisters in my new paint down the track. I started by scuffing the old paint with a bit of P36 to give the stripper something to "key" into. Then i masked off the apertures to prevent the stripper running into them.

It took two applications of stripper to get all the old paint off. The pink puttied area on the lower guard covered a rust repair. It was too thick for the stripper to get off, so i used a strip disc on my angle grinder to buzz the putty & bog off. Thankfully, it wasn't covering rust holes, there was a metal plate welded in there.


The left hand quarter appeared straight, however it had some blisters in the paint which led me to believe it had an old repair. After scrapping off the first application of stripper, it became evident my suspitions were right.


This is why i feel even thought it's a messy time consuming job, paint stripping was the best method to use. Under the paint & edges of the bog, surface rust was evident. If i'd sanded & primed over this old repair, within a matter of months, the blisters would've come back. With the old paint off & the bog removed, i'll be able to treat the rust properly.


Once i've stripped the whole rear of the car including the beaver panel, i'll start repairing the small dents etc & re-repairing the gouge in the left quarter, so it won't have anywhere near the amount of bog i dug out of it. more pics coming soon
#140
 _LJ355_
Posted 13 October 2009 - 07:45 PM
Was talking to mick about it the other day and had a look at his VN holy sheet what a animal
#141
 _LH SLR 3300_
Posted 13 October 2009 - 08:26 PM
#142
 _nial8r_
Posted 14 October 2009 - 09:22 AM
#143
 _LH SLR 3300_
Posted 14 October 2009 - 03:12 PM
#144
 _LH SLR 3300_
Posted 14 October 2009 - 05:16 PM


There is a fair amount of surface rust present which wasn't visible until the paint came off. If i'd just buzzed the old paint & primed/painted over it, it would've kept rusting. I can treat this rust easily now & be safe in the knowledge that i won't find corrosion blisters appearing under my new paint in a few years time

#145
 _nial8r_
Posted 14 October 2009 - 06:37 PM
#146
 _BCR42Y_
Posted 15 October 2009 - 09:38 AM
#147
 _BlownOutlaw_
Posted 17 October 2009 - 07:43 AM
Ive just got my rego in the mail yesterday for the Torana so now I can get the rego checks done and then I will pull the whole thing appart and start on the paint and panel too and also replace the bushes. Might need some of your advice as I go along.
#148
 _LH SLR 3300_
Posted 17 October 2009 - 12:11 PM
Today i started on the repairs now the basic body shell is back to metal. I started on the left quarter as it had an old repair that needed fixing properly. It had two gouges that had just been bogged up with no attempt to push the damage out.

This picture didn't show the true depth of the bog as i scraped as much out as i could while paint stripping the quarter. I could've just filled it up with bog again but i don't like applying it too thick as it tends to crack & lift over time. First step was to remove the remaining bog from the old repair.

Then to aid in picking the lows & high spots, i applied a black guide coat over the area to be repaired.

Then using a body file, i i lightly filed the panel.

As access to this area was difficult, i'm using a dent puller for this repair. As i'm a panel beater by trade, i use these machines regularly. This machine is actually mine & it has well & truely paid for itself many times over.

I start by pulling out the area around the lowest part of the dent, working my way around in a circle until i reach the centre of the dent. This way i gradually pull the damage out. I run the file over the panel occasionaly, pulling & lightly filing until all the black guide coat is gone.


Once i'm satisfied i've removed all the low spots, i run a sander over the panel with P80.

There is still a little trace of black guide coat remaining in this pic but it isn't high lighting dents, it's high lighting P36 grinding marks from the previous repair. rather than try to file them out, i will either wipe a thin skim of filler over the panel or polyester spray fill it. I wiped some prepsol over the panel to "sight down" it to check for overall straightness. It is by no means perfect, this repair method is time consuming, but i know this repair is of a far better quality than the original & i won't have to load bog into it to get it straight.

I know most people on this forum won't have access to the dent puller i do, but the next posts i do will show how i repair dents using hammers & dollies.
Cheers Matt
#149
 _LH SLR 3300_
Posted 17 October 2009 - 02:05 PM

the rest of the panel was fairly straight apart from three dents on the top of the panel where it meets the bootlid. Here you can see where the block with P120 has picked them up by the guide coat remaining.

As there was good access to behind these dents by hand, i repaired them the old fashioned way with a couple of hammers & dollies.

The tool with the red handle is called a "slapper" or "flipper" & it's pretty much a bastard file that has been bent into an "S" shape. This tool is excellent for basic dent repairs. As hitting steel panels causes them to stretch, it's all too easy to over stretch them & cause "high spots" or "oil canning". This tool used properly can control the stretching. After locating the dents, i get a dollie with slightly more curve than the panel i'm trying to repair. I gently bump the bulk of the dent up with the dollie, then while keeping upward pressure on the panel, gently bump it with the flipper. Here the marks from the coarse surface of the flipper can be seen.

Then, as in my last post, i run the body file over the panel. I repeat the procedure until the surface of the panel has uniform file marks & the guide coat is gone.


I take this method of repair, rather than trying to bump the damage out in one go, so as to avoid over stretching the metal. With paitence & some practice, this method of repair can be done by most anyone who is handy with tools & can be very satisfying in the knowledge that the repair has been done properly without the need for heaps of bog & without having to pay an hourly rate for a panel beater to do it
#150

Posted 17 October 2009 - 10:06 PM
The car is looking awsome the time and effort going into it is unbelievable well done your last post reminds me of when i was a little kid and the old man explained to me how to ride a bike sounds good in theory .
Hats off to you mate it is a shame that your the other side of Oz or i would be hitting you up for some "practical"
Garth
2 user(s) are reading this topic
0 members, 2 guests, 0 anonymous users


 View Garage


