SS LX hatch build up
#1 _galaxyhatch_
Posted 27 October 2009 - 08:38 PM
I am new to this site and have certainly been blown away with thequality of the vehicles produced by some of the members and such asAyden's hatch, it has inspired me to share some of the build shots anddescription of my Torry progress which after 12 years in the making hasalmost come to an end.
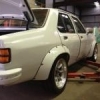
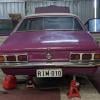
To start off I bought her as a rolling shell some 12 years ago of agood friend of mine, she didn't look much at the time but all the partswere there and she was an original 76 lX SS hatch L31. (half the reasonI bought her..........but of course I am also a bit partial to thehatch's)
01.JPG 205.87K 83 downloads 02.JPG 210.77K 132 downloads
Now I wont go and bore you with the details, but needless to say I started building the car when I was younger and was heading down a style nightmare and it took 5 years to build to almost ready stage just to have started all over again the right way.
So I will skip the first build photo's, as they are embarassing and go straight to the second time around.
Here is a shot of the engine bay prep, sooo many holes to weld.
3eng bay prep.JPG 146.52K 136 downloads
Prep work on the body
almost painted.JPG 106.92K 155 downloads
The layup of the Pearl blue ghost flames over the Galaxy Blue paint
Bonnet flames before clear.JPG 118.23K 127 downloads
trial paint of the flame work, have to give credit to the Airbrush artist as to me it didn't look enough color.
bonnet flames pearl reflecting bf clear.JPG 99.09K 140 downloads
After the paint, straight of the gun
after paint and cleared.jpg 127.24K 153 downloads
Bonnet after paint
bonnet after clear.jpg 43.25K 177 downloads
Engine bay after paint
eng bay cleared.jpg 128.53K 180 downloads
I'll skip the long winded slow build up and go straight to the engine build and then final shots of where she is at now.
Engine built up ready to go in the car
DSC02848.JPG 150.73K 179 downloads
Engine bay shots as it stands now
Engine bay.JPG 167.24K 246 downloads
engine bay1.JPG 159.64K 280 downloads
Here are some shots of the vehicle outside Sprints and my Trimmers workshop
Torry.JPG 97K 311 downloads
rear shot.JPG 122.44K 289 downloads
Sprints shot.JPG 132.98K 280 downloads
Last shot is what I have done with the boot install under the floor and I managed to squeeze all of the jacking gear and tools in nicely.
boot install.JPG 109.46K 220 downloads
That's it for now until my Trimmer can finish of the interior and by the way it has taken 12 years because the only things I havent done myself are the external paint, bottom end engine build and the Trim. The rest is all me.
I thank you all for viewing and I certainly welcome any critsims, comments or suggestions that you all may have, as there is certainly alot of Torry building experience in this site.
Cheers for now Dave
#2
Posted 27 October 2009 - 09:42 PM
Cheers, Craig
P.S. the engine bay looks trick
#3 _mello92_
Posted 27 October 2009 - 09:44 PM
Far out mate, thats come up awesome!
LOVE that boot install!
If you dont mind me asking, what size tyres and rims are on it?
Cheers.
#4
Posted 27 October 2009 - 09:47 PM
#5 _cruiza_
Posted 27 October 2009 - 10:00 PM
critisms none
my thoughts are I like the orginal ideas, while I m not a fan of flames I like that you have done something different, I think the old school mags are good too but old school mags and flame job are a bad mix either go with modern mags or go back to old school paint job
attention to detail particluly engine bay and boot top marks
thanks for sharing and job well done now go and enjoy drive it till the wheels fall off
#6
Posted 27 October 2009 - 11:01 PM
I see quite a few little 'neat touches' that I haven't seen before in the engine bay alone. I bet a lot of time have gone into creating this one haha cheers
What's the running gear?
#7
Posted 28 October 2009 - 06:40 AM
#8
Posted 28 October 2009 - 07:58 AM
Hatches are the greatest! HAHA!
I really like your boot install! Great idea to have a nice organised tool kit in there! It's what every torana needs! HAHA!
Is that a A/C condenser I see? or a Power Steering pump? I really like the neat engine bay, and the flames are subtle (Im normally not a fan, but they are subtle and i don't mind them!) Kinda reminds me of smokems car!
#9 _soss_
Posted 28 October 2009 - 04:10 PM
#10 _nial8r_
Posted 28 October 2009 - 04:46 PM
#11 _galaxyhatch_
Posted 28 October 2009 - 08:09 PM
Subtle things I have changed besides the obvious is, no door locks or boot locks (keyless enty) electric windows, changed the Split folding seats into one bench folding to accomidate the child seat that will sit in the centre and anchor back the the tail gate catch (oh... and it will be trimmed the same as the rest of the car) and lastly a custom air-con job.
To answer some raised questions:
Mello92,
the tyre sizes are: rear, 265/50/15 on Magnum (x-bathurst Rims) 15x10's with 5" backspacing and fronts are 245/50/14 on CSA 14x7 rims.
I have a matching set of rims for each. Ie a full set of magnums (fronts are not polished yet) and I also have rear 14x8 CSA'a with 4" backspacing with brand new BF goodrich 265/50/14 tyres. As we all know it is very hard to find 265/50/14's arond these days so these will end up being my display tyres. Thus the reason there are BF's on the front and Yoky's on the rear. I ended up getting the rear tyres for nothing.
And 265/50/15's are easier to find.
P1030096.JPG 532.99K 70 downloads
Difference between the two rear tyres and rims
P1030096.JPG 532.99K 70 downloads
I did toy with the idea of 295/50/15's but the car looked like one of thoses cartoon funny cars with the biggest tyres possible under them.
P1020917.JPG 444.23K 86 downloads
Heath,
The running gear is all standard at the moment (to get her registered) and it has obviously a 308 up front, M21 box and a GU7 diff as per the plates.
P1020712.JPG 473.65K 113 downloads
P1020713.JPG 462.25K 100 downloads
P1020711.JPG 449.2K 92 downloads
P1020902.JPG 565.93K 113 downloads
MRLXSS,
It is an A/C compressor you see in the engine bay, I didn't like the way the 308 brackets sitted and stuck the eyesore of a compressor right over the valley cover, so I decided to change where she was mounted.
this way the engine bay looks symetrical and the gilmer/ vband works well together.
I also custom hid the Condenser in front of the radiator and behind the fans and ran custom routed lines to a modified under dash unit plumed into the original heater box, so the theair comes out of the middle vents.
air con pump.JPG 111.13K 138 downloads
As a foot note the interior is basically standard SS with all added accessories hidden and the seats will be HQ black vinayl with a black and silver check (5mm checks) cloth insert.
P1020687.JPG 531.42K 131 downloads
I thankyou all once again and though we all have different taste and idea's, it is nice to chat with those that can appreciate a good build and the effort that goes into it.
Again, please fell free to add any suggestions comments and critisims.
Happy Torana building.
Cheers Dave
Attached Files
#12
Posted 28 October 2009 - 08:14 PM
#13 _gen3torrie_
Posted 28 October 2009 - 10:41 PM
i hope that my 4 door turns out just as lovely as that
... im loving the ghost flames too
cheers josh
#14 _beergut_
Posted 28 October 2009 - 11:39 PM
nice work m8t
#15 _greenmachine215_
Posted 29 October 2009 - 12:26 PM
and an excellent colour of choice, Most of the hatches gettin around S.A seem to be blue including mine.
do you take it out much of just keep it tucked away from harms way?
cheers
marc
#16 _BAILLIE_
Posted 29 October 2009 - 12:36 PM
Hope you get at least another 12 years worth of enjoyment cruising around in it.
Nice tough stance and I love the ghost flames too
How long 'till rego and what's your plan for the driveline?
#17 _galaxyhatch_
Posted 29 October 2009 - 07:59 PM
Thanks for the great responses,............. just makes me want to drive her now though!
Marc:
It is still tucked away as it isn't rego'd yet and my trimmer hasn't done the seats, door cards and carpet yet, so I am not displaying her in the flesh until it is all done and driving on the road. But, I was very tempted to just black out the windows and put her in the All Torry day coming up on the 8th, But Brian didn't want to show her until he had trimmed her.
So you will have to wait until the SMASA show and shine to see her in her full debut glory.
Ballie:
Reg should happen either Mid December this year or early Jan next year (waiting on Trimmer)
Cheers All.... and those that can...........drive em hard...........and to those that are still building.........the light gets closer and closer every day.
Cheers Dave
Sorry forgot to add,
Ballie,
Driveline will hopefully be Top loader and 9 inch...............I know...... not to original but it works.
Cheers dave
#18 _LXATIV_
Posted 30 October 2009 - 07:44 AM
I thankyou all for your kind comments. All I started out to do was to build a hatch to my standard of build and obviously my tastes, but to have subtle modern aspects added that don't detract to much from the old sckool look and feel. I am blown away that you all like it, considering the build standards on this site and that it was only done to how I wanted to build her (i'e not to a trophy sheet)
Subtle things I have changed besides the obvious is, no door locks or boot locks (keyless enty) electric windows, changed the Split folding seats into one bench folding to accomidate the child seat that will sit in the centre and anchor back the the tail gate catch (oh... and it will be trimmed the same as the rest of the car) and lastly a custom air-con job.
To answer some raised questions:
Mello92,
the tyre sizes are: rear, 265/50/15 on Magnum (x-bathurst Rims) 15x10's with 5" backspacing and fronts are 245/50/14 on CSA 14x7 rims.
I have a matching set of rims for each. Ie a full set of magnums (fronts are not polished yet) and I also have rear 14x8 CSA'a with 4" backspacing with brand new BF goodrich 265/50/14 tyres. As we all know it is very hard to find 265/50/14's arond these days so these will end up being my display tyres. Thus the reason there are BF's on the front and Yoky's on the rear. I ended up getting the rear tyres for nothing.
And 265/50/15's are easier to find.
P1030096.JPG 532.99K 70 downloads
Difference between the two rear tyres and rims
P1030096.JPG 532.99K 70 downloads
I did toy with the idea of 295/50/15's but the car looked like one of thoses cartoon funny cars with the biggest tyres possible under them.
P1020917.JPG 444.23K 86 downloads
Loving that hatch mate, looks awesome. Bet you cant wait to go for a burn after waiting for so long. I was just wondering where you had gotten your rims from? Definetly a fan of them. Look very 70's to me
#19 _galaxyhatch_
Posted 01 November 2009 - 05:42 PM
I ended up getting them from EBAY, and it took me 2-3 years to find a set, just lucky to have found them at all. You are correct with the vintage as they are Sampson Engineering Magnums made here in SA and they were mainly made for Bathurst. These wheels have had some track time and I am yet to find out who ran with them as the have sequential Bathurst serial numbers on them.
I am a big fan of period mags and you don't see too many nice Torry's with them on any more, they always show them with Convo pro's..
Cheers For the comments, nice to see there are still some jelly bean fans out there.
Dave.
#20
Posted 01 November 2009 - 05:53 PM
I like the hatch mate, love the engine bay. The flames are brilliantly done but I dunno if I like them against the flares. Beautiful car either way, I'm sure you'll have a lot of fun in it.
Tim
#21 _galaxyhatch_
Posted 02 November 2009 - 01:51 PM
Can't think of the name of the guy that sold them, he was here in SA, and he ended the auction on EBAY early as these wheels were going to an uncle up in Queensland. But he ended up changing his mind so I scored them instead.......bonus. They were a full set, 15x10's times 3 for the rear and 14x7 times 2 for the fronts.
He was also selling a set of detailed hotwires as well.
It was funny actually, my mate Brian from Cool Trimming has a meet and greet show every year and this years, the guy actually showed up and as I was talking to him and he recognised the wheels and he ended up being the guy I got them from.............but still cant remember his name.........arguhhh!!!!!!!!!!!
Anywho, thanks for the comments and I am so hanging out to go for a drive.
Cheers Dave
#22
Posted 02 November 2009 - 02:43 PM
#23 _doogs_
Posted 05 November 2009 - 08:33 AM
Good to see something a little different on an L31. It's not necessarily everyones choice and the flames are not my thing
but it is nice to have some variety, and you certainly did a great job.
Top job.
#24 _HatchmanSS76_
Posted 06 November 2009 - 10:07 AM
All the work you've done looks top notch. Looking forward to seeing it out and about at some stage.
#25 _Torrie_Man_
Posted 06 November 2009 - 10:45 PM
2 user(s) are reading this topic
0 members, 2 guests, 0 anonymous users