


haydens supercharged 78 UC
Started by
_V6 UC_
, Dec 10 2009 08:31 PM
261 replies to this topic
#51

LXCHEV
-

- Members
-

- 3,551 posts
Lotsa Posts!
- Name:Brett
- Location:Melbourne
- Car:'76 LX - 383 Chev
- Joined: 08-November 05
Posted 18 August 2010 - 02:50 PM
Awesome conversion, the blown V6 looks nice. Great quarter mile time too, I'm impressed
#52
_BlownUC202_
_BlownUC202_
-

- Guests
Posted 19 August 2010 - 02:59 PM
ill have to have a look when i get home from work on monday.
#53
_V6 UC_
_V6 UC_
-
- Guests
Posted 23 August 2010 - 10:46 PM
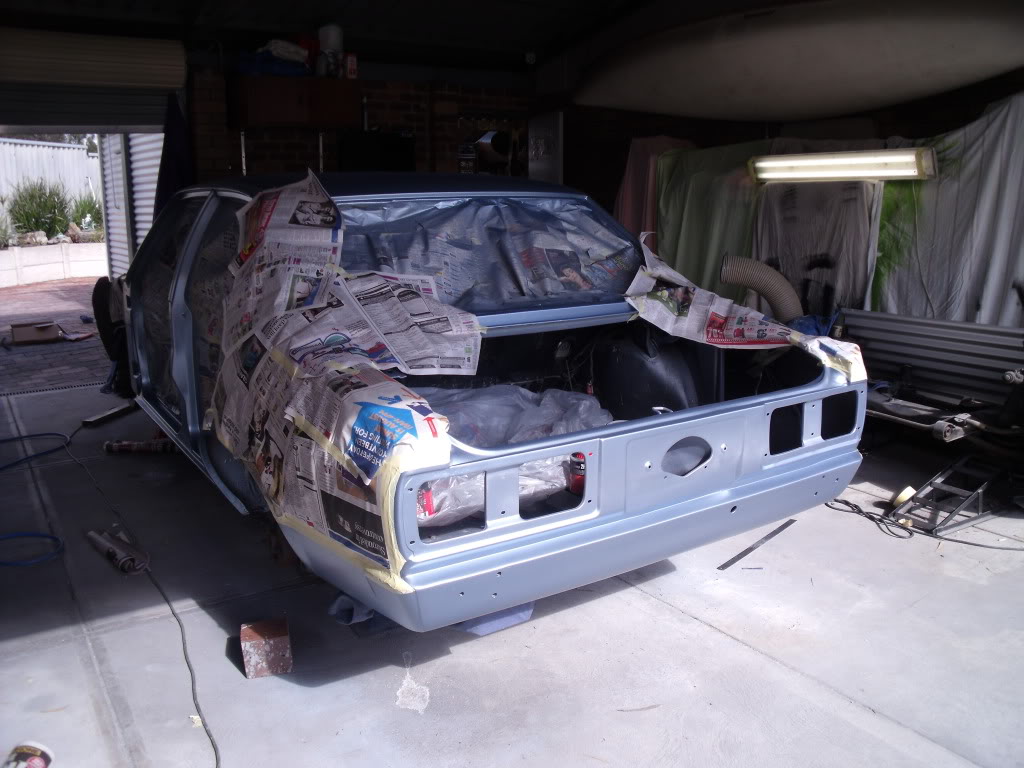
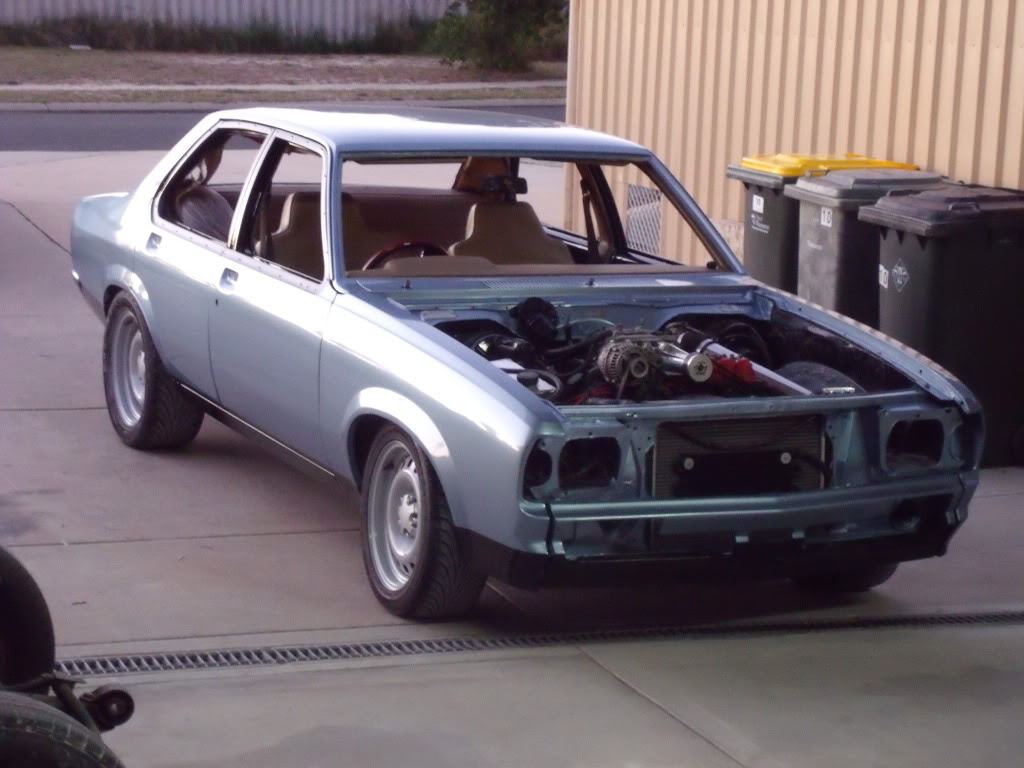
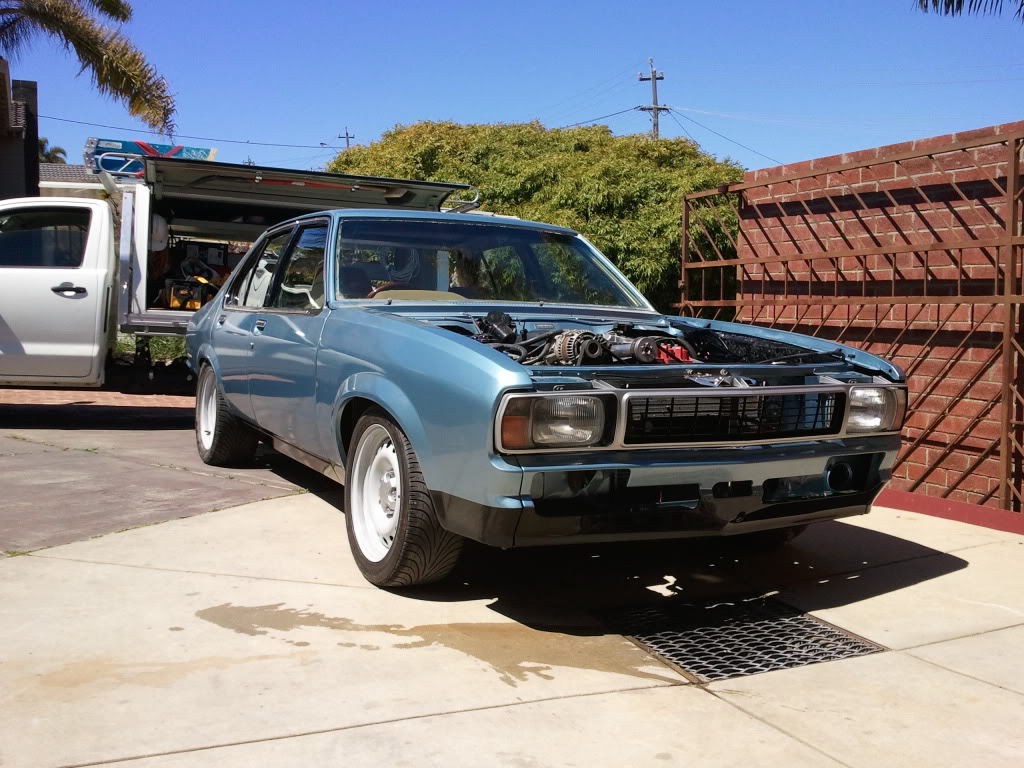
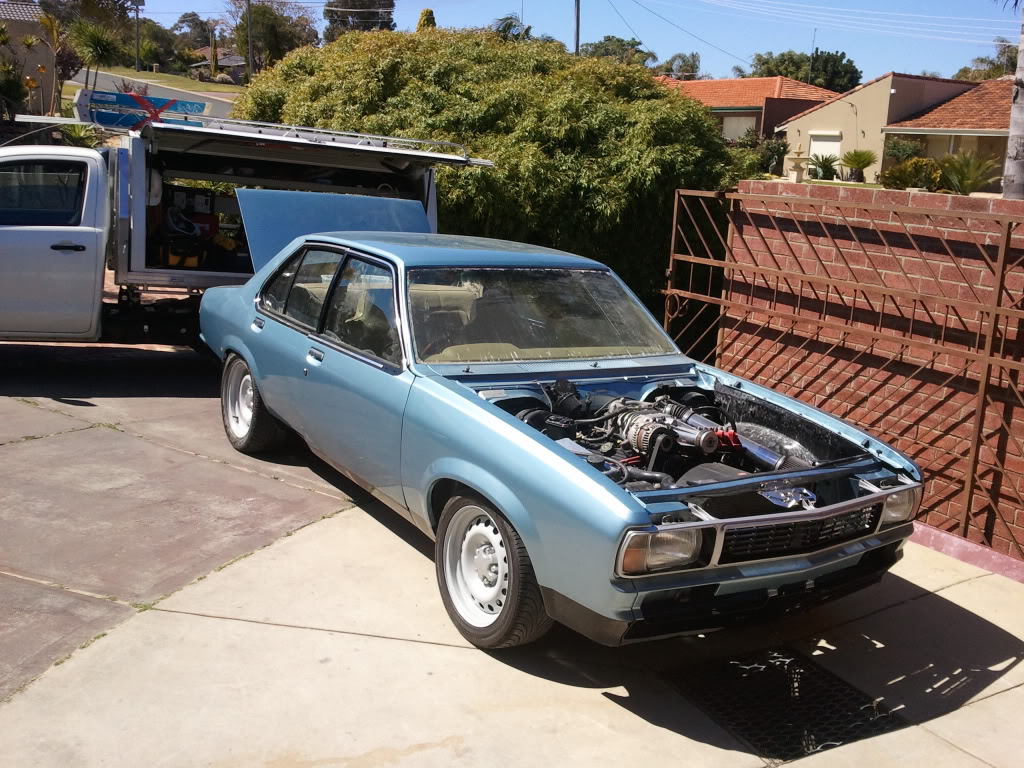
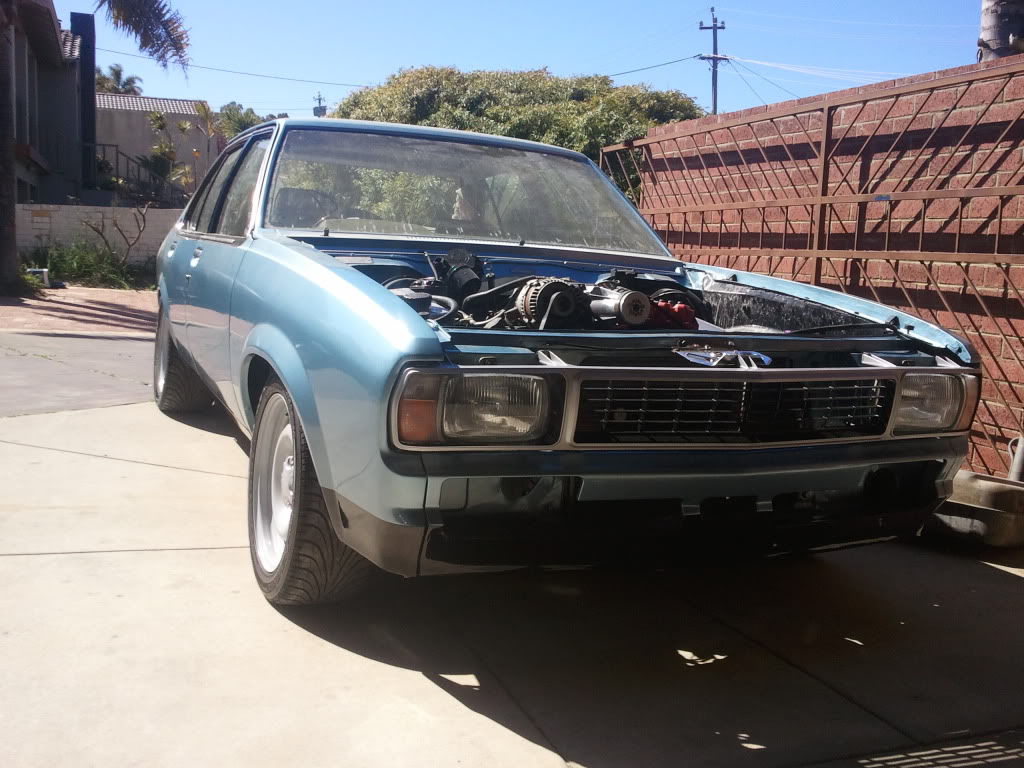
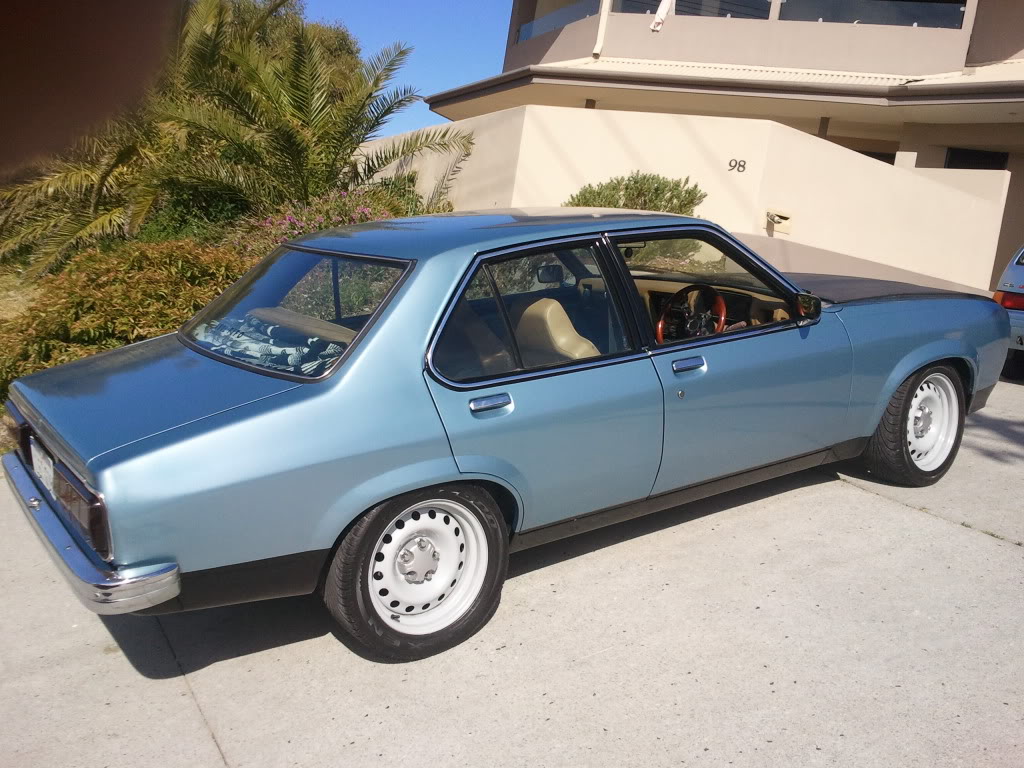
finally got it painted  after a shitload of hours and a few extra helping hands its ready for reassembly(except bonnet)
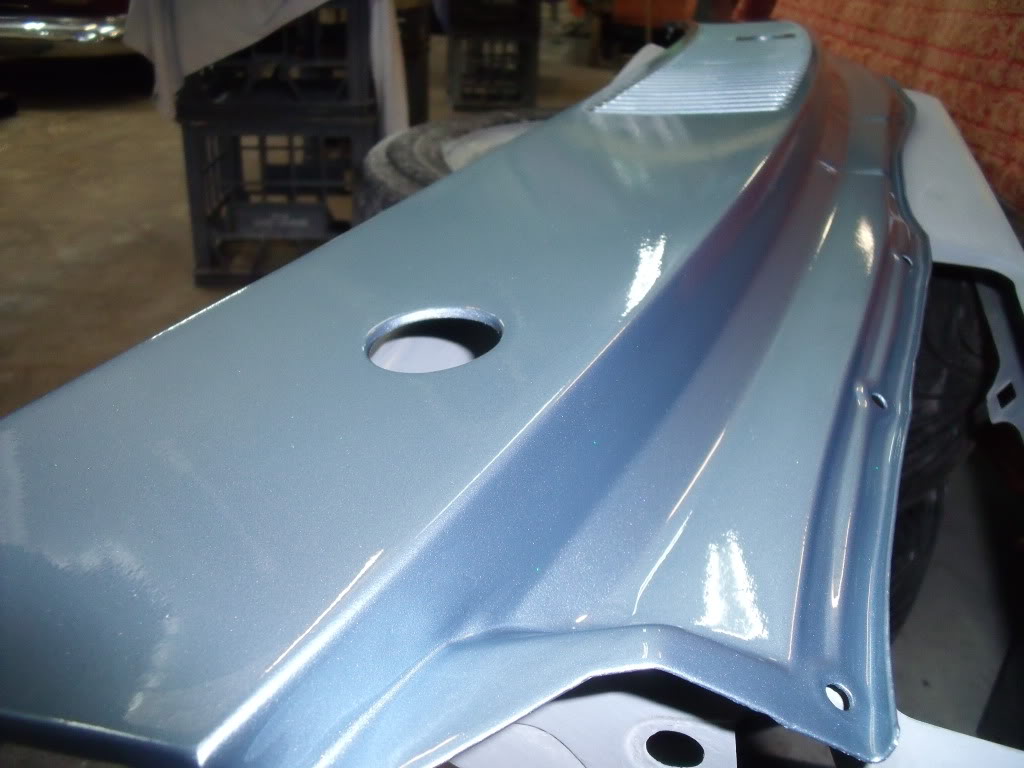
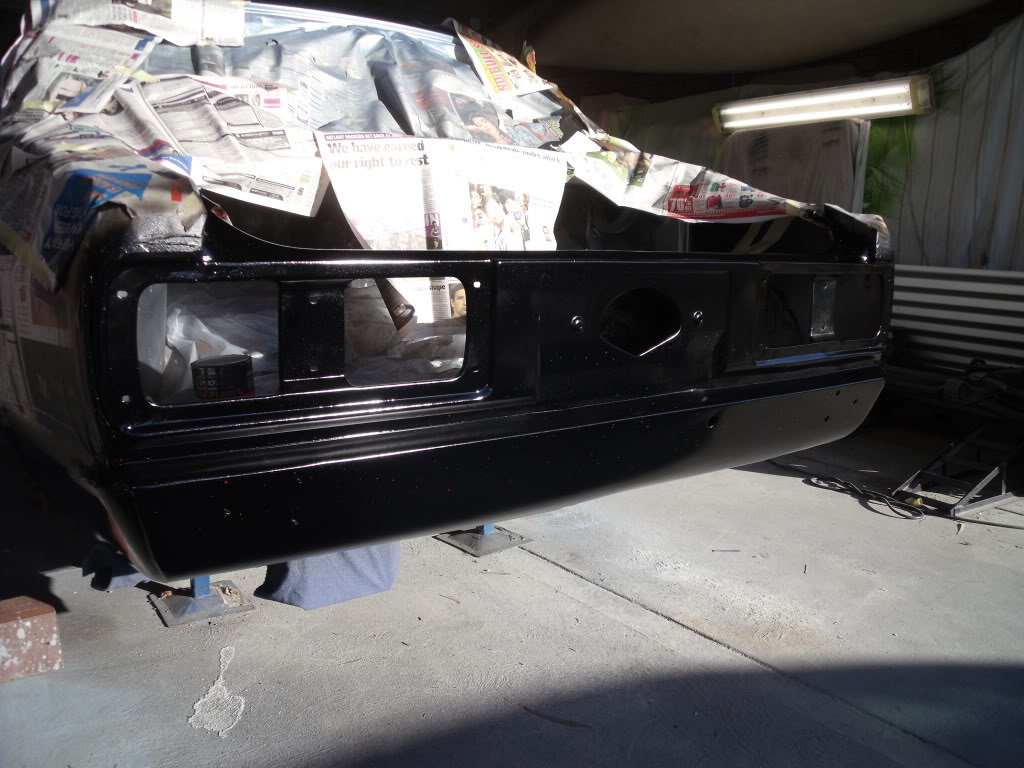
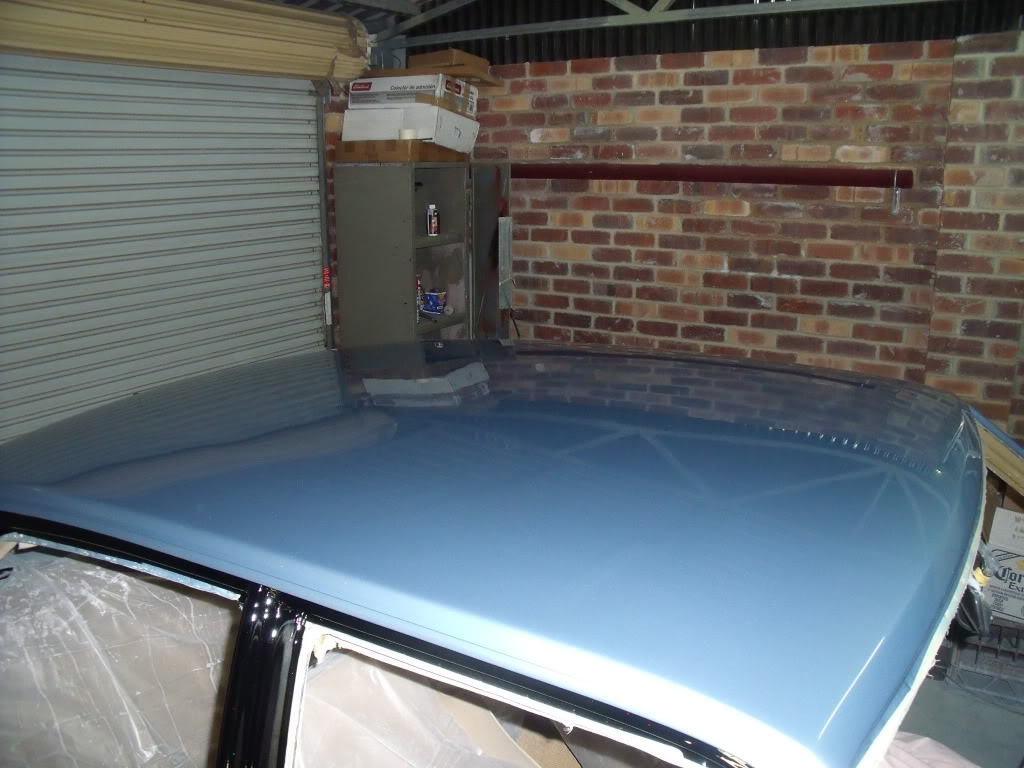
opted for 2k with base coats of the bluw and black then clearing over the lot. i added pearl to the both the blue and black and shows up really nice in the sun.
masked up and ready for primer


primed and ready for rubing back
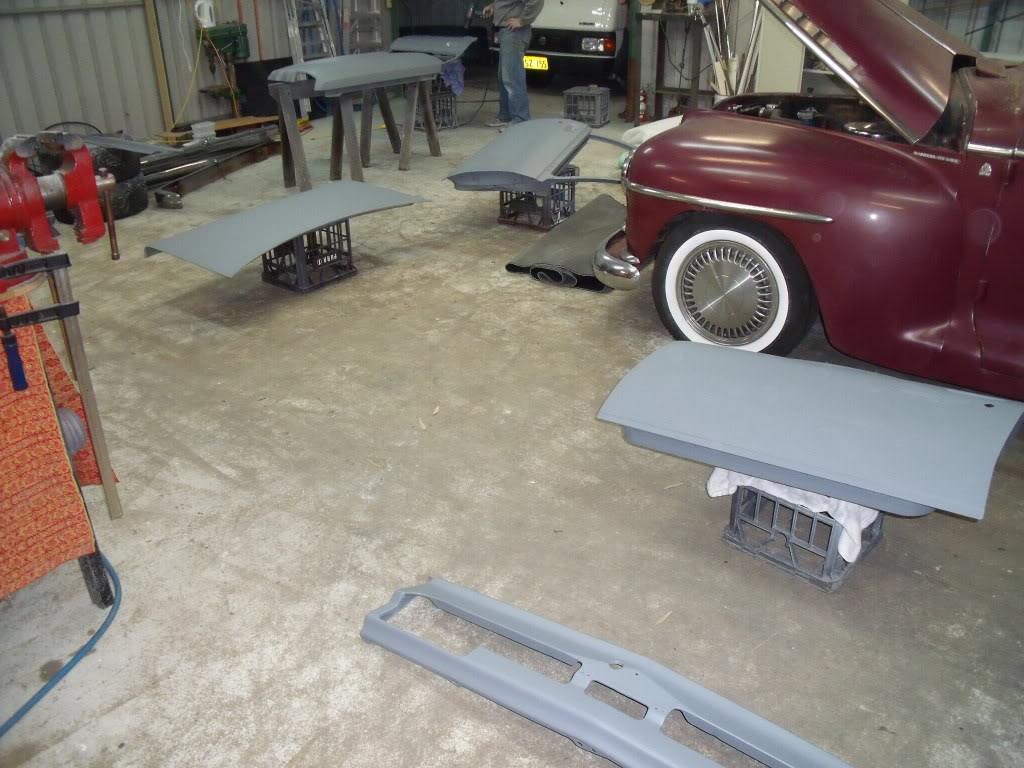
my uncle did alot of the spraying, not bad for a chippy
sprayed up all the door jambs first and the cowl vent to get an idea of how well the paint was going to go down, turned out to be alot easier than we thought with the coulour differences not being noticeable.
I thought that the car would have to be sprayed with the doors on etc. to get the metallic to all look the same, but it sprayed the same everytime.
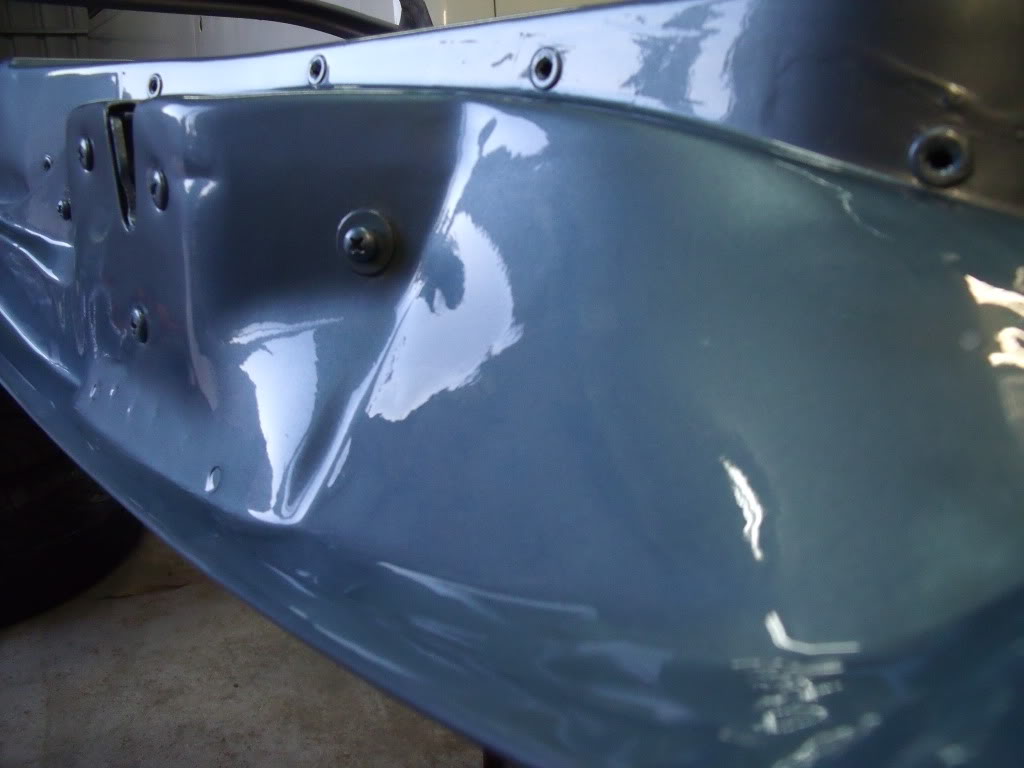
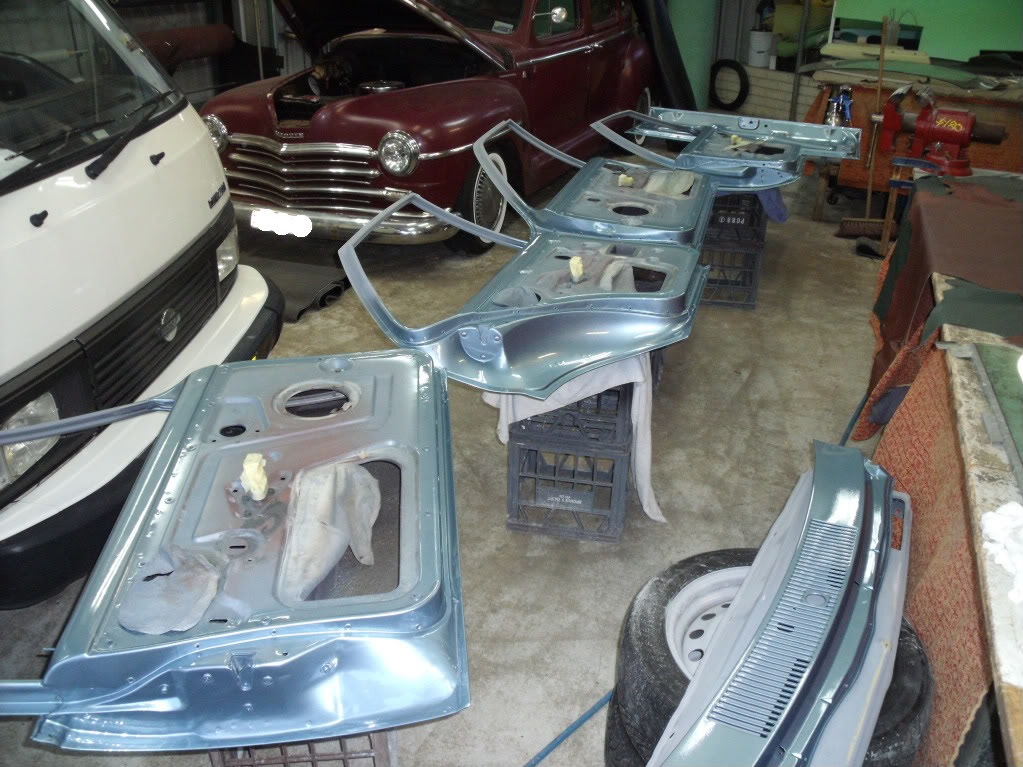
after a shitload of hours and a few extra helping hands its ready for reassembly(except bonnet)opted for 2k with base coats of the bluw and black then clearing over the lot. i added pearl to the both the blue and black and shows up really nice in the sun.
masked up and ready for primer
primed and ready for rubing back
my uncle did alot of the spraying, not bad for a chippy
sprayed up all the door jambs first and the cowl vent to get an idea of how well the paint was going to go down, turned out to be alot easier than we thought with the coulour differences not being noticeable.
I thought that the car would have to be sprayed with the doors on etc. to get the metallic to all look the same, but it sprayed the same everytime.
#54
_V6 UC_
_V6 UC_
-
- Guests
Posted 23 August 2010 - 10:55 PM
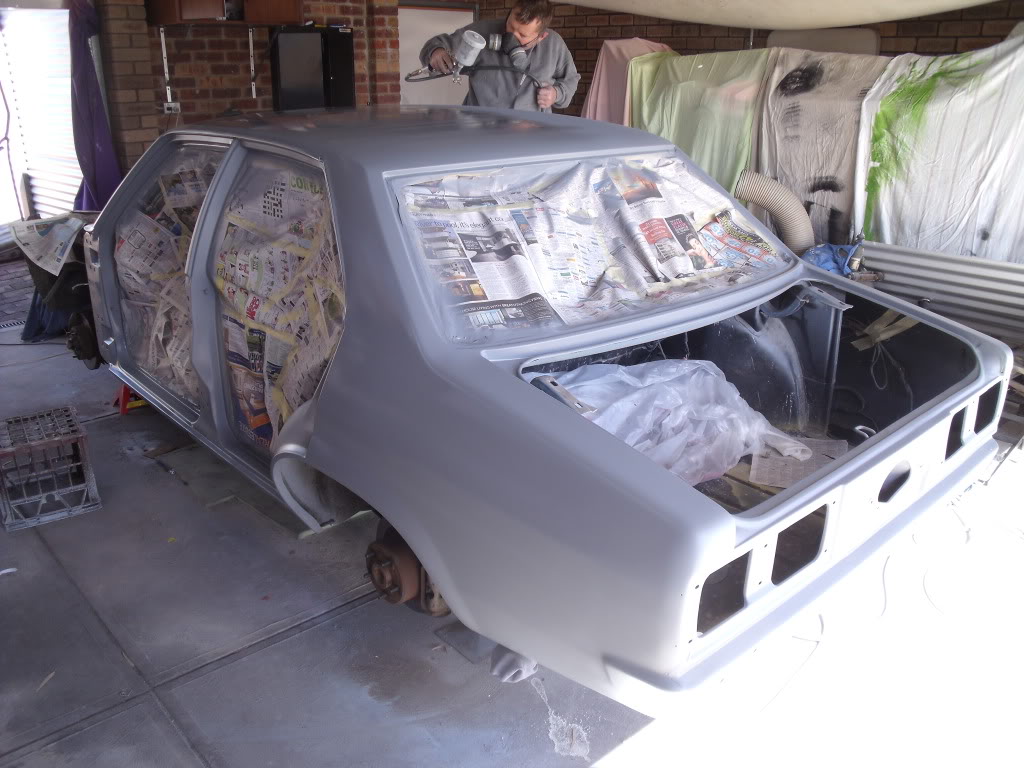
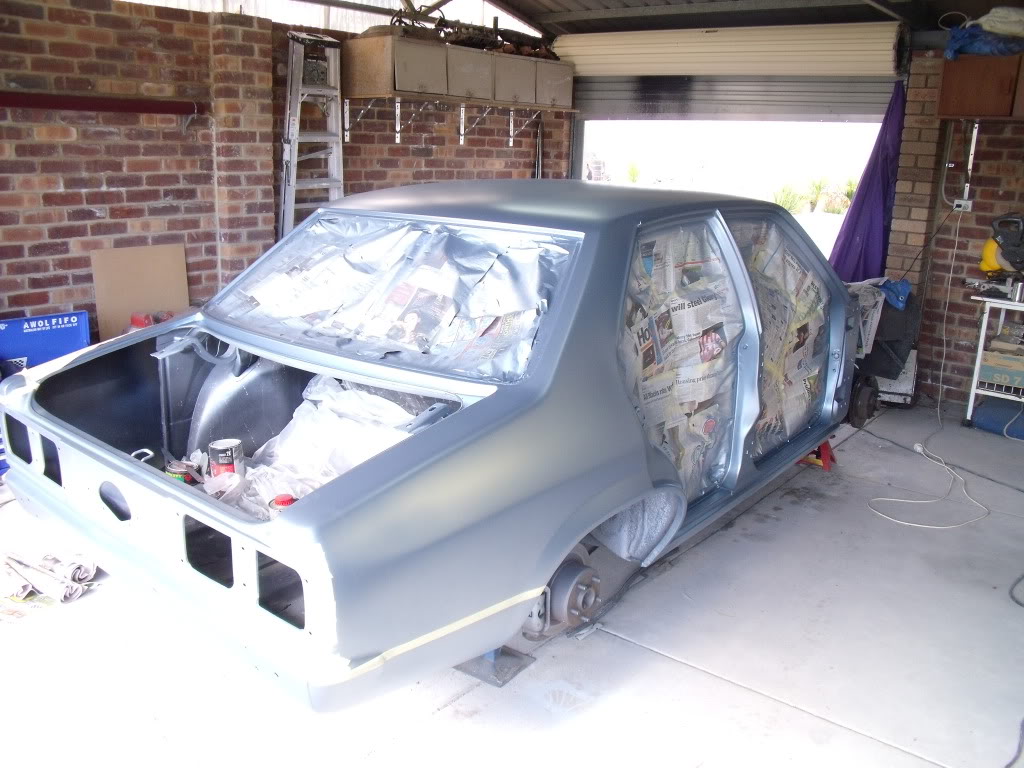
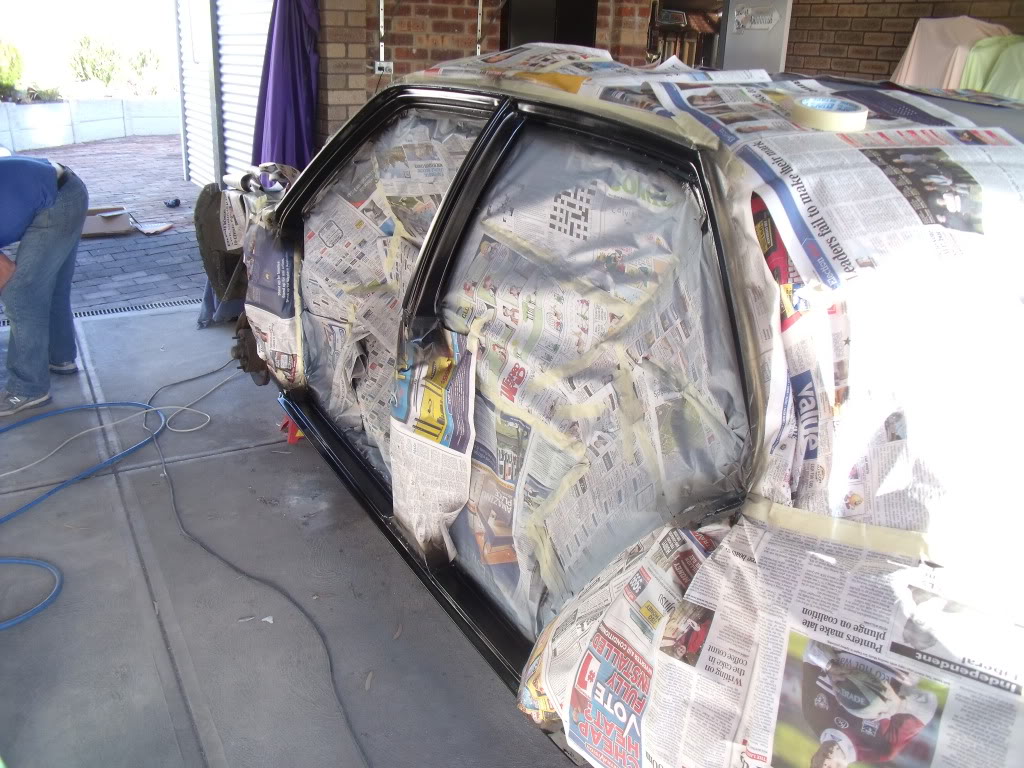
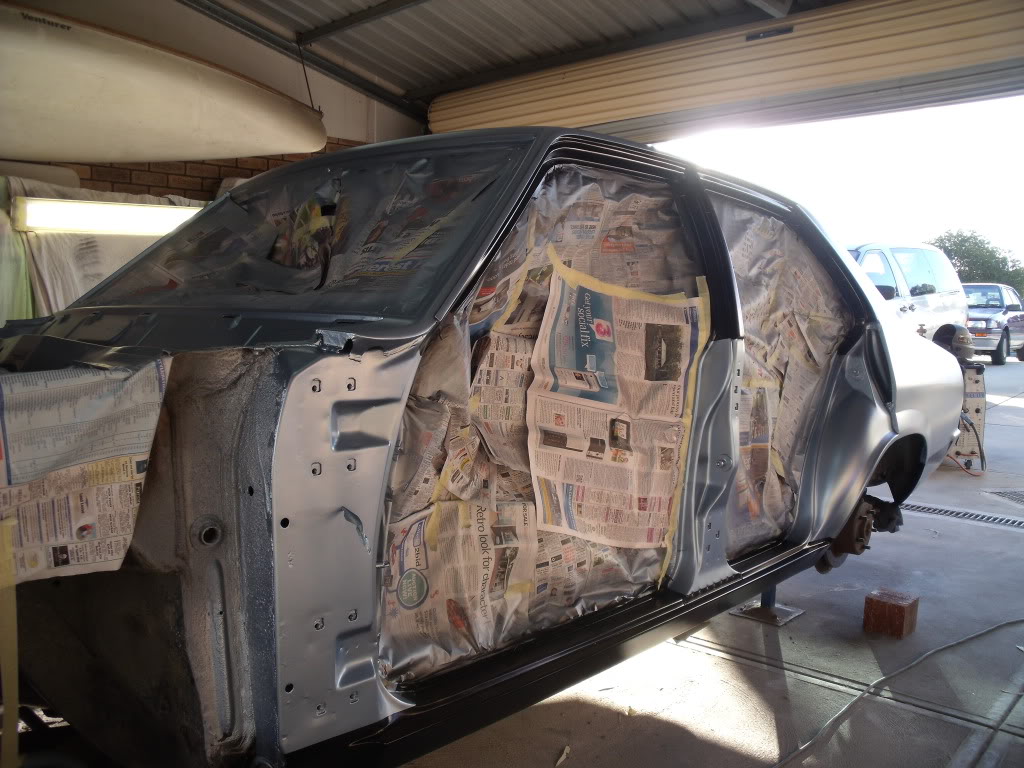
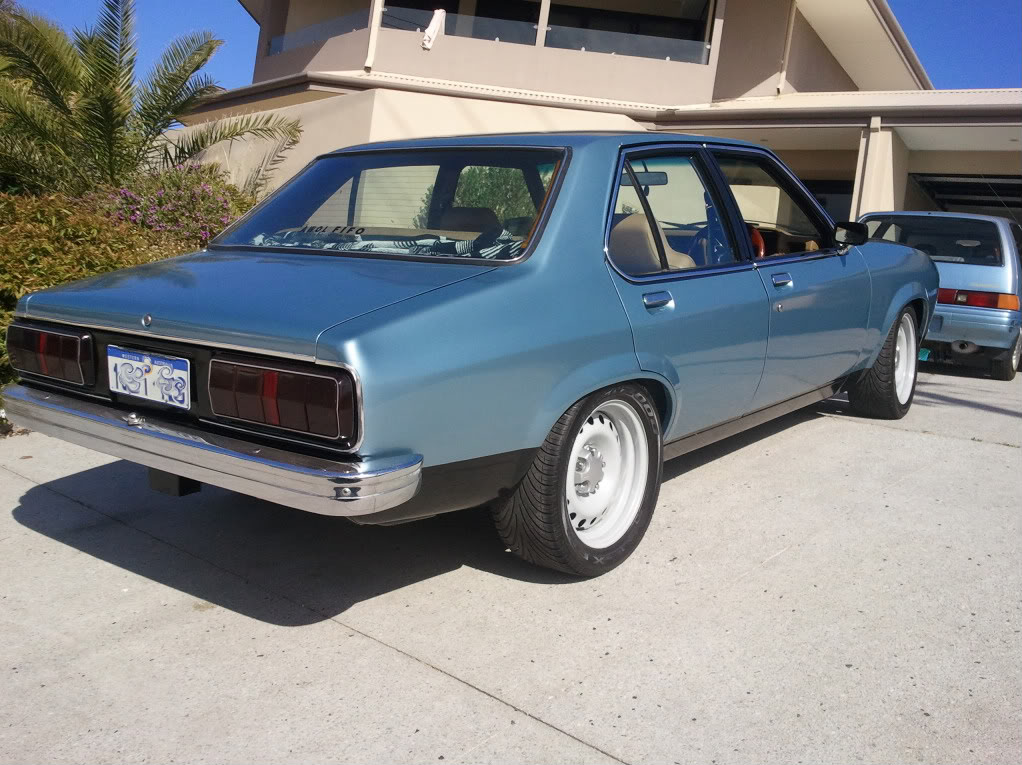
base coat down, now to mask up everywhere for the blackouts
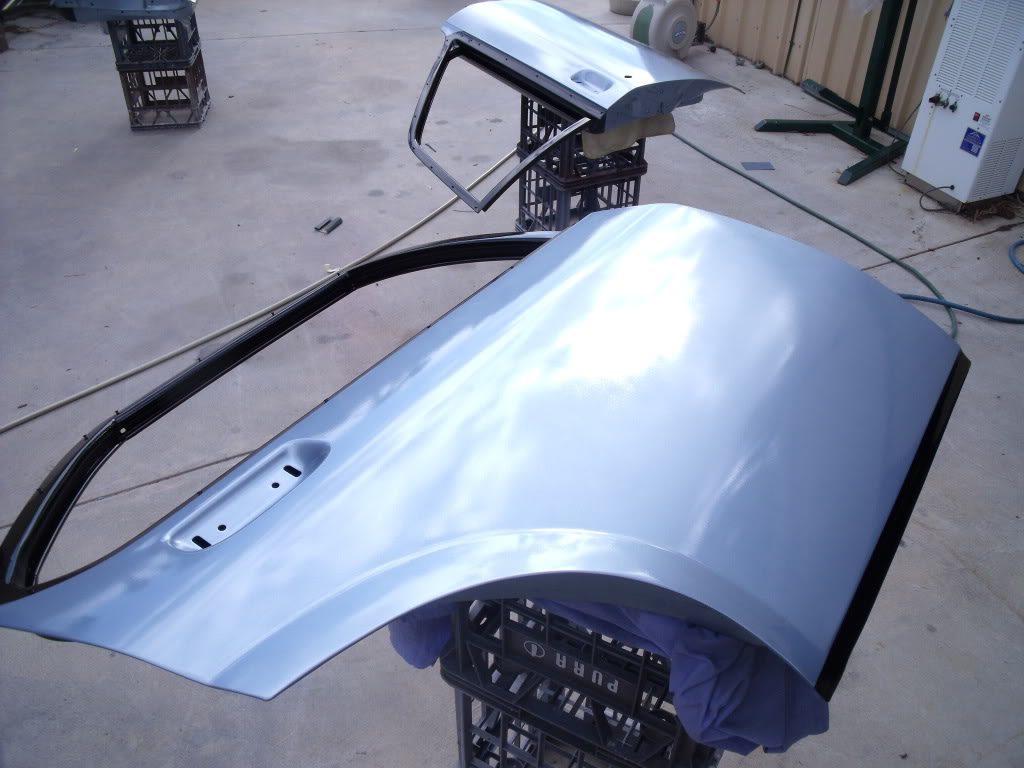
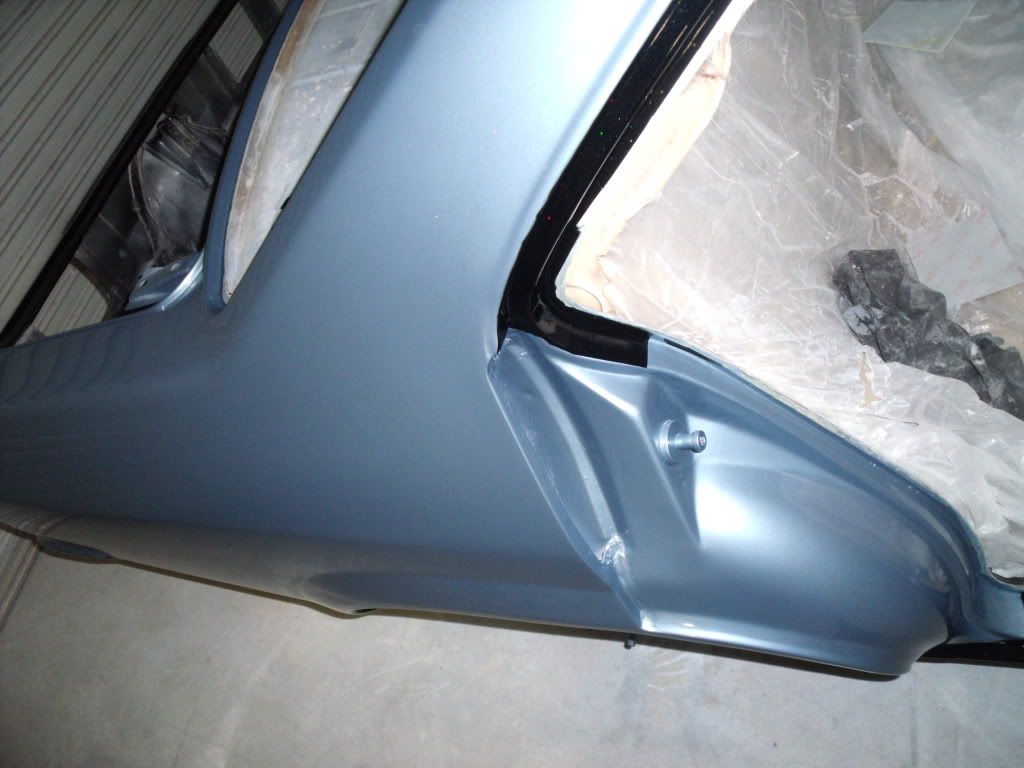
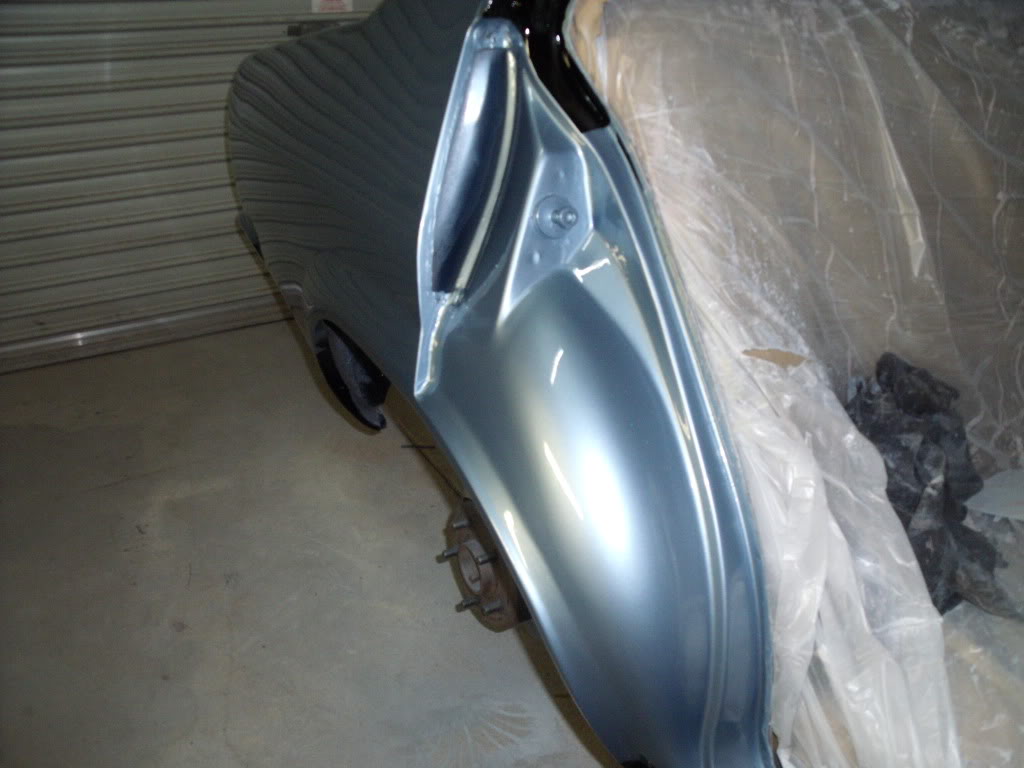
the doors came out awsome, dead straight, i put alot of time into blocking them to get em nice
il put some pics up later looking down the car when its assembled so u can see how it looks
blackouts sprayed on body
u can see the pearl showing up in the sun
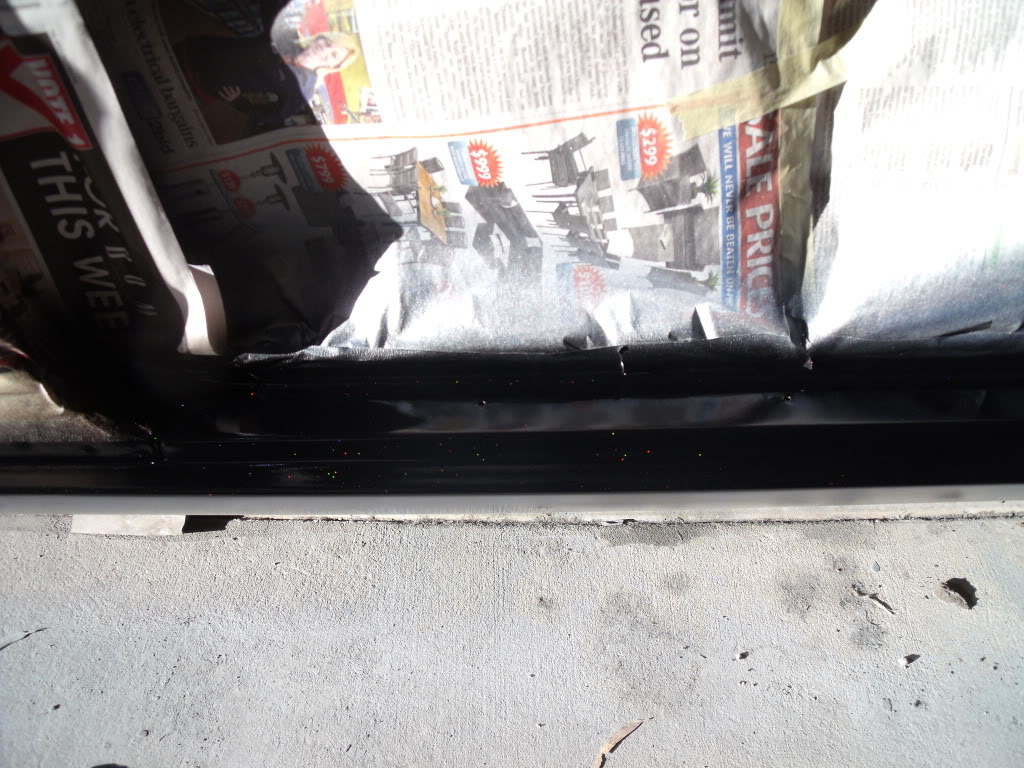
clearcoats on
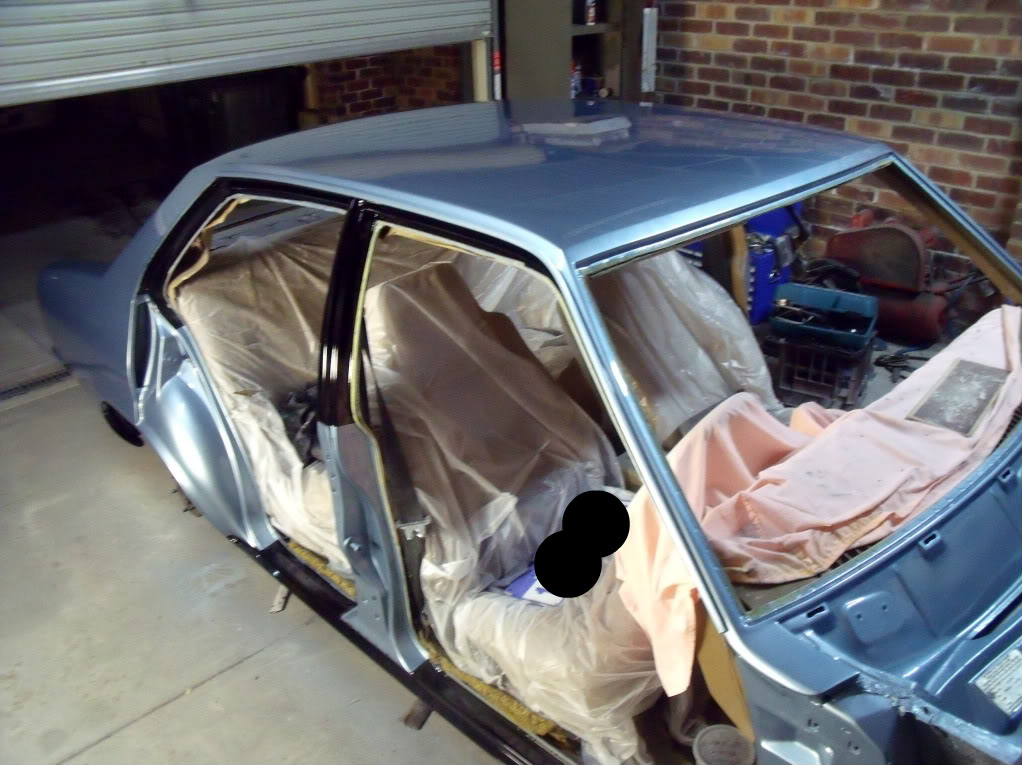
theres a few runs in the clear for the first coat which was a bit heavy but i should be able to block and buff them out.
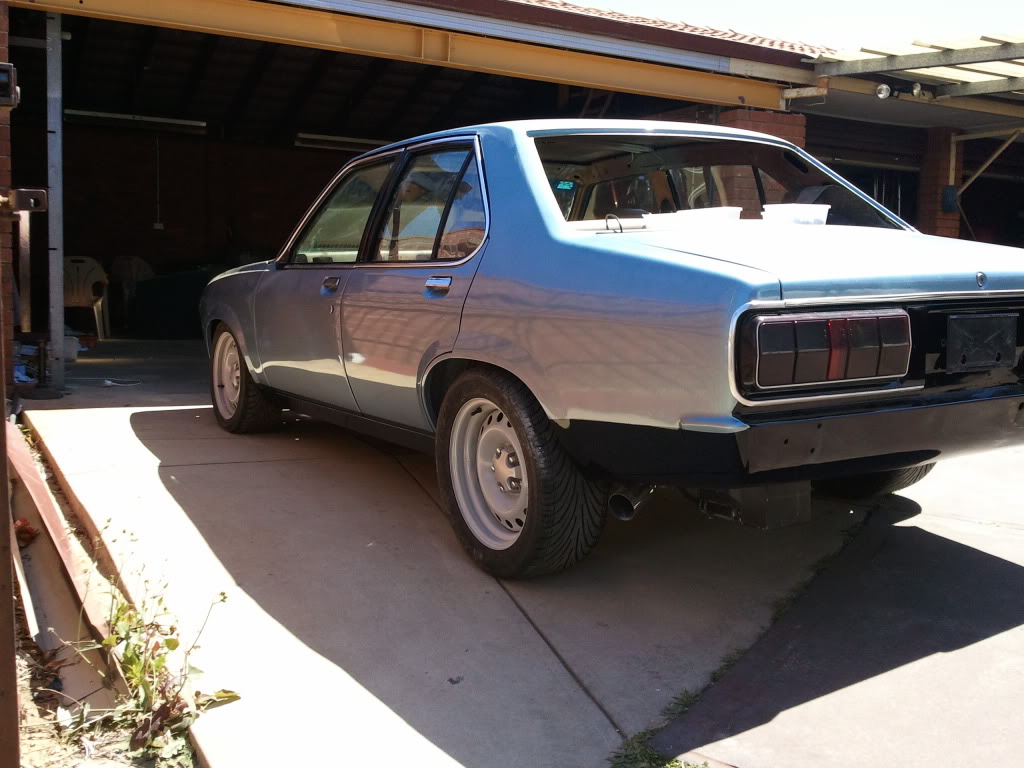
Now comes the fun part of reasembling everything. Turned out pretty good i think for my first attempt at doing a respray, my uncle has done a couple cars but still, a good job for a sheety and a chippy i reckon
the doors came out awsome, dead straight, i put alot of time into blocking them to get em nice
il put some pics up later looking down the car when its assembled so u can see how it looks
blackouts sprayed on body
u can see the pearl showing up in the sun
clearcoats on
theres a few runs in the clear for the first coat which was a bit heavy but i should be able to block and buff them out.
Now comes the fun part of reasembling everything. Turned out pretty good i think for my first attempt at doing a respray, my uncle has done a couple cars but still, a good job for a sheety and a chippy i reckon
#55
_BlownUC202_
_BlownUC202_
-
- Guests
Posted 23 August 2010 - 11:02 PM
not bad mate did u end up using my headlight surround?
#56
_V6 UC_
_V6 UC_
-
- Guests
Posted 23 August 2010 - 11:06 PM
in the end i fixed mine, it was going to be a bit too much work to fit the one that u sent me cos of the way it was removed, thanks anyway, it turned out pretty good, bit of dolly work and i got it all straight
#57
_BlownUC202_
_BlownUC202_
-
- Guests
Posted 23 August 2010 - 11:09 PM
Yeah sorry about that i was looking at my car and the wreck and by the looks of it the ones on the wreck had been replaced before thats why it was so hard to remove. Ill have a look at that trim for you in the morning 2.
#58
_BlownUC202_
_BlownUC202_
-
- Guests
Posted 25 August 2010 - 07:23 PM
Ok i got two boot trims one is dented and kinked the other is good apart from a slight bend but it hasnt got any kinks or dents.
#59
_studricho_
_studricho_
-
- Guests
Posted 25 August 2010 - 07:39 PM
The paint job looks smick from what I can see for your first paint job.
Very nice work. Makes me want to pick up a paint gun now.
Very nice work. Makes me want to pick up a paint gun now.
#60
_V6 UC_
_V6 UC_
-
- Guests
Posted 25 August 2010 - 09:33 PM
im just gonna roll with wat i got for a bit jason, once i got the car back together and have a good look at it, il decide. Also its hard being so far away and the trim isnt something u can really post. Some dust settled in the clear over night :( and there is also a couple runs in the clear which sucks, im hoping it can buff out. Lining the doors up is a royal pain in the arse any1 got any tips??
#63
_Martin_
_Martin_
-
- Guests
Posted 29 August 2010 - 02:16 PM
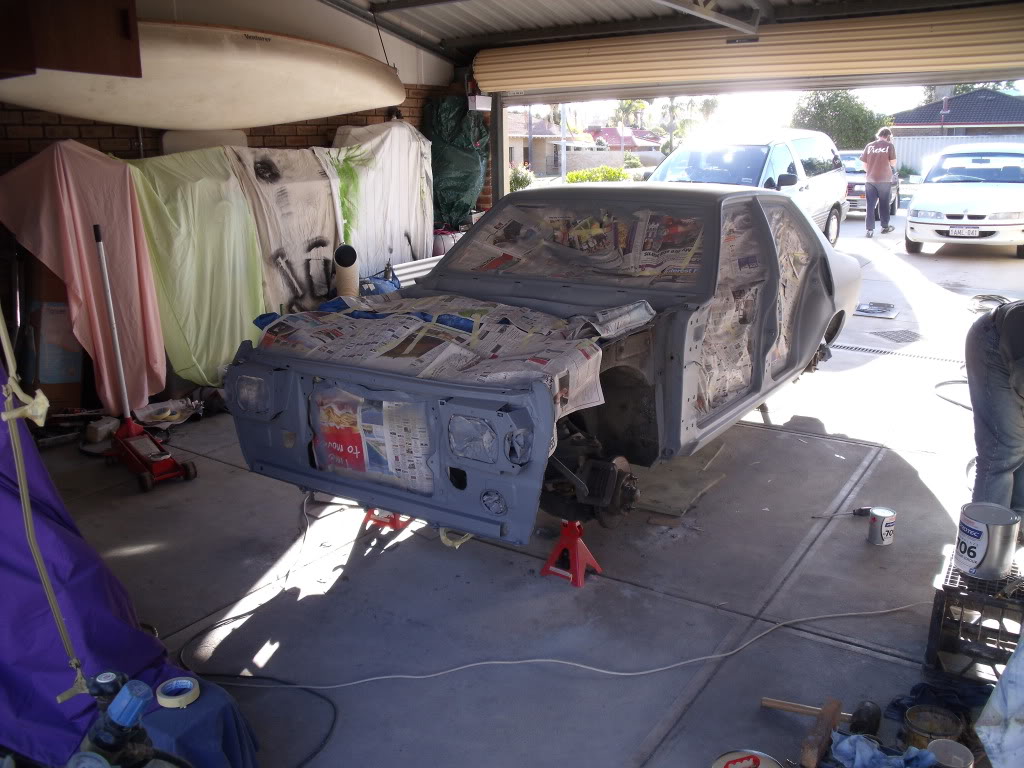
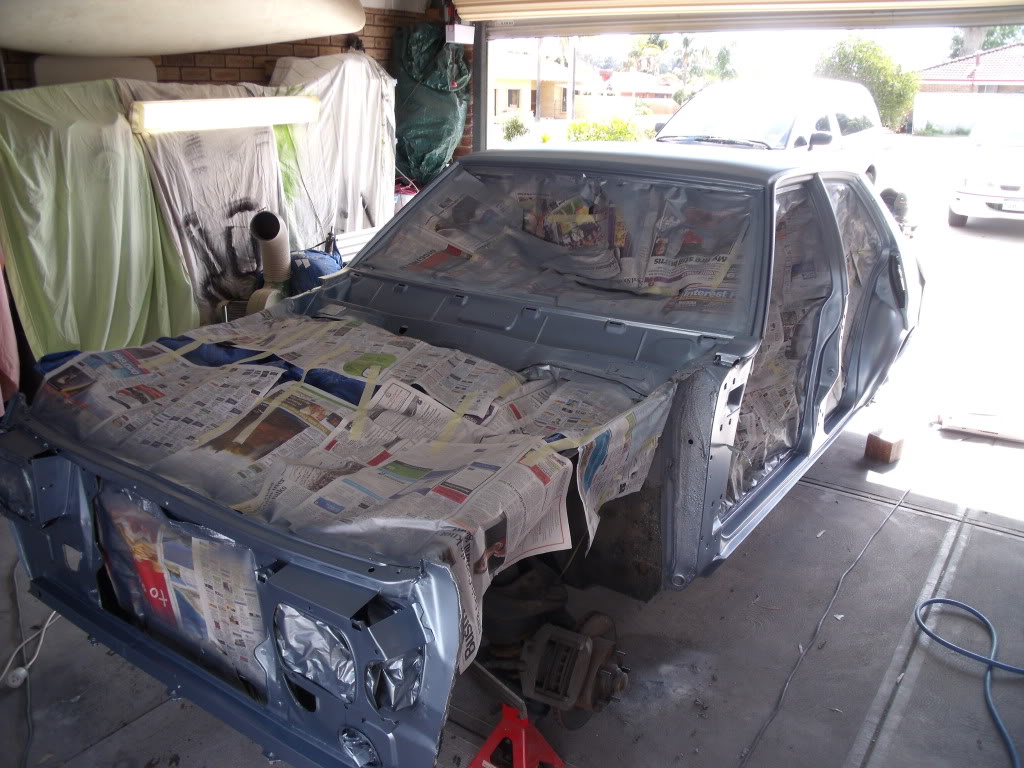
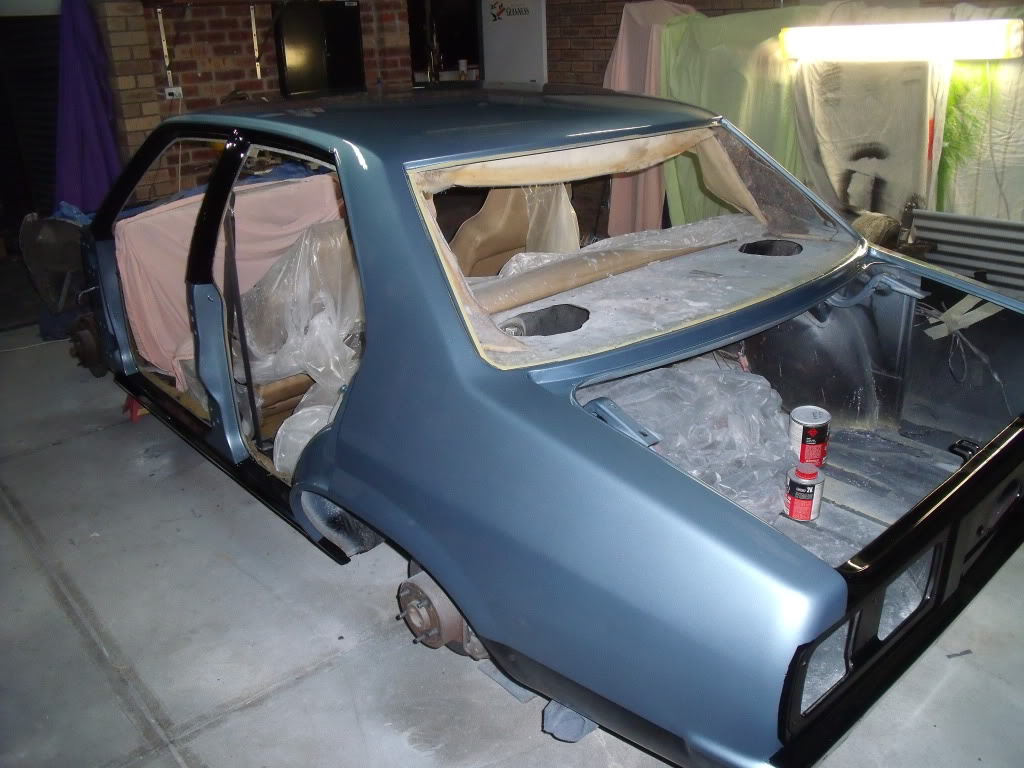
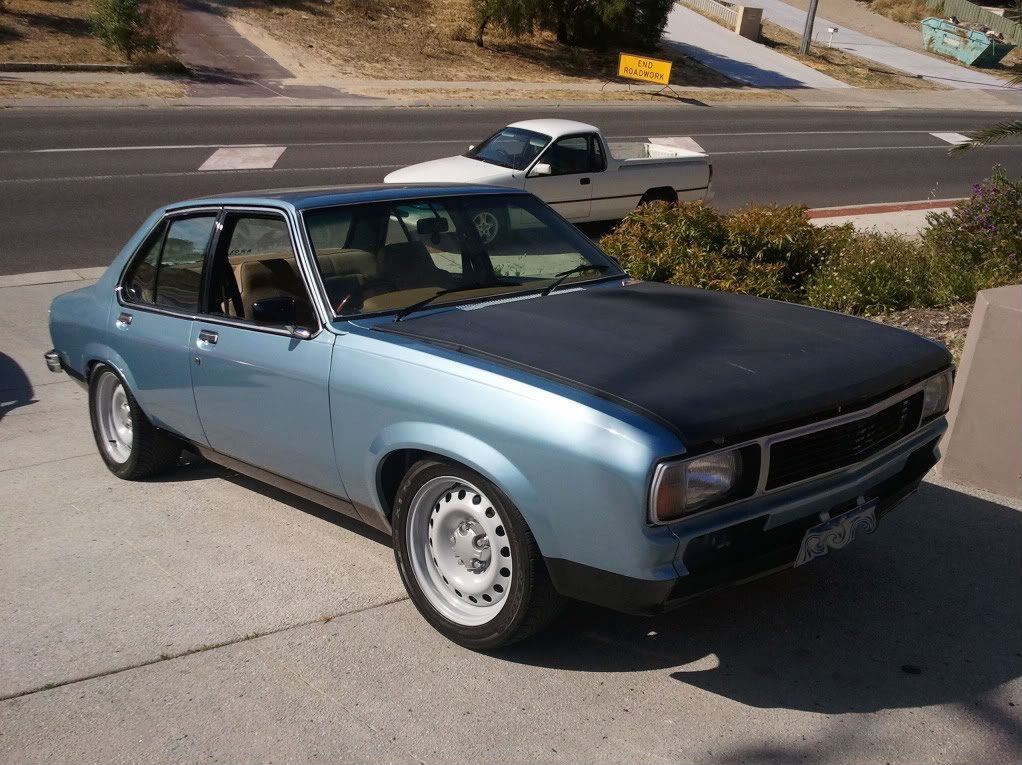
mock up, still needs gaps set properly
Looks good mate how much longer until you think you will have it back on the road? Im looking forward to seeing some pics with the grill, bumper, bonnet etc.
Cheers
Martin
#64
_V6 UC_
_V6 UC_
-
- Guests
Posted 29 August 2010 - 03:32 PM
i still have to paint the bonnet, but shouldnt be too long, will just do a bit after work each day
mock up, still needs gaps set properly
Looks good mate how much longer until you think you will have it back on the road? Im looking forward to seeing some pics with the grill, bumper, bonnet etc.
Cheers
Martin
#65
Heath
 View Garage
-

- Administrators
-
- 18,378 posts
I like cars.
- Name:Heath
- Location:Eastern Suburbs, Melbourne
- Car:Heavily Modified UC Sunbird Hatchback
- Joined: 07-November 05
View Garage
Posted 29 August 2010 - 07:35 PM
Looks a million bucks to me already.
#66
_V6 UC_
_V6 UC_
-
- Guests
Posted 29 September 2010 - 05:56 PM
update, door glass and all new seals in(only took rares spares 3 weeks to sort their shit out) new headlining goes in tomoro then i can fit the windscreens
ive left the bumpers off cos it still needs to be buffed and have a few runs cleaned up
ive left the bumpers off cos it still needs to be buffed and have a few runs cleaned up
#68
_V6 UC_
_V6 UC_
-
- Guests
Posted 08 November 2010 - 07:45 PM
some goddies came in the mail today
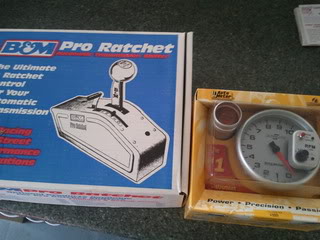
loving the $US to $AU exchange atm.
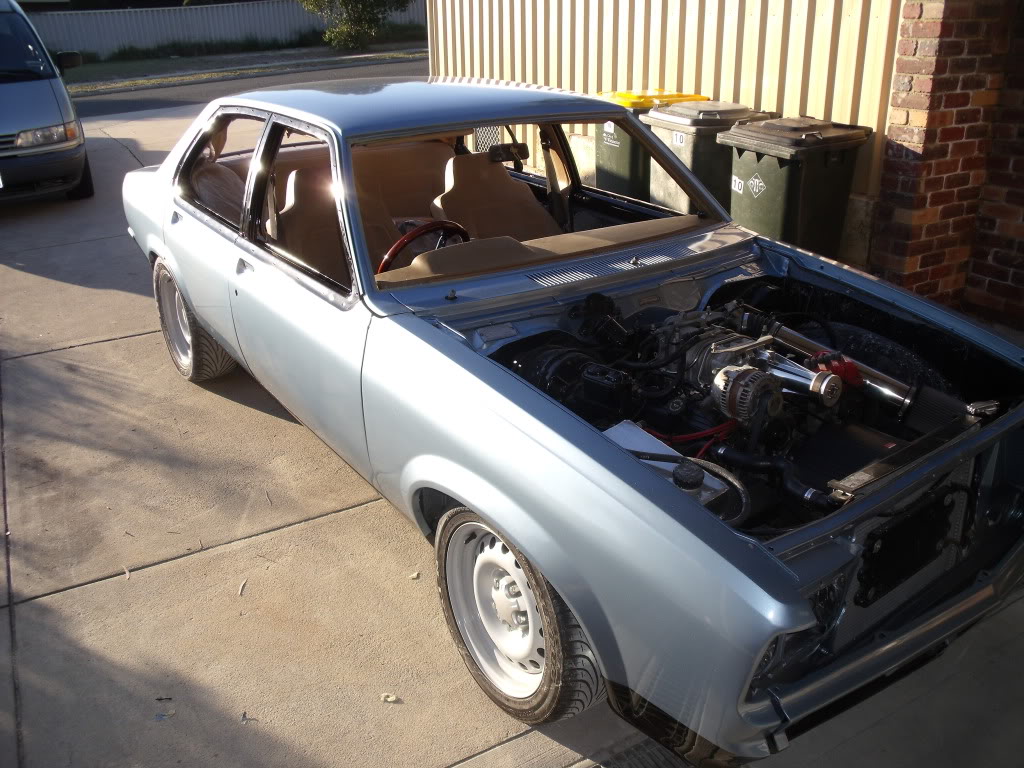
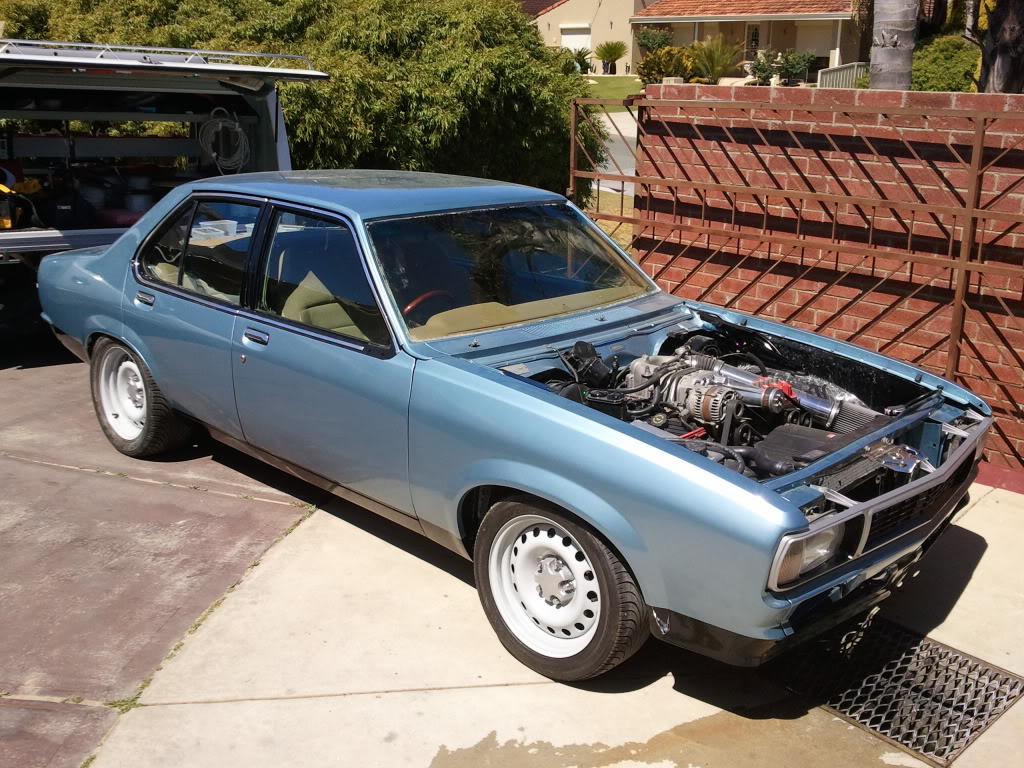
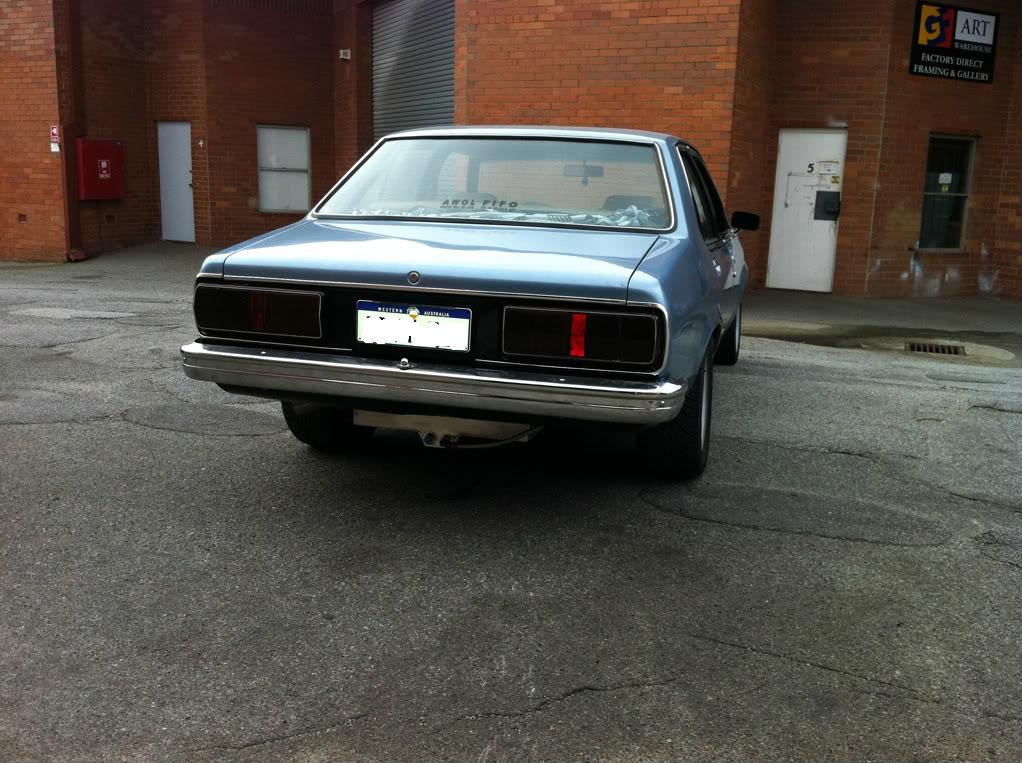
car is back on the road, ive fitted a bosch 044 and finally have been driving it my mates just gonna repair the bonnet now, too hard trying to source one, theyre rare as rockinghorse shit.
couple pics of it in the sun
loving the $US to $AU exchange atm.
car is back on the road, ive fitted a bosch 044 and finally have been driving it
my mates just gonna repair the bonnet now, too hard trying to source one, theyre rare as rockinghorse shit. couple pics of it in the sun
#70
_V6 UC_
_V6 UC_
-
- Guests
Posted 08 November 2010 - 11:32 PM
i would still like to have a look at the bonnet josh, i posted this before i called u. Could you please send pics, thanks
#71
_gen3torrie_
_gen3torrie_
-
- Guests
Posted 09 November 2010 - 12:30 AM
yeah i will take a pic tomorrow morning when i get back from work
#72
_dickiep_
_dickiep_
-
- Guests
Posted 09 November 2010 - 10:33 AM
really liking this project mate. well done. i'll hopefully be using the same wheels on my lc!

#74
_youngy_11_
_youngy_11_
-
- Guests
Posted 17 November 2010 - 08:12 PM
Very nice Hayden. Great conversion, I have similar plans would love to see your car, shame you live 3000kays away.
#75
_V6 UC_
_V6 UC_
-
- Guests
Posted 15 August 2011 - 01:29 PM
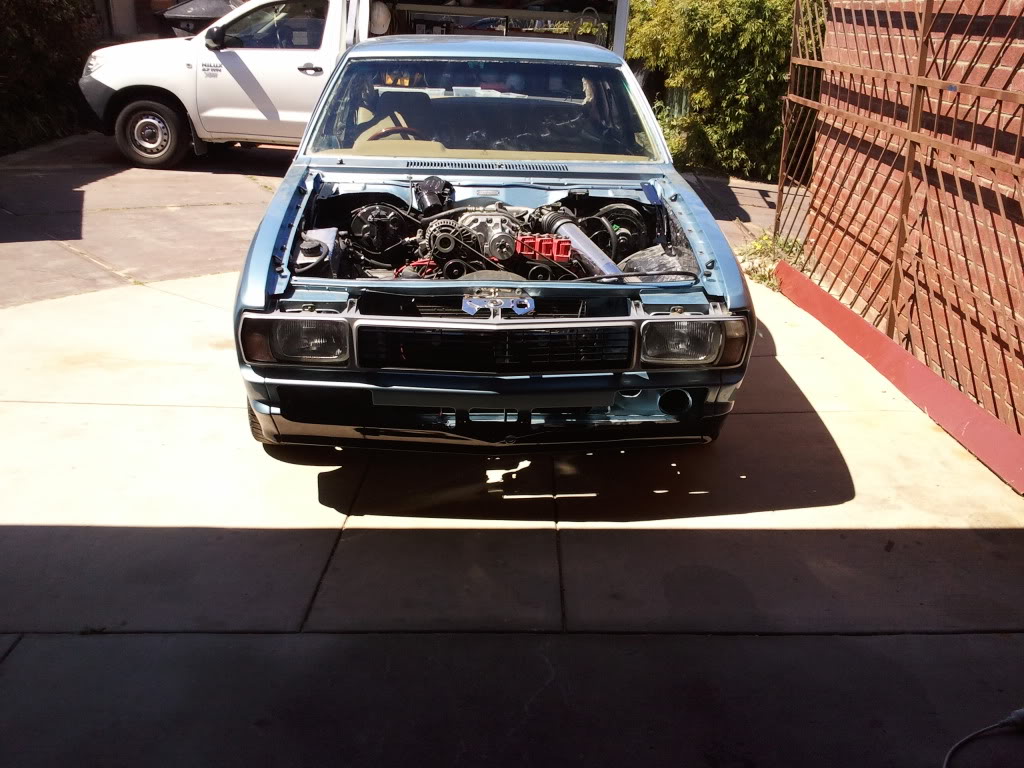
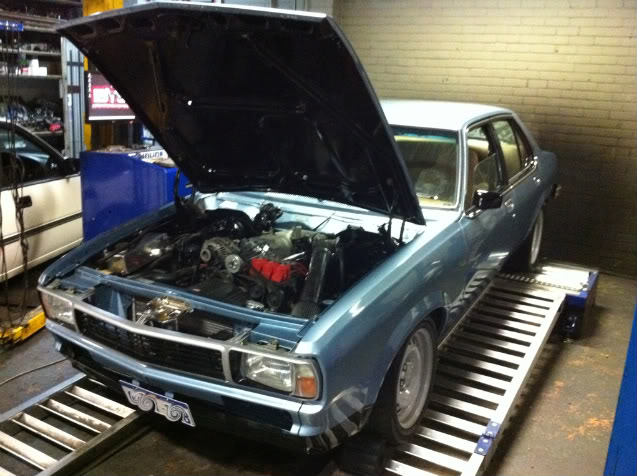
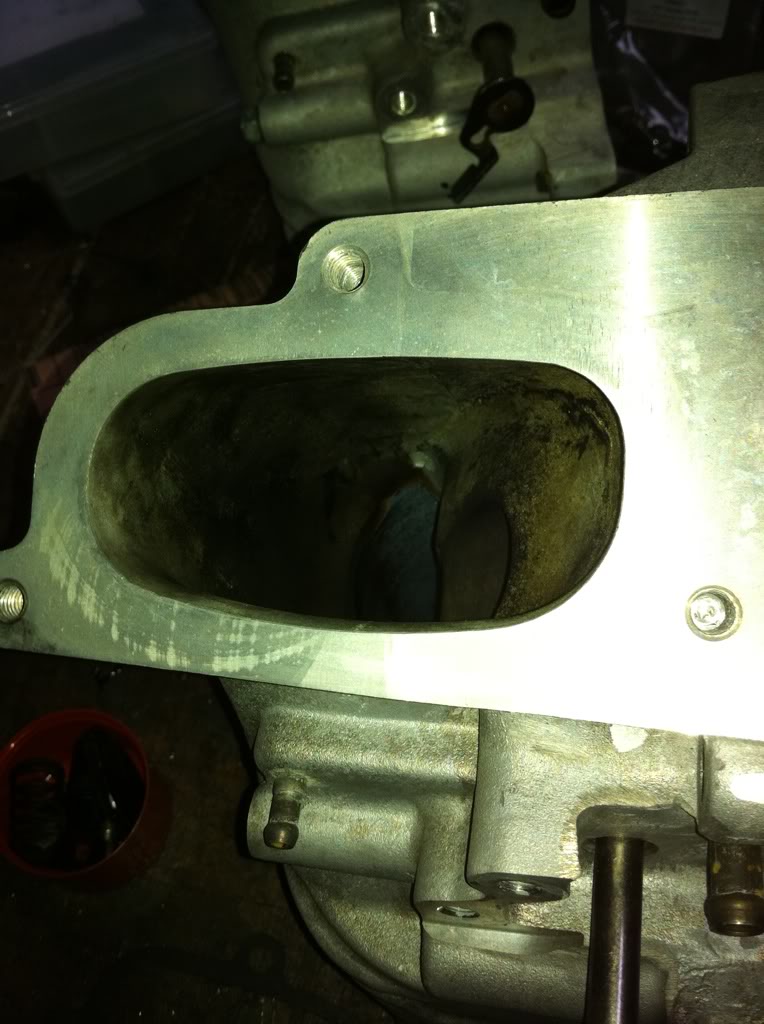
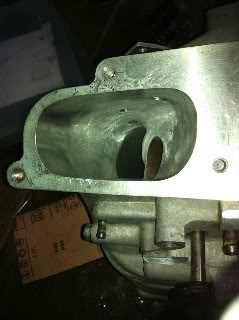
time for a bit of an update, its been a while, currently got the blower and intake manifold off, porting all of it, has come up real good. Im going to b using an 85mm ls1 throttle body, and carbon fibre BYE ubend into the back of the blower, which is also going to be port matched and has been made as a one off, its massive
I put an 044 inplace of the vl turbo pump, this played with the fuel in the tune a bit, made it run a little rich but we run it up on the dyno anyway to get a comparisonj, still made 251hp and 522nm torque at the wheels
blower before and after porting
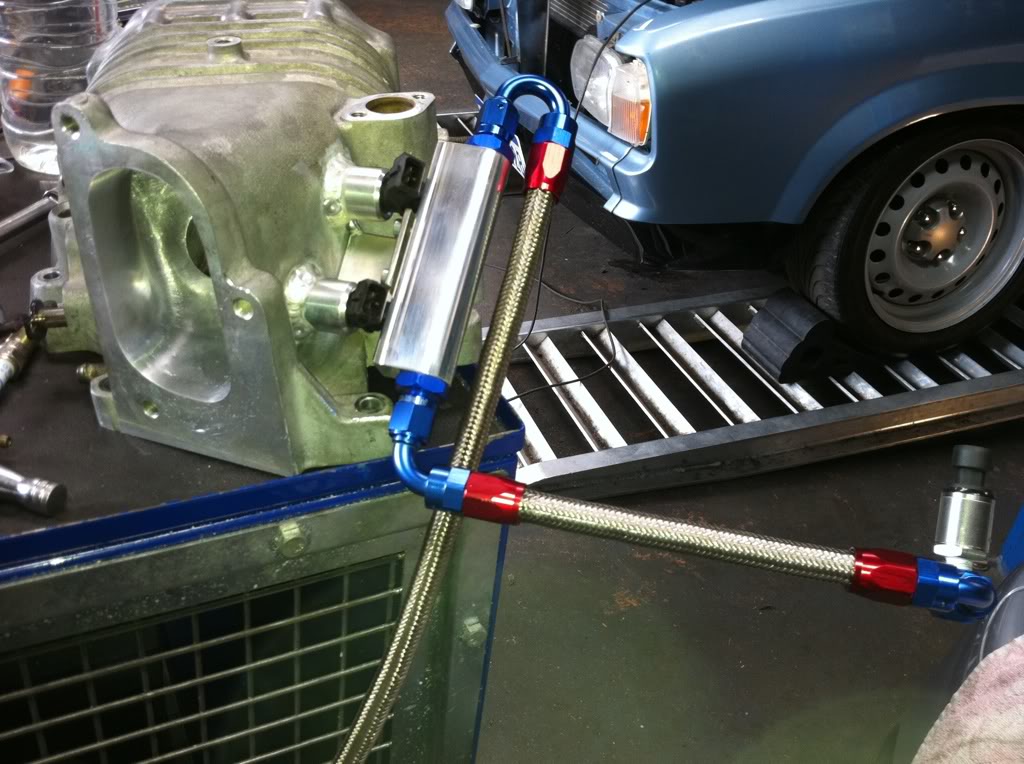
i also welded 2 injector cups into the back of the blower, im going to run the car on e85 and the idea is to spray fuel in to cool intake temps
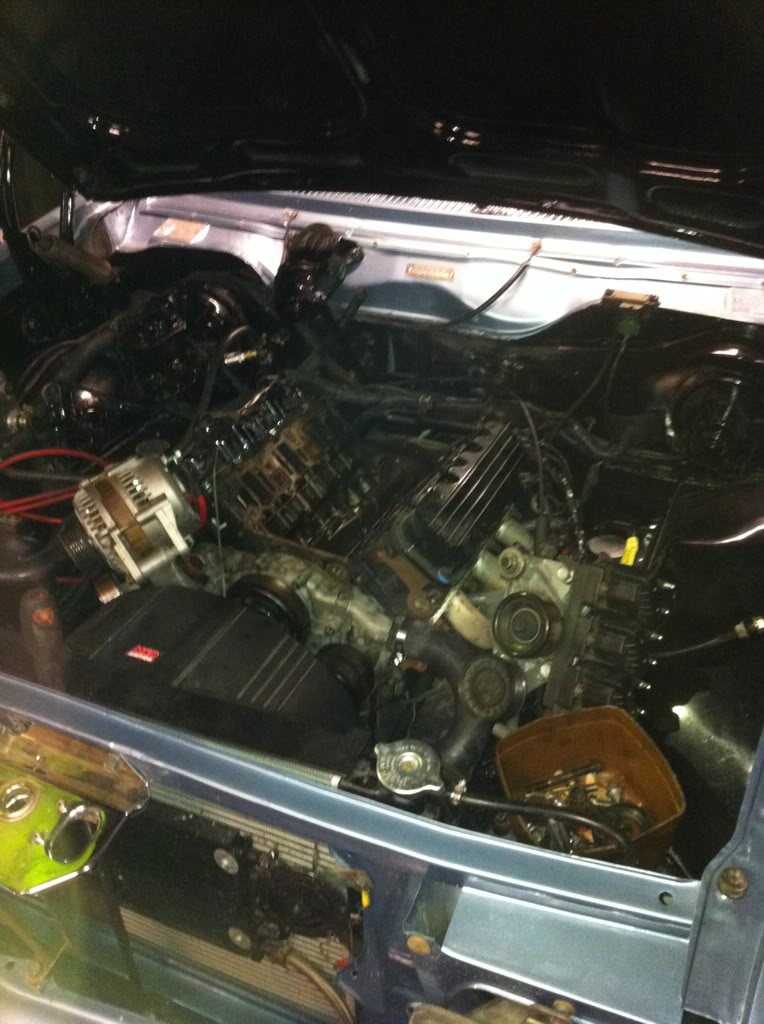
as it sits
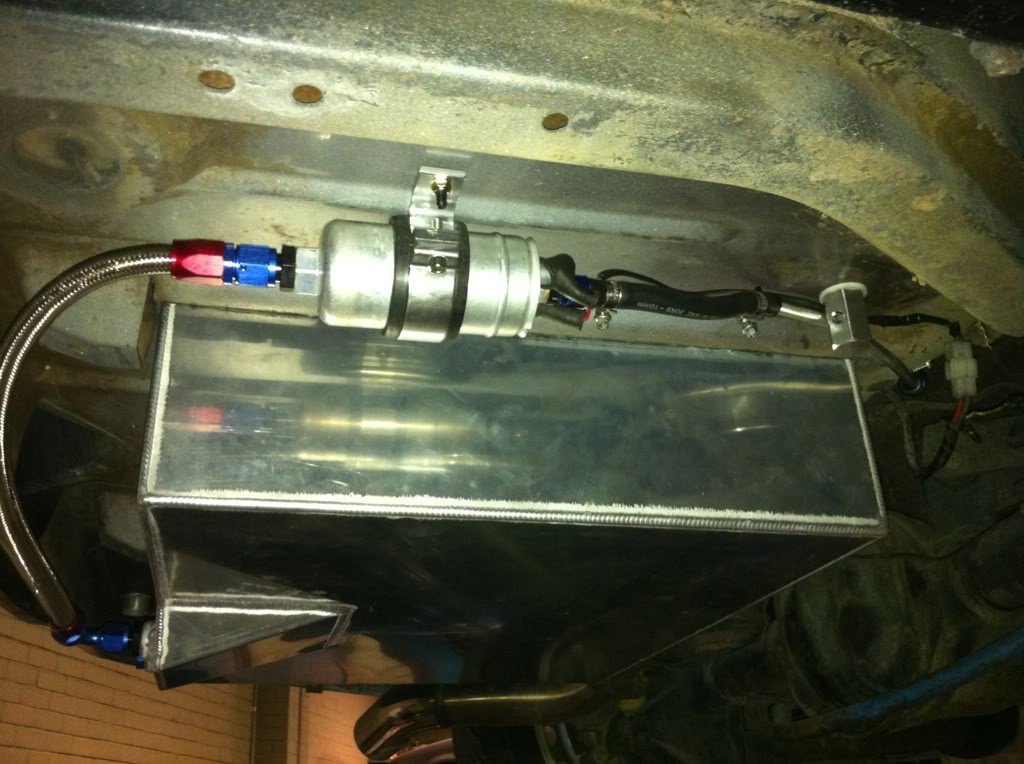
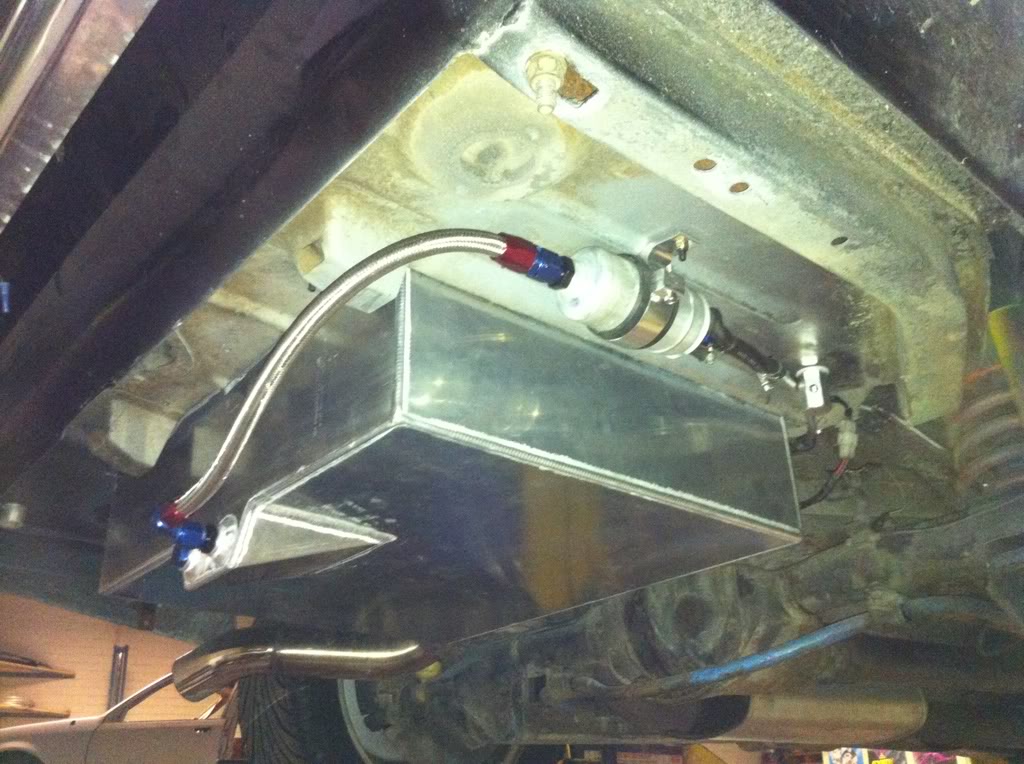
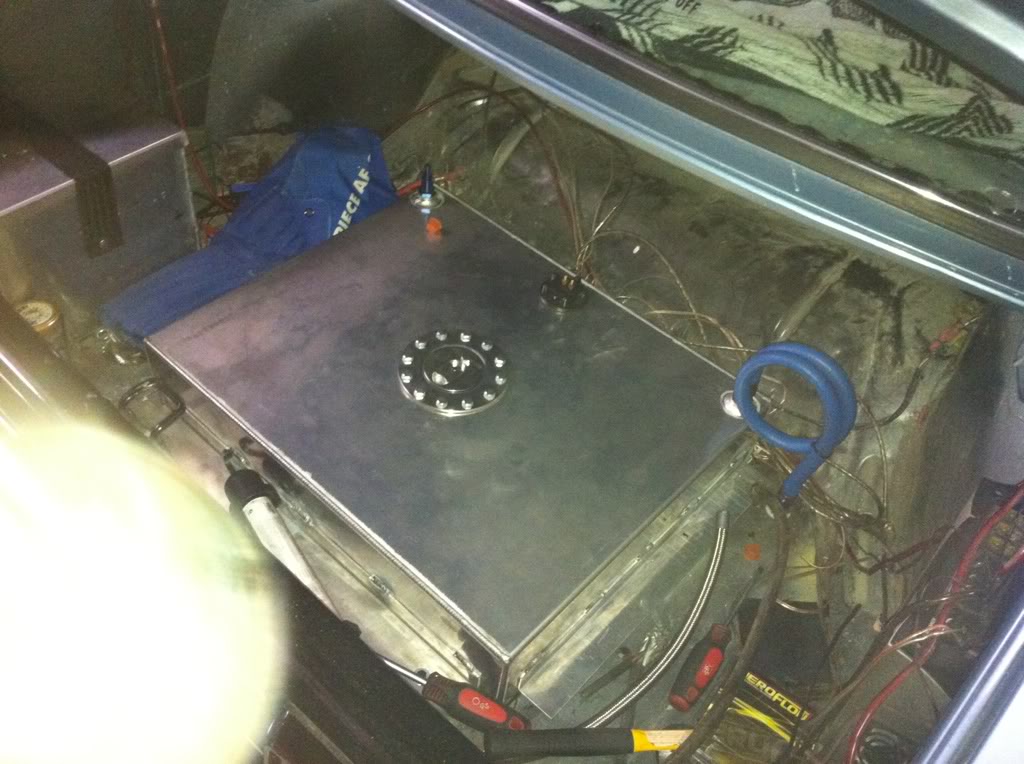
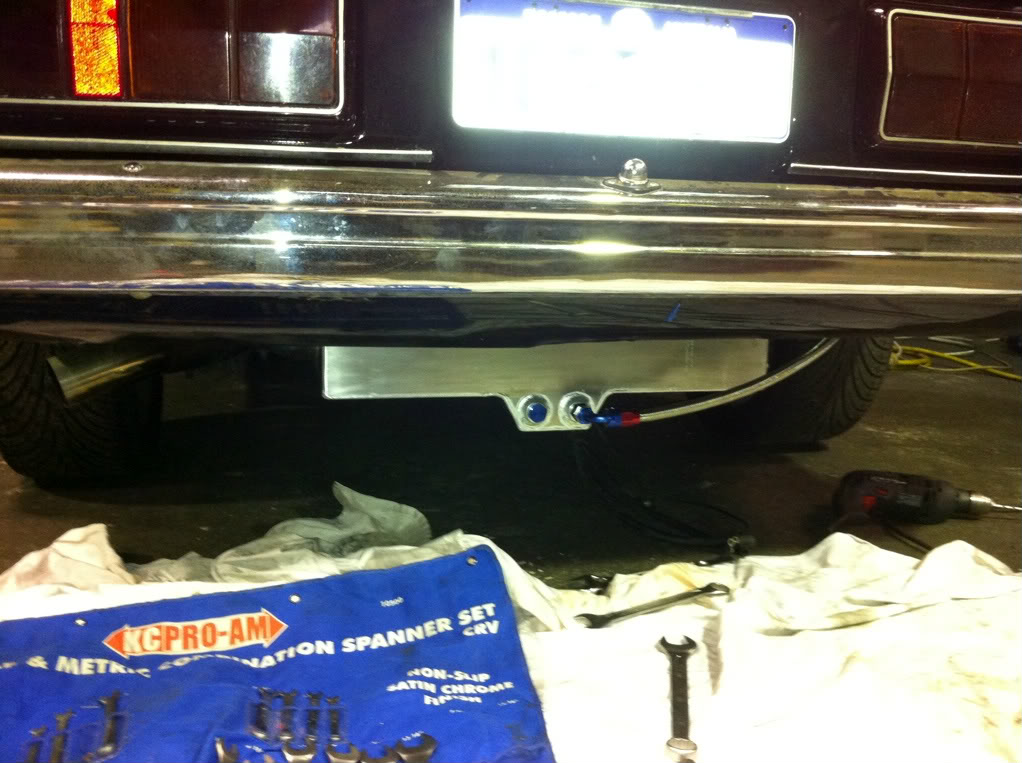
i also installed a 75L fuel cell, i welded a flange onto it and cut a hole thru my boot so it hangs at the same lowest point as my old tank, im trying to keep it as legal as possible, and will get an external filler and pressure test the cell. I did this to get rid of the surge set up and to have a bigger tank for the e85.
its good having access to a mates workshop he is as keen as me to push this combo, we will be tuning tomorow and wednesday night, doing 2 tunes one for bp 98 one for e85, cos i will have to buy in drums as its not at the pump here.
I put an 044 inplace of the vl turbo pump, this played with the fuel in the tune a bit, made it run a little rich but we run it up on the dyno anyway to get a comparisonj, still made 251hp and 522nm torque at the wheels
blower before and after porting
i also welded 2 injector cups into the back of the blower, im going to run the car on e85 and the idea is to spray fuel in to cool intake temps
as it sits
i also installed a 75L fuel cell, i welded a flange onto it and cut a hole thru my boot so it hangs at the same lowest point as my old tank, im trying to keep it as legal as possible, and will get an external filler and pressure test the cell. I did this to get rid of the surge set up and to have a bigger tank for the e85.
its good having access to a mates workshop
he is as keen as me to push this combo, we will be tuning tomorow and wednesday night, doing 2 tunes one for bp 98 one for e85, cos i will have to buy in drums as its not at the pump here.


1 user(s) are reading this topic
0 members, 1 guests, 0 anonymous users

