
Try VN discs and backing plates with nissan callipers, best of both worlds.
 1 votes
Fixing my brothers UC hatch
Started by
_dirtbag_
, Dec 30 2009 01:19 PM
1690 replies to this topic
#326

turbo76lx
-

- Members
-

- 645 posts
Forum Fixture
- Name:Glen
- Location:Vic
- Car:LX
- Joined: 15-August 08
Posted 10 February 2010 - 07:59 PM
#327
_dirtbag_
_dirtbag_
-

- Guests
Posted 10 February 2010 - 09:19 PM
Hello again. Well today was another fun day.
Got the rear brakes sorted out. Thanks to everyone for the suggestions, but me being a tight a$$ I decided to just modify what was already there.
The plan is to mount the shock inside the lower bracket, rather than next to it.
The mount was cut. and the original captive bolt removed. The shock will now mount on a high tensile 5/8 bolt.
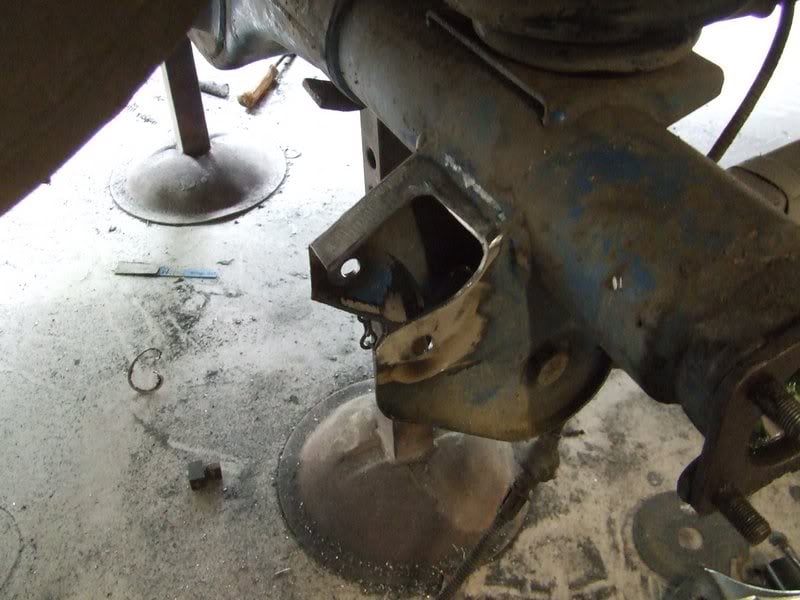
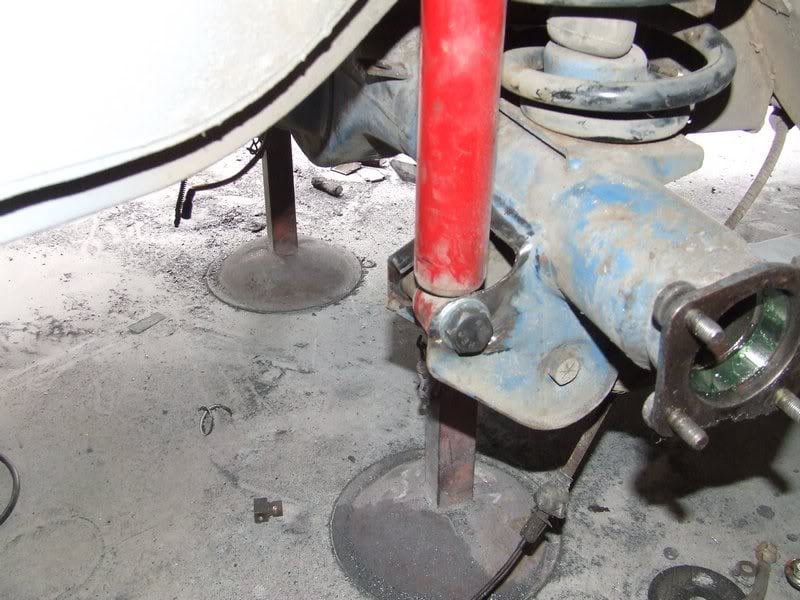
This system will work fine. It's a similar set up we used to use on hot rods, so I have no doubt about it's strength. There is still ample room between the shock and the body, and there is stacks of room between the shock and the caliper.
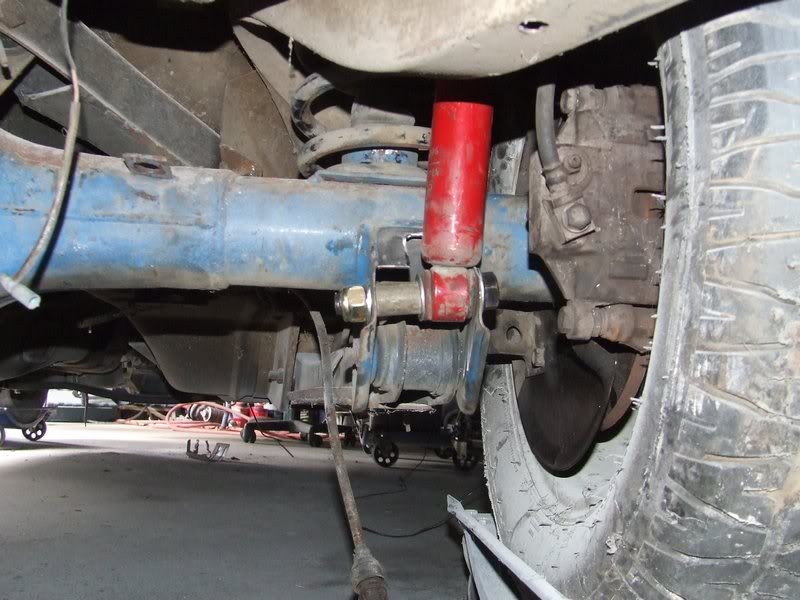
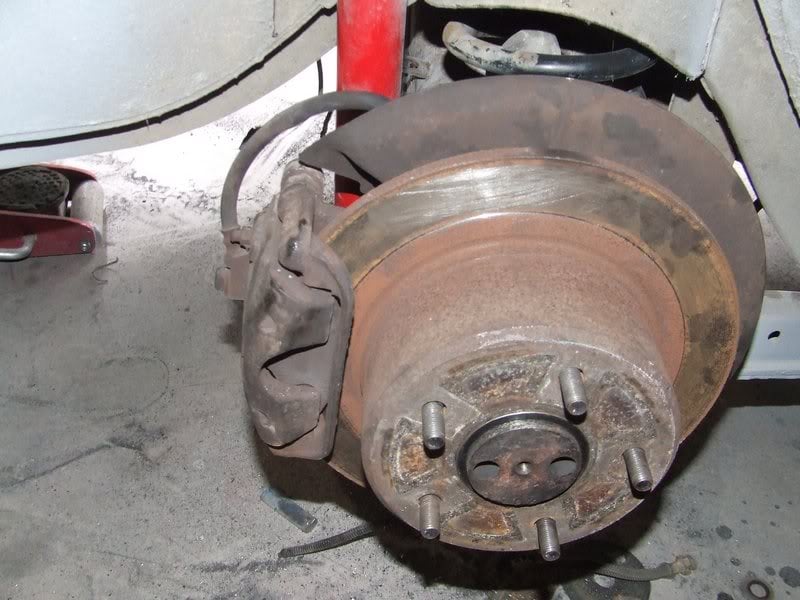
With that done the brakes fit like a charm.
Knowing what I know now I wouldn't have mounted the 5/8 bolt on the same angle as the original mount, but the shock is no more out of shape on the mount than it used to be.
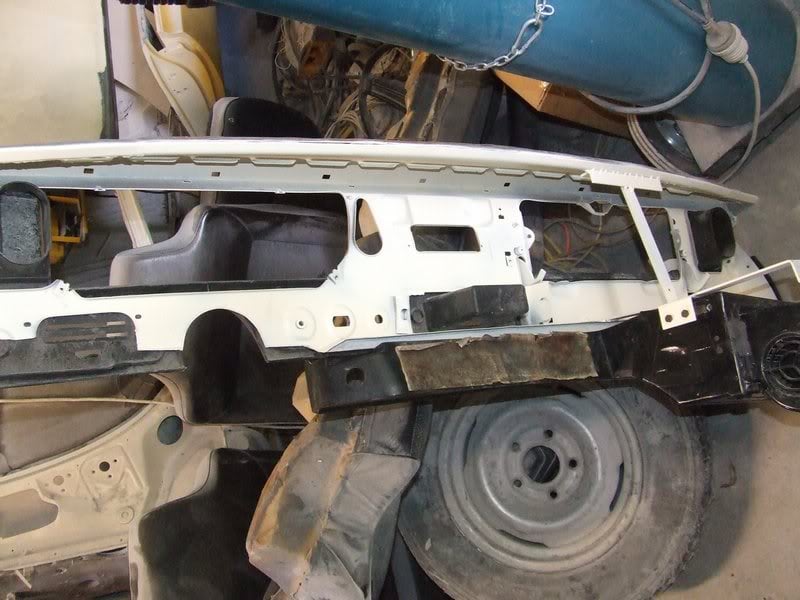
The next job was fine tuning the A/C mounting to the dash.
The A/C had these two little alloy tabs that held the vent/control end of the unit to the dash. The problem with the alloy tabs it you could see them on the dash. I thought of another way to mount this part of the A/C so it didn't need these alloy tabs. It will look a lot cleaner. I also made some fine adjustments to the main A/C mounts so the whole unit sits better against the dash.
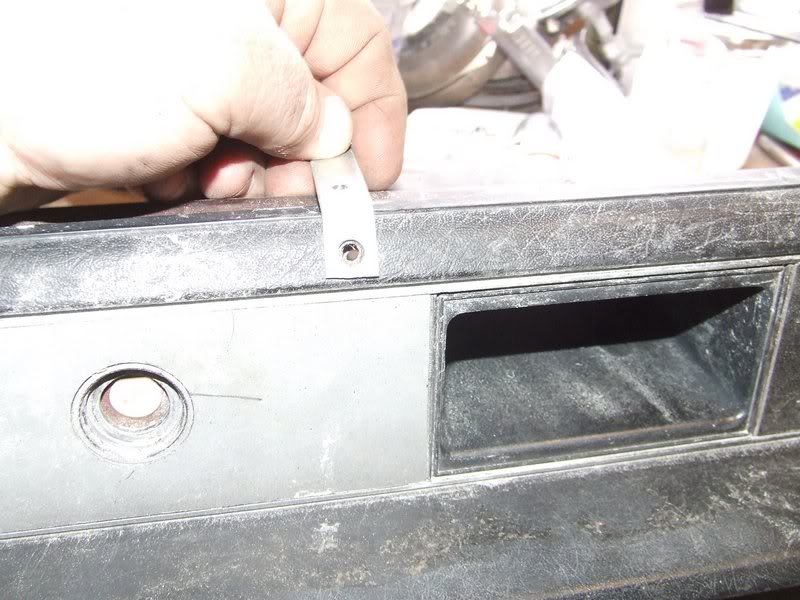
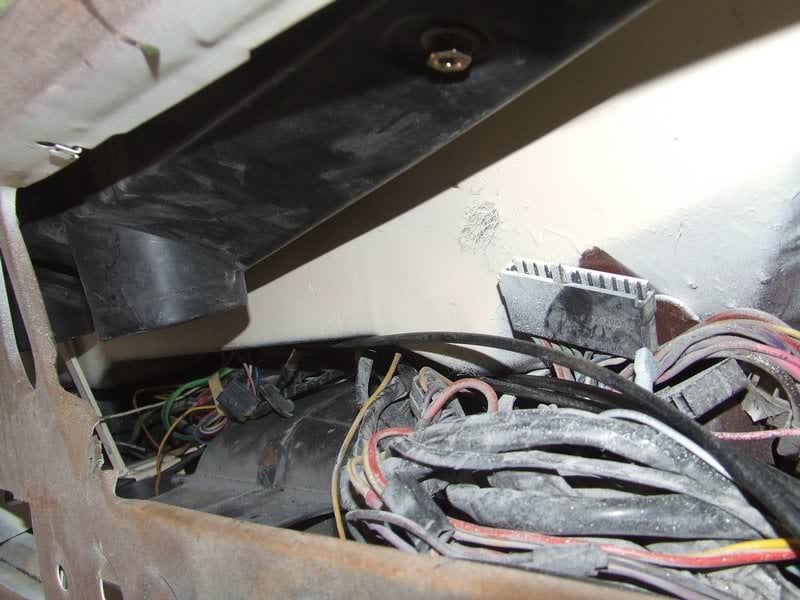
You can see in the next pic there are two little holes in the face of the dash down near the A/C unit. This is where the two alloy tabs used to be.
Very visible. In this pic it's mounted to the dash, but the mounts are now internal. I also modified the mounting system so the lower part of the dash can be removed without having to take out the A/C unit. Might be helpful later.
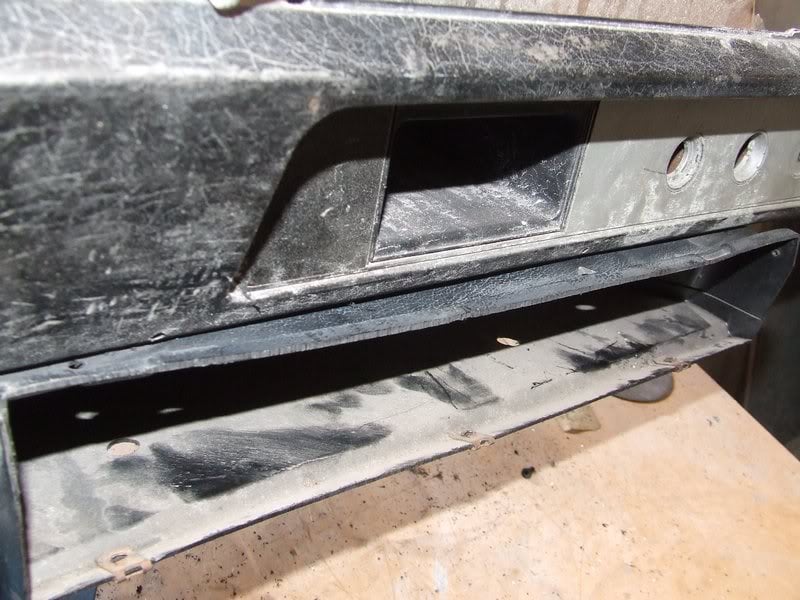
I think the whole unit sits a lot nicer against the dash now. Don't worry about how floppy that big opening is on the right, that's where the vents and controls mount. They hold that part of the unit in shape.
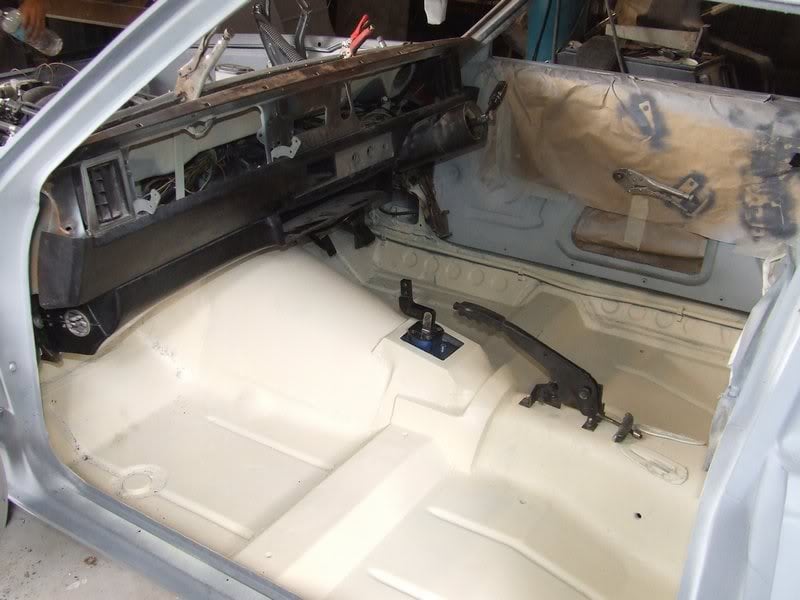
Before I mount the heater, dash and A/C I thought I should seal the floor after it all got cleaned, plus there is a fair bit of bare metal. I used some 2pac etch primer after applying the rust converter yesterday.
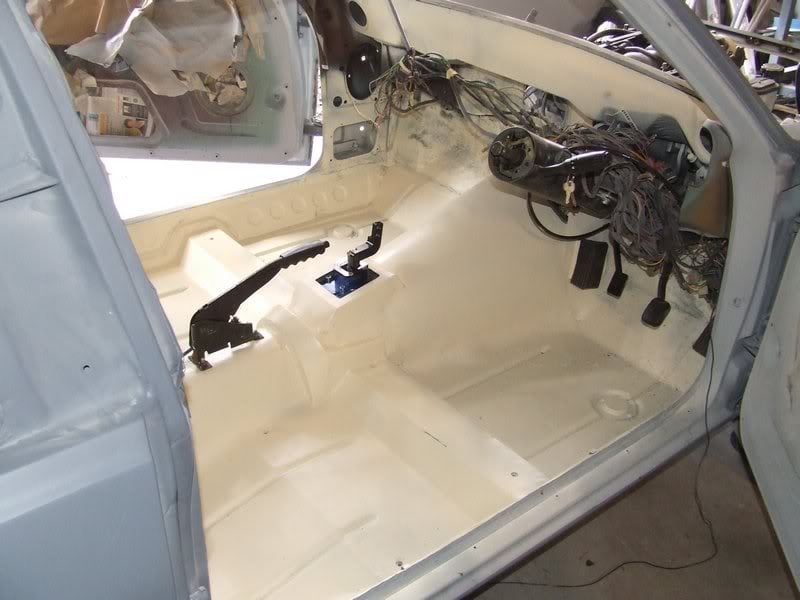
It's not pretty, but that's why they invented carpet : )

I also gave the underside of the dash a coat or two of etch primer as it had some rust repairs done, so needed the bare metal covered.
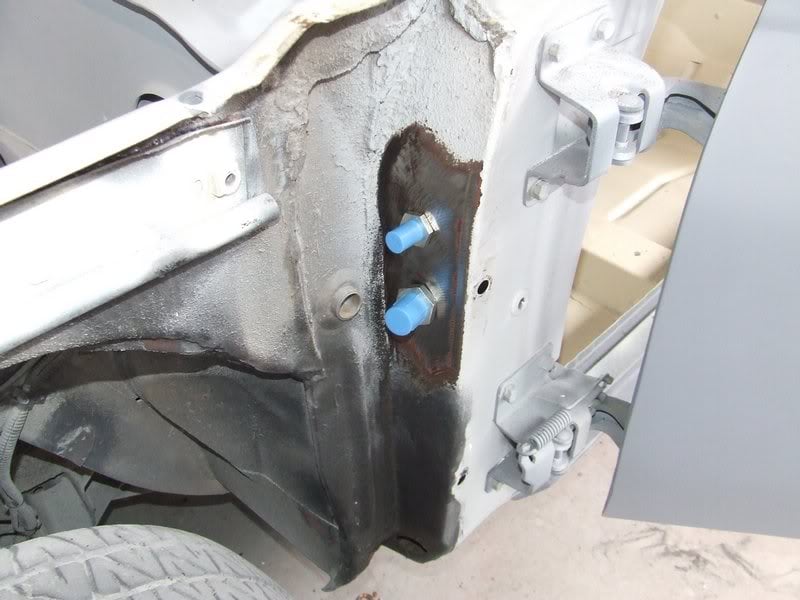
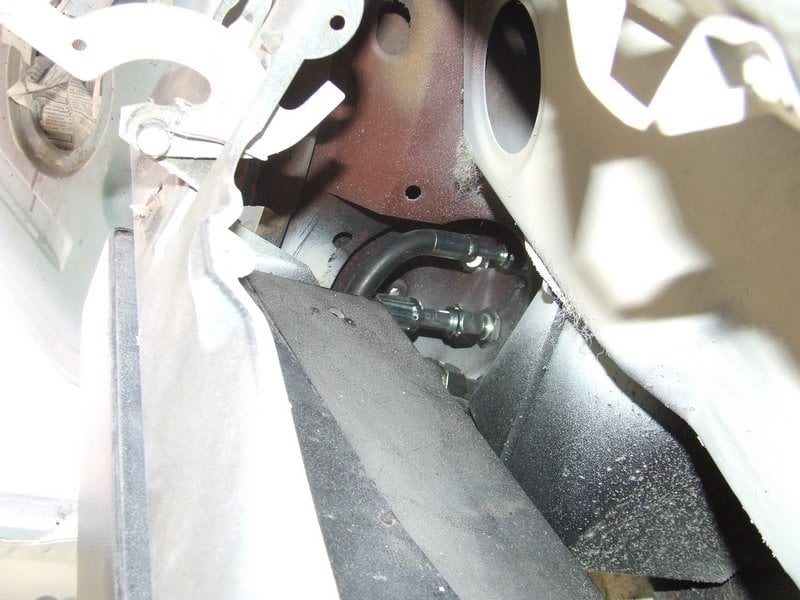
Here's the hoses I had made yesterday. They mount to the fittings on the A/C unit, and then mount to the outside of the A pillar, meaning the unit and hoses can now stay in place and the connections can be done under the guard where there's much more room.
This is just the mock up fit, nothing is tightened up, so don't whinge at the hoses being ugly : )
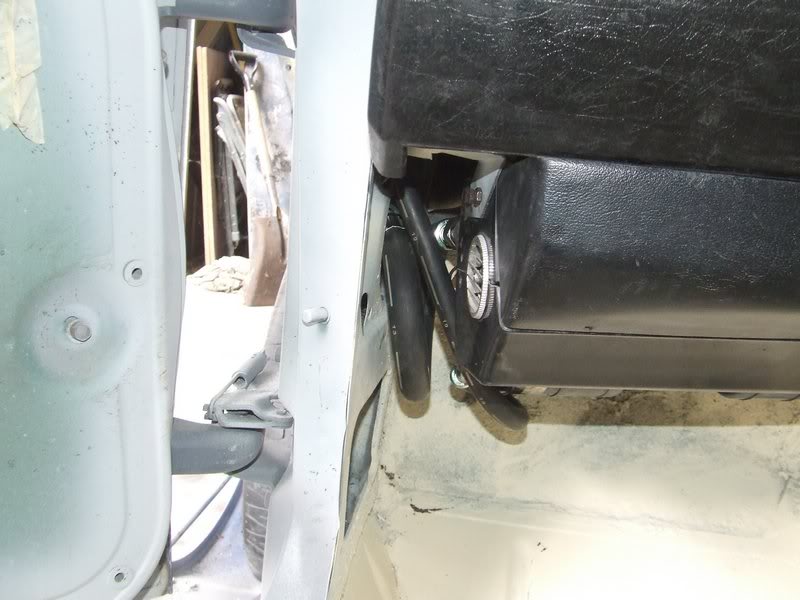
This is where the connections are now. Again, not tightened up.
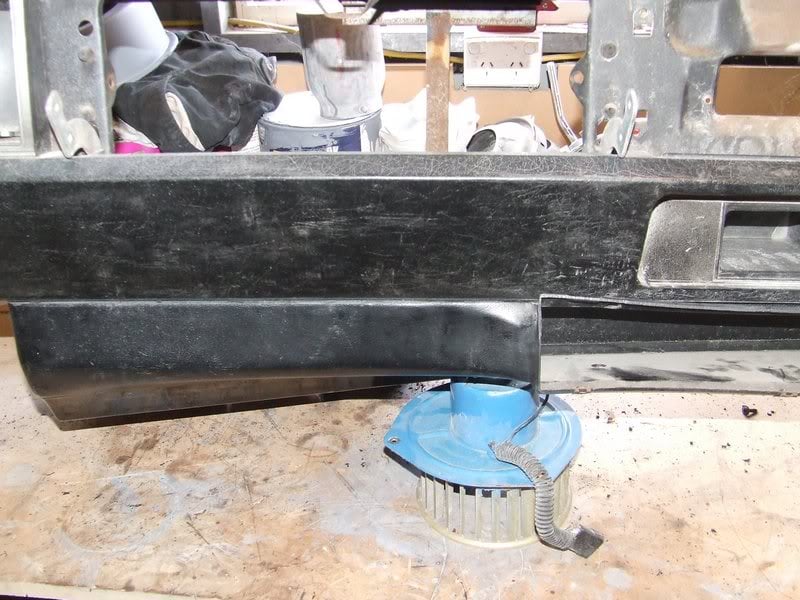
Here's just another shot showing how the A/C unit mounts. I think it's better anyway, even if no one else sees the difference : )
Now, fingers crossed tomorrow will see the dash get welded in.
Got the rear brakes sorted out. Thanks to everyone for the suggestions, but me being a tight a$$ I decided to just modify what was already there.
The plan is to mount the shock inside the lower bracket, rather than next to it.
The mount was cut. and the original captive bolt removed. The shock will now mount on a high tensile 5/8 bolt.
This system will work fine. It's a similar set up we used to use on hot rods, so I have no doubt about it's strength. There is still ample room between the shock and the body, and there is stacks of room between the shock and the caliper.
With that done the brakes fit like a charm.
Knowing what I know now I wouldn't have mounted the 5/8 bolt on the same angle as the original mount, but the shock is no more out of shape on the mount than it used to be.
The next job was fine tuning the A/C mounting to the dash.
The A/C had these two little alloy tabs that held the vent/control end of the unit to the dash. The problem with the alloy tabs it you could see them on the dash. I thought of another way to mount this part of the A/C so it didn't need these alloy tabs. It will look a lot cleaner. I also made some fine adjustments to the main A/C mounts so the whole unit sits better against the dash.
You can see in the next pic there are two little holes in the face of the dash down near the A/C unit. This is where the two alloy tabs used to be.
Very visible. In this pic it's mounted to the dash, but the mounts are now internal. I also modified the mounting system so the lower part of the dash can be removed without having to take out the A/C unit. Might be helpful later.
I think the whole unit sits a lot nicer against the dash now. Don't worry about how floppy that big opening is on the right, that's where the vents and controls mount. They hold that part of the unit in shape.
Before I mount the heater, dash and A/C I thought I should seal the floor after it all got cleaned, plus there is a fair bit of bare metal. I used some 2pac etch primer after applying the rust converter yesterday.
It's not pretty, but that's why they invented carpet : )
I also gave the underside of the dash a coat or two of etch primer as it had some rust repairs done, so needed the bare metal covered.
Here's the hoses I had made yesterday. They mount to the fittings on the A/C unit, and then mount to the outside of the A pillar, meaning the unit and hoses can now stay in place and the connections can be done under the guard where there's much more room.
This is just the mock up fit, nothing is tightened up, so don't whinge at the hoses being ugly : )
This is where the connections are now. Again, not tightened up.
Here's just another shot showing how the A/C unit mounts. I think it's better anyway, even if no one else sees the difference : )
Now, fingers crossed tomorrow will see the dash get welded in.
#328

Posted 11 February 2010 - 04:38 AM
Except it won't fix any clearance problems, same basic caliper.Try VN discs and backing plates with nissan callipers, best of both worlds.
Hiding the mounting tabs was worth the effort I reckon, it would be one of those things you'd always notice when sitting in the car. Looks great!
#329
MRLXSS
-

- Members
-
- 12,414 posts
The Render Garage
- Name:Matt
- Location:Upwey, Melbourne
- Car:355 LX Hatchback, DeLorean DMC-12, LX SS Hatch, VY Cross8 Crewman
- Joined: 09-November 05
Posted 11 February 2010 - 08:25 AM
Heath, I guess we'll have to wait and see if the tyres will take up some of the roughness. It'll have 265/50/15s on it, so at least they have a bit of sidewall in them.
I'm running the IRS springs in my car, and the exact same tyres... I think they are great... They are soft just cruising around, and only get stiff on a big heavy bump. The best thing about that is no tyre scrape!
Maybe in heaths car, the Sedan springy back seat makes it worse... Lucky the mighty hatchback is a superior car and has the comfier foam backseat! HAHA!
#330
ToRunYa
-

- Members
-
- 2,073 posts
No Longer A Contributing Ninja/Member.
- Name:Em
- Location:Bumf*ck Idaho
- Joined: 08-November 05
Posted 11 February 2010 - 08:51 AM
i cant find the answer in the thread, but what did that ac unit come from? i have an aftermarket for mine but its really bulky has extra vents on the p/s side and no one can take shotgun without smashing their knees on it!
#331
Heath
 View Garage
-

- Administrators
-
- 18,393 posts
I like cars.
- Name:Heath
- Location:Eastern Suburbs, Melbourne
- Car:Heavily Modified UC Sunbird Hatchback
- Joined: 07-November 05
View Garage
Posted 11 February 2010 - 03:09 PM
Ahh yes with 15"s it shouldn't be a problem. I just saw your pink full sized Holden sedan and it had big wheels so I thought you might put big wheels with low profile tyres on this as well.Heath, I guess we'll have to wait and see if the tyres will take up some of the roughness. It'll have 265/50/15s on it, so at least they have a bit of sidewall in them.
#332
_doogs_
_doogs_
-
- Guests
Posted 11 February 2010 - 03:19 PM
Looking grouse mate, love your work. I Think I will keep your brake fluid trick in mind for a few plastics from my car.
Ahhhh, such wise words !
Oh no, look, it's an auto. No clutch pedal. What a waste of a good car : )
Ahhhh, such wise words !
#333
_dirtbag_
_dirtbag_
-
- Guests
Posted 11 February 2010 - 09:37 PM
ToRunYa I'm not sure what the A/C unit is from. The way it fits I would assume a torana, but will ask my brother where he got it from.
I did a bit more work today.
Put the fuel tank back in to double check the filler neck would fit, as it's pretty huge, and to see if there was enough room for the fuel pump/regulator/filter underneath.
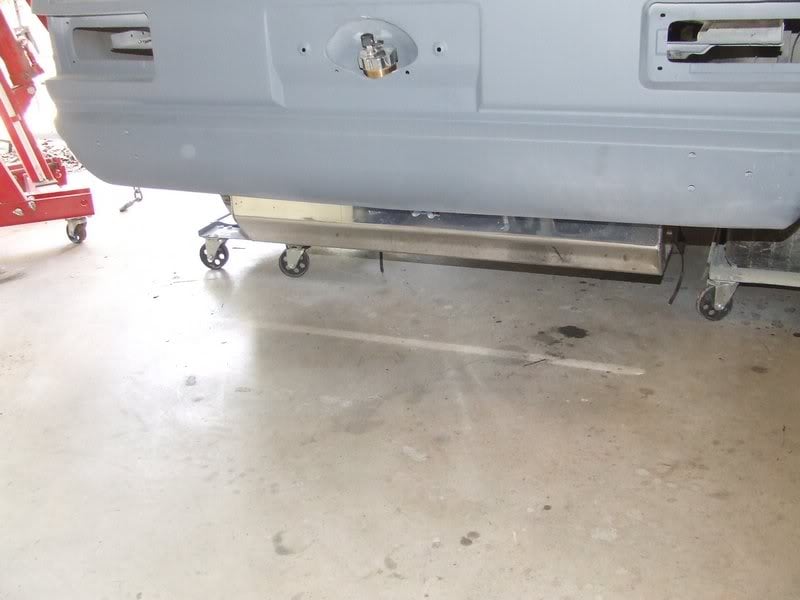
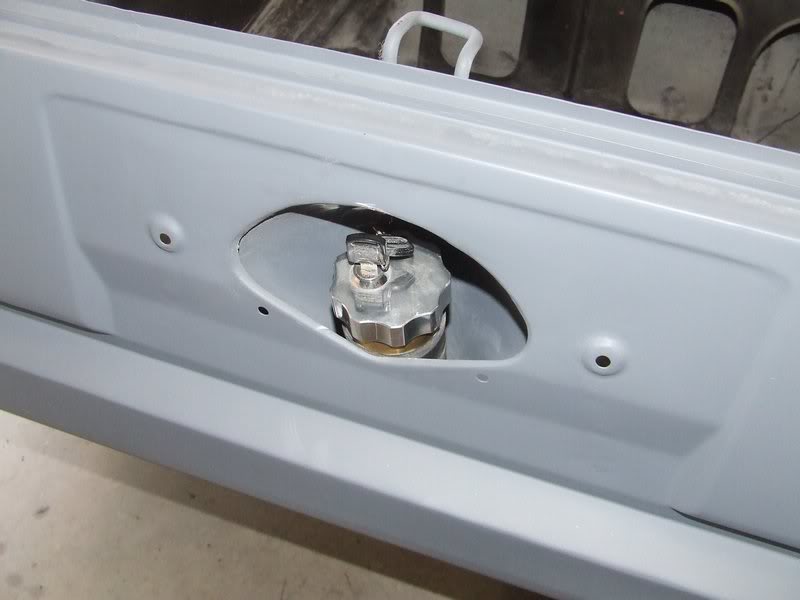
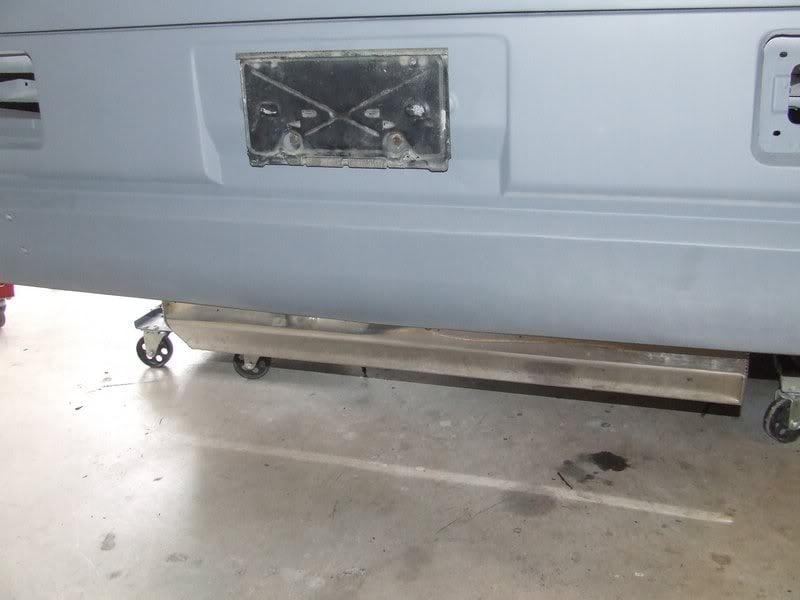
Also fitted the number plate mount to make sure it didn't hit the filler. It didn't.
I did a bit more work today.
Put the fuel tank back in to double check the filler neck would fit, as it's pretty huge, and to see if there was enough room for the fuel pump/regulator/filter underneath.
Also fitted the number plate mount to make sure it didn't hit the filler. It didn't.
#334
_dirtbag_
_dirtbag_
-
- Guests
Posted 11 February 2010 - 09:46 PM
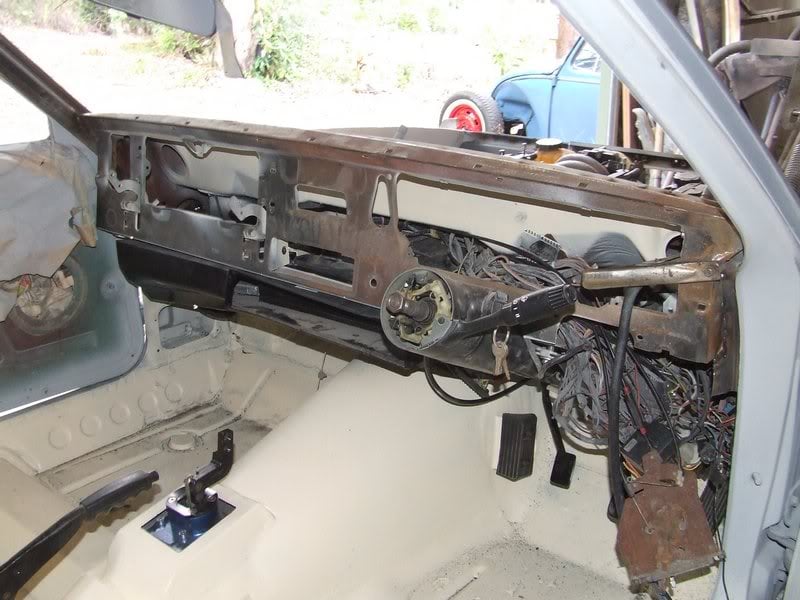
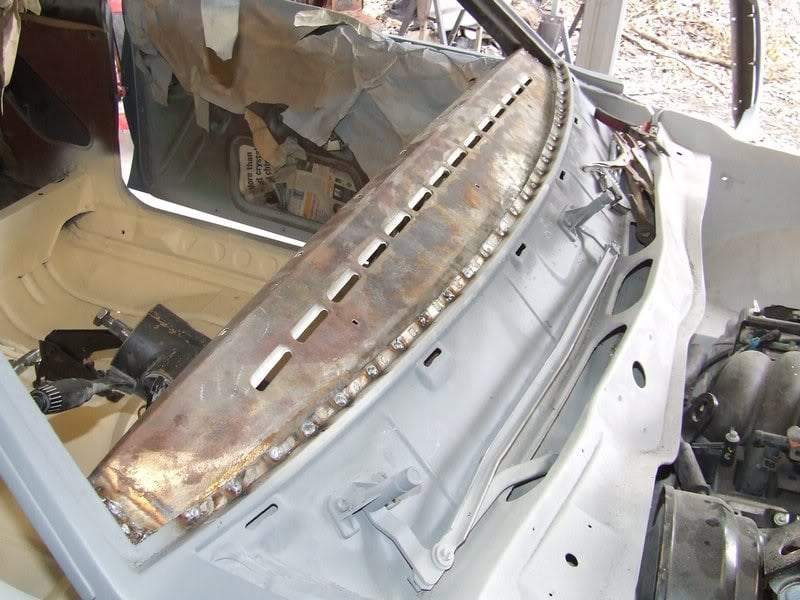
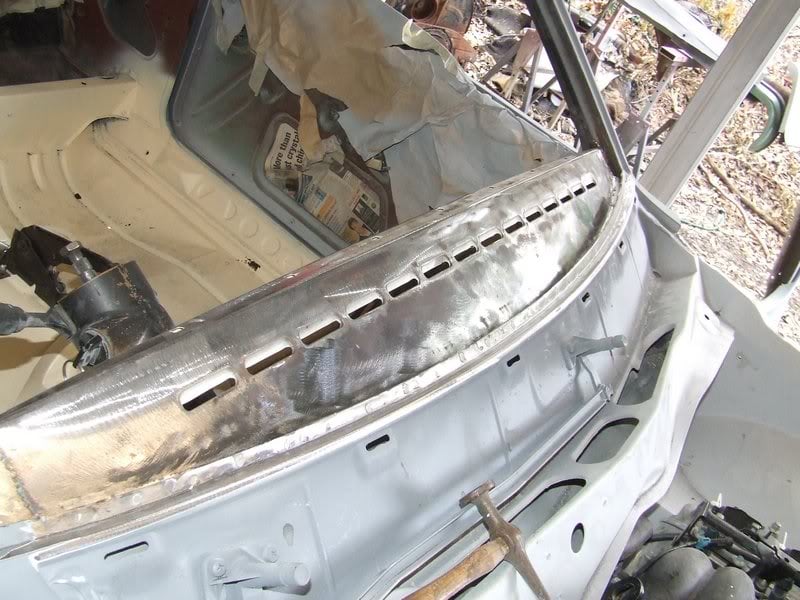
Then it was time to finally weld the dash in.
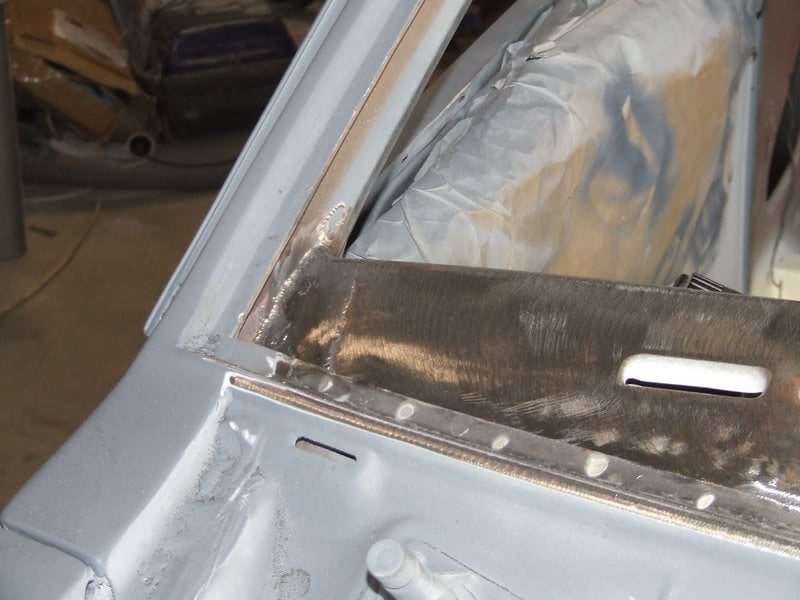
I tacked the sides on and made sure it was in the right spot before plug welding the front to the windscreen frame.
I welded the sides of the dash to the A pillars. I assumed this is how it went. I couldn't remember and the ends of this dash were so rusty when I got it and had to replace both ends. Anyway, it's in, so who cares : )
I ended up getting rid of the 3 square holes in the top of the dash that had dome top bolts that held the demister vent in place, after this shot was taken.

Instead of having the bolt heads on top of the dash, I drilled the square holes out to 8mm and plug welded some quarter inch bolts underneath the dash to mount the demister vent.
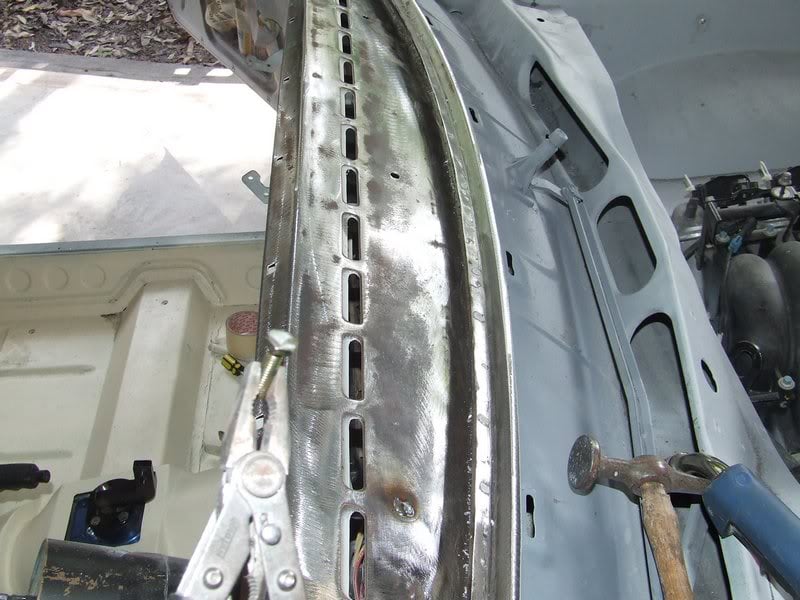
Now it's a nice smooth dash. No one will notice, but I know it's done : )
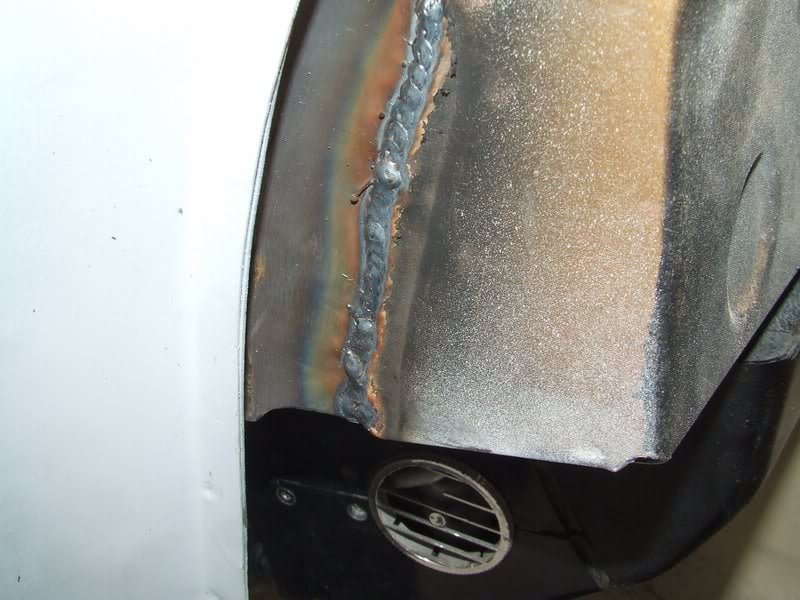
This pic is funny. The metal on the left of the weld is UC, and to the right of the weld is LX. The LX dash was so rusty on the ends I kept a bit of the UC dash there on the sides to help mount the LX dash. Made it a lot easier. Not the prettiest weld though.
I tacked the sides on and made sure it was in the right spot before plug welding the front to the windscreen frame.
I welded the sides of the dash to the A pillars. I assumed this is how it went. I couldn't remember and the ends of this dash were so rusty when I got it and had to replace both ends. Anyway, it's in, so who cares : )
I ended up getting rid of the 3 square holes in the top of the dash that had dome top bolts that held the demister vent in place, after this shot was taken.
Instead of having the bolt heads on top of the dash, I drilled the square holes out to 8mm and plug welded some quarter inch bolts underneath the dash to mount the demister vent.
Now it's a nice smooth dash. No one will notice, but I know it's done : )
This pic is funny. The metal on the left of the weld is UC, and to the right of the weld is LX. The LX dash was so rusty on the ends I kept a bit of the UC dash there on the sides to help mount the LX dash. Made it a lot easier. Not the prettiest weld though.
#335
_dirtbag_
_dirtbag_
-
- Guests
Posted 11 February 2010 - 09:56 PM
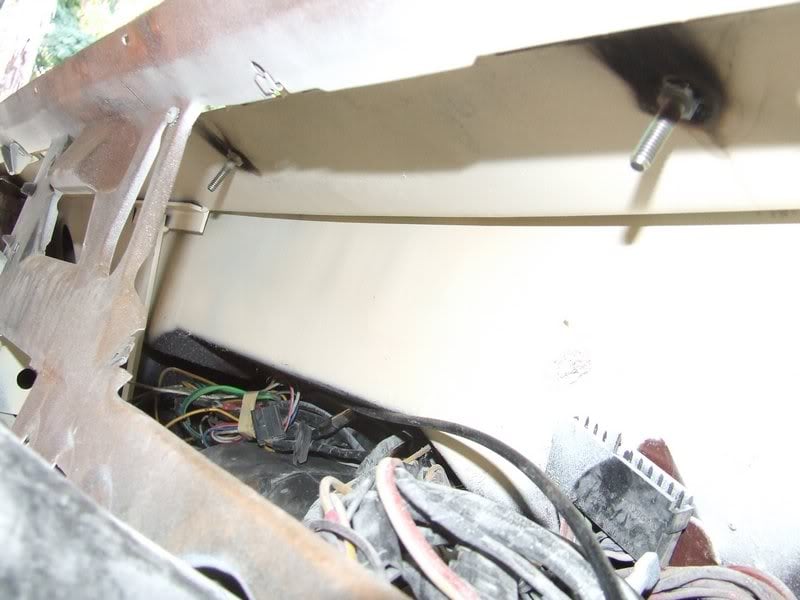
The A/C hoses got fitted properly too. I made an adjustment to the inside of the A pillar so there's a lot more room for them in there now.
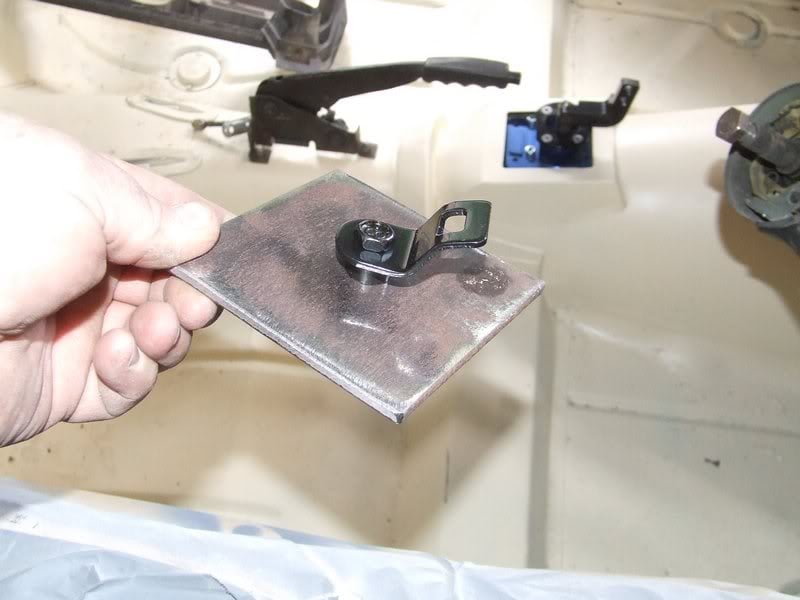
I also made some plates for mounting the child restraints.
It's 100mmx100mmx5mm plate and just a pair of Klippan restraints.

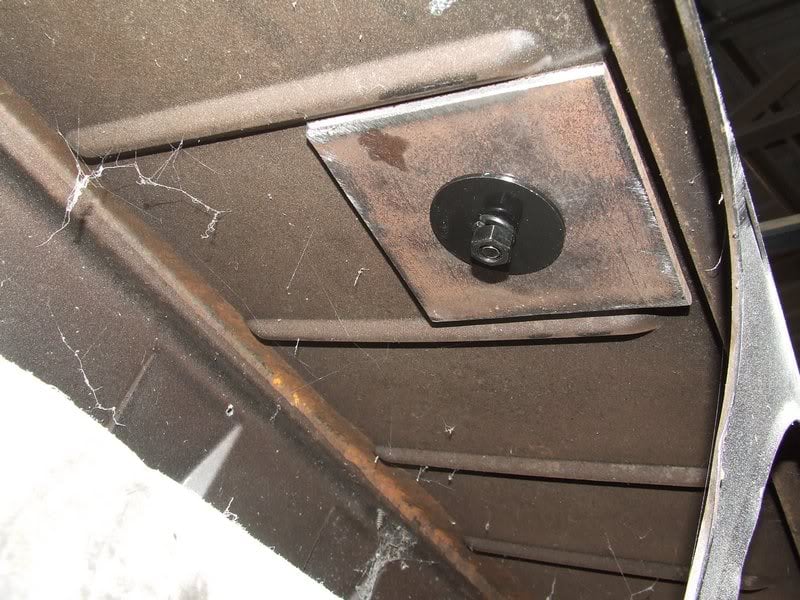
Don't worry about the next photo, I know the bolt isn't tightened up. They were only done up finger tight to check they fitted and to take these pics. They got taken out straight away to clean all the floor in the rear area with a wire wheel. Fun job that one.
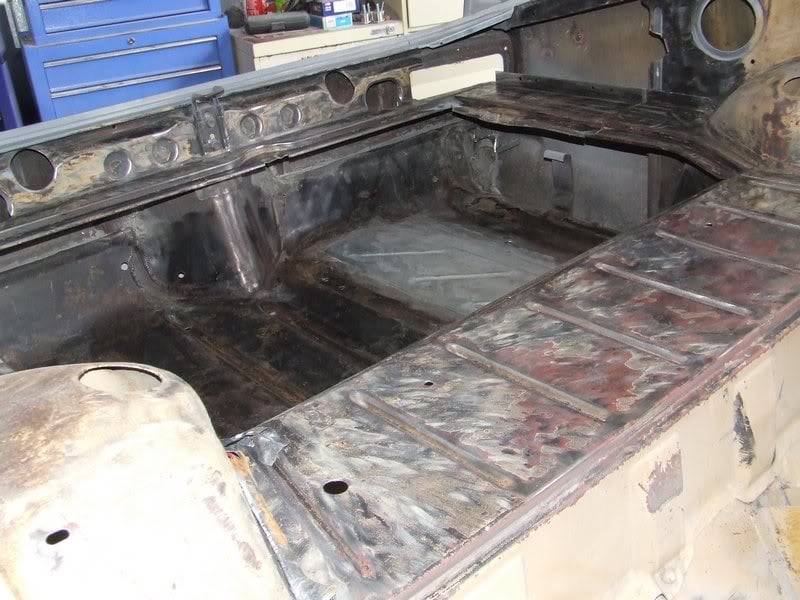
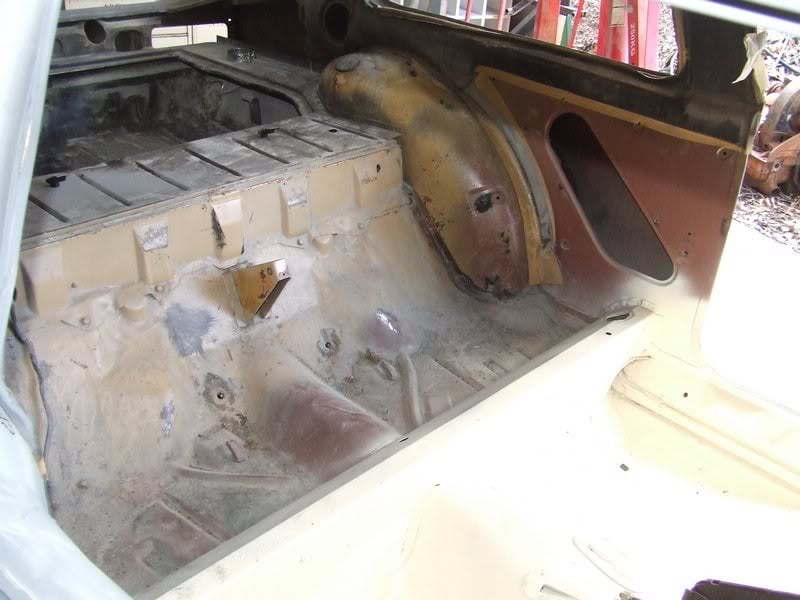
The rest of the rear section was stripped out.
Last thing I did today was to repair the front corner of the dash where the heater controls and headlight switch goes.
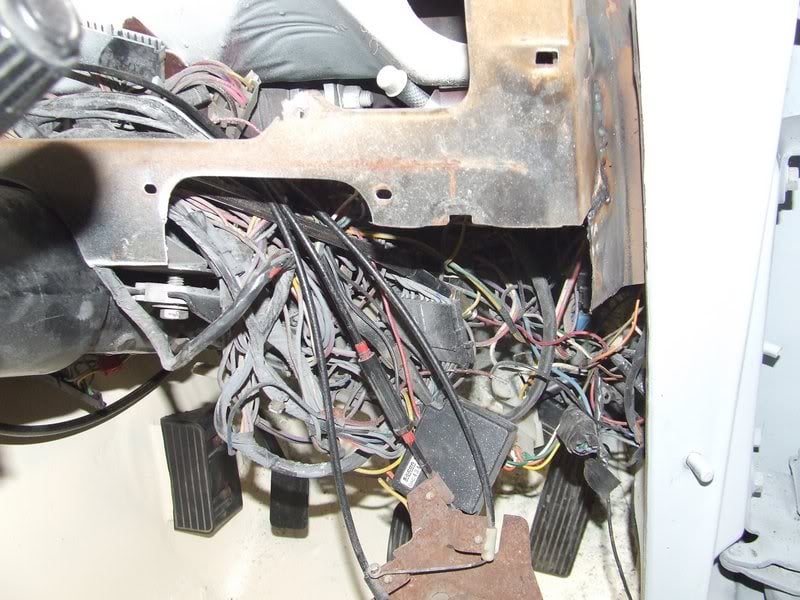
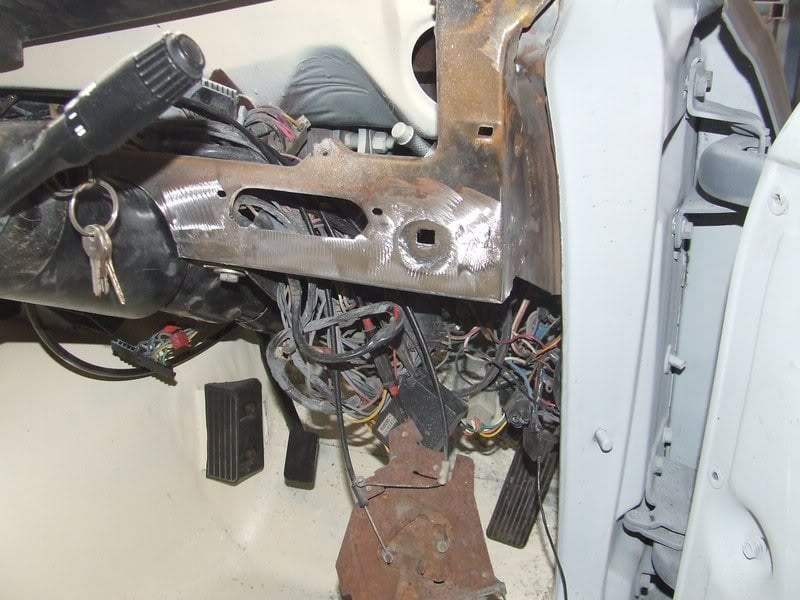
It's a bit ugly, but the plastic part of the dash covers it so it'll be fine.
I also made some plates for mounting the child restraints.
It's 100mmx100mmx5mm plate and just a pair of Klippan restraints.
Don't worry about the next photo, I know the bolt isn't tightened up. They were only done up finger tight to check they fitted and to take these pics. They got taken out straight away to clean all the floor in the rear area with a wire wheel. Fun job that one.
The rest of the rear section was stripped out.
Last thing I did today was to repair the front corner of the dash where the heater controls and headlight switch goes.
It's a bit ugly, but the plastic part of the dash covers it so it'll be fine.
#336
_cruiza_
_cruiza_
-
- Guests
Posted 12 February 2010 - 05:28 PM
Well done Mr Dirt, top work I am following it with great interest, and you get my vote for best project log of 2010.
I am sure that as time draws near you will not disapoint by fitting chrome bumpers, you know painted are best, not that I am argueing because I know that
Argueing on the Internet is like winning the special olympics even if you win you are still special
I am sure that as time draws near you will not disapoint by fitting chrome bumpers, you know painted are best, not that I am argueing because I know that
Argueing on the Internet is like winning the special olympics even if you win you are still special
#337
_dirtbag_
_dirtbag_
-
- Guests
Posted 12 February 2010 - 09:08 PM
Thanks Michael. I wont disappoint by fitting chrome bumpers, I'll make everyone happy by fitting chrome bumpers : )
Today was a bit annoying, but a little bit got done anyway.
I finished cleaning the inside of the rear section and gave it a quick coat of etch primer just to seal up the bare metal areas,


I also gave the dash a couple of coats of etch primer too.


I then spent a while toying around with where to put the reservoir for the hydraulic clutch.
I sat the gauges in and put the steering wheel on to see how easy it would be to pull the gauges out if I mounted the reservoir behind the gauges. I decided it would be too annoying to service the clutch with the reservoir behind the gauges. Time to find somewhere else.

The spot I like the best is inside the vent on the drivers side. The vent can still be there, but wont be hooked up. You can then simply remove the vent to gain access to the reservoir.

I figured there'd be less chance of the child restraints getting lost or damaged if they're in the car, so there they are.

I went and picked up the AU thermo fans today as well. Nice looking bit of gear. Can't wait to have a radiator to mount them to.

Today was a bit annoying, but a little bit got done anyway.
I finished cleaning the inside of the rear section and gave it a quick coat of etch primer just to seal up the bare metal areas,
I also gave the dash a couple of coats of etch primer too.
I then spent a while toying around with where to put the reservoir for the hydraulic clutch.
I sat the gauges in and put the steering wheel on to see how easy it would be to pull the gauges out if I mounted the reservoir behind the gauges. I decided it would be too annoying to service the clutch with the reservoir behind the gauges. Time to find somewhere else.
The spot I like the best is inside the vent on the drivers side. The vent can still be there, but wont be hooked up. You can then simply remove the vent to gain access to the reservoir.
I figured there'd be less chance of the child restraints getting lost or damaged if they're in the car, so there they are.
I went and picked up the AU thermo fans today as well. Nice looking bit of gear. Can't wait to have a radiator to mount them to.
#338
_lxss5l_
_lxss5l_
-
- Guests
Posted 13 February 2010 - 09:36 PM
Thanks dude for replying with all the pics the sl/r is very nice.You had one of the angled up clutch master cylinders to.So aren't you going to swop your custom v8 converted hilux with a/c p/s with fresh candy metalflake blue paint for the uc shell?It's realy cuming along, nice pedals have you tried putting the LS1 under the dash?.The brakes look good i've got a similar set up and i just got the park brake cables made up.And the inside looks ausome i know how awkward it is to clean up the boot area when your in there with so little room top job
#339
hawk
-
- Members
-
- 2,190 posts
Forum Fixture
- Name:steve
- Location:Berwick, Melbourne
- Car:UC Torana
- Joined: 16-July 09
Posted 18 February 2010 - 08:44 PM
great project
any updates
any updates
#340
Neils LX
-

- Members
-
- 2,074 posts
Forum Fixture
- Name:a
- Location:North west NSW
- Joined: 18-March 07
Posted 18 February 2010 - 09:31 PM
Hi
Might not be your cuppa tea but if you have fitted the commodore footrest and V8 motor these footpedals might suit.
http://cgi.ebay.com....=item5ad40dbfcc
Love the build, should call it a UX not a UC.
Chears Neil
Might not be your cuppa tea but if you have fitted the commodore footrest and V8 motor these footpedals might suit.
http://cgi.ebay.com....=item5ad40dbfcc
Love the build, should call it a UX not a UC.
Chears Neil
#341
fenz
-

- Members
-
- 220 posts
Forum Member
- Name:Aaron
- Location:South Australia
- Car:LJ 2 door and UC V8 4door
- Joined: 26-July 09
Posted 19 February 2010 - 02:51 PM
WHERE DID YOU SOURCE THE FANS FROM?
I HAVE BEEN DOING SOME SEARCHING AND THEY SEEM TO VARY A GREAT DEAL IN PRICE.
NICE WORK SO FAR.
I HAVE BEEN DOING SOME SEARCHING AND THEY SEEM TO VARY A GREAT DEAL IN PRICE.
NICE WORK SO FAR.
#342
ls2lxhatch
-

- Members
-
- 5,332 posts
- Location:Perth
- Car:LX Hatch
- Joined: 29-May 06
Posted 19 February 2010 - 07:59 PM
There are the factory and aftermarket copies of the AU Falcon fans. The factory fans have Bosch motors, move more air and cost more than the copies. The fans above appear to be copies.
#343
_dirtbag_
_dirtbag_
-
- Guests
Posted 23 February 2010 - 06:13 PM
Well it's about time I did a bit of an update.
The new alloy radiator showed up, with a nice bend in it.

You can clearly see the problem when the straight edge is sitting there.

After some convincing I got it to a more acceptable shape. At least the mounts are square now.

This is all I cut out to fit the new radiator. I didn't have to cut it to fit it, but it looks neater.

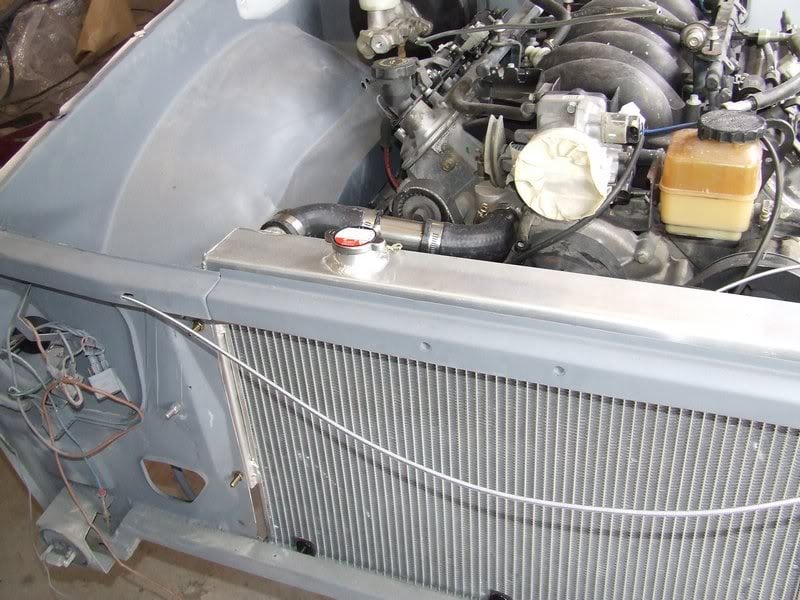
It looks good now it's mounted.

I only had to trim a tiny bit where the hose outlets are to mount the thermo fans.

Plenty of room between the radiator and the motor.


The next fun job will be sorting out radiator hoses.
The new alloy radiator showed up, with a nice bend in it.
You can clearly see the problem when the straight edge is sitting there.
After some convincing I got it to a more acceptable shape. At least the mounts are square now.
This is all I cut out to fit the new radiator. I didn't have to cut it to fit it, but it looks neater.
It looks good now it's mounted.
I only had to trim a tiny bit where the hose outlets are to mount the thermo fans.
Plenty of room between the radiator and the motor.
The next fun job will be sorting out radiator hoses.
Edited by dirtbag, 23 February 2010 - 06:14 PM.
#345
_dirtbag_
_dirtbag_
-
- Guests
Posted 23 February 2010 - 07:46 PM
The top radiator hose is from a hyundai excel 1.6 auto but it was a tad too long between bends so a bit of steel pipe fixes the problems.

The bottom hose is a combination of 2 different landcruiser hoses and some more steel pipe.
Thanks go to young Kev at Carbitz in Nambour for letting me go through all their hoses to get this sorted out.
It was a pain as the top and bottom outlets on the motor are different sizes and both are different to the radiator, so that made it interesting.


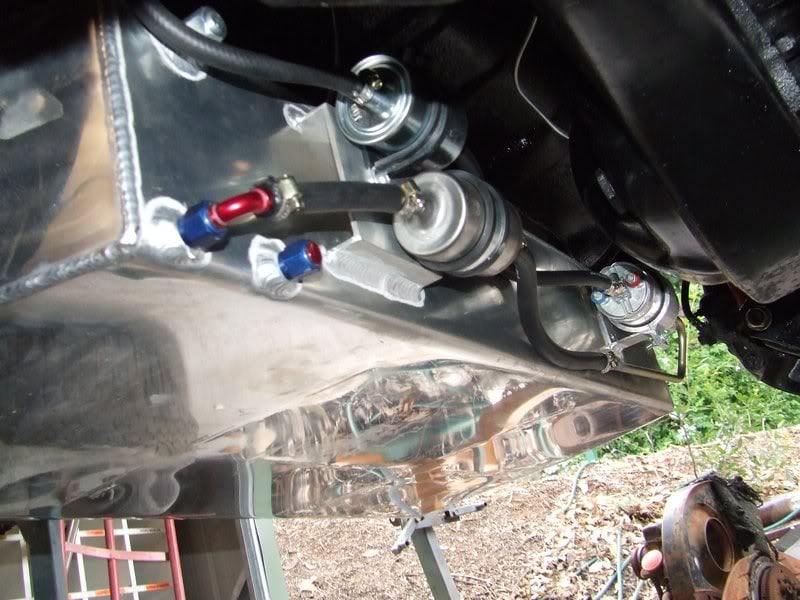
Next up is the fuel system.

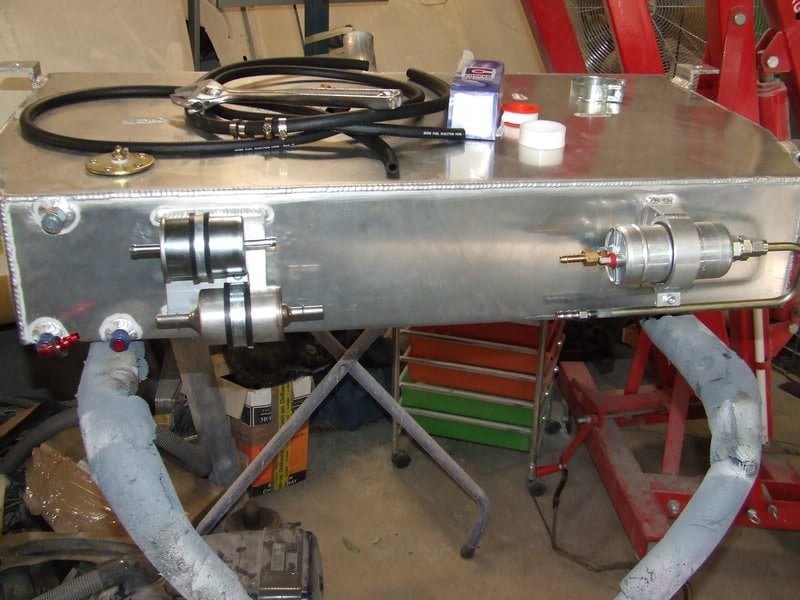
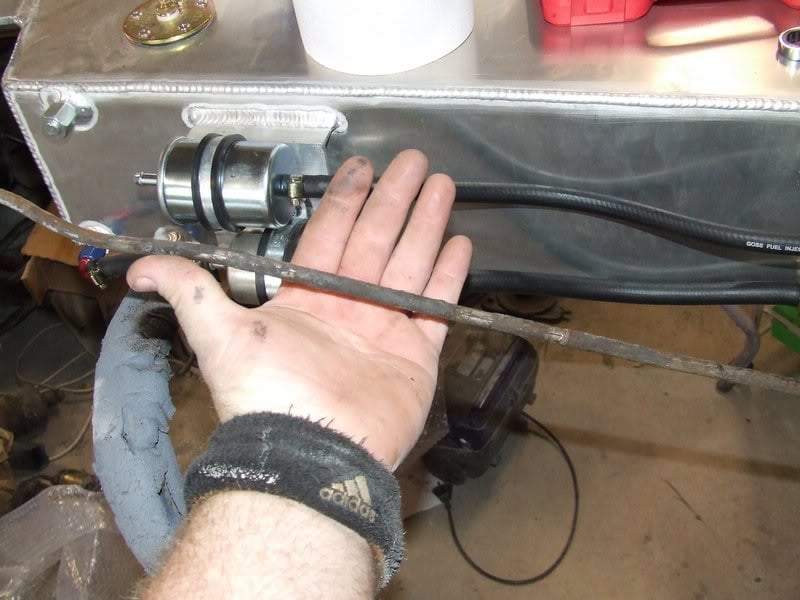
I was originally going to mount the pump here but to have room for a filter before and after the pump I ended up welding the pump mount to the other side of the tank and mounting the filters on the plate where the pump is here.

Here's the basic layout with the pump bracket welded on.

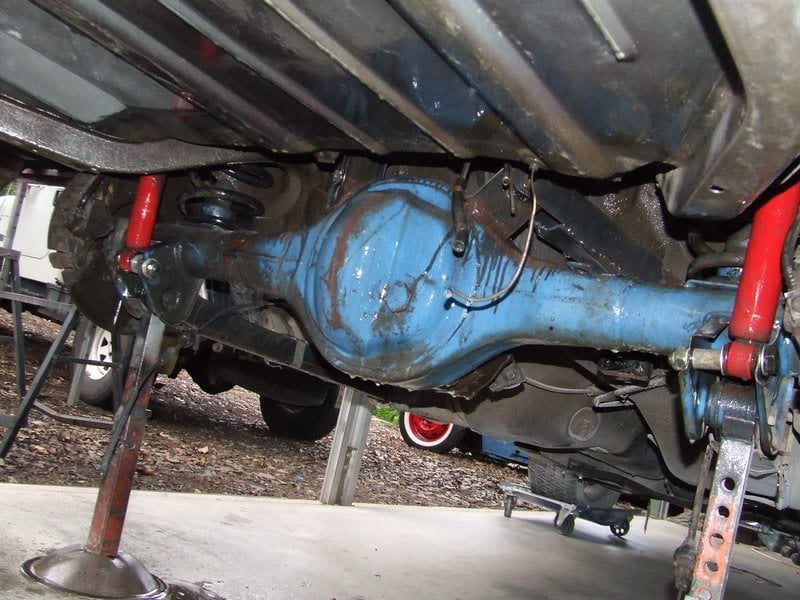
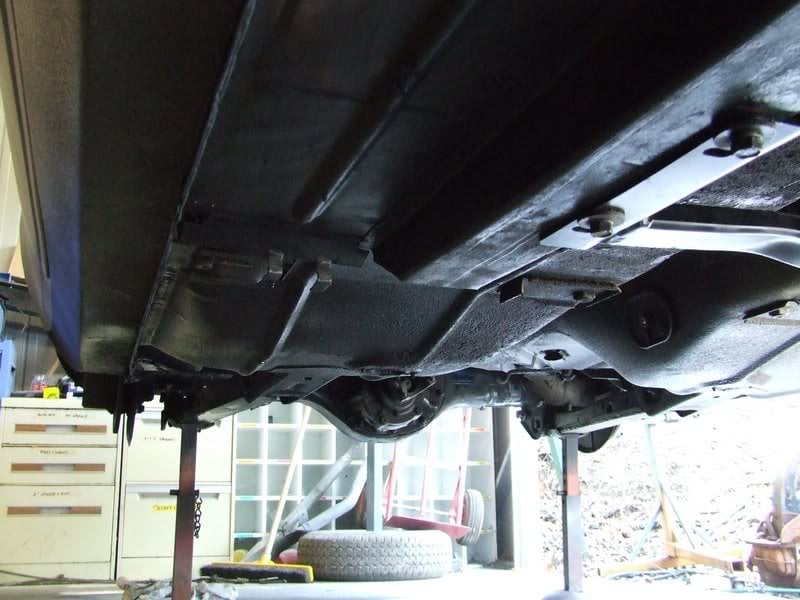
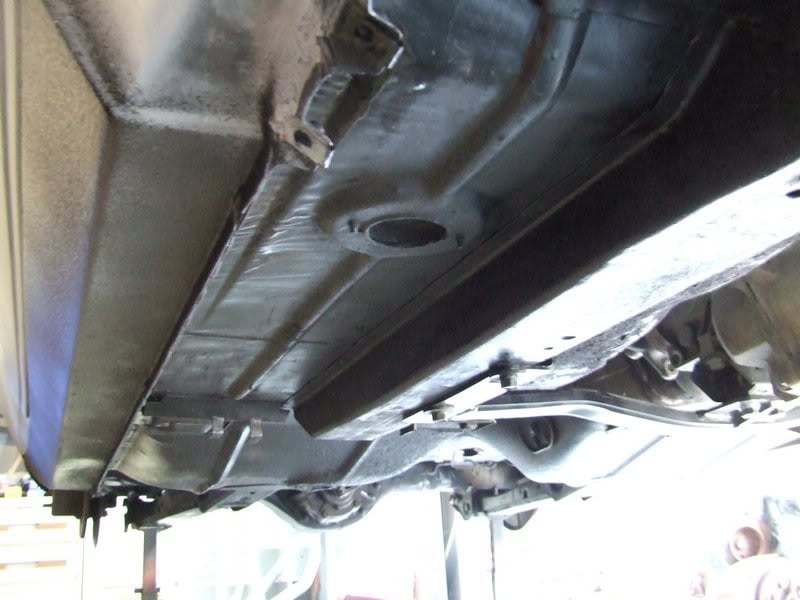
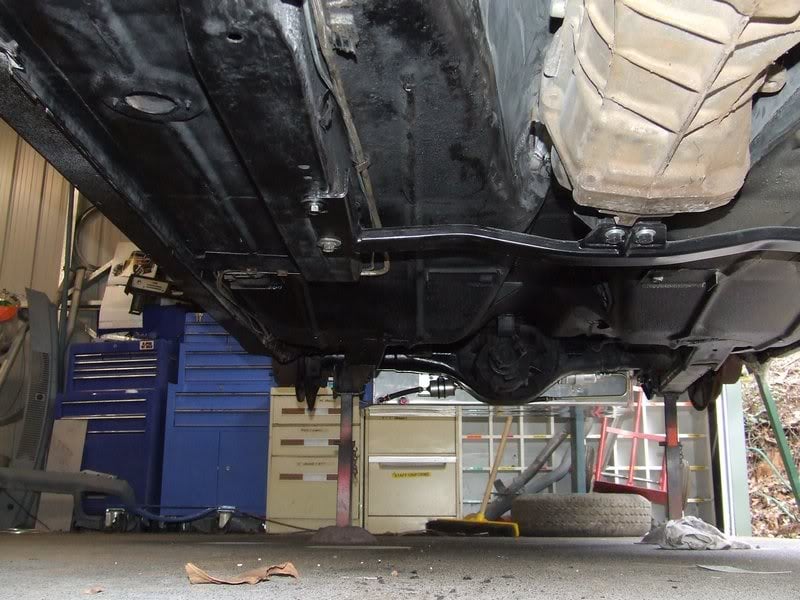
Before I run new brake and fuel lines I decided to give the underside a bit of a clean.

I used CT18 truckwash for the most of it and scraped off the really crusty bits, buts it's really just to check for rust and to make it look a bit less blue diffy : )
I ended up doing the truckwash 3 times, but it came up well in the end.
This is the first spray with CT18.
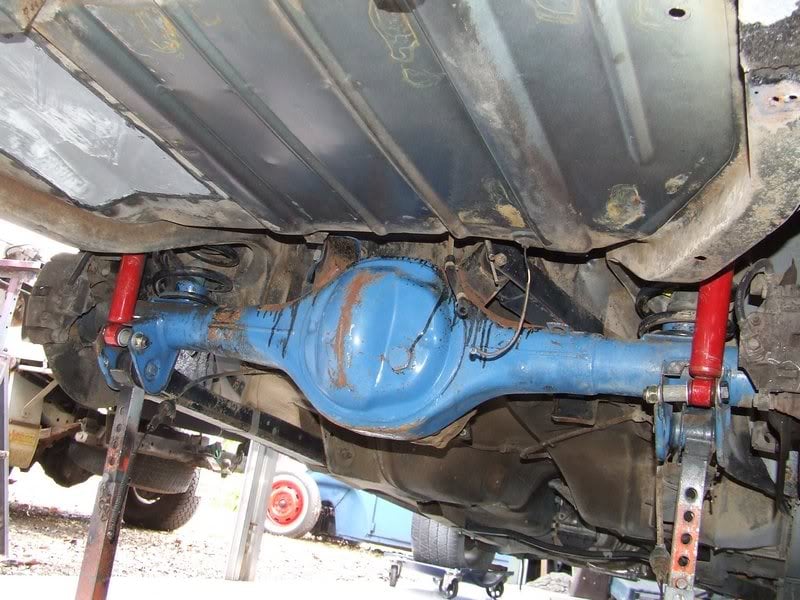
I let it dry after each going over with the truckwash to see how it was looking. This is after the first spray and hose off.
The under side is just getting a coat or two of stone guard.
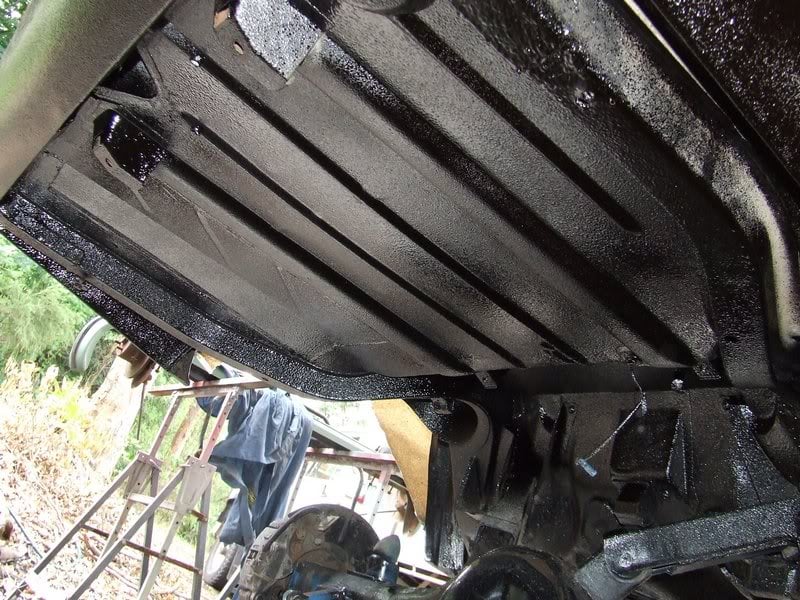
The sills copped some stone guard too. I'll reprime over this and top coat over it so it will be almost invisible.


Next job is to make this stuff into some brake lines.

The bottom hose is a combination of 2 different landcruiser hoses and some more steel pipe.
Thanks go to young Kev at Carbitz in Nambour for letting me go through all their hoses to get this sorted out.
It was a pain as the top and bottom outlets on the motor are different sizes and both are different to the radiator, so that made it interesting.
Next up is the fuel system.
I was originally going to mount the pump here but to have room for a filter before and after the pump I ended up welding the pump mount to the other side of the tank and mounting the filters on the plate where the pump is here.
Here's the basic layout with the pump bracket welded on.
Before I run new brake and fuel lines I decided to give the underside a bit of a clean.
I used CT18 truckwash for the most of it and scraped off the really crusty bits, buts it's really just to check for rust and to make it look a bit less blue diffy : )
I ended up doing the truckwash 3 times, but it came up well in the end.
This is the first spray with CT18.
I let it dry after each going over with the truckwash to see how it was looking. This is after the first spray and hose off.
The under side is just getting a coat or two of stone guard.
The sills copped some stone guard too. I'll reprime over this and top coat over it so it will be almost invisible.
Next job is to make this stuff into some brake lines.
#346
_dirtbag_
_dirtbag_
-
- Guests
Posted 23 February 2010 - 08:06 PM
Some of the fittings are for a single pipe flare and some are double flare, even though it all came off the same VP commodore. I just had to make sure I made the hoses the right way around to suit.
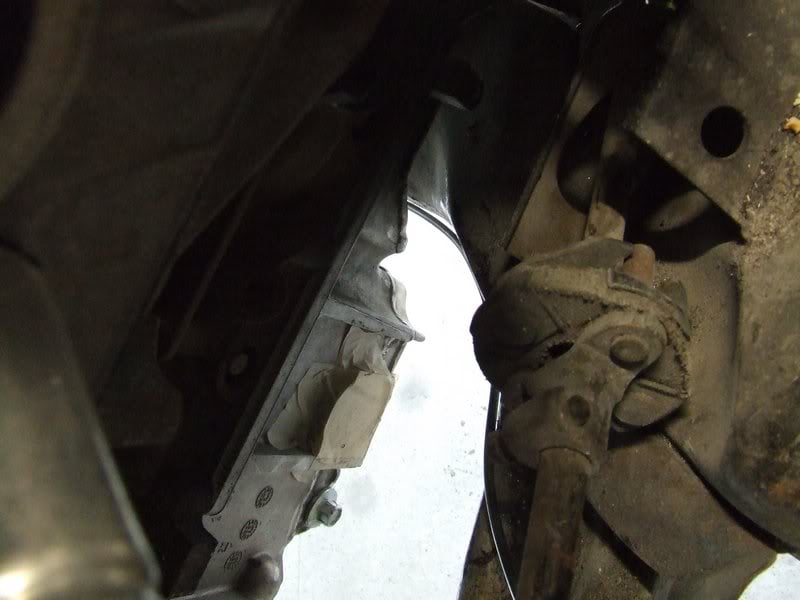
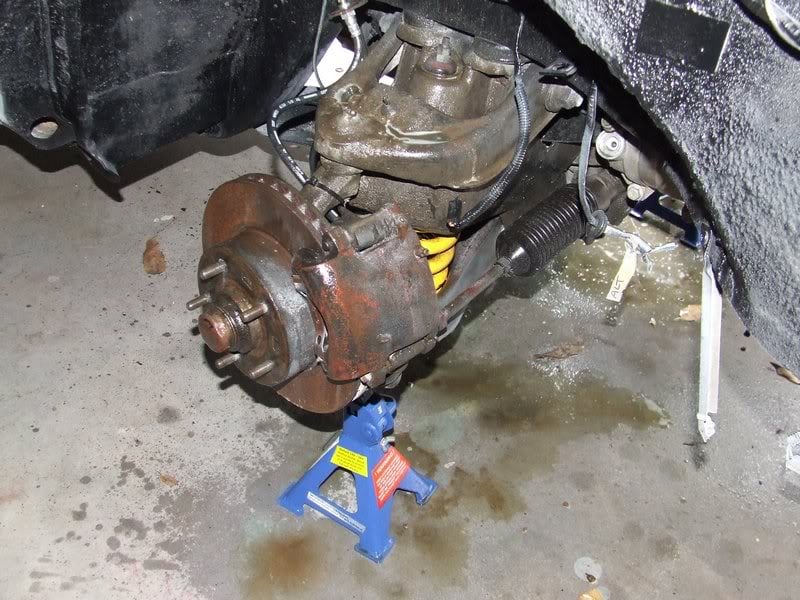
The rubber line is also commodore and is the T piece for the rear brakes. It fits perfectly into the original torana mount on the body and is even the right length. Bargain.

I had to check that the rubber hose didn't get squashed when the diff was raised, and luckily for me it didn't.

It certainly isn't super pretty, but it's better than before, and I know there's no rust in there.

I then had the fun job of removing the old hard lines for fuel and rear brakes. Once they were out I cleaned the drivers side of the floor and painted it so I could fit the new lines and not have to paint over them.
There's so much fun to be had cleaning under a car : )
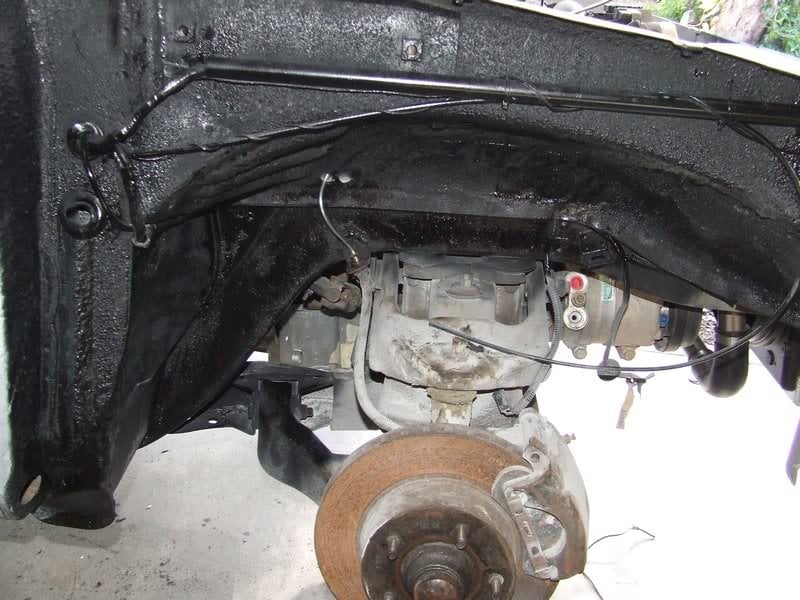
I also did the inside of the drivers side front guard so I could do the brake lines and bonnet release cable.
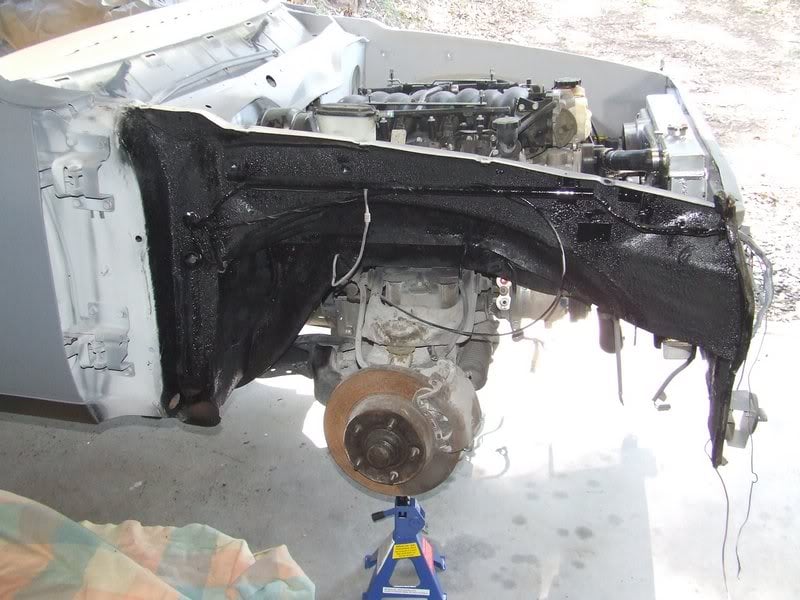
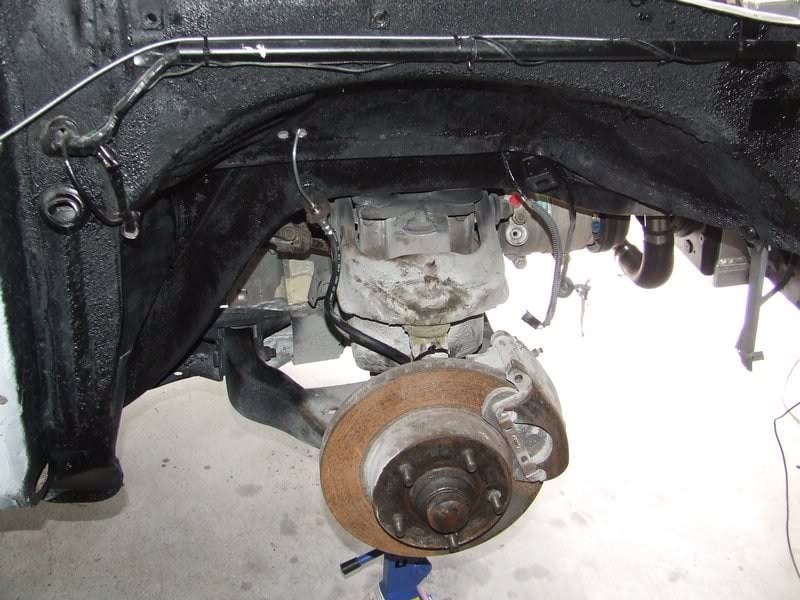
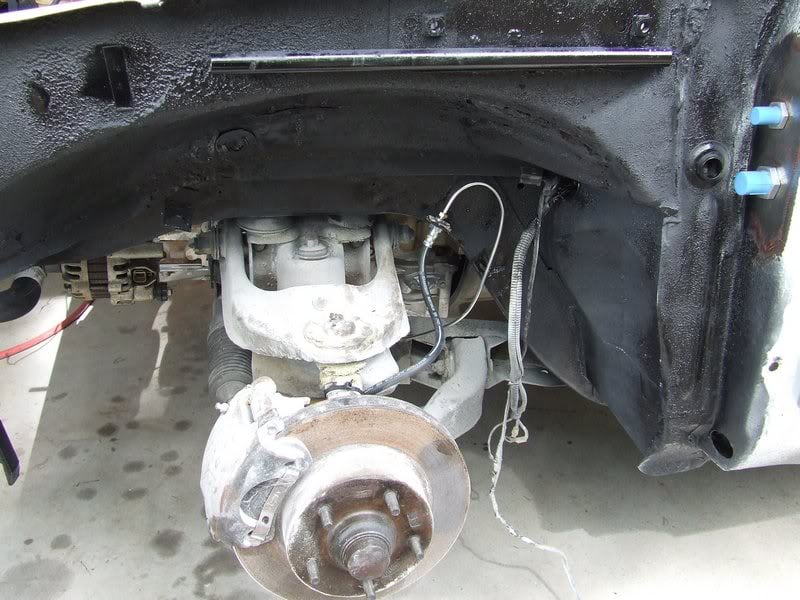
Here's the brake line for the front right wheel. The pipe coming out of the engine bay is for the rear brakes. It's connected to the rear rubber line and runs along the original path under the car. I just need a special fitting to connect it to the master cylinder.
The front right wheel brake line will go through the other hole in the inner guard and then run along the back of the crossmember.
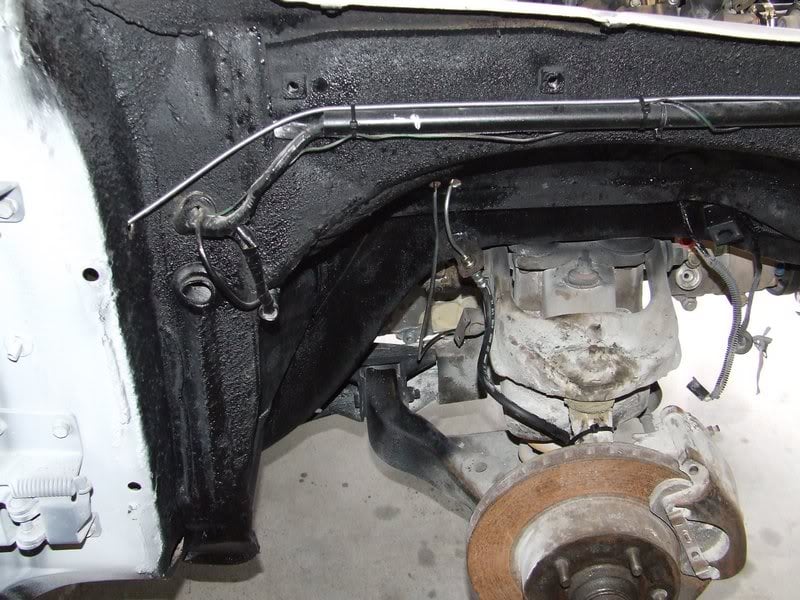
Here's the brake line in place. The flexi hose will need replacing as it's crusty and it needs to be metric at the end of the new brake line.
I also fitted an extra long bonnet release cable so I could completely hide it. It will only be visible at the bonnet latch.
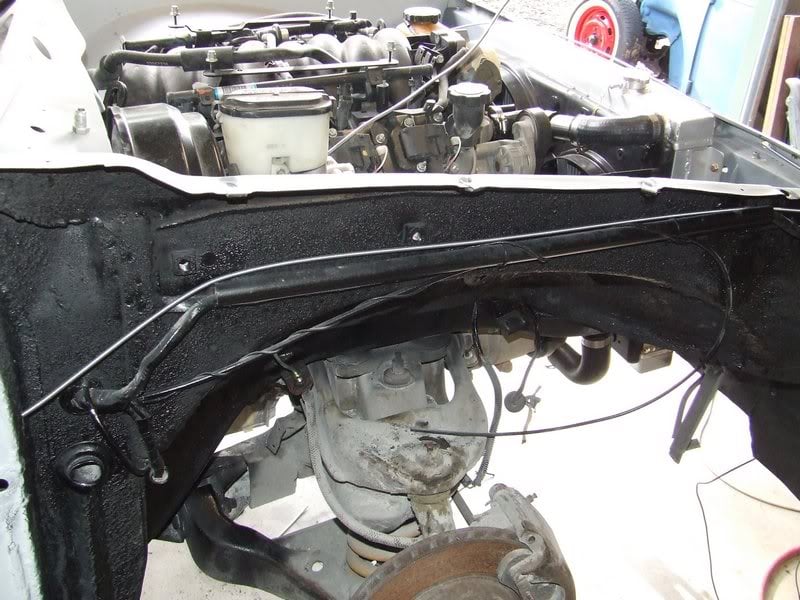
This is the only bit that will be seen as it goes into the bonnet latch.
The rubber line is also commodore and is the T piece for the rear brakes. It fits perfectly into the original torana mount on the body and is even the right length. Bargain.
I had to check that the rubber hose didn't get squashed when the diff was raised, and luckily for me it didn't.
It certainly isn't super pretty, but it's better than before, and I know there's no rust in there.
I then had the fun job of removing the old hard lines for fuel and rear brakes. Once they were out I cleaned the drivers side of the floor and painted it so I could fit the new lines and not have to paint over them.
There's so much fun to be had cleaning under a car : )
I also did the inside of the drivers side front guard so I could do the brake lines and bonnet release cable.
Here's the brake line for the front right wheel. The pipe coming out of the engine bay is for the rear brakes. It's connected to the rear rubber line and runs along the original path under the car. I just need a special fitting to connect it to the master cylinder.
The front right wheel brake line will go through the other hole in the inner guard and then run along the back of the crossmember.
Here's the brake line in place. The flexi hose will need replacing as it's crusty and it needs to be metric at the end of the new brake line.
I also fitted an extra long bonnet release cable so I could completely hide it. It will only be visible at the bonnet latch.
This is the only bit that will be seen as it goes into the bonnet latch.
#347
_dirtbag_
_dirtbag_
-
- Guests
Posted 23 February 2010 - 08:13 PM
On another tangent, but something I'm excited about, is my flares for my MK1 2 door escort showed up. They're the big works style flares. I can't wait to get this thing going.

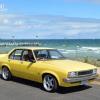
For those that don't know what they look like fitted, here's some examples.
I love these things so much. If only I was allowed to stick a 5 litre in mine legally : )


How cool are they : )
For those that don't know what they look like fitted, here's some examples.
I love these things so much. If only I was allowed to stick a 5 litre in mine legally : )
How cool are they : )
#348
_UNVSM8_
_UNVSM8_
-
- Guests
Posted 24 February 2010 - 08:22 PM
that red escort is awesome! the uc is coming along nicely! i like what u have done so far 
ben
ben
#349
_dirtbag_
_dirtbag_
-
- Guests
Posted 25 February 2010 - 06:53 AM
Thanks Ben.
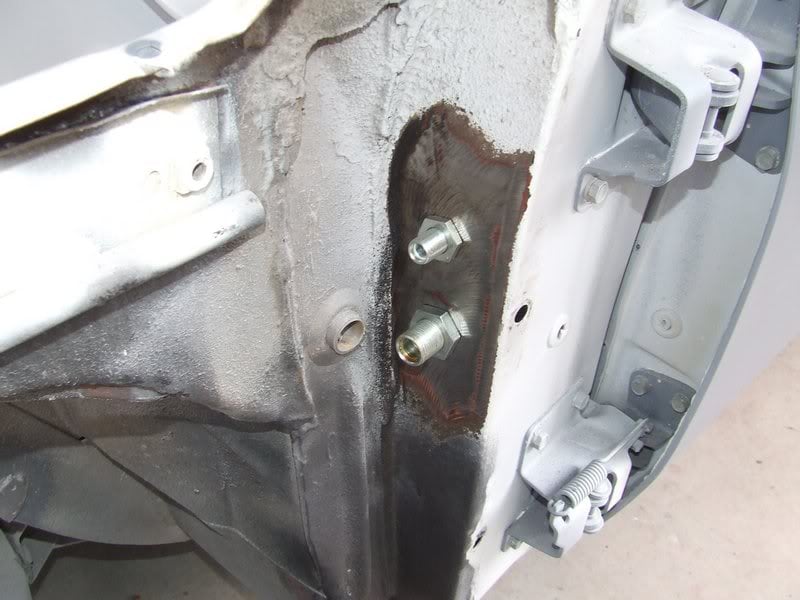
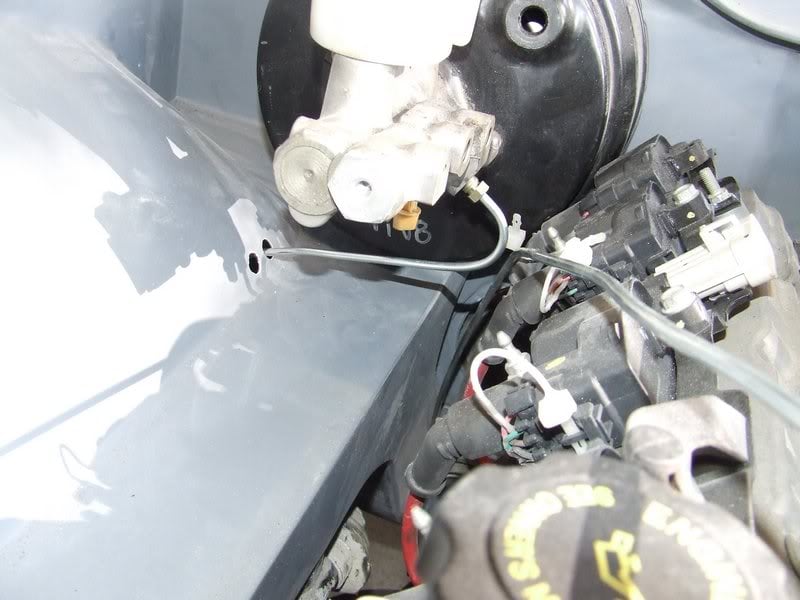
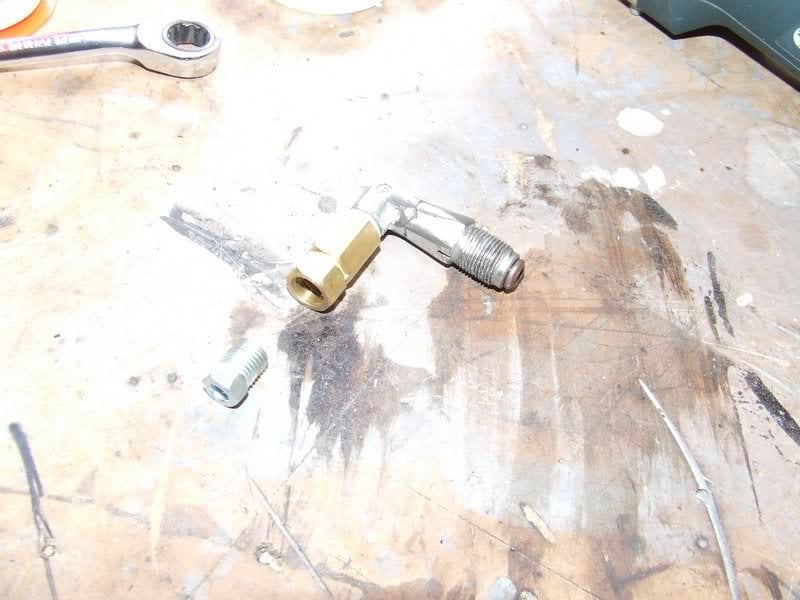
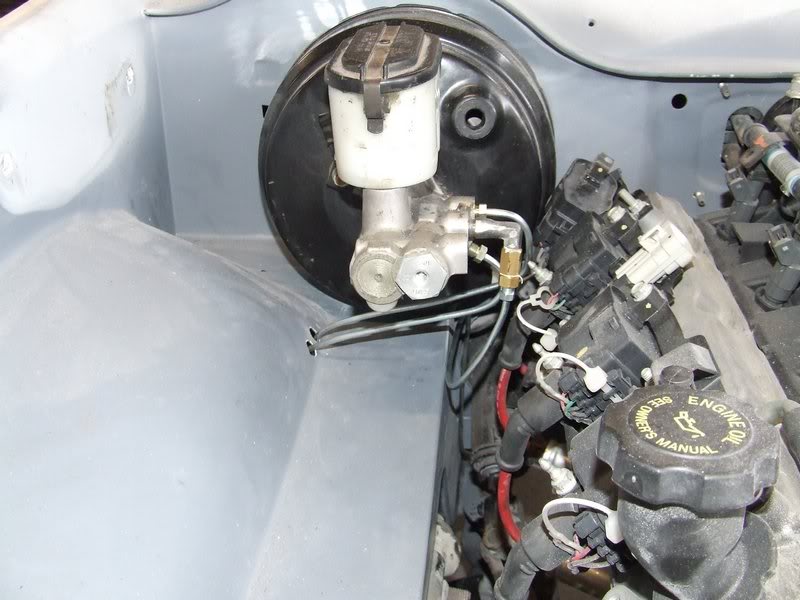
Well I got some more work done on the brake lines. I had to invent a fitting that would allow me to screw the 3/16 fitting into the 1/4 inch hole. This is what I came up with, as there was nothing I could find with the same 12x1mm thread I needed.
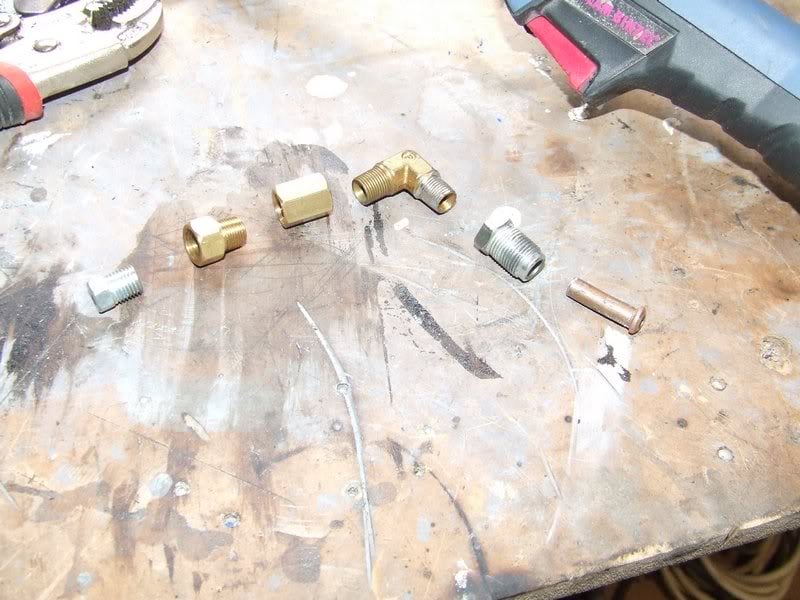
The fitting with the flared pipe in front of it got welded to the 90 degree elbow. With the short piece of flared pipe pushed inside it will now seal against the master cylinder. I screwed the fitting in before welding and marked the top so I knew the bend would be facing the right way.
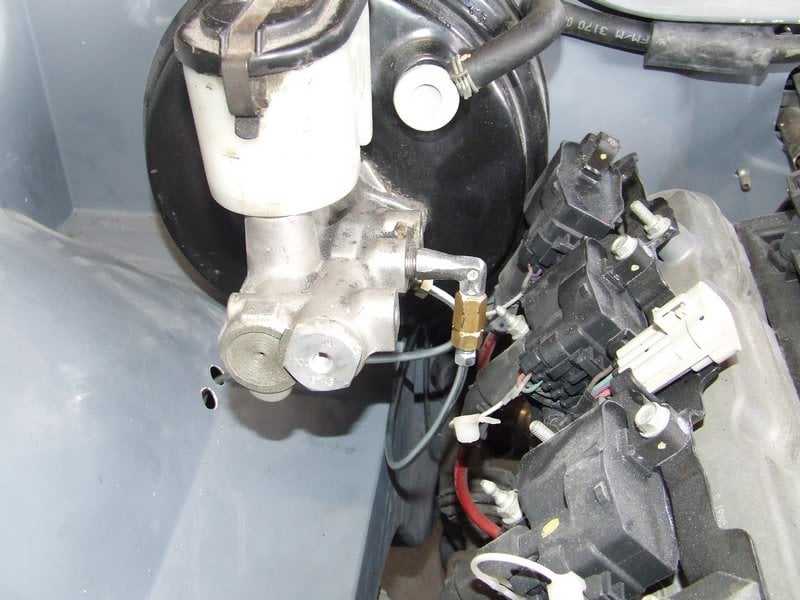
Here it is fitted to the master cylinder with the rear brake line now connected.
I had the new rubber lines made that are metric at the pipe end and imperial at the caliper end. This brake is now finished, along with the rears. Yay. I also changed the pipe from the master cylinder on this wheel comes through the front hole in the inner guard, as it was easier to route the other line through the back hole.
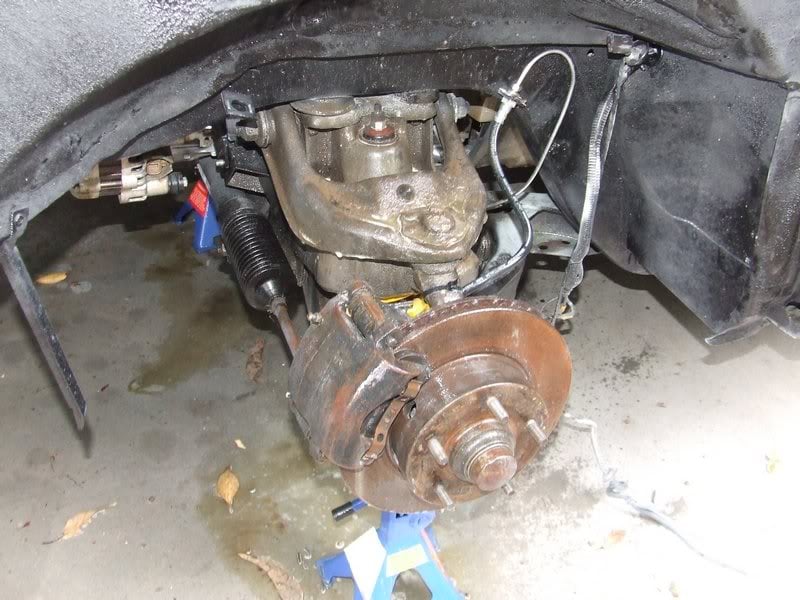
Here's the hose for the left front wheel disappearing towards the motor.
Making the pipe for the front left wheel was a little tricky, as I wanted it in one piece but it curls around so much at each end I don't think it can be removed without cutting it. This made it interesting to make.
Once the motor comes out again I'll attach the pipe to the crossmember with some "P" clamps.
Next step was cleaning the old steel fuel line, as it was covered in crap but still good enough to use.
The new rear brake line and original fuel line still run in their original mounts under the car. Don't give me grief about how crap the underside looks, I'm way too lazy for that sort of attention to detail. Once the motor and box come out I'll be able to do a better job on the front floors and tunnel.
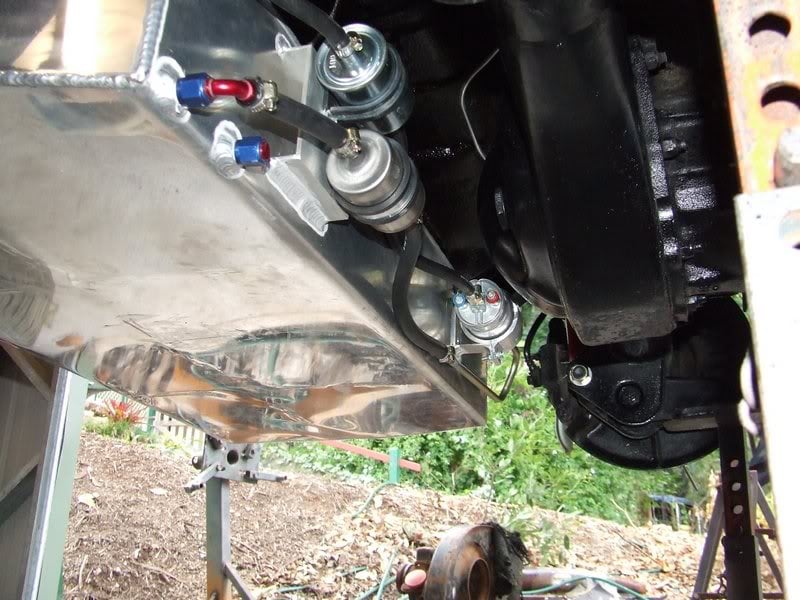
Next the fuel tank went back in and the filter joined to the steel fuel line under the car with a piece of rubber hose. EFI grade of course : )
I tried to make as much room around the diff as possible and still be able to get at everything. I think it's turned out pretty well.
Next awesome job is cleaning the front suspension and steering.
That's it for now.
Well I got some more work done on the brake lines. I had to invent a fitting that would allow me to screw the 3/16 fitting into the 1/4 inch hole. This is what I came up with, as there was nothing I could find with the same 12x1mm thread I needed.
The fitting with the flared pipe in front of it got welded to the 90 degree elbow. With the short piece of flared pipe pushed inside it will now seal against the master cylinder. I screwed the fitting in before welding and marked the top so I knew the bend would be facing the right way.
Here it is fitted to the master cylinder with the rear brake line now connected.
I had the new rubber lines made that are metric at the pipe end and imperial at the caliper end. This brake is now finished, along with the rears. Yay. I also changed the pipe from the master cylinder on this wheel comes through the front hole in the inner guard, as it was easier to route the other line through the back hole.
Here's the hose for the left front wheel disappearing towards the motor.
Making the pipe for the front left wheel was a little tricky, as I wanted it in one piece but it curls around so much at each end I don't think it can be removed without cutting it. This made it interesting to make.
Once the motor comes out again I'll attach the pipe to the crossmember with some "P" clamps.
Next step was cleaning the old steel fuel line, as it was covered in crap but still good enough to use.
The new rear brake line and original fuel line still run in their original mounts under the car. Don't give me grief about how crap the underside looks, I'm way too lazy for that sort of attention to detail. Once the motor and box come out I'll be able to do a better job on the front floors and tunnel.
Next the fuel tank went back in and the filter joined to the steel fuel line under the car with a piece of rubber hose. EFI grade of course : )
I tried to make as much room around the diff as possible and still be able to get at everything. I think it's turned out pretty well.
Next awesome job is cleaning the front suspension and steering.
That's it for now.
#350
_AD_75_
_AD_75_
-
- Guests
Posted 25 February 2010 - 05:35 PM
Starting to take shape nicely tim, tidy work as always the brake/tank/rad setup looks very neat. 


1 user(s) are reading this topic
0 members, 1 guests, 0 anonymous users

