
This car is going to be ausome mate i carn't believe how quickly it's taking shape and i love those extractors you did a wicked job it's a shame you can't buy them of the shelf like that. And i recon that steering column mod is a great idea to.Thers always something new to pic up on hear
 1 votes
Fixing my brothers UC hatch
Started by
_dirtbag_
, Dec 30 2009 01:19 PM
1690 replies to this topic
#377
 _nial8r_
_nial8r_
-

- Guests
Posted 07 March 2010 - 07:56 PM
yep they extractors have come up a treat and your opinion is just right mate, keep up the good work 
#378
orangeLJ
-

- Members
-

- 10,261 posts
Yes, yes I do post alot!
- Joined: 02-May 06
Posted 08 March 2010 - 07:34 AM
Nice pipes!
Will the LS1 fit up between the chassis rails so you can drop the engine, Gbox and cross member out all at once?
Will the LS1 fit up between the chassis rails so you can drop the engine, Gbox and cross member out all at once?
#379
_nial8r_
_nial8r_
-
- Guests
Posted 08 March 2010 - 04:54 PM
looking at the pic's it looks like it all would drop out in 1 piece ...
#380
_dirtbag_
_dirtbag_
-
- Guests
Posted 08 March 2010 - 05:46 PM
Hi guys. Yes, you could drop the whole lot out in one piece if desired, crossmember and all.
#381
_dirtbag_
_dirtbag_
-
- Guests
Posted 08 March 2010 - 09:20 PM
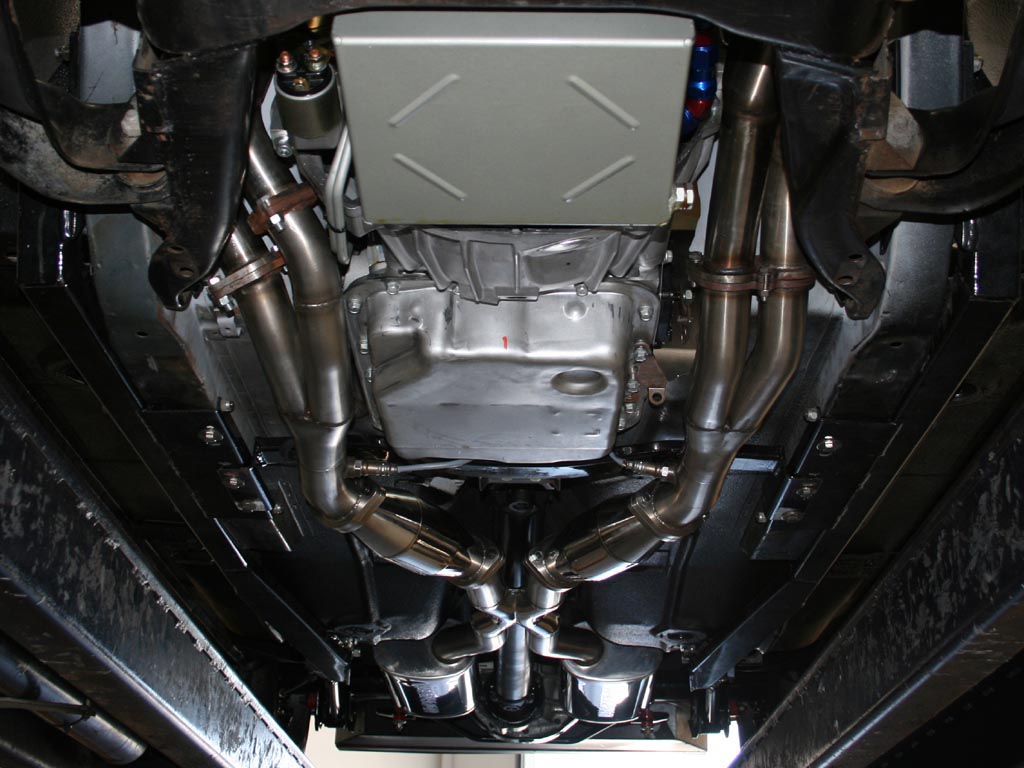
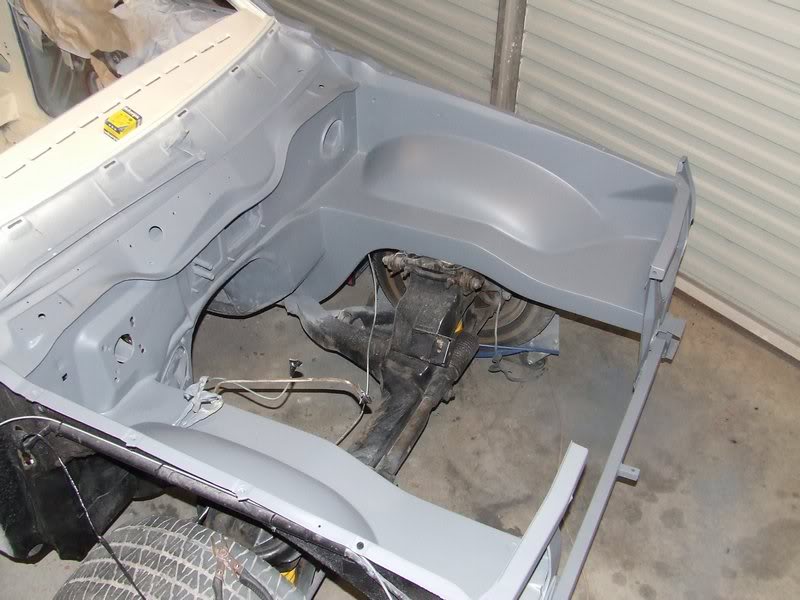
I finished welding the drivers side extractor today.
I welded the inside of the flange and die ground it smooth for a bit better flow. I also tried to keep the Y pieces as smooth as I could inside too as I was making them.

All welded and sanded down, ready for some shiny coating.

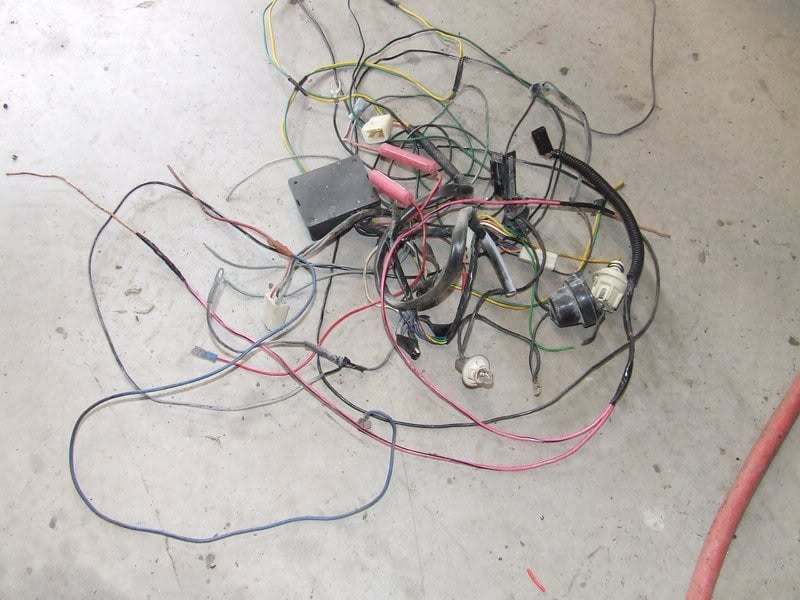
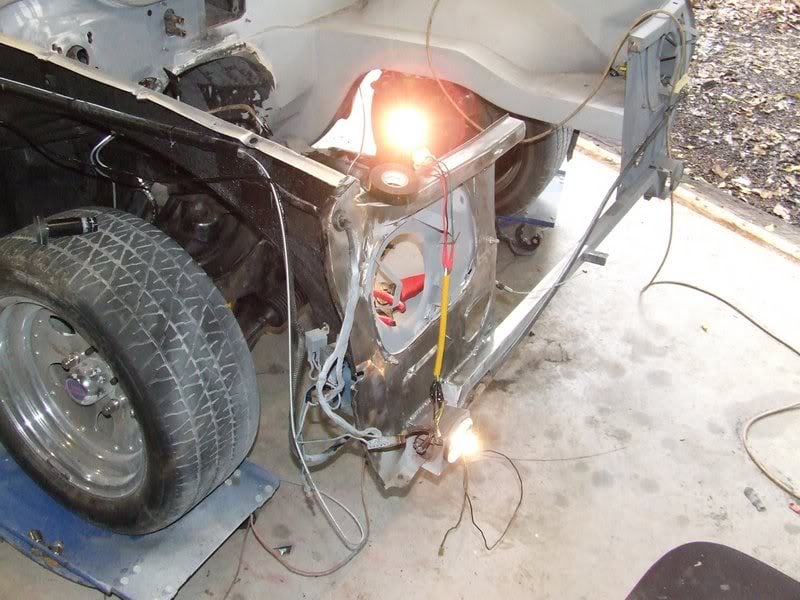
The next fun step was to start sorting some wiring. The alternator and starter motor wiring are on the wrong side they need to be on to suit the chev, so that all needs to be changed over. For now I set up a bodgy battery arrangement so I could find out what goes where. Only the lights are working so far. The loom is a mess.

The loom under the dash has seen better days. Most wires are cut into for some reason, things like old alarms and immobilisers. Lucky me : )

Oh, and earlier it was mentioned I just swap a wire or two and plug it in, well the UC dash has no common plugs to the LX dash. I really know nothing about this, as I've never done it before, but I'm learning. Slowly : )

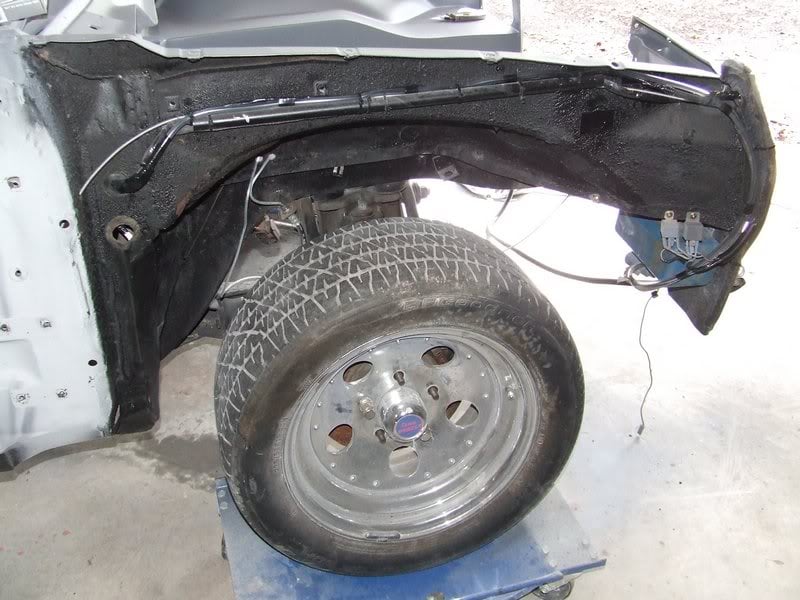
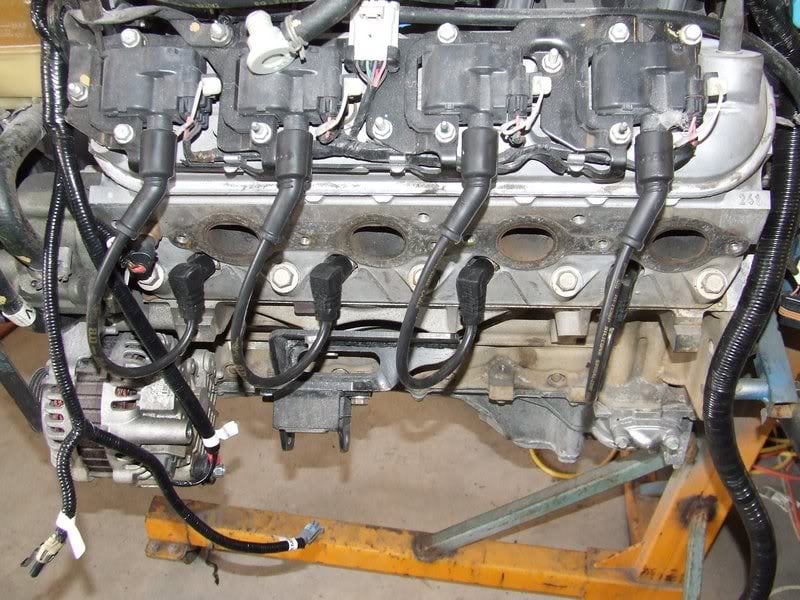
Because the extractors ended up being such a weird shape I need to change the spark plug leads to 90 degree ones. It doesn't look like there's much room, but there is enough. The pic just doesn't show it.

Can anyone see a problem with me fitting the oxygen sensors just forward of the collector, facing outwards? I'm not sure if they're supposed to be a certain distance from the head.

I welded the inside of the flange and die ground it smooth for a bit better flow. I also tried to keep the Y pieces as smooth as I could inside too as I was making them.
All welded and sanded down, ready for some shiny coating.
The next fun step was to start sorting some wiring. The alternator and starter motor wiring are on the wrong side they need to be on to suit the chev, so that all needs to be changed over. For now I set up a bodgy battery arrangement so I could find out what goes where. Only the lights are working so far. The loom is a mess.
The loom under the dash has seen better days. Most wires are cut into for some reason, things like old alarms and immobilisers. Lucky me : )
Oh, and earlier it was mentioned I just swap a wire or two and plug it in, well the UC dash has no common plugs to the LX dash. I really know nothing about this, as I've never done it before, but I'm learning. Slowly : )
Because the extractors ended up being such a weird shape I need to change the spark plug leads to 90 degree ones. It doesn't look like there's much room, but there is enough. The pic just doesn't show it.
Can anyone see a problem with me fitting the oxygen sensors just forward of the collector, facing outwards? I'm not sure if they're supposed to be a certain distance from the head.
#382
_keg006_
_keg006_
-
- Guests
Posted 08 March 2010 - 10:01 PM
Hi mate awesome project and thread. Check it out every day
here is a link for some info on lambda sensors. page 9 is where its at.
THe closer to the head the better but that location shouldnet affect it much. And as long as it gets exhaust gases from all cylinders.
http://www.bosch.com...s/Section_D.pdf
The mounting says it should be at least 10 degrees above the horizontal
and one more important note from it all (depending on the sensor that is used) Do not cover the connectors
hope this info helps.
Edited by keg006, 08 March 2010 - 10:12 PM.
#383
ls2lxhatch
-

- Members
-
- 5,332 posts
- Location:Perth
- Car:LX Hatch
- Joined: 29-May 06
Posted 08 March 2010 - 10:02 PM
My O2 sensors are in the last collector just before the flange. It would be worth checking chassis rail clearance before fitting them on the outside. I have the labelled all the wires on the back of my LX dash if that helps with wiring.
Edited by ls2lxhatch, 08 March 2010 - 10:04 PM.
#384
orangeLJ
-
- Members
-
- 10,261 posts
Yes, yes I do post alot!
- Joined: 02-May 06
Posted 09 March 2010 - 01:03 PM
Hi guys. Yes, you could drop the whole lot out in one piece if desired, crossmember and all.
Then no need to get anyone round to help you put the motor back in the frshly painted bay!
lift the car, roll the lot in underneath, and bobs your uncle

#385
_AD_75_
_AD_75_
-
- Guests
Posted 09 March 2010 - 03:30 PM
Because the extractors ended up being such a weird shape I need to change the spark plug leads to 90 degree ones. It doesn't look like there's much room, but there is enough. The pic just doesn't show it.
Eek! wonder how hard its gunna be to get the plugs out looks very tight in there hope ya bro has tiny hands
 Pipes came up nicely though good effort.
#386
_dirtbag_
_dirtbag_
-
- Guests
Posted 09 March 2010 - 08:18 PM
Thanks again for the info Andy. Under your car looks awesome man, good job!!
orangelj I did think about doing what you say to install the motor and box after painting, but I've heard the crossmember can be a bit of a battle to get back into place, especially when fully assembled with running gear. Is this true? I've never done it, so can only go off what I've heard.
Also, I'd need people to help lift the body anyway, as I wouldn't want to hook the engine crane to a painted body. We'll see though. I can't wait to be at that stage : )
Oh, and Aido, yes, that one spark plug will be a fun thing to get at. The extractor will have to be loosened off about half way to get the spanner onto the plug. Hopefully wont need too many spark plug changes. I just couldn't find any other way of fitting the pipes, so that's the price you pay for sticking something where it isn't meant to be : )
Edited by dirtbag, 09 March 2010 - 08:18 PM.
#387
ls2lxhatch
-
- Members
-
- 5,332 posts
- Location:Perth
- Car:LX Hatch
- Joined: 29-May 06
Posted 09 March 2010 - 08:44 PM
Lowering the body onto the k-frame is easy once you get the technique down. I have it down to about 20 minutes on my own to install the k-frame with the engine, gearbox and extractors.
Engine Install
Engine Install
Edited by ls2lxhatch, 09 March 2010 - 08:48 PM.
#388

Posted 10 March 2010 - 06:33 AM
Can be a bit annoying at the time but you're not dealing with topside painted surfaces and everything else is very easy this way.orangelj I did think about doing what you say to install the motor and box after painting, but I've heard the crossmember can be a bit of a battle to get back into place, especially when fully assembled with running gear. Is this true? I've never done it, so can only go off what I've heard.
I use a method similar to Andy with the support under the front of the chassis rails, crane doesn't even get close to the body. I prefer using the crane because it can hold in any position as long as you like rather than wanting to put it down at a bad moment!Also, I'd need people to help lift the body anyway, as I wouldn't want to hook the engine crane to a painted body.
#389
myss427
 View Garage
-

- Members
-
- 1,636 posts
Forum Fixture
- Location:Canberra
- Car:427 hatch, CV8 Monaro, Ve SSV ute. Was part owner A9X sedan until he sold it without telling me!
- Joined: 17-November 05
View Garage
Posted 10 March 2010 - 08:44 AM
I do exactly the same as LS2Hatch does, and use a tie down on the rear of control arms to slide them in easier.
#390
_nial8r_
_nial8r_
-
- Guests
Posted 10 March 2010 - 02:28 PM
can the plug on the drivers side be removed with out taking the extractors off ?? and with the lead being so close to the pipe will the heat create any problems ???
#391
_dirtbag_
_dirtbag_
-
- Guests
Posted 10 March 2010 - 04:23 PM
Lee, the spark plug lead can come on and off with the extractor bolted on, and the plug itself can come out, but a ratchet wont fit in there. A tube spark plug spanner will fit though as they have a much smaller head.
The lead is close, but the pic makes it look closer than it is. I've had holden V8s with less clearance than this and never had any dramas, so fingers crossed : )
As for the front end coming out, I'll leave that up to my brother. All the crossmember bushes are already nolathane so I didn't see the point in removing it.
At the end of the day I don't really care which way it goes back together. I'll just be so bloody happy it's going back together for the last time : )
#392
_dirtbag_
_dirtbag_
-
- Guests
Posted 10 March 2010 - 08:58 PM
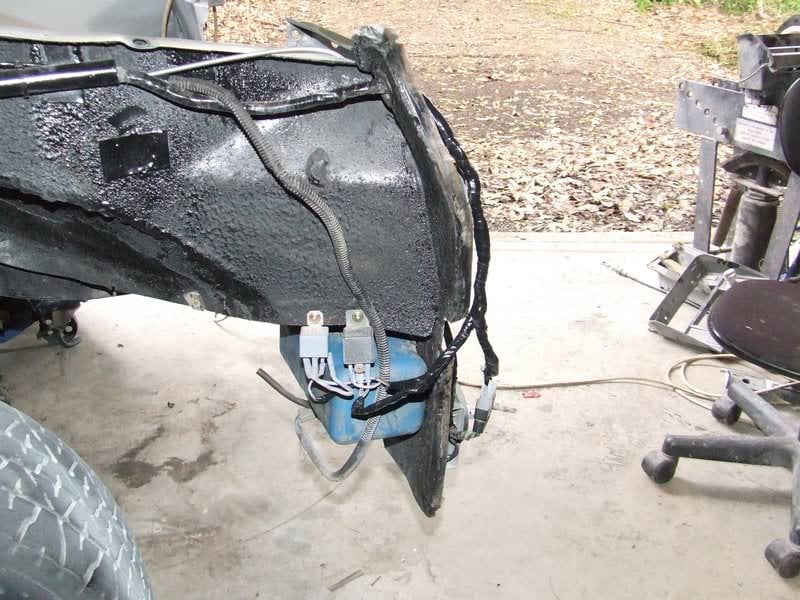
Starting to get somewhere with the original wiring finally. Basically nothing worked and nearly every wire was spliced into.
I bought new "00" size battery cables as the battery is going in the back. I also bought new alternator wire, heat shrink, bulbs, battery terminals etc.

This is less than half the crap I cut out from under the dash.
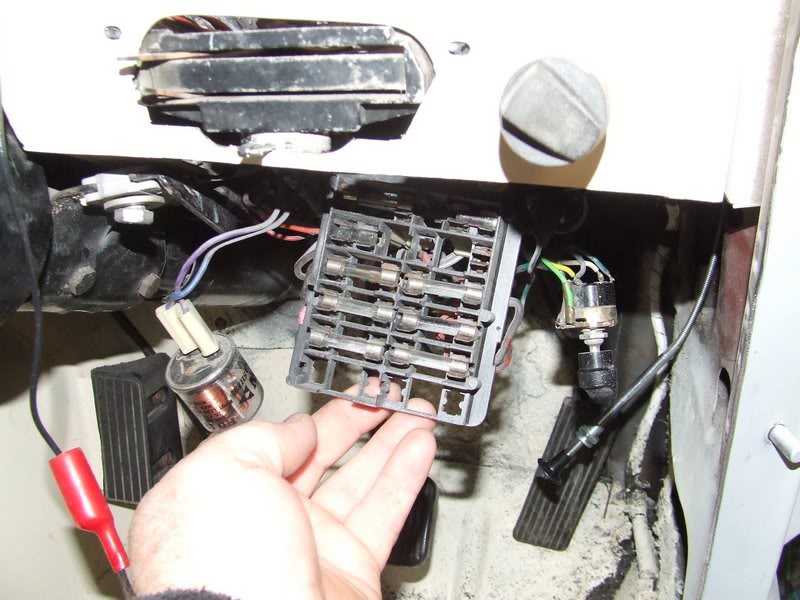
Now all that's left hanging under the dash is the intermittent wiper switch, the fuse box and the flasher unit.
After some mucking around I had lights and indicators. Better than nothing.
I even got excited enough to start cleaning the front of the radiator support panel.
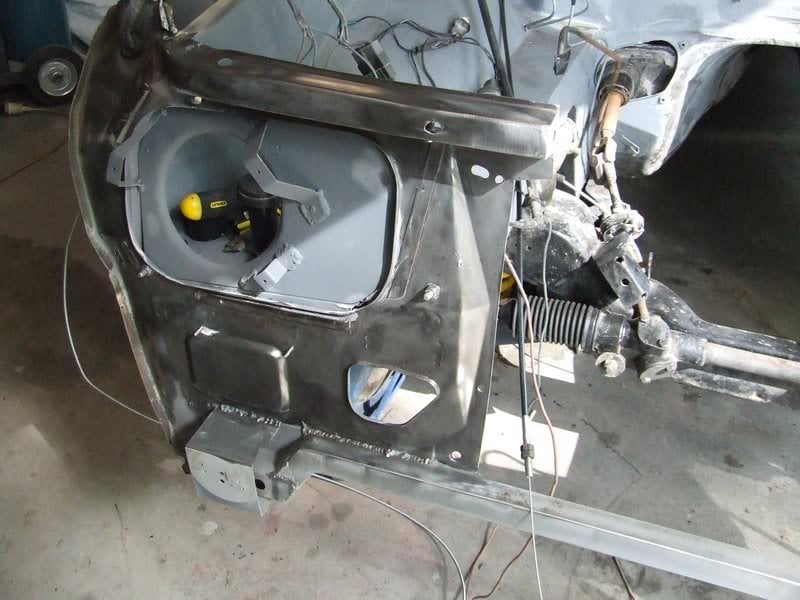
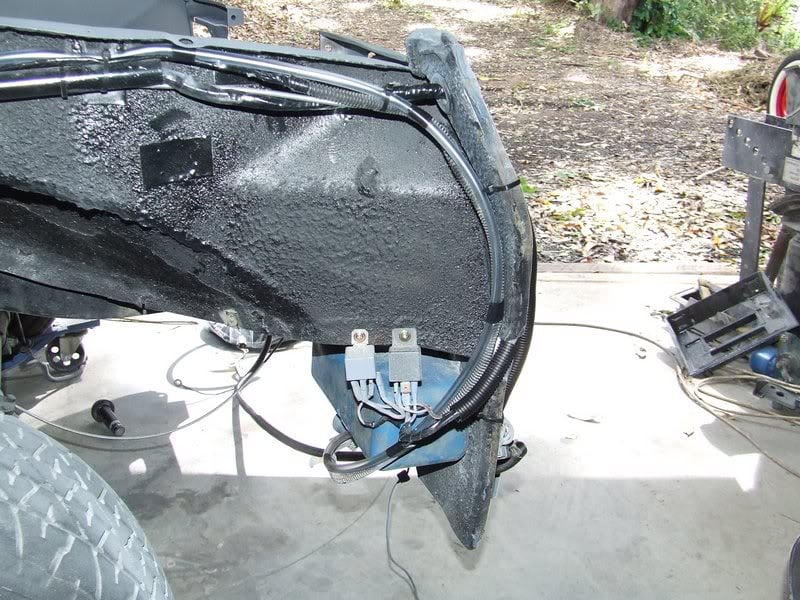
I mounted the window squirter bottle under the guard and even got the wiring working. I just need to hook up the hose now. I also tried to neaten up the headlight wiring/relays a bit.
I changed the indicator wiring to suit the new indicators too.
I bought new "00" size battery cables as the battery is going in the back. I also bought new alternator wire, heat shrink, bulbs, battery terminals etc.
This is less than half the crap I cut out from under the dash.
Now all that's left hanging under the dash is the intermittent wiper switch, the fuse box and the flasher unit.
After some mucking around I had lights and indicators. Better than nothing.
I even got excited enough to start cleaning the front of the radiator support panel.
I mounted the window squirter bottle under the guard and even got the wiring working. I just need to hook up the hose now. I also tried to neaten up the headlight wiring/relays a bit.
I changed the indicator wiring to suit the new indicators too.
#393
_76S.L.R_
_76S.L.R_
-
- Guests
Posted 10 March 2010 - 09:44 PM
I'm ashamed to say I only saw this thread last week!= Dirtbag mate your a bloody ledgend, your work is bloody flawless= can you fly over to Perth to help with my LX! your daughters a little cutie too and will be car nut at a later age I suspect!? my turn in 5 weeks(the wife's due to have a little Girl) maybe your daughter can teach her how to weld HEE,HEE keep up the good work bloke..
your daughters a little cutie too and will be car nut at a later age I suspect!? my turn in 5 weeks(the wife's due to have a little Girl) maybe your daughter can teach her how to weld HEE,HEE keep up the good work bloke..
#394
ls2lxhatch
-
- Members
-
- 5,332 posts
- Location:Perth
- Car:LX Hatch
- Joined: 29-May 06
Posted 10 March 2010 - 11:11 PM
As for the front end coming out, I'll leave that up to my brother. All the crossmember bushes are already nolathane so I didn't see the point in removing it.
I think with the cutout in your radiator support panel in is far easier to drop the engine in from the top than it is to use the k-frame method.
#395
_dirtbag_
_dirtbag_
-
- Guests
Posted 11 March 2010 - 08:48 PM
Hello again.
76S.L.R thanks for the kind words, and yes we'll have to arrange for the kids to do some welding : )
Andy, do you have any advice for me in regards to changing the rear main seal on the LS1? I know there's a tool you can get to fit the new seal without it folding over itself, but I can't find the tool separately, I've only found it in a big LS1 servicing tool package.
Also, today I found the LH/LX heater fan switch is knackered. Does anyone out there have a spare one they'd like to sell me????
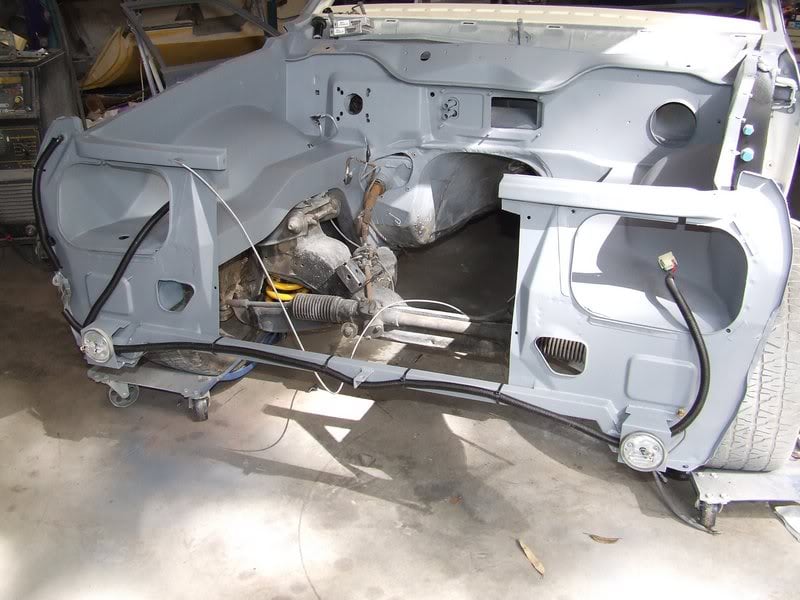
After mucking about a bit with the wiring I got a tad over it so decided I'd go back to the front of the radiator support panel.
I cleaned the rest of it back to metal and welded up all the unused holes. There were quite a few.

Once that was done I thought seeing as the engine bay is getting a bit knocked around I'd give it all a sand with some 120 dry and reprime the bay as well. I also sanded and reprimed the headlight mounts and the heater box.


I'm really happy with the way the heater box turned out after I chopped it up.

The lip at the top of the firewall is looking a bit neater now too after being smoothed out.

I really like this primer that I've been using. It's just a protec 2 pack primer filler, but it tacks off really fast so it doesn't get full of crap as it dries. This is only about 15 minutes after I sprayed the last coat and it's already lost it's shine. Easy to sand too : )
Tomorrow = more wiring : ) YAY!!!!
76S.L.R thanks for the kind words, and yes we'll have to arrange for the kids to do some welding : )
Andy, do you have any advice for me in regards to changing the rear main seal on the LS1? I know there's a tool you can get to fit the new seal without it folding over itself, but I can't find the tool separately, I've only found it in a big LS1 servicing tool package.
Also, today I found the LH/LX heater fan switch is knackered. Does anyone out there have a spare one they'd like to sell me????
After mucking about a bit with the wiring I got a tad over it so decided I'd go back to the front of the radiator support panel.
I cleaned the rest of it back to metal and welded up all the unused holes. There were quite a few.
Once that was done I thought seeing as the engine bay is getting a bit knocked around I'd give it all a sand with some 120 dry and reprime the bay as well. I also sanded and reprimed the headlight mounts and the heater box.
I'm really happy with the way the heater box turned out after I chopped it up.
The lip at the top of the firewall is looking a bit neater now too after being smoothed out.
I really like this primer that I've been using. It's just a protec 2 pack primer filler, but it tacks off really fast so it doesn't get full of crap as it dries. This is only about 15 minutes after I sprayed the last coat and it's already lost it's shine. Easy to sand too : )
Tomorrow = more wiring : ) YAY!!!!
#396
_Bomber Watson_
_Bomber Watson_
-
- Guests
Posted 11 March 2010 - 09:05 PM
Lemme guess, 443 Parafill in GV5 base grey???
Same stuff im using, yes its very nice.
Same stuff im using, yes its very nice.
#397
rodomo
-

- Members
-
- 18,034 posts
To advertise here, call 13TORANA
- Name:R - O - B Dammit!
- Location:Way out west of Melbourne Awstraylya
- Joined: 10-December 05
Posted 11 March 2010 - 10:53 PM
Andy, do you have any advice for me in regards to changing the rear main seal on the LS1? I know there's a tool you can get to fit the new seal without it folding over itself
IF it's the problem I'm thinking of when you are trying to fit the outer edge of the seal to the block at the same time as the lip is engaging the crank?
Cut a piece of thin plastic (a pelaco shirt box cover or similar) to the size of the circumference of the crank X 3" (75mm) wide.
Roll this sleeve around the crank in a slight cone shape and feed the inner lip of the seal over the sleeve. Lube seal lip and sleeve.
Push the seal up the sleeve and tap it into the block.
Remove the sleeve.
Edited by rodomo, 11 March 2010 - 10:54 PM.
#398
J-Rod
-

- Members
-
- 189 posts
Forum Member
- Location:..
- Joined: 08-November 05
Posted 12 March 2010 - 06:35 PM
Awesome job you're doing Dirtbag.
This thread is a real inspiration. Your fabrication skills and ingenuity are really impressive.
With the oxygen sensors.. are the ones you have the heated type? If not they'll need to reach around 360(?) degrees C to work.
This thread is a real inspiration. Your fabrication skills and ingenuity are really impressive.
With the oxygen sensors.. are the ones you have the heated type? If not they'll need to reach around 360(?) degrees C to work.
#399
_dirtbag_
_dirtbag_
-
- Guests
Posted 12 March 2010 - 07:47 PM
The oxygen sensors are just the standard commodore ones, so whatever they are??
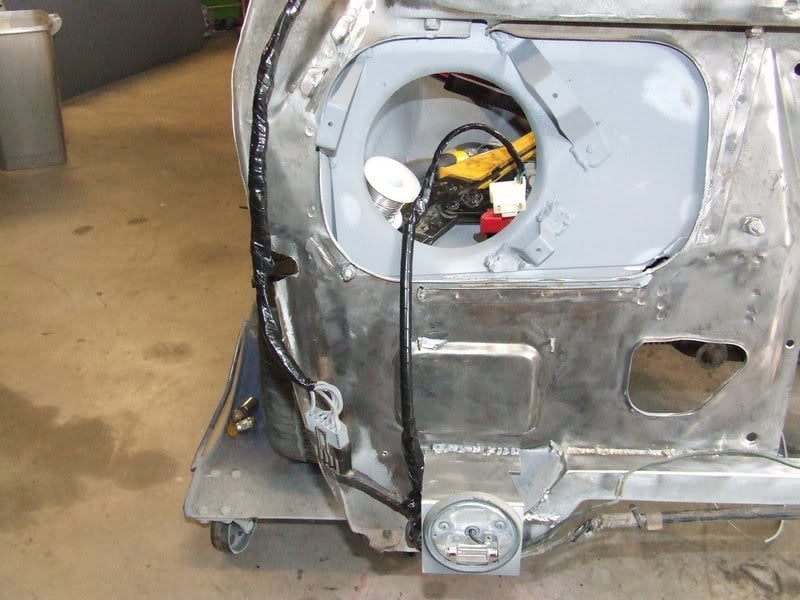
Not much to show when just doing wiring, but here's a couple of pics anyway.
The front of the original loom is now finished.
I ran a new hose for the windscreen squirters as well.
Does anyone have any of the plastic drains that run from the plenum to the A pillar they'd like to sell? Please?
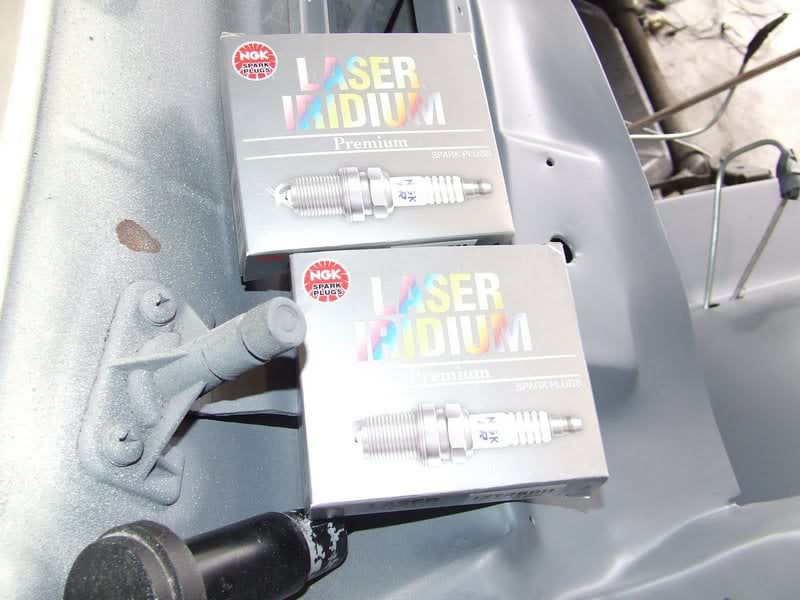
I also bought some fancy pants long life spark plugs.
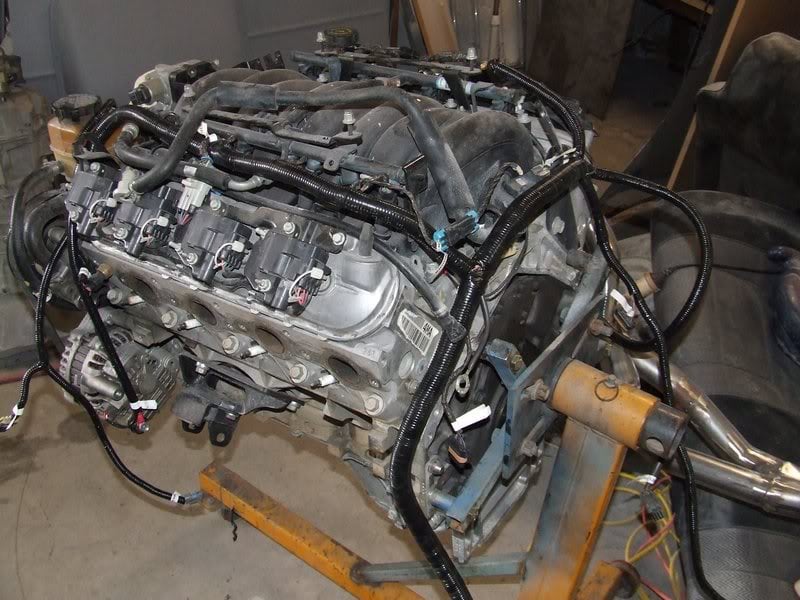
I refitted the wiring loom to the motor after it was modified by CAE.
I had custom spark plug leads made up to suit the new extractors.
Not much to show when just doing wiring, but here's a couple of pics anyway.
The front of the original loom is now finished.
I ran a new hose for the windscreen squirters as well.
Does anyone have any of the plastic drains that run from the plenum to the A pillar they'd like to sell? Please?
I also bought some fancy pants long life spark plugs.
I refitted the wiring loom to the motor after it was modified by CAE.
I had custom spark plug leads made up to suit the new extractors.
#400
Growla
-

- Members
-
- 229 posts
Forum Member
- Location:Canberra ACT
- Car:LX SL/R LS1 conversion completed July 2010
- Joined: 07-February 07
Posted 12 March 2010 - 08:38 PM
Great work! Any chance of posting a picture of the underside of the transmission tunnel where the input shaft goes in. With my tunnel, I'll have to remove/modify the strengthening rib to get the T-56 gearbox to sit level. At the moment to much angle.
Cheers
Mark
Cheers
Mark


1 user(s) are reading this topic
0 members, 1 guests, 0 anonymous users

