Jump to content


* * * * * 1 votes

Fixing my brothers UC hatch


  • Please log in to reply
1690 replies to this topic

#401 _dirtbag_

_dirtbag_
  • Guests

Posted 12 March 2010 - 09:10 PM

Hi Mark. Do you mean you'll have to remove the floor crossmember like I did? Do you mean where the tail shaft goes in? If so, yeah, I can take some pics over the weekend and post them for you.

When you say too much angle, I assume you mean front to rear? Are you using an aftermarket gearbox crossmember or making your own?


You can sort of just see where the floor has been welded to the old crossmember I had to cut through to fit the shifter.


Posted Image


This shows how much I had to cut out


Posted Image

This doesn't really show a lot, but here it is anyway.

Posted Image


I'll try to get some better pics soon.

#402 Growla

Growla

    Forum Member

  • Members
  • PipPipPip
  • 229 posts
  • Location:Canberra ACT
  • Car:LX SL/R LS1 conversion completed July 2010
  • Joined: 07-February 07

Posted 13 March 2010 - 10:55 PM

I used CAE engine mounts and the engine and gearbox (modified T-56 Camaro/mustang rear housing)sit on an up hill angle from front to back. So I have bought CRS engine mounts which set the engine lower and forward compared to CAE. Now have to cut the F body Sump(DAM!). Or maybe I can cut the ridge out where the tail shaft goes and put the ridge on top like you have. As my gearbox is a fair bit shorter than the commodore T-56 and the input shaft sits in the middle of that ridge which is in the way.

As for the gearbox crossmember it the similar as yours (CAE type). But doesn't really suit now that I changed the rear extension housing. So I'll make my own.
cheers
Mark

#403 _mick74lh_

_mick74lh_
  • Guests

Posted 14 March 2010 - 07:18 PM

Awesome. Love your job of the hidden wiring. The looms out to the headlights are really neat. I can understand how that dash wirings a pain in the arse so good luck getting it sorted. Also have you decided with your brother what wheels the car is gonna wear yet?


#404 _dirtbag_

_dirtbag_
  • Guests

Posted 15 March 2010 - 01:25 PM

Thanks Mick, glad you like it : )

As for wheels, they are already here, and look awesome, but brother wants to leave them a secret until it's finished. I think a bit of mystery is good. They really suit the car though.

#405 _dirtbag_

_dirtbag_
  • Guests

Posted 16 March 2010 - 04:48 PM

Well wasn't today a lot of fun. Not really. : )

I cleaned and stone guarded under the front floorpans and trans tunnel. This black gunk goes everywhere, and when I did the rear section I didn't cover the floor, or myself, and paid the price of a sticky floor for 2 weeks and still have black dots on me.

This time I bought some drop sheets, wore long clothes and spent some time masking off some areas.


Posted Image

Posted Image


Mark (growla) is this a good enough pic of the area you wanted to see where I cut throught the floor support?


Posted Image


I also gave some of the inner guards a coat too, including where I cut the lip off the firewall.


Posted Image


None of this is real pretty I know, but should do the job.


Where the stone guard wraps around the corner onto the firewall will get primed over and top coated, so it wont be noticeable at all.


Posted Image


Here's the motor with the rear seal removed. A bit easier than the old holden and chev small blocks from the 70's hey : )

I had a workshop replace the seal for me, as I don't want to be responsible if it leaks later.

Posted Image


And the new seal in place.
Excuse these pics, I used my phone.

Posted Image


And then the new flywheel and new flywheel bolts were torqued into place.


Posted Image


And here's the motor back home ready to get the clutch fitted.


Posted Image

#406 _AD_75_

_AD_75_
  • Guests

Posted 16 March 2010 - 08:33 PM

Well wasn't today a lot of fun. Not really. : )

I cleaned and stone guarded under the front floorpans and trans tunnel. This black gunk goes everywhere, and when I did the rear section I didn't cover the floor, or myself, and paid the price of a sticky floor for 2 weeks and still have black dots on me.

This time I bought some drop sheets, wore long clothes and spent some time masking off some areas.


Posted Image


I also gave some of the inner guards a coat too, including where I cut the lip off the firewall.


Posted Image


None of this is real pretty I know, but should do the job.


Understating it as always! i think it came up pretty tidy, the bits you trimmed off the firewall look much better too with some stone guard finish on. Getting closer to paint! have we decided on a color yet?..cant wait to see what sort of wheels you picked. :)

Edited by AD_75, 16 March 2010 - 08:34 PM.


#407 Growla

Growla

    Forum Member

  • Members
  • PipPipPip
  • 229 posts
  • Location:Canberra ACT
  • Car:LX SL/R LS1 conversion completed July 2010
  • Joined: 07-February 07

Posted 17 March 2010 - 07:25 AM

Thanks, I see you still left some of the ridge. For my car I have to raise this about 20-25mm. I want no vibration in the tail shaft.

Cheers
Mark

#408 _dirtbag_

_dirtbag_
  • Guests

Posted 18 March 2010 - 05:49 PM

Mark, just be careful raising the gearbox too high might result in the rest of the tunnel being too low.

Well I've done a couple of small things, but nothing very exciting.

I finally finished welding the left hand extractor. There wasn't much left to do, I was able to get to most of it while it was bolted to the motor.


Posted Image


I then bored a hole in the collector for the oxygen sensor bung.

This is where stepped drills come in really handy.


Posted Image


A bit of hot glue -

Posted Image


Here's this side finished ready for HPC.


Posted Image

I figured I'd better weld the oxygen sensor bung into the other extractor too. Now they're both all done. I hope : )


Posted Image


My next fun job is turning this collection of fittings into a T piece and an adaptor so I can use the LX senders for oil pressure and water temp as well as the standard LS1 senders.


Posted Image


Here's the T piece for the oil sender after I'd welded one of the fittings to it. There will be another fitting at the other end yet, as the LX sender is gas thread and the LS1 sender is M16x1.5mm.


Posted Image


Here's the T piece made and senders fitted.


Posted Image


I can't fit it with the holden sender fitted, but it's easy to fit that sender afterwards.


Posted Image


Once I was happy with it, I covered it in some Ferro pre plumbers 2 pac putty. It sets like concrete so means I'll be able to get a spanner on any part of it.


Posted Image


I had to drill the fitting out a little to allow the water temp sender to fit inside.

Posted Image

Posted Image


I then welded the other fitting on to give me the thread that I needed.


Posted Image


I know it's not screwed all the way in, but this is where the holden temp sender is going.

Posted Image


I never seems like much work when I post the pics. I'll have to pull my finger out a bit I think : )

#409 lxsstorana

lxsstorana

    Forum Fixture

  • Members
  • PipPipPipPipPip
  • 2,499 posts
  • Name:Mick
  • Location:Eastwood, Sydney
  • Car:SS Hatchback
  • Joined: 23-March 06

Posted 18 March 2010 - 05:53 PM

Great work as always. :rockon:

It's all those little jobs that take the time.

Mick.

#410 ls2lxhatch

ls2lxhatch

  • Members
  • PipPipPipPipPipPipPip
  • 5,332 posts
  • Location:Perth
  • Car:LX Hatch
  • Joined: 29-May 06

Posted 18 March 2010 - 06:25 PM

It is a little late now but you can buy both the fittings you made in brass from Castle Auto Electric.

GENIII-O/P Oil Pressure tee-piece adaptor. $55
Posted Image

GENIII-T/S Temp Sender adaptor. Suits all 1/8'' NPT guage senders $44
Posted Image

Edited by ls2lxhatch, 18 March 2010 - 06:28 PM.


#411 MRLXSS

MRLXSS

    The Render Garage

  • Members
  • PipPipPipPipPipPipPip
  • 12,399 posts
  • Name:Matt
  • Location:Upwey, Melbourne
  • Car:355 LX Hatchback, DeLorean DMC-12, LX SS Hatch, VY Cross8 Crewman
  • Joined: 09-November 05

Posted 18 March 2010 - 06:42 PM

Posted Image


So thats where that sender is! I bought the socket for it, but had no clue where it was!

#412 76lxhatch

76lxhatch

    That was easy!

  • Members
  • PipPipPipPipPipPipPip
  • 7,184 posts
  • Location:Unzud
  • Car:SS
  • Joined: 04-August 08
Garage View Garage

Posted 18 March 2010 - 07:06 PM

GENIII-O/P Oil Pressure tee-piece adaptor. $55
GENIII-T/S Temp Sender adaptor. Suits all 1/8'' NPT guage senders $44

Eeek, at those prices I'd make my own too!

Dirtbag great work as always, especially with the photos so we can all see what you've been up to :spoton:

#413 Heath

Heath

    I like cars.

  • Administrators
  • PipPipPipPipPipPipPip
  • 18,359 posts
  • Name:Heath
  • Location:Eastern Suburbs, Melbourne
  • Car:Heavily Modified UC Sunbird Hatchback
  • Joined: 07-November 05
Garage View Garage

Posted 18 March 2010 - 07:22 PM

^ haha exactly what I was thinking!

#414 Growla

Growla

    Forum Member

  • Members
  • PipPipPip
  • 229 posts
  • Location:Canberra ACT
  • Car:LX SL/R LS1 conversion completed July 2010
  • Joined: 07-February 07

Posted 18 March 2010 - 08:21 PM

You can get a three wire temp sender with an adaptor that looks orginal and for your fuel rail you can get a AN fitting. No bodgie hose connection.

cheers
Mark

#415 _hatch76_

_hatch76_
  • Guests

Posted 18 March 2010 - 09:08 PM

Awsome project pic's mate. For beginers like myself, I find looking through pictures like this and seeing how it's done, very interesting and rewarding. Is supprising how much info you can pick up. she's gonna be boner material when finished. Keep up the good work.Posted Image

#416 _dirtbag_

_dirtbag_
  • Guests

Posted 20 March 2010 - 06:44 PM

Well I got a bit more done.

First thing was to bolt the gearbox and extractors back on so I could see how much I had to extend the wiring for the oxygen sensors. With that done it was time to load it all back into the car....again!!!!

I bolted the main battery cable to the starter motor before fitting the motor, as it's a lot easier when it's not in the car.


Posted Image


Here's the oxygen sensors fitted and all plugged in.


Posted Image


I then ran the battery cable to the back of the car.

It had enough room to go straight through the extractors and into the inner guard area, so that's what I did.

Posted Image

Posted Image


If you look amongst the mess you can see the battery cable running along the inner sill, cable tied to the loom for the tail lights.

Posted Image


Once at the rear of the car I realised just how sad the tail light wiring looked, so I did a bit of work there.

I removed the horrid clamped on wiring for the old towbar too.

Posted Image

Covered it with some conduit.


Posted Image

Then tucked away.


Posted Image


Now it was time for the big wiring. I was a bit stand offish about this part, as I'm certainly no auto sparky, but it had to be done.

I looked about and figured the best place for the main engine loom to go inside the car was through the lower firewall.


Posted Image


There's plenty of room here, and it's fairly well hidden away really.

Posted Image


It was actually quite hard getting the huge computer plugs through the 60mm hole, as the exhaust doesn't allow a straight path through the hole. It's in there now though.


Posted Image

Doesn't look too bad to me.

Posted Image


The computer and new wiring harness had nowhere else to go but in the glovebox opening. It'll still be able to have a glovebox, it might just be a tad smaller inside.

Posted Image

One thing I really wanted to do today was to be able to turn the motor over with the key. Before I finished I ran one wire, yes, the starter wire : )

And presto, it now turns over with the key. It's a small victory, but an important one none the less : )

Posted Image


The only wiring left to go in the engine bay now is the heater motor, the wiper motor and the thermo fans. I don't think it'll look too overcrowded when it's all finished.

I wont be using that intake pipe either. I just stuck it on there so I could plug the sensors in. Because it's now tuned MAFless I'll be able to make something more symmetrical, as it wont need that big ugly alloy thing hanging off the end : )

Posted Image


Now I just need to figure out the rest of the wiring, put some fuel in it, cross my fingers and hope like hell it starts : )

Then I get to rip it all apart again : )

De ja vu anyone ????

#417 _cruiza_

_cruiza_
  • Guests

Posted 21 March 2010 - 08:23 AM

Mr Bag
Everytime I turn my PC on I have to come see what you have been upto, and everytime you post there is always something clever, neat or just well exicuted, starting to see / imagine the finished car, and it looks like its going to be a good one

#418 _johnharte_

_johnharte_
  • Guests

Posted 23 March 2010 - 11:07 AM

Well Mr DB - A truely great thread.. I have lost a few hours of my life reading this which I will never get back, but what i get in return is priceless!!

Im heading over to the UK at the end of this week - so if there are any MK1 bits you want bringing back in my luggage.. Let me know...

John

#419 _dirtbag_

_dirtbag_
  • Guests

Posted 23 March 2010 - 02:13 PM

Hi John. I'm glad you enjoyed the thread. As for MK1 escort bits, a BDA motor would be nice : ) What I do need is a round headlight grill, but probably wont fit in a suitcase : (

#420 _@milco@_

_@milco@_
  • Guests

Posted 23 March 2010 - 02:36 PM

royal mail!!!!!!! i reckon he could post it when he is there........

Well Mr DB - A truely great thread.. I have lost a few hours of my life reading this which I will never get back, but what i get in return is priceless!!

Im heading over to the UK at the end of this week - so if there are any MK1 bits you want bringing back in my luggage.. Let me know...

John


mmm you should fill your suit case with 1.75 and 2" SU carbys! cheap as chips over there! if you bring some back i will buy some for sure.... hint hint..... i just got 3x 2" SU ram tubes sent from the uk for $80aud total. brand new with a mesh gauze over the trumpets, midel in australia wanted 40-50 each!

#421 greens nice

greens nice

    Forum Fixture

  • Members
  • PipPipPipPipPip
  • 1,011 posts
  • Name:Kevin
  • Location:QLD
  • Car:EH Holden
  • Joined: 01-November 08

Posted 23 March 2010 - 06:18 PM

royal mail!!!!!!! i reckon he could post it when he is there........


Well Mr DB - A truely great thread.. I have lost a few hours of my life reading this which I will never get back, but what i get in return is priceless!!

Im heading over to the UK at the end of this week - so if there are any MK1 bits you want bringing back in my luggage.. Let me know...

John


mmm you should fill your suit case with 1.75 and 2" SU carbys! cheap as chips over there! if you bring some back i will buy some for sure.... hint hint..... i just got 3x 2" SU ram tubes sent from the uk for $80aud total. brand new with a mesh gauze over the trumpets, midel in australia wanted 40-50 each!


could you post a link to their website please? Posted Image

#422 _dirtbag_

_dirtbag_
  • Guests

Posted 24 March 2010 - 01:24 AM

Well unfortunately the car's at a stage where I'm busy doing stuff, but there's not much to see.

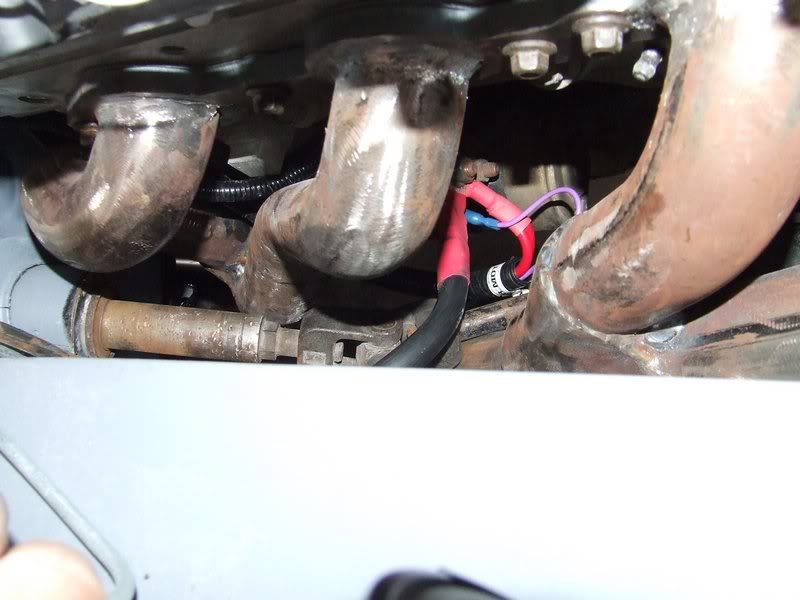
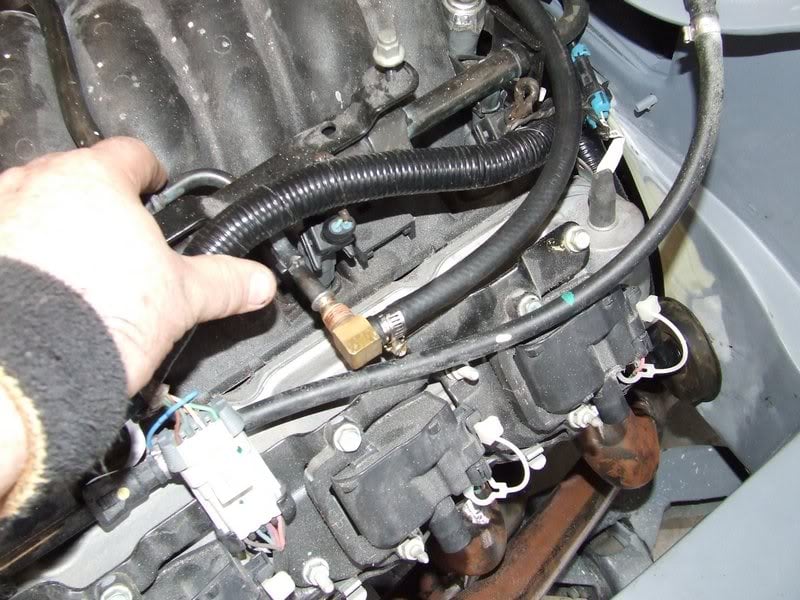
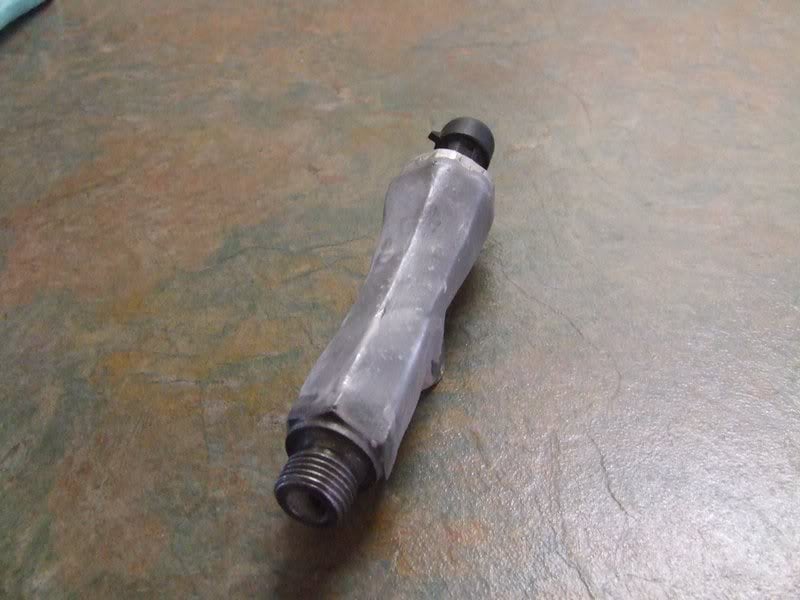
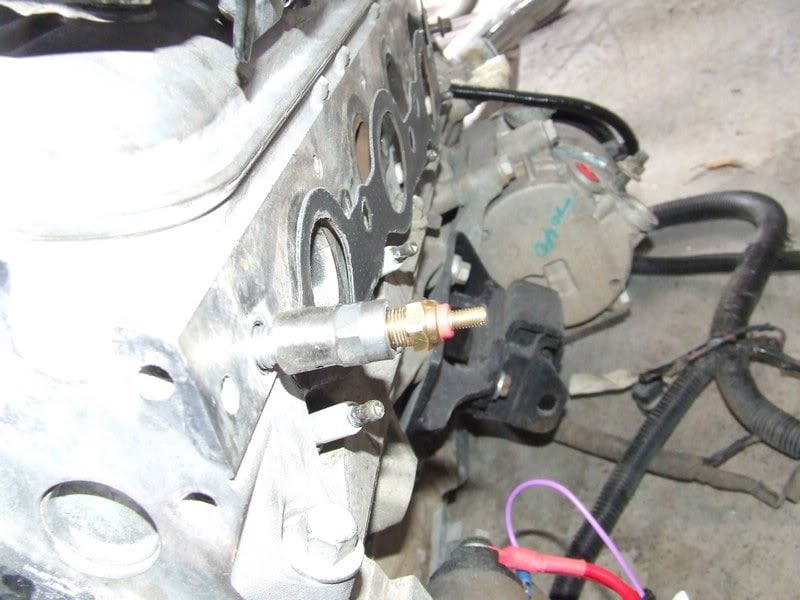
I took the fuel rails off and silver soldered a brass fitting on to replace the weird original fuel line fitting. Now it's just a basic barb set up.


Posted Image


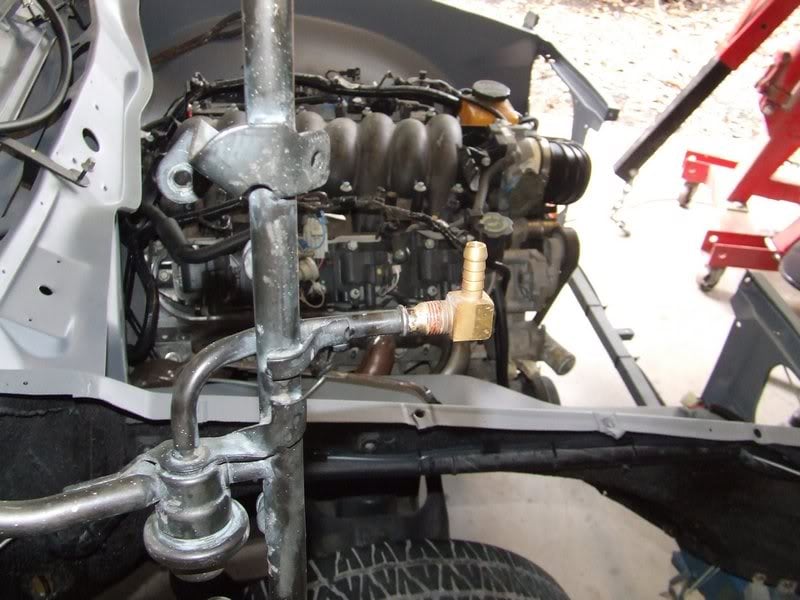
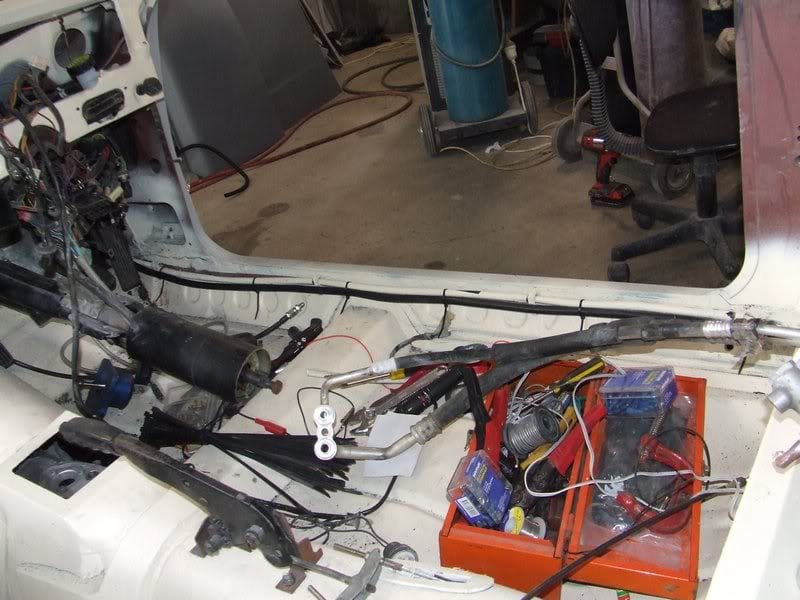
I've still yet to properly run the fuel line, but I was eager to get it running, so I just ran it over the top instead. It will end up running up the trans tunnel and up the back of the motor. It should be fairly well out of sight that way.

Posted Image

Here's the new fitting. It's nothing amazing I know, but I didn't know of an easier way to attach a normal fitting. Plus, it will be hidden under a cover anyway.


Posted Image


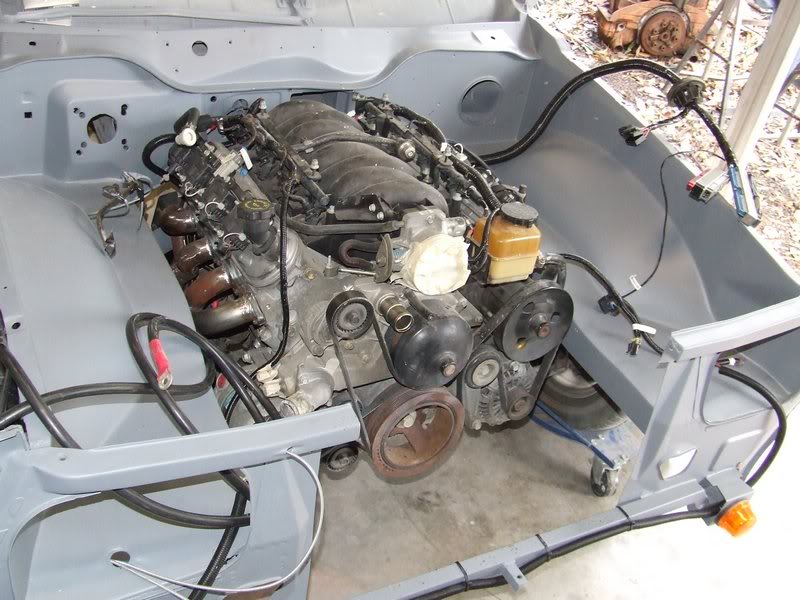
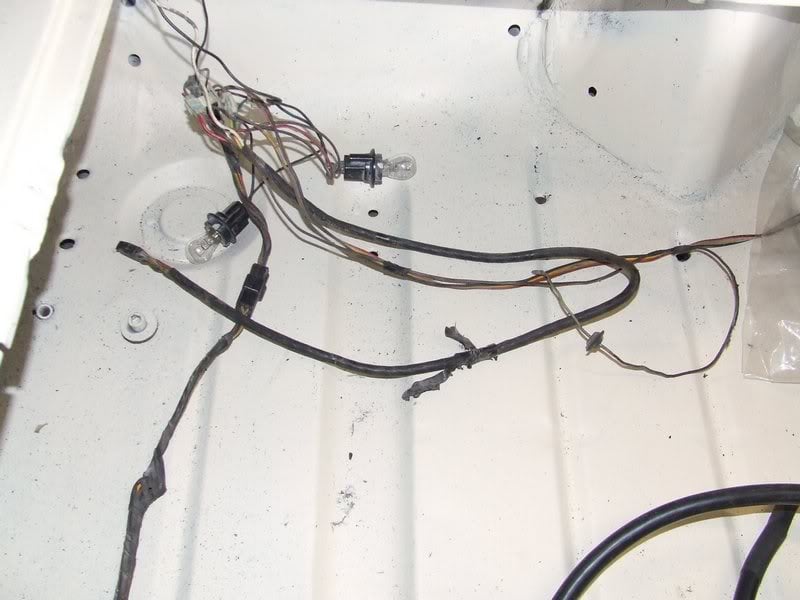
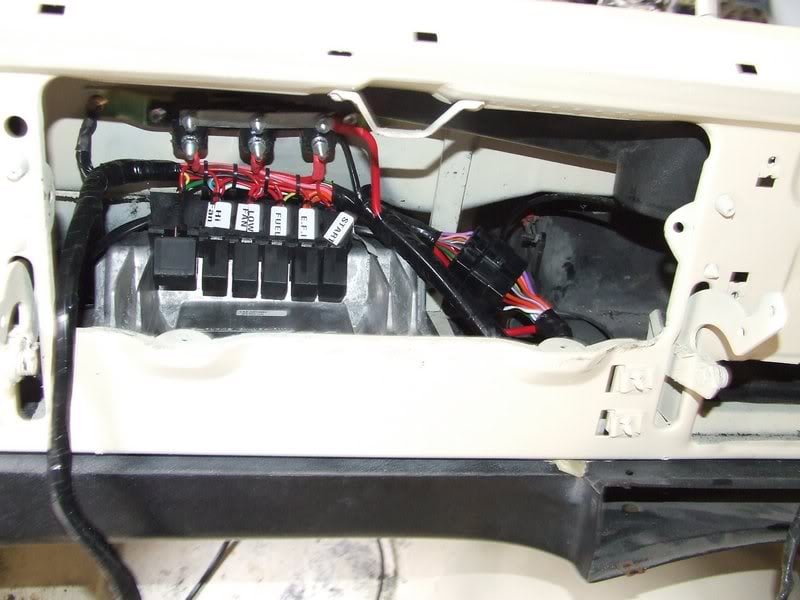
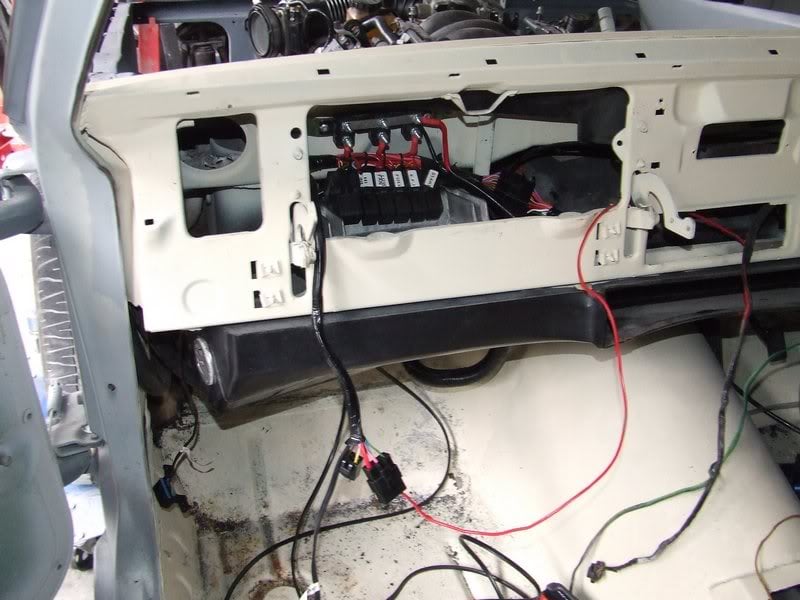
I only had a few more wires to connect before finally attempting to kick it in the guts, so to speak : )

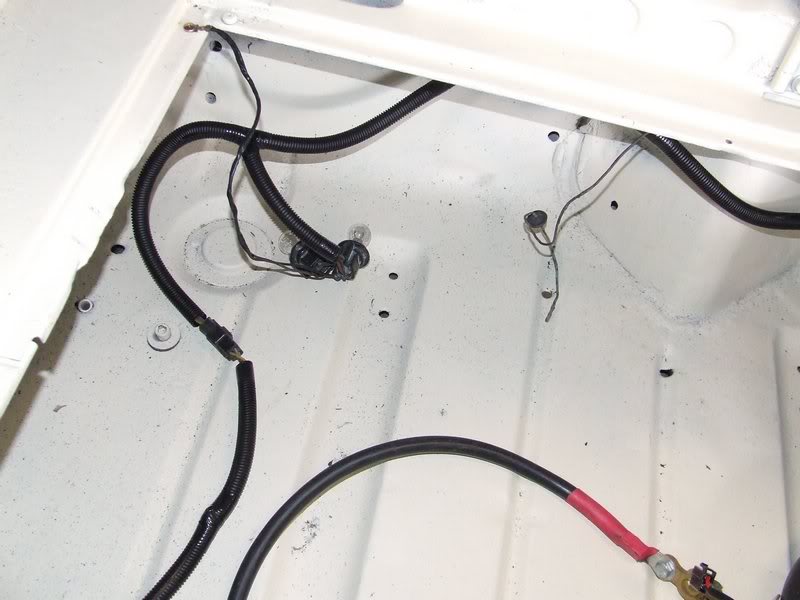
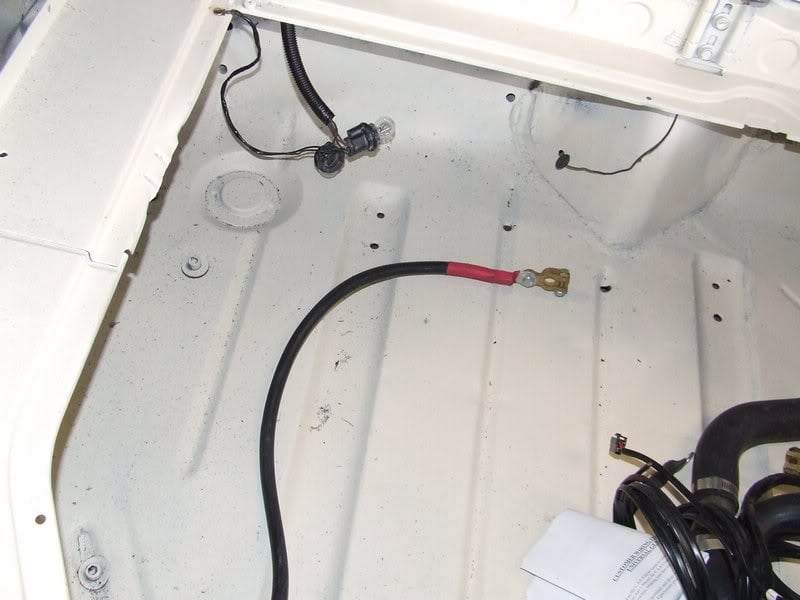
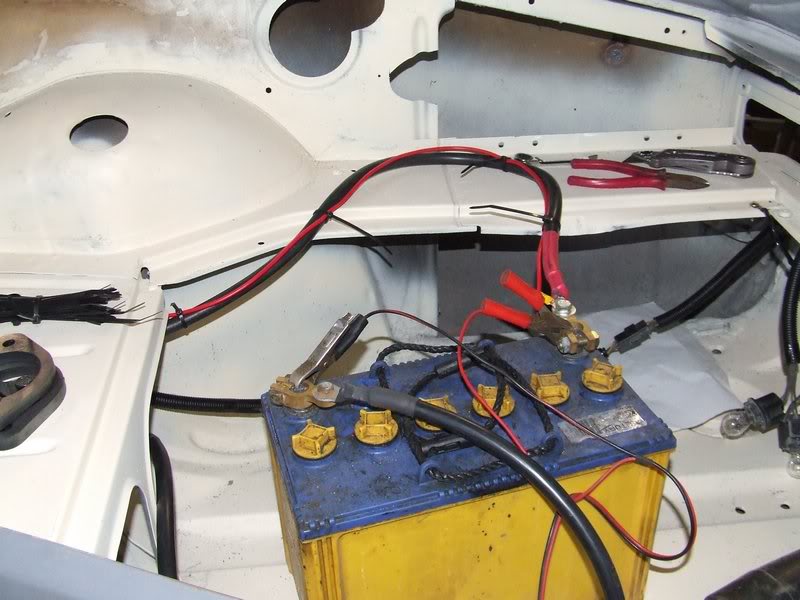
I could have spliced the main 6mm power wire for the computer into the battery cable, but I ran it all the way to the battery instead, so if need be it can be easily disconnected. I just tied it to the battery cable, to try and keep everything in some kind of order.

The battery I'm using isn't the one for this car. My brother already has a dry cell one for it, but I'm not going to canberra to get it : )


Posted Image


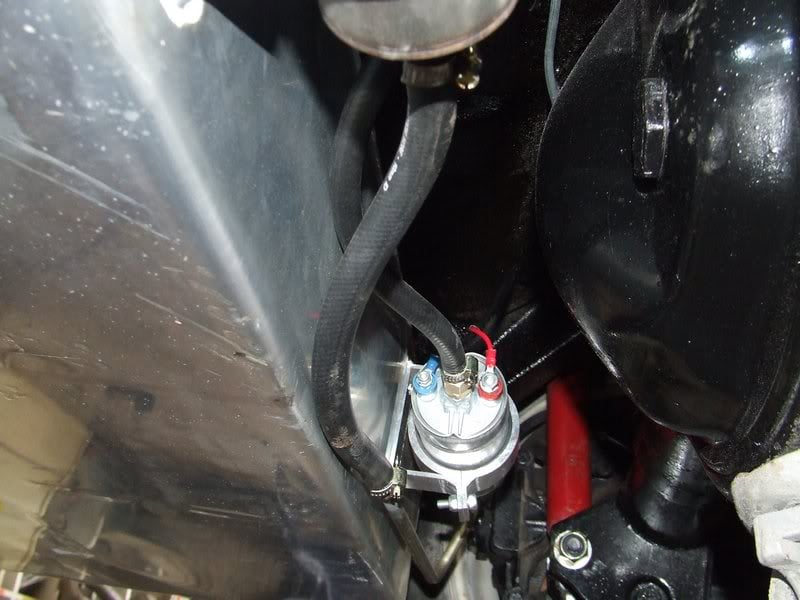
The next wires were for the fuel pump. I decided to put a 25 amp kill switch on the power wire for the pump, again, just in case. For giggles I stuck a missile switch cover on it. This switch will be hidden away, as the dash is to remain as standard looking as possible.

Posted Image


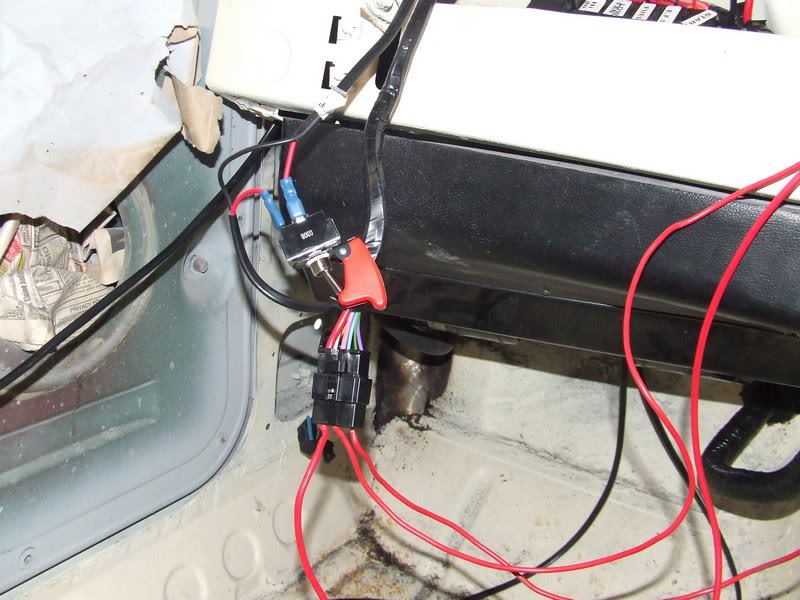
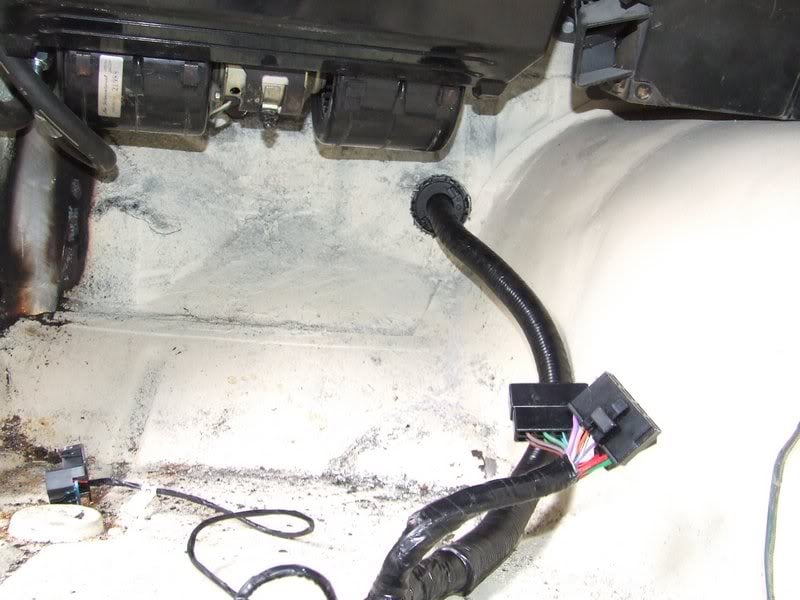
With all the wiring I've had to do on this car so far, I've gone through a few grommets. I was going to get all different sized ones for the different looms, but stuff that, everything gets a 1 inch grommet. Even the 2 wires for the fuel pump : )

Posted Image


How much of a tight a$$ company is Bosch for not even supplying nuts for the terminals on the 044 pump??? I dug some up and got the wiring finished. It's all systems go under here now.

Posted Image


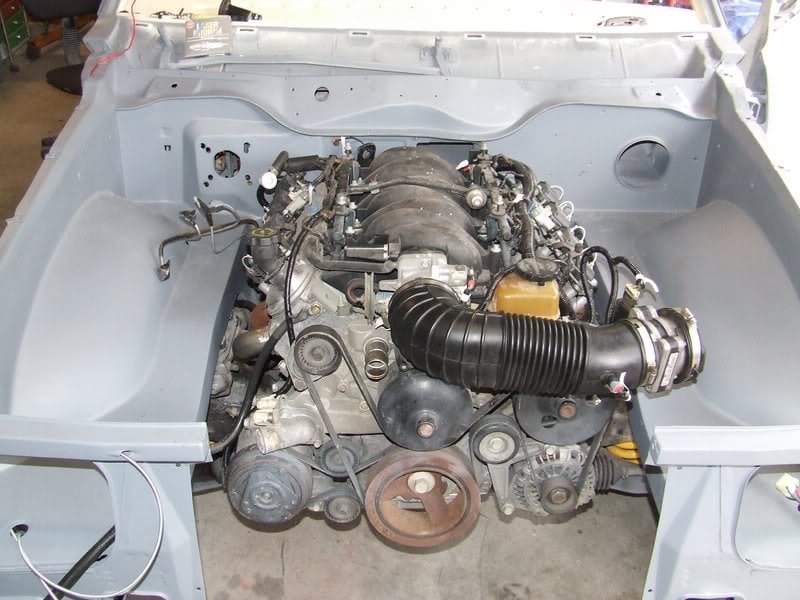
Once this was done I turned the ignition to hear the lovely buzz of he fuel pump, only to see fuel leak from 2 of the injectors. My fault. I kind of thought I'd squished a couple of the O rings when putting the fuel rails back on. No biggy, I planned on replacing all the O rings anyway.

I couldn't resist though, so I turned the key that extra turn and she fired into life first go!!!!! Yay. What a relief, as I am NOT an auto sparky by any means. As soon as it fired I turned it off though, as there was the fuel leak issue. Plus, I hadn't found the right oil filter yet, so I just taped it off. Sad I know.

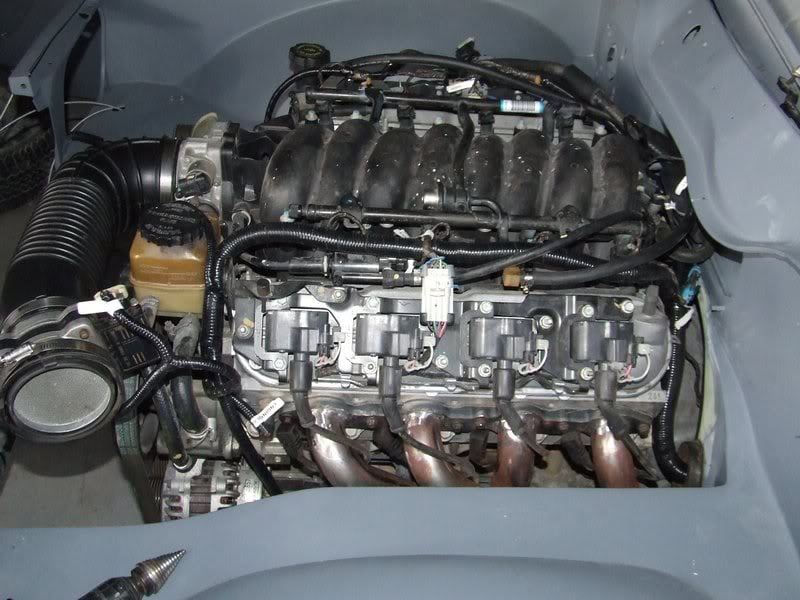
I went and bought new O rings and grabbed a third oil filter to try on the LS3 sump, third times the charm. Filter on and fuel leaks fixed and it fires right up and idles perfectly. I just need to find some heater hoses now and I can fill it with water and check for leaks there too. Have I mentioned how relieved I am that if fired up? : )


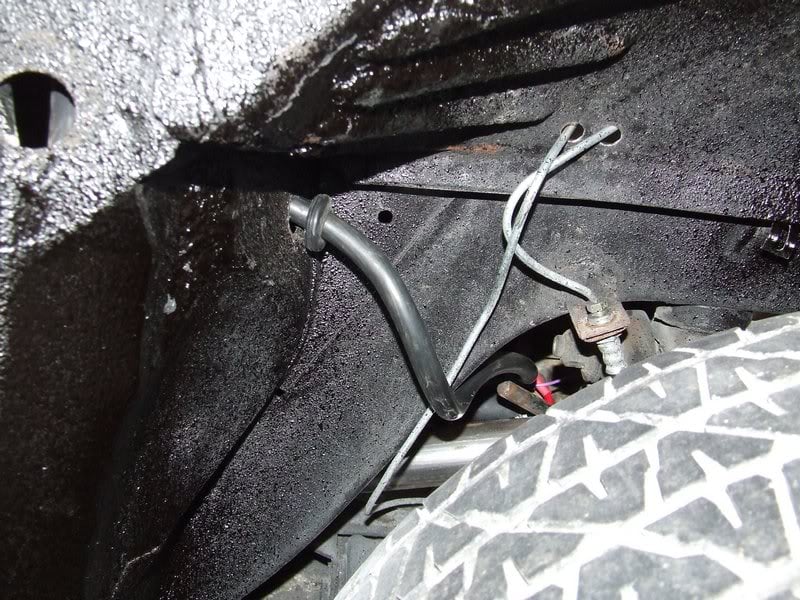
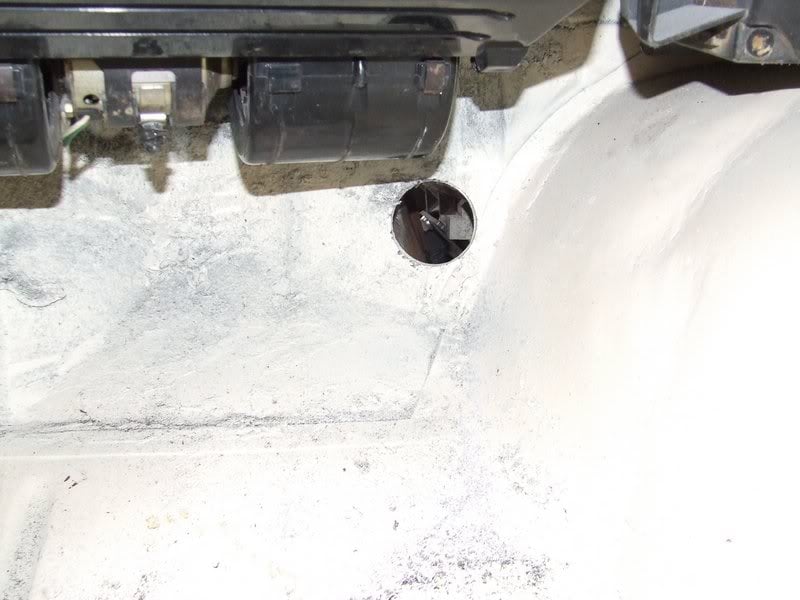
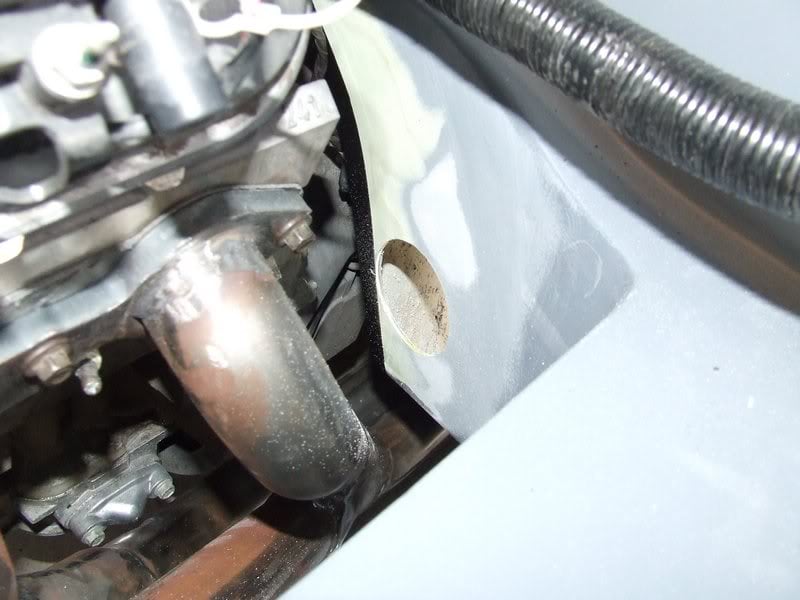
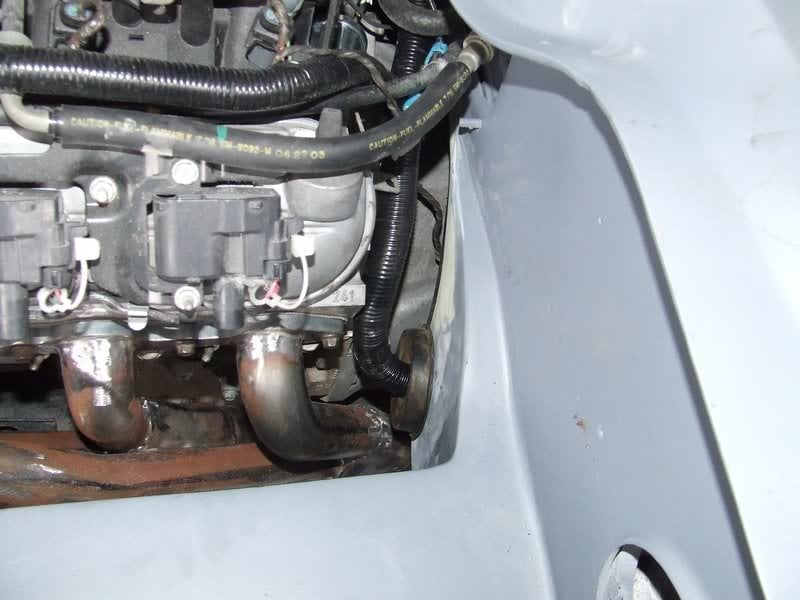
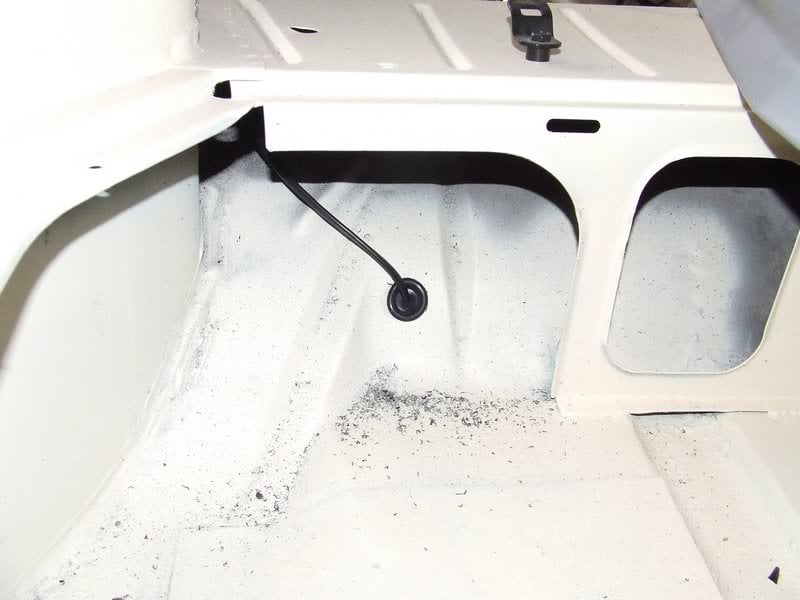
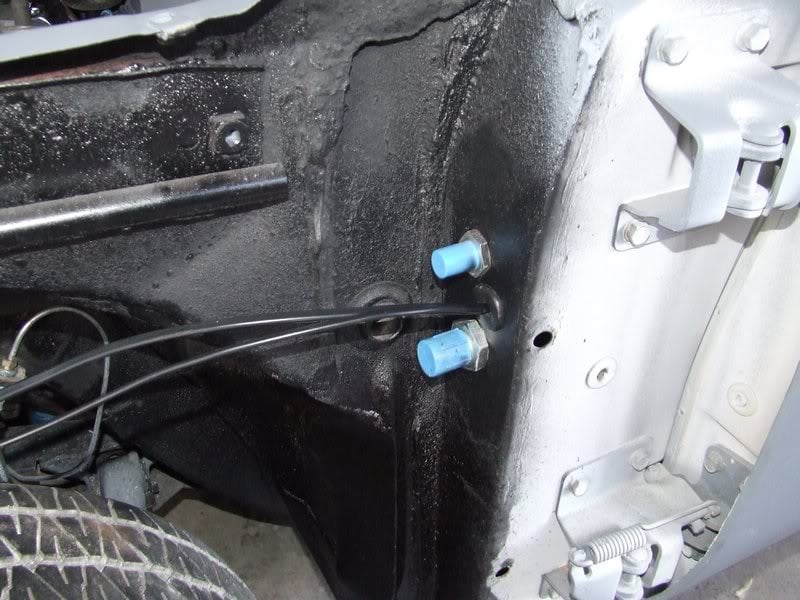
There was a perfect bit of space between the A/C lines in the A pillar to run the wiring for the thermo fans. Again, a 1 inch grommet saves the day : )

I'll refit the radiator tomorrow and finish running these wires. This is as far as I got today.

Posted Image


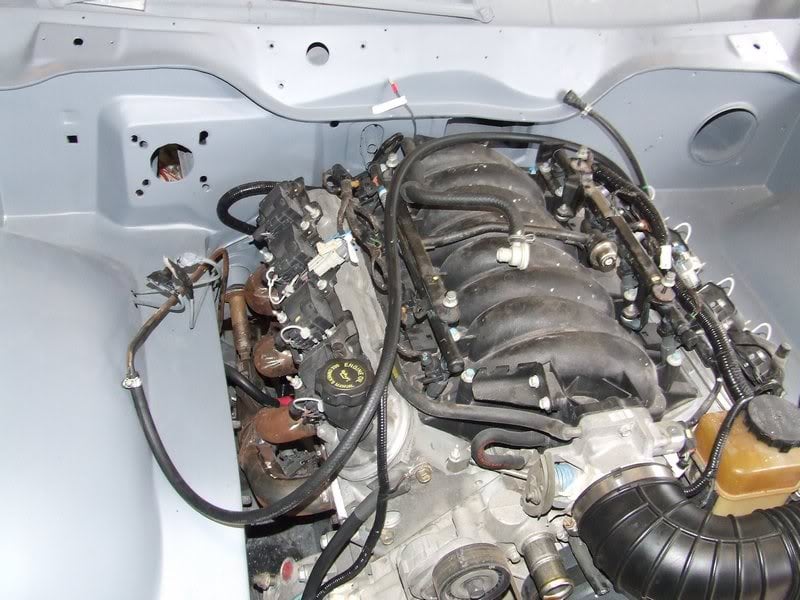
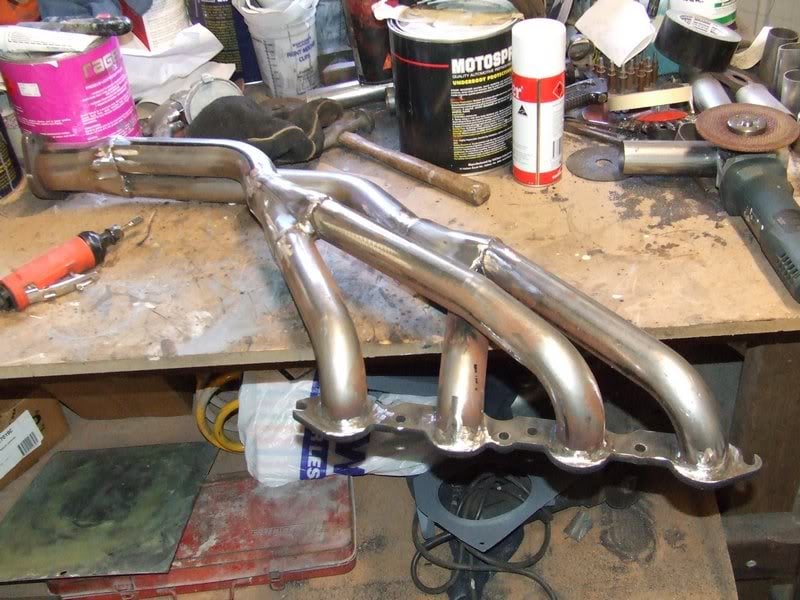
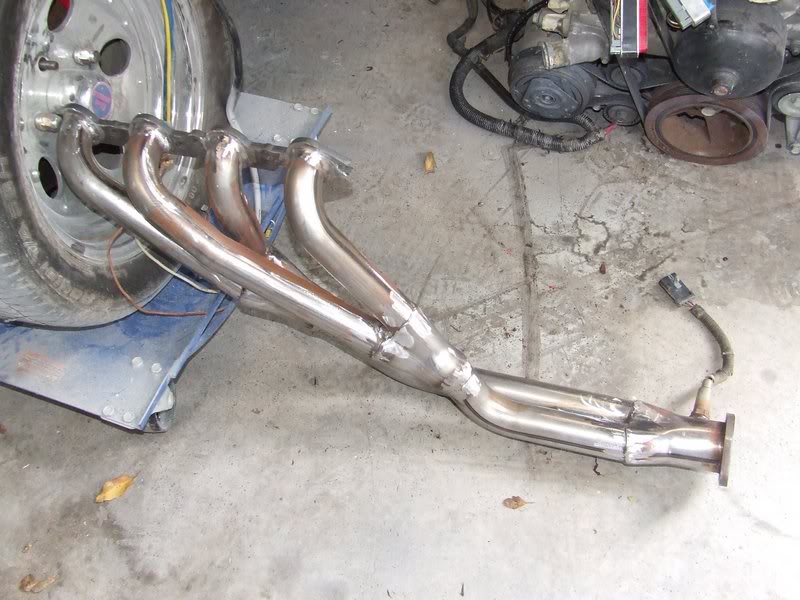
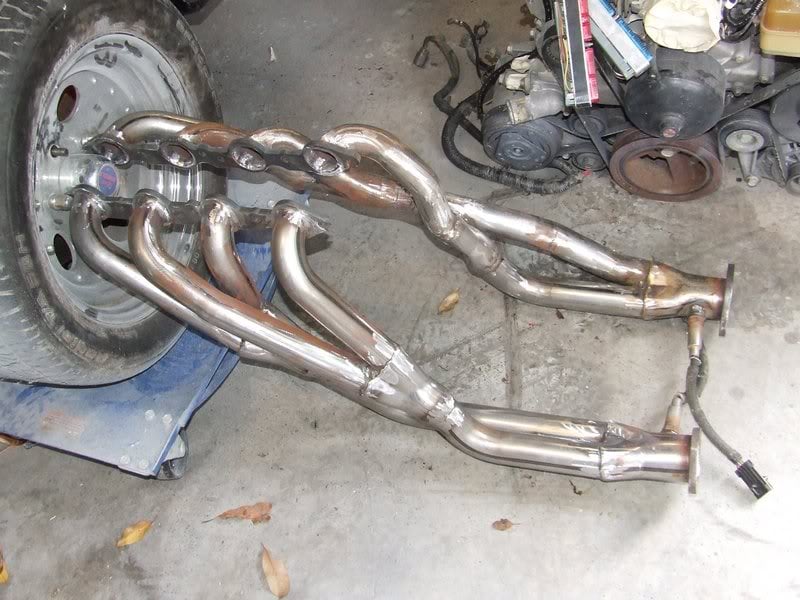
I had spark plug leads made up and they all seem to work well. There's not a lot of room around the pipes so the factory ones were way to chunky. I might have already mentioned these, but hey, it's 1.22am and I can't sleep, so shut up : )

Posted Image


If I can find out how to attach a short vid I'll stick a quick bit of the motor firing up here.

If it doesn't work, feel free to tell me how to do it, even though it's not a very exciting vid.


http://s567.photobucket.com/albums/ss112/pur308/?action=view&current=DSCF1319.flv

#423 _dirtbag_

_dirtbag_
  • Guests

Posted 24 March 2010 - 01:54 AM

OK, that didn't work. I'll try this.

I think this worked. It's got no exhaust other than the extractors but still sounds quiet on the vid. You can even see my dirty hand prints go up in smoke on the left extractor : )

[url="]

Edited by dirtbag, 24 March 2010 - 01:58 AM.


#424 _studricho_

_studricho_
  • Guests

Posted 24 March 2010 - 05:06 AM

Great news that it fired up. Always a good feeling isn't it?

With your wiper motor wiring and the heater box I have an idea that you may like. I did it with mine.

Wiper motor wiring..


Cut out a notch in the opening for the wiper motor close as possible to where the plug goes on the wiper engine. Now extend the harness and run the harness inside the plenum chamber and through the fresh air duct near fuse box side. You'll have to make sure that the harness will not get caught in the movement of the wiper arms. I used some urethane for this.

You will have to take a small V from the fresh air duct for the harness to get passed it into the cab of the car.

Heater box fan wiring..


I just drill a hole very close to the heater fan motor plug and used a grommet to seal it in the firewall. It's easier to remove the terminals from the plug block so you don't need such a big hole in the firewall.

I don't have any pictures, but I can take some if you need.

#425 76lxhatch

76lxhatch

    That was easy!

  • Members
  • PipPipPipPipPipPipPip
  • 7,184 posts
  • Location:Unzud
  • Car:SS
  • Joined: 04-August 08
Garage View Garage

Posted 24 March 2010 - 05:58 AM

^ I run the blower wiring inside the housing so you can't see anything from the outside.

Excellent work on getting it running first go! Always adds a bit of motivation to the project.


3 user(s) are reading this topic

0 members, 3 guests, 0 anonymous users