Jump to content


* * * * * 1 votes

Fixing my brothers UC hatch


  • Please log in to reply
1690 replies to this topic

#476 _niterida_

_niterida_
  • Guests

Posted 30 March 2010 - 06:54 PM

Sorry but that speedo just looks so wrong - how could you spoil the entire car with that horrid looking thing ??????


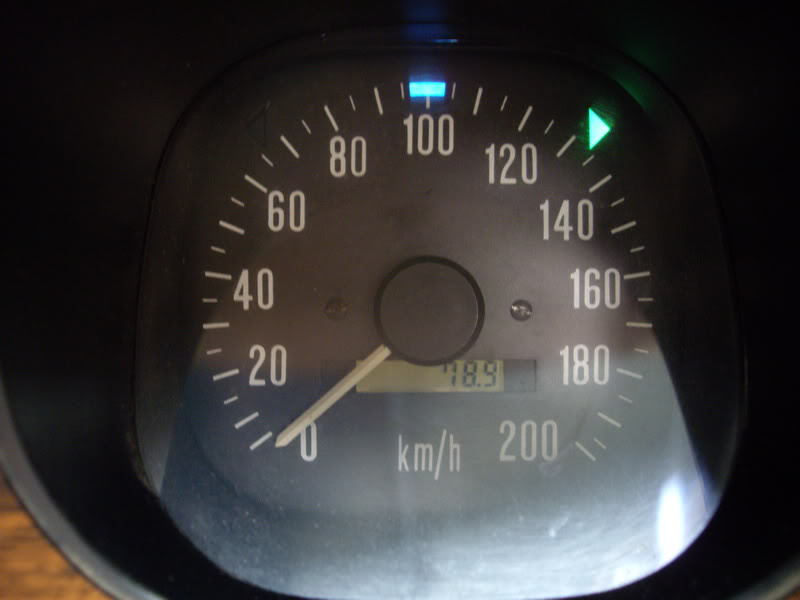
It only reads to 200kmh - nowhere near fast enough Posted Image

#477 _dirtbag_

_dirtbag_
  • Guests

Posted 30 March 2010 - 08:31 PM

hahahahaha : ) Thanks Ken, that's a good one :spoton:


There are 300km/h ones available, but they don't look as good. Besides, this way you can hear the needle slap the stopper much harder : )

#478 Dasman56

Dasman56

    Forum Member

  • Members
  • PipPipPip
  • 107 posts
  • Joined: 12-March 09

Posted 30 March 2010 - 08:49 PM

You've probably already thought of this but if you paint the needles orange on the fuel, oil and temp gages you would'nt even know they're different gages.


#479 Heath

Heath

    I like cars.

  • Administrators
  • PipPipPipPipPipPipPip
  • 18,359 posts
  • Name:Heath
  • Location:Eastern Suburbs, Melbourne
  • Car:Heavily Modified UC Sunbird Hatchback
  • Joined: 07-November 05
Garage View Garage

Posted 30 March 2010 - 10:25 PM

I don't know how much truth there is in it, but if you do do that, beware of the weight that the paint adds (I repeat it might be an absolute load of shit, but it could be significant enough to affect the accuracy of the gauge). Agree it would look good.

Hope you didn't throw away the original SL/R gauges that came out of that cluster!

#480 _dirtbag_

_dirtbag_
  • Guests

Posted 31 March 2010 - 05:22 PM

Hey Joshua, I'm not sure if the original gauges from the cluster work, but they do appear to be in very good condition. I'll ask my bro what he wants to do with them. Or maybe he'll post his answer on here and reveal himself : )


Here's the loom for the oil and temp gauges/lights. I've just taped it up so it's easier and neater to run through the dash to see where it will fit. I've also fitted plugs to each wire for if it needs to be removed. It shouldn't, but I'm just trying to make things as simple for anything that happens in the future. If there's room I'll put some conduit over it.

Posted Image


Here's the wires going to the senders. I've taped these to the main loom, so when I pull the motor and wiring back out to paint, I'll open the loom up and put these wires inside. It's too hard to get in there at the moment.

Posted Image


All the gauge cluster wiring is finished and the LEDs for turn signals and high beam light are in position to be mounted into the dash fascia. I've also 2pac apoxied the new lenses onto the cluster. Looks spiffy : ) I also gave the original needles a coat or two of orange paint.

Posted Image


The dash fascia also got a good clean and a paint with some black today. The old silver looked terrible. SS dashes look awesome, because they're smooth and greyish. This is vinyl finish and was painted with silver frost. Idiots!!!! : )


Posted Image


I really wanted to get the dash all together today, but with the glue taking so long to dry, and the crap weather meaning the paint wouldn't dry, I figured it would be best to just leave it until tomorrow. Pity.

How good is that lower dash section with no stereo cut into it : )


Posted Image


The last bit of wiring to figure out in he dash is the A/C. I really have no idea, and don't want to waste time so I'll get a sparky mate over to guide me with this I think.

Posted Image


With the dash not being able to go in I spent the rest of the day dry sanding bits of the body again. No pics, there's enough pics of sanding here already.

#481 _76_LX_

_76_LX_
  • Guests

Posted 31 March 2010 - 06:40 PM

Heh this is the first time I've seen this thread, and I'm totally in awe of your metal/welding skills. Awesome job! :)

#482 _LH8VD69_

_LH8VD69_
  • Guests

Posted 01 April 2010 - 03:36 PM

Pity u didnt use all the original SS gauges in the dash but it still looks pretty good with those ones all the same :-)

#483 _dirtbag_

_dirtbag_
  • Guests

Posted 01 April 2010 - 03:49 PM

Yeah, the original gauges do look good, but unfortunately aren't too easy to make work with all the electronic jiggery that's in the car now. At least there's no monster tacho on the A pillar : )

#484 _dirtbag_

_dirtbag_
  • Guests

Posted 01 April 2010 - 07:18 PM

Well last night I was able to fit the gauge cluster to the dash fascia, only to find one of the mounting tabs had been snapped off somewhere down the line. Seeing as it's a fairly important mount, I figured I'd better rebuild it with some more 2 pac plumbers putty.

Here's where the mounting post used to be.

Posted Image


I mounted the cluster with the other mounting post to get an idea of how big to make the new one. Seeing as it doesn't get seen, I went for strength over style. Lucky, as it's not easy to shape.

Posted Image


Once I'd mixed it and plopped it into place, I screwed a screw into it and then removed it so when it was dry there would be somewhat of a hole already there.

Posted Image

Then this morning when it was dry I was able to put the screw back in and tighten it right down. Brilliant : )

Posted Image


Here's what I used. It's good for all sorts of things. I use it to fix radiators too, and have used it on intake manifolds etc. Great stuff.

Posted Image

With the cluster mounted I finally got to see what the dash was going to look like. Not too bad in my opinion. You can also see the 3 LEDs in the front of the dash between the gauges and vent. The two between the gauges are for the indicators, and the one near the vent is high beam. They're not as obvious in real life as they are in this pic.


Posted Image

Drivers eye view : )

Posted Image

This is just showing some of the dash lights working. I'm pretty proud of these things actually working, as I'm really not very smart.

Posted Image


When the dash comes back out I'll paint the lower half too.

Posted Image

I quickly bolted the glovebox in, but haven't done a particularly good job of lining it all up. But you get the idea of how it looks now anyway.

Posted Image


Am I right in assuming there's something that bolts in behind the ashtray to support it? Does anyone have one spare they'd like to sell????

Another thing I did today which I'm happy about is I got the A/C all wired up and working. Well, working electrically, there's still no hoses made yet. It activates the thermo fans now, and the little red LED even comes on now. Yippee. It actually blows pretty well too, as you can see by my lovely plastic bag being filled with air. hahaha


Posted Image


I don't really know what the gauges are worth, or if Mr brother wants to sell them, but here they are anyway, just so you know what they look like.

Posted Image

That's it for another day.

#485 _eh-buddy_

_eh-buddy_
  • Guests

Posted 01 April 2010 - 07:21 PM

that dash looks great tim

#486 turbo76lx

turbo76lx

    Forum Fixture

  • Members
  • PipPipPipPipPip
  • 645 posts
  • Name:Glen
  • Location:Vic
  • Car:LX
  • Joined: 15-August 08

Posted 01 April 2010 - 07:29 PM

With the speedo it can be modified to fit the old face over the VDO speedo, but not cheap or easy to do.

Great work, don't stop.

Posted Image

#487 GML-31

GML-31

    Oh My, Don't you post alot

  • Members
  • PipPipPipPipPipPipPip
  • 5,239 posts
  • Name:Kev
  • Location:Highland Park
  • Car:too many
  • Joined: 08-November 05

Posted 01 April 2010 - 07:30 PM

Looks good my only thought would have been to paint dash in satin black rather than gloss however.

#488 _Woodsy_

_Woodsy_
  • Guests

Posted 01 April 2010 - 07:36 PM

Hey Tim, try some satin black pain for the dash. Looks 100 times better.

#489 _dirtbag_

_dirtbag_
  • Guests

Posted 01 April 2010 - 07:38 PM

Yeah, I know, the gloss is terrible but that's all I had and I hated the old silver so much I just had to get rid of it : )

I still need to paint the lower part of the dash, so will redo the whole lot then with something less shiny. Jeez you're a hard bunch to please hahahaha.

#490 _Bomber Watson_

_Bomber Watson_
  • Guests

Posted 01 April 2010 - 07:49 PM

Were all just Caring Understanding Nineties TypeS mate...

Cheers.

#491 _dirtbag_

_dirtbag_
  • Guests

Posted 01 April 2010 - 07:56 PM

hahaha Bomber, love it : )

Not that there's a hidden message in there or anything..........

#492 _76S.L.R_

_76S.L.R_
  • Guests

Posted 01 April 2010 - 08:03 PM

Great work as allways mate, I dont post on here an awfull lot but I sure visit here often to check your progress= I had the same problem with the Dash Mounting post broken!! I used that Steel Putty to repair mine, seems to be strong enough: I hope?.I'm with the other guys, that dash needs to be a Satin finish but thats's no biggie, for someone thats not a sparky you do very well: wish I was as good being that my LX has a few Electrical probs!! such as Fuel Gauge reading wrong( new sender to), Horn Not working and no High Beam oh the joy of old cars...........

#493 _dirtbag_

_dirtbag_
  • Guests

Posted 01 April 2010 - 08:26 PM

Hi 76S.L.R With the fuel gauge just make sure it's the right sender, as LH and LX senders are backwards compared to LC/LJ and UC. I had the same problem with the oil and temp senders on the LS1 and had to mount LX senders on the motor as well. I'm yet to find out if the fuel sender in the new fuel tank is the wrong way around or not. If so I'll have to get it rewound.

#494 _dirtbag_

_dirtbag_
  • Guests

Posted 02 April 2010 - 11:54 AM

Here's something exciting. It's really just to show Mr brother how the lights work.


#495 _mick74lh_

_mick74lh_
  • Guests

Posted 02 April 2010 - 12:27 PM

Wow! I reckon you or your bro could just about score a Street Machine feature article with this car. Don't know how you actually go about that getting one but there are so many unique things about it now and the quality of the build is bloody good. I've seen much lesser cars featured in Street Machine.

Also do you have any photos of what you started with, with this car?

#496 _dirtbag_

_dirtbag_
  • Guests

Posted 02 April 2010 - 01:17 PM

Thanks mick74lh. I'd love for the car to get into street machine. I guess we'll just have to wait and see how it turns out.

As for how the car was at the start, just go to the start of this thread. There's some pics of how it was when I got to it.

#497 _dirtbag_

_dirtbag_
  • Guests

Posted 02 April 2010 - 04:39 PM

Well today I didn't touch the soldering iron or wire strippers once : ) First day in a long time that that's happened.

Instead, I thought I'd make a gearstick, as I didn't have one for the B&M shifter.

Mr brother liked the idea of using an old original 4 speed gearknob, to keep the original look. It just so happened that I still had the old 4 speed knob from my first ever torana. I like the idea of a piece of that car living on in this car : )

First job was to dig through my crap and find a bolt that had the same thread as the gear knob.

Posted Image


I have a piece of 25mm alloy rod to make the stick out of, but I don't want the thread at the top to be alloy. What I did was machine the head of the bolt down and tapped a thread on it slightly different to the one already on the bolt, and tapped a thread inside the gearstick the same as the new thread. I wanted a different thread so it would stop going into the gearstick when it reached the other thread. Does that make any sense????

Posted Image


The different thread stops at the right place to leave enough of the bolt sticking out to mount the knob onto.

Posted Image


Ta-da : )

Posted Image


Now I need to machine out the bottom of the new stick to fit onto the existing part of the shifter.


Posted Image


I cut most of it out with a cutting disc, but then levelled it all out on my mill. For those wondering, it's the biggest mill in the world. When I say biggest, I mean it's about 2 foot tall and I can carry it around : ) hahaha. It's very handy though.


Posted Image

It says "micro mill" on it, but they mean "HUGE MILL" : )


Posted Image


Once that was done I just had to drill and tap the two mounting holes and the job was done.

Posted Image


I only have the two bolts at the moment to mount the stick as that's all that was there, and being Good Friday nothing was open to get more, but you still get the idea.


Posted Image

Once it's got a gearstick boot around it I think it'll look great.

Posted Image

Posted Image

To continue with my "not doing any wiring today" enjoyment, I spent the rest of the day cleaning up (notice the car isn't full of crap anymore??) and dry sanding some more bits and pieces of the car.

Tomorrow I might look at mounting the charcoal canister under the guard or something awesome like that : )

#498 _AD_75_

_AD_75_
  • Guests

Posted 02 April 2010 - 05:41 PM

Hey i think you missed a spot :tomaatit: 
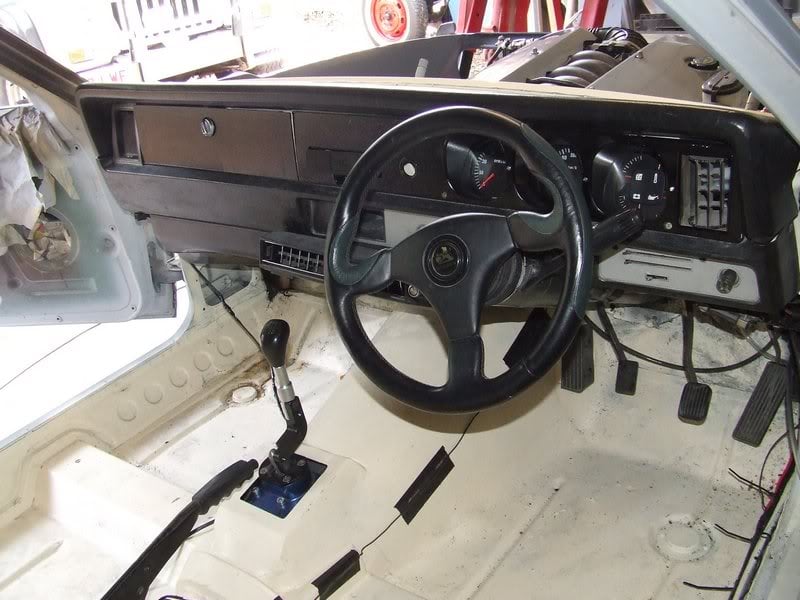
heheh..interested to see the dash when the bottom bit is painted too. Are you really gunna change the color from gloss to a flatter black? nice work with the VDO gauges too, at first i wasn't feeling it but it came up real good! :spoton:

Edited by AD_75, 02 April 2010 - 05:41 PM.


#499 _niterida_

_niterida_
  • Guests

Posted 02 April 2010 - 06:24 PM

I like the shifter idea - without the bonnet up it will just look like an SS Posted Image

I also like your day off from soldering and wiring - spent sanding instead - not sure which one would be worse Posted Image

#500 _dirtbag_

_dirtbag_
  • Guests

Posted 02 April 2010 - 06:25 PM

Hi Aido. Yes, I'll change the black. I think the straight gloss looks a bit tacky and cheap. Too plasticy. I know, it's plastic, but I like a more subtle, vinyl like finish of a semi gloss.


2 user(s) are reading this topic

0 members, 2 guests, 0 anonymous users