

 1 votes
Fixing my brothers UC hatch
Started by
_dirtbag_
, Dec 30 2009 01:19 PM
1693 replies to this topic
#651
 _Woodsy_
_Woodsy_
-

- Guests
Posted 19 April 2010 - 08:52 AM
Yeah but its orange chris so it dont count
#652
_Kush_
_Kush_
-
- Guests
Posted 19 April 2010 - 09:18 AM
With those two vacuum cleaner nostrils, I think it would get Amy Winehouse's seal of approval too. 
#653
_dirtbag_
_dirtbag_
-
- Guests
Posted 19 April 2010 - 06:32 PM
hehehe. You guys are funny : )
Well I was hoping to get some bits primed today, but the weather just wasn't going to play the game so I did some other super exciting things instead.
I figured I'd put off stripping some components back for long enough, so that's what I did today.
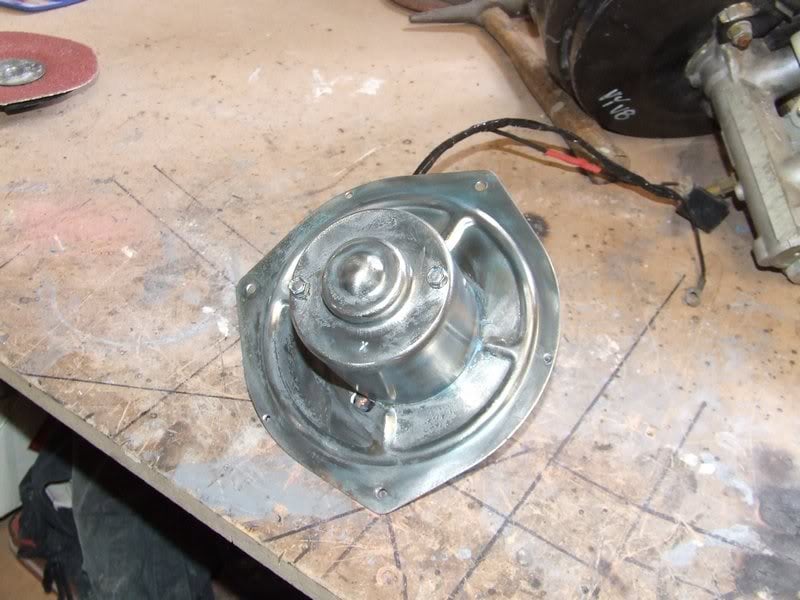
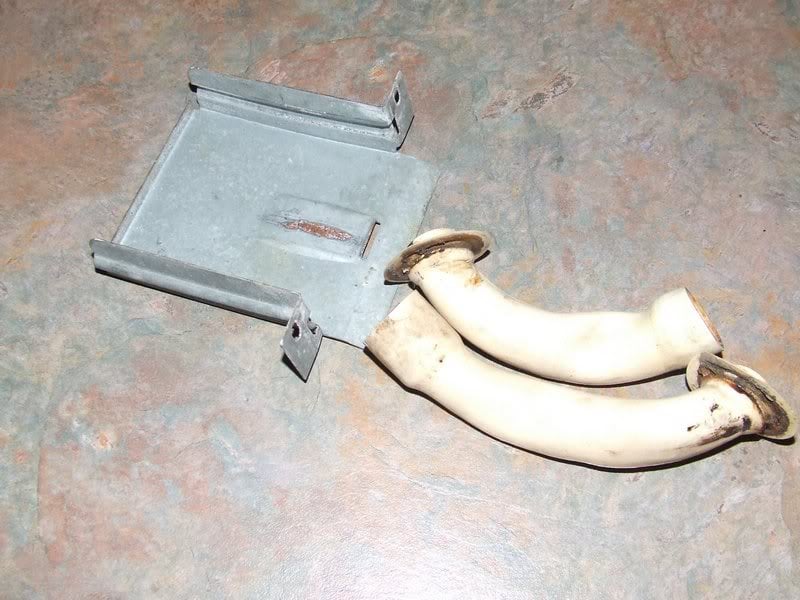
One of you clever lads mentioned earlier in this thread something about hiding the heater motor wires inside the heater box. That seemed like a very good idea so I had a look at how to do that.
Luckily, the little hole where the wire comes out is located in a way that will allow the wiring to be pulled back inside. I removed the fan wheel to do this, is it's only 1 nut to remove.
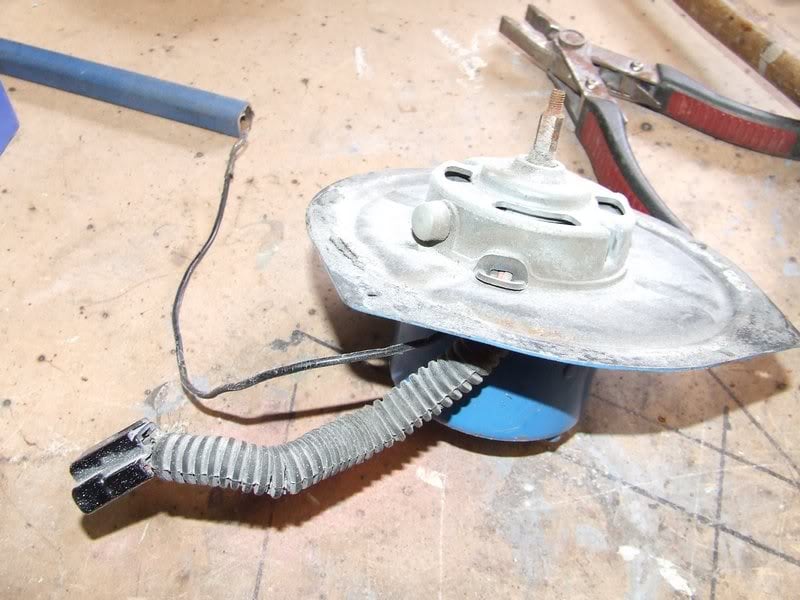
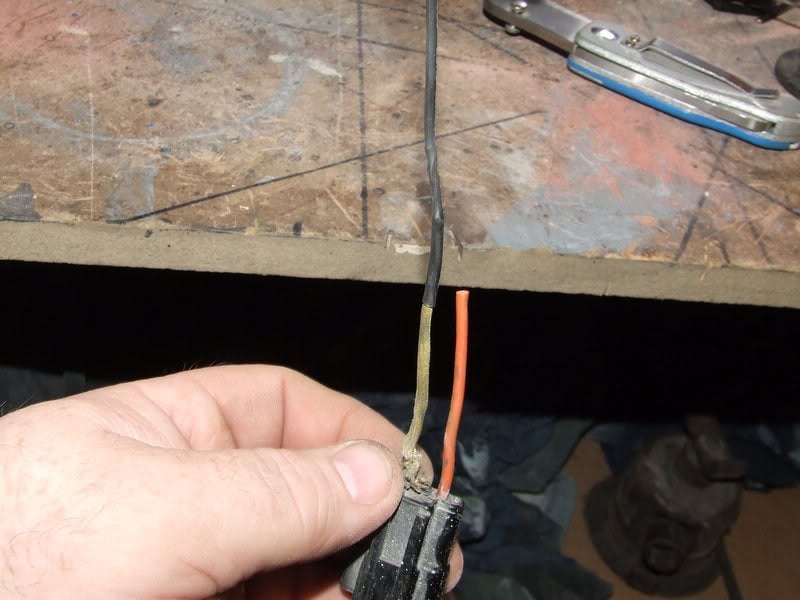
The pull the wires through the hole I just cut the plug off and resoldered the wires back together, rather than trying to dismantle the plug. One of the wires had a cloth sheath, instead of the usual plastic insulation. This wire was a solid wire, very weird. Anyway, the cloth was a bit old a buggered so I just covered the whole thing in heat shrink. The solid wire was a lot longer than the other wires, so the other 2 wires were extended.
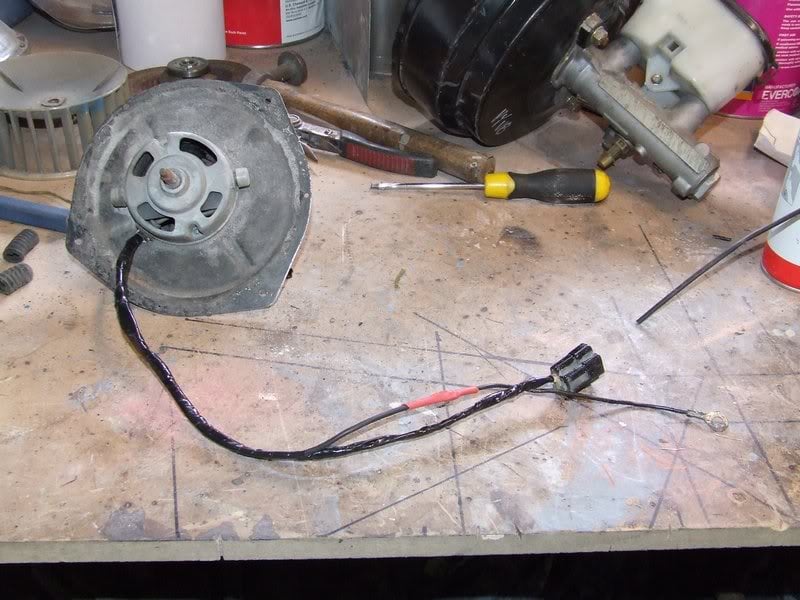
Here's the wiring finished, and coming out the inner side of the motor surround.
Then there was the exceptionally fun job of stripping it back to metal.
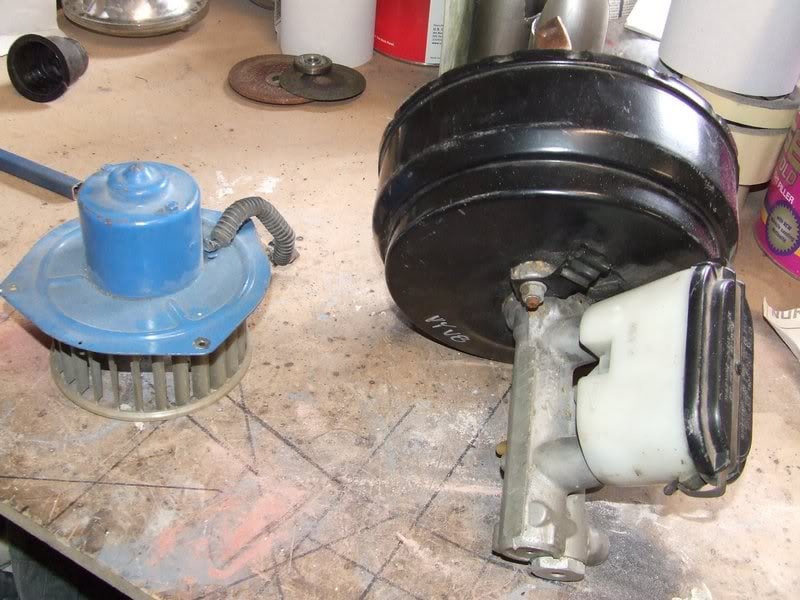
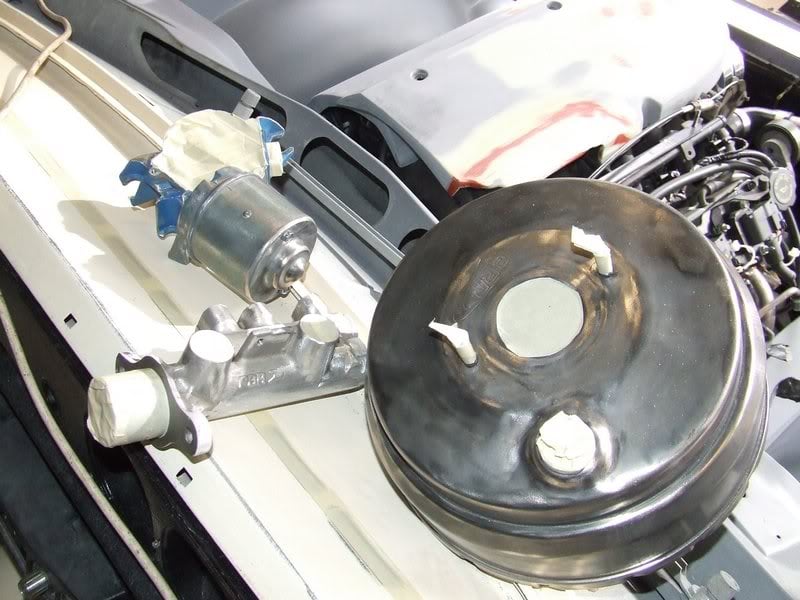
The brake booster was next. I was hoping to just rub it down and paint it, being the lazy bugger I am, but there were a few scratches in it that were quite deep so I figured I'd bare metal it too. What a pain that was!! I don't know what they use on these things, but it's very tough. All done now though, thank god.

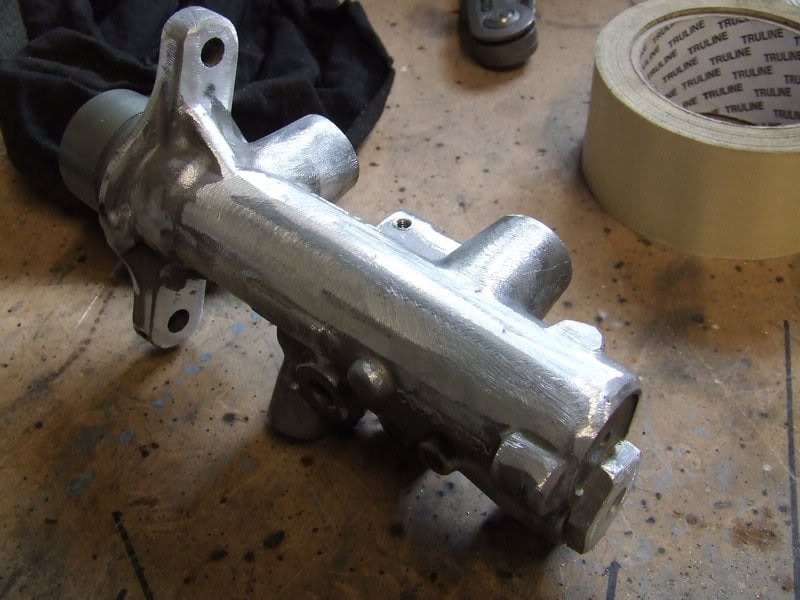
Next up was the master cylinder. I gave it a clean but decided I didn't like the big flat area on the side of it.
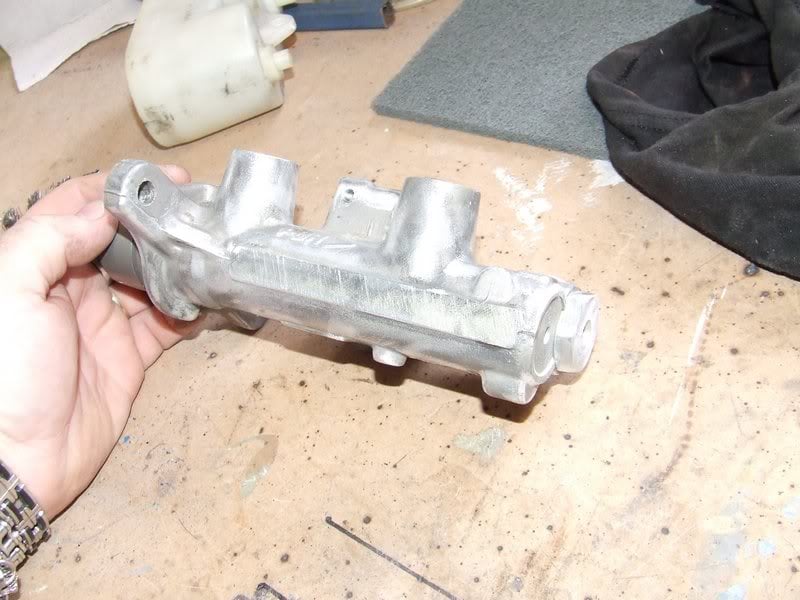
So I sanded it smooth, leaving as much of the metal here as I could, as I assume it needs some strength in it.
Next bit of awesome fun-ness was the wiper motor.
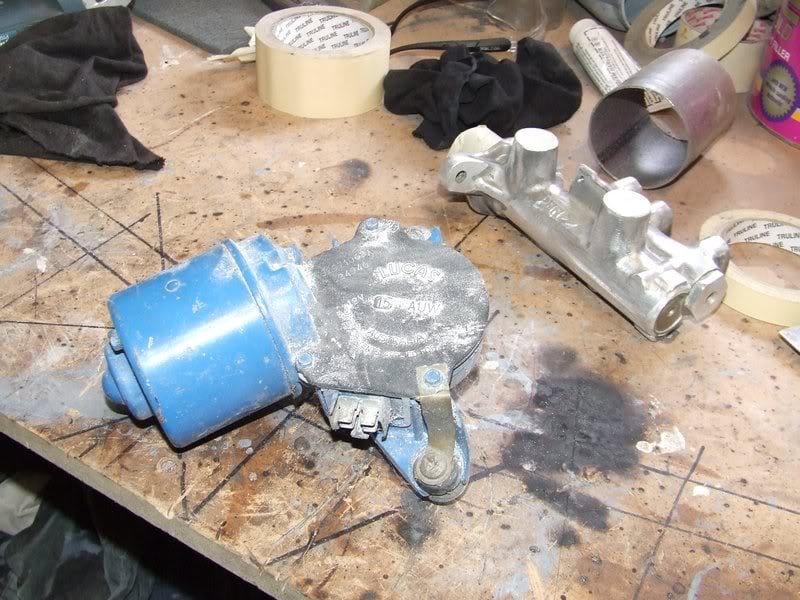
Most of the paint was fairly easy to get at but some of it was hard due to the confined space. The paint left on was rubbed back with scotchbrite so the primer will still stick.
I removed the cover plate for the drive wheel on the wiper motor to paint separately, and am wondering whether to make an alloy one or not. I don't know if I want to make a feature out of something like a wiper motor?
There was still a flare that I wasn't 100% happy with how it sat, so I started on that today too. The gap between the flare and body was a bit big for my liking. The piping would have still covered it, but fixing the problem now will make for a better result later. I hope : )
hahaha. I just posted the pic and realised the wheel is the main feature of the pic, so I had to delete it : ) Sorry, no pic of the flare today : )
And finally, a big thank you must go to OLJ_08 for sending me the A pillar drains and ashtray support I needed. Cheers mate, I owe you one
So now I have even more parts to prime : )
Well I was hoping to get some bits primed today, but the weather just wasn't going to play the game so I did some other super exciting things instead.
I figured I'd put off stripping some components back for long enough, so that's what I did today.
One of you clever lads mentioned earlier in this thread something about hiding the heater motor wires inside the heater box. That seemed like a very good idea so I had a look at how to do that.
Luckily, the little hole where the wire comes out is located in a way that will allow the wiring to be pulled back inside. I removed the fan wheel to do this, is it's only 1 nut to remove.
The pull the wires through the hole I just cut the plug off and resoldered the wires back together, rather than trying to dismantle the plug. One of the wires had a cloth sheath, instead of the usual plastic insulation. This wire was a solid wire, very weird. Anyway, the cloth was a bit old a buggered so I just covered the whole thing in heat shrink. The solid wire was a lot longer than the other wires, so the other 2 wires were extended.
Here's the wiring finished, and coming out the inner side of the motor surround.
Then there was the exceptionally fun job of stripping it back to metal.
The brake booster was next. I was hoping to just rub it down and paint it, being the lazy bugger I am, but there were a few scratches in it that were quite deep so I figured I'd bare metal it too. What a pain that was!! I don't know what they use on these things, but it's very tough. All done now though, thank god.
Next up was the master cylinder. I gave it a clean but decided I didn't like the big flat area on the side of it.
So I sanded it smooth, leaving as much of the metal here as I could, as I assume it needs some strength in it.
Next bit of awesome fun-ness was the wiper motor.
Most of the paint was fairly easy to get at but some of it was hard due to the confined space. The paint left on was rubbed back with scotchbrite so the primer will still stick.
I removed the cover plate for the drive wheel on the wiper motor to paint separately, and am wondering whether to make an alloy one or not. I don't know if I want to make a feature out of something like a wiper motor?
There was still a flare that I wasn't 100% happy with how it sat, so I started on that today too. The gap between the flare and body was a bit big for my liking. The piping would have still covered it, but fixing the problem now will make for a better result later. I hope : )
hahaha. I just posted the pic and realised the wheel is the main feature of the pic, so I had to delete it : ) Sorry, no pic of the flare today : )
And finally, a big thank you must go to OLJ_08 for sending me the A pillar drains and ashtray support I needed. Cheers mate, I owe you one
So now I have even more parts to prime : )
Edited by dirtbag, 19 April 2010 - 06:33 PM.
#654

Posted 19 April 2010 - 08:01 PM
You didn't have to chop the blower plug, the motor unbolts off the mounting plate easy enough, doesn't matter now though.
Its going to be quite cumulative effect paying attention to all the small bits and pieces once you get everything back together, should look good!
Its going to be quite cumulative effect paying attention to all the small bits and pieces once you get everything back together, should look good!
#655
_dirtbag_
_dirtbag_
-
- Guests
Posted 19 April 2010 - 08:04 PM
Oh well, this just proves how much of a dumb ass I really am : )
Thanks for the idea though. It'll look much better with the wires hidden.
Thanks for the idea though. It'll look much better with the wires hidden.
#656
_torana_umunga74_
_torana_umunga74_
-
- Guests
Posted 19 April 2010 - 08:33 PM
ha ha sorry tim i sent the ashtray thing but it got posted back to me for some stupid reason. i keep frOcking somethin up when i post stuff
#657
_OLJ_08_
_OLJ_08_
-
- Guests
Posted 19 April 2010 - 08:52 PM
hey dirt bag,no worries about the drain plugs and the ash tray holder,glad you could use them.
The hatch is lookin good and gettin there.whats the go with the paint work?will you be doin that also
The hatch is lookin good and gettin there.whats the go with the paint work?will you be doin that also
#658
_dirtbag_
_dirtbag_
-
- Guests
Posted 19 April 2010 - 09:05 PM
Hey, thanks anyway Nic, sorry for the inconvenience.
OLJ_08, I wont be painting this car. I've had enough of painting so I'm taking a back seat on this one. This will be the first car I've built and not actually painted myself. I'll be doing all the paint prep and fit up, but I'll be getting a proper painter in a booth to do the shiny stuff. He's done a bit for me already so I know he does good work.
OLJ_08, I wont be painting this car. I've had enough of painting so I'm taking a back seat on this one. This will be the first car I've built and not actually painted myself. I'll be doing all the paint prep and fit up, but I'll be getting a proper painter in a booth to do the shiny stuff. He's done a bit for me already so I know he does good work.
#659
_doogs_
_doogs_
-
- Guests
Posted 19 April 2010 - 09:16 PM
Coming on well as always mate.
Love the colar idea, neatens things up even more!
Love the colar idea, neatens things up even more!
#660
_cruiza_
_cruiza_
-
- Guests
Posted 20 April 2010 - 12:06 AM
when you did the heater fan you mentioned a funny wire that was cloth covered and solid.
that is a resistor wire kinda of like a ballest resistor wire. when the fan is powered by 12 v it is fast when power is though resistor wire there is voltage drop across resistor wire and fan is slow. this wire gets hot so is cloth covered as plastic would melt. covering it in heatshrink is not a god idea as it will not be able to radite heat and over heat ... small fire... larger fire... no more car... suggest you take heat shrink off!
this is why it is normally wound in a loose coil in engine bay to give it air to breath and keep it cool
#661
TerrA LX
-

- Members
-

- 14,241 posts
Fulcrum Fixture
- Location:Sid 'n' knee
- Joined: 31-May 06
Posted 20 April 2010 - 12:22 AM
that is a resistor wire kinda of like a ballest resistor wire... ... small fire... larger fire... no more car... suggest you take heat shrink off!
this is why it is normally wound in a loose coil in engine bay to give it air to breath and keep it cool
Excellent info cruiza, I never knew that. thanx for the heads up.
#662
_nial8r_
_nial8r_
-
- Guests
Posted 20 April 2010 - 06:43 AM
its coming along nice your doing a really great job and thx to cruiza about the ballest resistor wire as mentioned above by TerrA LX keep up the good work
#663
Posted 20 April 2010 - 07:28 AM
Interesting about the motor wire, early Commodores used the same basic resistor pack setup but just had normal wiring albeit a lot chunkier - if its stuffed maybe just replace the wire with much heavier gauge?
#664
_dirtbag_
_dirtbag_
-
- Guests
Posted 20 April 2010 - 08:06 AM
cruiza, thanks for the info. This is why I love this forum. The knowledge here is priceless.
I'll redo that wire, as a fire is not on the list of things to do. Thanks again.
I'll redo that wire, as a fire is not on the list of things to do. Thanks again.
#665
Heath
 View Garage
-

- Administrators
-
- 18,403 posts
I like cars.
- Name:Heath
- Location:Eastern Suburbs, Melbourne
- Car:Heavily Modified UC Sunbird Hatchback
- Joined: 07-November 05
View Garage
Posted 20 April 2010 - 12:45 PM
Certain wiper motors have a metal cover plate, not the plastic type. You should track down one of those ones and just polish it or get it chromed. Looks way better
#666
Potta
-

- Members
-
- 6,026 posts
Oh My, Don't you post alot
- Name:Craig
- Location:Gozzy, WA
- Car:LC GTR, LC 4 door
- Joined: 01-May 09
Posted 20 April 2010 - 01:37 PM

Chrome bits look good.....
#667
_dirtbag_
_dirtbag_
-
- Guests
Posted 20 April 2010 - 01:46 PM
Yeah, that's why I said I'm thinking about making an alloy cover, but I still don't know if I want to make the wiper motor stand out. I'm thinking painting it body colour with no chrome will help it blend in. Thoughts?
#668
_torana_umunga74_
_torana_umunga74_
-
- Guests
Posted 20 April 2010 - 01:49 PM
put it under the cowl. ive seen that done...
#669
_nial8r_
_nial8r_
-
- Guests
Posted 20 April 2010 - 06:27 PM
^^^ do you know of someone on GMH-T that has done that mod ?? as i would like to hide mine there, i would rather see it in place and working before i go and fil in the holes 
my thoughts on the chrome are if your not gonna have any other chrome under the bonnet it will stand out like a sore thumb
my thoughts on the chrome are if your not gonna have any other chrome under the bonnet it will stand out like a sore thumb
#670
Potta
-
- Members
-
- 6,026 posts
Oh My, Don't you post alot
- Name:Craig
- Location:Gozzy, WA
- Car:LC GTR, LC 4 door
- Joined: 01-May 09
Posted 20 April 2010 - 06:31 PM
Yeah, can't argue with that either.
It's one of those all or nothing things....
It's one of those all or nothing things....
#671
_dirtbag_
_dirtbag_
-
- Guests
Posted 21 April 2010 - 10:34 AM
Well the weather finally let me get a bit of priming done. Good old Sunshine Coast : )
Before I did that though, I grabbed the headlight buckets to give them a prep job, as the back of them can be seen in the engine bay. I noticed the flat section was a bit lumpy, so I sanded it smooth. This plastic much be half titanium, because it wasn't easy getting it flat.
I also sanded all the writing off the wiper motor cover.


Then I got some primer filler on the lot.


Wasn't that exciting to look at? : )
I bought a couple of things too. I got some more heat shield for the heater wire, thanks again to cruiza for the heads up.
I also bought some 8mm nutserts and stainless bolts to mount the drop tank straps. I know, the tank is already mounted, but straps look cool.

Just as the primer had flashed off, the weather came back to being crap as usual. It started as a sun shower, then back to grim wetness : ) At least I was able to get the priming done while the sun was out.

Have I mentioned lately how much I love playing with nutserts?
Because the UC had an offset tank, like a commodore, the straps will have to be a bit different to each other where they mount.
The drivers side lined up with the original mounting block, so I stuck a nutsert in there, but the passengers side is just mounted into the floor.


Even though the front of the straps aren't mounted yet and the rubber strips aren't fitted you can see the look I'm going for.

I had to stick the engine covers back on after priming to see how they looked after being smoothed out. I like it : )


Before I did that though, I grabbed the headlight buckets to give them a prep job, as the back of them can be seen in the engine bay. I noticed the flat section was a bit lumpy, so I sanded it smooth. This plastic much be half titanium, because it wasn't easy getting it flat.
I also sanded all the writing off the wiper motor cover.
Then I got some primer filler on the lot.
Wasn't that exciting to look at? : )
I bought a couple of things too. I got some more heat shield for the heater wire, thanks again to cruiza for the heads up.
I also bought some 8mm nutserts and stainless bolts to mount the drop tank straps. I know, the tank is already mounted, but straps look cool.
Just as the primer had flashed off, the weather came back to being crap as usual. It started as a sun shower, then back to grim wetness : ) At least I was able to get the priming done while the sun was out.
Have I mentioned lately how much I love playing with nutserts?
Because the UC had an offset tank, like a commodore, the straps will have to be a bit different to each other where they mount.
The drivers side lined up with the original mounting block, so I stuck a nutsert in there, but the passengers side is just mounted into the floor.
Even though the front of the straps aren't mounted yet and the rubber strips aren't fitted you can see the look I'm going for.
I had to stick the engine covers back on after priming to see how they looked after being smoothed out. I like it : )
#672
MRLXSS
-

- Members
-
- 12,420 posts
The Render Garage
- Name:Matt
- Location:Upwey, Melbourne
- Car:355 LX Hatchback, DeLorean DMC-12, LX SS Hatch, VY Cross8 Crewman
- Joined: 09-November 05
Posted 21 April 2010 - 01:02 PM
Very Nice mate!
The smooth covers look the goods!
The smooth covers look the goods!
#673
Heath
View Garage
-
- Administrators
-
- 18,403 posts
I like cars.
- Name:Heath
- Location:Eastern Suburbs, Melbourne
- Car:Heavily Modified UC Sunbird Hatchback
- Joined: 07-November 05
View Garage
Posted 21 April 2010 - 01:12 PM
Great, but no photos of you with the headlight thingos sticking out of your chest? Geeze!
#675
Potta
-
- Members
-
- 6,026 posts
Oh My, Don't you post alot
- Name:Craig
- Location:Gozzy, WA
- Car:LC GTR, LC 4 door
- Joined: 01-May 09
Posted 21 April 2010 - 01:40 PM
I wasn't too sure about the look of the engine covers but now they are painted up they look the goods.
Nice work as always mate. Keep it up.
Nice work as always mate. Keep it up.


1 user(s) are reading this topic
0 members, 1 guests, 0 anonymous users

