Fixing my brothers UC hatch
#51
 _dirtbag_
Posted 31 December 2009 - 03:51 PM
I like to try and do things a little different if I can, but these days everything has been done before so it's getting pretty hard.
LS1 will certainly liven the old girl up a bit, especially with a proper (manual) gearbox : )
#52
 _yldlj_
Posted 31 December 2009 - 04:23 PM
#53
 _torana_
Posted 31 December 2009 - 05:29 PM
Would you consider doing other peoples cars in the future? Of course you would have to be paid handsomely for your skills, as i have an ss with the same issues that i want to do up in the future and it would be awesome to know you have paid for a quality job and not crap.
awesome respect
julian
#54
 _dirtbag_
Posted 31 December 2009 - 05:47 PM
As for doing other peoples cars I have no problem with that. Especially if it's a car I like. such as an SS : )
#55
 _studricho_
Posted 01 January 2010 - 09:09 AM
It's great to see someone that thinks out side the box.
#56

Posted 01 January 2010 - 11:58 AM
#57
 _dirtbag_
Posted 01 January 2010 - 12:38 PM
#58

Posted 01 January 2010 - 02:45 PM
#59
 _dirtbag_
Posted 01 January 2010 - 06:27 PM
Well the last couple of days have been fine tuning the front end/spoiler so everything lines up as it should. After getting it bolted together the best I could, I knew I'd still need to add a little bit of filler to get the gaps spot on. It's a necessary evil : )

At least it's not a lot of filler. Just enough to know how much I hate sanding it : )

This shows that the front spoiler is about level if not a little lower than the sills, which is pretty good I think. You can also just see here that the spoiler comes to a peak, but in line with the UC stone tray, not the LX nose cone. I don't think the difference is too obvious. Not enough for me to worry about anyway.
Once I was happy enough with the finish I smothered the lot in 2k primer filler.


Now I have to wait until tomorrow to be able to bolt it all back together again and see it all in one colour for a change.
#60

Posted 01 January 2010 - 06:57 PM
Now the moment I've been waiting for - putting the bum back on : )
Now that looks 120% better. Love your work, front and back.
#61

Posted 01 January 2010 - 07:30 PM
thats a different way of converting the front to look like an LX, I have only seen people replace the whole radiator support and inner skirts. where abouts on the sunny coast are you?
I have seen the standard UC rad support etc retained and spacers used to fit the LX panels, looks the part till you pop the bonnet.
Good for a hill climber etc.
#62
 _dirtbag_
Posted 01 January 2010 - 07:35 PM
#63
 _gen3torrie_
Posted 01 January 2010 - 09:44 PM
And wow thats a really smart idea with the front End having a removable bar. I'm jealous of kingswood owners as they can just take there nosecone then the innner support and rip there engine out.
You've given me some really great idea's as i just basically got given a UC 4 door but that'll come way later on, my LX is just about ready for paint.
Oh and bugger me you have some great metal and welding skills
i can barely cut a piece of wood straight let alone metal and my welding pfft looks like bird poo when im done.
i can't wait to see this done
#64
 _niterida_
Posted 01 January 2010 - 10:05 PM
2 WORDS f*ck ME thats one inspirational build.
if i worked as fast as you my torana would be done 10x's over by now.
Yeah its awesome - certainly inspiring me - can't wait to get my UC hatch delivered home so I can start work on it. I won't be doing an LX conversion but I do have one very big change in mind that will need those sorts of skills and more
I think all taht work has been time-lapsed - he had those photos taken over a period and only posted them up over the last week or so, making it look like he works like a maniac
#65
 _dirtbag_
Posted 02 January 2010 - 12:51 AM
Yeah, this stuff certainly doesn't happen in a week. There's about 5 or 6 months work here. It's up to date now, so it'll slow down a little bit, but I'm still at it, so work wont stop : )
#66
 _Yella SLuR_
Posted 02 January 2010 - 09:51 AM
Would love to see some of the tools you use in doing this.
Do you run holiday camps for a week or so? Shed & Breakfast rather than a Bed & Breakfast.
Edited by Yella SLuR, 02 January 2010 - 09:53 AM.
#67
 _dirtbag_
Posted 02 January 2010 - 10:53 AM
As for tools, lots of hammers and dollies, an english wheel, a small folder, a bead roller and a shrinker/stretcher are my main weapons. I can put up pics of any of those if you're chasing info.
Well after priming the front panels again yesterday I had to go out first thing today and bolt it back together, as it's been a long time since I'd seen the front end all the same colour.
I'm not sure yet whether I'll keep the high tech bumper mount I've got going on here though. : )
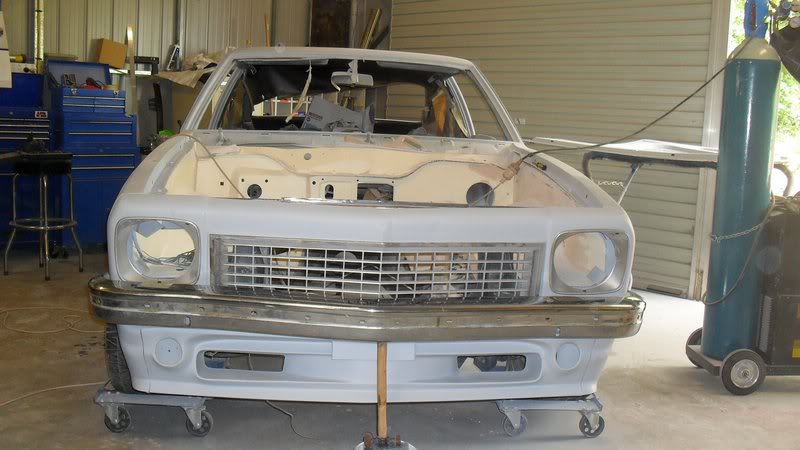
I like the look of it. Most people wont even know it's different, and I like the subtle idea. Pity it was so much bloody work!!!! : )
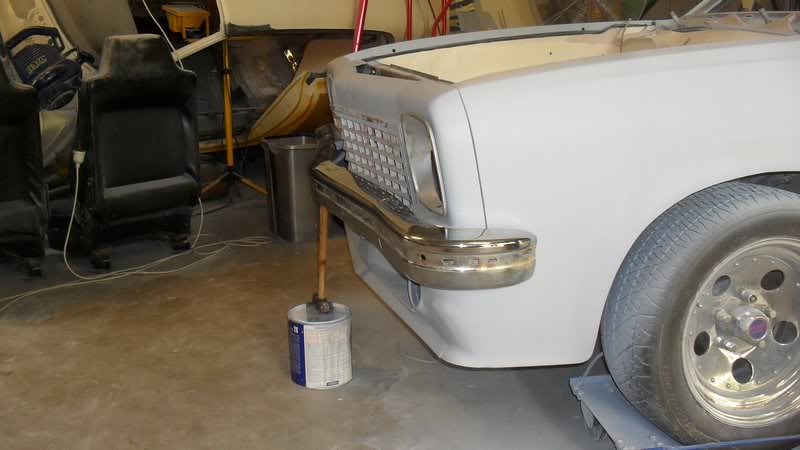
I'm really happy now with how the panels have lined up. Now I can get stuck into the engine bay smoothing and driveline swap. Yay!
Shed and breakfast......hahahaha. I love that!! : )
#68

Posted 02 January 2010 - 07:57 PM
hope those wheels are going
#69
 _dirtbag_
Posted 02 January 2010 - 08:02 PM
#70
 _Yella SLuR_
Posted 02 January 2010 - 08:12 PM
Yeah, I'm familiar with all those. We are just putting together an English Wheel ATM. Also need to get some mounted dollys and a stand, and a whole heap more practice. Although knowing what is possible is half the key. Thanks for sharing that bit.
What I would like is some more info on how you formed the indicator shape into the existing panel. Did you use something as a buck to form it?
Here's where my sheet metal fabrication is at, although I have the hubcap and wheel chock from 1.6mm steel in the shed!!

^ Oh, designed to hold your sat-nav in the Torana ash tray, so it don't have to be stuck to your window (Doesn't look right on older cars).
I like how quick you can fabricate things quickly with simple tools with such a light material as sheet metal.
Edited by Yella SLuR, 02 January 2010 - 08:27 PM.
#71
 _Yella SLuR_
Posted 02 January 2010 - 08:32 PM
Oh, there is this as well. My first sheet metal exercise.
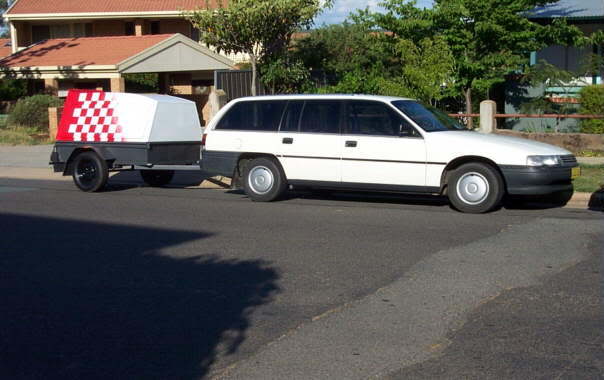
Tows well behind a Torana.
Anyways, back to your stuff, and how you formed that indicator shape in the original panel.
Edited by Yella SLuR, 02 January 2010 - 08:33 PM.
#72
 _dirtbag_
Posted 02 January 2010 - 11:58 PM
As for the indicators, I made the shape of the opening - rings - from the same 6mm steel rod as I used to form the brake ducts. I tacked the rings I made from the 6mm rod into place, as they touched the original UC stone tray in one spot. I then just used the old dolly in a vice trick and a hammer to shape the new sheetmetal to fit around it. I'll dig up some pics as I was making it, as I took crap loads of photos while doing this car as it's the only way my brother gets to see it : )
Edited by dirtbag, 03 January 2010 - 12:12 AM.
#73
 _dirtbag_
Posted 03 January 2010 - 12:09 AM
You can see here the ring I made to form the opening. At this stage I've already made the lower section, but the top is still yet to be done.

This pic of the inside of the spoiler shows the ring and the bits of shaped metal around it. It's not too pretty in there, but it does the job : )

To finish the top of the spoiler and give it some support, I welded a length of 13mm RHS along the top. This also filled the gap left under the bumper. I made the top section of the indicator surround mould into this part just to give the area a bit more shape.
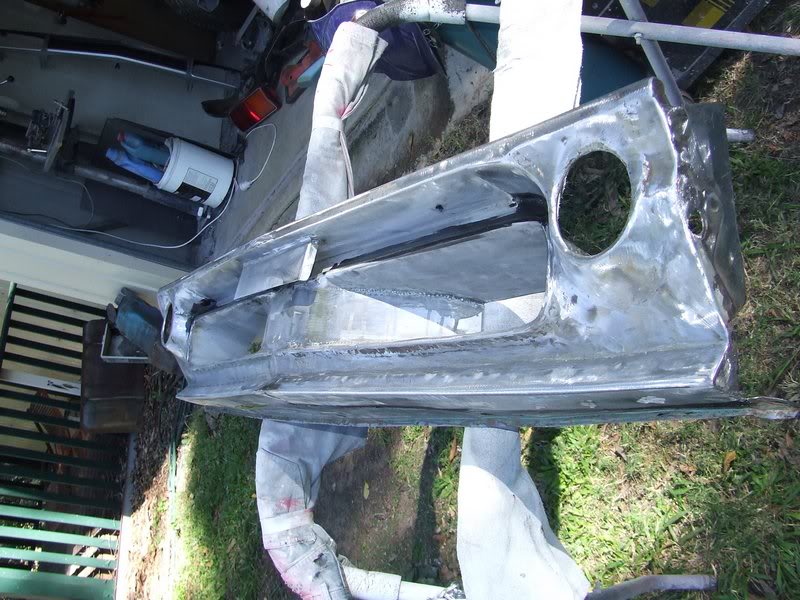
I hope that's kind of what you were after.
#74
 _Yella SLuR_
Posted 03 January 2010 - 07:04 AM
Mmm, tech course, was just the introduction. Just keep picking up stuff from there.
Glad to see I'm not the only one that hates sanding!!!
Edited by Yella SLuR, 03 January 2010 - 07:05 AM.
#75
 _torriechick_
Posted 03 January 2010 - 09:09 AM
1 user(s) are reading this topic
0 members, 1 guests, 0 anonymous users


