
Hi Tim, is the best way to get paint off with a wire cup brush on an angle grinder? Or do I need to use a sander? My hatch finally turned up last weekend and I'm keen to do some improvements (damage).
 1 votes
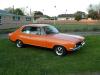
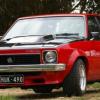
Fixing my brothers UC hatch
Started by
_dirtbag_
, Dec 30 2009 01:19 PM
1690 replies to this topic
#1177
 _dirtbag_
_dirtbag_
-

- Guests
Posted 20 July 2010 - 09:28 PM
Hey Kush. When I'm stripping a whole car back to metal I use 24 grit discs on a 7" grinder. I'll usually then smooth it out a bit with 36 grit, just to get the little leftover bits, as you don't want to dig into the metal too much with the 24 grit. It just does a good job of killing paint : )
I use a wire wheel only when I don't think the metal is thick enough to be sanded with a 36 grit disc. Plus, the sanding discs give a better key for the etch primer to stick to.
I use a wire wheel only when I don't think the metal is thick enough to be sanded with a 36 grit disc. Plus, the sanding discs give a better key for the etch primer to stick to.
#1178
_BAILLIE_
_BAILLIE_
-
- Guests
Posted 21 July 2010 - 01:14 AM
wow, god dam, what a thread.
Here was me, thinking "Ah, yeh, just have a quick gander and see what this is all about.."
Then next thing I know I was hooked and dragged into some kind of mystical crack thread, so addictive and compelling that it had to have UC in the name to warn off the unprepared!
Just spent the most part of two days lost in this thread.
First off, that sump is hectic : )
Congrats of getting the steering rack issues sorted, as well as the extractors, and everything else!
I can't believe the rate of knots this project is getting done at, and the workmanship etc. You're a bloody machine.
All the little tips for welding, grinding, sanding etc. have been good. Good flow of pics and amusing banter, and i'm glad you have been able to get a few tips from the forum too.
I commend you for only building cars that get driven, and for having the good sense that it's no fun without a real gearbox.
I had a great laugh at all the colours, (and comments) and didn't ruin any of the surprises.
The paint and wheels look great. I prefer coded bumpers and door handles with body colour, but if it's all black then chrome works amazingly IMO.
I'm sure your brother with be wrapped with the car. I think I'd be too scared to drive it knowing all the work that's gone into it, not to mention it will be worth a bomb when it's done.
I really need some sleep now, i have one question tho, and it's not about the crossmember bolts. Oh, wait yeh I will ask about them : )
- They look like some decent sized holes in the chassis there, was your mod plate guy concerned about this at all?
- Did you ever find out about the origin of the A/C unit? (looks the goods btw, like the factory put it there)
Cheers,
-Baillie
#1179
_dirtbag_
_dirtbag_
-
- Guests
Posted 21 July 2010 - 04:26 AM
Hi Baillie. Glad you had some fun reading the thread. It's been fun posting it and getting all the comments from everyone.
As for the A/C unit, I have no idea. My brother bought it and sent it up. That's all I know.
As for the holes in the chassis, my mod plate guy has no problem with them as they're the exact same size as the holes that were in the top of the chassis, and I've added enough extra steel by skinning the top of the rails in 1.2mm zinc for him to be satisfied about the structural rigidity of the car.
#1180
_sjohnst7_
_sjohnst7_
-
- Guests
Posted 21 July 2010 - 08:21 AM
Hi Baillie,
I don't remember what the a/c unit is, I'm sorry - too long ago...
I don't remember what the a/c unit is, I'm sorry - too long ago...
#1181
_BAILLIE_
_BAILLIE_
-
- Guests
Posted 21 July 2010 - 10:22 AM
Hi Baillie. Glad you had some fun reading the thread. It's been fun posting it and getting all the comments from everyone.
As for the A/C unit, I have no idea. My brother bought it and sent it up. That's all I know.
As for the holes in the chassis, my mod plate guy has no problem with them as they're the exact same size as the holes that were in the top of the chassis, and I've added enough extra steel by skinning the top of the rails in 1.2mm zinc for him to be satisfied about the structural rigidity of the car.
Ok, the chassis mod makes sense. Probably could have figured that one out, lol.
Why did you use zinc?
Did you put any rust proof or something inbetween the panels before welding, or would that have messed up the weld?
What did you use to cut the 2 holes in the sides?
Hi Baillie,
I don't remember what the a/c unit is, I'm sorry - too long ago...
All good. It looks familiar, I think I saw one in a HQ or a Torry years ago, but i can't really recall either.
#1182
_Woodsy_
_Woodsy_
-
- Guests
Posted 21 July 2010 - 10:31 AM
What did you use to cut the 2 holes in the sides?
Looks like a hole saw
#1183
_dirtbag_
_dirtbag_
-
- Guests
Posted 21 July 2010 - 06:36 PM
Yep, Josh is right, nothing more glamourous than the good old hole saw. Obviously make sure it has a steel cutting bit in it though : )
Well today saw a few more really annoying jobs get done, and some not get totally done.
The steering rack is being a bit of a pain. The tie rods hit the calipers, even with the grease nipples removed. This means I'll have to get steerings arms CNC plasma cut with slightly different geometry like we used to do at the hot rod shop. Not too expensive, so that's good.
Another option would be to swap the stubs over and have the calipers at the back, but then the turning circle is crap, so I don't want to do that.

Even with a 2 1/2mm washer as a spacer, the new rack still hit the crossmember in 2 places.


To stop the rack hitting I'll have to space it out a bit more, then I'll get the new steering arms changed to suit.
It looks pretty though : )

I'm not out to bag this power steering conversion, I'm just stating what I come across so my brother knows what's going on. I also had to cut away some of the right hand engine mount plate where the column used to pass through.
Also put a rebuild kit through the lower steering coupling.

Finally, the front wheels have a use again : )

The next really fun job was fitting the clutch. I machined up a quick little clutch aligning tool to help with the job.
The clutch pressure plate even matches the colour of the car : )

Here's the tool I machined up to align the clutch. It's made from a hard nylon that I use to make chain guide wheels with for my downhill mountain bikes. It's good strong stuff and really easy to machine.
The cloth tape is just on there so it coulf bite into the splines of the clutch plate a bit more. It worked a treat. I've never had a gearbox slip on as easily as this one did.

Finally the motor, gearbox and crossmember are all bolted together. It's been a long time coming.

Another pic of how close the motor is to the new rack. I hope it doesn't come across like I'm bagging out the rack conversion. It was not designed for an LS1 motor.

It sure is ugly without all the covers and what not. Hooray for covers then hey : )

Cleaned up a bit in the engine bay by painting under the chassis rails and the base of the firewall black, to cover the ugly overspray that was there.

I also made this heavy duty bumper bar. It's a thing of beauty. I was going to go with the stock bumpers smoothed and chromed, but now I'm in love with this thing : )
OK, it's just so I can use the engine crane to lift the body so I can slip the motor, box and crossmember underneath. Should do the job I think, it's all 5mm wall steel.

I'm really really really hoping tomorrow will see the front end back in the car, but I'm not counting my chickens until it's actually done.
Well today saw a few more really annoying jobs get done, and some not get totally done.
The steering rack is being a bit of a pain. The tie rods hit the calipers, even with the grease nipples removed. This means I'll have to get steerings arms CNC plasma cut with slightly different geometry like we used to do at the hot rod shop. Not too expensive, so that's good.
Another option would be to swap the stubs over and have the calipers at the back, but then the turning circle is crap, so I don't want to do that.
Even with a 2 1/2mm washer as a spacer, the new rack still hit the crossmember in 2 places.
To stop the rack hitting I'll have to space it out a bit more, then I'll get the new steering arms changed to suit.
It looks pretty though : )
I'm not out to bag this power steering conversion, I'm just stating what I come across so my brother knows what's going on. I also had to cut away some of the right hand engine mount plate where the column used to pass through.
Also put a rebuild kit through the lower steering coupling.
Finally, the front wheels have a use again : )
The next really fun job was fitting the clutch. I machined up a quick little clutch aligning tool to help with the job.
The clutch pressure plate even matches the colour of the car : )
Here's the tool I machined up to align the clutch. It's made from a hard nylon that I use to make chain guide wheels with for my downhill mountain bikes. It's good strong stuff and really easy to machine.
The cloth tape is just on there so it coulf bite into the splines of the clutch plate a bit more. It worked a treat. I've never had a gearbox slip on as easily as this one did.
Finally the motor, gearbox and crossmember are all bolted together. It's been a long time coming.
Another pic of how close the motor is to the new rack. I hope it doesn't come across like I'm bagging out the rack conversion. It was not designed for an LS1 motor.
It sure is ugly without all the covers and what not. Hooray for covers then hey : )
Cleaned up a bit in the engine bay by painting under the chassis rails and the base of the firewall black, to cover the ugly overspray that was there.
I also made this heavy duty bumper bar. It's a thing of beauty. I was going to go with the stock bumpers smoothed and chromed, but now I'm in love with this thing : )
OK, it's just so I can use the engine crane to lift the body so I can slip the motor, box and crossmember underneath. Should do the job I think, it's all 5mm wall steel.
I'm really really really hoping tomorrow will see the front end back in the car, but I'm not counting my chickens until it's actually done.
Edited by dirtbag, 21 July 2010 - 06:50 PM.
#1184
ls2lxhatch
-

- Members
-

- 5,332 posts
- Location:Perth
- Car:LX Hatch
- Joined: 29-May 06
Posted 21 July 2010 - 07:03 PM
I recommend you replace the urethane disc in the rag coupler with a rubber one. The urethane discs have a nasty habit of melting if the headers are close.
Rare spares have reproduction rag couplers in the pipeline. If you cant wait then I have a spare NOS rag coupler that you could raid for the disc.
Rare spares have reproduction rag couplers in the pipeline. If you cant wait then I have a spare NOS rag coupler that you could raid for the disc.
Edited by ls2lxhatch, 21 July 2010 - 07:07 PM.
#1185
_LH SLR 3300_
_LH SLR 3300_
-
- Guests
Posted 21 July 2010 - 07:45 PM
Yes i've had this happen too. A mate had one completely fail in his Corvette, lucky for him it happened while turning in his driveway & not on the open road.
#1186
_dirtbag_
_dirtbag_
-
- Guests
Posted 21 July 2010 - 08:31 PM
I rang around all the decent steering places around here and that was the only thing I could get. If brother can find a rubber one he can replace it himself later : )
#1187
MictheAussie
-
- Members
-
- 235 posts
Forum Member
- Name:Mic
- Location:Colorado, USA
- Car:LJ
- Joined: 14-January 10
Posted 22 July 2010 - 01:05 AM
Off topic, But when isn't this thread.... Pics of said downhill Mountain Bikes!!!
#1188
slr5640
-
- Members
-
- 798 posts
XA9X
- Name:Brian
- Location:Portland Vic
- Joined: 17-November 05
Posted 22 July 2010 - 01:24 PM
Is it possible to remove some material to give clearance for the tie rod ends?The tie rods hit the calipers, even with the grease nipples removed
The A9X bracket are acalloped out for this reason.
from this thread..
http://www.gmh-torana.com.au/forums/index.php?showtopic=1012&st=25


#1189
MRLXSS
-

- Members
-
- 12,414 posts
The Render Garage
- Name:Matt
- Location:Upwey, Melbourne
- Car:355 LX Hatchback, DeLorean DMC-12, LX SS Hatch, VY Cross8 Crewman
- Joined: 09-November 05
Posted 22 July 2010 - 01:34 PM
What steering arms are you using DB? I had the exact same problem with the tie-rod hitting the caliper..
I forked out the $300 odd for the A9X steering arms and it fixed this problem (Drops the tie rod a lot further down)
I forked out the $300 odd for the A9X steering arms and it fixed this problem (Drops the tie rod a lot further down)
#1190
Growla
-
- Members
-
- 229 posts
Forum Member
- Location:Canberra ACT
- Car:LX SL/R LS1 conversion completed July 2010
- Joined: 07-February 07
Posted 22 July 2010 - 04:17 PM
I'll second that MRLXSS. No issues with those harrop arms.
#1191
_dirtbag_
_dirtbag_
-
- Guests
Posted 22 July 2010 - 04:45 PM
Hi Matt. I have no idea what the steering arms are from. The front brake conversion was already on the car when my brother bought it.
Can you tell me how far the Harrop ones drop the tie rod end?
Can you tell me how far the Harrop ones drop the tie rod end?
#1192
_sjohnst7_
_sjohnst7_
-
- Guests
Posted 22 July 2010 - 05:16 PM
I expect they will be UC arms which are fairly similar to the Harrop ones. IS that right?
#1193
_dirtbag_
_dirtbag_
-
- Guests
Posted 22 July 2010 - 06:16 PM
Off topic, But when isn't this thread.... Pics of said downhill Mountain Bikes!!!
Hi Mic.
My downhill bike is a 2003 Kona Stab Primo. I've painted it a couple of times, but the last (current) paint job is a funny one. I sandblasted the frame and rear swing arm, hand cut some stickers for the stencil for the new logos, dusted some black over the stencils to give some shading, then 2 pac cleared it. I like the finish. I also made a floating rear caliper set up. Made a big difference.
I also renamed it. It's now the Kona Boner : ) I'm such a child....
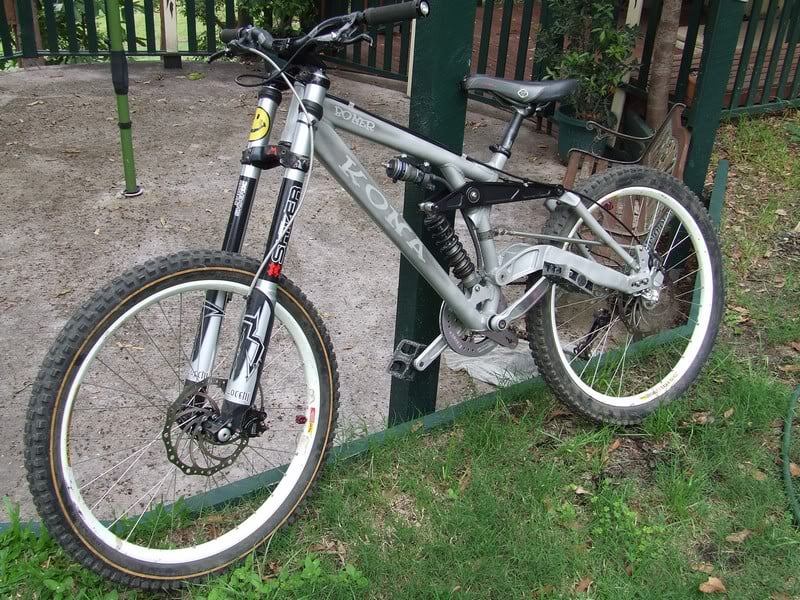
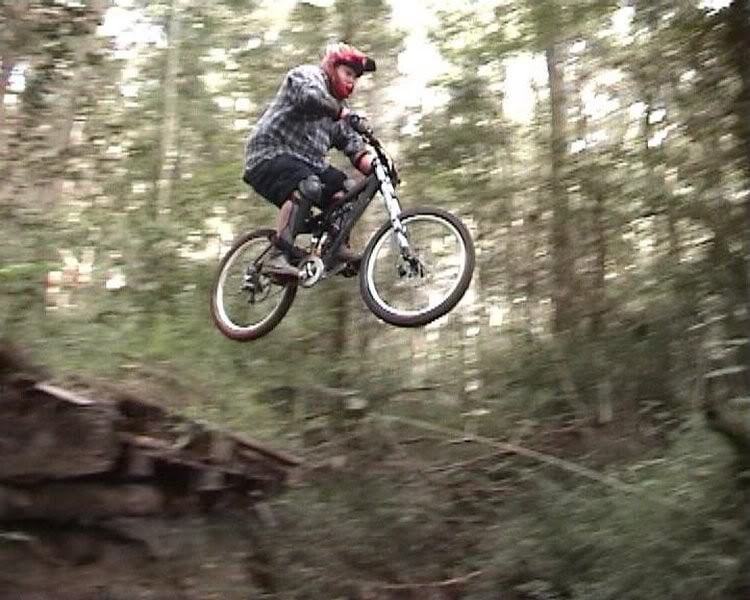
This is one of the gap jumps on the coast. It's not massive, about 4 metres, but it's a dry creek and about 2 1/2 metres deep, so you don't want to come up short : )
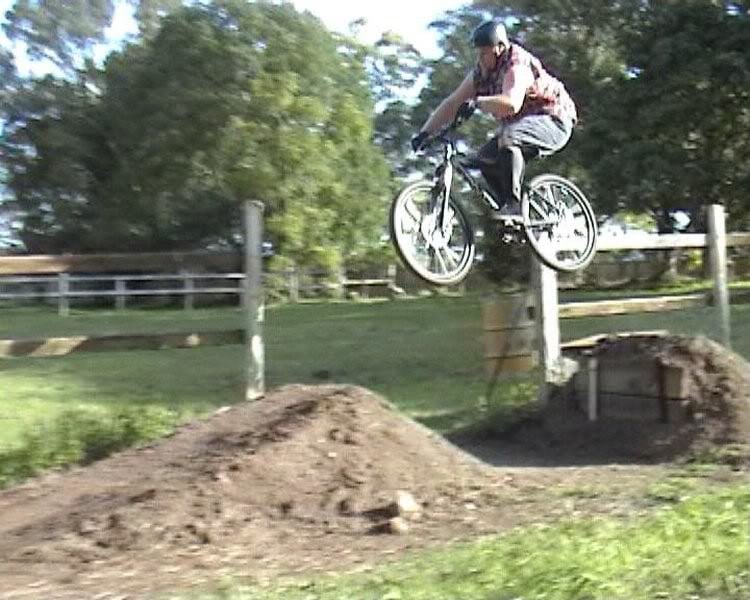
My hardtail is an Avanti Manic. It's a great little bike. It used to have Marzocchi Dirt Jumper III forks but have recently changed them to 7" triple trees : )
For dirt jumps though the short forks are the best.
These jumps we made at my friends parents house.
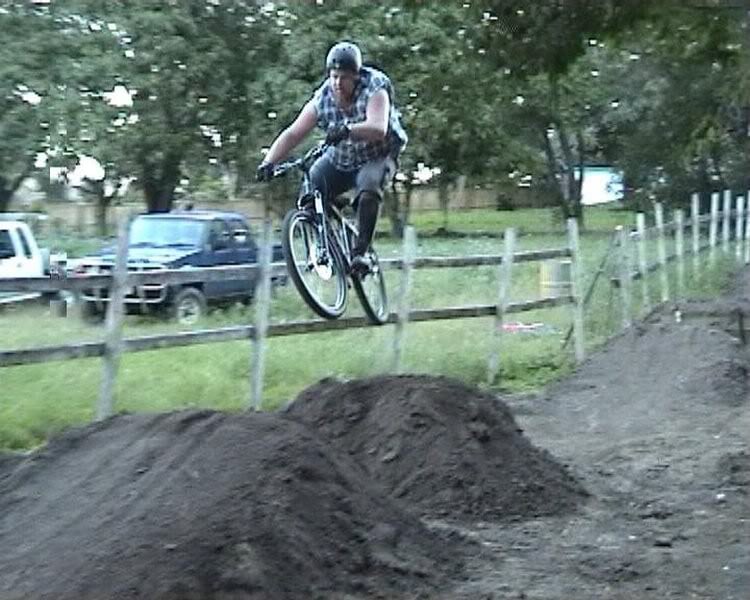
I guess white men CAN jump....actually, I should say FAT white men can jump : )
hahaha.
#1194
_dirtbag_
_dirtbag_
-
- Guests
Posted 22 July 2010 - 07:03 PM
Did a little bit more on the hatch today.
I bought some really exciting things to go on the motor. I know, you're thinking turbos, but these are even better than that.
Fan belts : ) hahaha

Also re fitted the wiring loom, extractors, new long life spark plugs, coil packs and put new oil in the gearbox. I put new oil in the motor yesterday so it had overnight to reveal any leaks. I still have my fingers crossed. I hate oil leaks.


Once all that was done, it was wheel stand time : )

I absolutely love this next pic. I need to photo shop a tube frame chassis in there and it would look just like a funny car with the body up : )

The front bumper/lift point I made sure did do a good job. Made it so easy.


At last, it's all back where it belongs.


I'm really happy with how my heater box modification turned out. Plenty of room there now.

I bought some really exciting things to go on the motor. I know, you're thinking turbos, but these are even better than that.
Fan belts : ) hahaha
Also re fitted the wiring loom, extractors, new long life spark plugs, coil packs and put new oil in the gearbox. I put new oil in the motor yesterday so it had overnight to reveal any leaks. I still have my fingers crossed. I hate oil leaks.
Once all that was done, it was wheel stand time : )
I absolutely love this next pic. I need to photo shop a tube frame chassis in there and it would look just like a funny car with the body up : )
The front bumper/lift point I made sure did do a good job. Made it so easy.
At last, it's all back where it belongs.
I'm really happy with how my heater box modification turned out. Plenty of room there now.
#1195
_lxss5l_
_lxss5l_
-
- Guests
Posted 22 July 2010 - 07:07 PM
Your doing such a great job Tim there isn't to many guys out there that could build a hole car like this . I've just got the same rack so i,m very interested in the tie rod end clearence to the calaper mount bracket when useing the UC steering arms with similar brakes . The uc steering arms should have cast on them [font="""]AF1GM7248 (RH) [/font][font="""]AF1GM7249 (LH). So it looks like your front brakes and stub axles are Hq ones? theres no separate calaper brackets is there and the disks still measure 11.0 inches (280mm) ?. Some other conversions seem to use the wb alloy calapers but as Brian sugests I think you mite be able to just take anough off to make it work. Hopefully with out the harrop arms. I'm shore Axistr had to do that on one he did in the steering section. [/font]
#1196
_dirtbag_
_dirtbag_
-
- Guests
Posted 22 July 2010 - 07:18 PM
Here's a quick couple of before shots of the engine bay, just for fun.

After the metal work got done.

And here's an unfinished glimpse of how it's going to look now.

I'm just going to bung a heap of pics here now just because I like them : )


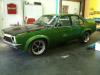
I know there's much showier engine bays out there, and that LS1 motors are really ugly, but I think this looks great. I know I'd certainly have it. Yes, that's what I'll do : )
ahahahahahaha......
After the metal work got done.
And here's an unfinished glimpse of how it's going to look now.
I'm just going to bung a heap of pics here now just because I like them : )
I know there's much showier engine bays out there, and that LS1 motors are really ugly, but I think this looks great. I know I'd certainly have it. Yes, that's what I'll do : )
ahahahahahaha......
#1197
MRLXSS
-
- Members
-
- 12,414 posts
The Render Garage
- Name:Matt
- Location:Upwey, Melbourne
- Car:355 LX Hatchback, DeLorean DMC-12, LX SS Hatch, VY Cross8 Crewman
- Joined: 09-November 05
Posted 22 July 2010 - 07:27 PM
I REALLY Like that!!!!!!
It's something completely different and i would never have gone for it myself, but it works really really well!!! It suits the A9X paint scheme perfectly!!
10/10
It's something completely different and i would never have gone for it myself, but it works really really well!!! It suits the A9X paint scheme perfectly!!
10/10
#1198
_Kush_
_Kush_
-
- Guests
Posted 22 July 2010 - 08:25 PM
It's lookin sweet, Tim. I feel bad that you've gotta be a surragate mother to these little projects that you do. Go and find your own hatch! I don't care how broke you are, just do it! By the way, those mountain bike shots were hillarious, I didn't know such a big lad would enjoy being that high off the ground  oh, and one more thing, how about you knock up a filler panel between the rad support and the nosecone? Like black dices one.
oh, and one more thing, how about you knock up a filler panel between the rad support and the nosecone? Like black dices one.
#1199
_dirtbag_
_dirtbag_
-
- Guests
Posted 22 July 2010 - 09:33 PM
Hi Kush. To be honest I don't really like anything on the black dice car. Except for the hundreds of things I do like about it : ) hehehe..
I might have a look at making something up. All comes down to time, and whether or not my brother wants me to.
I might have a look at making something up. All comes down to time, and whether or not my brother wants me to.
#1200

 View Garage
Posted 22 July 2010 - 09:41 PM
I've never been a fan of plastic engine covers, but that's come up quite nicely. Still not sure about the moustache, but its getting better as more parts are added to the engine bay
It would be a shame to compromise on the geometry after putting in the power steering conversion and all the other hard work on the car, why not just use the proper steering arms?[font="""]Hopefully with out the harrop arms.[/font]


3 user(s) are reading this topic
0 members, 3 guests, 0 anonymous users

