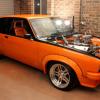
Fixing my brothers UC hatch
#1301
 _BATHURST-32D_
Posted 05 August 2010 - 03:34 AM
cheers gong
#1302
 _eh-buddy_
Posted 05 August 2010 - 09:46 AM
#1303
 _dirtbag_
Posted 05 August 2010 - 04:43 PM

Steering arms from Harrop arrived today. As did the number rear number plate light. Thanks again Vinny.

Unfortunately this car being a UC meant that the new panels my brother bought for the rear side areas are too tall, as the UC has a higher floor. I'll have to unpick the vinyl and cut them down. Bummer.


The moulded carpet is another thing that isn't quite right for this car. Those rear shock support thingys that we were talking about earlier that aren't on this car might need to go on this car, so these bits of carpet will fit properly.
Can someone with a hatch please give me the dimensions of those supports? Thanks.

I've got the roof lining pretty much all glues now. I am definitely not a trimmer. I'll need to steam this a bit, but it's better than the old one.

I also glues this piece of carpet in the back. I assumed it was meant to go the other way around, with the slot going to the top, but it just wouldn't sit right at looked awful, so it's in this way instead : )

I've also got the left door nearly ready for the new vinyl top to go on, but ran out of day.
I took one of the new front seats and the old rear seat to the trimmer so he can match the rear seat to the new front seats. Should look awesome.
Tomorrow I'll get some wood and make the floor piece to go in the hatch area, and I'll also get some steel so I can mount the new front seats.
It'll be nice to be able to actually sit in the car at last.
#1304

Posted 05 August 2010 - 05:00 PM
Also you might need to weld tuns stops onto the steering arms to stop the calipers fowling, had to with mine.
#1305
 _Brad1979UC_
Posted 05 August 2010 - 05:15 PM
Love the pinchweld trick!! Lucky, i almost threw my old pinchweld out last week!
#1306
 _dirtbag_
Posted 05 August 2010 - 05:27 PM
The roof lining looks like it needs a tad more stretching to get it tight, but steaming might shrink it enough to achieve the same outcome.
Also you might need to weld tuns stops onto the steering arms to stop the calipers fowling, had to with mine.
Yeah, well as a trimmer I make a pretty good fabricator : )
It was pretty hard to even get it that smooth. If I had someone else here helping it might have been easier, didn't, so that's the best I could do.
Another reason why I wanted to be working on the camaro this week..........
#1307
 _Kush_
Posted 05 August 2010 - 07:13 PM
If nobody gives you the dimensions for the shock support bracey things by tomorrow arv, I'll measure mine up for you. I'm not going outside now though..... The possums are out and they get angry and bitey
#1308
 _Kush_
Posted 06 August 2010 - 06:59 PM
#1309

Posted 06 August 2010 - 08:46 PM
#1310
 _dirtbag_
Posted 06 August 2010 - 08:49 PM
Hi Mitch. My brother wants to have the car there, but there's still a heap to do. Maybe everyone on this forum can come over one weekend for a working bee???? hahaha.
#1311
 _Bomber Watson_
Posted 06 August 2010 - 08:52 PM
Im fairly handy on the spanners
Cheers.
#1312
 _dirtbag_
Posted 06 August 2010 - 08:58 PM
I wont even charge you too much for helping hahaha : )
#1313

Posted 06 August 2010 - 09:11 PM
#1314
 _Kush_
Posted 06 August 2010 - 09:26 PM
Edited by Kush, 06 August 2010 - 09:29 PM.
#1315
 _Bomber Watson_
Posted 06 August 2010 - 10:23 PM
Cheers.
#1316
 _The Baron_
Posted 07 August 2010 - 05:36 PM

Notice how the Harrop ones have no travel limit tabs near the tie rod end. Compare it to the original and you will see what I mean. I expect this will allow a tighter turning circle but you may have wheel fouling noises too.
Mind you......better than bump steer!!
Edited by The Baron, 07 August 2010 - 05:39 PM.
#1317
 _Kush_
Posted 07 August 2010 - 08:47 PM
#1318
 _sjohnst7_
Posted 07 August 2010 - 10:04 PM
It wasn't cheap, but is nicely made, has whatever fittings you want, has a nice filler cap and is baffled. It's very shiny too!
I can't remember the web address, sorry.
Harrop steering arms were somewhere around $350. (www.harrop.com.au)
#1319

Posted 07 August 2010 - 10:06 PM
#1320
 _lxss5l_
Posted 07 August 2010 - 11:13 PM
That reminds me when a guy I bourt parts of was trying to sell me some recoverd uc ones both of us didn't realise ether untill he put one up against mine. PS I like those new steering arms
#1321

Posted 10 August 2010 - 02:21 PM
What an epic build this thread has covered! I only just discovered this thread recently (the title was a bit mis-leading, and I didn't realise what I'd been missing out on, HAHA).
But now that I've just spent the last week or two reading every bloody page, I'm finally up to date... and damn my eyes hurt
This car is a real credit to you - the workmanship and custom modifications is a real inspiration, and the humourous comments have been very entertaining along the way. I really like the way it's all turned out. I was very happy to see the flares going on, and with the wheel and colour combo it officially looks nuts! (But BLACK would have been nice) LOL. The driveline choice is also full of awesomeness.
Top work! Cheers for sharing the build-up with us all. As for the title of this thread - I think it's fixed now.
#1322

Posted 10 August 2010 - 08:01 PM
Hope I can be of some help in the steering department. If your using HQ stubs you need to use A9X steering arms to minimise bump steer as you have done purchasing Harop arms. As Andy has stated if your running UC front end use UC steering arms, LX use LX arms etc. My racks basically sit in the same position as the factory but around 5-8mm forward due to the larger diameter of the power steering cylinder. The main reason the power steering conversion reduces bumpsteer and gives better handling it due to the power steering hydraulic cylinder, it's like having a shock absorber built in, or like a steering damper on a four wheel drive, remove it off a four wheel drive and see how much difference it makes. Then there is the added bonus of much quicker ratio and to top it off you can now steer it with one hand, and one hand to do what you want with ?.
I run UC arms on my hatch to clear the brakes calipers a bit better and the steering tie rod bars more level due to my ride height, but I could have used the LX steering arms with basically the same result, I was just trying different setup to see if any of the changes were for the better. I also carried out a conversion on a standard LX and even with 2 degrees negitive caster the car steered like a gem and no bump steer.
And last of all I recomend not to weld bits on the end of your steering arms stops, it is most important that on full lock there is clearance between the arm and lower control arm, as I have designed the system to bottom out on full lock in the internal parts of the power steering rack. It is so easy to add excessive load on the steering components on full lock and not notice it using one hand up top on the tiller and bending parts, loading up bushes until they start spliting, or knocking out your wheel alignment. All modern cars with power steering have this design feature so make sure you have clearance on full lock under power assistance, it only needs a bees dick but they must have clearance.
Hope this helps.
Lenny.
#1323
 _cruiza_
Posted 11 August 2010 - 09:30 PM
hey dirbag just an idea for the the car a nice chevy badge on the grill would really set the car off hehehe
#1324
 _Bomber Watson_
Posted 11 August 2010 - 09:39 PM
Edited by Bomber Watson, 11 August 2010 - 09:42 PM.
#1325
 _dirtbag_
Posted 12 August 2010 - 01:14 AM
I made up some mounts for the new seats. They're 50x5mm flat steel, so I don't think they'll fall out in a hurry.
I've made the mounts bolt in the original seat mounts in the floor, then the new seats bolt to the new mounts. The seats have 3 rows of holes in the mounting tabs, so the seat height can be changed if needed.


I also made a new floor for the hatch area, and cut a hole in each end with a spade bit to act as a finger pull to remove the panel.

Starting to look a bit neater.

First trial fit of the moulded carpet.

There was a lot of heating done around the tunnel, as I had to make a much larger tunnel for the t56. Once I was happy enough with how the carpet was going to sit on the tunnel, I took it all out and fitted the underlay.
The carpet is pulled to its limit over the new tunnel, so I couldn't use underlay on it, but it went everywhere else.

I pulled all the old trim clips out of the old rear trims and fitted them to the new ones so I could stick one in and have a look. Very pretty : )

Then I was able to mount the carpet and chuck a seat in there. I only have one seat here at the moment as the other one is at the trimmers so he can trim the rear seat to suit. He's also going to mount a gearstick and handbrake boot to the carpet once it's all done. He's a good trimmer, does most of our hot rods around here, so looking forward to seeing the rear seat trimmed. His name is Chris Bakker.


Then I got to mess it all up again with the remote locking kit. Being a 2 door the stupid loom isn't long enough to reach the latch, so I'll lenghthen it, fit the solenoid and then I can put the new door card on. Yay!

I also fitted up the grill and headlight surrounds. It's starting to resemble a car at last.


Edited by dirtbag, 12 August 2010 - 01:17 AM.
2 user(s) are reading this topic
0 members, 2 guests, 0 anonymous users


 View Garage


