Jump to content


Photo
- - - - -

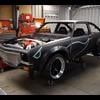
LX sedan + left over parts


  • Please log in to reply
228 replies to this topic

#26 turbo76lx

turbo76lx

    Forum Fixture

  • Members
  • PipPipPipPipPip
  • 645 posts
  • Name:Glen
  • Location:Vic
  • Car:LX
  • Joined: 15-August 08

Posted 28 February 2010 - 07:45 AM

My shed is the same full of spare parts that i may not need but i know soon as i get rid of something you can bet that will be the part i am after for the next project.

But the spares are starting to pile up.

IMGP0663_resize.jpgAttached File  IMGP0663_resize.JPG   162.9K   2 downloads
IMGP0664_resize.jpgAttached File  IMGP0664_resize.JPG   170.22K   2 downloads
IMGP0666_resize.jpgAttached File  IMGP0666_resize.JPG   185.3K   2 downloads
IMGP0667_resize.jpgAttached File  IMGP0667_resize.JPG   138.04K   2 downloads
IMGP0673_resize.jpgAttached File  IMGP0673_resize.JPG   127.79K   2 downloads
IMGP0674_resize.jpgAttached File  IMGP0674_resize.JPG   151.81K   2 downloads


Edited by turbo76lx, 22 October 2017 - 10:44 AM.


#27 _nial8r_

_nial8r_
  • Guests

Posted 28 February 2010 - 03:54 PM

^^^ you dont wanna sell them 2 rubberless bars you have there do ya ??? Posted Image

#28 turbo76lx

turbo76lx

    Forum Fixture

  • Members
  • PipPipPipPipPip
  • 645 posts
  • Name:Glen
  • Location:Vic
  • Car:LX
  • Joined: 15-August 08

Posted 28 February 2010 - 04:52 PM

The rubberless bars will end up on my hatch. I'm actually after another set for this project myself. If i happen to find a spare set i will let you know.

#29 _Yella SLuR_

_Yella SLuR_
  • Guests

Posted 28 February 2010 - 05:24 PM

Oh, a Torana bum!!!!

Posted Image

#30 turbo76lx

turbo76lx

    Forum Fixture

  • Members
  • PipPipPipPipPip
  • 645 posts
  • Name:Glen
  • Location:Vic
  • Car:LX
  • Joined: 15-August 08

Posted 28 February 2010 - 06:58 PM

Modifyed the booster today using a VN booster and master cylinder. If i had a spare LX dual diaphragm booster i would have just pulled both the LX and VN apart

and made one out of the two, but had to do a cut and shut job. I still pulled the VN booster apart to get the push rod out so when i welded it i could put the seals in water

without quenching the weld. Also gave me a chance to make sure the seals and diaphragm are in good condition.

Super home made separator.

IMGP0691_resize.jpgAttached File  IMGP0691_resize.JPG   147.74K   2 downloads

LX and VN push rods.

IMGP0693_resize.jpgAttached File  IMGP0693_resize.JPG   172.09K   2 downloads

Keeping the seal cool after welding.

IMGP0694_resize.jpgAttached File  IMGP0694_resize.JPG   172.26K   2 downloads

Brand new second hand booster.

IMGP0695_resize.jpgAttached File  IMGP0695_resize.JPG   133.05K   2 downloads


Edited by turbo76lx, 22 October 2017 - 10:46 AM.


#31 _nial8r_

_nial8r_
  • Guests

Posted 02 March 2010 - 07:21 AM

i have to do the same with my LX as i will be running the VN booster, love the seperater Posted Image

#32 MRLXSS

MRLXSS

    The Render Garage

  • Members
  • PipPipPipPipPipPipPip
  • 12,400 posts
  • Name:Matt
  • Location:Upwey, Melbourne
  • Car:355 LX Hatchback, DeLorean DMC-12, LX SS Hatch, VY Cross8 Crewman
  • Joined: 09-November 05

Posted 02 March 2010 - 08:00 AM

:clap:

Wish i had your skills! Dammit!!

#33 _nial8r_

_nial8r_
  • Guests

Posted 02 March 2010 - 12:11 PM

you only learn by macking stuff ups Matt, its how i learn most of the stuff i know and i still stuff up Posted Image

#34 turbo76lx

turbo76lx

    Forum Fixture

  • Members
  • PipPipPipPipPip
  • 645 posts
  • Name:Glen
  • Location:Vic
  • Car:LX
  • Joined: 15-August 08

Posted 02 March 2010 - 06:38 PM

I still stuff up to but learnt how to hide my mistakes or just not post the photos. Like most other people you learn by your mistakes or if all else fails read the manual.

But most of the time i learn by just pulling things apart, like the booster i started with a broken one and thought well i can't stuff it anymore so pull it apart and see how it works.

#35 _nial8r_

_nial8r_
  • Guests

Posted 03 March 2010 - 06:53 PM

was it hard popping the VN booster apart ???

#36 _toranajohn_

_toranajohn_
  • Guests

Posted 03 March 2010 - 09:04 PM

mate u are a very clever hands on guy sensational work

#37 turbo76lx

turbo76lx

    Forum Fixture

  • Members
  • PipPipPipPipPip
  • 645 posts
  • Name:Glen
  • Location:Vic
  • Car:LX
  • Joined: 15-August 08

Posted 04 March 2010 - 06:10 PM

nial8r - it's not to hard to separate the booster, you do need to make up some kind of sepator not only to pull it apart but also put it back together.

The HK shop manual or volume 2 HQ service manual gives a good run down, just make sure you keep everything clean and only use rubber grease.

#38 turbo76lx

turbo76lx

    Forum Fixture

  • Members
  • PipPipPipPipPip
  • 645 posts
  • Name:Glen
  • Location:Vic
  • Car:LX
  • Joined: 15-August 08

Posted 04 March 2010 - 07:14 PM

Decided to modify the engine mounts to move it foward 12mm, basically just used the HQ mounts welded a new piece on filled the original holes

and drilled new holes. I also had a play with torana mounts and was suprised that the only difference between Torana and HQ mounts was the

height and didn't move the motor foward or back.

HQ mounts.

IMGP0701_resize.jpgAttached File  IMGP0701_resize.JPG   155.5K   3 downloads

25x6 flat bar tacked on and hole filled.

IMGP0702_resize.jpgAttached File  IMGP0702_resize.JPG   181.93K   2 downloads

Welded, sanded and a pilot hole drilled.

IMGP0703_resize.jpgAttached File  IMGP0703_resize.JPG   181.77K   2 downloads

Old holes filled then sanded.

IMGP0704_resize.jpgAttached File  IMGP0704_resize.JPG   165.97K   2 downloads
IMGP0706_resize.jpgAttached File  IMGP0706_resize.JPG   147.35K   2 downloads

Finished mounts with the excess flat bar cut off.

IMGP0707_resize.jpgAttached File  IMGP0707_resize.JPG   156.43K   2 downloads


Edited by turbo76lx, 22 October 2017 - 10:48 AM.


#39 turbo76lx

turbo76lx

    Forum Fixture

  • Members
  • PipPipPipPipPip
  • 645 posts
  • Name:Glen
  • Location:Vic
  • Car:LX
  • Joined: 15-August 08

Posted 04 March 2010 - 07:49 PM

With the modified mounts i can now remove the dissy without having to cut the drip rail on the fire wall and the air box doesn't need to be modified.

IMGP0709_resize.jpgAttached File  IMGP0709_resize.JPG   139.73K   2 downloads
IMGP0708_resize.jpgAttached File  IMGP0708_resize.JPG   110.64K   2 downloads

The gearbox mount still fits the slots in the cross member.

IMGP0710_resize.jpgAttached File  IMGP0710_resize.JPG   122.8K   2 downloads


Edited by turbo76lx, 22 October 2017 - 10:49 AM.


#40 turbo76lx

turbo76lx

    Forum Fixture

  • Members
  • PipPipPipPipPip
  • 645 posts
  • Name:Glen
  • Location:Vic
  • Car:LX
  • Joined: 15-August 08

Posted 14 March 2010 - 06:50 PM

Keyed all the locks the same today, what a fun job. Also found 6cyl VL commodore accelerator cable will work but need to shorten the inner cable about 30mm.

IMGP0724_resize.jpgAttached File  IMGP0724_resize.JPG   146.46K   2 downloads
IMGP0725_resize.jpgAttached File  IMGP0725_resize.JPG   148.52K   2 downloads


Edited by turbo76lx, 22 October 2017 - 10:52 AM.


#41 _nial8r_

_nial8r_
  • Guests

Posted 15 March 2010 - 03:16 PM

looks like ya been busy mate, what box & cross member are you using ??
also bring the motor forward is a really good idea, how much room do you have now between the the radiator & the front of the motor as this could be an option for me so that i wont have to cut the lip on the fire wall Posted Image

#42 rodomo

rodomo

    To advertise here, call 13TORANA

  • Members
  • PipPipPipPipPipPipPip
  • 18,026 posts
  • Name:R - O - B Dammit!
  • Location:Way out west of Melbourne Awstraylya
  • Joined: 10-December 05

Posted 15 March 2010 - 06:13 PM

This is my kind of thread! Keep up the good (think outside the square) work! :spoton:

#43 turbo76lx

turbo76lx

    Forum Fixture

  • Members
  • PipPipPipPipPip
  • 645 posts
  • Name:Glen
  • Location:Vic
  • Car:LX
  • Joined: 15-August 08

Posted 15 March 2010 - 07:13 PM

looks like ya been busy mate, what box & cross member are you using ??
also bring the motor forward is a really good idea, how much room do you have now between the the radiator & the front of the motor as this could be an option for me so that i wont have to cut the lip on the fire wall :spoton:


Not that busy, getting closer to starting body work which i'm not looking forward to. I'm just using an aussie 4 speed and standard cross member.

From a 3 core radiator to the front of the block in 269mm, if i remember on the weekend i will take some more mearurements.

12mm is about the most you can move the motor forward unless you modify the sump.

IMGP0713_resize.jpgAttached File  IMGP0713_resize.JPG   145.16K   2 downloads

Edited by turbo76lx, 22 October 2017 - 10:53 AM.


#44 orangeLJ

orangeLJ

    Yes, yes I do post alot!

  • Members
  • PipPipPipPipPipPipPip
  • 10,261 posts
  • Joined: 02-May 06

Posted 16 March 2010 - 10:56 AM

Wow!

How did you go about keying all the locks the same?

I have about ten door locks for my ute, but only one with a key that fits.

#45 _GTRToranaRacing_

_GTRToranaRacing_
  • Guests

Posted 16 March 2010 - 11:54 AM

hi Glen,
You have down a great job,
i wish i could learn how to do cool things like that :burnout:
keep posting more pictures as you go along, it will be good to see what it looks like in the end.
are you going to use it as a everyday car ?
Regards Jesse

#46 _LXATIV_

_LXATIV_
  • Guests

Posted 16 March 2010 - 12:20 PM

He said in the first post that he was going to turn it into a cheap daily driver, although with the work thats going into this, i would love to see what his idea of going all out on a car


#47 _doogs_

_doogs_
  • Guests

Posted 16 March 2010 - 04:27 PM

Nice project man, loving your work.
This will definitely be one of the cooler dailys going round!

#48 turbo76lx

turbo76lx

    Forum Fixture

  • Members
  • PipPipPipPipPip
  • 645 posts
  • Name:Glen
  • Location:Vic
  • Car:LX
  • Joined: 15-August 08

Posted 16 March 2010 - 08:50 PM

Thanks for the comments guys, to me the fabrication side is the easy part and costs nothing but time, it's the body work and paint that i'm not looking forward to,

i've only done a small amount of panel work in the past so it's going to be a steep learning curve.

OrangeLJ The hardest thing about re-keying the locks is to gently work around the the back of the lock slowly with a screw driver to pry off the stainless steel shroud without

destroying it then the lock can come apart. I will try and take some more photos and write a better decription on how to.

#49 rodomo

rodomo

    To advertise here, call 13TORANA

  • Members
  • PipPipPipPipPipPipPip
  • 18,026 posts
  • Name:R - O - B Dammit!
  • Location:Way out west of Melbourne Awstraylya
  • Joined: 10-December 05

Posted 16 March 2010 - 11:52 PM

How did you go about keying all the locks the same?


Would I be right in saying that there are only 5 or 6 different size sliding plates and all you have to do is move them up and down the barrel to suit your keys? :dontknow:

#50 turbo76lx

turbo76lx

    Forum Fixture

  • Members
  • PipPipPipPipPip
  • 645 posts
  • Name:Glen
  • Location:Vic
  • Car:LX
  • Joined: 15-August 08

Posted 18 March 2010 - 05:16 PM

rodomo There are 6 sliding plates which are all the same besides the small notch on the side. Most of the time you can get away with swapping the plates around, if not file a new ' v '.

A glove box lock is a bit easier. I will get some photos on how to do the glove box lock on the weekend.

IMGP0728_resize.jpgAttached File  IMGP0728_resize.JPG   89.95K   2 downloads
IMGP0730_resize.jpgAttached File  IMGP0730_resize.JPG   69.49K   2 downloads


Edited by turbo76lx, 22 October 2017 - 10:54 AM.


1 user(s) are reading this topic

0 members, 1 guests, 0 anonymous users