LX sedan + left over parts
#76
Posted 07 June 2010 - 09:48 AM
Ill give you the keys to my shed and feel free to head over and work on my hatch its only a short trip to mansfield lol.
Fantastic Idea on the rear tub, I will now refer to this mod as 'turbo76'ing the rear'. What is the length of your diff and what rim/ backspace combo are you going to run?
jim
#77
Posted 07 June 2010 - 08:06 PM
The diff is standard width, i'll probably make up a custom set of wheels to get the right off set.
#78
Posted 11 June 2010 - 01:25 PM
#79
Posted 15 June 2010 - 10:02 AM
Great job so far. Quality work and a great read. Keep it up!
#80
Posted 08 August 2010 - 09:32 PM
Haven't been to motivated on doing the body work so made up the exhaust over the diff, decided to go a 3" single. Made it from some old 3" stainless tube.
Also started planing the surge tank and fuel lines and hopefully there will be no need the modify the fuel tank.
IMGP0968_resize.JPG 129.52K
1 downloads
IMGP0971_resize.JPG 95.59K
1 downloads
Edited by turbo76lx, 22 October 2017 - 11:13 AM.
#81 _doogs_
Posted 08 August 2010 - 11:51 PM
#82
Posted 15 August 2010 - 08:06 PM
Got a few more jobs done, gave the fuel tank a coat of paint. Also made up the surge tank, made it from 100x50 aluminium RHS, used a holley red for the lift pump and a standard
VN EFI pump and filter all mounted to the surge tank. The whole unit is rubber mounted to the floor on the opposite side to the muffler. The return line from the surge tank to
the fuel tank will be 'teed' into the line that goes from the filler neck to the tank. This means no modifying the fuel tank.
IMGP0972_resize.JPG 109.92K
0 downloads
IMGP0973_resize.JPG 117.49K
0 downloads
Edited by turbo76lx, 22 October 2017 - 11:14 AM.
#83 _Kush_
Posted 15 August 2010 - 08:19 PM
#84 _Barman_
Posted 17 August 2010 - 08:33 AM
#85
Posted 17 August 2010 - 08:14 PM
started planing the next one after that too. I need to stop looking for projects.
#86 _j.e.d._
Posted 18 September 2010 - 12:35 PM
#87
Posted 18 September 2010 - 08:03 PM
Yes it is time for an update. Picked up another parts car, always handy to have.
It's also going to be used to set up another project, something alot of people have talked about but
no one has done yet ( future project after the next V8 hatch).
Stripped most of the paint from the engine bay but keep loosing motivation on doing the body work so rewired most
of the VN engine loom to tidy everything up and also all the fuses and relays will now be mounted in the car on the passengers side under the dash.
Last saturday picked up a tremec TR-3550 5 speed for $500 but it was totally pulled down, so i've put it back together after welding up a small crack it had it the case, hopefully it will be ok.
Then on sunday picked up a supra R154 5 speed at the Shepparton swapmeet for $400, so now i'm on the hunt for a turbo patten to toploader bellhousing or a turbo patten to R154 bellhousing, which ever bellhousing i get first i will be using.
Now with a 5 speed box i will be getting the 3.55 ratio 9" centre i have rebuilt and get some new 31 spline axles made.
Also hid the wire on the heater fan in the engine bay.
Big thanks Shane for helping me carry the R154 gearbox back to my car. (hurry up and get your torana on the road)
Link to hiding the heater fan wiring http://www.gmh-toran...showtopic=48391
Full house.
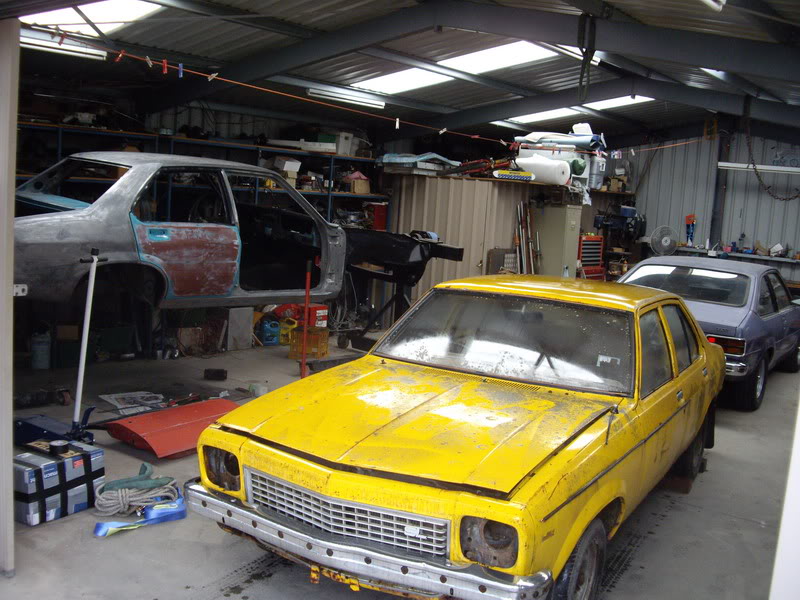
How i got the tremec TR-3550
IMGP0992_resize.JPG 167.33K
0 downloads
All back together, hopefully ok.
IMGP0997_resize.JPG 168.32K
0 downloads
R154 (with SR20 bellhousing)
IMGP0990_resize.JPG 164.76K
0 downloads
Edited by turbo76lx, 22 October 2017 - 11:18 AM.
#88
Posted 09 October 2010 - 05:32 PM
Still haven't been motivated to do anything on the body, tempted to just pay someone to do it.
So tidied up the rocker and engine covers, not a full polish just a satin finish (easier to clean) and removed the ribs.
IMGP1013_resize.jpg 119.36K
0 downloads
IMGP1011_resize.JPG 119.15K
0 downloads
Edited by turbo76lx, 22 October 2017 - 11:19 AM.
#89 _dirtbag_
Posted 09 October 2010 - 05:54 PM
#90
Posted 09 October 2010 - 05:58 PM
Ruts
#91
Posted 09 October 2010 - 06:14 PM
Ruts- thanks but it's just a bit of spit and polish.
#92 _DomDom_
Posted 09 October 2010 - 08:16 PM
dirtbag- i could always put it on a truck and send it up to you. Hmmm yes 2 door conversion is something i have thought of but it's too hard to get a set of coupe doors and "b" pillars.
Ruts- thanks but it's just a bit of spit and polish.
I always look forward to this build.
I'm sure Tim could stretch a couple of doors without too much problem. ;-).
Dom
#93 _dirtbag_
Posted 09 October 2010 - 11:40 PM
#94
Posted 14 February 2011 - 08:26 PM
Update time, rust repairs on the body are done and most of the big dints tapped and the entire outside of the shell stripped of paint ready to be etched.
Also made up a tail shaft loop from some 100mm nb pipe and 50x6 flat bar.
Cut 2 peices of pipe 50mm wide and sat them over each other at the size i wanted the loop thn marked where they intersect.
IMGP1156_resize.JPG 171.8K
2 downloads
Cut where the mark are.
IMGP1157_resize.JPG 209.56K
2 downloads
Hammered the start of each pipe flat to make it more of an oval. Then weld.
IMGP1158_resize.JPG 149.42K
1 downloads
IMGP1159_resize.JPG 230.41K
1 downloads
Then added the flat bar off each side and used the off cuts from the pipe for a bit more bracing.
IMGP1160_resize.JPG 112.76K
2 downloads
Edited by turbo76lx, 22 October 2017 - 11:21 AM.
#95
Posted 14 February 2011 - 08:32 PM
The tail shaft loop bolts up under the rear seat mounts which means removing the nut from the seat mount and hammering flat the side of the mount.
IMGP1165_resize.JPG 108.25K
1 downloads
IMGP1164_resize.JPG 118.8K
2 downloads
Painted and yes i have made 2, one for this car and one for the next hatch.
IMGP1167_resize.JPG 140.65K
1 downloads
Edited by turbo76lx, 22 October 2017 - 11:23 AM.
#96
Posted 14 February 2011 - 08:40 PM
#97
Posted 14 February 2011 - 08:42 PM
nice work though mate!
#98 _mick74lh_
Posted 14 February 2011 - 10:18 PM
#99
Posted 15 February 2011 - 03:35 PM
Mick i used a 3M clean and strip disc and sand paper to take the powder coating off. Then used 120G 3" roloc sanding discs then 3" roloc scotch brite discs to give it the satin finish.
After that a quick rub with steel wool and water. I'm not coating them with anything, if they need a clean it's just a quick hit with some steel wool.
Roloc discs.
IMGP1168_resize.JPG 191.89K
1 downloads
Edited by turbo76lx, 22 October 2017 - 11:24 AM.
#100
Posted 20 February 2011 - 07:33 AM
Got the body in etch finally, the only problem was since the body has been in bare metal for so long i had reapplied the rust converter a few times.
So i had to take the body back to bare again.
IMGP1169_resize.JPG 158.61K
1 downloads
Edited by turbo76lx, 22 October 2017 - 11:25 AM.
2 user(s) are reading this topic
0 members, 2 guests, 0 anonymous users