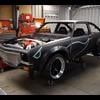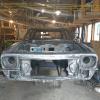
LX sedan + left over parts
#126

Posted 12 April 2011 - 10:07 PM
#127
 _Kush_
Posted 12 April 2011 - 10:08 PM
I think
#128

Posted 12 April 2011 - 11:17 PM
That's bullshit man.
It would make you want to strangle him, then revive him so you can strangle him again.
Then revive him again and pour acid or bleach via funnel into his mouth until he suffers such severe pain until he passes away.......
#129

Posted 14 April 2011 - 10:49 AM
IE
manufacturer details
type pf paint? 2 pac or Enamal /acrylic??
I myself am at that point of interior painting and undercarriage detailing, and I am alot like you, great on the tools but the whole painting thing is like trying to learn to speak Russian for the first time.
Yes folks, theirs another hatch being secretly built !! But i aint painting it orange...I'm rather taken with that new holden commodore metalic green you seen on the new VE hsv sedans and utes
more on mine later...10 years in the build so far........
#130

Posted 14 April 2011 - 08:57 PM
The paint is KBS rust seal. http://www.kbs-coati...er_c_7-1-0.html I used their aquaklean and rust blast but next time i would just use a good degreaser and rust converter.
I think it's a urethane paint, it come up with a good finish even if you just use a paint brush to put it on. Don't buy it in anything bigger than 1 liter tins because it doesn't last long once you open the tin.
Edited by turbo76lx, 22 October 2017 - 11:38 AM.
#131

Posted 22 April 2011 - 09:31 PM
Got a few more things done, axles in, new braided brake lines and the brakes bled, VN headers modified and the rest for the exhaust done in stainless steel.
 IMGP1222_resize.JPG 103.33K
0 downloads
Edited by turbo76lx, 22 October 2017 - 11:39 AM.
#132

Posted 26 April 2011 - 08:17 PM
Personally i see your build as a real down to earth, do it at "home/ work/workshop" build that anyone here can do. I also say that not taking away any cudo's to anyone else that has built cars themselves at home or the like, just this one in particular has
- Gotten me off my arse
- Inspired this 40 yr old to getting on with my own car
- has shown me some real world do it yourself repairs that i can do myself, that i thought i'd have to farm out - cause I'm a bit lazy at times
- and finally might hopefully allow myself and my kids to cruise around again in a classic piece of aussie muscle again
Keep up the good work..i follow your thread with keen interest
must get around to getting my own build thread up
#133
 _v6locker_
Posted 27 April 2011 - 08:03 PM
#134

Posted 27 April 2011 - 09:56 PM
Scott i'm glad i've inspired you, it's hard to find that motivation sometimes.
Got the tail shaft on saturday, Matt from hardy spicer was going to the easter nats so brought it up for me. Went with a 3.5" shaft with 1350 uni joints just incase i go for a power up grade in the future. Original i was going with a 3' shaft but now with the 3.5" shaft the tail shaft loop is a bit close so i'll have to make another one.
Exhaust is in, being stainless i think it's going to be a bit loud and i might have to jam a couple more hot dogs in there if it's anything like my panel van. Tested the heater core and found it had a hole in so used the core from the V8 hatch (next project), so that's in as will as the fan. Also engine wiring loom is sitting in place and started working out how to wire up the relays and mount the computer.
At the same time i'm rewiring the original dash loom for the HX indicator/wiper stalk and also wire in intermittent wiper control, high/low beam headlight relays, electronic speedo, radio, centre locking and an alarm.
 IMGP1224_resize.JPG 141.38K
0 downloads
Edited by turbo76lx, 22 October 2017 - 11:40 AM.
#135

Posted 07 June 2011 - 09:56 PM
Got a few more things done, finished re-wiring the dash loom and the motor is also wired. With a bit of luck i might get it to start this weekend.
Some of the fun of wiring.
 IMGP1227_resize.JPG 219.73K
0 downloads
 IMGP1232_resize.JPG 140.75K
0 downloads
Edited by turbo76lx, 22 October 2017 - 11:41 AM.
#136

Posted 08 June 2011 - 04:37 PM
Engine bay looks neat mate, not a wire in sight!
#137
 _nial8r_
Posted 08 June 2011 - 08:07 PM
#138
 _mick74lh_
Posted 08 June 2011 - 08:19 PM
#139

Posted 08 June 2011 - 08:59 PM
#140
 _gen3torrie_
Posted 08 June 2011 - 10:31 PM
#141

Posted 09 June 2011 - 12:52 AM
Cant wait to see more!!!
Dave
#142

Posted 09 June 2011 - 07:03 AM
Just rub some candle wax or soap on the face of the sanding disc, this will help it to not clog up.
#143

Posted 09 June 2011 - 10:04 AM
#144

Posted 12 June 2011 - 10:07 PM
#145
 _Liam_
Posted 12 June 2011 - 10:45 PM
#146
 _j.e.d._
Posted 01 July 2011 - 01:40 PM
Edited by j.e.d., 01 July 2011 - 01:40 PM.
#147

Posted 05 July 2011 - 07:58 PM
Plus it only cost me $10 at a swapmeet. I'm not sure about the later commodore ones. The vn one is bolted to a bracket which then has 2 studs that
goes through the fire wall. Hope this helps.
#148

Posted 13 July 2011 - 12:50 PM
Got a few more things done. The motor was running rough, i had replaced most of the sensors.
After a few hours chasing the problem i found the new map sensor was the cause, so i fitter a second hand 20 year old map sensor and all fixed.
The car is now all wired. Repainted the dash and steering column in buckskin.
Made another clutch pedal, the first i made using a uc clutch pedal, if you lifted the pedal the cable would fall off.
The second one i used a lx 6 cylinder pedal which was a pedal stop so the pedal can't be lifted.
 IMGP1256_resize.JPG 144.16K
0 downloads
 IMGP1251_resize.JPG 135.39K
0 downloads
The left one is the modified uc, right is the modified lx 6 cylinder.
 IMGP1241_resize.JPG 130.56K
0 downloads
Edited by turbo76lx, 22 October 2017 - 11:44 AM.
#149
 _mick74lh_
Posted 13 July 2011 - 05:44 PM
#150

Posted 14 July 2011 - 03:11 PM
Looks awesome. Love the dash. This is gonna be such a sweet car.
Agreed. That respray on the dash looks the goods. Keep up the awesome work!
1 user(s) are reading this topic
0 members, 1 guests, 0 anonymous users


