hatch project
#126
Posted 15 February 2011 - 12:42 PM
Next stop the floor, need to fill in a few unwanted holes, cut off a few unwanted brackets, make a RHS mufler hanger bracket and bash out a few dents from where someone tried to use the car as a 4WD. Then KBS the floor inside and out.
#127 _Kush_
Posted 15 February 2011 - 02:06 PM
Lookin good, Derrin
#128
Posted 15 February 2011 - 07:10 PM
#129
Posted 16 February 2011 - 09:26 AM
I don't know how Dirtbag and others do it all of the time.
Would drive me insane.
#130
Posted 16 February 2011 - 09:41 AM
Just curious, but did you have the welds certified before you primed?
#131
Posted 16 February 2011 - 10:27 AM
#132 _LS1 Hatch_
Posted 16 February 2011 - 11:03 AM
I smoothed mine out some, but still have way more holes in it than you do
Attached Files
#133
Posted 16 February 2011 - 11:08 AM
Your firewall looks really nice all smoothed out like that!
I smoothed mine out some, but still have way more holes in it than you do
I still have to drill a couple of holes right in the centre behind where the dizzy sits for the wiring to pass through. Only remembered after i finished yestereday!
#134 _LS1 Hatch_
Posted 16 February 2011 - 11:32 AM
(it's for a vacuum line and the wiper motor harness...)
#135
Posted 16 February 2011 - 12:32 PM
That's pretty much the same response i got from dot.My certifier is happy that as a qualified boilermaker and ticketed pressure vessel welder i know what i'm doing.
#136
Posted 04 March 2011 - 07:33 AM
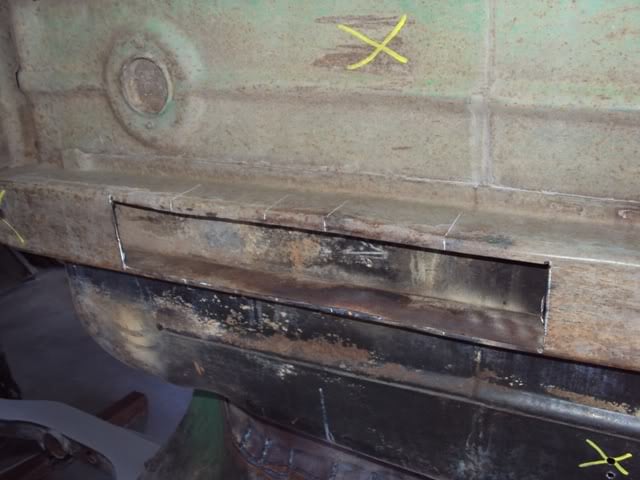
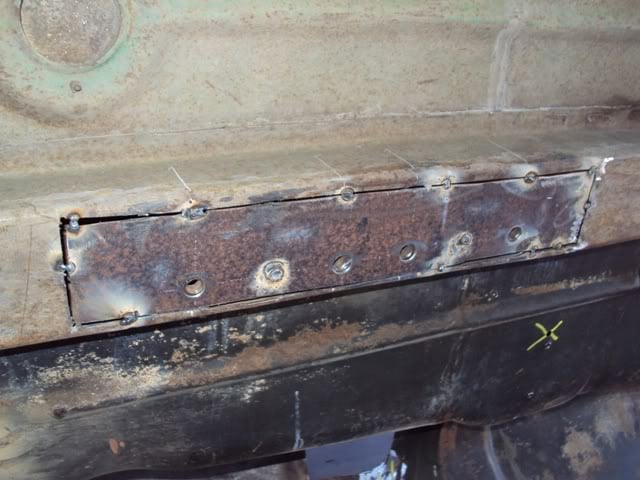
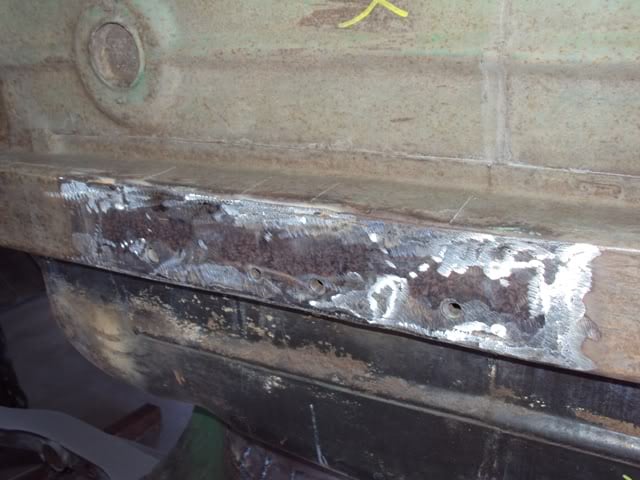
Been working on tidying up underneath the car. Cutting off unwanted brackets, filling up unwanted holes etc.
The biggest job has been straightening up the chasis rails (both sides) that someone used as a jacking point.
I tried to straighten it up with heat and a slide hammer but didn't have much luck due to the 3/8" thick bar inside the rail. The easiest way seemed to be to cut the section out and replace it.
Next to strip off the underside in prep for paint, Looking forward to that!
#137 _Kush_
Posted 04 March 2011 - 09:26 AM
What's the thickness of the walls on those rails. 1.6 or 1.2 ??
I've got a few dents that I'll need to start on soon.
#138
Posted 06 March 2011 - 04:51 PM
#139
Posted 23 March 2011 - 08:04 PM
The floor came up pretty good, i wasn't too worried about getting it perfectly smooth as i am going to finish all of the underside with body deadener before i paint the car.
#140
Posted 02 April 2011 - 11:51 AM
Painted the floor inside with KBS Rustseal.
Also filled in the bottom of the plenum and repared a piece of the plenum which had rusted,
Covered the weld with seam sealer to mrevent any possible leaks and painted it with KBS as well.
#141
Posted 10 May 2011 - 05:32 PM
I have been getting stuck into the rust in the hatch area and as usual if you think you only have a little rust problem then you will be dissapointed when you strip everything back and have a look at what someone else has covered up with bog and brass.
Here is the LH C-pillar repaired, i replaced the rusted inner section, rust converted everything inside, etch primed it and drilled a couple of drain holes inside the pillar as well.
Also replaced a piece in the upper corner.
And the lower corner.
Cut this section out of the rear panel as it had been stoved in and about an inch of bog used to fill it, will be replaced with a straight section of steel.
This area needed plenty of work as the section directly above the tail light also needed replacing.
And one of the worst areas is below the chanel that holds the rubber along the rear panel, the easiest wat to tackle this will be to cut it all out and start again.
#142 _Kush_
Posted 10 May 2011 - 06:22 PM
Did you have to make those repair sections yourself or can they be bought from the shop? I've got to do the same repairs
#143 _Liam_
Posted 10 May 2011 - 06:33 PM
Excellent work, Derrin!
Did you have to make those repair sections yourself or can they be bought from the shop? I've got to do the same repairs
Shoulda bought a 4 door...
Nice work mate, as always.
#144
Posted 10 May 2011 - 08:21 PM
#145
Posted 18 May 2011 - 05:05 PM
Went down to my mate's shop and made up a couple of pieces i needed.
Replaced the section across the back first,
Then i added the rubber channel and the section i had cut out which had been dented.
Hopefully i should finish off the hatch area tomorrow.
#146 _Liam_
Posted 18 May 2011 - 07:10 PM
#147
Posted 18 May 2011 - 09:05 PM
#148
Posted 27 May 2011 - 04:02 PM
Finished off smoothing out the c-pillar repairs and primered them.
And stripped back the rear panel ready to be smoothed out.
#149
Posted 05 June 2011 - 07:48 PM
Smoothed out a few areas with filler.
Then primered it.
Next step, strip the hatch, repair any damge and get it ready to test fit to the body.
Edited by derrin71, 05 June 2011 - 07:49 PM.
#150 _Kush_
Posted 05 June 2011 - 08:55 PM
All you LX guys have got it too easy! You don't need to change the taillights! Hahaha!
3 user(s) are reading this topic
0 members, 3 guests, 0 anonymous users