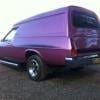
Update of my accomplishments these days off.
I stripped the roof and repaired a heap of hail stone dints. Strange as the top of the hatch didn't have any hail dints? Pretty sure the hatch itself is the original one. We will see when i strip the bonnet

Dad came around and left me with a heap more work to do!!
He is a qualified panel beater and spray painter with about 45 years experience, he will be painting the car. But i have to do the panel work. If he isn't happy with my prep he won't paint it.
We fitted the hatch to see how it looks.

We ran into a little trouble, when i replaced the rear drivers side corner corner of the hatch opening the rear corner of the quarter panel must of pulled in about 5mm, this meant absolutely no gap between hatch and quarter panel. To fix it we had to slice the quarter away from the rear panel and use a block of wood and gentle persuasion with 2lb hammer. The gap is right now. Just need to weld up the gap again and tidy it up. This is an example of why it is important to test fit all panels before paint.

The gap along the passengers side of the hatch is also a little out due to the not-quite-right repair panel. A little fiddling will be required here as well.

Dad also straightened a large area of the passengers quarter with his flipper and body file which had waves like the ocean. I wasn't quite game to tackle this bit.
Back to work tomorrow.


 View Garage


