
HQ Statesman
Started by
_nzstato_
, Jul 07 2010 09:30 AM
323 replies to this topic
#151
 _nzstato_
_nzstato_
-

- Guests
Posted 10 April 2011 - 02:22 PM
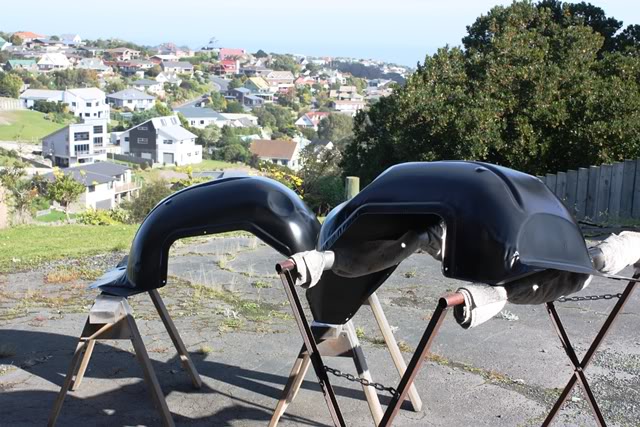
Just to confirm that I am quite possibly the worse painter in the world, I finally got some colour on these things. Beautiful day here in Dunedin.
#152
_Bomber Watson_
_Bomber Watson_
-
- Guests
Posted 10 April 2011 - 02:55 PM
Dont look to bad from over here??
Gloss would have been nice though
Just remember for next time that the shine goes on the outside of the paint not the inside.

Gloss would have been nice though
Just remember for next time that the shine goes on the outside of the paint not the inside.
Edited by Bomber Watson, 10 April 2011 - 02:56 PM.
#153
_nzstato_
_nzstato_
-
- Guests
Posted 10 April 2011 - 03:13 PM
Good from afar but far from good, but I'm a pedantic lil bugger anyway.
Rightoh, next time I'll paint it from the inside out, not the outside in
Didn't want gloss, my grubby mits would ruin it. Next project will be the one where I really learn how to spray.
Rightoh, next time I'll paint it from the inside out, not the outside in
Didn't want gloss, my grubby mits would ruin it. Next project will be the one where I really learn how to spray.
Edited by nzstato, 10 April 2011 - 03:13 PM.
#154
_mick74lh_
_mick74lh_
-
- Guests
Posted 10 April 2011 - 10:51 PM
Dont look to bad from over here??
Gloss would have been nice though
Just remember for next time that the shine goes on the outside of the paint not the inside.
What do you mean Bomber? Do you mean if you were spraying a gloss finish to start off spraying it dryer and makes progressive coats wetter?
Hey those guards don't look bad to me either. Have you got much more metalwork to do now?
#155
_nzstato_
_nzstato_
-
- Guests
Posted 11 April 2011 - 06:01 AM
Well once I finish the boot I have the drivers sill and end of the gutter to replace. I 'think' that the bonnet has nothing wrong with it, if so it will be the only rust/damage free panel that came with the car. I've still got to smooth out the rear panels and am not 100% sure if I'm going to be able to smooth out one of these rear doors as much as I'd like it. So all in all, a bit of work to do.
#156
_Bomber Watson_
_Bomber Watson_
-
- Guests
Posted 11 April 2011 - 05:47 PM
Dont look to bad from over here??
Gloss would have been nice though
Just remember for next time that the shine goes on the outside of the paint not the inside.
What do you mean Bomber? Do you mean if you were spraying a gloss finish to start off spraying it dryer and makes progressive coats wetter?
Hey those guards don't look bad to me either. Have you got much more metalwork to do now?
It was a joke.
#157
_mick74lh_
_mick74lh_
-
- Guests
Posted 11 April 2011 - 08:06 PM
Dont look to bad from over here??
Gloss would have been nice though
Just remember for next time that the shine goes on the outside of the paint not the inside.
What do you mean Bomber? Do you mean if you were spraying a gloss finish to start off spraying it dryer and makes progressive coats wetter?
Hey those guards don't look bad to me either. Have you got much more metalwork to do now?
It was a joke.
Told you i was slow
#158
_Quagmire_
_Quagmire_
-
- Guests
Posted 11 April 2011 - 09:11 PM
pfffft just hit it with 50 zillon coats of clear 
#159
_nzstato_
_nzstato_
-
- Guests
Posted 17 April 2011 - 04:45 PM
Right, progress this week (might be a bit of a novel, sorry).
I needed to get a new hard line made up for the trans since an old brazed repair finally gave way. Gave an auto transmission speciallist a call who have had previous dealings with (though not all good dealings). Told him I had the pipe and could bring it in to bend up up a new piece and flare the ends for the fittings. "um, ah well it's not really all that easy, ya really need the car to make sure it clears everything etc etc" yea I know that, bend it up close to the original and I can make it all fit, told him car isnt going anywhere at the mo "um ah well we really need to do it on the car, the last lot I made took 6 hours labour" 6 Frocking hours? wtf? I said yea rightoh, seeya. Went to another place, guy was good bloke, said I could just make up a rubber hose with fittings ($20 odd all up) and would give me a good deal on a trans radiator later down the track. Ended up talking about cars for the next 30 min.
Other than that, fixed some more rust
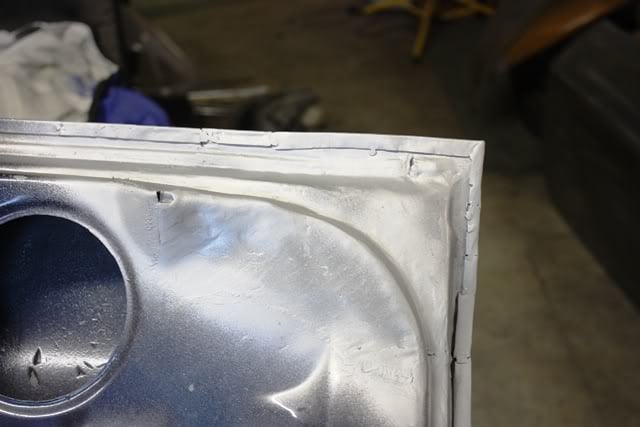
Attempted to make this bit in one piece, after 3 stuffed pieces thought stuff it and made it out of 3
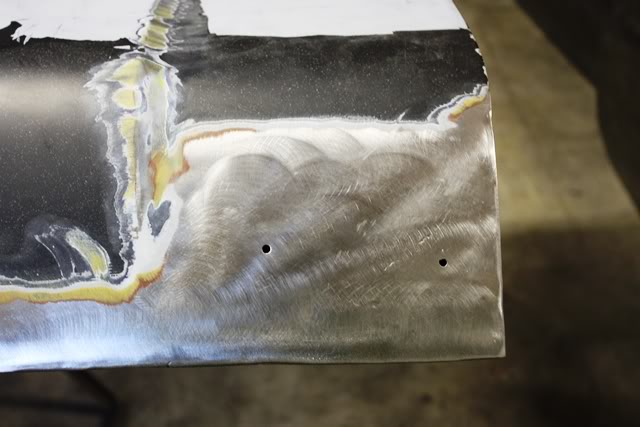
Really happy with this repair, through a combination of hammers, dollys, shrinking disc and panel file this shouldnt need any sort of filler at all, mint.
I needed to get a new hard line made up for the trans since an old brazed repair finally gave way. Gave an auto transmission speciallist a call who have had previous dealings with (though not all good dealings). Told him I had the pipe and could bring it in to bend up up a new piece and flare the ends for the fittings. "um, ah well it's not really all that easy, ya really need the car to make sure it clears everything etc etc" yea I know that, bend it up close to the original and I can make it all fit, told him car isnt going anywhere at the mo "um ah well we really need to do it on the car, the last lot I made took 6 hours labour" 6 Frocking hours? wtf? I said yea rightoh, seeya. Went to another place, guy was good bloke, said I could just make up a rubber hose with fittings ($20 odd all up) and would give me a good deal on a trans radiator later down the track. Ended up talking about cars for the next 30 min.
Other than that, fixed some more rust
Attempted to make this bit in one piece, after 3 stuffed pieces thought stuff it and made it out of 3
Really happy with this repair, through a combination of hammers, dollys, shrinking disc and panel file this shouldnt need any sort of filler at all, mint.
#160
_jabba_
_jabba_
-
- Guests
Posted 17 April 2011 - 07:33 PM
Your repairs just seem to be getting better and better as you go. Well done .
.
#161
_nzstato_
_nzstato_
-
- Guests
Posted 18 April 2011 - 05:48 AM
Yea that seems to be the way, annoying that it's now close to the end of rust repairs. Lets just pray that I don't start redoing some of my repairs....
#162
_nzstato_
_nzstato_
-
- Guests
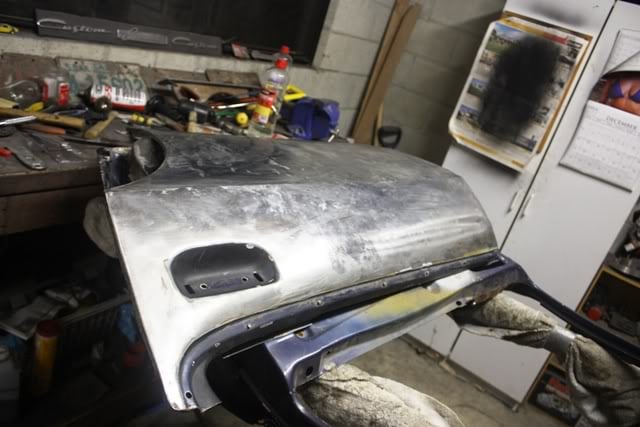
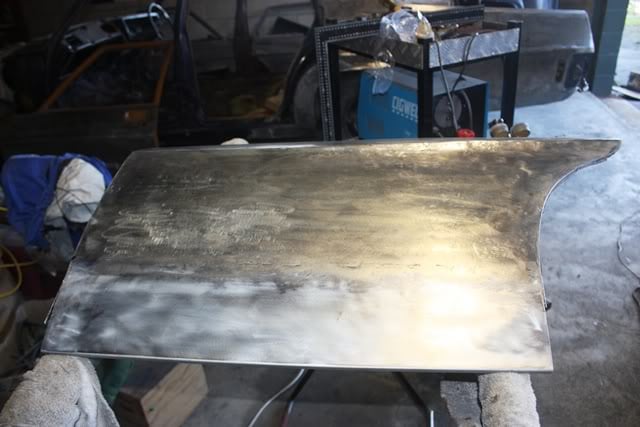
Posted 26 April 2011 - 06:51 PM
More panelbeating over the long weekend....
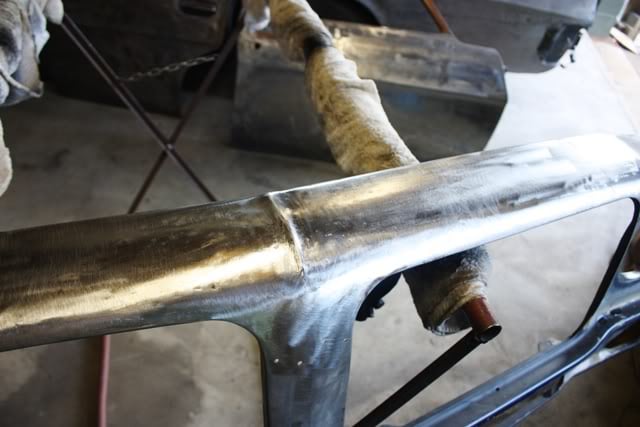
Finally got the nosecone to a presentable state, I refuse to touch it anymore!
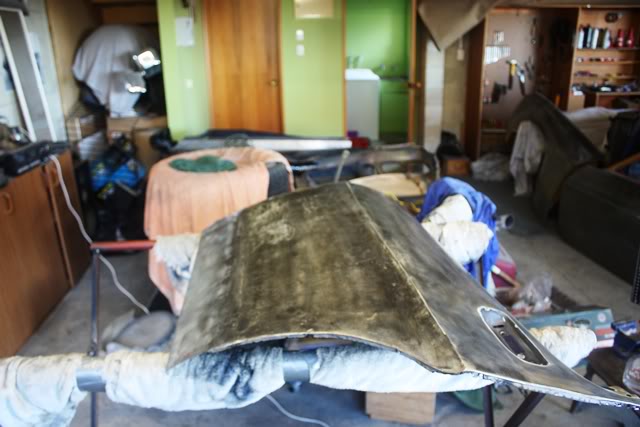
One of the rear doors is almost a write off (full of dents). I've pulled it off the skin to beat it out and fix up some problem areas, the jury is still out if I am able to save this (it's half done in the photo).
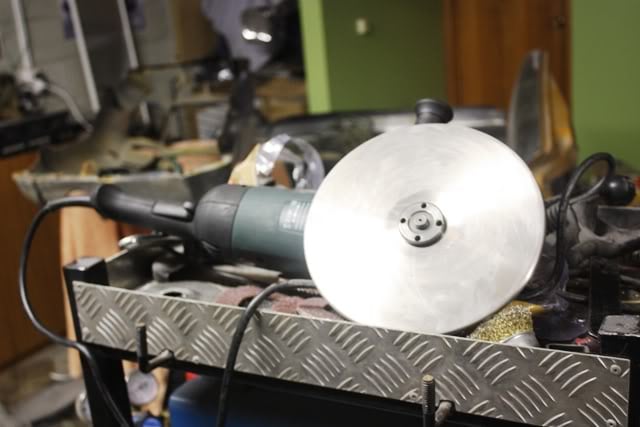
Though our cause is helped somewhat by the new toy, shrinking discs rule...
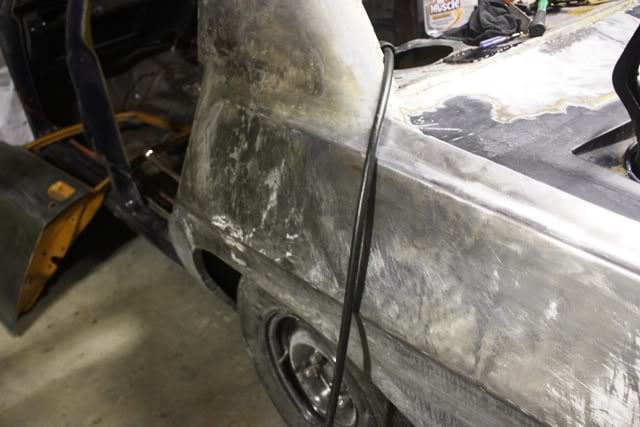
Also got on to the rear quarters, this is an example of what I'm dealing with. Previous person welding up the trim holes far too hot which has distorted and pulled the panel in to form a low spot
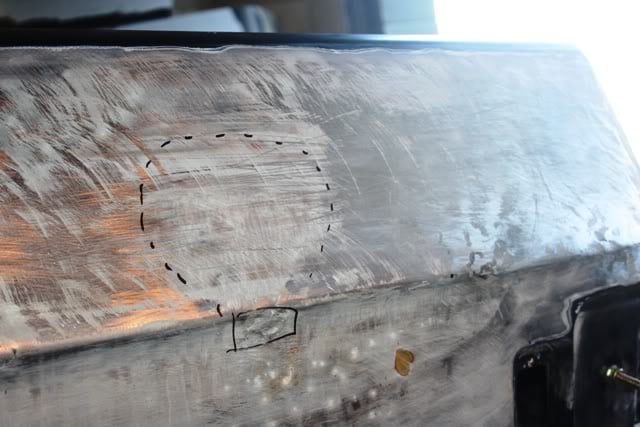
If you lose where you are with highs a lows, one way to get the constrast back is to cover the metal with perminant marker...
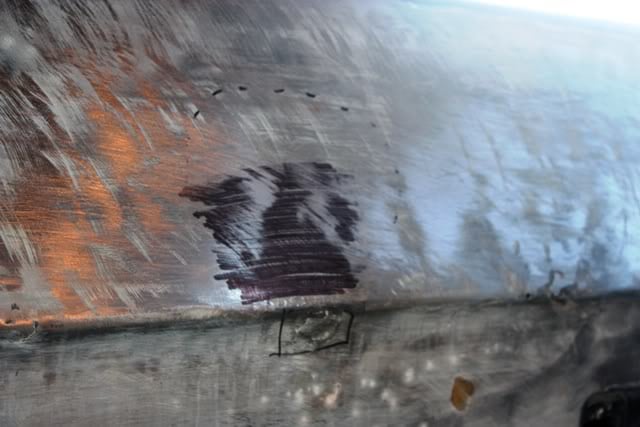
Top of the quarter is as good as I can get it...
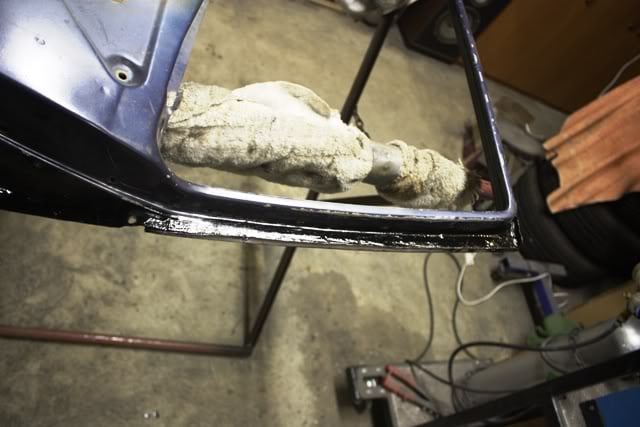
Also pulled the skin back from the top of the door as you could see a whole lot of rust hiding below, wire brush and POR15 dealt to that
Finally got the nosecone to a presentable state, I refuse to touch it anymore!
One of the rear doors is almost a write off (full of dents). I've pulled it off the skin to beat it out and fix up some problem areas, the jury is still out if I am able to save this (it's half done in the photo).
Though our cause is helped somewhat by the new toy, shrinking discs rule...
Also got on to the rear quarters, this is an example of what I'm dealing with. Previous person welding up the trim holes far too hot which has distorted and pulled the panel in to form a low spot
If you lose where you are with highs a lows, one way to get the constrast back is to cover the metal with perminant marker...
Top of the quarter is as good as I can get it...
Also pulled the skin back from the top of the door as you could see a whole lot of rust hiding below, wire brush and POR15 dealt to that
#163
_LH SLR 3300_
_LH SLR 3300_
-
- Guests
Posted 26 April 2011 - 07:13 PM
Excellent workmanship!! I like the permanent marker guide tip, haven't thought of that one myself, i use flat black in a spray gun but your method is a good one. Great work removing the door skins & folding back the flanges to deal with rust tracking behind them, you must have alot of paitence to do this type of repair. I'm sure alot of people on this forum will gain from your skill & knowledge. Well done!
#164
_nzstato_
_nzstato_
-
- Guests
Posted 26 April 2011 - 07:34 PM
Excellent workmanship!! I like the permanent marker guide tip, haven't thought of that one myself, i use flat black in a spray gun but your method is a good one. Great work removing the door skins & folding back the flanges to deal with rust tracking behind them, you must have alot of paitence to do this type of repair. I'm sure alot of people on this forum will gain from your skill & knowledge. Well done!
Thanks, appreciate it since sometimes it looks to me like I'm not really getting anywhere but I spose I am.
Marker pen wasn't my idea, picked it up from another instructional dvd. It's great when dealing with small areas and the best thing is that it dries straight away, unlike the paint. I need to get some of the marker pens with the really wide nibs.
Removing the skin wasn't too back, just drilled out the spot welds and peeled everything back with a screwdriver then tidyed the edges up with a panel hammer and a toe dolly.
#165
_LH SLR 3300_
_LH SLR 3300_
-
- Guests
Posted 26 April 2011 - 07:51 PM
It looks to me like you're making good progress but i know sometimes it does feel like you're not. In my opinion though, the satisfaction of knowing the work has been done to the highest standard & that you've done it all yourself makes all the long hours worthwhile. From what i can see in your pics, i don't think much filler will be needed & personaly i'd rather spend more time getting the metal work right than spend days applying & sanding out bog to get the panels straight. Keep up the good work.
#166
_nzstato_
_nzstato_
-
- Guests
Posted 27 April 2011 - 05:47 AM
Cheers, I'm really trying to get the metal as good as I can get it, sadly alot of the metal has been distorted previously and annoyingly it's in areas where I can't get the dolly. Hopefully giving the painter a call this week so I'll see what he says.
#167
_nzstato_
_nzstato_
-
- Guests
Posted 01 May 2011 - 06:23 PM
Well some good news and some bad news. Good news is that I might have a new shed to play in a month or so, bad news is that I may have to use some of the money I had earmarked for the paint job may need to used for part of the house deposit. Not sure what's going to happen but this project will not stall/be sold.
So pushing on...
Re did one of the repairs in the lower 1/4, purely because I wasn't happy with it. Final result is pretty good and will need way less filler than what was there, plus the welding is alot better.

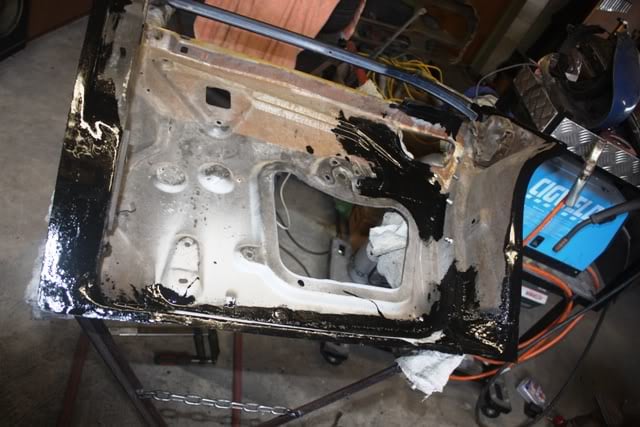
POR15 the inner of the door frame
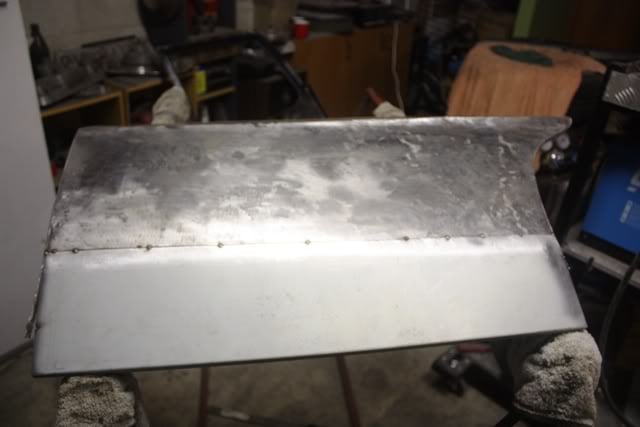
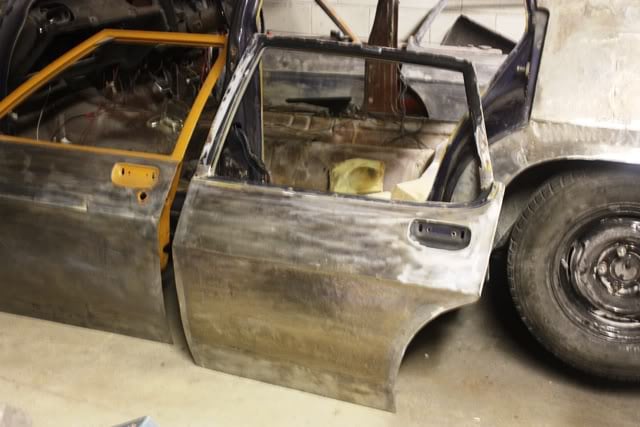
Also, back to the door skin I'm fixing. Decided the lower half of it was just too dented/ripped/rotten to warrent repairing. So in typical fashion I took a lower skin for a HQ front door I had sitting around and cut it up/bent up, to suit the skin. Laying it on the frame ensured it was sitting right and the ability to panelbeat it properly off the frame is a good way to ensure the steel is close to perfect as possible. If I had to fix a lower skin again I wouldnt hesitate to do it off the frame again.

So pushing on...
Re did one of the repairs in the lower 1/4, purely because I wasn't happy with it. Final result is pretty good and will need way less filler than what was there, plus the welding is alot better.
POR15 the inner of the door frame
Also, back to the door skin I'm fixing. Decided the lower half of it was just too dented/ripped/rotten to warrent repairing. So in typical fashion I took a lower skin for a HQ front door I had sitting around and cut it up/bent up, to suit the skin. Laying it on the frame ensured it was sitting right and the ability to panelbeat it properly off the frame is a good way to ensure the steel is close to perfect as possible. If I had to fix a lower skin again I wouldnt hesitate to do it off the frame again.
#168
_nzstato_
_nzstato_
-
- Guests
Posted 15 May 2011 - 06:36 PM
Far too long since I have updated this. Have picked up some extra work in the evenings so sadly can only find time to work on it in the weekends
Welded up the lower section for the skin, so glad I decided to do it properly, am getting sick of this door now.
Bit more hammer, bit more dolly and a bit more shrinking disc and we have a (generally) straight skin
Chucked it back on the frame ( plenty of seem sealer) and fixed up a few more bits...
Very happy to have this done, like the nosecone, I'm leaving it the hell alone!
Unhappy with another one of my old repairs I decided to redo it properly (the experience has definately helped me though)
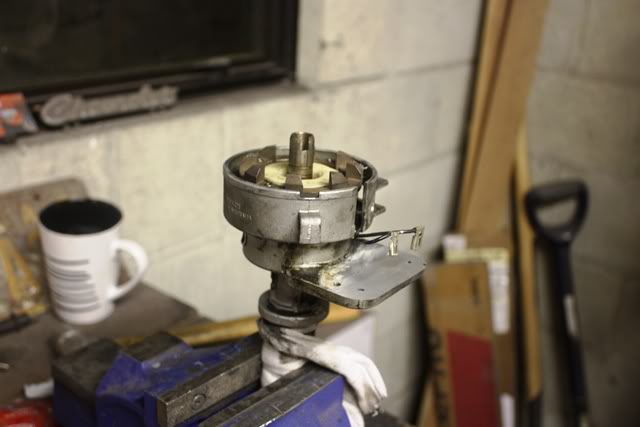
Pick up another one of these too (they are bloody exey over here so if they are cheap I grab em!), the shafts on this one is siezed so will require a refresh and test.
Welded up the lower section for the skin, so glad I decided to do it properly, am getting sick of this door now.
Bit more hammer, bit more dolly and a bit more shrinking disc and we have a (generally) straight skin
Chucked it back on the frame ( plenty of seem sealer) and fixed up a few more bits...
Very happy to have this done, like the nosecone, I'm leaving it the hell alone!
Unhappy with another one of my old repairs I decided to redo it properly (the experience has definately helped me though)
Pick up another one of these too (they are bloody exey over here so if they are cheap I grab em!), the shafts on this one is siezed so will require a refresh and test.
#169
_nzstato_
_nzstato_
-
- Guests
Posted 27 May 2011 - 04:59 PM
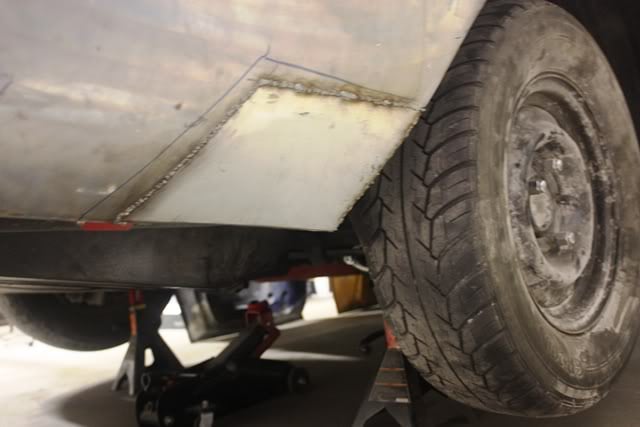
Rightoh, time to get serious...
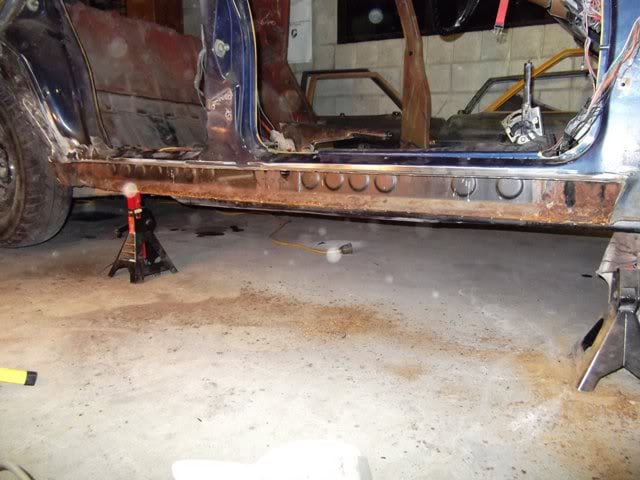
Been meaning to do this for a while, ripped the drivers side sill off
Inner isnt too bad but the outer was like swiss cheese

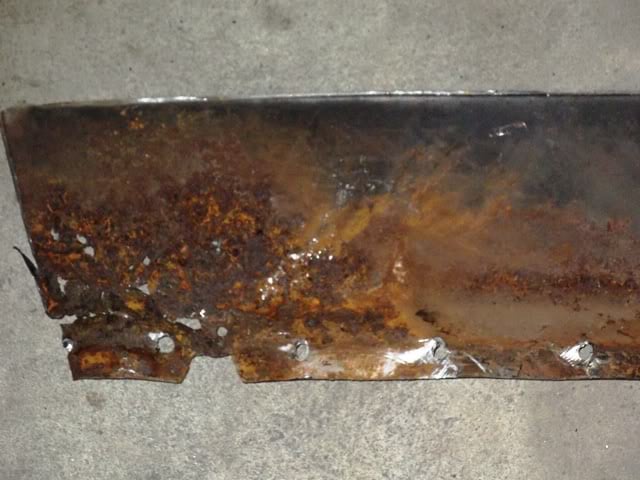
Some more crappy repairs
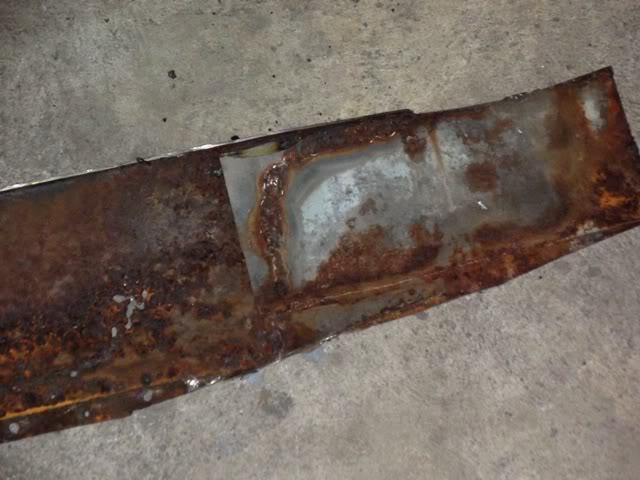
Now the question is how should I cut and weld it? Hard up close to the door frame?
Or cut halfway across the top bend of the sill (though it would need to be trimmed compared how I have it here)? I'm leading towards this idea as it will be easier to hide the repair, or should I do the former?
Been meaning to do this for a while, ripped the drivers side sill off
Inner isnt too bad but the outer was like swiss cheese
Some more crappy repairs
Now the question is how should I cut and weld it? Hard up close to the door frame?
Or cut halfway across the top bend of the sill (though it would need to be trimmed compared how I have it here)? I'm leading towards this idea as it will be easier to hide the repair, or should I do the former?
#170
_Bomber Watson_
_Bomber Watson_
-
- Guests
Posted 27 May 2011 - 07:05 PM
Thats a very strange looking shoe.
I would usually vote right up the top as per top pick, but theres an awe full lot of variance along the length so perhaps half way would be better....
Let someone who actually knows what there belting on about answer says i.
I would usually vote right up the top as per top pick, but theres an awe full lot of variance along the length so perhaps half way would be better....
Let someone who actually knows what there belting on about answer says i.
#171
_beige_lj_
_beige_lj_
-
- Guests
Posted 27 May 2011 - 10:13 PM
Thats a very strange looking shoe.
I cant see the shoe???? Am i blind or are you referring to the hand broom bomber????
Good work anyway, looks like it comely along nicely, just wait till all the rust is done what a big relief that will be!!!
#172


 View Garage
Posted 28 May 2011 - 07:52 AM
I don't know either but I usually pick the spot that is easiest to dress afterwards, gives more room for error and fix ups without affecting the end result.Let someone who actually knows what there belting on about answer says i.
#173
_nzstato_
_nzstato_
-
- Guests
Posted 28 May 2011 - 04:08 PM
Shoe? What you been smoking bomber?
Yea that's my thought too hatch, will sleep on it me thinks. Been rebuilding the rear corner of the inner sill today, Might get a photo or two up tonight...
Yea that's my thought too hatch, will sleep on it me thinks. Been rebuilding the rear corner of the inner sill today, Might get a photo or two up tonight...
#174
_LH SLR 3300_
_LH SLR 3300_
-
- Guests
Posted 28 May 2011 - 04:30 PM
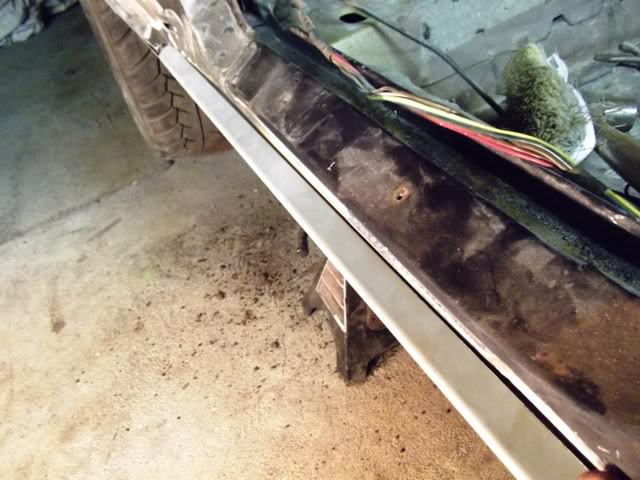
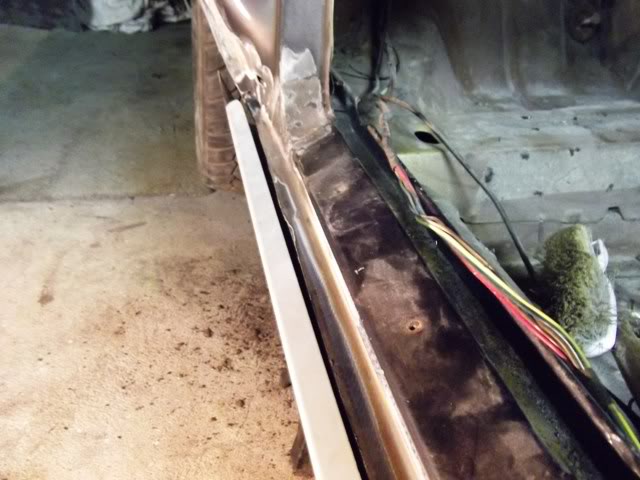
If you're going to butt weld the sill, personally i'd join it as close as possible to the step. Reason being is the folded step has more strength & is less likely to distort whereas half way it can distort creating an uneven surface requiring varying thickness of filler to get straight. A metre rule or similar straight edge will be handy when doing this repair.I recently fitted both sill panels including inners to an XW GT at work & i fitted & gapped up all four doors & more or less left them on when fitting the outer sills to make sure the gap between the base of the doors & top of the sills was even, exactly 6mm the whole length. I also trial fitted the guards to make sure the gap to the leading edge of the sill was the same both sides. Alot of stuffing around but the owner is paying big $ so understandably he is very fussy add to which the car will be painted gloss black so everything has to be spot on.
#175
_nzstato_
_nzstato_
-
- Guests
Posted 28 May 2011 - 04:49 PM
^ This was the answer I was needing (I was hoping you'd chip in). I think I'll slice the existing sill to give it a very slight edge (which I will bend down) to rest the new sill on and weld straight, was going to hang the doors too (that's why I wanted them finished first) but hadnt considered the front guard, best I do that too. Cheers for that, your build is looking good too


1 user(s) are reading this topic
0 members, 1 guests, 0 anonymous users

