
Great work Anton, looks great.


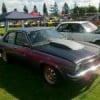
PROJECT PAPAYA - A VERY FRUITY RESTO THREAD
Started by
notna
, Jul 27 2010 11:14 PM
703 replies to this topic
#426

Rob2408
-

- Members
-

- 309 posts
Forum Fan
- Name:Rob
- Location:Brisbane
- Car:1974 L32 SLR
- Joined: 29-October 11
Posted 30 June 2013 - 06:35 PM
#427
StephenSLR
-
- Members
-
- 6,714 posts
Oh My, Don't you post alot
- Name:Stephen
- Location:Sydney
- Car:1976 LX SL/R
- Joined: 12-November 05
Posted 30 June 2013 - 07:06 PM
Anyone got pics of how far up the blackouts come on the rear quarters and valance? I haven't researched that yet.

Here's my car, 9/76 L32 SL/R
The whole rear section, valance/beaver panel is body colour, the only blackout on the whole rear is within the spoiler.
When I bought it the blackout was only the top of the bonnet, top of fenders, wiper grille/plenum, sills below doors and rear quarters. The section within the window chrome was also blacked out when I bought it.
The blackouts on the top side part of the front fender and below the window chrome was added later.
The front spoiler was body colour.
s
Edited by StephenSLR, 30 June 2013 - 07:14 PM.
#428
notna
-
- Members
-
- 706 posts
Forum Fixture
- Name:Reverse of username
- Location:Sydney
- Car:1976 LX L32 SL/R
- Joined: 21-May 07
Posted 30 June 2013 - 07:29 PM
Cool, cheers for that.
Behind the rear wheels and around onto the valance... how far up from the bottom does that measure? And is it even all the way around? I can't remember what mine was like before stripping the paint off! lol 
#429
_sunburst73-xu1_
_sunburst73-xu1_
-

- Guests
Posted 30 June 2013 - 07:33 PM
WOW nice work, how the hell did you paint that on a day like today????

#430
notna
-
- Members
-
- 706 posts
Forum Fixture
- Name:Reverse of username
- Location:Sydney
- Car:1976 LX L32 SL/R
- Joined: 21-May 07
Posted 30 June 2013 - 07:43 PM
Heaters cranking... and I worked up a sweat too! Hard work that is... especially when your arm gets tired in the middle of doing the roof! Oh that's agony!!!!
#431
StephenSLR
-
- Members
-
- 6,714 posts
Oh My, Don't you post alot
- Name:Stephen
- Location:Sydney
- Car:1976 LX SL/R
- Joined: 12-November 05
Posted 30 June 2013 - 08:21 PM
^ From the lowest point where the beaver panel joins and measuring straight up is 78 mm

From the right hand side of that rule where the tab on the panel ends (tab folds over) and measuring straight up is 88 mm
s
Edited by StephenSLR, 30 June 2013 - 08:32 PM.
#432
notna
-
- Members
-
- 706 posts
Forum Fixture
- Name:Reverse of username
- Location:Sydney
- Car:1976 LX L32 SL/R
- Joined: 21-May 07
Posted 30 June 2013 - 08:50 PM
Quality work. Thanks for that!
Mine was black along the rear valance too. Anyone else?
#433
StephenSLR
-
- Members
-
- 6,714 posts
Oh My, Don't you post alot
- Name:Stephen
- Location:Sydney
- Car:1976 LX SL/R
- Joined: 12-November 05
Posted 30 June 2013 - 09:16 PM
Mine was black along the rear valance too
I think the 5000's had that scheme, they also had the rear quarter blackouts painted higher to line up with the side lettering.

The LH's had the section between the blinkers blacked out.
I guess it if was painted by the dealerships there'd be variations.
s
Edited by StephenSLR, 30 June 2013 - 09:16 PM.
#434
notna
-
- Members
-
- 706 posts
Forum Fixture
- Name:Reverse of username
- Location:Sydney
- Car:1976 LX L32 SL/R
- Joined: 21-May 07
Posted 30 June 2013 - 09:37 PM
Satin or gloss? I would prefer satin myself... might do it that anyway. It's a nice contrast with the vibrant and glossy Papaya!
#435
StephenSLR
-
- Members
-
- 6,714 posts
Oh My, Don't you post alot
- Name:Stephen
- Location:Sydney
- Car:1976 LX SL/R
- Joined: 12-November 05
Posted 30 June 2013 - 09:46 PM
Satin or gloss?
It seems to be the same as the bonnet, definitely not gloss.
I think it was just called anti-glare black in those days.
s
#436
_bpi_
_bpi_
-
- Guests
Posted 30 June 2013 - 09:57 PM
I'm pretty sure they run the black beneath the rear bumper originally
#437
StephenSLR
-
- Members
-
- 6,714 posts
Oh My, Don't you post alot
- Name:Stephen
- Location:Sydney
- Car:1976 LX SL/R
- Joined: 12-November 05
Posted 30 June 2013 - 09:58 PM
Apparently Tuxedo Black was used on the A9X bonnets
http://www.gmh-toran...net-paint-code/
Here's a brochure showing the SL/R, it's hard to tell from the pic but looks like they may have had the rear beaver panel blacked out.
http://www.gmh-toran...ipes-blackouts/
I know mine was rear ended, not sure if they painted it exactly how it was but then again I didn't have the blacked out 'smile' either.
s
Edited by StephenSLR, 30 June 2013 - 10:07 PM.
#439
hanra
-

- Members
-
- 10,975 posts
Oh My, Don't you post alot
- Name:Brad
- Location:Farrrrrr North Qld
- Car:1975 LH SL/R 5000, 1967 Morris Cooper S, E36 BMW, Toyota Corolla, Isuzu DMax
- Joined: 24-March 11
Posted 30 June 2013 - 10:07 PM
Geez I'm glad my car is black! No need to worry about black outs!!!!
#440
StephenSLR
-
- Members
-
- 6,714 posts
Oh My, Don't you post alot
- Name:Stephen
- Location:Sydney
- Car:1976 LX SL/R
- Joined: 12-November 05
Posted 01 July 2013 - 08:31 AM
I notice the black within the window moulding does have a sheen to it, it's not a proper matte finish. It could be a gloss that hasn't been buffed to a mirror finish.
Then again the car is nearing 40 years old, it could be the gloss has faded out of it.
s
#441
notna
-
- Members
-
- 706 posts
Forum Fixture
- Name:Reverse of username
- Location:Sydney
- Car:1976 LX L32 SL/R
- Joined: 21-May 07
Posted 01 July 2013 - 04:46 PM
No time to rest.... since everything was still nicely masked up, I carried on today with the black outs.
Lots of masking...
 IMG_20130701_114003.jpg 130.02K
2 downloads
IMG_20130701_114003.jpg 130.02K
2 downloads
And then.... all done. Absolutely LOVE the satin black on Papaya!
IMG_20130701_135413.jpg 131.34K
2 downloads
....and unmasked. How nice is that? I basically did the blackouts as they were before I stripped off the paint. I dug out my old pics and worked it all out, using reference points, such as the bumper mount holes, etc.
IMG_20130701_141805.jpg 120.58K
4 downloads
With that all done, it was time to unmask EVERYTHING.
IMG_20130701_144345.jpg 172.9K
1 downloads
So pleased and proud of all that I have done here.
IMG_20130701_144652.jpg 153.88K
1 downloads
So now I can push it back over to the side of the garage and admire it daily. On to the next phase of the resto.... what will that be? Hmmm....
IMG_20130701_145617.jpg 157.93K
2 downloads
#442
_mick74lh_
_mick74lh_
-
- Guests
Posted 01 July 2013 - 05:04 PM
Wow that looks amazing! You've gotta be stoked with that.
#443
LHSL
-
- Members
-
- 995 posts
Forum Fixture
- Name:Phillip
- Location:SYDNEY
- Car:1974 LH SL; 2 x 1975 LH S Toranas
- Joined: 30-March 07
Posted 01 July 2013 - 05:51 PM
Looks tops. I know a lot of painters would say you are crazy spraying 2 pac in a garage. That stuff is dangerous. Love the results though. Tops.
Edited by LHSL, 01 July 2013 - 05:52 PM.
#444
notna
-
- Members
-
- 706 posts
Forum Fixture
- Name:Reverse of username
- Location:Sydney
- Car:1976 LX L32 SL/R
- Joined: 21-May 07
Posted 01 July 2013 - 06:24 PM
Yea... I know, dangerous stuff. I don't recommend that anyone do it, and whilst I tried to take every precaution possible to be safe, I know I probably wasn't. I don't plan on spraying any more cars in 2K after this one.
For a computer geek, I am pretty damn satisfied with my own spray painting, welding and panel work. Happy to "retire" on this one and enjoy it for many years to come. 
#445
StephenSLR
-
- Members
-
- 6,714 posts
Oh My, Don't you post alot
- Name:Stephen
- Location:Sydney
- Car:1976 LX SL/R
- Joined: 12-November 05
Posted 01 July 2013 - 07:09 PM
I don't plan on spraying any more cars in 2K after this one.
Damn, I was going to ask you if you'd do mine, lol.
s
#446
hanra
-
- Members
-
- 10,975 posts
Oh My, Don't you post alot
- Name:Brad
- Location:Farrrrrr North Qld
- Car:1975 LH SL/R 5000, 1967 Morris Cooper S, E36 BMW, Toyota Corolla, Isuzu DMax
- Joined: 24-March 11
Posted 01 July 2013 - 07:35 PM
This is EXCELLENT Anton. Good on you. I wish I lived nearby to lend a hand.
#447
_Red One_
_Red One_
-
- Guests
Posted 03 July 2013 - 06:43 PM
That's turned out really nice mate. Well done.
I love the black on Papaya now too.
Brad
#448
notna
-
- Members
-
- 706 posts
Forum Fixture
- Name:Reverse of username
- Location:Sydney
- Car:1976 LX L32 SL/R
- Joined: 21-May 07
Posted 04 July 2013 - 03:40 PM
Cheers for the comments guys.
Finishing touches to the body shell now. Masked up for the blackouts on the door pillars....
IMG_20130704_142103.jpg 188.94K
5 downloads
And then, just like a birthday present... unwrapped, to admire
IMG_20130704_150424.jpg 167.73K
1 downloads
That pretty much finishes off the body now... Oh, except I had to respray the front apron, and trans tunnel, due to overspray... 
IMG_20130704_153337.jpg 152.64K
2 downloads
All looking mighty fine now I think
So next... I will work on the doors and guards. They are part prepped. Will finish that prep and paint them soon. Progress.... love it!!
#450
Mort
 View Garage
-

- Members
-
- 2,760 posts
Lotsa Posts!
- Name:Mort
- Location:Moranbah, QLD.
- Car:74 LH SL/R 4.2, 75 LH 4 door 186
- Joined: 16-December 07
View Garage
Posted 05 July 2013 - 12:03 AM
Very nice, can't wait to see all the hanging panels done and fitted.


1 user(s) are reading this topic
0 members, 1 guests, 0 anonymous users

