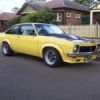
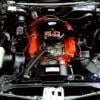
Awesome job anton! im glad you went with 2K! its a bit toxic to work with but you cant beat the shine you can get right off the gun if you prep and spray it right! the car looks fantastic mate so jealous! ![]()

PROJECT PAPAYA - A VERY FRUITY RESTO THREAD
#451
 _AD_75_
Posted 05 July 2013 - 03:45 AM
#452

Posted 05 July 2013 - 12:03 PM
Great work out of a garage.
#453

Posted 08 July 2013 - 08:41 AM
Great work Anton, looks fantastic.
#454

Posted 08 July 2013 - 08:45 AM
Paint looks fantastic! Well done.
#455

Posted 16 July 2013 - 12:06 PM
Yea Mitch... it's come a long way huh! ![]()
Been working on some smaller things now. Trying to finish off parts that will bolt up to the body with ease, and free up some shed space, so I can progress the swinging panels.
Here is my grotty, but nicely sealed and reco'd on the inside, fuel tank.
 IMG_20130711_141121.jpg 153.48K
1 downloads
Stripped the outside...
 IMG_20130712_130731.jpg 167.94K
0 downloads
Had a few small dents to skim fill and block back, then gave it an etch prime...
 IMG_20130712_133008.jpg 155.92K
0 downloads
The local wildlife approved ![]()
 IMG_20130712_141634.jpg 183.27K
1 downloads
Then I 2K hi-filled it and blocked it back. Didn't snap a pic of that. A couple of days later, gave it a few coats of some silver I had already. Colour is called "Aluminium" and is a Leyland Australia colour from 71/2, that was used on wheel rims for one particular model. I had this left over from my Mini Clubman GT resto. Page #1 of this thread shows that car ![]()
 IMG_20130714_161747.jpg 120.92K
0 downloads
Then I gave the retaining straps a clean and paint in satin black. I lined the underside with cork, as I'm not a fan of metal on metal, especially on a fuel tank!
 IMG_20130716_105759.jpg 59.91K
1 downloads
And then, in the car, I guess it will look like this... upside down of course! ![]()
 IMG_20130716_105713.jpg 156.04K
0 downloads
Will bolt it up this week. Nothing goes in between the tank and the car does it?
#456

Posted 16 July 2013 - 12:18 PM
#457

Posted 16 July 2013 - 12:27 PM
Oh yea? Never would have thought of that. Cheers Brad! Electricals have always been my downfall! ![]()
Edited by notna, 16 July 2013 - 12:27 PM.
#458
 _j.e.d._
Posted 16 July 2013 - 12:53 PM
Looks purdy! Hope I can get my car to look as good as yours! (doubt it though)
#459

Posted 16 July 2013 - 03:17 PM
To easy mate. Get your self a multimeter and measure the resistance from the sender body to the body once its fitted it might be ok??? But all that paint and cork might insulate it Id imagine!!Oh yea? Never would have thought of that. Cheers Brad! Electricals have always been my downfall!
I took the precautionary measure and solder a GND wire to the sender body whilst the sender was out of the tank.
Im in Sydney this Saturday for Motorex, do you live any where near town?
#460

Posted 17 July 2013 - 10:48 AM
Hey Brad, if Motorex is still at the Sydney showgrounds, I'm about a 20 minute drive north from there. You coming down just for that?
#461

Posted 17 July 2013 - 12:41 PM
Yep, fly in Saturday morn, go to Motorex, then home Sunday morn first thing.
#462

Posted 17 July 2013 - 01:41 PM
You're keen mate. Anything in particular of interest? And yep... i'm 20 mins from there.
#463

Posted 17 July 2013 - 02:04 PM
Ill have to see how Im traveling for time on Saturday but would be pretty cool to drop in and check out your car!
#464

Posted 24 July 2013 - 06:13 PM
Some progress, pointers, and problems... :/
Been working on the front guards over the past week, getting them ready for colour, and then today, COLOUR! They are both the original guards, but did need a lot of work. I had previously worked them over and primed them and thought they were pretty damn spot on.
Recently I bought myself a set of really good sanding blocks, after reading some advice from others, in this thread I think! They are magic! And as you can see below, my "perfect" guards weren't so!
Guards, primed and guide coated, with long block....
 IMG_20130718_125911.jpg 184.23K
4 downloads
And now... after only minor wet sanding with 800 and the long block, you can totally see those low spots! I had no idea! I did think it was fine, after sanding it using a small cork block.
 IMG_20130718_130321.jpg 125.24K
2 downloads
After that block back, I did have to prime again, which I didn't take pics of. I again wet sanded with 800 and then..... COLOUR, in my makeshift bubble booth, which really does work well!
 IMG_20130724_172716.jpg 95.02K
2 downloads
So there you have my progress, and a pointer about blocking back... now comes... the problem! :( I put a run in one guard. I'd classify it as, a bad one :( Fortunately it's in a good spot to fix, so... how do I? I'm an ace with removing runs from acrylic, and buffing, but I'm sure 2K isn't the same.
So... what technique would be best to remove the run, and buff the paint back to a shine? Once in the past I tried this, but couldn't buff the paint back to a decent shine. It remained dull, and looked shite. Tips, advice, is appreciated.
#465
 _DomDom_
Posted 24 July 2013 - 07:44 PM
Wow. Those guards look nice.
Great work Anton.
#466
 _sting_
Posted 24 July 2013 - 08:04 PM
Hi where it you get the long block from.
cheers sting
Edited by sting, 24 July 2013 - 08:05 PM.
#468

Posted 24 July 2013 - 10:40 PM
To easy mate. Get your self a multimeter and measure the resistance from the sender body to the body once its fitted it might be ok??? But all that paint and cork might insulate it Id imagine!!
What sort of figures are we looking for?
Hey Anton, how do you find the duro blocks compared to the old long board etc?
#469

Posted 24 July 2013 - 10:50 PM
What sort of figures are we looking for?
A dead short. 0 ohms. From the sender body to the body of the car.
#470

Posted 24 July 2013 - 10:54 PM
^ Ahhh, thanx, anything higher than zero means resistance, giving a false reading, the the higher the number the worse the effect.
#471

Posted 25 July 2013 - 12:08 AM
Hey Anton, how do you find the duro blocks compared to the old long board etc?
Pretty sure it was you that got me onto those, and yea.... they are brilliant! I bought a set, which has 8 different shapes. Wish I had used these years ago!
#472

Posted 25 July 2013 - 07:56 AM
If you do not have a good low resistance GND for your fuel sender, it will be in-accurate.^ Ahhh, thanx, anything higher than zero means resistance, giving a false reading, the the higher the number the worse the effect.
#473

Posted 25 July 2013 - 05:31 PM
I love it when you come back to something the next day, and it looks BETTER than what you had first thought. The gloss and finish on these blew me away. Very proud ![]()
 IMG_20130725_120800.jpg 299.64K
2 downloads
Also sprayed the door hinges yesterday, and today I blocked and primed the front apron. Will hit this with colour tomorrow, then pack things up for a while. Start a new job next week and we all know how full-on that can be in those first few weeks! ![]()
#474

Posted 26 July 2013 - 06:25 PM
Last update for a little while. I was going to pack-up all my stuff today and give the garage back to the Minister of Complaints, but I figured... just one more day! ![]()
Primed, blocked, and primed the front apron yet again, then set it up overnight, ready for colour today...
 IMG_20130726_091030.jpg 110.15K
1 downloads
Got up early, heated the garage nicely, then hit it with some Papaya goodness. Let it set under heat lamps, then packed up EVERYTHING :(
 IMG_20130726_151111.jpg 154.89K
1 downloads
To save on storage space, I have loosely hung both guards and the front apron on the body. You can see it all coming together now. LOVE IT!
Start my new job on Monday, so will be focussed on that for a while now.
Cheers guys ![]()
#475

Posted 26 July 2013 - 07:02 PM
Someone's been a busy boy. ![]()
Great work as usual and good luck with the new job.
2 user(s) are reading this topic
0 members, 2 guests, 0 anonymous users


