Jump to content


Photo

LH - LX Rad Support Dimension Please


  • Please log in to reply
17 replies to this topic

#1 notna

notna

    Forum Fixture

  • Members
  • PipPipPipPipPip
  • 706 posts
  • Name:Reverse of username
  • Location:Sydney
  • Car:1976 LX L32 SL/R
  • Joined: 21-May 07

Posted 26 September 2010 - 09:29 PM

Hey guys,

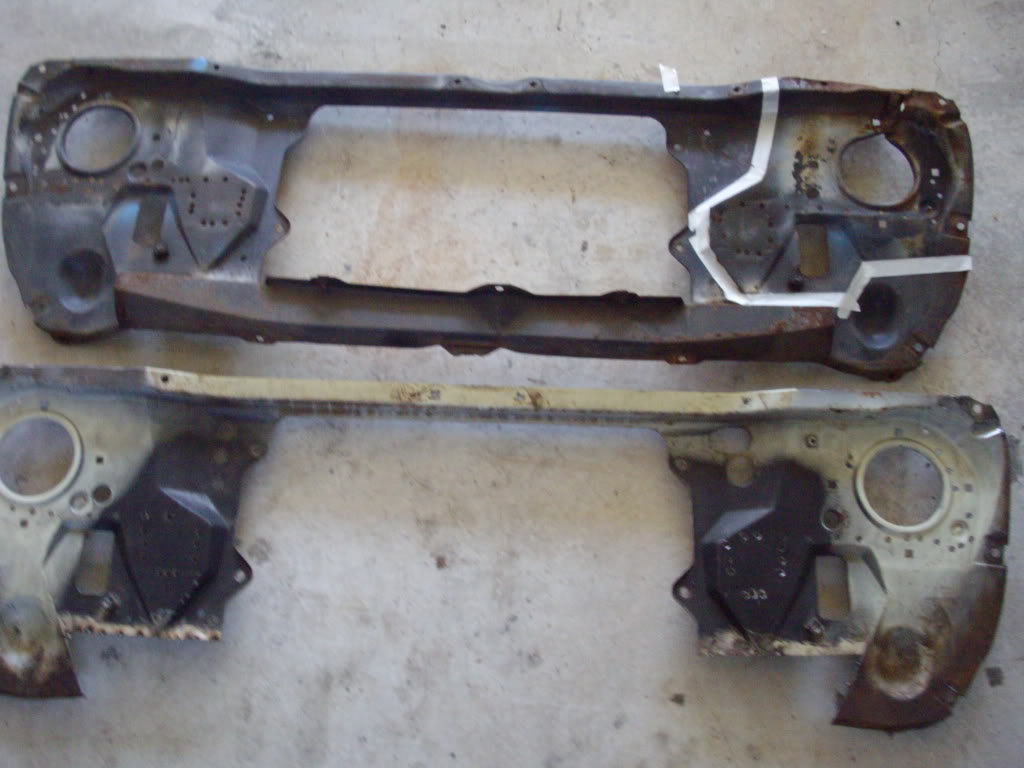
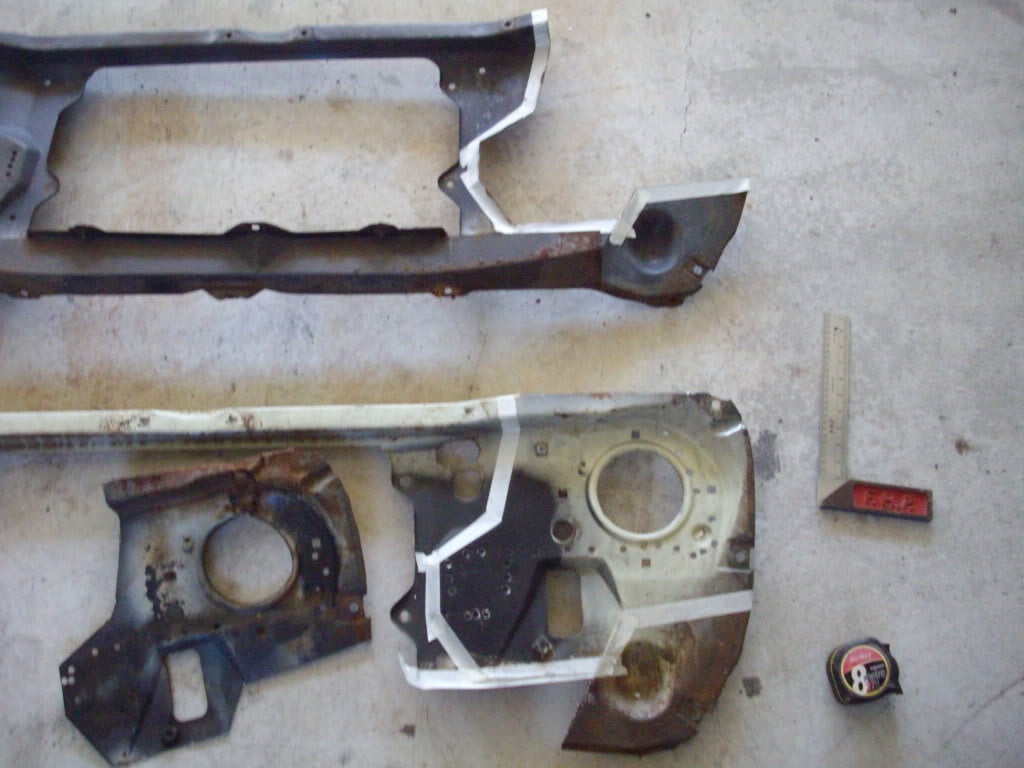
My SL/R came with a repaired rad support. It was a dodgy job, and I have cut that part out and bought a Rare Spares rad support rust repair section.

Can someone have a look at the attached image and tell me what that dimension is please? I need to know so I can trim up my rad support and weld the new section in, and have all the holes line up for the radiator.

Cheers!! Posted Image

Attached File  SDC11407.jpg   137.68K   4 downloads
#2 notna

notna

    Forum Fixture

  • Members
  • PipPipPipPipPip
  • 706 posts
  • Name:Reverse of username
  • Location:Sydney
  • Car:1976 LX L32 SL/R
  • Joined: 21-May 07

Posted 26 September 2010 - 09:33 PM

...oh and one more question...

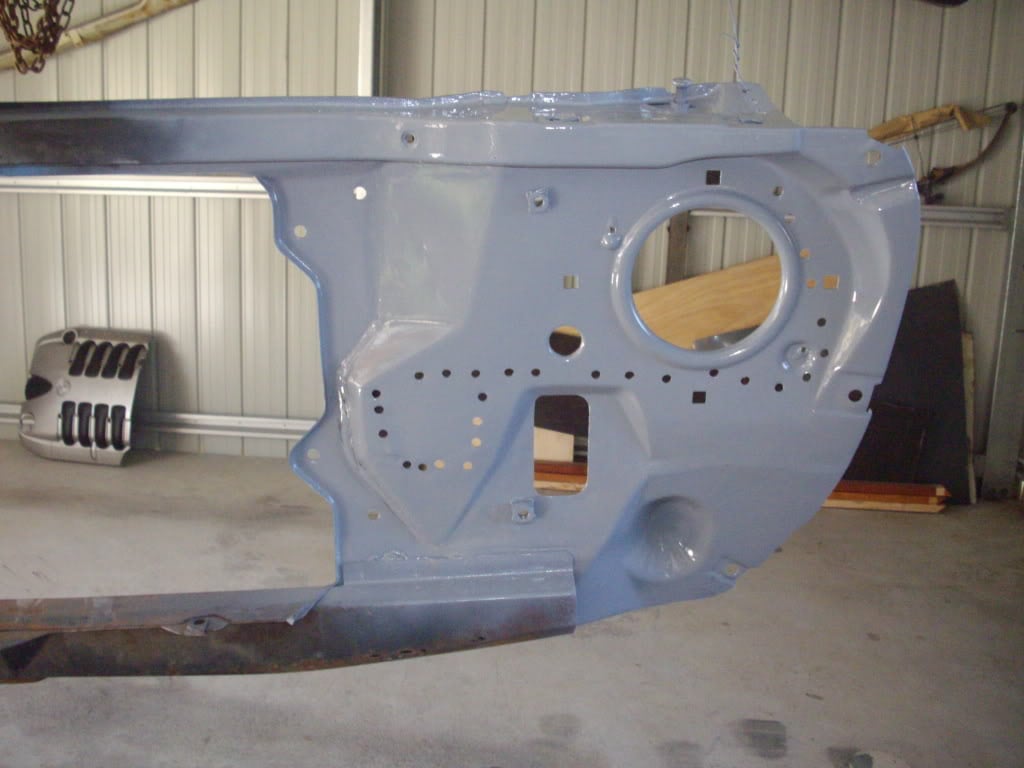
For those who have done this repair, is this the correct profile after you weld the rust repair section in?

Attached File  SDC11413.jpg   122.9K   2 downloads
Does anyone have some pics handy of their rad support? I have nothing to work off and would really appreciate some visual help. Taaaa. Posted Image

Edited by notna, 26 September 2010 - 09:33 PM.


#3 TerrA LX

TerrA LX

    Fulcrum Fixture

  • Members
  • PipPipPipPipPipPipPip
  • 14,241 posts
  • Location:Sid 'n' knee
  • Joined: 31-May 06

Posted 26 September 2010 - 09:34 PM

bolt the apron on, it will show you where to locate the bottom piece.

#4 _nial8r_

_nial8r_
  • Guests

Posted 27 September 2010 - 08:12 AM

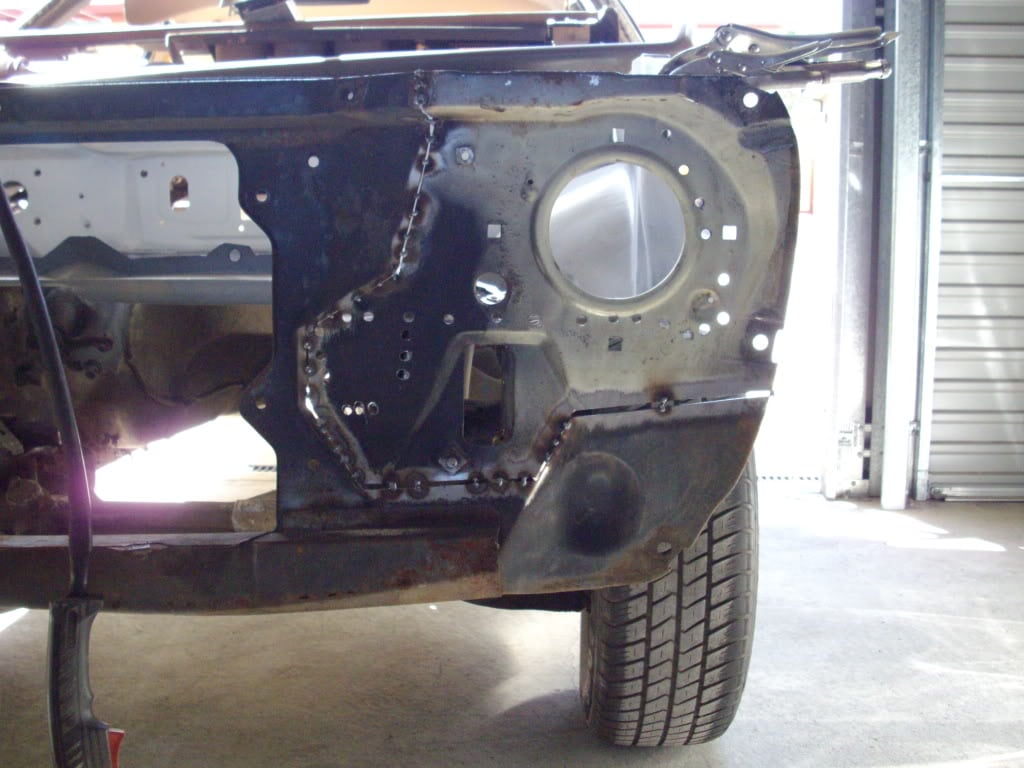
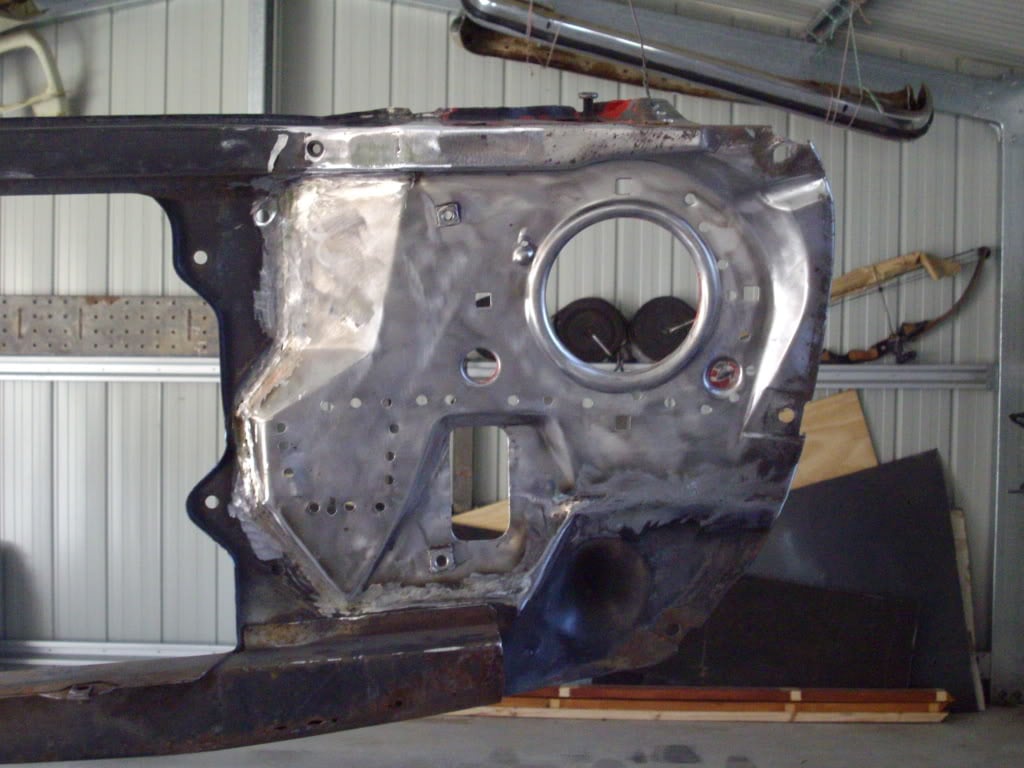
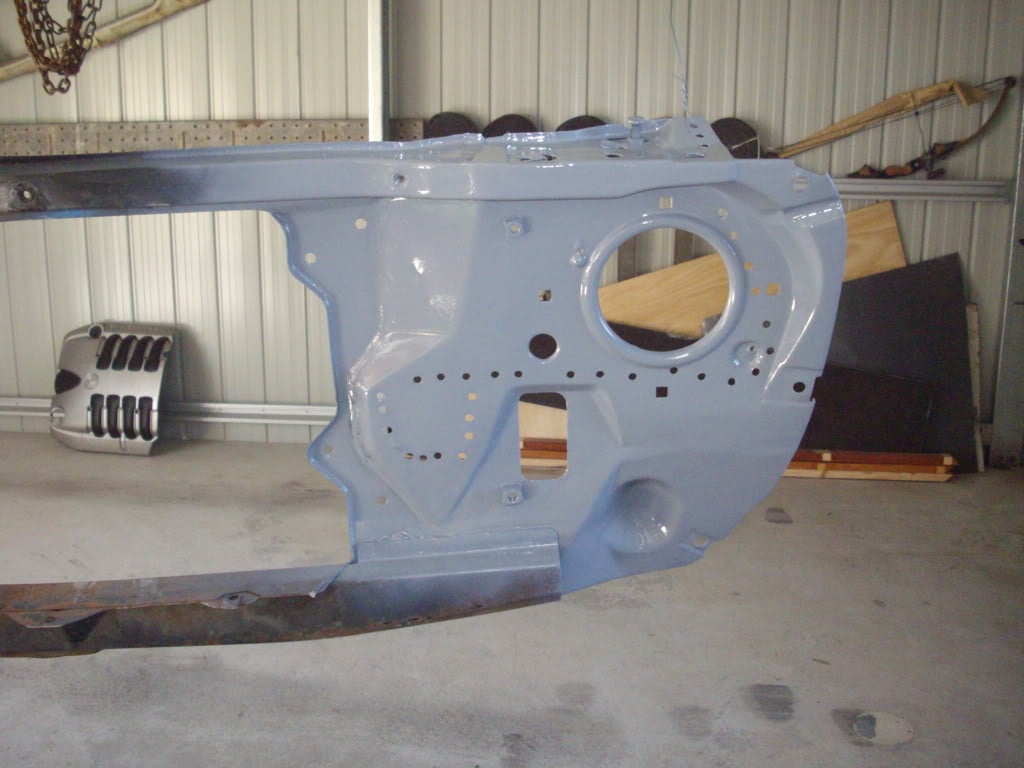
and if you bolt your bonnet striker on at the top of the support it will give you the distance between the top and bottom.. here is some pic's of one that i repaired, wasnt real happy with but i had to make one from 3.
Posted Image

Posted Image

Posted Image

Posted Image

Posted Image

Posted Image

hope that might help but if your really want the measurments i have a support hanging in my shed and can grab them for you if ya like ???

#5 notna

notna

    Forum Fixture

  • Members
  • PipPipPipPipPip
  • 706 posts
  • Name:Reverse of username
  • Location:Sydney
  • Car:1976 LX L32 SL/R
  • Joined: 21-May 07

Posted 27 September 2010 - 10:48 AM

Very helpful pics. Thank you.

I do have my front apron that I can bolt on for positioning. Bonnet striker must be somewhere..... it was removed when I bought the car. It's probably in a box. Again, great idea, thank you.

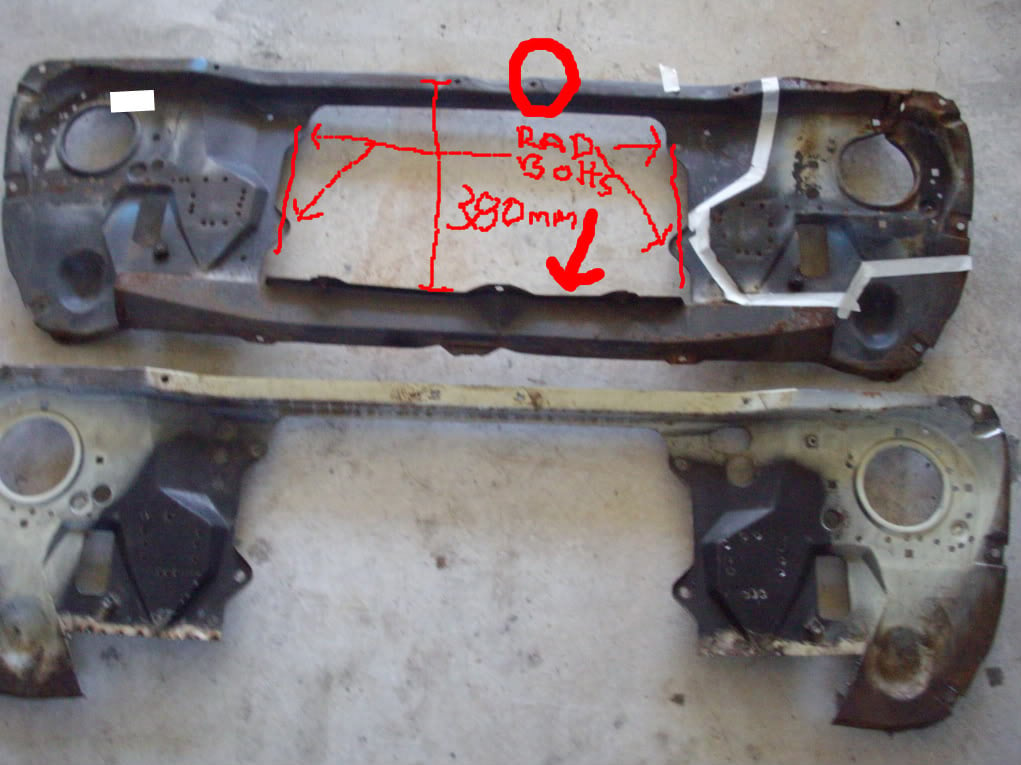
Question Lee..... In the pic below, are the 2 areas circled in red both parallel to each other, and 90 degrees to the ground? Is this where the radiator bolts to?

Attached File  IMGP3606.jpg   84.26K   3 downloads


Cheers.

#6 _nial8r_

_nial8r_
  • Guests

Posted 27 September 2010 - 04:23 PM

hohpe you can understand my editing Posted Image here is a pic,

Posted Image

the holes you have circled are the radiator bolt holes and the bottom tabs kick inwards a bit. about 5-10mm.
also the top and bottom hole arn't parallel, if you can make out the red lines in the photo, the line starts on the inside of the top hole and runs through the centre of the bottom hole and is the same on both sides. i hope that makes some sence, Posted Image i also chucked in the measurment from the top to the bottom and its 380mm from the centre of the striker hole to the top of the lower section of the support.

#7 _LH SLR 3300_

_LH SLR 3300_
  • Guests

Posted 27 September 2010 - 05:48 PM

Some friendly advice, using self tapper screws, mount the support panel to the car. You only need a few each side, use a metre rule or tape measure to check lengths & diagonal measurements to ensure the front is square. Once this is done, i scribe "witness" marks to assist in keeping the alignment correct while removing & refitting the radiator support. Using the measurements & method Lee mentioned, tack the repair section in a couple of places each side but not the part you circled in the previous post. The reason being, if that section on each side paralell to the section & directly behind the turn signal indicator is either to far forward or back, your guards & front apron won't bolt up properly. Trial fit both guards & front apron, adjusting the fitment of the repair section where necessary. It may seem overkill but i always check & re-check panel fitment while welding up repair sections like this because sometimes even slight distortion can affect panel alignment. Sometimes i'll bolt up & unbolt panels a few times with one final check once the job is done, as it's easier to fix any problems before the paint goes on. Nothing more dishearting than having to damage fresh paint to re-repair something you thought was OK. Just my opinion from 20 years in the panel beating trade.


#8 notna

notna

    Forum Fixture

  • Members
  • PipPipPipPipPip
  • 706 posts
  • Name:Reverse of username
  • Location:Sydney
  • Car:1976 LX L32 SL/R
  • Joined: 21-May 07

Posted 29 September 2010 - 10:45 PM

Awesome advice all round. Thanks heaps guys. I'm a big believer in listening and learning before completing. All of the above has been taken on board. YOu shall see my results soon in the resto thread.

#9 _nial8r_

_nial8r_
  • Guests

Posted 30 September 2010 - 11:21 AM

chuck me the link to your thread so i can have a captain cook Posted Image

#10 notna

notna

    Forum Fixture

  • Members
  • PipPipPipPipPip
  • 706 posts
  • Name:Reverse of username
  • Location:Sydney
  • Car:1976 LX L32 SL/R
  • Joined: 21-May 07

Posted 01 October 2010 - 07:03 PM

Can do =) See link under sig!

#11 _LH SLR 3300_

_LH SLR 3300_
  • Guests

Posted 01 October 2010 - 08:24 PM

Just checked your project thread out, nice project & great colour choice. You're doing very well with your repairs too,i can see you know what you're doing but i might give you some more friendly advice re rail repairs. If you haven't done so already, check the lengths & diagonal measurements to make sure they are square. Another thing to check is heights. This can be hit & miss without an aligning jig, so i use a spirit level to give me a guide. Sit the level on the roof turret & take note of the reading, then sit it on the wiper panel & it should have the same reading. Place a straight edge like a plank of wood across the top of both chassis rails & sit the level on top. If it has the same reading as the wiper panel & roof turret, the heights should be OK. Again, this is only guide to see if one rail is lower or higher than the other. These cars have some adjustment in panel alignment but the better you get the chassis alignment at this stage, the better the final result will be once the car is painted & reassembled. Cheers Matt

#12 notna

notna

    Forum Fixture

  • Members
  • PipPipPipPipPip
  • 706 posts
  • Name:Reverse of username
  • Location:Sydney
  • Car:1976 LX L32 SL/R
  • Joined: 21-May 07

Posted 02 October 2010 - 04:53 PM

Your advice is always welcome!

I had been measuring heights and checking levels, but not in all the places you have mentioned. Will do ASAP. Cheers for your input.

You are welcome over anytime to eyeball it and advise some more. Posted Image

#13 _nial8r_

_nial8r_
  • Guests

Posted 02 October 2010 - 07:37 PM

dont your worry notna i have picked Matts brains a million times over now, on the phone and in person, all round great bloke and plenty of knowlage and will pretty much answer any question you have and even the one ones you dont have like me lol Posted Image

#14 notna

notna

    Forum Fixture

  • Members
  • PipPipPipPipPip
  • 706 posts
  • Name:Reverse of username
  • Location:Sydney
  • Car:1976 LX L32 SL/R
  • Joined: 21-May 07

Posted 16 October 2010 - 05:50 PM

Sooo ready to do this, but out of welding gas!!!! Can't get to BOC to exchange bottle (too busy at work). Soooo frustrating. Having to fart-ass around with other things much less interesting >:-(

Contemplating buying gassless MIG wire tomorrow just to get down and dirty!

As always.... will keep you posted of progress.


#15 _nial8r_

_nial8r_
  • Guests

Posted 17 October 2010 - 05:53 PM

im not a great fan of gasless migs, i just hope once you get it on it doesnt move on ya cause it would be a real bitch if you had to unpick it all again, then again your mig might be a lot better than mine as when i tried welding using gasless wire it didnt seem to get the penatration, anyways let us know how ya go Posted Image

#16 _Kush_

_Kush_
  • Guests

Posted 18 October 2010 - 01:08 PM

im not a great fan of gasless migs, i just hope once you get it on it doesnt move on ya cause it would be a real bitch if you had to unpick it all again, then again your mig might be a lot better than mine as when i tried welding using gasless wire it didnt seem to get the penatration, anyways let us know how ya go Posted Image


Did you reverse the polarity on your mig using gasless? Sometimes people overlook doing this. :)

#17 _nial8r_

_nial8r_
  • Guests

Posted 18 October 2010 - 06:59 PM

yeah kush i reversed them over Posted Image

#18 notna

notna

    Forum Fixture

  • Members
  • PipPipPipPipPip
  • 706 posts
  • Name:Reverse of username
  • Location:Sydney
  • Car:1976 LX L32 SL/R
  • Joined: 21-May 07

Posted 18 October 2010 - 09:46 PM

Yea... did a bit on the weekend with gasless wire. Definitely more "blobby" and harsh than welding with a gas MIG, however.... if all you are going to do is grind the welds flush afterwards, then it's fine. Did the trick for me. My MIG belongs to the father in-law, and he is away. I CBF swapping over the gas bottle.... lol.


1 user(s) are reading this topic

0 members, 1 guests, 0 anonymous users