
Removing LC front doors
#1

Posted 12 October 2010 - 05:44 PM
Im helping my mate pull down his LC sedan. We got the rear doors off fine but the fronts are a paint in the bum.
I have a meatal bar with a fork that iv been trying to hit out but the hinge does not want to move.
Sadly unlike later LH-UC toranas the front gaurds are welded in so i cant even get in from behind to hit the hinge out.
WD40 has not moved anything and only other option i can think of is to heat up the hinge with an oxy then belt hinge out.
Anyone got any tips before my mate burns it or does something silly.
Chears Neil
#2
 _SnotGobbler_
Posted 12 October 2010 - 06:41 PM
im glad youve asked this question, im in the same boat for my LJ. pins are pretty tight... doors need to come off soon
will be watching for any hints
#3
 _BATHURST-32D_
Posted 12 October 2010 - 06:45 PM
ps make sure one person holds the vice grips out strait.
cheers gong
Edited by BATHURST-32D, 12 October 2010 - 06:46 PM.
#4
 _shan620_
Posted 12 October 2010 - 07:22 PM
#5

Posted 12 October 2010 - 08:06 PM
Thank gong, shan and i shall give it another go.
Chears Neil
#6

Posted 12 October 2010 - 08:40 PM
#7

Posted 12 October 2010 - 08:55 PM
#8
 _Mike73_
Posted 13 October 2010 - 02:01 PM
the first mistake most people make is to remove the riverted pin that attatches the check strap, this is not necessary unless the pin is worn.
To remove chack strap from door just remove spring inside door then unbold the two 1/4 " bolts and take away the roller mecanism.
The hinge pins are a real headache which I have done battle with since the early 1980's when I rebuilt my first Torana.
The Holden workshop manual shows a large bar with a slot in it ( a small bar would be less effective ) of course this only works if the pin is not rusted in.
WD 40 can help ( sometimes ) and the pin can be started of course by placing a large flat edge bar against the smaller end and offset striking it but you must be sure not to mushroom the end of the pin or it will never come out!
Rusted pins are a real problem and heating is one option that many resort to, but be careful as the pins will be in a weaker state when hot, it usually better to quench them and work then cold.
There are a couple of sources that supply replacement door seals, the one in Queensland I can recommend.
Yet other people cut the hinge off on the car side of the hinge, I would be trying other options before doing this myself.
Sometimes the pins are broken in the middle and unless you can get a right angle drill in and drill them out, about the only option would be to cut the hinge off!
Mike
#9
 _BATHURST-32D_
Posted 13 October 2010 - 06:10 PM
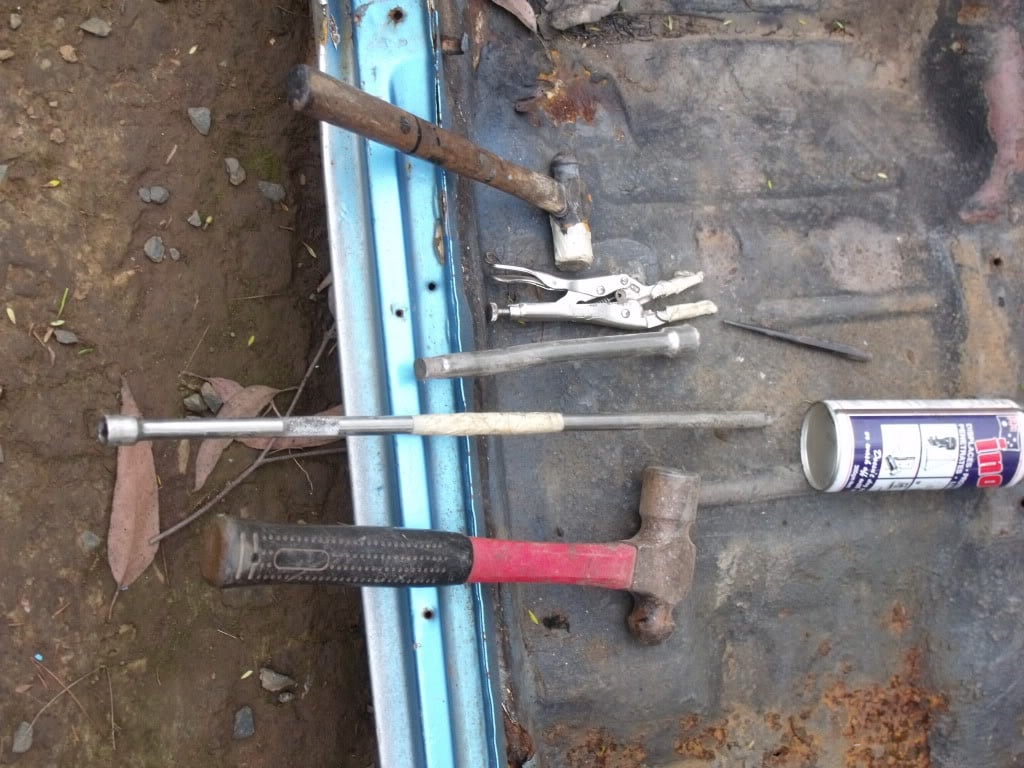
these are the tools you will need to complete the job
step 1
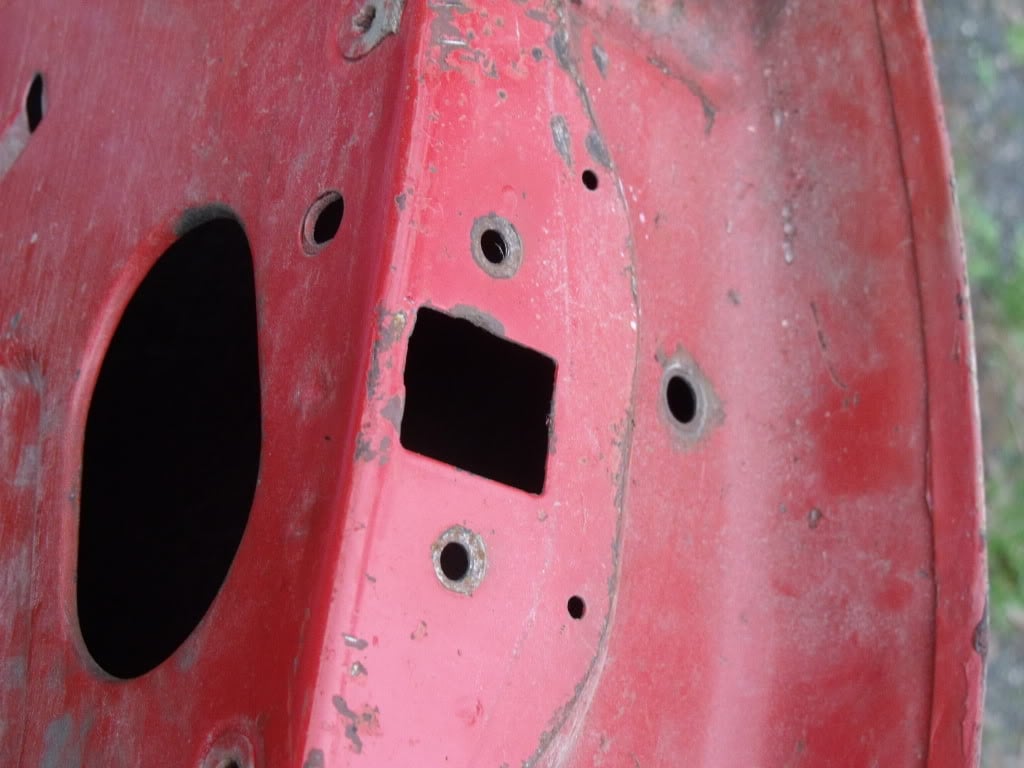
using a 7/16 spanner take the 3 bolts out of the check trap mecanism
step 2
soak both pins with INOX
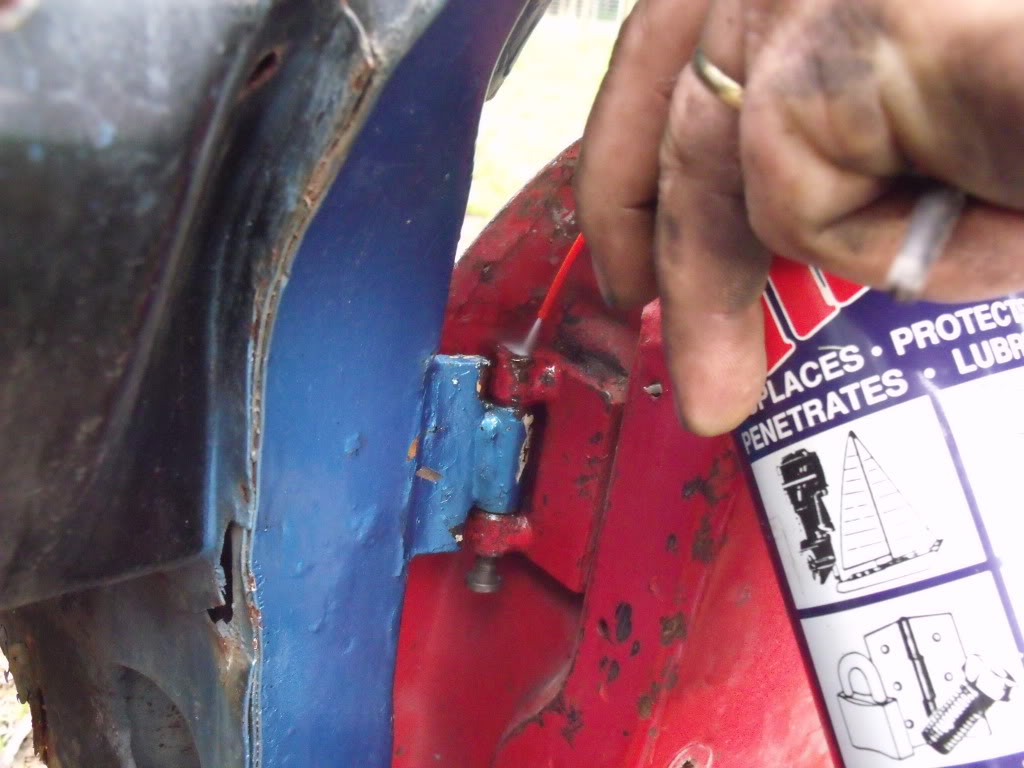
step 3
take your long bar and give the top of the pinhead a hit until it is level with the hinge
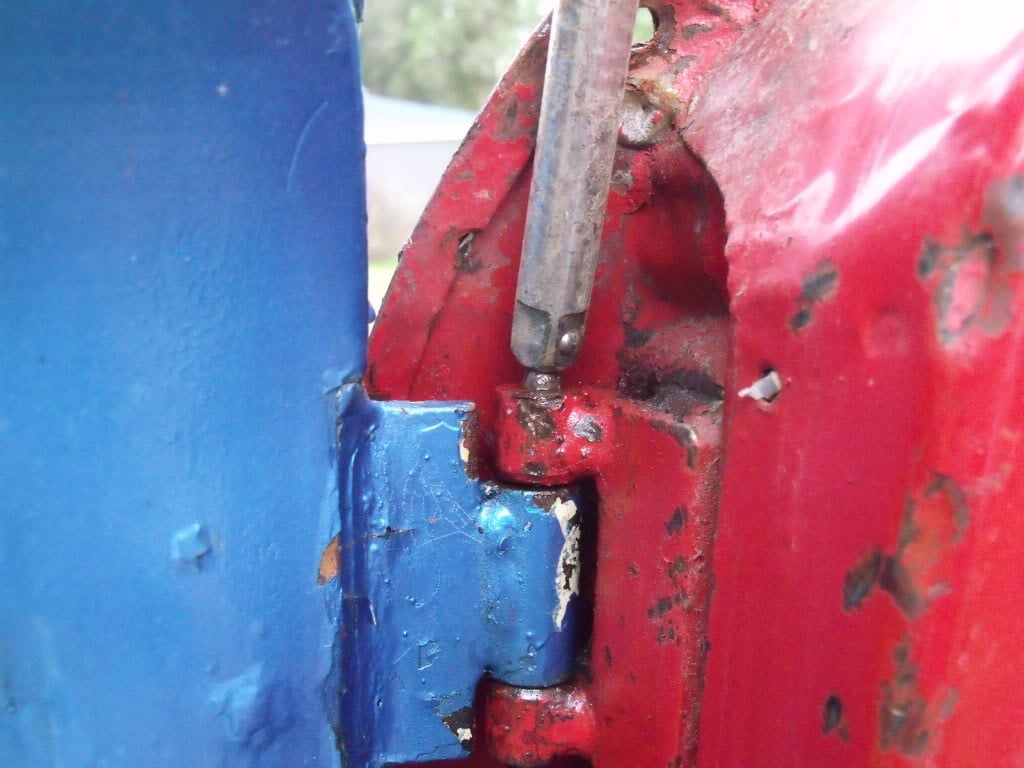
step 4
now spray some more INOX in the hole, and take a pair of vice grips and twist side to side,,some times you may need to bang the pin back in so the INOX works its wonders
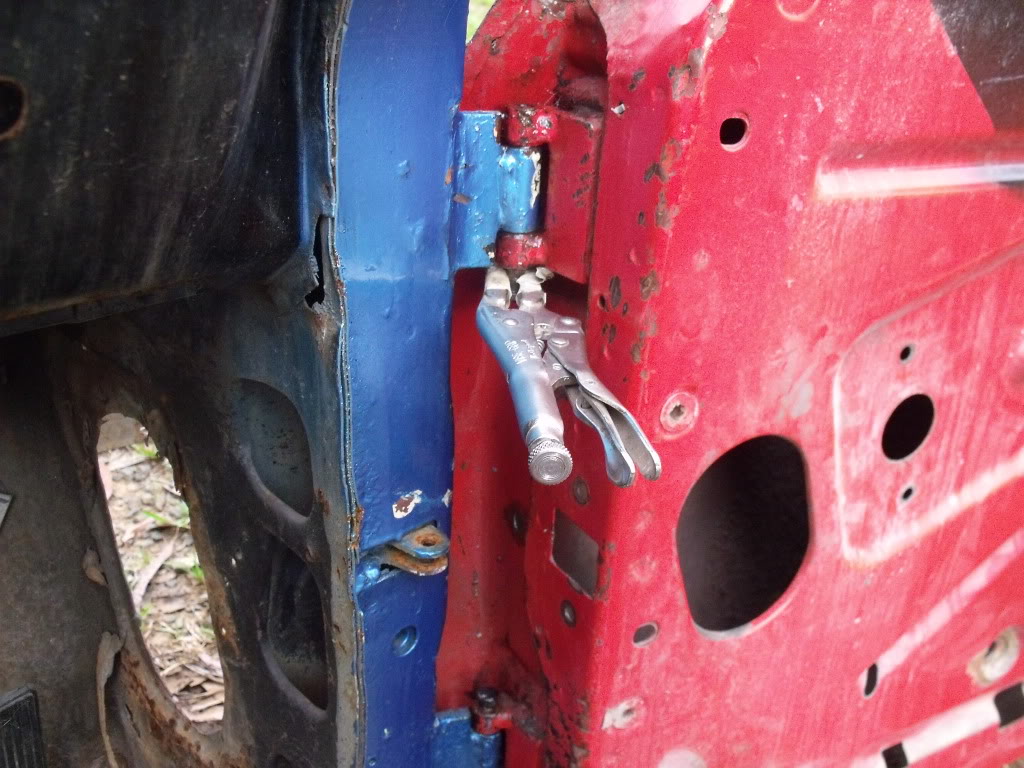
step 5
now take your long rod and a hammer and give it a wack
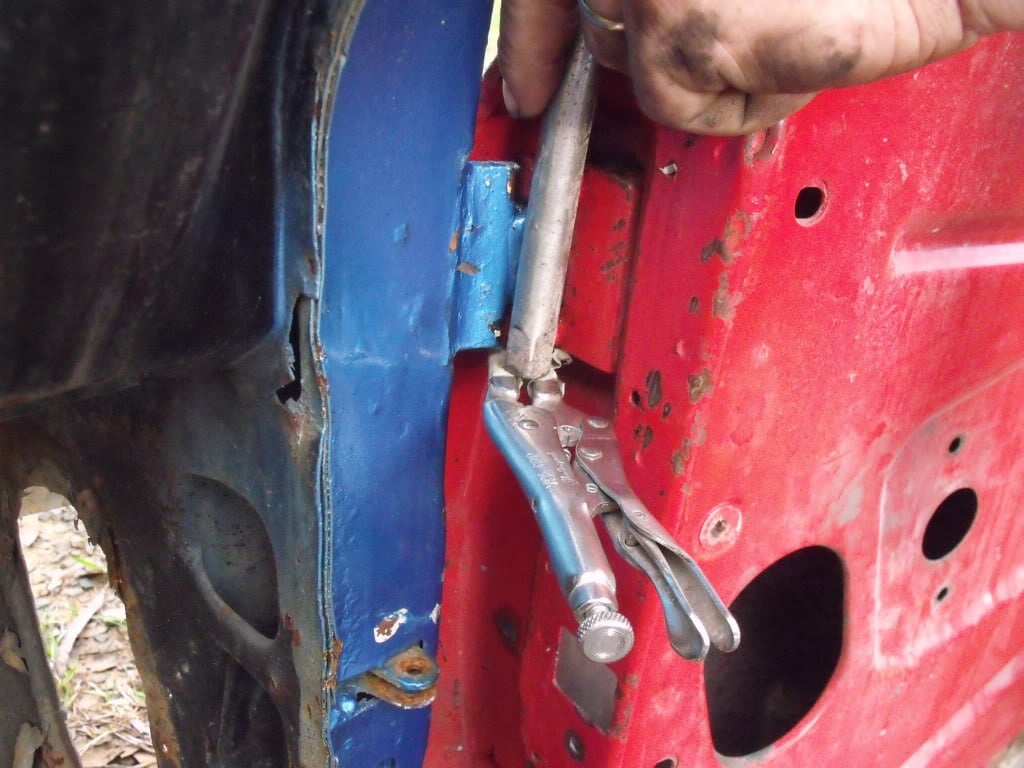
now your pin should be half way out

step 6
now repeat the same thing on the bottom one but this time use the shorter rod,, only this time while your mate holds the door you take the bottom one right out, then return to taking out the top one.
please note if this dont work you can always try using oxy, only then do you need to cut the doors off
here is the job finished
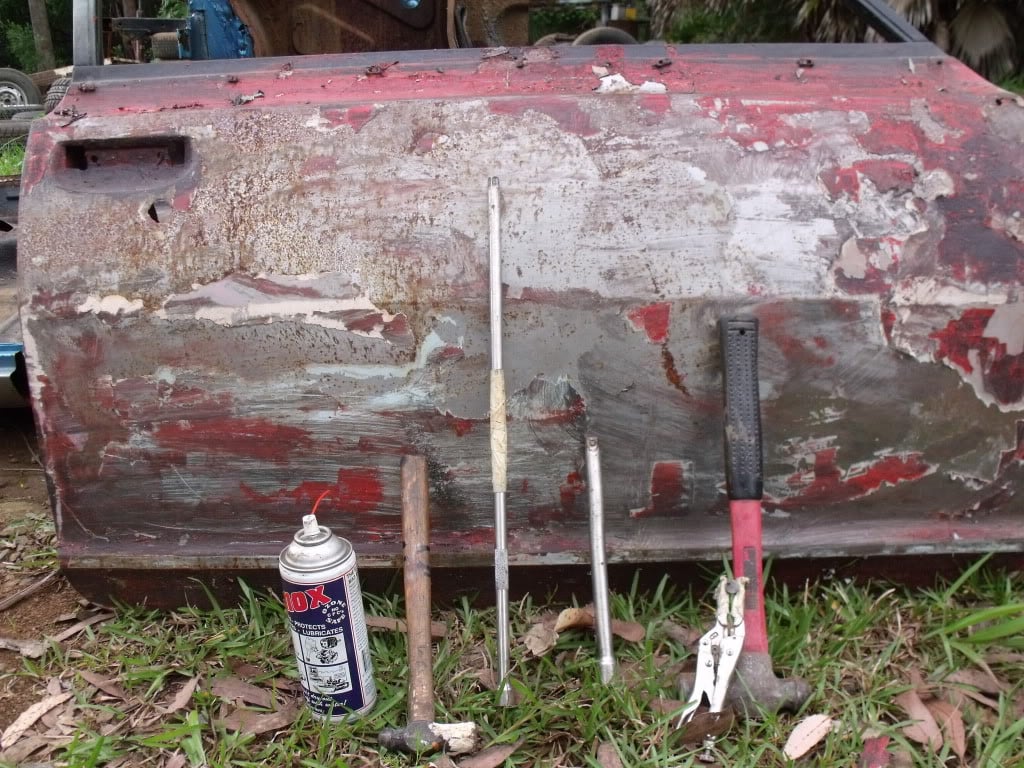
cheers gong
Edited by BATHURST-32D, 13 October 2010 - 06:11 PM.
#10
 _Agent 34_
Posted 14 October 2010 - 02:43 PM
#11
 _SnotGobbler_
Posted 14 October 2010 - 04:46 PM
maybe all my short socket extentions will make one long one otherwise its out to buy more stuff lol
dont think i have much else to improvise
#12
 _Quagmire_
Posted 14 October 2010 - 06:01 PM
they are 1/2" socket extentions yeah?
#13

Posted 15 October 2010 - 04:31 PM

cheers gong
[/quote]
Chears mate with some extra help my my uncle we got them off today, thanks again Neil
#14
 _Agent 34_
Posted 16 October 2010 - 09:40 AM
Another tool that i used was a welding hammer, it's the one with the point at one end and a chisel at the other, it was good as it allowed to move the angle of the hit around the pin head when it was comming out however the pliers are the go as John said with the hammer it dosent bent the pin.
It's off to the Soda blaster for a bath !
#15
 _73LJWhiteSL_
Posted 19 April 2011 - 11:07 PM
Steve
#16

Posted 20 April 2011 - 02:29 PM
#17
 _stretchlc_
Posted 20 April 2011 - 07:16 PM
#18

Posted 20 April 2011 - 09:59 PM
I recently removed mine after 37 years of sitting in same place, I think the picture of top pin Gong has shown = pin in the wrong way around, Mine were tap upwards for top pin & downwards for bottom pin.. I used WD40 and soaked for a couple of days then used a pin punch to hammer the pin flush with hinges, then got some thin stainless stell rod that I cut to size in order to hammer the pins all way out, Were hard to do but with each strike of the hammer could see them moving so I kept at it.... Pins were still good and not worn at all, But I still got a set of new pins for when it's time to re-hang those heavy doors..... Not the hardest thing I've had to do but it's right up there, Until I discovered the stainless rod around 5mm in daimeter and as they say All jobs are made easier with the right tools....
Hi Andrew
Sorry to disappoint you but your door pins are in the wrong way round, Gongs are correct.
Top hinge pin has the head facing down and bottom hinge has the head facing up.
Cheers
Dave
#19

Posted 20 April 2011 - 10:03 PM
I feel your pain guys!.....and to think that holden was still using this exact same set up in the VN-VT Commodores!.....I dont get it!
Not exactly the same, commodore hinge pins are tubular with a slot down the side so hopefully should not be the same drama to remove as the LC-LJ pins.
#20

Posted 20 April 2011 - 10:56 PM
I recently removed mine after 37 years of sitting in same place, I think the picture of top pin Gong has shown = pin in the wrong way around, Mine were tap upwards for top pin & downwards for bottom pin.. I used WD40 and soaked for a couple of days then used a pin punch to hammer the pin flush with hinges, then got some thin stainless stell rod that I cut to size in order to hammer the pins all way out, Were hard to do but with each strike of the hammer could see them moving so I kept at it.... Pins were still good and not worn at all, But I still got a set of new pins for when it's time to re-hang those heavy doors..... Not the hardest thing I've had to do but it's right up there, Until I discovered the stainless rod around 5mm in daimeter and as they say All jobs are made easier with the right tools....
Hi Andrew
Sorry to disappoint you but your door pins are in the wrong way round, Gongs are correct.
Top hinge pin has the head facing down and bottom hinge has the head facing up.
Cheers
Dave
No Disappionments here Dave, Glad you set the record right & I will be sure to replace mine as per your recommendations & just goes to show these things were never intended / nor do they just fall out of the hinges....... Disappionted if nobody had corrected me and I had to remove new pins to make right again, But only after Gong had seen it and said "Those door pins are in the wrong way"......
#21

Posted 21 April 2011 - 10:20 PM
Um yeah mate sorry but your pins were the wrong way round ps these pins were originally zinc plated obviously not well but my suggestion seems as apparently the new aftermarket pins are incorrect diameter is to simply wire brush (ie on the bench grinder) & rezinc ur gmh pins drop some anti sieze on them & tap them back in. THE USE OFF AN (OXY TORCHE) SHOULD ONLY be used to heat the hinge in order ONLY to break the rust contact inside PLEASE DO NOT cut off hinges unless LAST resort guy,s. What gong has stated would be best & yes inox or penetrene or lanilon sprayed for a few days prior to removal would help BEST OF LUCK TO YOU ALL & HAPPY PULLING ( HA HA LOL) Grumpy xu1 ps, yes commodore pins are hollow so they use a pin puller through the middle & a 1/2 square piece of steel much the same technique though.
I recently removed mine after 37 years of sitting in same place, I think the picture of top pin Gong has shown = pin in the wrong way around, Mine were tap upwards for top pin & downwards for bottom pin.. I used WD40 and soaked for a couple of days then used a pin punch to hammer the pin flush with hinges, then got some thin stainless stell rod that I cut to size in order to hammer the pins all way out, Were hard to do but with each strike of the hammer could see them moving so I kept at it.... Pins were still good and not worn at all, But I still got a set of new pins for when it's time to re-hang those heavy doors..... Not the hardest thing I've had to do but it's right up there, Until I discovered the stainless rod around 5mm in daimeter and as they say All jobs are made easier with the right tools....
Hi Andrew
Sorry to disappoint you but your door pins are in the wrong way round, Gongs are correct.
Top hinge pin has the head facing down and bottom hinge has the head facing up.
Cheers
Dave
No Disappionments here Dave, Glad you set the record right & I will be sure to replace mine as per your recommendations & just goes to show these things were never intended / nor do they just fall out of the hinges....... Disappionted if nobody had corrected me and I had to remove new pins to make right again, But only after Gong had seen it and said "Those door pins are in the wrong way"......
1 user(s) are reading this topic
0 members, 1 guests, 0 anonymous users


