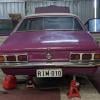
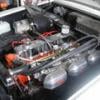
Lucky the lime green metalic GTR 1972
#251
 _BARRY JACKPOT_
Posted 11 September 2012 - 04:39 AM
#252
 _pico76_
Posted 11 September 2012 - 03:40 PM
#253
 _LONA-CK_
Posted 14 September 2012 - 06:15 AM
panel shops is the reason i started doing my own work.
anyways no need to rush getting it back together now and the car will turn out even better for this.
good luck
cheers gong
#254
 _Agent 34_
Posted 17 September 2012 - 08:44 PM
still no paint on this car grant??? so it would be fare to say your not makin it to bathurst with it, thats a bummer man
panel shops is the reason i started doing my own work.
anyways no need to rush getting it back together now and the car will turn out even better for this.
good luck
cheers gong
Yep , John still no car !
I can report that the engine bay is painted and the doors are swung and inside the door frames are painted.
I am pretty gutted as I tried so hard to get there, anyway way lets hope that the paint is worth the wait. The color is amazing and really glad that all this effort went into the car, just for the color
your right, really enjoying the last stages, but it's bloody hard work to pick up the ball and run some days, but were getting there.
#255
 _Agent 34_
Posted 27 September 2012 - 06:09 AM
Err no paint to report back yet so not sure what's happening there
But there has been plenty of movement at the station in other areas as I march on
1) got my rare spares rubber kit and talked about the door seals and he assures me that they are the new ones
2) got new tail light lenses
3) took the fuel line to be re zinc - as it had heaps of dis-colouration and i wanted it to look good
4) got the head light surrounds back from the restorers and he did an amazing job on the repairs and you cannot tell where the crease was across the lower portion of the rim- wasn't cheap - but worth it
the only problem is that the rest of the car trim needs polishing and the guy is closing down, he has given me another name to take the stuff to - so next week I'm off there to drop the rest of the stuff to.
the only question i have to get some feed back on is the radio ariel and whether or not to cut a whole in the passenger side guard, I'm not that keen on this and if anyone can tell me if the new radio 's will work without an ariel in the old position. I'm thinking of putting the radio in the boot, but this may be a lot later down the track with the car post finishing ?
1 more mill
#256

Posted 27 September 2012 - 07:58 AM
I mounted my cd player head unit under the dash, right up near the firewall... With a remote control and iPod connected in the glovebox, and hidden speakers in the back, the whole stereo is invisible
Looking forward to seeing this painted!
#257
 _Agent 34_
Posted 28 September 2012 - 04:55 PM
The story goes like this - few beers and a bit on ebay surfing and saw the nut that goes onto the push rod that goes onto the fork of the clutch.
bought the nut and smaller rod thinking that it was right - but the internal size was wrong.- bummer
So I took the clutch rod and the wrong nut to daniel from peninsular engine reconditioners to beg for some help with the machining to make it work.
He is such a bloody ledgend - he just made me a full new one on the lath in about 15 mns - no shit
The clutch is now fully re built and finished yeah !
the one that I bought was a Hg / HT one - so it's for sale !
Edited by Agent 34, 28 September 2012 - 04:56 PM.
#258
 _Agent 34_
Posted 29 September 2012 - 05:34 PM
1) the heater box went back to together today - I just need to adjust the foam that holds the heater core in place , the foam i have is too hard and the bottom is not sitting correct, it all works and shuts which is great
2) here is some photos of the headlight surrounds and the rear brake light surrounds - they are off for painting now
3) got the fuel line back and it looks smick
4) here is a photo of the two nuts
1 more mill
Attached Files
#259
 _mikecatts_
Posted 30 September 2012 - 05:23 AM
Getting closer...
#260
 _Agent 34_
Posted 01 October 2012 - 06:01 PM
Looking at the budget for shocks - it's $500 for a full set of Koni shocks adjustable ones. The original car came with K MAC sway bars Koni Adjustible shocks and seems like shelby springs as they were originally yellow.
so i decided to keep the shockers and just paint them to save some money at this stage - they seem fine and everything is working with the dampening.
it's amazing when you adjust the dampening of the rate of piston ( by pushing down and rotating the upper chrome sleve) how the rate of rise or dampening of the piston adjusts - cannot wait to start mucking around with the suspension, as I will be installing the same full set up back in the car and will have to see how the car sits.
Did the steering rack bits and pieces today read to bolt up.
It's not the right red - but it's the closest i had.
need to source some old school clamps for the rubbers on the steering
one more mill
Attached Files
#261
 _BARRY JACKPOT_
Posted 01 October 2012 - 07:36 PM
#262
 _Agent 34_
Posted 13 October 2012 - 05:18 PM
Yep did a lap of bathurst but it was on the monday after the big race and was in a Falcon station wagon BAAAAAAAAAAAAAAAAAAAAAAAAAHHHHHHHHHHHHHHHHH !!!
Anyway, thank god that I didn't kill myself trying to get there for that lap - bit of a bummer to the guys that were there, but sounds like the tarmac rally was a blast anyway.
Ok so back to business;
I need a photo of the front of someones car showing the brake line and where it goes off the two side rubber flexible hoses - so If someone can post great !
Painted the front disk ready for putting on tomorrow with heat resistant black paint.
Head light surrounds and tail light surrounds being painted
1 more mill
Attached Files
#263

Posted 16 October 2012 - 05:53 PM
Next time I might even think to turn the steering to full lock, LOL.
Pic is drivers front wheel.
Cheers

#264
 _Agent 34_
Posted 19 October 2012 - 04:59 AM
I cannot find the actual brake line , routing diagram from the hard steel lines OFF the flexible hose to the proportioning valve. John K gave me some but there are three that come out;
1) to the rear
2) to the left front
3) to the right front
just need the detail after it leaves the valve and goes down through the cross member around the engine mount
checked all the books and cannot find
cheers
#265

Posted 19 October 2012 - 09:02 PM
roger Dave thanks.
I cannot find the actual brake line , routing diagram from the hard steel lines OFF the flexible hose to the proportioning valve. John K gave me some but there are three that come out;
1) to the rear
2) to the left front
3) to the right front
just need the detail after it leaves the valve and goes down through the cross member around the engine mount
checked all the books and cannot find
cheers
Grant
I'll see what I can dig up over the weekend.
Cheers
Dave.
#266
 _2ELCS_
Posted 19 October 2012 - 09:30 PM
Have a look through my build thread ....maybe find what you need in there?
Wayne
#267

Posted 21 October 2012 - 04:58 PM
I have these from my car some time ago, do they help you?
Regards Simon


#268
 _Agent 34_
Posted 22 October 2012 - 04:30 PM
hit the jackpot - just what I needed thanks heaps for this one.
#269

Posted 22 October 2012 - 05:52 PM
No worries, just read the whole thread, what an awesome colour looking forward to seeing the end product.
Great work so far, well done
Regards Simon
Edited by debkar, 22 October 2012 - 05:52 PM.
#270
 _Agent 34_
Posted 03 November 2012 - 04:19 PM
Ok so today there was a strategic MAN CAVE move, it resulted in all the bits needed to re assemble the motor onto the K frame and then the BOX onto the motor.
I have a sort of winch in the garage to do this so i can move things around.
Bit of Bling Bling - got the headlight and tail lights back from Brock's 72 - thanks grant.
Pushed in the wheel bearings and now mounted the rotors.
And NO the car's not painted - don't ask.
My Dad passed away about 4 years ago and I keep using all his tools when I working on the car as it's AF, today there was this really old copper dolly I used to knock the bearing shells in to the hub. spins me out, I'm sure he is in the garage with me some days.
Attached Files
Edited by Agent 34, 03 November 2012 - 04:23 PM.
#271
 _BARRY JACKPOT_
Posted 03 November 2012 - 11:06 PM
#272

Posted 05 November 2012 - 08:26 AM
Edited by ljv8, 05 November 2012 - 08:28 AM.
#273
 _Agent 34_
Posted 05 November 2012 - 06:48 PM
chris - yep know what you mean.
steve - thanks it was one thing that I wanted to do was to create a reference to doing the resto on these cars for someone else so that they can have a base point to work off. it's been trying at some stages but it's coming together.
And without further Ado, the weekends work was doing some of the fun stuff with the motor and starting to bolt it all back together.
i have sussed out how to assemble the cross member and motor here and then lift off into the trailer once together with the gearbox.
the fan is really close to the harmonic balancer , and I'm not sure how much clearance is required, it's like 4mm off the bolt. It's a blue mtr with red fan
1 more mill
Attached Files
#274
 _tryhard_
Posted 05 November 2012 - 07:15 PM
#275

Posted 06 November 2012 - 10:20 AM
1 user(s) are reading this topic
0 members, 1 guests, 0 anonymous users


 View Garage


