LC Coupe - 350Chev, T400, 9in, AP and Skyline Brakes
#1 _ls1lj_
Posted 03 January 2011 - 10:05 PM
Thought it was about time that I started a build thread so here we go......
Here are some early pics of the car
More pics and progress to come.
Cheers
Ben
#2
Posted 04 January 2011 - 07:47 AM
#3 _73LJWhiteSL_
Posted 04 January 2011 - 07:57 AM
Steve
#4 _ls1lj_
Posted 05 January 2011 - 05:17 PM
Started having a look at solutions for my handbrake components yesterday.
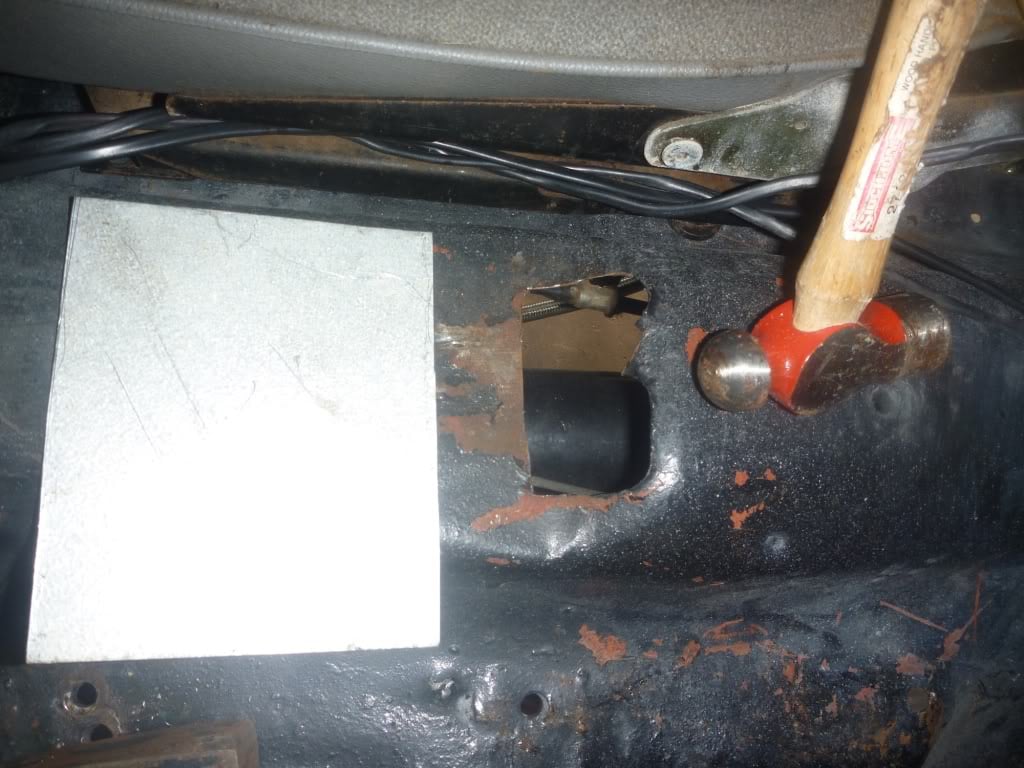
I inherited a nice hole that had been butchered into the tunnel behind the handbrake lever. The original handbrake cable was actually 3 pieces joined together with u clamps
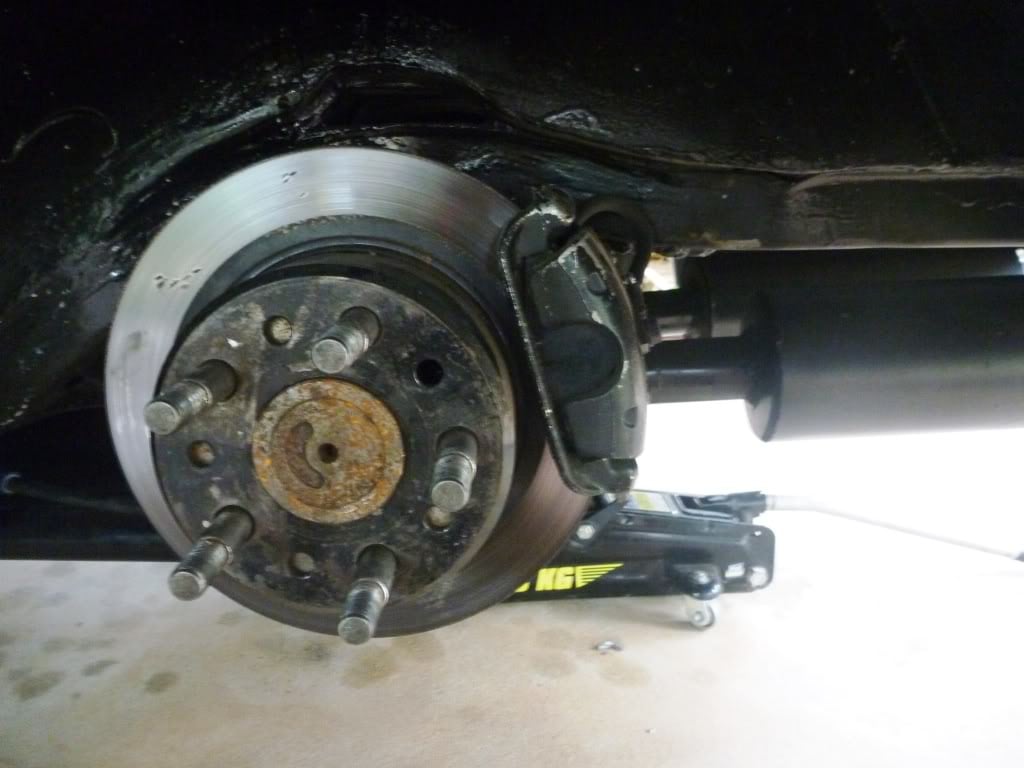
I have VR Commodore callipers, discs and backing plate currently fitted to my 9inch diff.
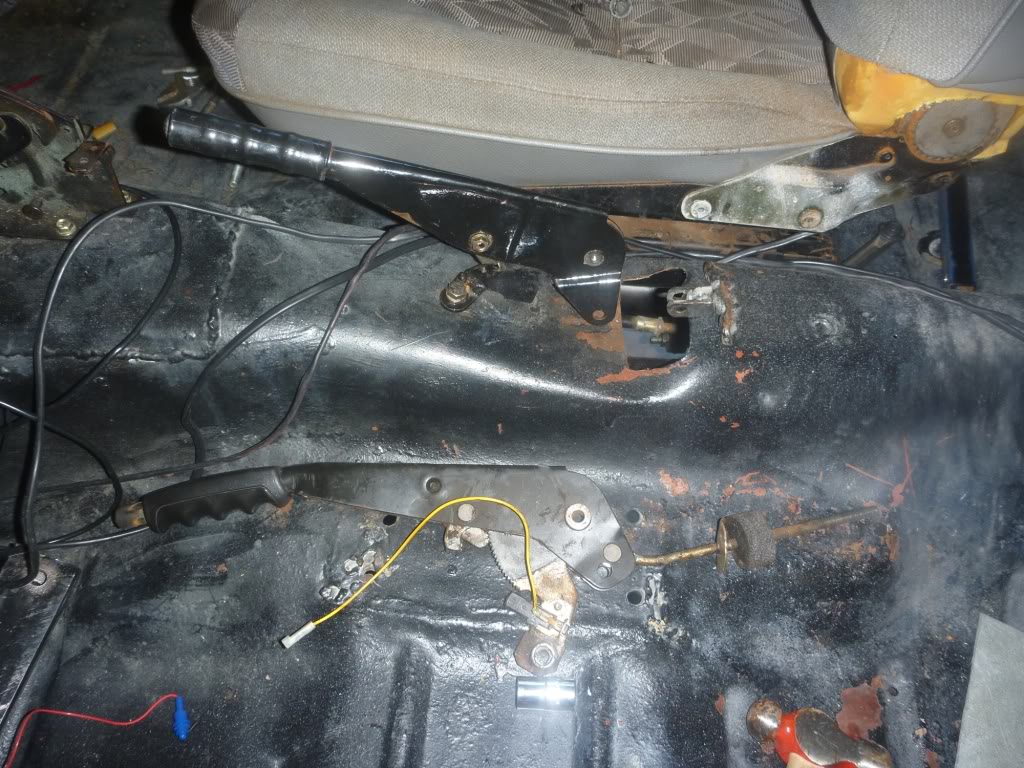
I read somewhere that a standard commodore VS wagon cable can be used without modification for this set up. I have a VR parts ute in the back yard so I ripped out the handbrake lever and cable off to see if i could use that. However when i dummy trialed it, it was way too long, no matter how I ran it under the floor. Maybe the standard cable works on the big Torana's, but I will need to get some new ends swaged onto the cable in this case.
I have a couple of options:
1. Use the original handbrake assembly and use two separate cables with threaded rod like original Torana or
2. Use the Commo one which has a one piece cable and a c braket/cable sleeve
The Torana handbrake assembly has alot of slop in it, but it would be good to use as many original components as possible and there are factory mounting nuts. However the Commo assembly is alot tighter and uses a long threaded rod which the handbrake attaches to. This is good as it can be adjusted from under the car, rather than trying to tighten nuts under the carpet like the original.
Undecide as yet, but after reading Dirtbags build thread and seeing his awesome metal fabrication skills I was inspired to give it a go myself. with no skills at all, I cut out a patch piece and had a go using the vice and hammer. All I can say is that Dirtbag makes it look easy, but my first amature attempt turned out ok, still needs more shaping and trimming but forgot to take a photo. Doesn't have to be perfect anyway as it will be covered with carpet.
Went out last night and got polaxed, pretty sure i was still drunk when i woke up at lunch time today haha. So hiding out in the aircon watching UFC DVD's today instead of working on the car.
#5 _ls1lj_
Posted 13 January 2011 - 03:59 AM
Finished off most of the chassis rails over the xmas break. The passengers side didn't fit that well and i had to straighten the original rail on the drivers side, but it ended up fitting better than the passengers.
Few photo's - Grind off washers
Noticed that my radius rods had been butchered to fit the starter motor in and my extractor also sit on top of them also, which the RTA might tell me I need 10mm clearance for to pass rego, hopefully they won't see it�.
Found a bit of rust in the drivers rail which I cleaned up
Had to disconnect fuel and brake air lines that had been attached with what seemed like hundreds of tex screws
Had to remove the brake bundy tubes to install the kit and then reroute them.
I installed the rails by myself with the engine in, so the worst part was sliding the CRS rails up in between the original chassis and the radius rod arm. I ended up using a ratchet strap to pull the radius arms in a bit and also jamming a screw driver under the bush.
I then used trolley and scissor jacks to jack the rails into place.
Unfortunately the back cross brace that runs between the rails fouls on the exhaust, so I have left it off for now. Will try and get it through rego without it then fabricate a new one out of box section once the car is on the road.
That's it for now, more to come.
Cheers
Ben
#6 _dirtbag_
Posted 13 January 2011 - 06:26 AM
Good job . Keep up the good work
#7 _honda400_
Posted 13 January 2011 - 11:34 AM
I'm glad the privies owner of my lj put the rail kit in, it looks like it would of been a pain to put in alone.
For my hand brake I used Torana hand brake cables and got the cable guy to put the Commodore ends on for me.
Keep the updates coming.
Lee.
#8
Posted 17 January 2011 - 12:42 PM
Cheers for the pictures of the CRS Kit too. I have some fun ahead of me.
#9
Posted 17 January 2011 - 12:45 PM
#10 _ls1lj_
Posted 17 January 2011 - 05:11 PM
That's looking awesome Ben. It's funny nearly all the VE commo utes up here are that colour and I thought I was sick to death of it until I saw it on your LC. Looks excellent. Really suits it.
Good job . Keep up the good work
Cheers Dirtbag, I haven't seen any holdens up here that color at all, there is a Fraud festiva and a Mazda Color I think it is that is fairly similar also.
Looking good mate, I like the interior. What's the lower dash made from or out of?
I'm glad the privies owner of my lj put the rail kit in, it looks like it would of been a pain to put in alone.
For my hand brake I used Torana hand brake cables and got the cable guy to put the Commodore ends on for me.
Keep the updates coming.
Lee.
Thanks Lee the lower dash is just shaped sheet metal. If I were to redo it I would weld some brackets on the back so the it attaches under the dash, not on the front like mine. The Chassis kit was a pain in the ass to fit by myself without a hoist.
Using the Torana handbrake cable would have been easier, but I was being a tight ass and wanted to use the FREE VR one I had. Still don't have it 100% sorted yet, might have another go at it tomorrow.
Ben nice car! Mine is the same colour with a little more gold pearl in it.
Cheers for the pictures of the CRS Kit too. I have some fun ahead of me.
Yeah mate the CRS instructions are really crap and i had planned on doing a how to install type thread as there was not that much info i could find on here. However someone borrowed my camera so didn't get enough photo's in the end. if you have any questions when you go to put yours in fire them this way.
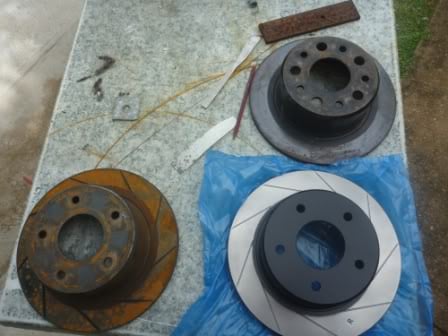
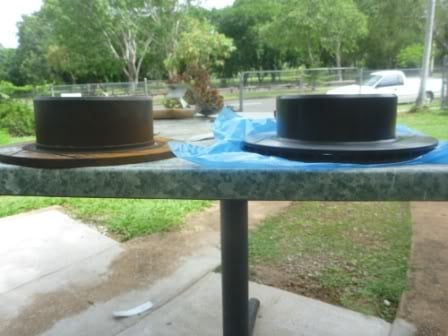
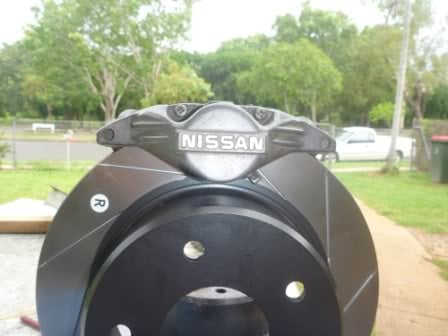
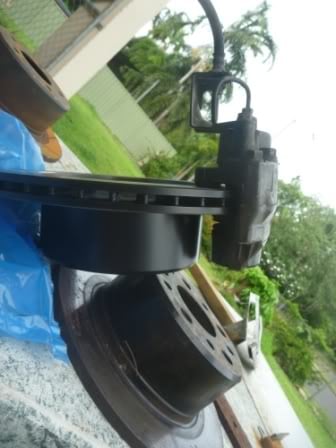
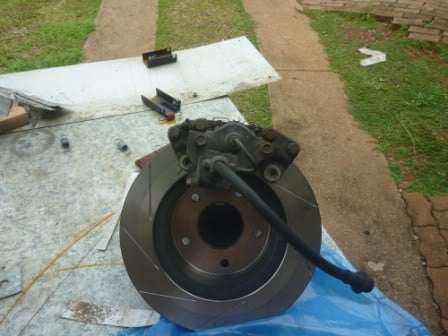
As for the brakes I have hub adaptors from Mr Spares, 5000 series DBA 300mm VT discs and 4 pot AP racing callipers for the fronts. I have been too busy with other parts of the car (actually too lazy haha) so haven't sorted out the calliper brackets yet. As for the back I got some R32 twin piston callipers and a rebuild kit off ebay and ordered VN clubby vented discs for the rear. However i ordered these like two months ago and haven't got em yet wich is pretty annoying so haven't trialled them yet. There is a pretty good tutorial on front skyline brake install on here that is worth a look.
Have been playing with the seats and handbrake a bit over the last week or so, but don't have the camera with me so photo's to come later
Cheers
Ben
#11 _ls1lj_
Posted 22 January 2011 - 05:17 PM
#12
Posted 22 January 2011 - 09:48 PM
Attached Files
#13 _ls1lj_
Posted 23 January 2011 - 02:33 PM
Have you got up to the real fun part of the chassis kit yet?
Yeah it's all in there and all of the holes are drilled. Got the bolts through into the engine bay and the cab but only finger tight as i need a second person to help me. was considering using a 3mm spacer inbetween the kit rail and the firewall depending on how it pulled the rail in. will see when i tighten them, but will use the spacers if it induces too much tension.
A little hard to see in your pic but it looks like you did not have to grind anything off the lip above the uper control arm. I ground part of that lip flat to install mine so it was easier to get in there and so it would sit flush.
Got a full set of new seatbelts with the new plastic style clip, some chrome buffing compound and ordered 500 bucks worth of bits and pieces from rares to finish all the little bits off. Also ordered a Deka sealed batttery to go in the boot, will have to have a flip through the NCOP guidelines to see if i still need a battery case as well even though it is sealed.
#14 _Driver 73_
Posted 06 February 2011 - 05:05 PM
Great colour choice you made. I have a green (March 17) LJ with a mild 308 in it.
The 308 is heaps of fun to drive. BUT a 350 chev is another level all together lol
#15 _ls1lj_
Posted 22 February 2011 - 10:09 PM
Thats one tough LC Torana ls1lj
Great colour choice you made. I have a green (March 17) LJ with a mild 308 in it.
The 308 is heaps of fun to drive. BUT a 350 chev is another level all together lol
Thanks Driver
Yeah i rekon march 17 is one of the best factory colors
Have got a few bits and pieces finnised off in the last month, have been busy with work and cyclones seem to follow me around the country haha.
Got the handbrake sorted, put all the running gear back in the front end. Also brought some recaro style, but no name brand bucket seats that were brand new, just a little dusty for 150 for a pair including rails. Mounted up the drivers side but ran out of material for the passengers side.
I had to take the twin exhaust off at the flanges located mid cabin when i installed the new handbrake cables. and couldn't resist firing it up. Was loud as
F%&k and fairly cranky. Was going to take it for a joy ride before i left for Perth, but it didn't fire up. So poored a little fuel down the carby and cranked it again. It spluttered a little which i didn't think anything off as i had rerouted the fuel line so it had been drained. Turned it over again, didn't fire now i was suspicious as it usually fires up straight away. So a bit more fuel down the carby, turn it over again and smoke started smouldering out from under the dash. Couldn't exactly see where it was comming from so quickly turned off the ignition and disconnected the battery. I was so lucky it didn't go up in flames!
I'm not surprised at all as almost every part of the loom had been butchered with wires left with sections of unisulated wire. I had been taping these up as i found them and I had been planning on rewiring the whole car anyway. Guess it will be on top of the list when i get back.
Just glad my pride and joy didn't burn to the ground before i even got it registered.
#16 _tyre fryer_
Posted 24 February 2011 - 11:03 PM
Wow, that sucks to hear. Keep on going, it's such a nice build. Good pics of the chassis kit btw, shows what's really involved.
#17
Posted 03 April 2011 - 05:37 PM
Just curious, how did you end up sorting the handbrake install? Do those R32 calipers have the handbrake mechanism build into them?
What size are your front wheels and tyres? Do you have any clearance issues with the fronts?
Cheers,
Brett.
#18 _ls1lj_
Posted 23 April 2011 - 09:44 PM
Nice build Ben. Love the colour.
Just curious, how did you end up sorting the handbrake install? Do those R32 calipers have the handbrake mechanism build into them?
What size are your front wheels and tyres? Do you have any clearance issues with the fronts?
Cheers,
Brett.
Thanks Hybrid, haven't been able to do much in the last month or so due to work but the handbrake is all in and working. The R32 rear callipers don't have the handbrake built in only the R31 units do i think. However the R31 callipers run thinner? solid discs? from memory but don't take that as gospel. I have VR-VS commodore hand brake backing plates, discs and callipers. The VN Clubby rear discs were vented, but used the same handbrake mechanism, so will bolt straight ontoa VR/VS setup.
If youare running a standard tailshaft then i would just use the torana handbrake with the original floor mounts and just get the handbrake end reswaged with square hoop for VR rather than ball style for torana. if you have a heavy duty tailshaft and your car is lowered then I would set up the car ride height as you would want it, get a pasanger and a fat mate to sit in the back. simulate going over a few bumps and get a third mate to see if the tail shaft bottems out and engages the handbrake. There is a good chance it will and you will need to remount where the handbrake attatches to the rear of the tunnel to get more clearance. It is probably easier to run the original torana handbrake cable. I also tried to use the VR handbrake lever so only 1 threaded rod went through the floor and the two handbrake cables attached to a flat plate. This would have been nice so you didn't have to frock around with adjusting nuts under the carpet, instead it would be easily accesable from under the car. however the flat plate fouls on the bracket fot the front seats belts where they bolt to the tunnel so i scrapped that idea. In the end i used the original torana handbrake lever and the VR handbrake cable with shortened outer sheath and had threaded section swaged on the handbrake end of the cable.Istillhaven't made the brackets that retain the handbrake at theback of the tunnel but it works good enough for now.
As for the fronts with the HQ brake setup i had 7inch rims with 5inch backspace that cleared everything with the rim and the trye, however the weights for balancing the rim hung off the back and clash with the upper control arm on full lock. Easy fix to get the weights mounted in the rim further. I assume there would be some offset difference with the VT style hub converters but have not checked. Had the conversion hubs fitted up on stands but not at ride height to check so haven't ordered my wheels yet. I also thought i would be able to redrill my conversion hus to HQ but i don't think there will be enough meat on them so will have to buy some standard HQ discs and machine off the disc part so i can run commodore style discs without integrated hub. Again offset will be different so have to get that sorted before i buy rims.
#19
Posted 23 April 2011 - 11:15 PM
#20 _ls1lj_
Posted 24 April 2011 - 01:14 AM
Sweet build LS1LJ, Just curious how do you plan to get this beast registered ??? Correct with the fact that Missan R31 have the handbrake incorporated into caliper & also run a smaller / solid disc which is exactly what I have on my 9" into LJ and have been watching this thread from start to get some ideas on how to hook up the handbrake cables...... I got a set of hq cable joiners that am thinking of welding onto the r31 handbrake mechanisms so will be able to use the ball ends on torana cables, But hadn't thought about the thick walled tailshaft fouling on the cables so will have to see how that pans out and maybe go similar route to your setup...... Keep up the great work Dude and thanks for keeping us watchers upto date with your progress.......
I have already got approval in pricipal for 350 chev/T400/9 inch/tubbed with HQ front/VR rear discs and chassis kit. The guy at the RTA said they prefer an LS1/2 as it has more emissions junk on it. Even though Darwin is bassed on NCOP the guy recons that i may even be able to sneak an LS3 through. He said i would seriously have to upgrade the brakes though, when i told him i already had 4 pot ap's and 2 pot skyline brakes in the shed he almost fell off his seat. He said you might as well submitt something and there is a good chance it will go through. First goal is to just get it back on the road then i will apply for LS3. That way i can still mock it up in the 4 door and just bolt it in when its ready but that seems like it will be a while away at this rate haha.
#21
Posted 24 April 2011 - 01:36 AM
#22 _hp179block_
Posted 24 April 2011 - 01:29 PM
I would have thought trouble with No Heater, No External Fuel Filler just to start with.... But hey I guess it all depends on who you speak to and hope you have similar luck when it comes time to putting plates on that weapon
Yeah, but this is in the Northern Territory...
My brother (in Katherine) has a 69 Valiant Coupe with 383 Dodge, full registration and no engineer cert's
Edited by hp179block, 24 April 2011 - 01:29 PM.
#23
Posted 24 April 2011 - 02:10 PM
#24 _ls1lj_
Posted 25 April 2011 - 02:36 PM
I would have thought trouble with No Heater, No External Fuel Filler just to start with.... But hey I guess it all depends on who you speak to and hope you have similar luck when it comes time to putting plates on that weapon
Yeah will need 12v hair drier. I talked to him about the tank being in the boot and he said that you could work around it if you had the boot completely sealed with the tank rollover vent mounted outside the boot away from the exhaust. They are pretty laid back, the guy said i would have to jump through a few hoops but a fully blown engineers report is not always need depending on the quality of the workmanship. It's all good with verbal communication but i'm sure they will tear strips off it when i take it for rego. I'm not taking it as gospel, but we'll see..........
#25 _ls1lj_
Posted 01 May 2011 - 10:29 AM
The gen III alloy LS1 blocks were introduced in 1997. Between 97 and 98 the first blocks had thin sleeves and could only be machined out 0.005inch with the 99-04 gen III's being 0.10. The LS1 were upgrade to the LS6 steel block gen III which was released in the corvette and featured better crank case breathing at higher rpm's. There were a heap of crap truck variants also that we didn't see in oz. They had cast aluminum pistons instead of the hypereutectic ones (cast aluminum with silicon added). There is about 40kg weight difference between the steel and alloy blocks. The LS6 style heads had cathedral style ports and are much better than the stock LS1 heads. The intake manifold flows much better than the stock LS1 and is considered the best factory cathedral port manifold. The LS6 heads also had a smaller chamber giving increased compression ratio.
The gen IV LS2 (6.0L) alloy block was based on the LS6 with upgraded oil galleries for better oil distribution. In the gen 4 blocks the cam sensor reluctor is moved from the rear of the cam to upper timing gear and were machined for DOD. Basically there are electronic solenoids that shut off the oil flow to disengage the lifters for half of the cylinders. Knock sensors have also been moved and are not interchangeable between gen 3 and 4. The crankshaft reluctor wheel was also upgraded from 24 tooth to 58 tooth so the PCM had better resolution to aid VVT. An identical 6L iron block was also made. The LS2 has LS6 style casting head and was the last of the cathedral port heads made. The LS2 intake roughly flows as much as the LS6 manifold but the throttle body was upgraded from 78mm in the LS1 to 90mm in the LS2. Found in 2006+commodores, some Monaro's apparently and2005-2007 C6 corvettes
The L76 (6.0L) has DOD and is the cheapest to buy. If you want to cam it you have to throw away the DOD lifters and associated gear so you are basically wasting your money if you intend on installing a non VVt cam. VVT does have some merit and comp cams now have cams available which have surpassed the non VVT cams in terms of cam only HP gains. The L76 shares the same block etc as the LS2 but has LS3 style heads. The intake manifold for the L76 was the first manifold released with rectangular ports and I believe was designed in oz and exported to USA for limited vehicles. It has a 90mm throttle body. Production of the L76 has now ceased.
L98 (6.0L) is a gen IV alloy block the same as theLS2/L76 and uses LS3 style heads. I believe it uses the LS3 style intake manifold? DOD has been disabled
The LS3 (6.2L) is an improvement on the gen 4 6l blocks and can be machined out 0.020. It has LS3 casting style heads are very aggressive and are god for 600HP stock. It still retains the 90mm throttle body but massive air flow gains were made. Complete intake port air flow increased 17% over the LS2 head. If you look at a LS3 manifold next to a LS1 manifold there is a notable size difference. It has a bigger stock cam upgraded valve train and larger injectors. To date this is the best value for money stock LS engine GM has produced and should be you first choice unless you want the big cubs of the LS7.
LS7 (7L) are alloy and use a dry sump system but can be run wet also. All gen IV crank, cam and heads will bolt straight up and the LS7 has improved forged 6 bolt main caps. The problem with them is that they have pressed in iron cylinder sleeves, whereas all the other gen 4 blocks the sleeves are set before the block is cast. LS7 blocks are not recommended for nitrous or high psi forced induction because of this. This is why the LS9 (supercharged) engines were based on the ls3 block. The LS7 heads have offset rockers and runners that bolt directly to the head rather than the usual rail system. The stock LS7 heads have a raised rectangular head port which is different from the LS1/LS6 and LS3 style heads so if you use the LS7 heads then you need the LS7 intake and exhaust manifold. The LS intake manifold has huge valves and will only work with engine bores grater than 4.1 inches. The LS7 intake manifold has the highest airflow of al GM LS manifolds. Found in 2008+ E series W427 and 2006+ C6 Corvettes
The LS9 (6.2L supercharged) uses a dry sump and oil squirters for piston cooling and was loosely based on the LS3.
There are also the aftermarket blocks made by GM.
The CR5was designed for Le Mans and had the gen 3 style cam sensor set up. I t had billet main caps and 4340 studs. The LS7 block took a lot of its design features from the CR5 but the LS7 has a much lower standard of machining.
The LSX iron Bowtie block was released in 2007 and has been labeled as bullet proof. With machining it can be slapped together with anywhere between 364 and 454 ci. Heads for this block are not interchangeable with the aftermarket warhawk blocks???. The Oiling system has been further upgraded so it feeds the main bearings separately before it feeds the lifters which is also handy for solid roller setups.It also has 0.020 taller deck than normal gen4 blocks. A tall deck version is also available (1/2" taller) up to 510ci
Cheers Ben
Edited by ls1lj, 01 May 2011 - 10:37 AM.
1 user(s) are reading this topic
0 members, 1 guests, 0 anonymous users