SINGLE CAB KOMBI UTE V8 BUILDUP
#76
 _BAILLIE_
Posted 07 April 2011 - 06:26 PM
#77
 _dirtbag_
Posted 07 April 2011 - 07:27 PM
#78
 _nicko61_
Posted 24 April 2011 - 10:12 PM
#79
 _stcos85_
Posted 05 May 2011 - 08:47 PM
Great work so far on your project so far. Any updates
#80
 _roxzey_
Posted 11 May 2011 - 06:10 AM
#81
 _dirtbag_
Posted 11 May 2011 - 08:23 AM
#82
 _roxzey_
Posted 11 May 2011 - 02:51 PM
#83
 _dirtbag_
Posted 11 May 2011 - 05:58 PM
I did clean all the metal areas, re rust convert and etch primed them.

Looks good with a bit of primer. It will need a tiny bit of filler around the edges but nothing too drastic.

I think the interior will look pretty cool once it's all painted body colour.

I also primed the new rear wall I made, inside and out.


I can't wait to get into the really fun stuff. Hopefully soon!!!
#84
 _mick74lh_
Posted 11 May 2011 - 06:05 PM
#85
 _dirtbag_
Posted 07 June 2011 - 07:38 PM
I started by checking what I could cut out of the engine bay.
The lip that goes around the engine bay where the air cooled engine's tin ware used to seal against isn't needed any more, so I'll cut it off to gain a bit of extra width in the opening.
I also cut the rest of the inner panels that were above the engine bay.

I also cleaned up the chassis rails.
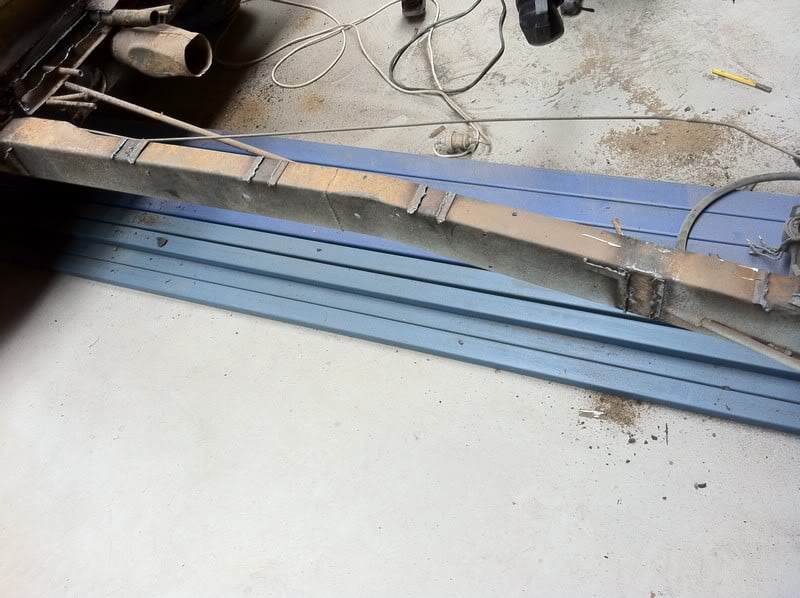
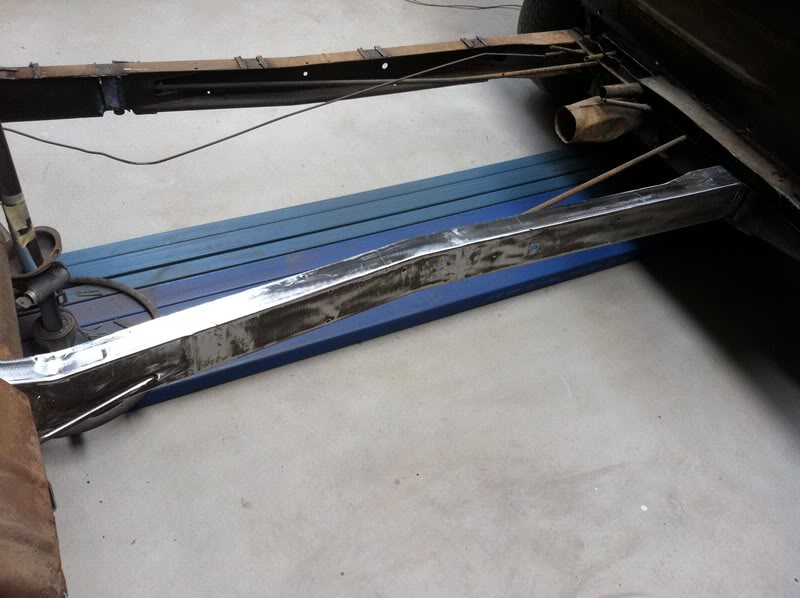
This is where the battery used to sit.

Here's the bits that were siliconed on removed. Nice repair : )

I removed all the old bits and ended up with a nice big hole.

How good is this?

There is also a bit of rust in the chassis rail, next to the old battery tray.

You can see here how much room can be made by removing the lip around the engine bay.

I got most of the metal trimmed out before I needed to do something else.

I thought I'd go back to the rear of the cab and finish cutting the crappy bits out.

More structural fibreglass : )

All gone!
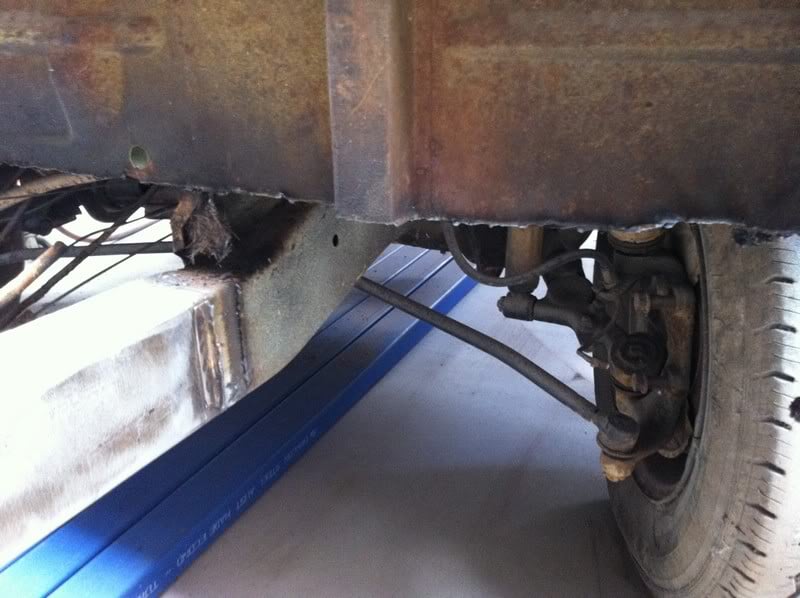
The inside of the B pillars needed a bit of rust repair.
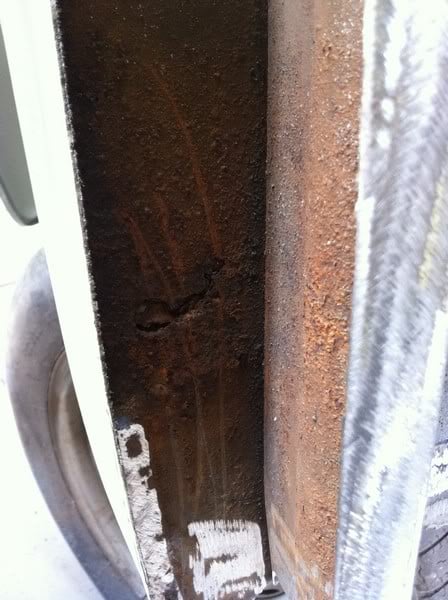
Here's the rust fixed, and a new lower section made from 2mm made and fitted. this will be the base for the new cab support.
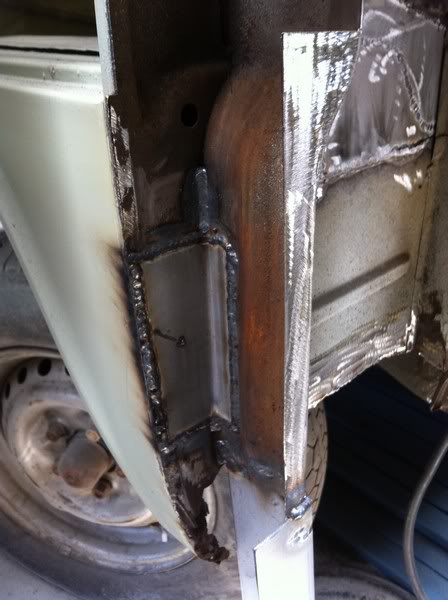

Here's the new piece of 75x50 with 2mm wall welded into place. It's good to finally be putting metal into this thing instead of constantly removing it.
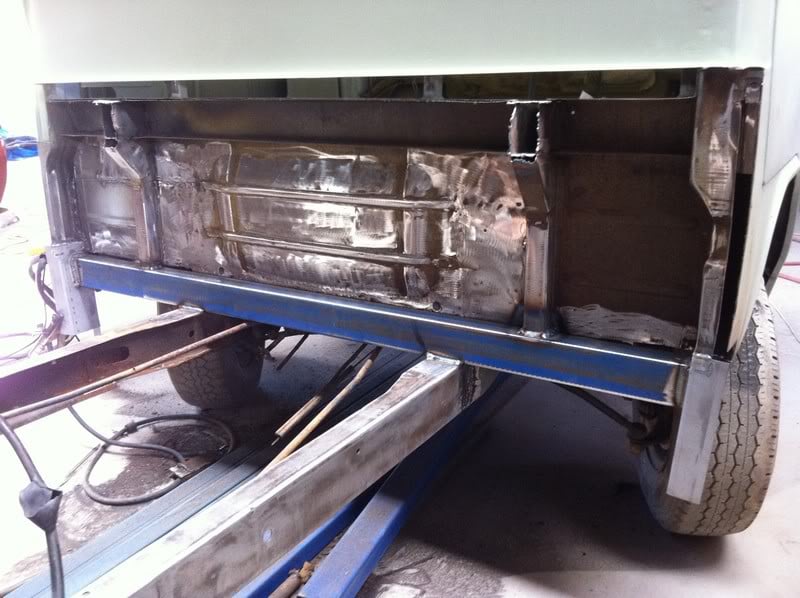
I'll fold some angle pieces to join the rear cab wall to the new support.
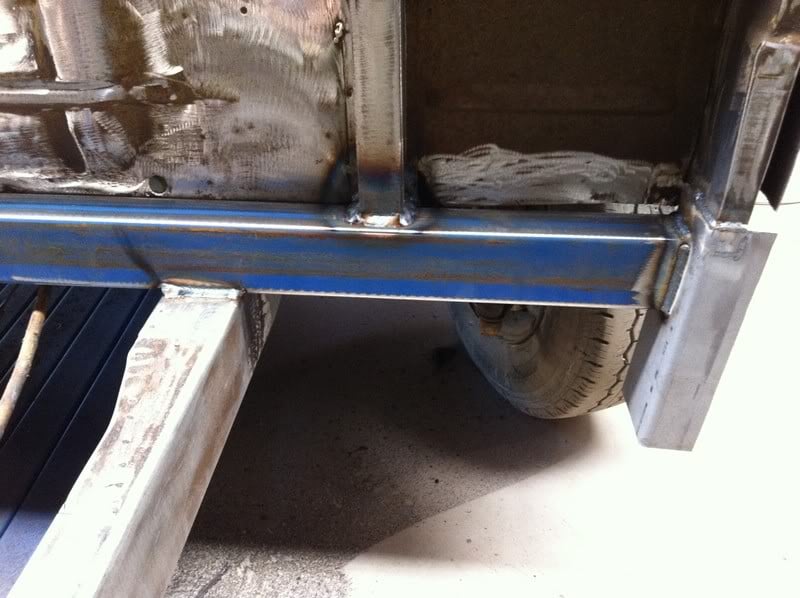
That's it for now.
#86
 _Lamo_
Posted 12 June 2011 - 09:12 AM
How good is this?
Wow. Looks like one of my welds.
Well done Dirtbag!
#87
 _TUFF75LH355_
Posted 12 June 2011 - 10:24 AM
#88
 _dirtbag_
Posted 12 June 2011 - 10:45 AM
#89
 _TUFF75LH355_
Posted 12 June 2011 - 05:55 PM
#90
 _dirtbag_
Posted 22 June 2011 - 07:54 PM
I added the front outriggers from the chassis to the base of the B pillar.
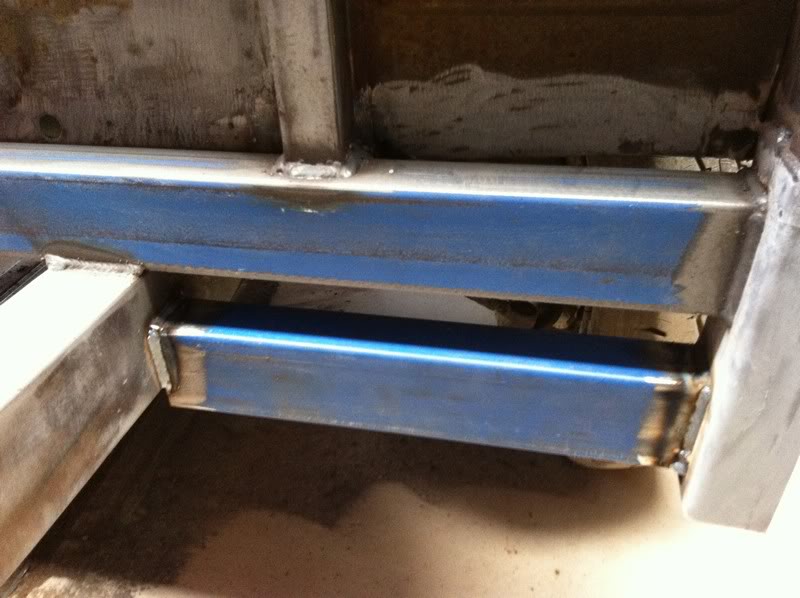

I then welded a piece of 25x50mm box along the front of the rear section. I'll join the rear floor to this.
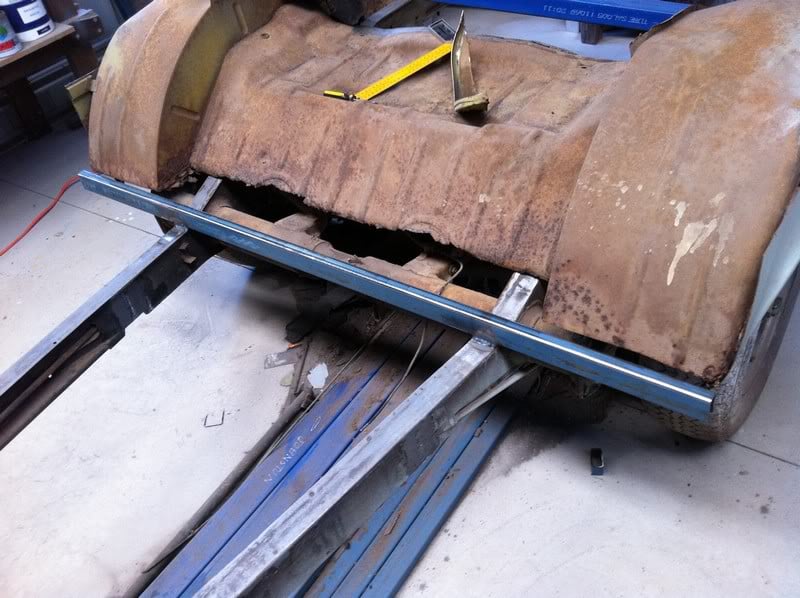
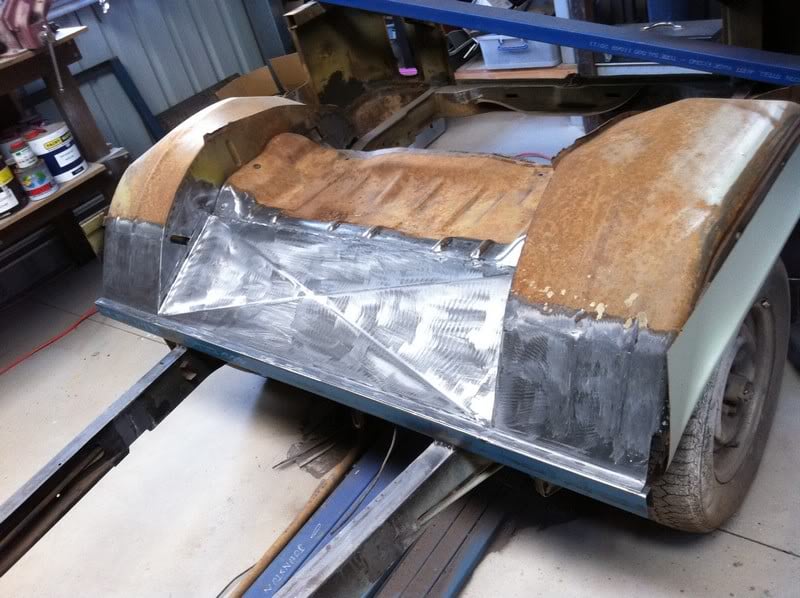
I started by cutting the front of the tubs off and fabricated new pieces. I also cut the middle section of the floor out as well.
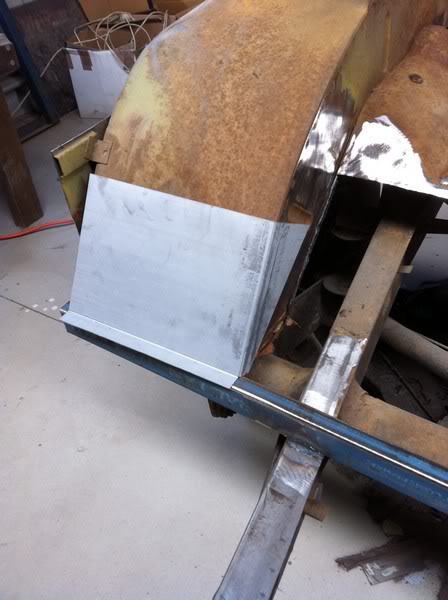
I hole punched some holes along the bottom for plug welding and bead rolled some lines into it to match up with the original piece.
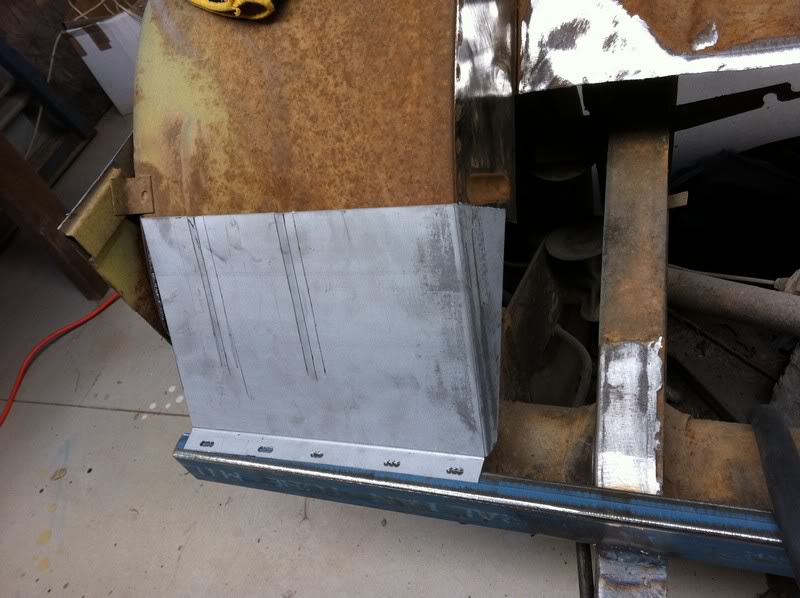
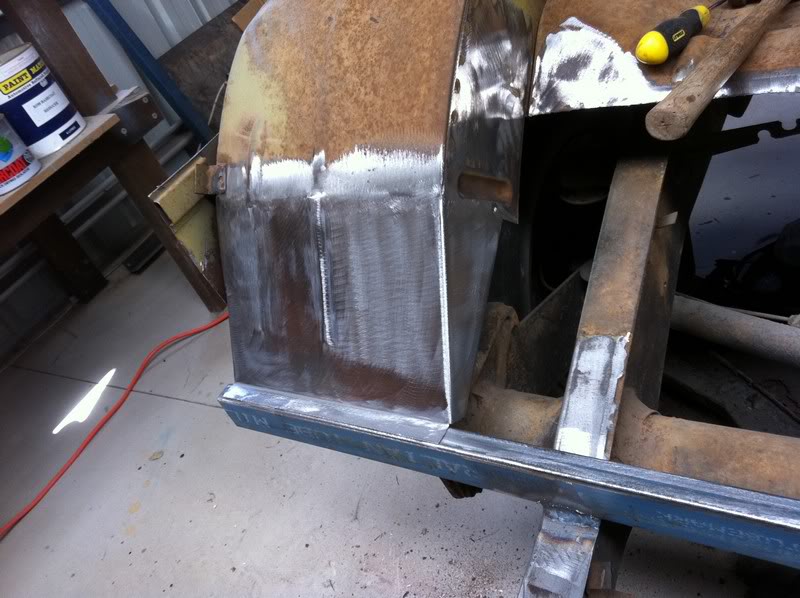
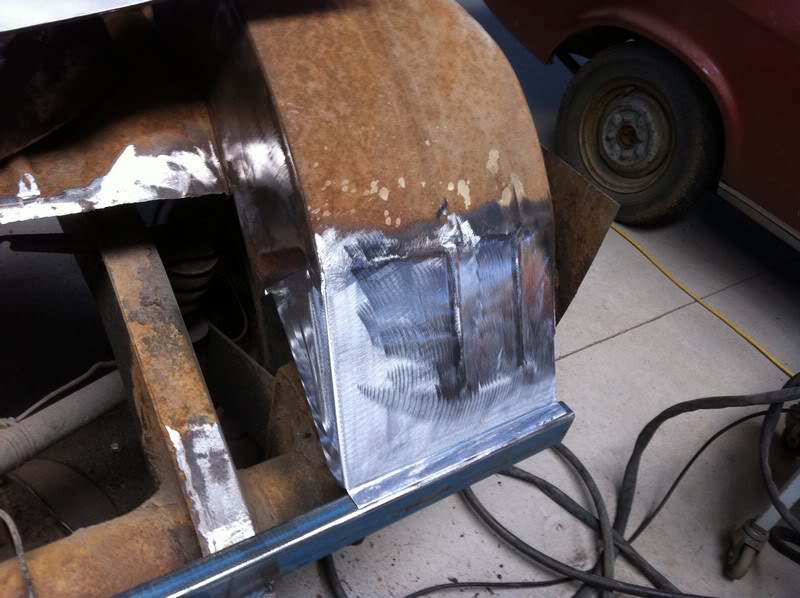

Here's the new centre piece in place.
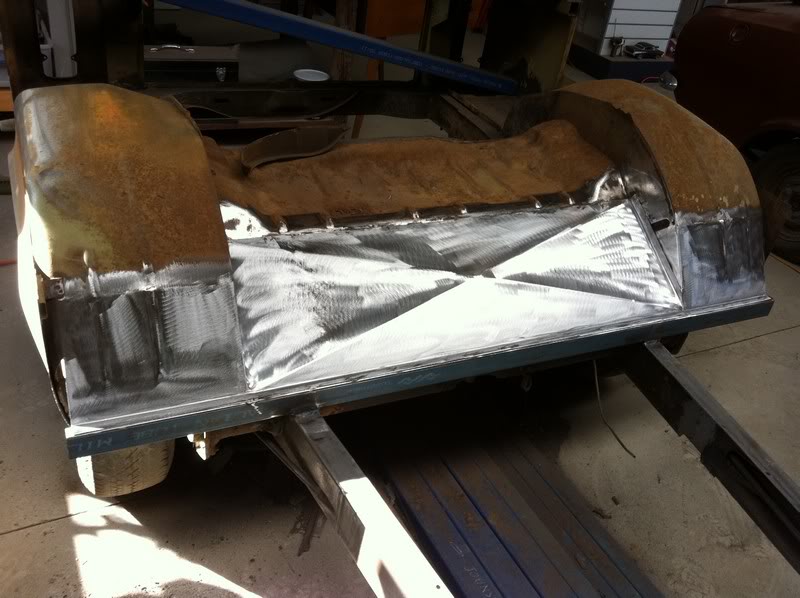

I still need to fix the outer edges, but apart from that this bit is done.
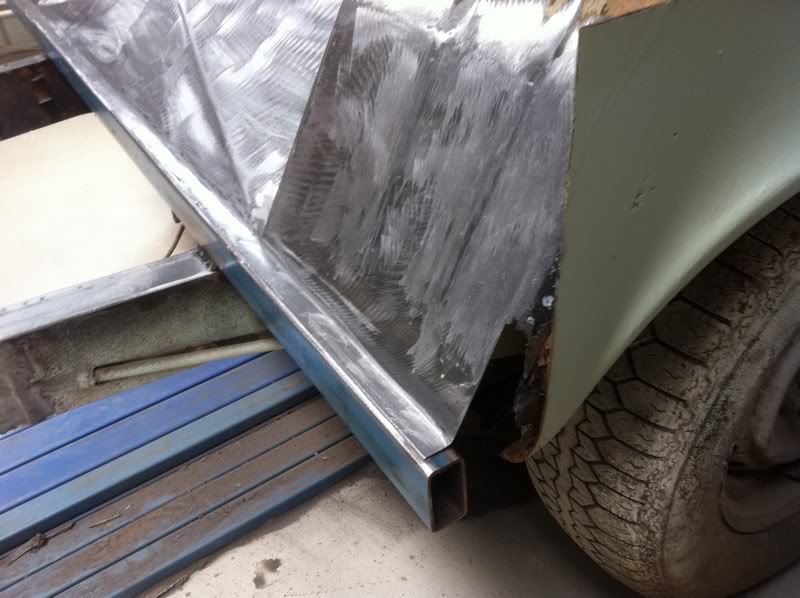
Some rust converter.
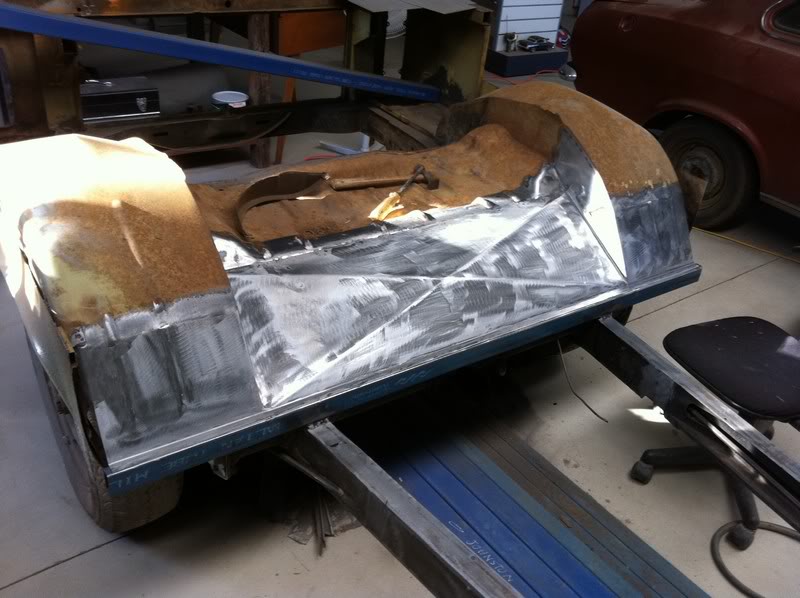
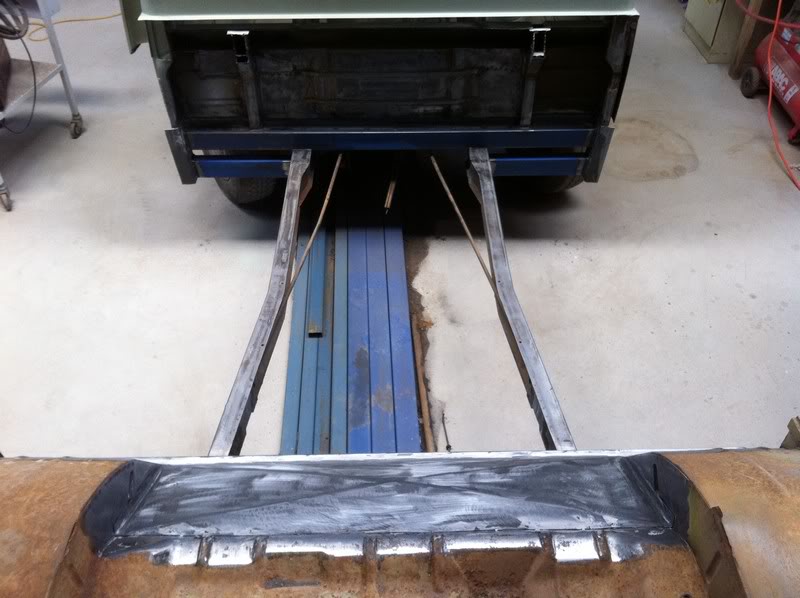
I then made up some pieces to join the lower part of the rear cab wall to the new crossmember.

After some welding and rust converter.

Now I just need to fix this big hole in the middle : )
#91

Posted 22 June 2011 - 08:03 PM
That looks horrible,just like a poxy bit of ductwork.
Every other thing you have done on this so far is trick as,but I reckon you dropped the ball on this one.
Sorry,mate,
#92
 _Viper_
Posted 22 June 2011 - 08:16 PM
Is that all the chassis is on these things in the middle? Doesnt the motor sit in that middle section? Does the engine become a stressed member? or is there other re-inforcement? Looks like it could almost fold in half.
Besides my stupid observation the rest is great, matched into the wheel tubs quite well.
#93
 _jabba_
Posted 22 June 2011 - 08:21 PM
I wish i had a nice big panbrake, i need to put some creases like that in the sheet metal on my trailer canopy.
#94
 _dirtbag_
Posted 22 June 2011 - 08:36 PM
Geeze mate,all that lovely stylised metalwork and then you weld in a crossbreak?
That looks horrible,just like a poxy bit of ductwork.
Every other thing you have done on this so far is trick as,but I reckon you dropped the ball on this one.
Sorry,mate,
To each their own WOT. If you can see any of these pieces when it's all finished, good luck to you : )
I put the crossbreak in (big X shape on the new middle section) to stop the panel becoming drummy, that's all. It will never be seen. Same with the new tub sections. I only put the swages in for my own amusement : ) hahaha.
btw, this piece basically is a poxy piece of ductwork. It's only there to let air flow through the radiator and over the crossbreak bit and through the engine bay.
Viper, the motors sit in the very rear, behind the back wheels. The middle section on a ute is normally a storage area accessible through a huge ugly door in the passengers side. This will have no door, and the part between the chassis rails will have no floor. There will just be a radiator in there at a 45 degree angle : )
#95

Posted 22 June 2011 - 08:45 PM
They serve their purpose well,but have zero style.
Which this car otherwise has heaps of.
Its a pet hate of mine,like checkerplate runningboards on hotrods.An industrial finish.
I hate checkerplate anywhere on a car actually.....Looks fine on the floor of schoolbusses......(runs and hides again....)
I will shutup and stop bitching now.
#96
 _dirtbag_
Posted 22 June 2011 - 09:29 PM
I'm confused now though. You say this car has heaps of style? hahahaha. That's funny : )
Keep the bitching coming though. It amuses me greatly. If no one had an opinion it would lead to very boring reading hehehe.
#97
 _Viper_
Posted 22 June 2011 - 09:48 PM
#98
 _dirtbag_
Posted 22 June 2011 - 09:56 PM
#99
 _Bomber Watson_
Posted 22 June 2011 - 10:06 PM
Or a couple of smaller radiators down the sides.....
I know you cant do it for legality purposes just throwing ideas out there.
#100
 _dirtbag_
Posted 22 June 2011 - 10:10 PM
1 user(s) are reading this topic
0 members, 1 guests, 0 anonymous users


