SINGLE CAB KOMBI UTE V8 BUILDUP
#101
 _cruiza_
Posted 23 June 2011 - 09:43 AM
enjoying your efforts as always, I have a question for you, not a criticism because I know better then to criticise an unfinished project.
when I look and the Kombi I see the bog box cab at the front and then a big heavy engine bit bit at the back joined by two bits of 'C' section. This looks to my untrained eye to have no structural strenght and would bend and twist easily. ( I have been watching American Hotrod)
Are you planning to box the chassis rails
add diagonals
add addition rails parallel to the current ones
regards
the big C
#102
 _dirtbag_
Posted 23 June 2011 - 10:05 AM
Good questions. The simple answer is, cars that flex in the middle are more comfortable : ) hahahaha
OK, seriously, the chassis is actually a box, it's just that the inner wall isn't in line with the edge of the rail. Having said that, there is also another set of rails to go in that I've removed. The normally run along the underside of the tray, but with everything on this car being so knackered, I just removed the lot. I'll replace them with some more of the thick wall 50x75 RHS.
You can see where the old rail was in this next pic. You can also see that the chassis is a box section in this pic too.

In this next pic, the square bit sticking out where the orange paint is in the foreground is where the top rails join in at the back. There will also be a few pieces of box section joining the two sets of rails together.

So when are you coming down this way again? You'll have to check out the new place : )
#103
 _Bomber Watson_
Posted 23 June 2011 - 10:10 AM
#104
 _dirtbag_
Posted 23 June 2011 - 01:17 PM
Edited by dirtbag, 23 June 2011 - 01:18 PM.
#105

Posted 23 June 2011 - 01:30 PM
whats that thing between the chassis rails in the above pic, just behind the cab, kind of looks like a muffler?
#106
 _cruiza_
Posted 23 June 2011 - 02:51 PM
and thanks for the answer Tim
TC and enjoy the new house
#107
 _dirtbag_
Posted 23 June 2011 - 05:53 PM
Hey, get back to work tim!
whats that thing between the chassis rails in the above pic, just behind the cab, kind of looks like a muffler?
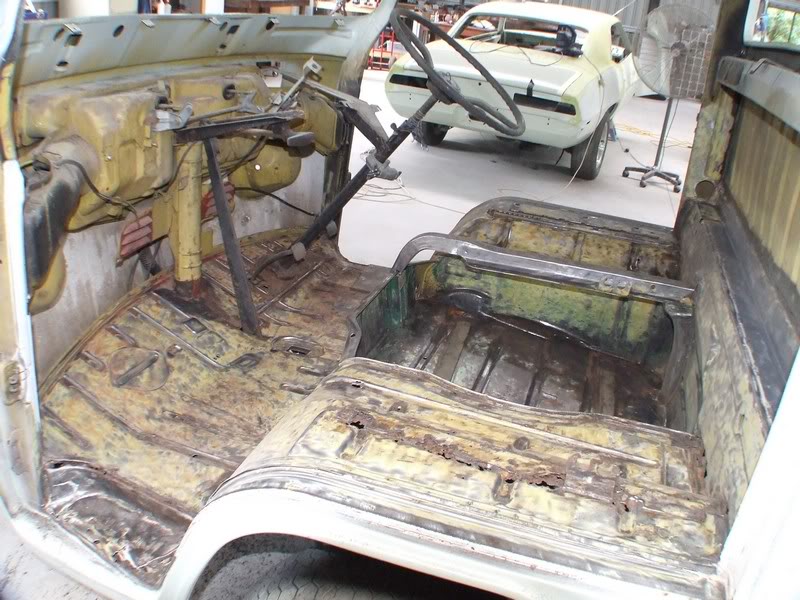
Hi Stinga. That muffler looking thing is part of the heater tube system. It used to run from the engine bay to the cabin, and use the hot engine bay air as a heater, seeing as there's no water : )
This next pic shows it coming up the front of the floor and into the vent system that lives behind the dash. All of it is gone now hehehe.
#108
 _dirtbag_
Posted 23 June 2011 - 07:53 PM
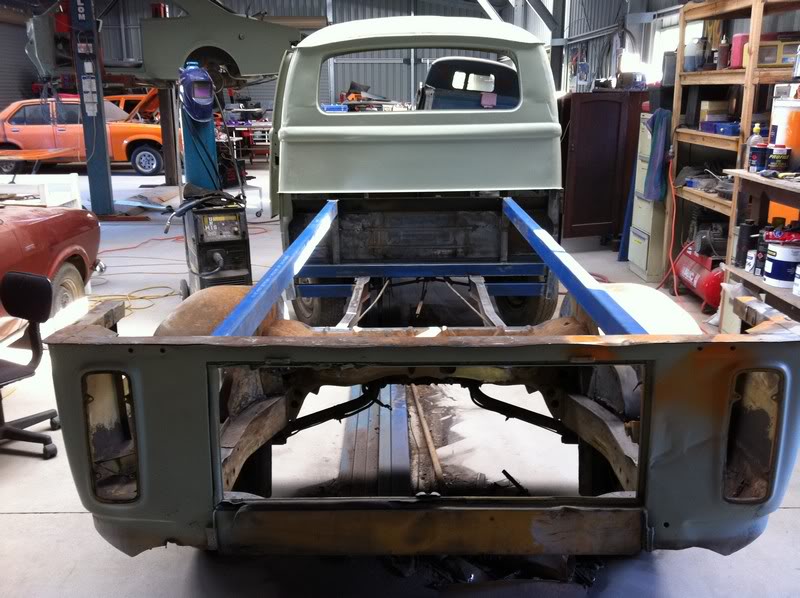
I cut a recess into the existing front rails for the new piece to slot in to. It will make for a longer join weld, meaning it will be stronger.

The new rails I'm fitting are slightly wider than the originals, so I spread the existing rear rails so the new piece could go inside.

Then I welded them in.
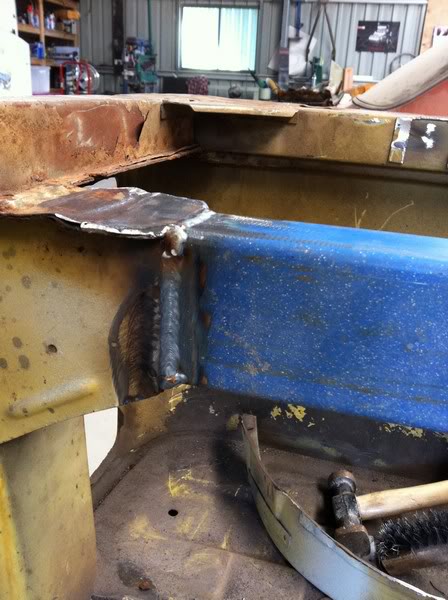
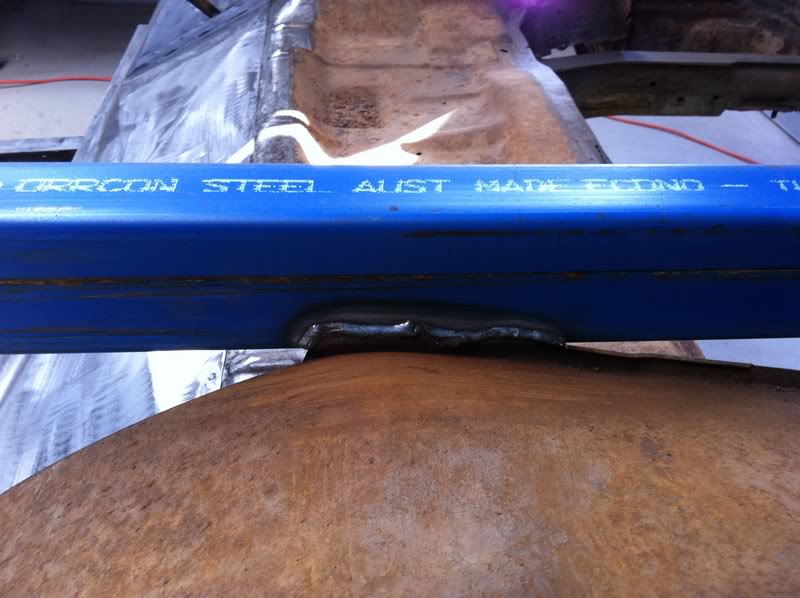
I also joined the tops of the wheel tubs into the new rails to help tie it all together.
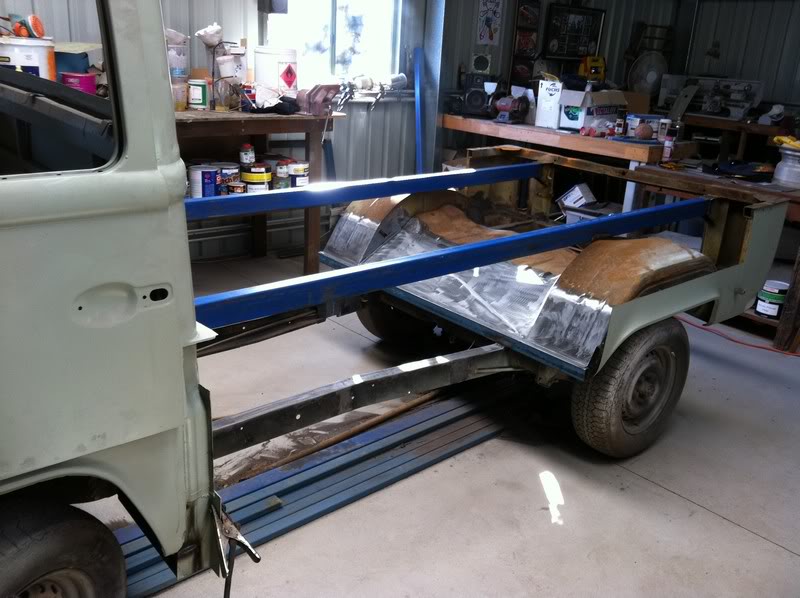
It still looks like a throw away heap, but it's feeling really solid now. Can't wait to do more!
#109
 _Viper_
Posted 23 June 2011 - 08:25 PM
More on topic, looks great now... much more solid
#110
 _jabba_
Posted 23 June 2011 - 08:38 PM
#111
 _dirtbag_
Posted 27 June 2011 - 05:40 PM
First job was to put the centre section in the front crossmember.
I want it to wrap around the chassis so Imade a cardboard template and marked it onto the RHS.

It fits great. Holds itself in nicely even before being welded.
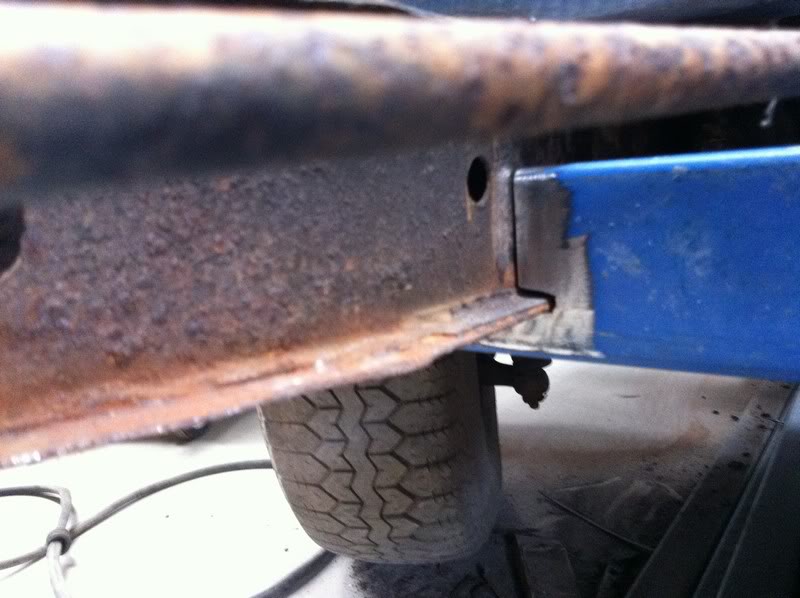
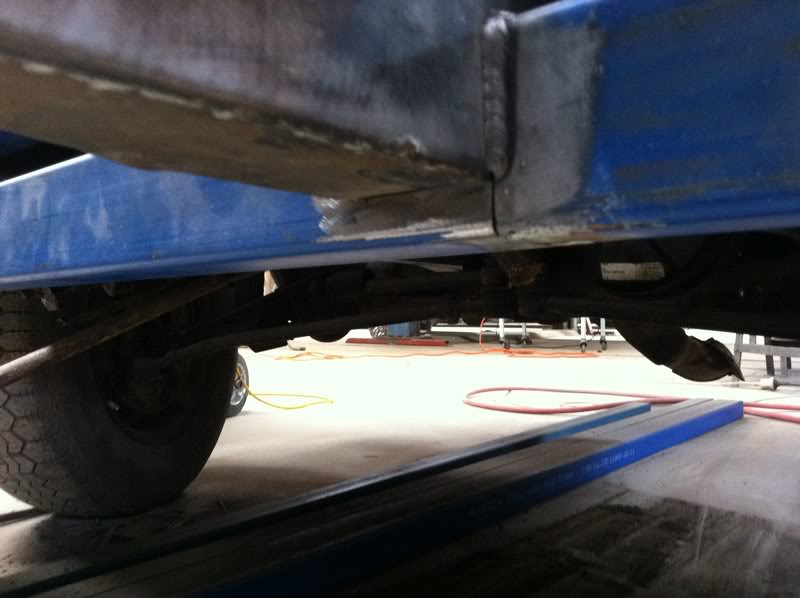
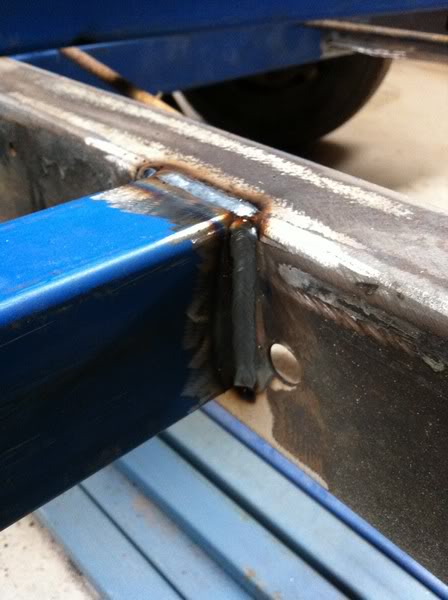
I then made and welded on the outriggers. The originals were just folded top hat sections, but I'm happier using the RHS for these. You can also see the centre part of the front crossmember in these next pics. Just so you know : )
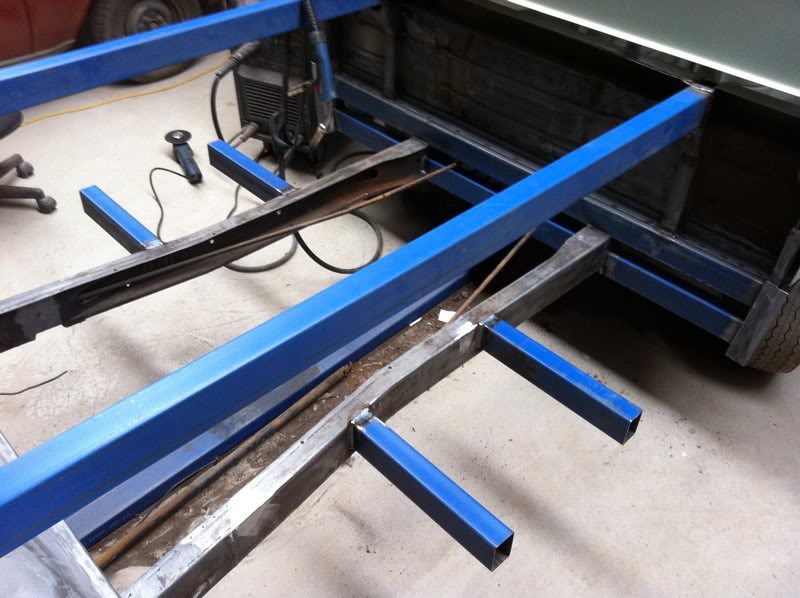

I try to get the welds as good as possible when doing structural work. I think they turned out OK for a dirtbag.
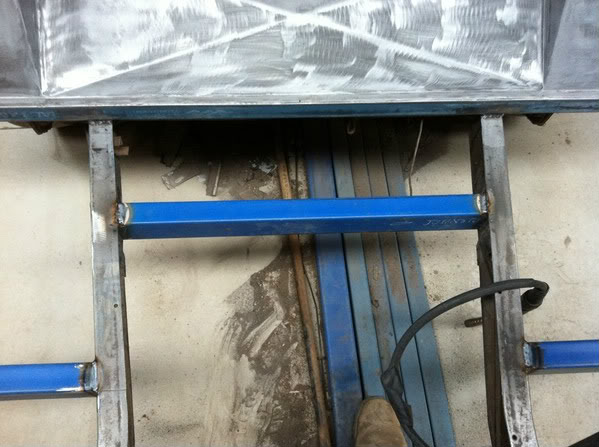
After than I made the rear crossmember. Again, the original was just folded 1mm, so this will be a lot stronger.
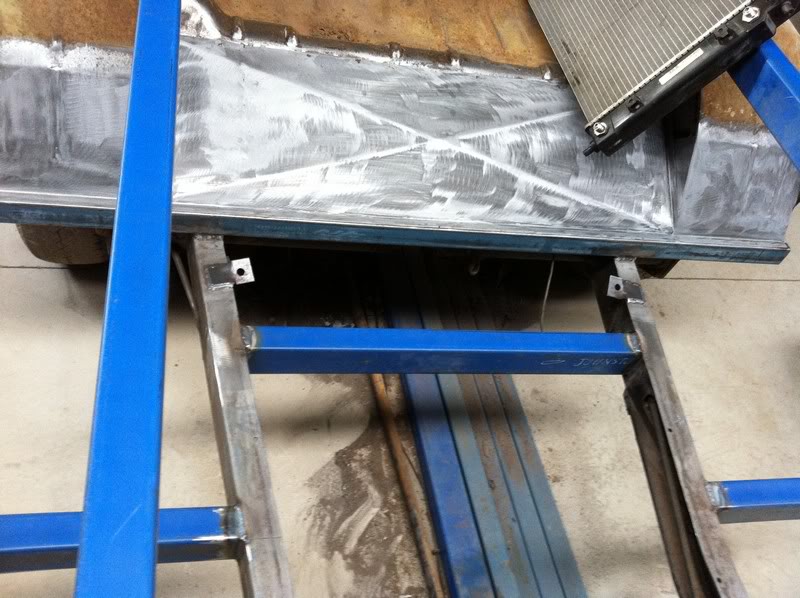
I then made up some lower radiator mounts. They're just 50x3mm flat bar, but will do the job here no worries as I've made a gusset to go underneath. I'll bore the mounting holes out properly when I get the rubbers for the radiator to sit in.
The radiator is from an LS1 powered commodore. This is a cheapie second hand one I bought to use as a mock up. I ran out of day so haven't made any top mounts yet.
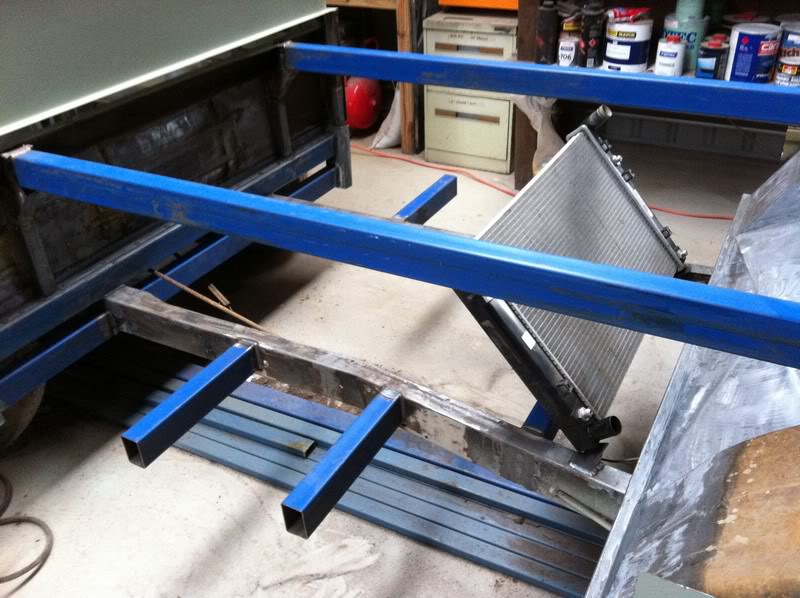
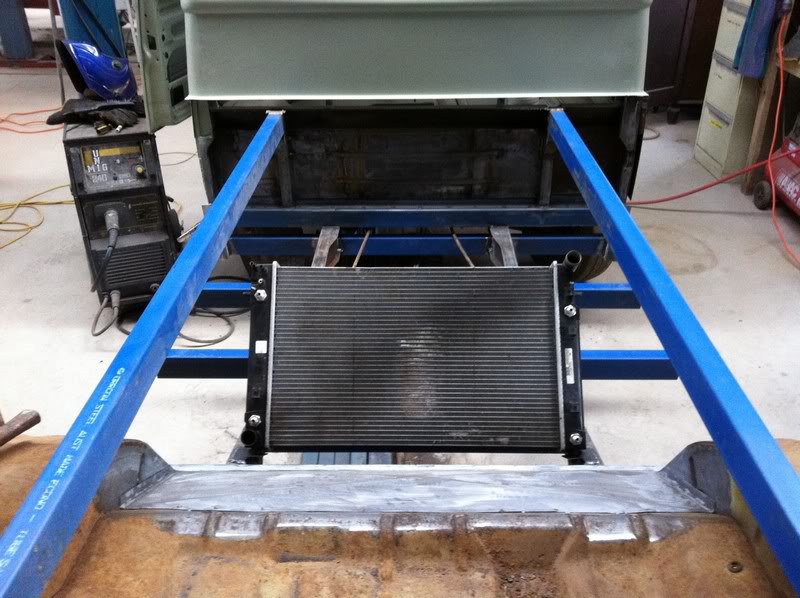
It's hopefully not too far away from being sheeted in now. Can't wait to get to that bit!

Edited by dirtbag, 27 June 2011 - 05:48 PM.
#112

Posted 27 June 2011 - 06:04 PM
I was worried that the chassis looked a bit flimsy, but now I get it.
I guess we're used to our torries with a body plonked on top of the rails.
This is gonna be awesome when its done!
#113
 _nzstato_
Posted 27 June 2011 - 07:02 PM
Whats the legislation regarding welding structural frame like? They're not picky about you doing it with a mig?
#114
 _dirtbag_
Posted 27 June 2011 - 09:23 PM
Aren't you allowed to over there?
#115
 _mick74lh_
Posted 27 June 2011 - 09:40 PM
That original heater system sounds like it would fill the cab with carbon monoxide in the event of an exhaust leak.
#116

Posted 27 June 2011 - 10:12 PM
That original heater system sounds like it would fill the cab with carbon monoxide in the event of an exhaust leak.
[/quote]
Correct! And also the cause of many early Beetle fires. Early Beetles had like an underfelt stuck to the (rear) firewall that used to ignite.
[quote name='mick74lh' timestamp='1309174833' post='602925']
Edited by rodomo, 27 June 2011 - 10:14 PM.
#117
 _nzstato_
Posted 28 June 2011 - 05:41 AM
No there's no drama welding chassis and so forth with a mig.
Aren't you allowed to over there?
Nah there aren't any dramas over here with it, just know alot of older guys who swear by welding with a stick when doing chassis work.
Over here if you want to do structurial welding you must first do a mini-certification. Just means you go to a NZHRA approved engineer and weld a T join in front of them, they chuck it in a vice and hit it with a hammer to see if it breaks. Steering and suspension components (scratch built) are the only things we aren't allowed to weld at home.
Welding
#118
 _Viper_
Posted 28 June 2011 - 09:47 AM
go to a NZHRA approved engineer and weld a T join in front of them, they chuck it in a vice and hit it with a hammer to see if it breaks
Haha very technical test that one... Shouldnt they be X-rayin it?
#119
 _dirtbag_
Posted 28 June 2011 - 06:22 PM
I started making the chamber for the radiator.
Each side is also the new inner sill. It seemed better to do each side in one piece, even though it was a bit of a pain.
I used 1.6mm zinc, so it's strong enough to not need any swages. Plus there is more framework to go in yet.
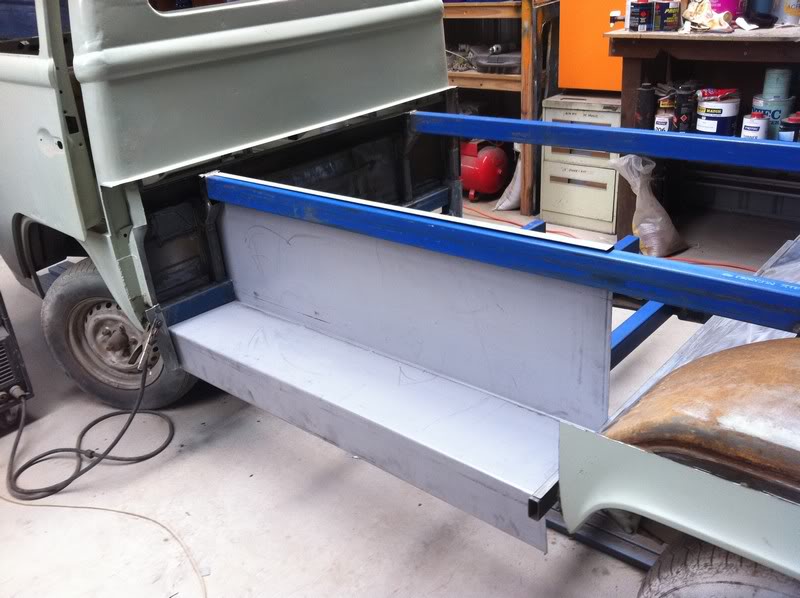
This new inner sill is 3 inches lower than the originals. Should give the sides a fatter look.
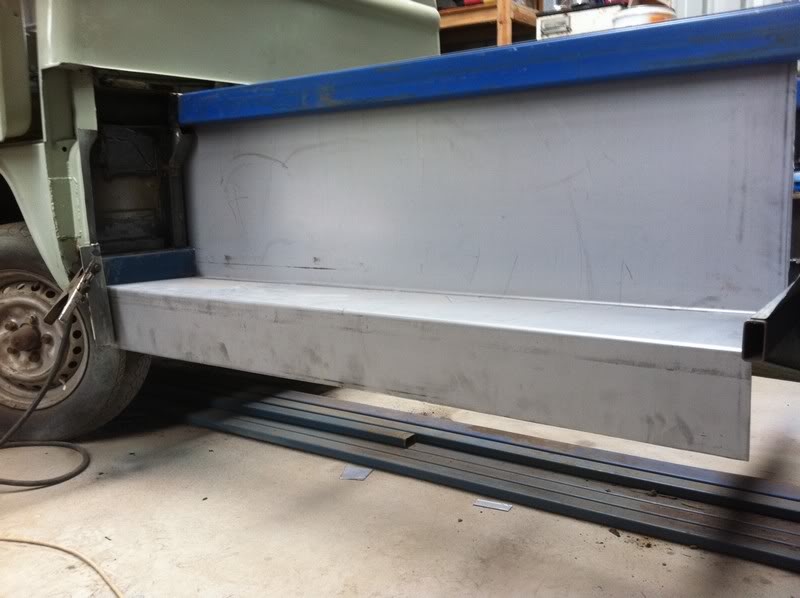
Lots of welding to get done in here. I'll fully weld around where the ends of the RHS meets the inner sill, and plug weld the rest of it from above.
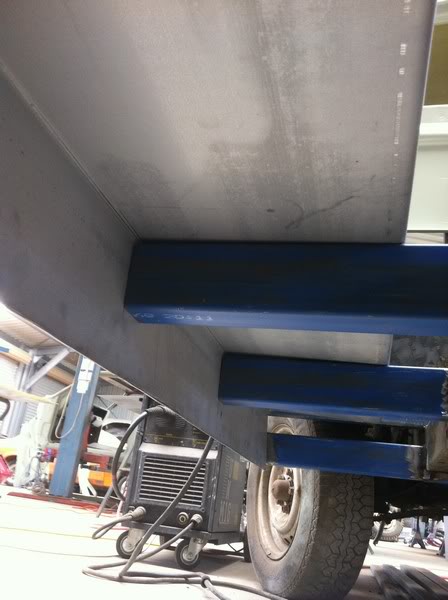
Here's the other side made and sitting in place. You can see there is heaps of contact areas between the frame and new sheetmetal so I can weld the living daylights out of it. This thing will be SOLID!
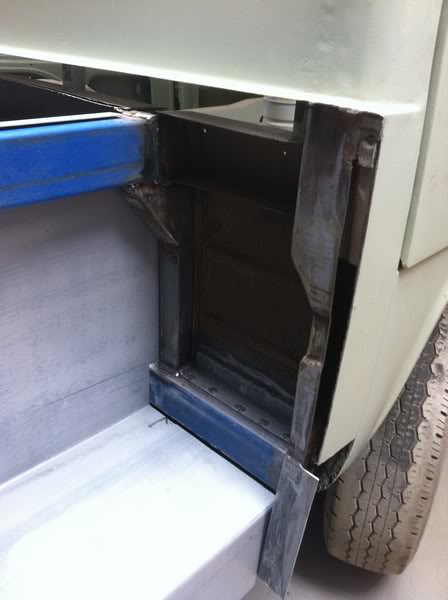
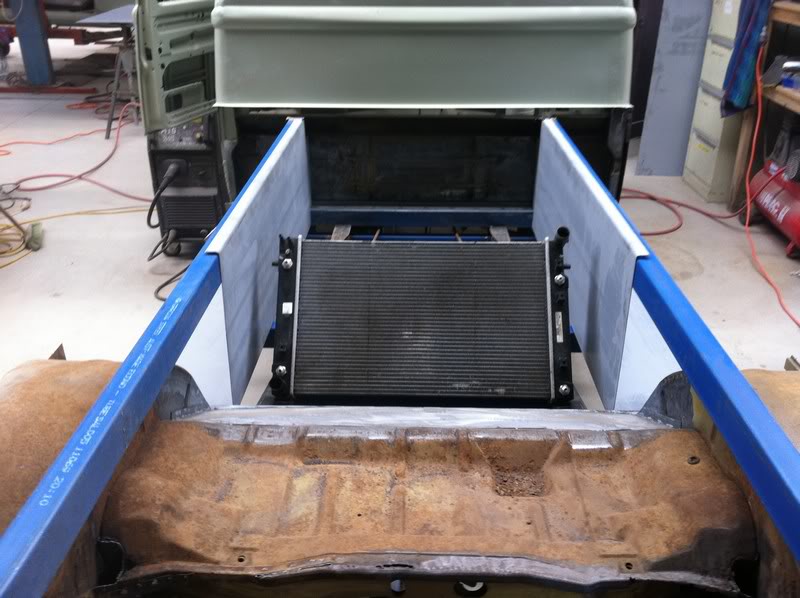
There will be no floor in the centre, for obvious reasons : )

The areas created on each side of this chamber will be used too. Not sure whether both sides will have fuel or gas tanks, or one side fuel or gas and the other side just for general storage. The timber tray will have trap doors in it to gain access to the radiator chamber, the side pockets and the engine bay. Should work well.
#120
 _cruiza_
Posted 28 June 2011 - 06:47 PM
#121

Posted 28 June 2011 - 06:50 PM
#122
 _dirtbag_
Posted 28 June 2011 - 06:58 PM
Stinga, yes there will be stainless mesh as a floor, like crimsafe, on top of the chassis rails. Should do the trick. It's not going to be a daily driver, but it has to be somewhat useable I think.
It's certainly a lot of fun building it : )
Edited by dirtbag, 28 June 2011 - 06:59 PM.
#123
 _Lamo_
Posted 28 June 2011 - 07:28 PM
#124
 _wblje_
Posted 28 June 2011 - 07:32 PM
#125

Posted 28 June 2011 - 09:19 PM
Is the owner using a cast iron chev or something newer????
1 user(s) are reading this topic
0 members, 1 guests, 0 anonymous users


